Loading ...
Loading ...
Loading ...
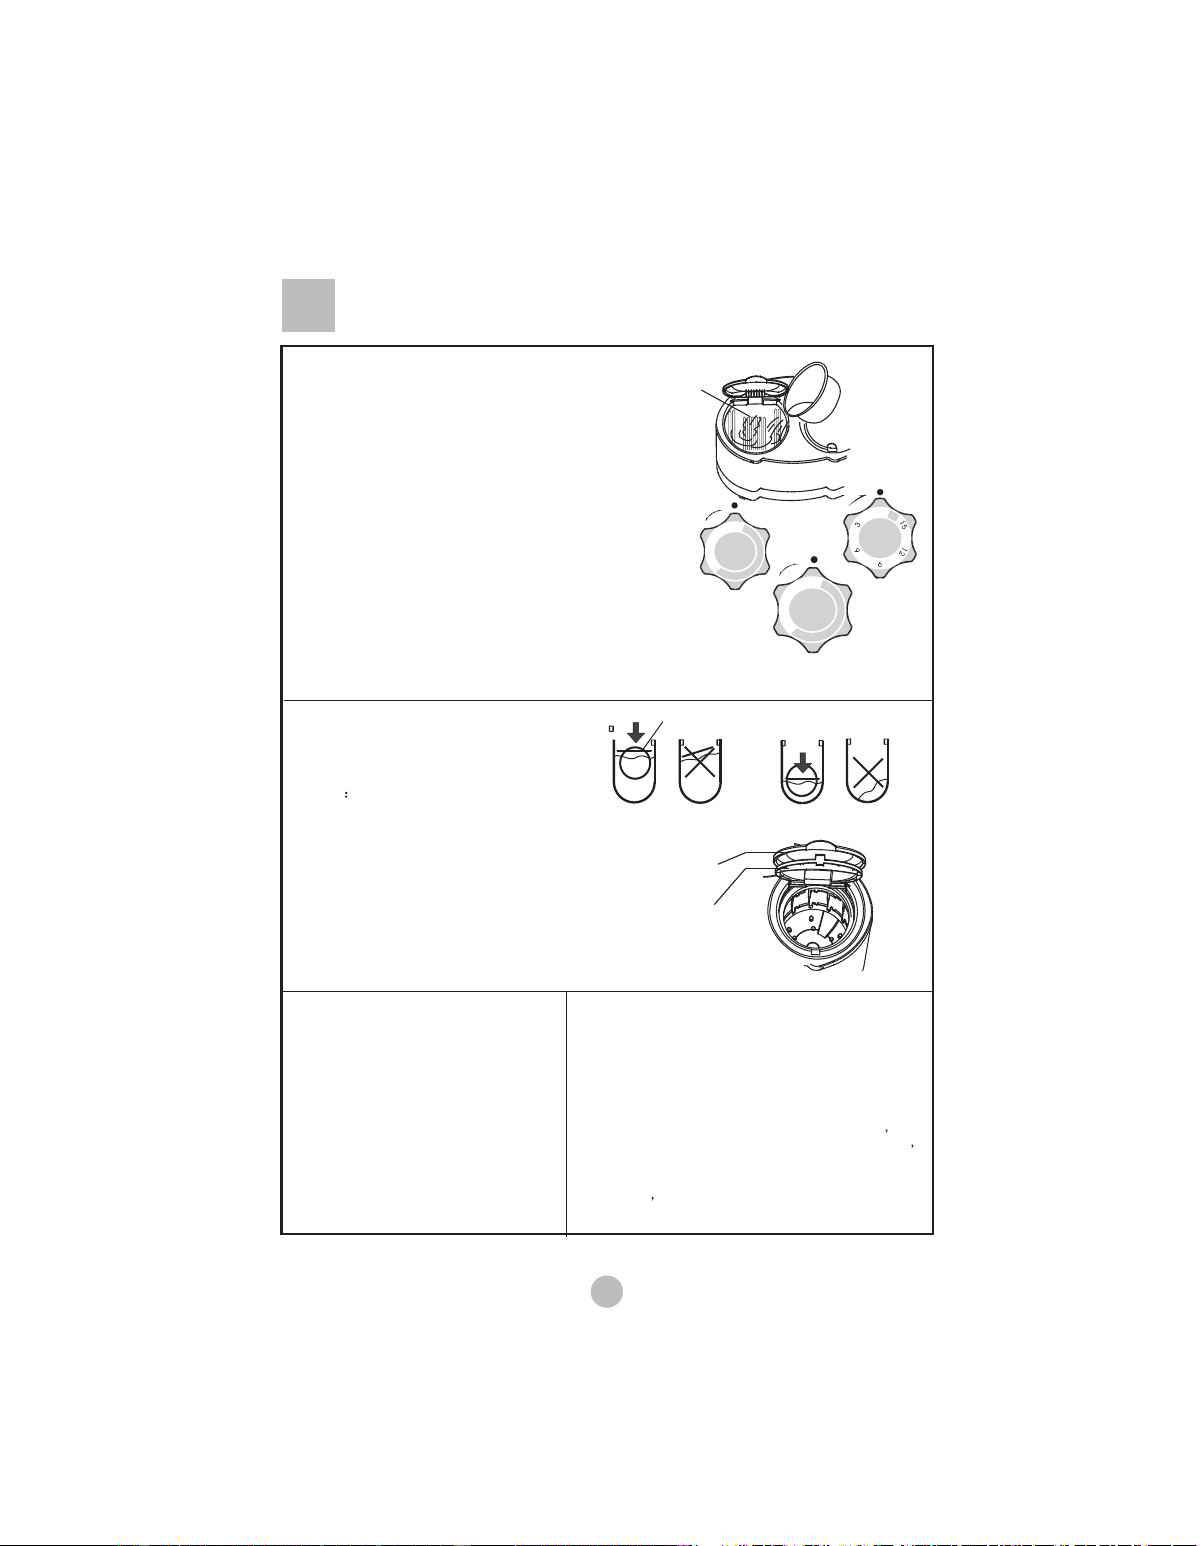
Figure 1
Washing sequence
Wash
2. Fill the water and add the dissolved washing
powder to make the water level reach the preset
position. Run washing program for some time to stir and
dissolve the powder completely.(Figure 1)
3.Put in the laundries. If the water quantity is
insufficient, please add water.
5.After washing, set the "WASH SELECTOR"
at "SPIN". (Figure 4).
1.Fill the water
Set the water-filling selector at the "WASH" side.
Set the water level adjusting lever to needed line.
Please note that the input water voltage should be
controled between 0.02~0.2MPa.
4.Select the current.
Select the strength of the current according to
the laundries. Select the washing time according to the
laundries. (Figure 2)(Figure 3)
1.Put the laundries into the spin tub
evenly and smoothly.
Midway spinning
2.Spin
(1) Put the gland in properly.
Please put in the gland properly even
if the laundries quantity is small.
(2) Close the inner and outer cover of the
spin tub.
(3) Spin for 1-2 minutes.
Push
Gland
Proper
The laundries
are slanting
No gland
Outer cover of
The spin tub
Inner cover of
The spin tub
Proper
Push
Rinsing
1.Put the laundries into the wash tub. Select
suitable current according to the laundries.
2.Fill the water
Fill suitable water continuously according to
the laundries quantity.
3. Rinse
Adjust the wash timer to 5-7 minutes to do
rinsing.
Spinning
1.Put the laundries into the spin tub evenly and smoothly.
2.Press the gland in the tub properly. Close the inner and
outer cover of the spin tub.
3.Spin
Select suitable spin time according to the laundries and
do spinning. During spinning, if there is abnormal sound
it is generally owning to slanting placement of the laundries.
Please stop the machine and reorder the laundries.
4.In spinning it will pause the work if you open the outer
cover of the spin tub. Close it to resume the spinning.
7
3.If the water quantity filled is too large, the water
may flow out from the wash tub side. Please
twist the water tap to limit the water filling.
Figure 4
CYCLE SELECTOR
Figure 2
CYCLE SELECTOR
D
RAI
N
WASH
CYCLE SELECTOR
Figure 3
WASH TIMER
Wash timer
WASH TIMER
OFF
DRA
I
N
WASH
CYCLE SELECTOR
The input water level should
not exceed the labled position.
Downloaded from www.ManualsFile.com manuals search engine
Loading ...
Loading ...
Loading ...