Loading ...
Loading ...
Loading ...
Installation Instructions (cont'd)
Facts to Consider About the
Location
You should carefully choose an indoor location for the new
water heater, because the placement is a very important consid-
eration for the safety of the occupants in the building and for
the most economical use of the appliance. This water heater is
not intended for outdoor installation.
Whether replacing an old water heater or putting the water
heater in a new location, the following critical points must he
observed.
• The location selected should be indoors as close to and as
centralized with the water piping system as possible. This
water heater, as well as all water heaters, will eventually leak.
Do not install without adequate drainage provisions where
water flow will cause damage.
A CAUTION
WATER HEATERS EVENTUALLY LEAK: Installation of
the water heater must be accomplished in such a manner
that if the tank or any connections should leak, the flow of
water will not cause damage to the structure. When such
locations cannot be avoided, a suitable drain pan should
be installed under the water heater. Drain pans are avail-
able at your local Sears stores. Such a drain pan must be
piped to an adequate drain.
A CAUTION
INSTALLATION IN RESIDENTIAL GARAGES: The
water heater must be located and/or protected so it is
not subject to physical damage by a moving vehicle.
• The location selection must provide adequate clearances for
servicing and proper operation of the water heater.
Water Piping
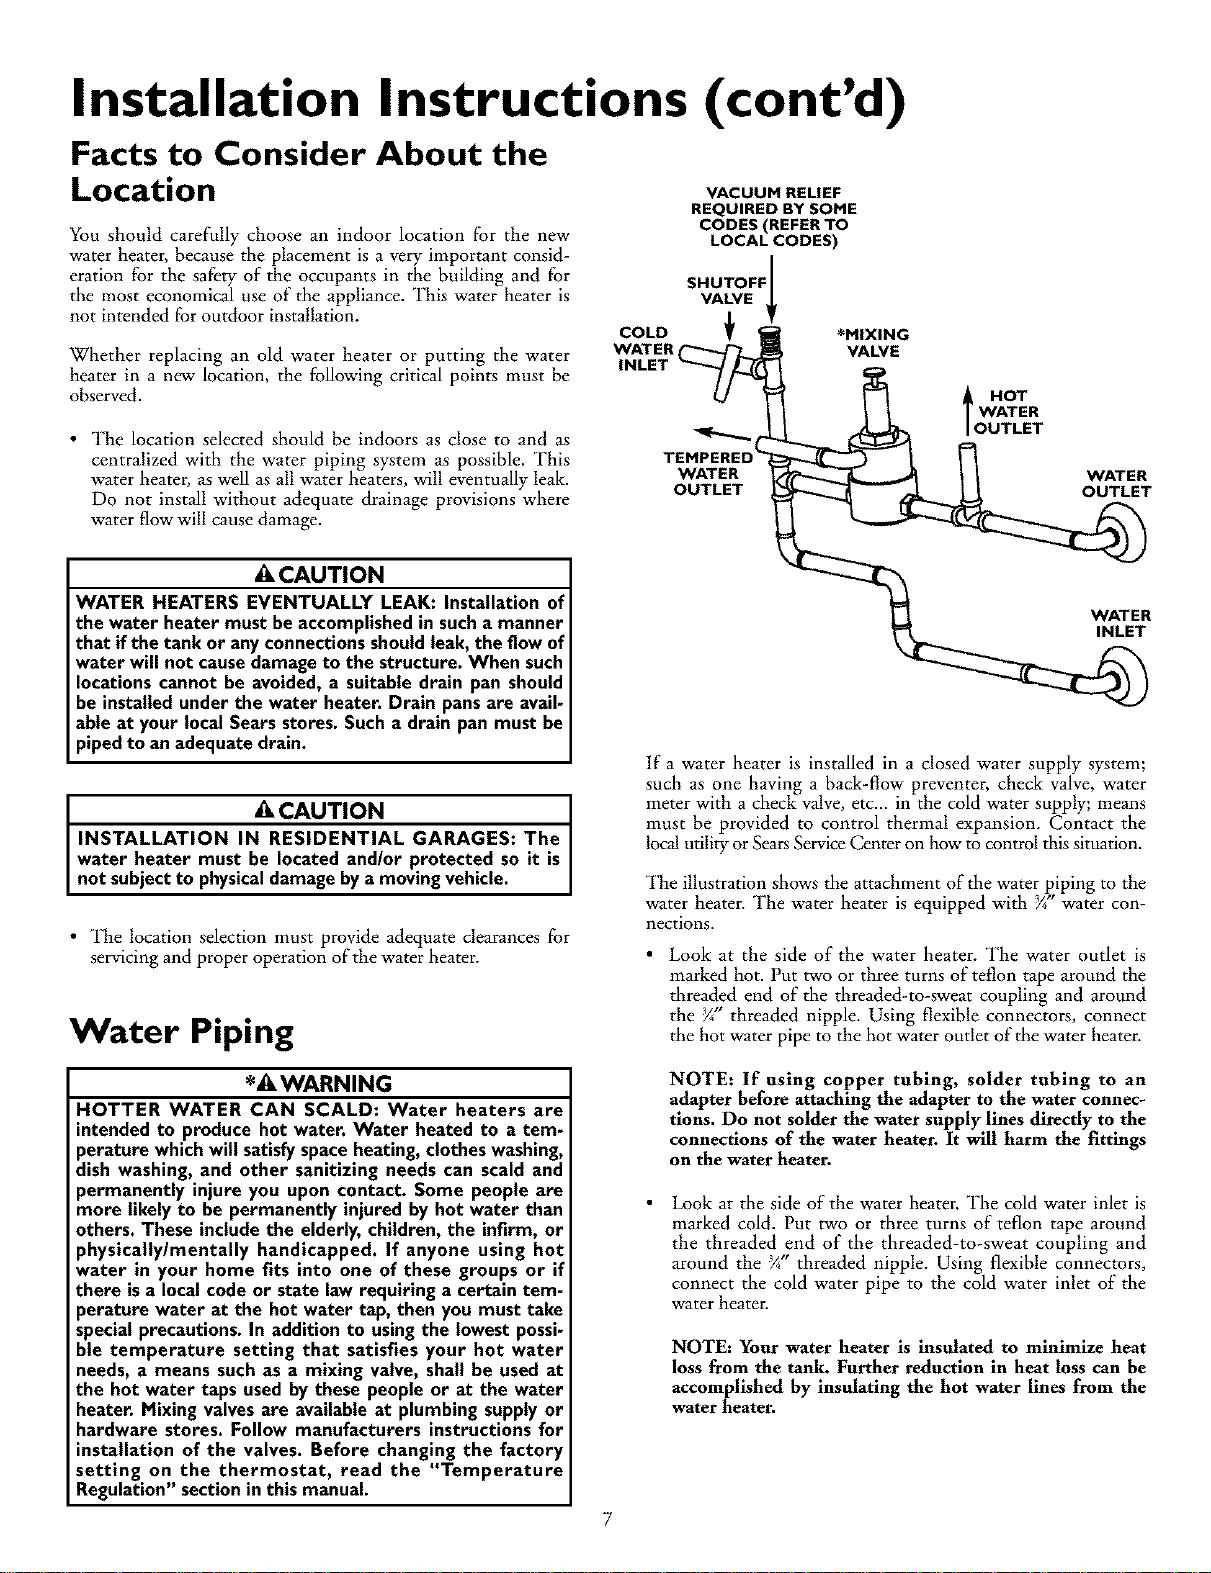
VACUUM RELIEF
REQUIRED BY SOME
CODES (REFER TO
LOCAL CODES)
SHUTOFF
VALVE
COLD _
WATER('_L_ _
INLET_
TEMPEREDC
WATER
OUTLET
*MIXING
VALVE
t HwgR
IOUTLET
WATER
WATER
INLET
If a water heater is installed in a closed water supply system;
such as one having a back-flow preventer, check valve, water
meter with a check valve, etc.., in the cold water supply; means
must he provided to control thermal expansion. Contact the
local utility or Sears Service Center on how to control this situation.
The illustration shows the attachment of the water piping to the
water heater. The water heater is equipped with }_" water con-
nections.
Look at the side of the water heater. The water outlet is
marked hot. Put two or three turns of teflon tape around the
threaded end of the threaded-to-sweat coupling and around
the _" threaded nipple. Using flexible connectors, connect
the hot water pipe to the hot water outlet of the water heater.
*AWARNING
HOTTER WATER CAN SCALD: Water heaters are
intended to produce hot water. Water heated to a tem-
}erature which will satisfy space heating, clothes washing,
dish washing, and other sanitizing needs can scald and
}ermanently injure you upon contact. Some people are
more likely to be permanently injured by hot water than
others. These include the elderly, children, the infirm, or
physically/mentally handicapped. If anyone using hot
water in your home fits into one of these groups or if
there is a local code or state law requiring a certain tem-
}erature water at the hot water tap, then you must take
special precautions. In addition to using the lowest possi-
ble temperature setting that satisfies your hot water
needs, a means such as a mixing valve, shall be used at
the hot water taps used by these people or at the water
heater. Mixing valves are available at plumbing supply or
hardware stores. Follow manufacturers instructions for
installation of the valves. Before changing the factory
setting on the thermostat, read the "Temperature
Regulation" section in this manual.
NOTE: If using copper tubing, solder tubing to an
adapter before attaching the adapter to the water connec-
tions. Do not solder the water supply lines directly to the
connections of the water heater. It will harm the fittings
on the water heater.
Look at the side of the water heater. The cold water inlet is
marked cold. Put two or three turns of teflon tape around
the threaded end of the threaded-to-sweat coupling and
3 /* . . .
around the ¼ threaded topple. Using flexible connectors,
connect the cold water pipe to the cold water inlet of the
water heater.
NOTE: Your water heater is insulated to minimize heat
loss from the tank. Further reduction in heat loss can be
accomplished by insulating the hot water lines from the
water heater.
7
Loading ...
Loading ...
Loading ...