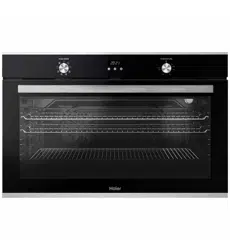
User Manual Haier HWO90S10EX2 Oven
INSTALLATION INSTRUCTIONS
Product Dimensions

Cabinetry Dimensions – Elevated Cabinet Installation (Wall)

Cabinetry Dimensions – Under Counter Installation

Mounting and Securing the Oven

General Instructions
- A suitable location for the product must be identified before starting installation.
- Product must not be installed in places which are under the effect of strong air flow
- Carry the product with minimum two people. Do not drag the product so that floor isn't damaged.
- Remove all transportation materials inside and outside the product. Remove all materials and documents from the product.
- Furniture surfaces for mounting and mounting materials to be used must have a minimum temperature resistance of 100 °C.
- Mounting cabinet must be level and secured and its floor must be flat for product not to tilt over. Cabinet floor must have a minimum strength that would handle a load of 60 kg.
- If there is a drawer below the oven, a shelf must be placed between oven and drawer.
WARNING: Do not install the product next to refrigerators or coolers. The heat emitted by the product increases the energy consumption of cooling devices.
WARNING: Do not use the oven door and/or handle to carry or move the product.
Important for Cooling
- The oven cooling fan takes extra steam out and prevents outer surfaces of the oven from overheating during operation. This is a necessary condition for better appliance operation and better cooking.
- Cooling fan shall continue operation after cooking is finished. Fan shall automatically stop after cooling is completed.
- A clearance must be left behind the enclosure where you'll place the appliance for efficient and good operation.
- This clearance shouldn't be ignored as it's required for ventilation system of the appliance to operate.

Technical Specifications

Electrical Connection
IMPORTANT
- Product must have an appropriate electrical connection at the mounting location. If not, arrange for an electrician or suitably qualified technician to make the necessary arrangements.
- Supply voltage must be in accordance with the values provided on the product rating label
- Product connection must be made in accordance with local and national electrical requirements.
- Check for any damage on the product before installing it. Do not have product installed if it's damaged.
- Do not turn on the mains electricity supply until the mounting and installation process is complete.

WARNING
- This oven must be installed and connected correctly according to manufacturer instructions and by an authorized service technician.
- Appliance must be installed in an oven enclosure providing suitable ventilation.
- Electrical connections of the appliance must be made only via power supply having an earth system in compliance with local regulations. Contact an authorized electrician if there is no socket complying with the earthed system where appliance will be placed.
- Manufacturing company is by no means responsible for damage resulting from connection of non-earthed sockets to appliance.
- Appliance power supply connection must be located in a place that can be accessed after installation.
- This oven has been manufactured as 220-240V 50Hz, AC power supply compliant and requires a 16 Amp fuse. If your power network is different than these indicated values, refer to an electrician or your authorized service technician.
- If the electrical fuse needs to be replaced, the electrical connection should be made as follows:
- Brown cable to Phase (to live terminal)
- Blue cable to Neutral terminal o Yellow-green cable to earth terminal
- Oven disconnecting switches must be in an accessible place for end user while oven is in its place.
- Power supply cable must not touch hot parts of the appliance.
- If supply cord is damaged, this cord must be replaced by the appliance manufacturer or its service agent or an equally competent and qualified personnel to prevent a hazardous situation.
MOUNTING AND SECURING THE OVEN
- Place the oven into the cabin with two or more people.
- Ensure that oven frame and front edge of the furniture match uniformly.
- Supply cord must not be under the oven or squeezed in between oven and furniture or bend.
- Fix the oven to the furniture by using the screws provided with the product.
- Screws must be mounted as shown in figure 4 by passing them through the plastic attached to frame of the product. Screws must not be over tightened.
- Check that oven doesn't move after mounting. If oven is not mounted in accordance with instructions, there is a risk of tilt over during operation.
IMPORTANT
Elevated Cabinet Installation (Wall)
- Cabinet must match the dimensions provided in figure 2 on earlier pages
- The clearances dimensions indicated at the rear part of cabinet as well as upper and lower sections are necessary so adequate ventilation can be achieved.
Under Counter Installation
- Cabinet must match the dimensions provided in the figure 3 on earlier pages
- A clearance must be provided at the rear part of the cabin as indicated so that necessary ventilation can be achieved.
- After mounting, the clearance between lower and upper part of the counter is indicated in figure 4 with "A = 5mm" is for ventilation and should not be covered.
HANDLING NOTES
- Do not use the door and/or handle to carry or move the appliance.
- Carry out the movement and transportation in the original packaging.
- Pay maximum attention to the appliance while loading/unloading and handling.
- Make sure that the packaging is securely closed during handling and transportation.
- Protect from external factors (such as humidity, water, etc.) that may damage the packaging.
- Be careful not to damage the appliance due to bumps, crashes, drops, etc. while handling and transporting and not to break or deform it during operation
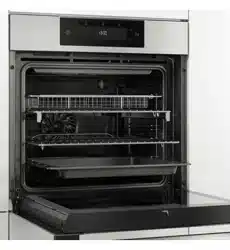
PRODUCT OVERVIEW

- Control Panel
- Wire Shelf x 2
- Rotisserie
- Wire Insert
- Roasting Dish
- Oven Door
- Handle
- Telescopic Guides
- Lamp
- Catalytic Side & Rear Panels
ACCESSORIES INCLUDED
Wire shelf

Used for placing foods to be baked or roasted on desired rack.
Roasting dish

Used for cakes, pastry, frozen foods, roasts and foods with high liquid content.
Wire insert

To be placed into roasting dish when direct contact with tray is not desired or to allow fat to drip into the roasting dist or prevent sticking.
Telescopic guides

Trays and wire shelves can be removed and accessed easily thanks to telescopic guides.
Rotisserie set

Used for roasting large joints of meat, the rotation cooks the meat evenly in its own juices.
USER GUIDE
USING THE OVEN
IMPORTANT: Here are the things you must do before using your oven
- Remove labels or accessories attached inside the oven. The cavity should be empty.
- Remove protective film on front side of the appliance if any is present.
- Remove dust and package residues by wiping inside of the oven with a damp cloth.
- Turn the oven “on” from the main isolating switch which should have be fitted by your electrician
- Set the thermostat button to the highest temperature (250 Max. °C) and run the oven for 30 minutes with its door closed. Meanwhile a slight smoke and smell might occur and that’s a normal situation.
- After the oven has cooled down completely, using a clean cloth, wipe down the inside of the cavity with warm water and a mild detergent.
- The oven is now ready for use.
NOTE:
- The cooling system of the oven will continue to operate after cooking is completed.
- Do not turn off the mains power of the oven in this situation. The cooling fans will automatically turn off once the oven system and electronics has cooled down.
OVEN CONTROLS

10 - FUNCTIONS

TEMPERATURE
- Temperature is in degrees Celsius
- The oven should be preheated for 7-10 minutes before cooking commences
TIMER
- The ditigal timer function can be used to set a cooking duration.
- The digital timer turns the heating elements off and provides an audible beep to indicate the set cooking duration is complete
- Refer to Timer Instructions on page 23 for details (note child lock is active by default)
NOTE: Rotisserie Function
- The rotisserie function operates on both Fan Grill and Grill Modes when the supplied rotisserie accessory is fitted into the oven. See instructions on the next page for fitting the rotisserie accessory.
- The rotisserie will stop rotating when the oven reaches a stable temperature and the grill element thermostat switches off during the cooking cycle. This is normal and not an error with the operation.
USING THE ROTISSERIE
Rotisserie shaft must be inserted into hole at rear of the oven to engage with rotating motor

- Place the rotisserie shaft assembly on the frame
- Slide the frame into the oven on rack position 2, ensure the drive shaft of the rotisserie is aligned and inserted into the hole in the rear of the oven, in order to engage with the rotisserie motor which is located in the back of the oven.
- Position a roasting dish or drip pan at the bottom in order to collect any fat that may drip down.
- Add some water in dripping pan for easy cleaning.
- Do forget to remove all plastic parts from rotisserie.
- After grilling screw the plastic handle to the skewer and take out the food from the oven.
USING OTHER OVEN FUNCTIONS
BAKE
Uses upper outer and lower elements
Ideal for cakes and foods that require baking for a long time or at low temperatures.
This function is not suitable for multi-shelf cooking.
FAN BAKE
fan plus upper outer and lower elements
Ideal for: single shelf baking that requires less than an hour to cook.
Foods such as muffins, biscuits and cupcakes.
The oven fan circulates hot air from the top outer and the lower elements and distributes it around the oven cavity.
Food cooked tends to brown quickly.
FAN FORCED
Uses fan plus rear element
Ideal for: multi-shelf cooking, eg biscuits, cookies, scones, muffins and cupcakes.
Hot air is blown into the cavity, providing a consistent temperature at all levels.
Always leave a gap between shelves to allow air to move freely. This ensures food on the lower tray can still brown.
If converting a recipe from BAKE to FAN FORCED, we recommend that you decrease either the bake time and/or the temperature by approximately 20°C.
FAN GRILL
Uses fan plus upper outer and inner elements
Ideal for: whole chicken, beef tenderloin or grilling fish or steak.
Uses the intense heat from the elements for top-browning and the fan to ensure even cooking of foods.
Meat, poultry and vegetables cook beautifully; food is crisp and brown on the outside while the inside remains moist and tender.
GRILL
Uses upper inner and outer elements
Ideal for: toasting bread or for top-browning to finish off dishes.
Intense radiant heat is delivered from both top elements.
When you place the grill on the top rack, the food on the grill shall not touch the grill.
Food shall be in the center of the grill to provide maximum air flow through the oven.
IMPORTANT: Keep the oven door closed while grilling.
RAPID HEAT
Uses fan plus upper, lower and rear elements
Ideal for: single or multi shelf baking where rapid heating of the complete cavity is required.
Delivers performance that is a combination of fan bake and fan forced and can be used for baking or roasting meats.
If converting a recipe from BAKE to RAPID HEAT, we recommend that you decrease either the bake time and/or the temperature by approximately 20°C to avoid burning
DEFROST
Uses the fan and light will switch on to gently circulate air defrost food.
STEAM CLEANING – see page 28 (Care and Cleaning Section)
NOTE: Oven must be preheated for 7-10 minutes to allow to reach the set temperature before cooking commences.
COOKING RECOMMENDATIONS
You can find in the following table the information of food types which we tested and identified their cooking values in our labs. Cooking times can vary depending the network voltage, quality of material to be cooked, quantity and temperature. Dishes to cook by using these values might not appeal to your taste. You can set various values for obtaining different tastes and results appealing to your taste by making tests.

USER GUIDE - TIMER
HOW TO USE THE TIMER

SCREEN SYMBOLS

It is an electronic timing module enabling your food you have put in the oven to be ready for service at any time you like. The only thing you need to do is to programme the cooking time of the food and also the time when you would like your food to be ready.
It is also possible to use a minute-programmed alarm clock independent from the oven. The case where the time clock is behind or ahead is not a malfunction. The oven time clock may be put back or ahead according to mains frequency as it runs directly with mains voltage. This is not a malfunction.
POWER ON
At power on, oven is inactive, time of day and symbols are flashing. The indicated time of day is not correct and has to be adjusted. Press
 to activate the oven and proceed adjusting the time of day as below.
TIME OF DAY ADJUSTMENT
Time of Day adjustment is only possible when no cooking program is in progress.
Press and
and  simultaneously for 3 seconds to enter the adjustment mode and then the dot symbol in between hours and minutes digits will start to flash. Using either and adjust the desired duration. The maximum adjustable duration is 23h 59 minutes.
Adjustment mode will be abandoned within 6 seconds after the last button press or can be terminated immediately by pressing the button.
Note: Time of day adjustment is also activated in first 7 seconds after power on.
SETTING THE MINUTE MINDER
With this function, you can adjust a duration in minutes. After the adjusted time has been elapsed, an alarm sound will be produced.
Press button once to enter the minute minder adjustment mode, symbol will start flashing on the screen. Using either or adjust the desired duration. The maximum adjustable duration is 10 hour. Adjustment mode will be abandoned within seconds after the last button press or can be terminated immediately by pressing the button.
CANCELLING THE ALARM BUZZER SOUND
Once the adjusted minute minder duration is elapsed, the buzzer alarm will start to sound, accompanied by the flashing symbol on the screen. Any button press will stop the alarm sound and this indication. If no button is pressed, the alarm sound will end automatically after 5 minutes, but the flashing symbol will go on.
SEMI AUTOMATIC COOKING
This cooking program is intended to start cooking immediately for a specified duration.
After the oven is set to the desired function and temperature via the oven knobs:
- Press the button twice, symbol will flash on the screen.
 and duration of cooking will show on the screen one after another.
- Using or buttons, adjust the desired cooking duration.
- After 6 seconds of the last button press or by pressing twice, the adjustment is completed. will be steady on the screen and the display shows the current time of day.
FULL AUTOMATIC COOKING
This cooking program is intended to perform a delayed cooking by programming the time of day, when the food should be ready. In other words, the oven will start cooking not immediately but will automatically calculate the time to start cooking.
- Perform step 1 and 2 of the semi auto cooking as above
 (cooking duration adjustment).
- Press button once again, symbol will flash on the screen and duration of cooking will show on the screen one after another.
- Using or buttons, adjust the desired end of cooking time.
 symbol will disappear but symbol will be still flashing on the screen. This indicates that an automatic cooking is programmed but cooking has not started yet.
- After 6 seconds of the last button press or by pressing , the adjustment will be completed, the display shows the current time of day.
END OF AUTO COOKİNG
When the cooking is finished automatically, the icon starts to flash. Alarm may be turned off by pressing any key. To disable the key lock, press the key for 2 seconds.Oven is taken to the manual mode by pressing thekey. Audible alarm shall sound for 7 minutesif you do not press any key.
POWER INTERRUPTS
Product is not affected by short power failures (up to 50 seconds approximately), and the timer and the clock shall resume working at this period.
Your oven shall be deactivated on other failures than short term power failures (that are more than 50 seconds) due to safety reasons. This is indicated with the flashing of the clockand the on the screen. The clock shall be displayed as 12:00 and it should be set again. (See power on)
Note: The flashing symbol indicates that the oven is inactive and you have to enter the manual mode.
CHILD LOCK
This function is intended to prevent any unauthorized modification of the timer settings. This function will be active, within 30 seconds after the last button press.  will appear. To deactive it, press thebutton for 3 seconds. will disappear.
PROGRAMMABLE OPTIONS Alarm tone:
Pressing and holding the button for 3 seconds will result in the currently valid buzzer tone being produced. By pressing and buttons, you may scroll through available buzzer tones. The last heard buzzer tone will be automatically recorded as the selected tone. After 6 seconds of the last button press or by pressing, the adjustment is completed.
Brightness setting:
Pressing and holding the button for 3 seconds will result in the currently valid brightness setting being showed. By pressing and buttons, you may scroll through 8 available brightness setting. The last seen brightness setting will be auto- matically recorded as the selected setting. After 6 seconds of the last button press or by pressing, the adjustment is completed.
Note: Default settings are highest.
Note: Programmable options will be reset after any power failure.
CARE AND CLEANING
IMPORTANT
- Turn the oven off from the main power supply, electrical socket or electrical isolating before carrying out any maintenance, care or cleaning.
- Never store flammable substances in the oven.
- Use warm water and mild detergent for cleaning dirt and stains.
- Never use abrasive or harsh cleaners, cloths, scouring pads or steel wool. Some nylon scourers may also scratch.
- Always wipe down any damp surfaces with a dry cloth once cleaning is complete
- Clean glass surfaces with special glass cleaning product. Do not clean your product with steam cleaners.
- Never use combustibles like acid, thinner and gas while cleaning your product.
- Do not wash any part of the product in dishwasher.
- Never use oven cleaner on catalytic panels.
- Never leave alkaline (salty spills) or acidic substances (such as lemon juice or vinegar) on the oven surfaces.
- Never use cleaning products with a chlorine or acidic base.
- Never spray detergent or liquid onto the buttons or dials on the control panel. Liquid may seep behind the c and damage the electronics.
STEAM CLEANING
It aids the cleaning process by softening grime collected over time.
- Remove all the accessories in the oven.
- Pour a half litre of water into the tray and Place the tray at the bottom of the oven.
- Set the switch to the steam cleaning mode.
- Set the thermostat to 70 °C degrees and operate the oven for 30 minutes.
- After operating the oven for 30 minutes, open the oven door and wipe the inner surfaces with a damp cloth.
- Use dish-washing liquid, warm water and a soft cloth for stubborn dirt, then dry off the area you have just cleaned with a dry clot

Removing the Oven Door

- Open the door fully by pulling the oven door toward you. Then perform unlock operation by pulling the hinge lock upwards with the aid of screwdriver as indicated above
- Set the hinge lock to the widest angle as shown . Adjust both hinges connecting oven door to the oven to the same position.
- Partially close the opened oven door so that it will be in a position to contact with hinge lock as above
- When the oven door is almost closed, pull upwards and it should seperate from the oven body. Make sure you are using two hands and holding the door securely during this operation
To reinstall the oven door: perform the above steps in the reverse order
Cleaning Oven Glass
- Lift by pressing on plastic latches on left and rightside asshown in Step 1 and pulling the profile toward you as shown in Step 2
- Glass is released after profile is removed as shown in figure 12.
- Remove the released glass by pulling toward yourself carefully.
- Outer glass is fixed to oven door profile.
- You can perform glass cleaning easily after glasses are released.
- You can mount glasses back by performing the above operations in reverse after cleaning and maintenance is completed.
- Ensure that profile is seated properly in place.

Catalytic Panel
- Catalytic panels are located behind the wire racks of the oven, on the right and left walls and rear of the oven cavity.
- Over time, oil and food odours permeate into enamelled oven walls and heating elements.
- Catalytic panels absorb any food and oil odours, and burns them during cooking to clean your oven.
Detaching catalytic panel
- To remove the side catalytic panels first remove the wire racks.
- Once wire racks are removed, catalytic panel will be free.
- To remove the rear catalytic panel, panel mounting screws need to be removed.
- It is advised to replace the catalytic panel once every 2-3 years.
- To reattach the catalytic panels, follow the above steps in reverse.

- It is important to place the wire grill into the oven properly.
- Do not allow wire rack to touch rear wall of the oven.
- You may place a deep tray or a standard tray in the lower and upper wire racks.
Installing and removing wire racks
- To remove wire racks, push down at the lower fixing point as indicated by the arrows. First remove the lower and then the upperside from installation location.
- To install wire racks; reverse the steps above
Replacing Oven Bulb
WARNING: To avoid the risk of electric shock, ensure that the oven mains power supply is turned off from the isolating switch at the wall.
- First disconnectthe power of appliance and ensure that appliance is cold.
- Remove the lamp glass cover by turning it counter clockwise as indicated in the figure below. If you have difficulty in turning, then using plastic gloves will help you in turning.
- Then remove the G 9 bulb and replace with a new bulb of the same. The power rating should not exceed that shown below and on the appliance rating label.
- Reinstall lamp glass cover by rotating clockwise (reverse order above).
- Swtich mains supply on and test that the new lamp works by operating the oven.
TROUBLESHOOTING
You may solve som e of the problems you may encounter with your product by checking the following points before calling customer care or a service agent.
Check Points
In case you experience a problem about the oven, first check the tablebelow and try out the suggestions.
Oven does not operate.
1. Power supply not available.
Oven stops during cooking.
1. Plug comes out from the wall socket.
- Re-installthe plug into wallsocket.
Turns off during cooking.
1. Too long continuous operation.
- Let the oven cool down after long cooking cycles.
2. Cooling fan not operating.
- Listen the sound from the cooling fan.
3. Oven not installed in a location with good ventilation.
- Make sure clearances specified in operatinginstructionsaremaintained.
4. More than one plugs in a wallsocket.
- Use only one plug for each wall socket.
Outer surface of the oven gets veryhot during operation.
1. Oven not installed in a location with good ventilation.
- Make sure clearances specified in operatinginstructionsaremaintained.
Oven door is not opening properly.
1. Food residues jammed between the door and internal cavity.
- Clean the oven well and try tore- open the door.
Internal light is dim or does notoperate.
1. Foreign object covering the lamp during cooking.
- Clean internalsurface of the oven and check again.
2. Lamp might be failed.
- Replace with a lamp with same specifications.
Electric shock when touching theoven.
1. No proper grounding.
2. Ungrounded wall socket is used
- Make sure power supply is grounded properly.
Water dripping.
Steam coming out from a crack on oven door.
Water remaining inside the oven.
1. Water or steam may generate under certain conditions depending on the food being cooked. This is not a fault of the appliance.
- Let the oven cool down and than wipe dry with a cloth.
The cooling fan continuesto operate after cooking is finished.
1. The fanoperatesfor a certain period for ventilation of internal cavity of the oven.
- This is not a fault of the appliance;therefore you don’t have to worry.
Oven does not heat.
1. Oven door is open.
- Close the door and restart.
2. Oven controls not correctly adjusted.
- Read the section regarding operationof the oven and reset the oven.
3. Fuse tripped or circuit breaker turned off.
- Replace the fuse or reset the circuit breaker. If this is repeating frequently,call an electrician.
Smoke coming out during operation.
1. When operating the oven for the first time
- Smoke comes outfromthe heaters.This is not a fault. After cycles, there will be no more smoke.
2. Food on heater.
- Let the oven to cool down and clean food residues from the ground of the oven and surface of upper heater.
When operating the oven burnt orplastic odour coming out.
1. Plastic or other not heat resistant accessories are being used inside the oven.
- At high temperatures, use suitableglassware accessories.
Oven does not cook well.
1. Oven door is opened frequently during cooking.
- Do not open oven door frequently, if the food you are cooking does not require turning. If you open the door frequently internal temperature drops and therefore cooking result will be influenced.
OTHER CONSIDERATIONS
RECOMMENDATIONS FOR ENERGY SAVING
Following details will help you use your product ecologically and economically.
- Use dark coloured and enamel containers that conduct the heat better in the oven.
- As you cook your food, if the recipe or the user manual indicates that pre- heating is required, pre-heat the oven.
- Do not open the oven door frequently while cooking.
- Try not to cook multiple dishes simultaneously in the oven. You may cook at the same time by placing two cookers on the wire rack.
- Cook multiple dishes successively. The oven will not lose heat.
- Turn off the oven a few minutes before the expiration time of cooking. In this case, do not open the oven door.
- Defrost frozen food before cooking.
Manufacturer's Warranty
Please read this warranty card carefully. Attach your purchase receipt to this warranty card and keep in a safe place. You must produce both warranty card and proof of purchase in the event of a warranty repair being required.
When you purchase any new Haier Product you automatically receive a two year Manufacturer'sWarranty covering parts and labour for servicing.
The Manufacturer undertakes to:
Repair or, at its option, replace without cost to the owner either for material or labour any part of the Product, the serial number of which appears on the Product, which is found to be defective within TWO YEARS from the date of purchase.
This warranty DOES NOT cover:
A Service calls which are not related to any defect in the Product. The cost of a service call will be charged if the problem is not found to be a Product related fault. For example:
- Correct the installation of the product.
- Provide Instruction on use of the product or change the setup of the product.
- Replace house fuses or correct house wiring.
- Correcting fault(s) caused by the user.
- Noise or vibration that is considered normal.
- Water on the floor due to incorrect loading or excessive suds.
- Blocked pumps, removal of foreign objects/substancesfrom the machine, including the pump and inlet house filters.
- Correcting damage caused by pests, eg. rats, cockroaches etc.
- Correct corrosion or discolouration due to chemical attack.
- Power outages or surges.
B Defects caused by factors other than:
- Normal domestic use or
- Use in accordance with the Product's User Guide.
C Defects to the Product caused by accident, neglect, misuse or 'Act of God'.
D The cost of repairs carried out by non-authorised repairers or the cost of correcting such un authorised repairs.
E Normal recommended maintenance as set out in the Product 's User Guide.
F Repairs when the appliance has been dismantled, repaired or serviced by other than an AUTHORISED CUSTOMER SERVICE CENTRE or the selling dealer.
G Pick up and delivery.
H Transportation or travelling costs involved in the repair when the product is installed outside the AUTHORISED CUSTOMER SERVICE CENTRE'S normal service area.
This product has been designed for use in a normal domestic environment. It is not intended for commercial use. Doing so may affect product warranty.
Service under this warranty must be provided by an Authorised Service Repairer (refer to the Customer Care section for contact details). Such service shall be provided during normal business hours. This warranty certificate should be shown when making any claim.
Note:
This Warranty is an extra benefit and does not affect your legal rights and applies only to product purchased in New Zealand and Australia. Please keep this Warranty Card in a safe place.
For Australian customers:
Our goods come with guarantees that cannot be excluded under the Australian Consumer Law. You are entitled to a replacement or refund for a major failure and for compensation for any other reasonably foreseeable loss or damage. You are also entitled to have the goods repaired or replaced if the goods fail to be of acceptable quality and the failure does not amount to a major failure.
Customer Care
Check the things you can do yourself.Refer to your User Guide and check:
- Your appliance is correctly installed.
- You are familiar with its normal operation.
- You have read the problem solving section in your User Guide.
If after checking these points you still need assistance, please refer to your nearest Haier Authorised Repairer.
In New Zealand, if you need assistance...*
Call your retailer who is trained to provide information on your appliance, or if we can be of any further help, please contact our Customer Care Centre:
Toll Free:0800 242 437 Fax:(09) 273 0656
Postal address: P.O. Box 58732, Botany, Manukau 2163
If you need service...
We have a network of independent Fisher & Paykel Authorised Repairers whose fully trained technicians can carry out any service necessary on your appliance. Your dealer or our Customer Care Centre can recommend a Fisher & Paykel Authorised Repairer in your area.
In Australia, if you need assistance...*
Call the Customer Care Centre and talk to one of our Customer Care Consultants.
Toll Free:1300 729 948 Fax:(07) 3826 9298
Postal Address: PO Box 798,Cleveland QLD 4163
If you need service...
We have a network of qualified Authorised Repairers whose fully trained technicians can carry out any service necessary on your appliance. Our Customer Care Centre can recommend an Authorised Repairer in your area.
* If you call or write, please provide: name, address, model number, serial number, date of purchase and a description of the problem. This information is needed in order to better respond to your request for assistance.
Product Detials