Loading ...
Loading ...
Loading ...
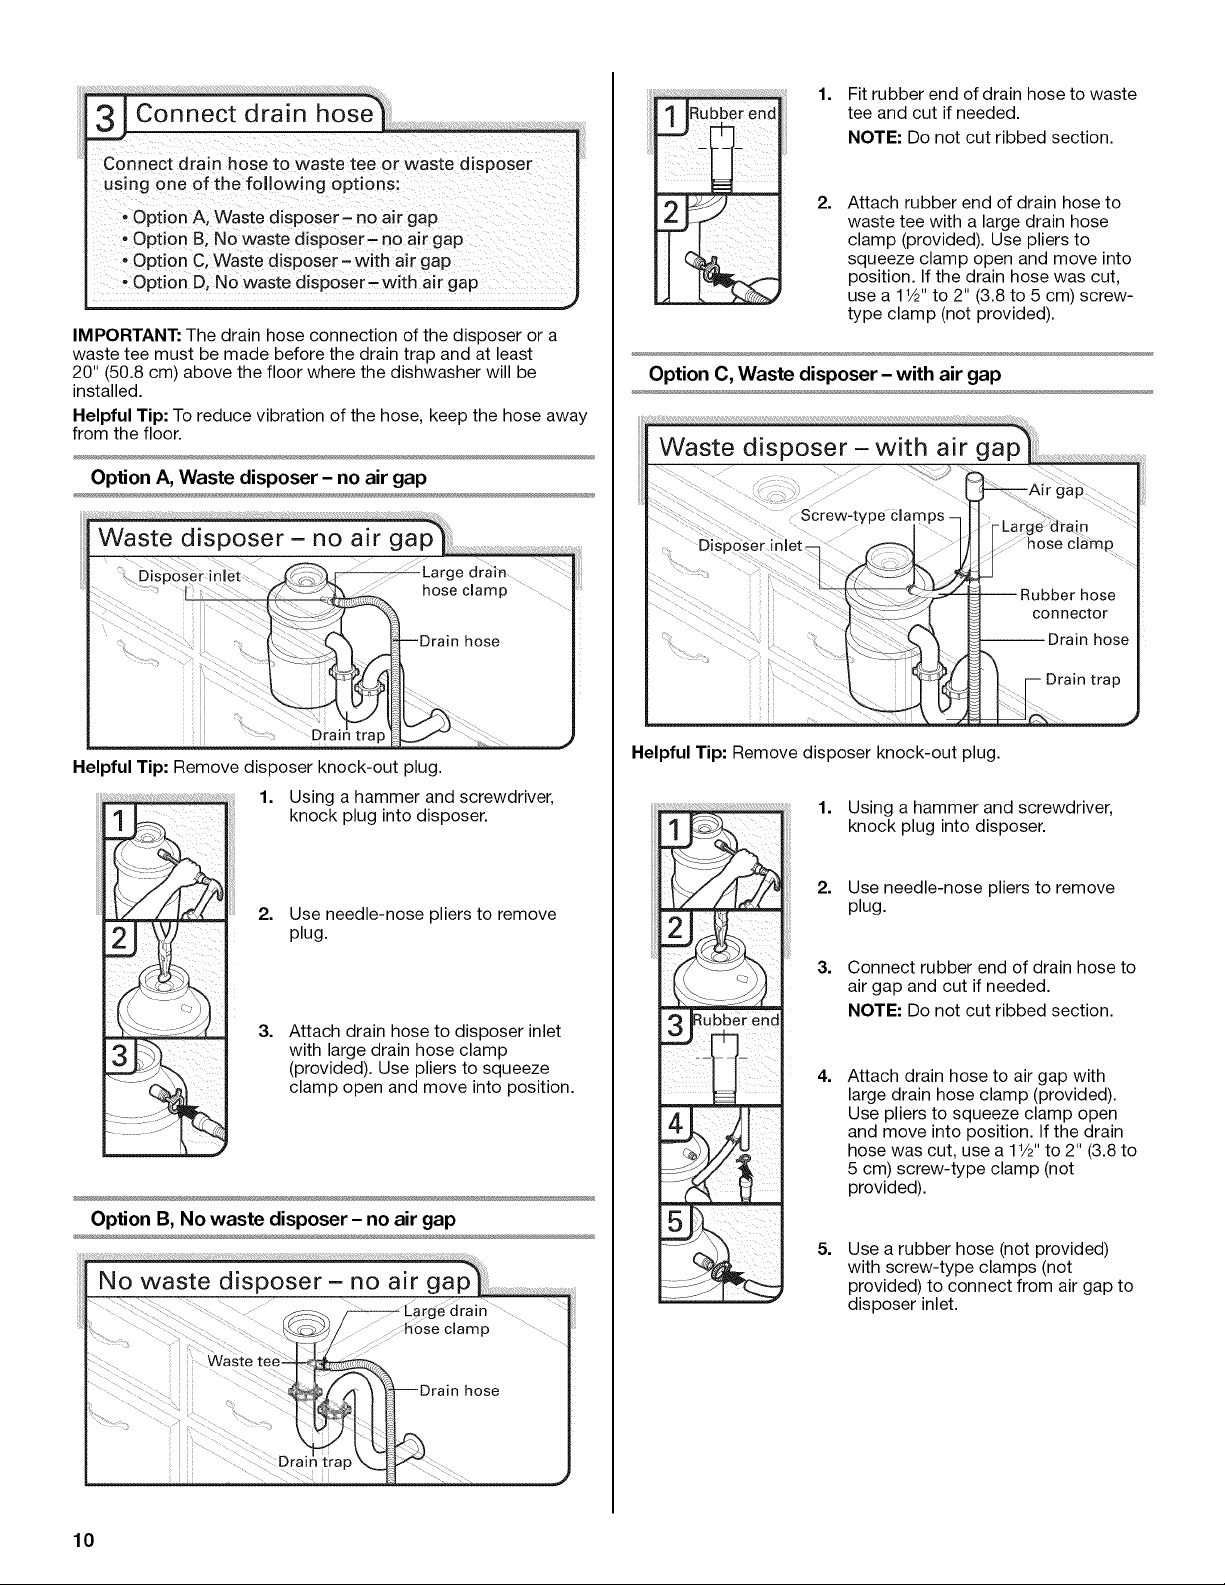
connectdrainh0set0Wasteteeorwastedisposer
usingOne0f the following 0ptions;
; opti0n A; Waste disp0ser _ n0 airgap;
, option B; N0 waste dispose r _ no air gap,
' Opt!on C, Waste disposer-with air gap i
;Option D, No Waste disp0ser_with a rgap i
IMPORTANT: The drain hose connection of the disposer or a
waste tee must be made before the drain trap and at least
20" (50.8 cm) above the floor where the dishwasher will be
installed.
Helpful Tip: To reduce vibration of the hose, keep the hose away
from the floor.
Option A, Waste disposer - no air gap
Helpful Tip: Remove disposer knock-out plug.
1. Using a hammer and screwdriver,
knock plug into disposer.
2. Use needle-nose pliers to remove
plug.
3=
Attach drain hose to disposer inlet
with large drain hose clamp
(provided). Use pliers to squeeze
clamp open and move into position.
Option B, No waste disposer - no air gap
Drait
1. Fit rubber end of drain hose to waste
tee and cut if needed.
NOTE: Do not cut ribbed section.
2= Attach rubber end of drain hose to
waste tee with a large drain hose
clamp (provided). Use pliers to
squeeze clamp open and move into
position. If the drain hose was cut,
use a 1V2" to 2" (3.8 to 5 cm) screw-
type clamp (not provided).
Option C, Waste disposer - with air gap
Helpful Tip: Remove disposer knock-out plug.
1. Using a hammer and screwdriver,
knock plug into disposer.
2. Use needle-nose pliers to remove
plug.
3. Connect rubber end of drain hose to
air gap and cut if needed.
NOTE: Do not cut ribbed section.
4=
Attach drain hose to air gap with
large drain hose clamp (provided).
Use pliers to squeeze clamp open
and move into position. If the drain
hose was cut, use a 11/2"to 2" (3.8 to
5 cm) screw-type clamp (not
provided).
5=
Use a rubber hose (not provided)
with screw-type clamps (not
provided) to connect from air gap to
disposer inlet.
10
Loading ...
Loading ...
Loading ...