Loading ...
Loading ...
Loading ...
24 25
Overload warning indicator (Fig. L)
This machine equipped with an overload warning indicator, the indicator will ashing when:
- The patio cleaner is overloaded.
- The patio cleaner is overheated.
- battery pack low capicity.
Cleaning wooden surfaces
Test the device on an inconspicuous area before using on sensitive surfaces, e. g. wood.
Do not allow the machine to be stationary in one area and keep the product moving to
increase the cleaning efciency
NOTE: Pre-treatments may be removed from pre-treated surfaces. Uneven light-dark effects
result from the type of wood or its treatment. It is a desirable result to remove the lm on
weathered wooden surfaces.
Apply a suitable care agent or preservative after cleaning for optimum results!
Correct handling of the brushes
Use only the brushes suitable for the surface to be cleaned.
Observe the following instructions for correct use of the brushes.
Position the brushes evenly on the surface to be cleaned.
(FIG. O)
Guide the brushes over the surface with light pressure.
Cleaning and replacing brushes
DANGER
Danger of electric shock Injuries due to touching live parts.
Switch off the device.
Remove the battery pack.
NOTE
Always replace both brushes at the same time.
The brushes must be replaced when the gearbox housing touches the ground while cleaning
the surface without exerting pressure on the device.
ATTENTION
Danger of burns
The gearbox can be very hot after use. Allow the device to cool down before replacing the
brushes.
1. Rotate the knob 1/4 turn that holds the roller brush.
(FIG. P)
2. Remove the brush.
(FIG. P)
3. Re-assemble the clean or new brush
.
(FIG. Q)
OPERATION
MAINTENANCE AND STORAGE
WARNING:
Before performing any repair work, always remove the battery pack and
wait until the cutting blade has come to a standstill.
CLEANING
1. Clean the unit using a damp cloth with a mild detergent.
2. Do not use any strong detergents on the plastic housing or the handle. They can be
damaged by certain aromatic oils, such as pine and lemon, and by solvents such as
kerosene. Moisture can also cause a shock hazard. Wipe off any moisture with a soft dry
cloth.
3. Use a small brush to clean the air vents on the rear housing.
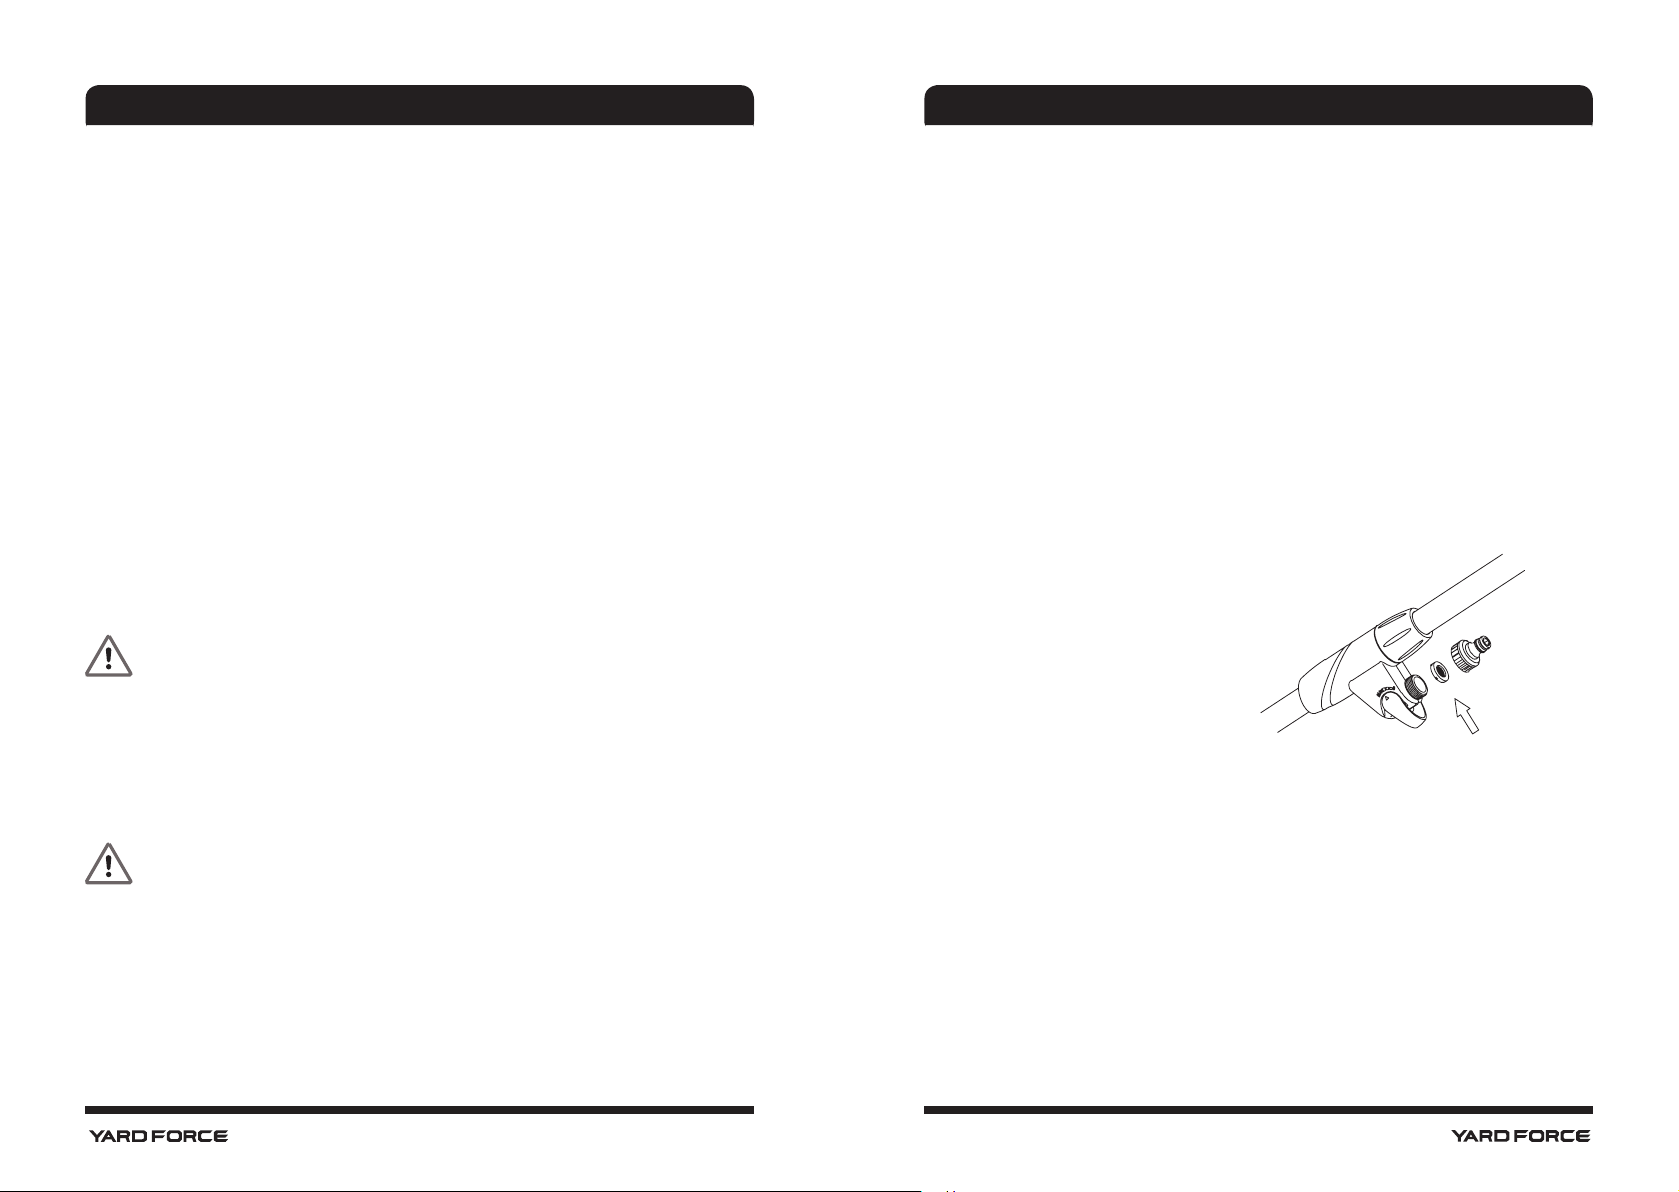
CLEANING THE WATER FILTER
If the water ow is inadequate then the water lter in the device must be cleaned.
1. Unscrew the hose connector at the water connection.
2. Pull out the water lter.
(FIG. R)
3. Clean the water lter under running water against the normal ow direction.
4. Fit the water lter.
5. Screw on the hose connector.
NOTE: Ensure that the sealing ring in the plug connector has been inserted correctly.
STORING THE UNIT
1. Remove the battery pack from the line trimmer when it is not in use.
2. Clean the tool thoroughly before storing it.
3. Store the unit in a dry, well-ventilated area, locked-up or up high, out of the reach of
children. Do not store the unit on or adjacent to fertilizers, petrol, or other chemicals.
TRANSPORT
Use the original packaging to ship whenever possible.
Loading ...
Loading ...