Loading ...
Loading ...
Loading ...
Dimensions and Clearances
Check the dimensions of the appliance and the installation path to ensure there is sufficient
room to move the appliance through doors or narrow openings.
The installation location chosen for the appliance should allow space behind the unit for
connections and airflow as well as space in front to open the doors.
Too small of a distance from adjacent items may result in reduced cooling and freezing
capability and increased power consumption. Allow at least 19” inches in front of the appliance
to open the door, and at least 2" clearance between the back of the appliance, sides and wall.
Levelling
• The refrigerator has two front leveling legs. Adjust the legs to alter the tilt from front-to back or
side-to side. If the refrigerator seems unsteady, or the doors do not close easily, adjust the
refrigerator’s tilt using the instructions below:
1. Turn the leveling leg counterclockwise to raise that side of the refrigerator or clockwise
to lower it. It may take several turns of the leveling leg to adjust the height of the
appliance.
2. Open the door and check to make sure that it closes easily. If the door does not close
easily, tilt the refrigerator slightly more to the rear by turning both leveling legs
counterclockwise. It may take several more turns.
Positioning the Refrigerator
• Arrange the refrigerator so that it does not vibrate against adjoining surfaces or against the
wall. Be sure to maintain a 2” clearance between the back of the appliance, sides and wall.
9
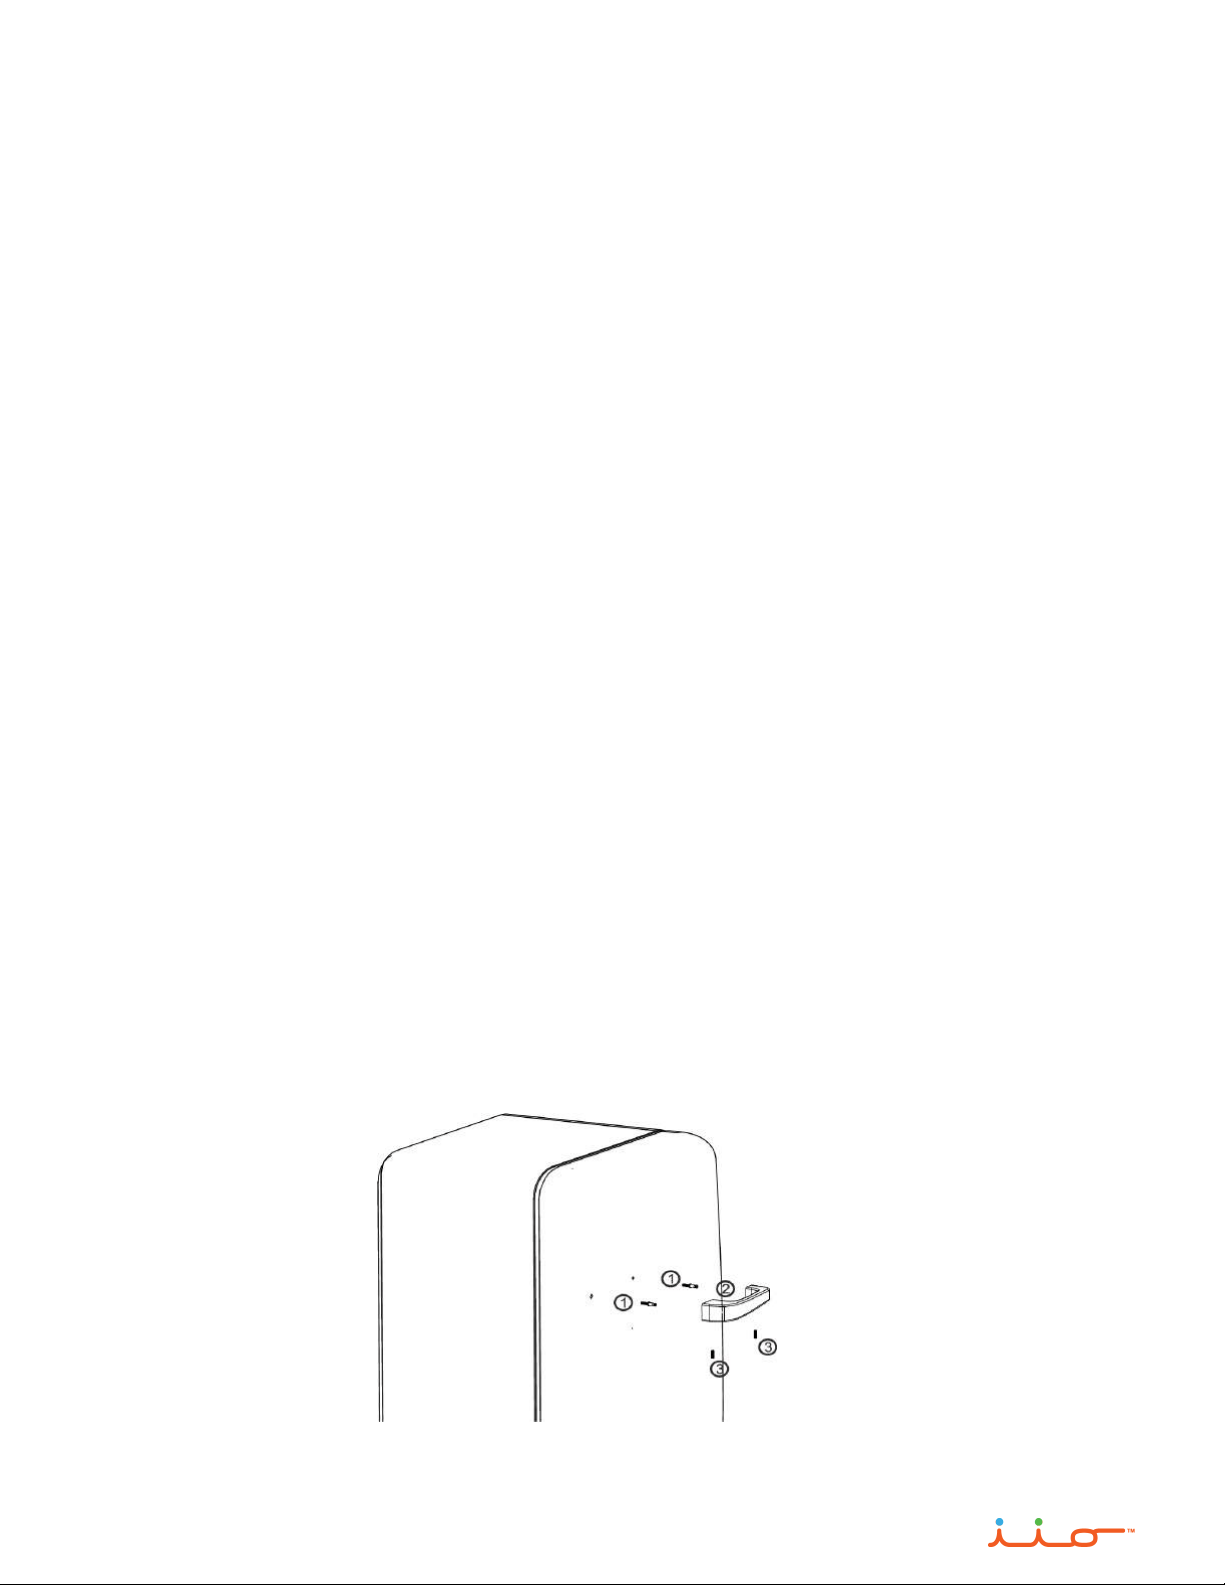
Door Handle Installation
• The door handle comes unattached due to packaging restrictions. It is easily attached following
the instructions below.
1. Carefully screw the two handle posts into the door. Do not over tighten.
2. Carefully align the handle holes with the two posts and gently push it in until fully seated.
3. Fasten the handle by carefully tightening the two lower screws on the handle. Do not over
tighten.
Loading ...
Loading ...
Loading ...