Loading ...
Loading ...
Loading ...
ASSEMBLY
" t
If unit is received assembled, repeat all steps in this section to be sure assembly is correct.
PREPARATION
This Operator's Manual is designed to help you assemble the tool and to provide its safe operation. It is important that
you read the entire manual to become familiar with the tool before you begin assembly. If you have any questions or
need further assxstanco, call our CUSTOMER ASSISTANCE HOTLINE at 1-800-235-5878.
The only tool needed for assembly is the box wrench provided with the unit.
A. ASSIST HANDLE ATTACHMENT
not use A WARNING [
Do
without the assist handle properly
installed.
I
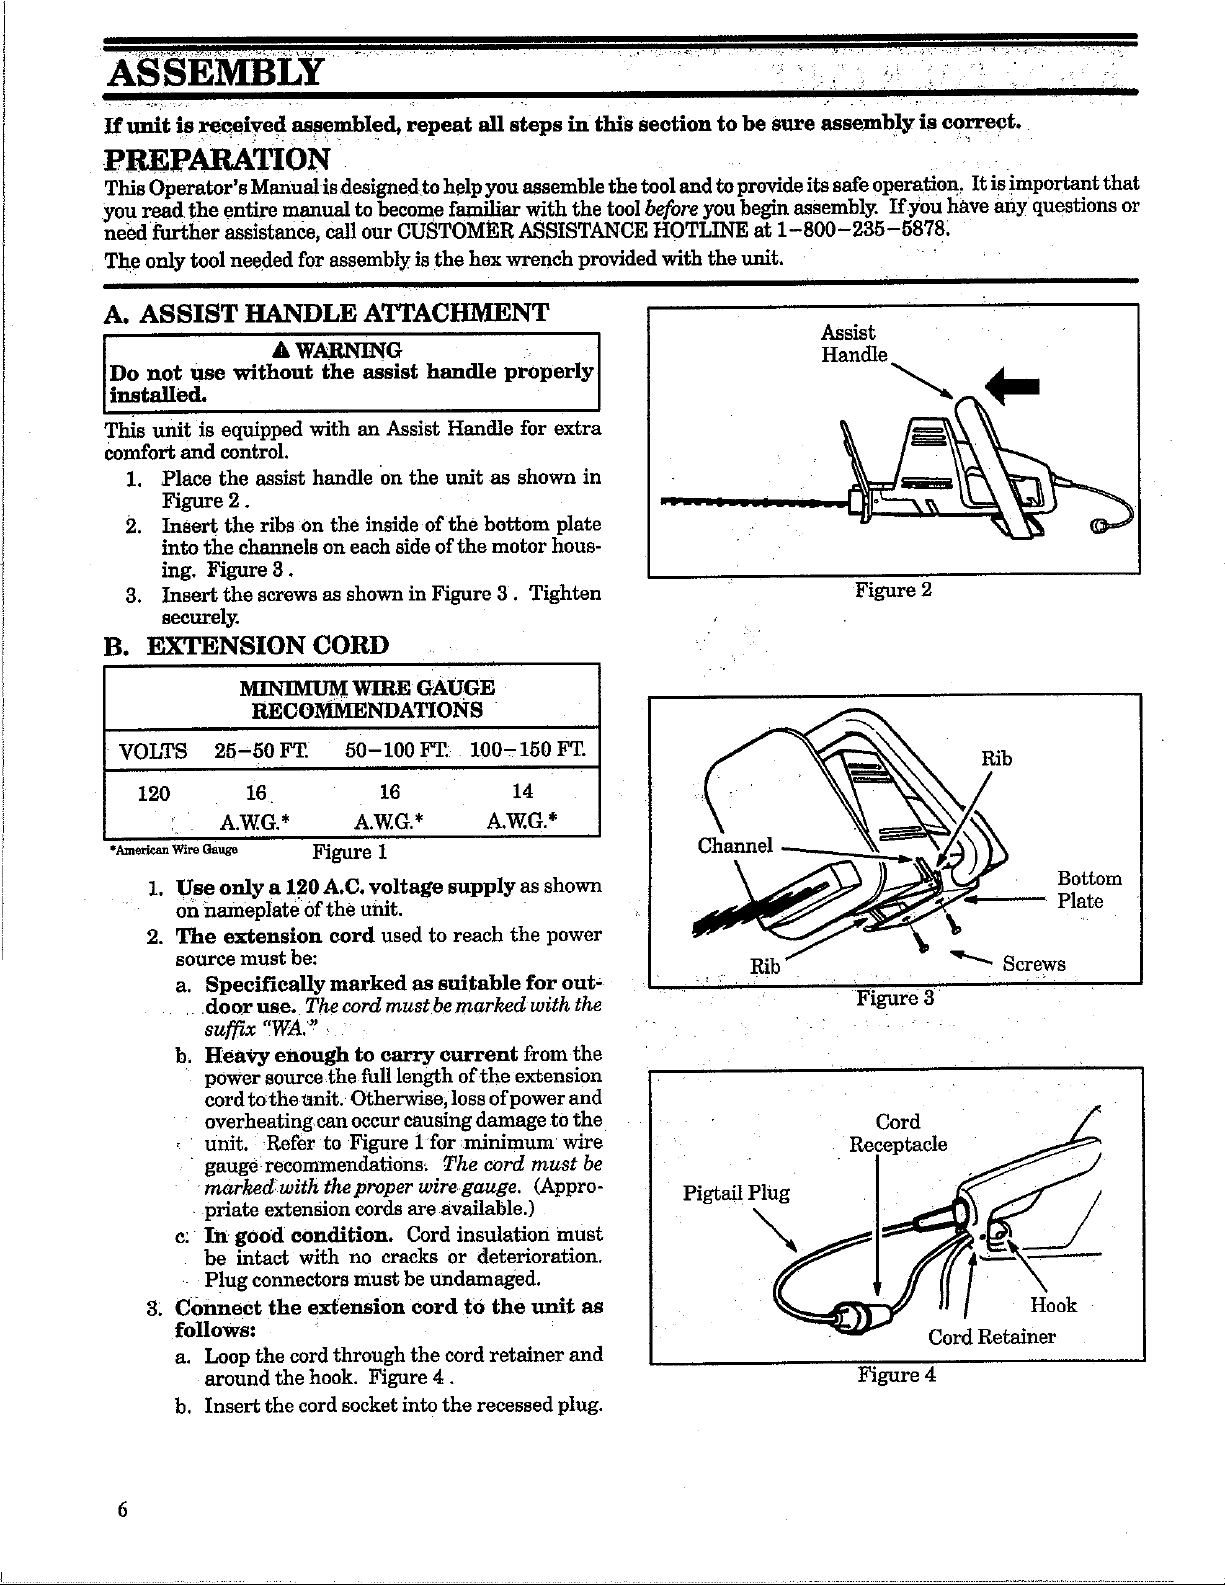
This unit is equipped with an Assist Handle for extra
comfort and control.
1. Place the assist handle on the unit as shown in
Figure 2.
2. Insert the ribs on the inside of the bottom plate
into the channels on each side of the motor hous-
ing. Figure 3.
3. Insert the screws as shown in Figure 3. Tighten
securely.
B. EXTENSION CORD
Assist
Handle
Figure 2
MINIMUM WIRE GAUGE
RECOMMENDATIONS
VOLTS 25-50 FT. 50-100 FT. 100_- 150 FT.
120 16 16 14
A.W.G.* A.W.G.* A.W.G.*
•_ w_ o_ Figure i
1. Use only a 120 A.C. voltage supply as shown
on nameplate of the unit.
2. The extension cord used to reach the power
source must be:
a. Specifieallymarked as suitable for out-
door use. The cord must be marked with the
suffix "WA."
b. Heavy enough to carry current from the
power source the full length of the extension
cord tothe unit. Otherwise, loss of power and
overheating can occur causing damage to the
unit. Refer to Figure i for minimum wire
gauge recommendatians_ The cord must be
markedwiththeproperwiregaugc. (Appro-
priato extension cords are available.)
c: In good condition. Cord insulation must
be intact with no cracks or deterioration.
Plug connectors must be undamaged.
3. Connect the extension cord to the unit as
follows:
a. Loop the cord through the cord retainer and
around the hook. Figure 4.
b. Insert the cord socket into the recessed plug.
Rib
/
Channel
Bottom
Plate
Cord
Receptacle
Pigtai! Plug
Hook
Cord Retainer
Figure 4
Rib _ Screws
Figure 3
Loading ...
Loading ...
Loading ...