Loading ...
Loading ...
Loading ...
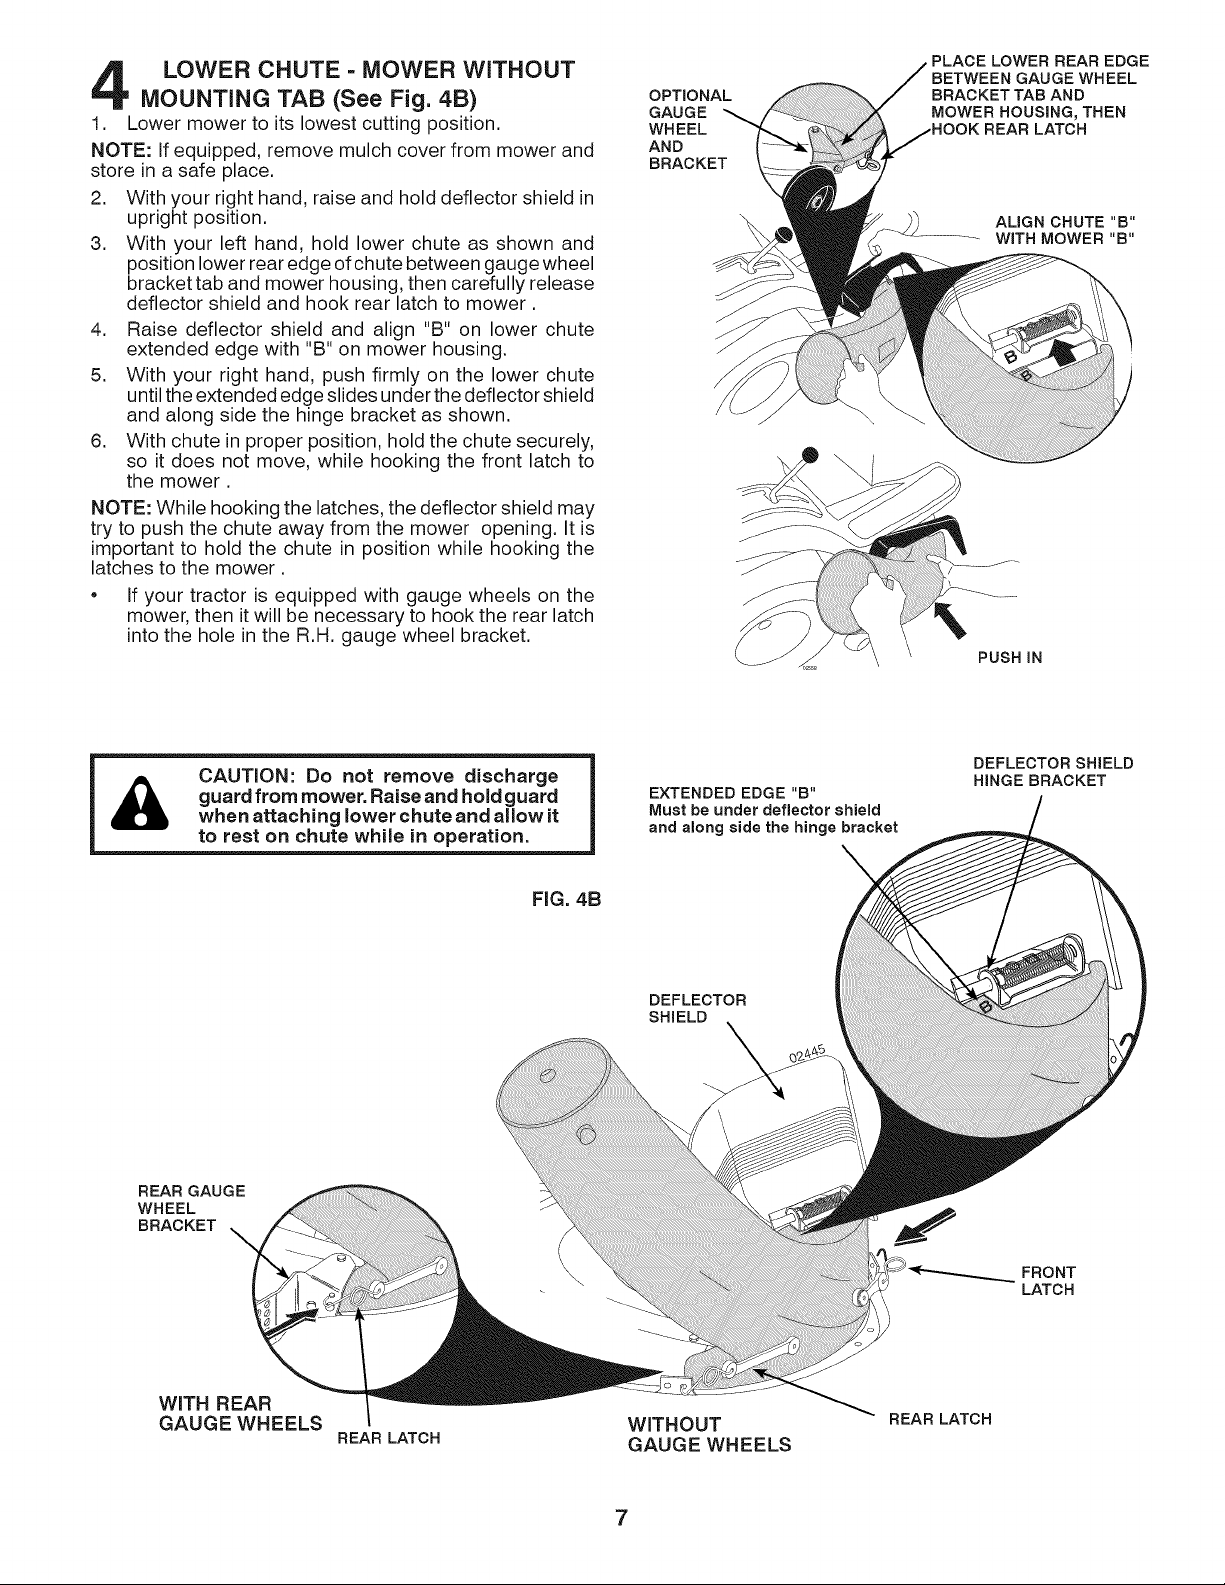
LOWER CHUTE - MOWER WITHOUT
MOUNTING TAB (See Fig. 4B)
1. Lower mower to its lowest cutting position.
NOTE: If equipped, remove mulch cover from mower and
store in a safe place.
2. With your right hand, raise and hold deflector shield in
upright position.
3. With your left hand, hold lower chute as shown and
position lower rear edge of chute between gauge wheel
bracket tab and mower housing, then carefully release
deflector shield and hook rear latch to mower.
4. Raise deflector shield and align "B" on lower chute
extended edge with "B" on mower housing.
5. With your right hand, push firmly on the lower chute
until the extended edge slides under the deflector shield
and along side the hinge bracket as shown.
6. With chute in proper position, hold the chute securely,
so it does not move, while hooking the front latch to
the mower.
NOTE: While hooking the latches, the deflector shield may
try to push the chute away from the mower opening. It is
important to hold the chute in position while hooking the
latches to the mower.
If your tractor is equipped with gauge wheels on the
mower, then it will be necessary to hook the rear latch
into the hole in the R.H. gauge wheel bracket.
OPTIONAL
GAUGE
WHEEL
AND
BRACKET
PLACE LOWER REAR EDGE
BETWEEN GAUGE WHEEL
BRACKET TAB AND
MOWER HOUSING, THEN
REAR LATCH
ALIGN CHUTE "B"
WITH MOWER "B"
PUSH IN
CAUTION: Do not remove discharge
guard from mower. Raise and hold guard
when attaching lower chute and allow it
to rest on chute while in operation.
EXTENDED EDGE "B"
Must be under deflector shield
and along aide the hinge bracket
\
DEFLECTOR SHIELD
HINGE BRACKET
DEFLECTOR
SHIELD
REAR GAUGE
WHEEL
BRACKET
\\\
\
FRONT
LATCH
WITH REAR
GAUGE WHEELS
REAR LATCH
WITHOUT
GAUGE WHEELS
REAR LATCH
7
Loading ...
Loading ...
Loading ...