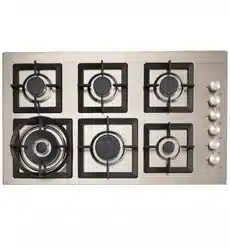

EV4BGSX
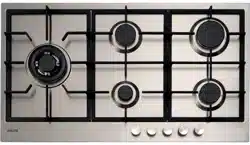
EV3WCTSFD

Preface
Thank you for choosing our gas cooktop.
To use this appliance correctly and prevent any potential risk, read these instructions before
using the appliance.
.HHSWKHVHLQVWUXFWLRQVLQDSODFHZKHUH\RXFDQ¿QGWKHPHDVLO\.
If you are unsure of any of the information contained in these instructions, please contact our
customer care centre
The manufacturer shall not be responsible for any damages to persons or property caused by
incorrect installation or use of the appliance.
7KHDSSOLDQFHKDVEHHQFHUWL¿HGIRUXVHLQFRXQWULHVRWKHUWKDQWKRVHPDUNHGRQWKH
appliance.
7KHPDQXIDFWXUHUDOVRUHVHUYHVWKHULJKWWRPDNHDQ\PRGL¿FDWLRQVWRWKHSURGXFWVDVPD\
be considered necessary or useful, also in the interests of the user, without jeopardising the
main functional and safety features of the products themselves.
The appliance is designed for a domestic environment and not a commercial one.
.

contents
Preface
Safety Warning
Safety Instructions
3
Installation
4
Child and People Safety
5
During Use
Cleaning and Service
8
Environmental Information
Instructions for use and maintenance
Description of the appliance
9
How to Use the appliance
10
Safety and Energy saving advice
12
Cleaning and Maintenance
Troubleshooting
13
Technical instructions
Using instructions
Positioning
Installing the appliance
Gas Connection
Electrical Connection
Gas Conversion
6
8
16
18
2
Gas Specifition
21
2
23
1
1
5
7
0
2
safety instructions
Ŷ 7KLVLQVWUXFWLRQERRNOHWPXVWEHNHSWZLWKWKHDSSOLDQFHIRUDQ\IXWXUHUHIHUHQFH
If the appliance is sold or transferred to another person, ensure the booklet is passed on to
the new user.
Ŷ 7KHPDQXIDFWXUHUGHFOLQHVDQ\OLDELOLW\VKRXOGWKHVHVDIHW\PHDVXUHVQRWEHREVHUYHG
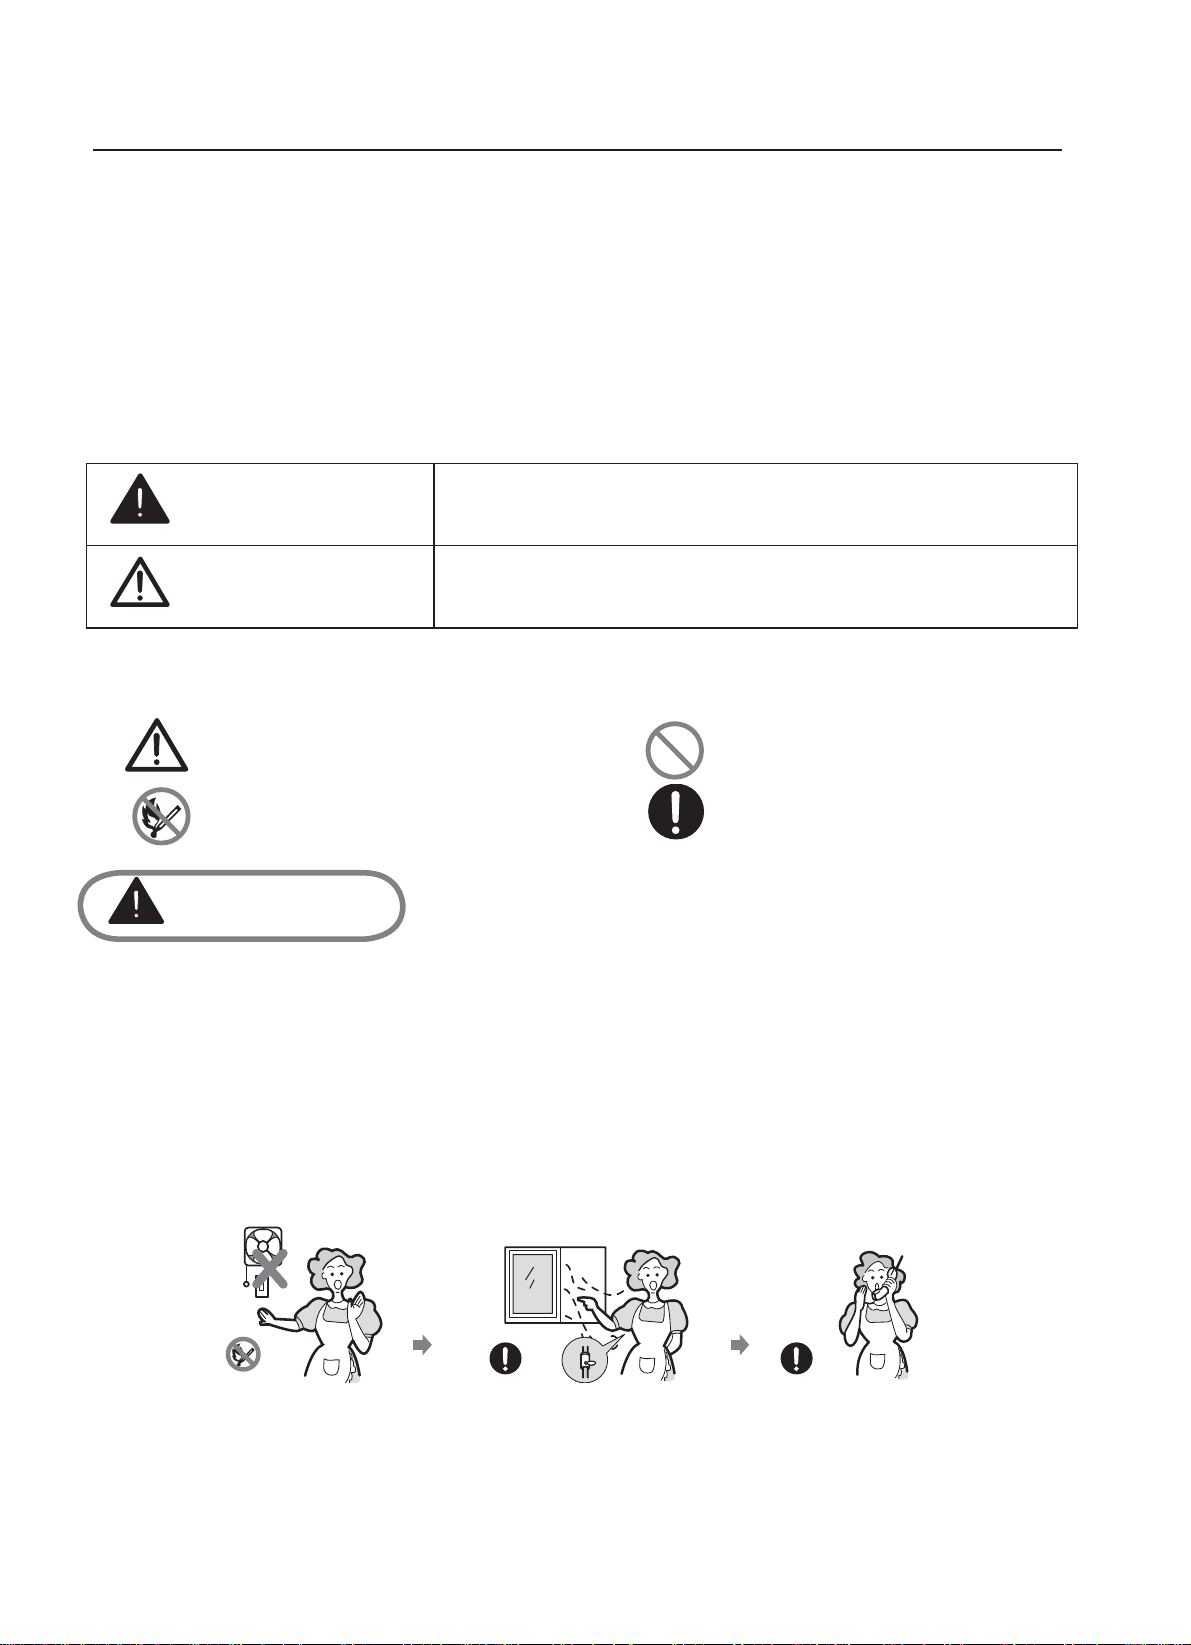
Ŷ 7KHIROORZLQJPDUNVDUHPDGHWREHHDVLO\XQGHUVWRRGVRWKDW\RXFDQSUHYHQWDQ\
accident caused by misuse in advance, and use the appliance more conveniently.
Ŷ
Danger/Warning
Neglect of this mark may result in severe personal injury or
death.
Caution
Neglect of this mark may result in minor personal injury or
property damage.
ʄ7KHIROORZLQJPDUNV
DVIROORZ
Caution No Access
No Fire Tool Must Do
Danger
ʄ,IJDVVHHPVWROHDNWDNHWKHDFWLRQVDVIROORZ
- Do not turn on the light.
- Do not switch on/off any electrical appliance and do not touch any electric plug.
- Do not use a telephone.
1 Stop using the product and close the middle valve.
2 Open the window to ventilate.
3 Contact our service centre by using a phone outside.
* The fuel gas contains mercaptan, so that you can smell the gas leak (smell of rotten garlic
or egg) even where only 1/1000 of the gas is in the air.
are u in the Instruction Manual
Please take the time to read this Instruction Manual before installing or
using the appliance.
Ŷ 5HDGWKHIROORZLQJFRQWHQWVWKRURXJKO\DQGHQVXUH\RXXQGHUVWDQGWKHP
sed
V
.
3
installation
Warning
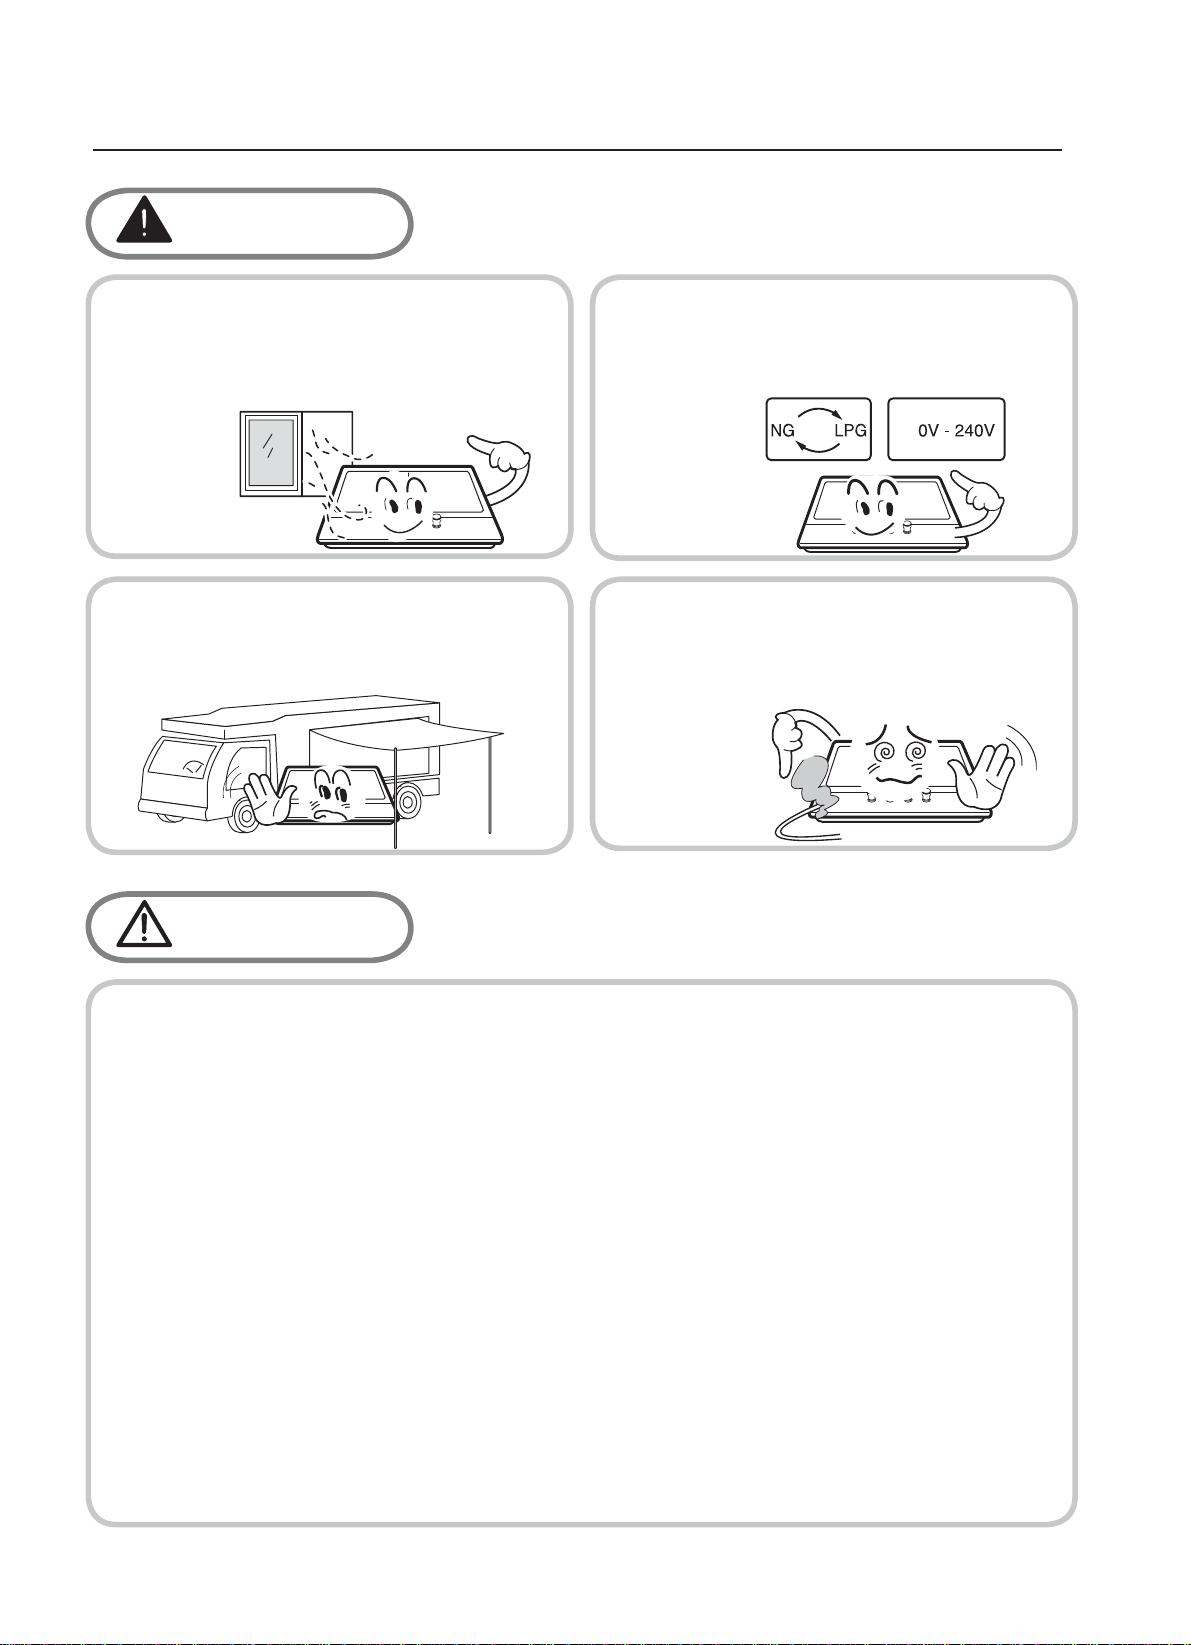
Ŷ7KLVDSSOLDQFHVKDOOEHLQVWDOOHGLQ
accordance with regulations in force
and only used in a well ventilated
space.
Ŷ3ULRUWRLQVWDOODWLRQHQVXUHWKDWWKH
gas and electrical supply complies
with the type stated on the rating
plate.
Ŷ:KHUHWKLVDSSOLDQFHLVLQVWDOOHGLQ
marine craft or in caravans, it should not
be used as a space heater.
Ŷ7KHJDVSLSHDQGHOHFWULFDOFDEOH
must be installed in such a way that
they do not touch any parts or the
appliance.
Ŷ7KLVDSSOLDQFHVKRXOGEHLQVWDOOHGE\DTXDOL¿HGWHFKQLFLDQRULQVWDOOHU
Ŷ7KHDGMXVWPHQWFRQGLWLRQVIRUWKLVDSSOLDQFHDUHVWDWHGRQWKHODEHORUGDWDSODWH
Ŷ5HPRYHDOOSDFNDJLQJEHIRUHXVLQJWKHDSSOLDQFH
Ŷ$IWHUXQSDFNLQJWKHDSSOLDQFHPDNHVXUHWKHSURGXFWLVQRWGDPDJHGDQGWKDWWKH
connection cord is in perfect condition. Otherwise, contact the dealer before installing
the appliance.
Ŷ7KHDGMDFHQWIXUQLWXUHDQGDOOPDWHULDOVXVHGLQWKHLQVWDOODWLRQPXVWEHDEOHWR
ZLWKVWDQGDPLQLPXPWHPSHUDWXUHRIÛ&DERYHWKHDPELHQWWHPSHUDWXUHRIWKH
room it is located in, whilst in use.
Ŷ,QWKHHYHQWRIEXUQHUÀDPHVEHLQJDFFLGHQWDOO\H[WLQJXLVKHGWXUQRIIWKHEXUQHU
control and do not attempt to re-ignite the burner for at least one minute.
Ŷ
The use of a gas cooking appliance results in the production of heat and moisture in the
room in which it is installed. Ensure that the kitchen is well ventilated: keep natural
YHQWLODWLRQKROHVRSHQRULQVWDOODPHFKDQLFDOYHQWLODWLRQGHYLFHPHFKDQLFDOH[WUDFWRUKRRG
Ŷ3URORQJHGLQWHQVLYHXVHRIWKHDSSOLDQFHPD\FDOOIRUDGGLWLRQDOYHQWLODWLRQIRU
H[DPSOHRSHQLQJRIDZLQGRZRUPRUHHIIHFWLYHYHQWLODWLRQIRUH[DPSOHLQFUHDVLQJ
the level of mechanical ventilation where present.
Caution
22
4

child and people safety
Ŷ'RQRWDOORZFKLOGUHQWRSOD\QHDURUZLWKWKHDSSOLDQFH
The appliance gets hot when it is in use.
Children should be kept away until it has cooled.
Ŷ7KLVDSSOLDQFHLVGHVLJQHGWREHRSHUDWHGE\DGXOWV
Ŷ&KLOGUHQFDQDOVRLQMXUHWKHPVHOYHVE\SXOOLQJSDQVRUSRWVRIIWKHDSSOLDQFH
Ŷ7KLVDSSOLDQFHLVQRWLQWHQGHGIRUXVHE\FKLOGUHQRURWKHUSHUVRQVZKRVHSK\VLFDO
VHQVRU\RUPHQWDOFDSDELOLWLHVRUODFNRIH[SHULHQFHDQGNQRZOHGJHSUHYHQWVWKHP
from using the appliance safety without supervision or instruction by a responsible
person to ensure that they can use the appliance safety.
Warning
Caution
5
during use
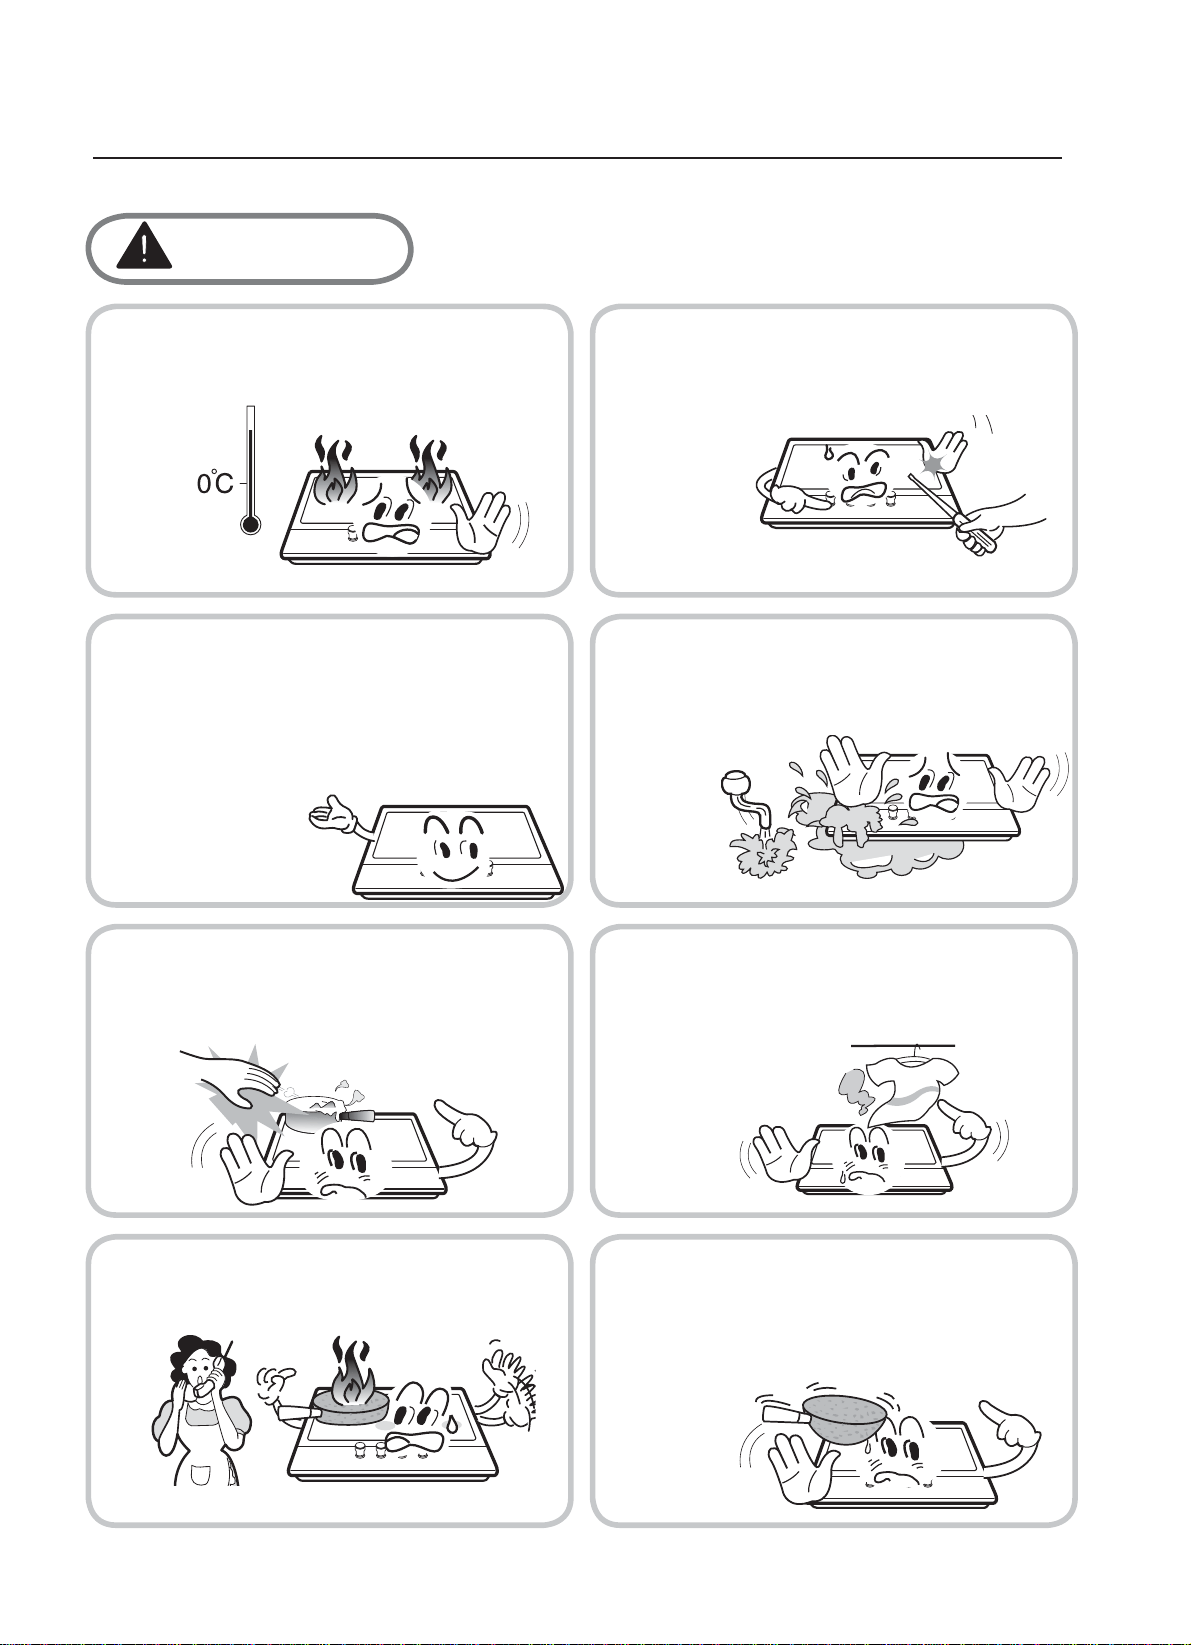
Ŷ2QO\XVHWKHDSSOLDQFHIRUSUHSDULQJ
food.
Warning
Ŷ
The use of a gas cooking appliance results
in the production of heat and moisture in
the room in which it is installed. Ensure
that the kitchen is well ventilated : keep
natural ventilation holes open or install a
mechanical ventilation device
(mechanical
H[WUDFWRUKRRG
Ŷ7KHKHDWLQJDQGFRRNLQJVXUIDFHVRI
the appliance become hot when they
are in use, take all due precautions.
Ŷ Never leave the appliance unattended
when cooking.
Ŷ'RQRWPRGLI\WKLVDSSOLDQFH
Ŷ'RQRWXVHWKLVDSSOLDQFHLILW
LQ
contact with water. Do not operate
this appliance with wet hands.
Ŷ'RQRWXVHODUJHFORWKVWHDWRZHOVRU
similar as the ends could touch the
ÀDPHVDQGFDWFK¿UH
Ŷ8QVWDEOHRUPLVVKDSHQSDQVVKRXOG
not be used on the appliance as they
can cause an accident by tipping or
spillage.
comes
Burner
panel is not designed to operate
from an external timer or separate
remote control system.
6
during use
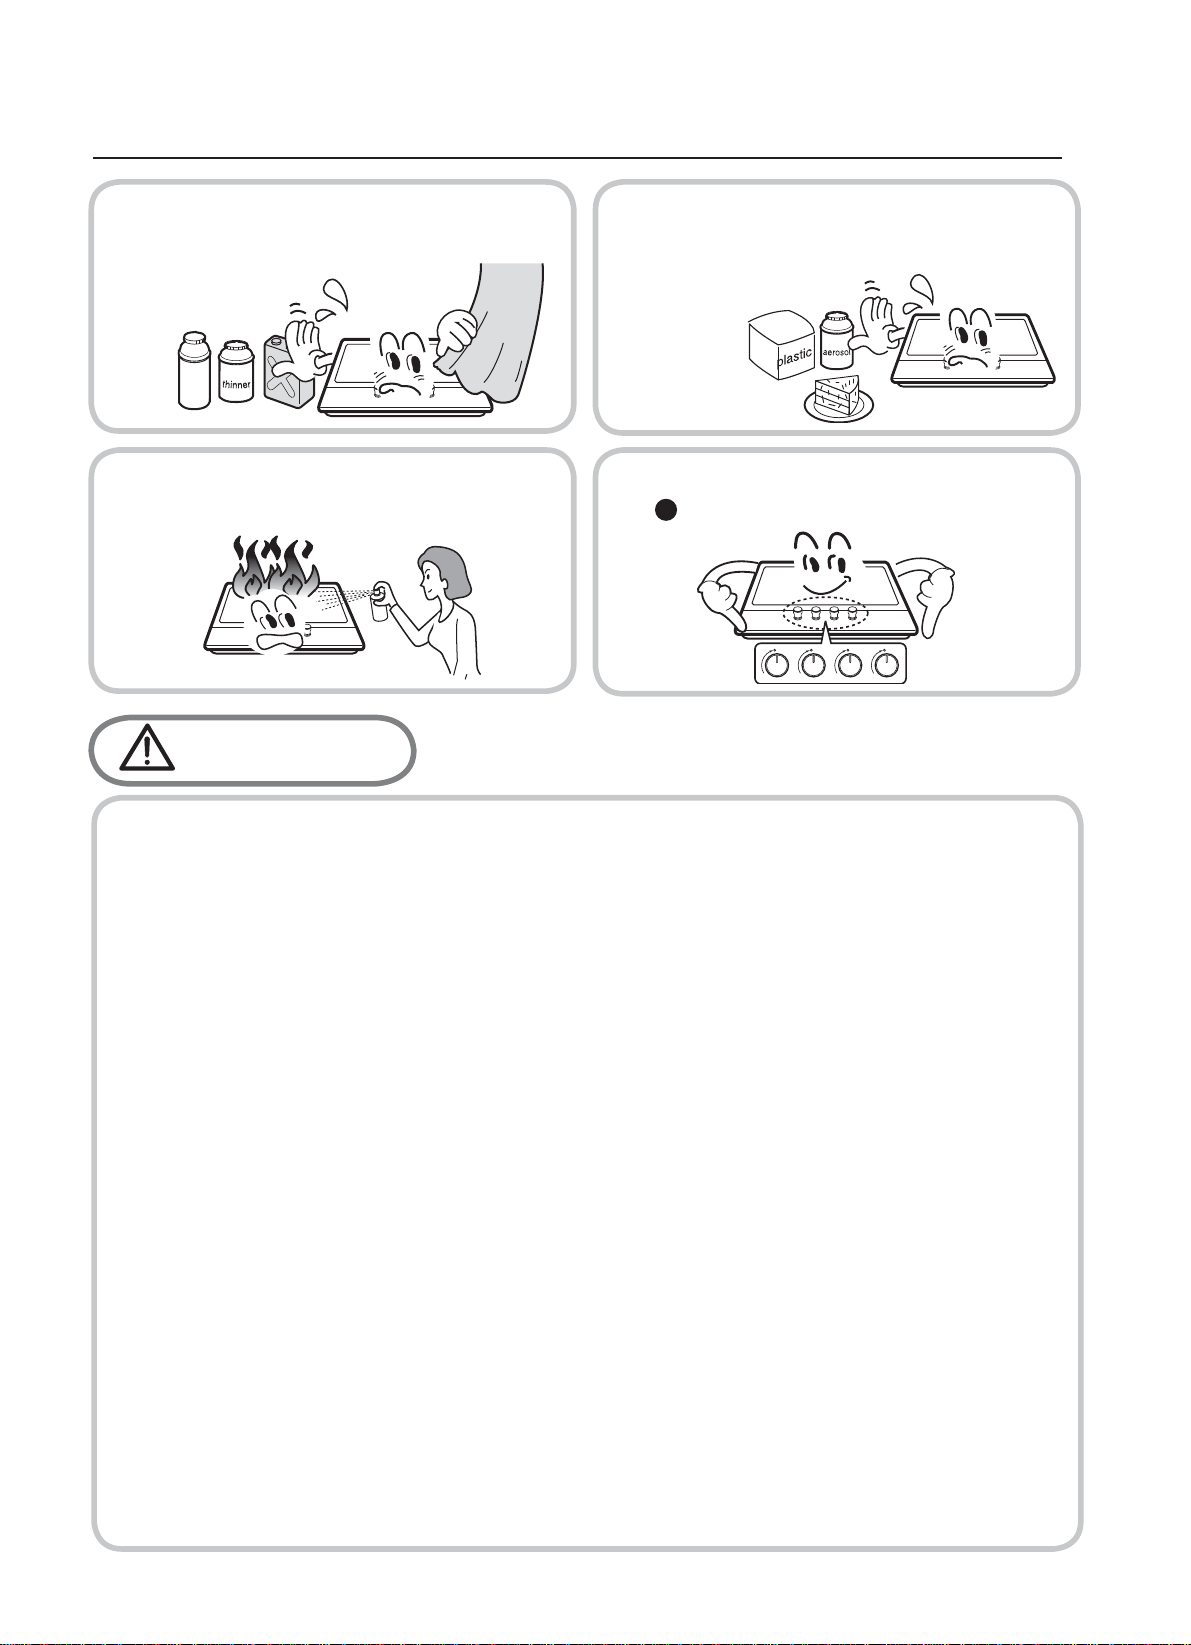
Ŷ'RQRWXVHRUVWRUHÀDPPDEOH
materials in the storage
drawer
near this appliance.
Ŷ'RQRWVSUD\DHURVROVLQWKHYLFLQLW\RI
this appliance while it is in operaiton.
Ŷ
7KLVDSSOLDQFHLVLQWHQGHGIRUGRPHVWLFFRRNLQJRQO\,WLVQRWGHVLJQHGIRUFRPPHUFLDORU
industrial purposes.
Ŷ
3URORQJHGLQWHQVLYHXVHRIWKHDSSOLDQFHPD\FDOOIRUDGGLWLRQDOYHQWLODWLRQIRUH[DPSOH
opening of a window, or increasing the level of mechanical ventilation where present.
Ŷ8VHKHDWUHVLVWDQWSRWKROGHUVRUJORYHVZKHQKDQGOLQJKRWSRWVDQGSDQV
Ŷ'RQRWOHWSRWKROGHUVFRPHQHDURSHQÀDPHVZKHQOLIWLQJFRRNZDUH
Ŷ7DNHFDUHQRWWROHWSRWKROGHUVRUJORYHVJHWGDPSRUZHWDVWKLVFDXVHVKHDWWRWUDQVIHU
WKURXJKWKHPDWHULDOTXLFNHUZLWKWKHULVNRIEXUQLQJ\RXUVHOI
Ŷ2QO\HYHUXVHWKHEXUQHUVDIWHUSODFLQJSRWVDQGSDQVRQWKHP'RQRWKHDWXSDQ\HPSW\
pots or pans.
Ŷ1HYHUXVHSODVWLFRUDOXPLQLXPIRLOGLVKHVRQWKHDSSOLDQFH
Ŷ:KHQXVLQJRWKHUHOHFWULFDODSSOLDQFHVHQVXUHWKHFDEOHGRHVQRWFRPHLQWRFRQWDFWZLWK
the appliance surfaces of the cooking appliance.
Ŷ,I\RXKDYHDQ\PHFKDQLFDOSDUWVHJDQDUWL¿FDOKHDUWLQ\RXUERG\FRQVXOWDGRFWRUEHIRUH
using the appliance.
Ŷ
6XFKFORWKVFDQFDWFK¿UH
on a hot burner.
Ŷ:KHQXVLQJJODVVFRRNZDUHPDNHVXUHLWLVGHVLJQHGIRUWRSSODWHFRRNLQJ
Ŷ7RPLQLPLVHWKHSRVVLELOLW\RIEXUQVLJQLWLRQRIÀDPPDEOHPDWHULDOVDQGVSLOODJHWXUQ
FRRNZDUHKDQGOHVWRZDUGWKHVLGHRUFHQWHURIWKHWRSSODWHZLWKRXWH[WHQGLQJRYHU
adjacent burners.
Ŷ$OZD\VWXUQEXUQHUFRQWUROVRIIEHIRUHUHPRYLQJFRRNZDUH
Ŷ&DUHIXOO\ZDWFKIRRGVEHLQJIULHGDWDKLJKÀDPHVHWWLQJ
Ŷ$OZD\VKHDWIDWVORZO\DQGZDWFKDVLWKHDWV
Ŷ)RRGVIRUIU\LQJVKRXOGEHDVGU\DVSRVVLEOH)URVWRQIUR]HQIRRGVRUPRLVWXUHRQIUHVK
foods can cause hot fat to bubble up and over the sides of the pan.
Ŷ
1HYHU WU\ WR PRYHDSDQRIKRW IDW HVSHFLDOO\DGHHSIDW IU\HU:DLW XQWLOWKHIDWLV
FRRO
Ŷ3HULVKDEOHIRRGSODVWLFLWHPVDQG
aerosols may be affected by heat and
should not stored above or below the
appliance.
Ŷ(QVXUHWKHFRQWURONQREVDUHLQWKH
‘ ’ position when not in use.
Caution
Do not use a tea towel or similar materials in place of a pot holder
completely
Do not use a tea towel or similar materials in place of a pot holder
Ŷ
If the surface
is made of glass-cracked, switch off the appliance to avoid defeat electr cutiono.
7
cleaning and service
environmental information
Ŷ$IWHULQVWDOODWLRQSOHDVHGLVSRVHRIWKHSDFNDJLQJ
with due regard to safety and the environment.
Ŷ:KHQGLVSRVLQJRIDQROGDSSOLDQFHPDNHLW
unusable, by cutting off the cable.
&RUUHFW'LVSRVDORI7KLV3URGXFW
:DVWH(OHFWULFDO(OHFWURQLF(TXLSPHQW
Ŷ7KLVPDUNLQJVKRZQRQWKHSURGXFWRULWVOLWHUDWXUHLQGLFDWHVWKDWLWVKRXOGQRWEH
disposed with other household wastes at the end of its working life. To prevent
possible harm to the environment or human health from uncontrolled waste disposal,
please separate this from other types of wastes and recycle it responsibly to promote
the sustainable reuse of material resources.
Ŷ+RXVHKROGXVHUVVKRXOGFRQWDFWHLWKHUWKHUHWDLOHUZKHUHWKH\SXUFKDVHGWKLVSURGXFW
RUWKHLUORFDOJRYHUQPHQWRI¿FHIRUGHWDLOVRIZKHUHDQGKRZWKH\FDQWDNHWKLVLWHP
for environmentally safe recycling.
Ŷ%XVLQHVVXVHUVVKRXOGFRQWDFWWKHLUVXSSOLHUDQGFKHFNWKHWHUPVDQGFRQGLWLRQVRI
WKHSXUFKDVHFRQWUDFW7KLVSURGXFWVKRXOGQRWEHPL[HGZLWKRWKHUFRPPHUFLDO
wastes for disposal.
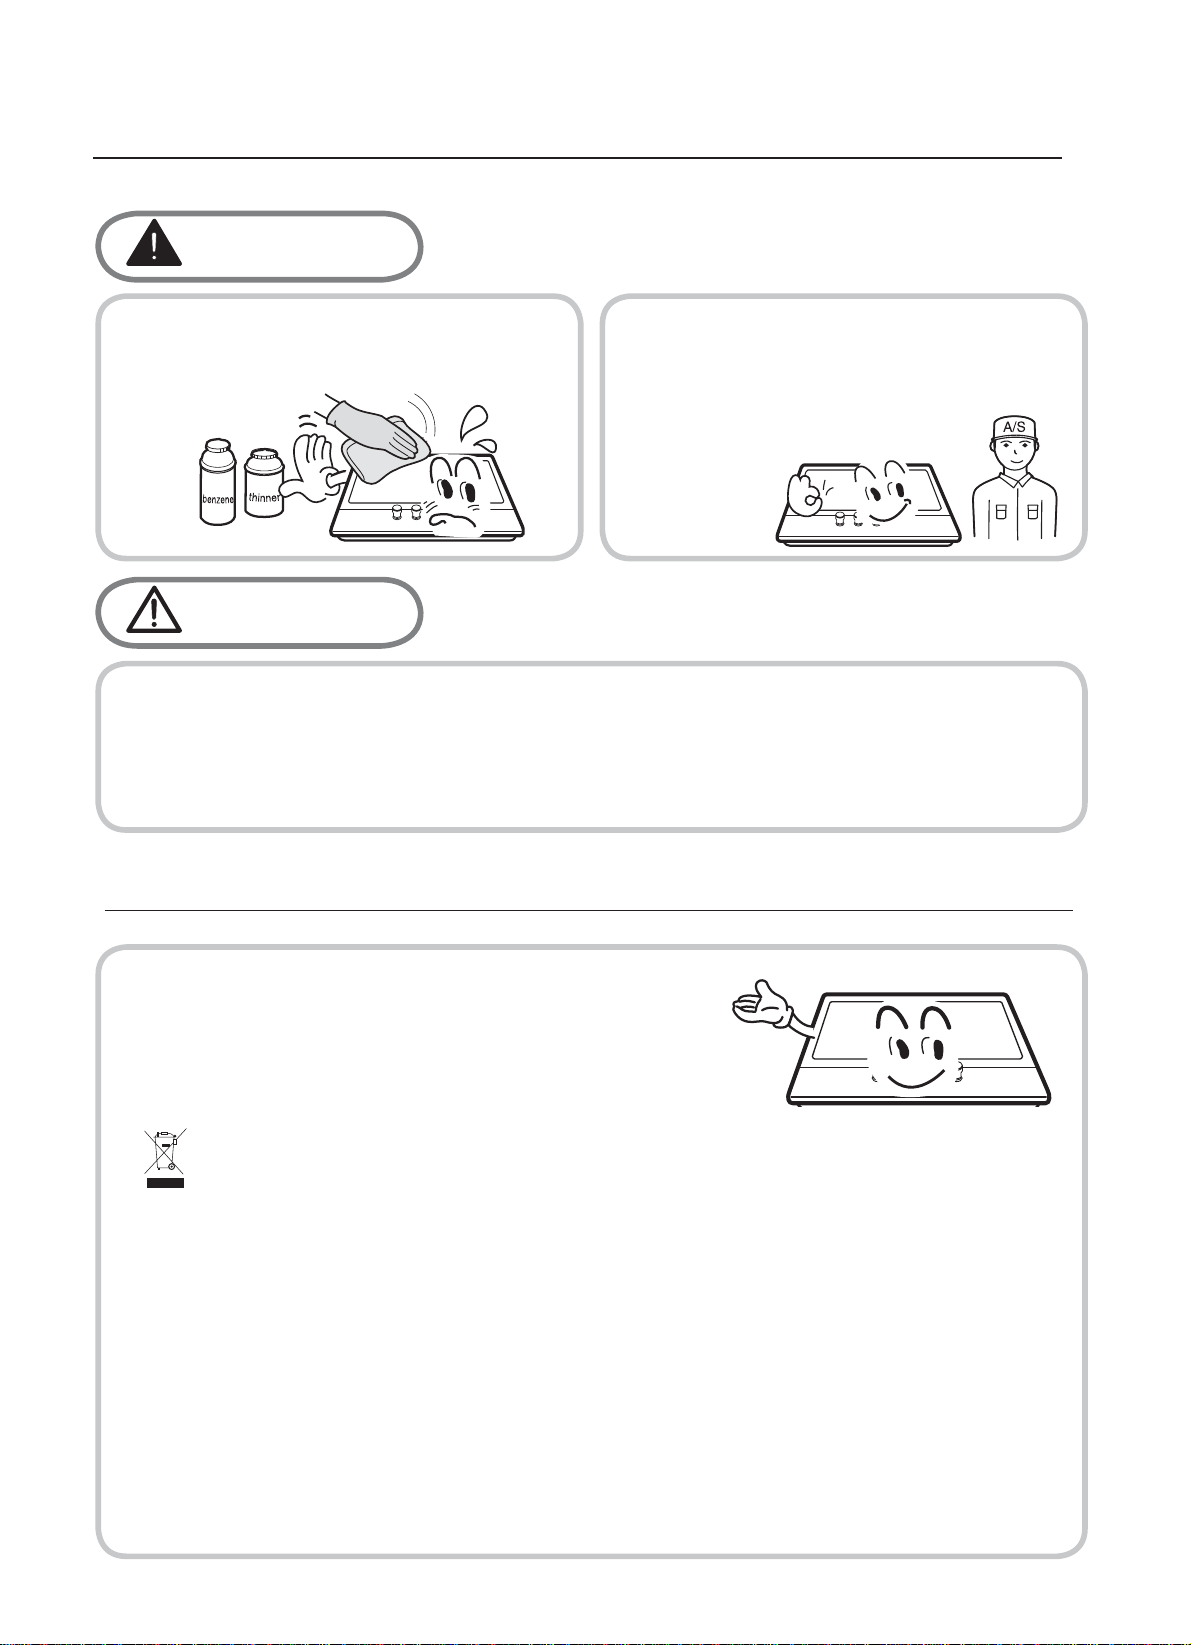
Ŷ1HYHUXVHDEUDVLYHRUFDXVWLF
cleaning agents.
Warning
Ŷ%HIRUHDWWHPSWLQJWRFOHDQWKHDSSOLDQFHLWVKRXOGEHGLVFRQQHFWHGIURPWKHPDLQV
and cooled.
Ŷ<RXVKRXOGQRWXVHDVWHDPMHWRUDQ\RWKHUKLJKSUHVVXUHFOHDQLQJHTXLSPHQWWR
clean the appliance.
Ŷ7KLVDSSOLDQFHVKRXOGRQO\EH
repaired or serviced by an authorised
Service Engineer and only genuine
approved spare parts should
be used.
Caution
8
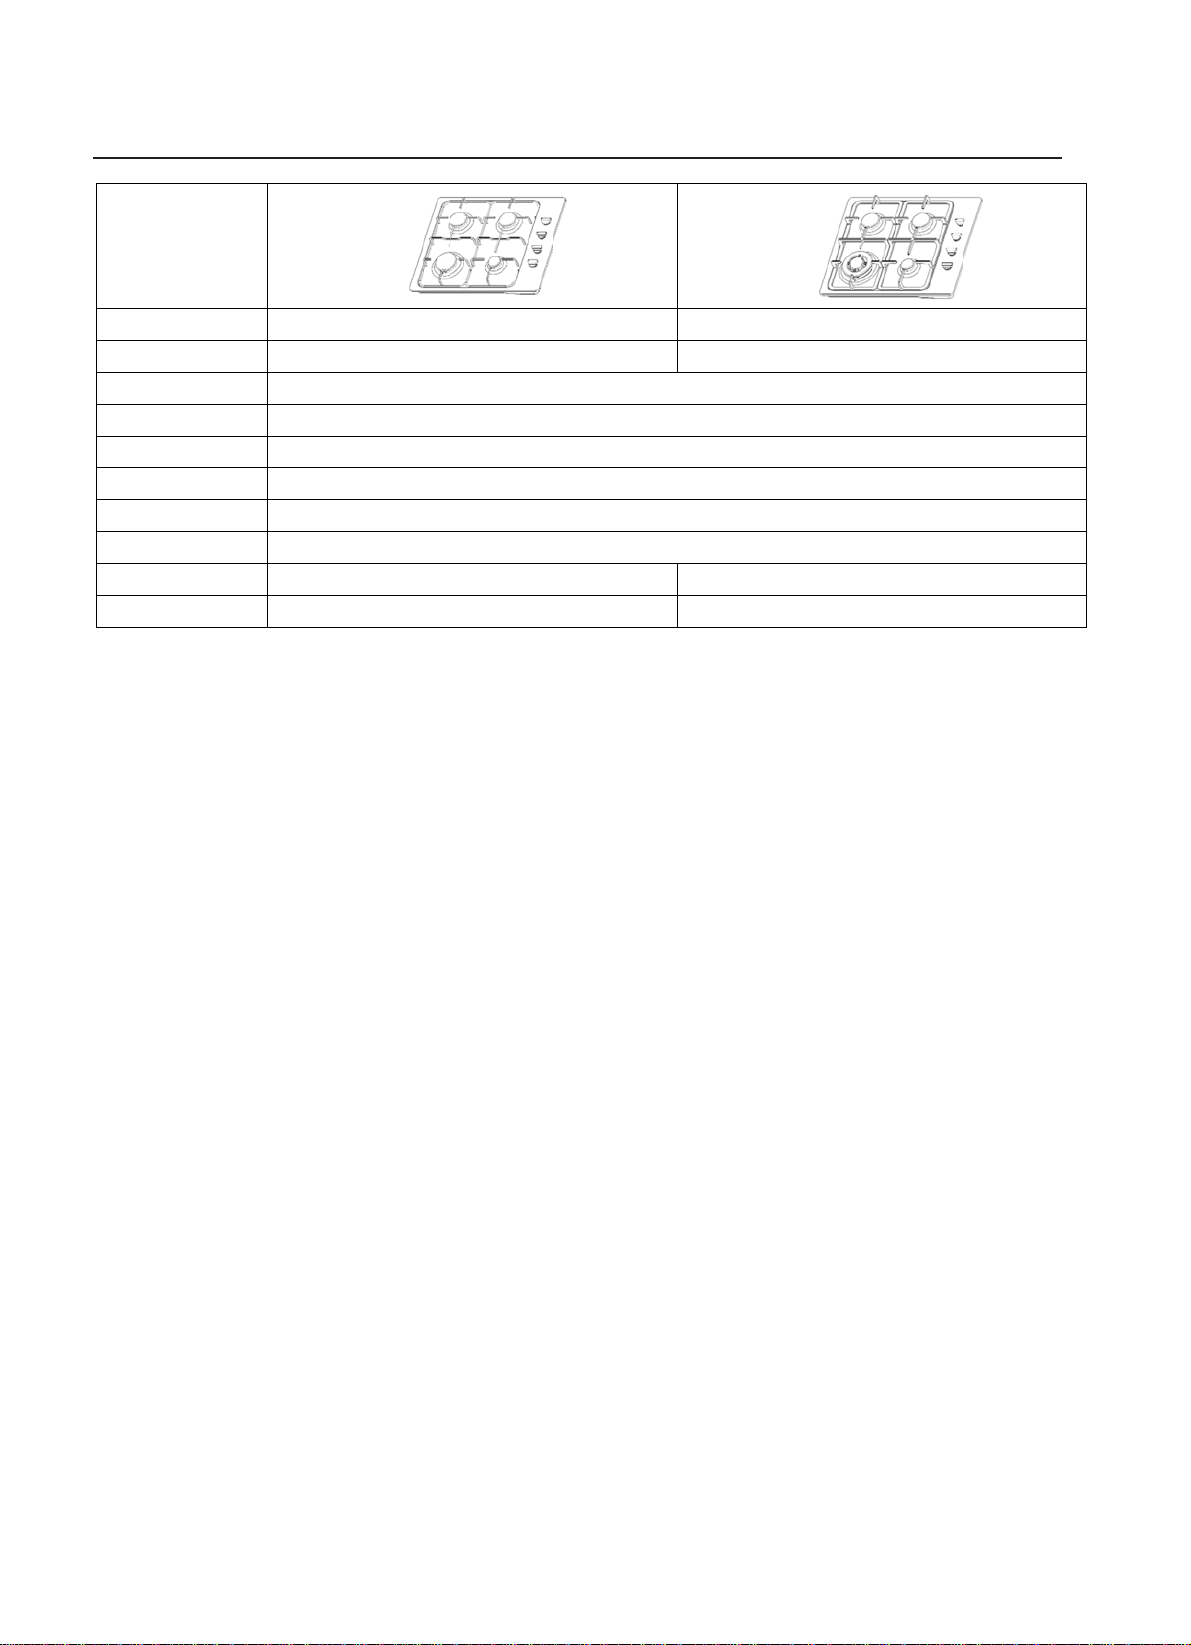
description of the appliance
D
Model
Pan Support
Wok pan Suppo
Top Plate
imension(W*D*
Ignition device
Gas Connectio
Electric supply
Burner Feature
ΣQn
rt
H)
n
Enamel
Rapid (1), Se
m
i-rapid (2), Au
x
7.6kW
S
Conti
n
220~24
0
iliary (1)
N/A
tainless Steel
590*500*95
uous Ignition T
y
G1/2 thread
Vac,50Hz/60Hz
,
T
p
e
0 .6W
riple-Crown(1),
Semi-rapid (2),
8.2kW
Cast Iron
A
uxiliary (1)
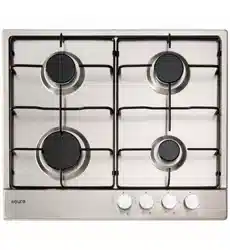
EV4BGSX
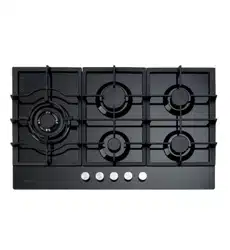
EV3WCTSFD
9
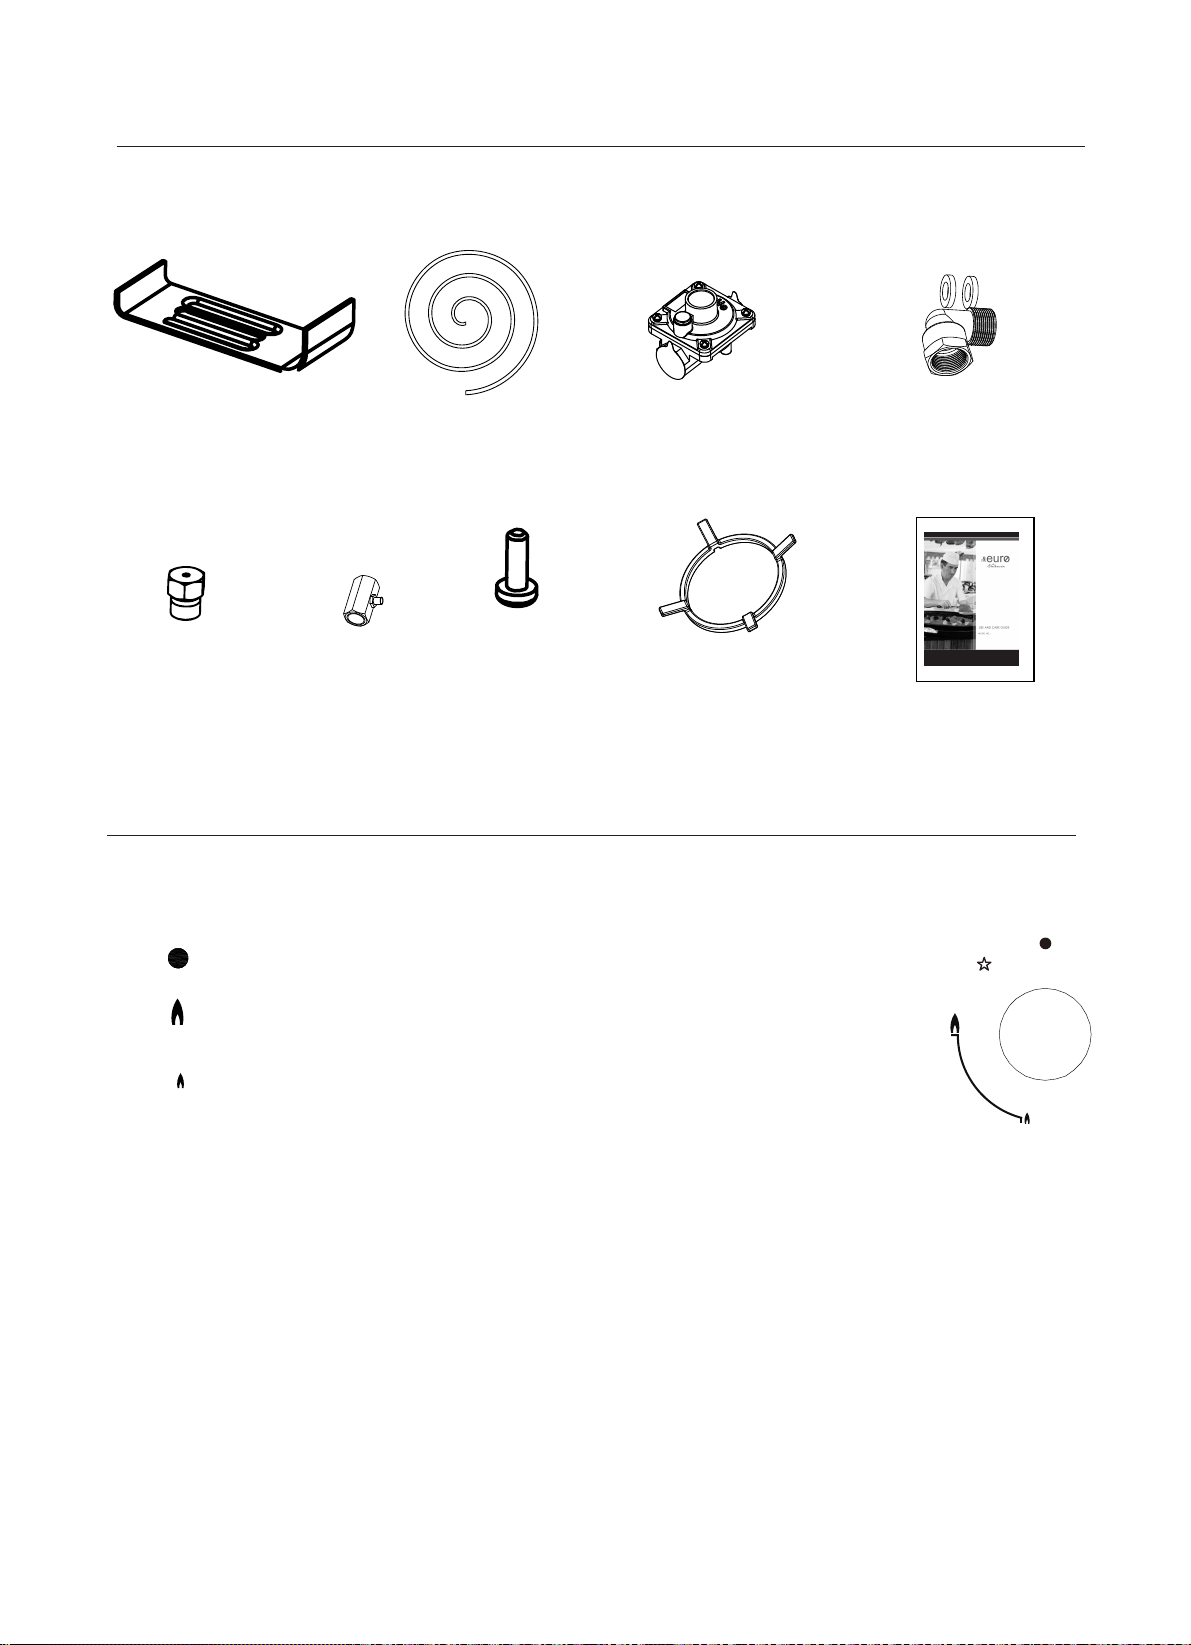
how to use the appliance
A
ccessories
description of the appliance
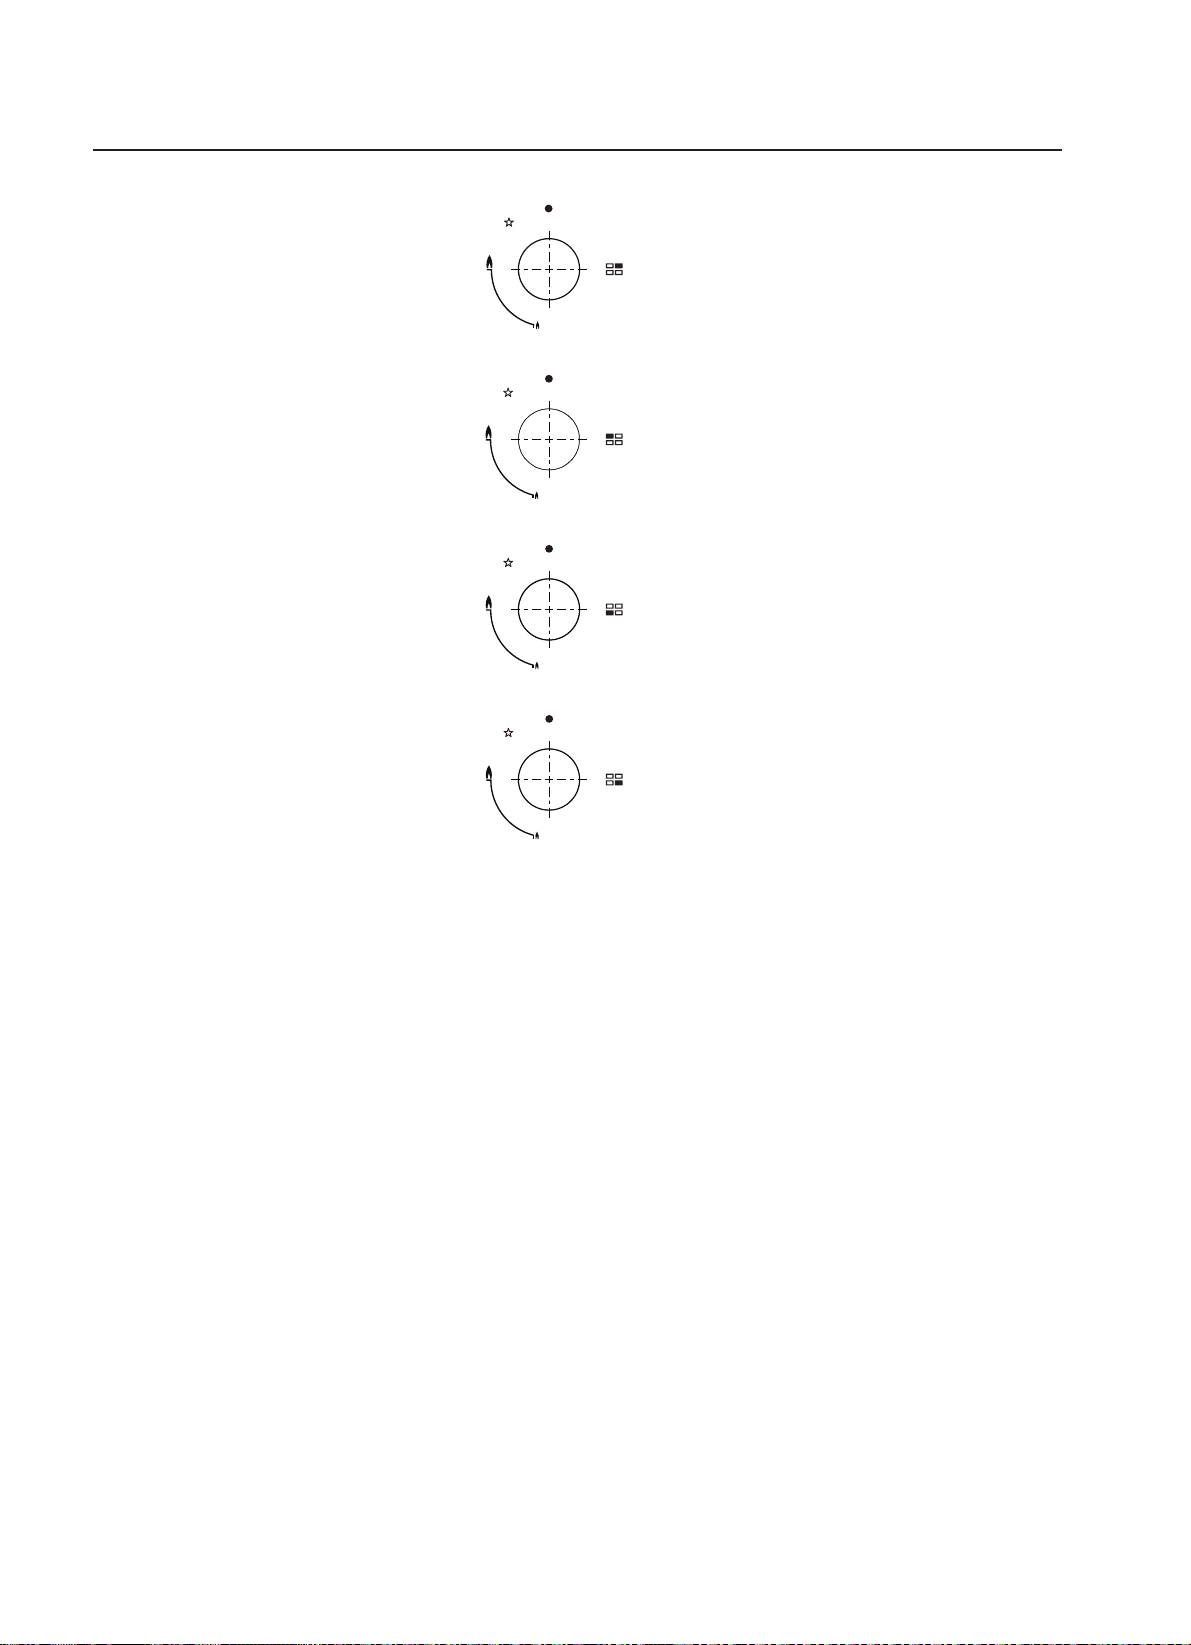
7KHIROORZLQJV\PEROVZLOODSSHDURQWKHFRQWUROSDQHOQH[WWRHDFKFRQWUROKDQGOH
Ŷ7KHPLQLPXPVHWWLQJLVDWWKHHQGRIWKHDQWLFORFNZLVHURWDWLRQRIWKHFRQWUROKDQGOH
Ŷ$OORSHUDWLRQSRVLWLRQVPXVWEHVHOHFWHGEHWZHHQWKHPD[LPXPDQGPLQLPXPSRVLWLRQ
Ŷ7KHV\PERORQWKHFRQWUROSDQHOQH[WWRWKHFRQWUROKDQGOHZLOOLQGLFDWHZKLFKEXUQHULWRSHUDWHV
Black circle: gas off
Large flame: maximum setting
Small flame: minimum setting
Automatic ignition with flame failure safety device
The appliance is fitted with a flame failure safety device on each burner, which is
designed to stop the flow of gas to the burner head in the event of the flame
going out.
Bracket (4) Sponge (4)
Screw (4)
I nj ector (4) Instruction Manual (1)
Voltage regulator valve (1)
Pressure joint(1)
EV4BGSX
EV3WCTSFD
Gas-pipe bend (1)
10
Auxiliary pan supporter(1)
Only for model:EV3WCTSFD
how to use the appliance
Automatic ignition with flame failure safety device
The appliance is fitted with a flame failure safety device on each burner, which is
designed to stop the flow of gas to the burner head in the event of the flame
going out.
To ignite a burner:
o Press in the control knob of the burner that you wish to light and turn it
anti-clockwise to the maximum position.
o If you keep the control knob depressed, the automatic ignition for the
burner will operate.
o You should hold down the control knob for 15 seconds after
the flame on
the burner has lit. If after 15s the burner has not lit, stop operating the
device and open the compartment door and/or wait at least 1 min before
attempting a further ignition of the burner.
o After this 15-second interval, to regulate the flame you should continue
turning the control knob anti-clockwise until the flame is at a suitable level.
The operating position MUST be at a position between the maximum and
minimum position.
o To switch the burner off, turn the control knob fully clockwise to the gas off
position.
o In case of power failure, the burners can be lit by carefully using a match.
11
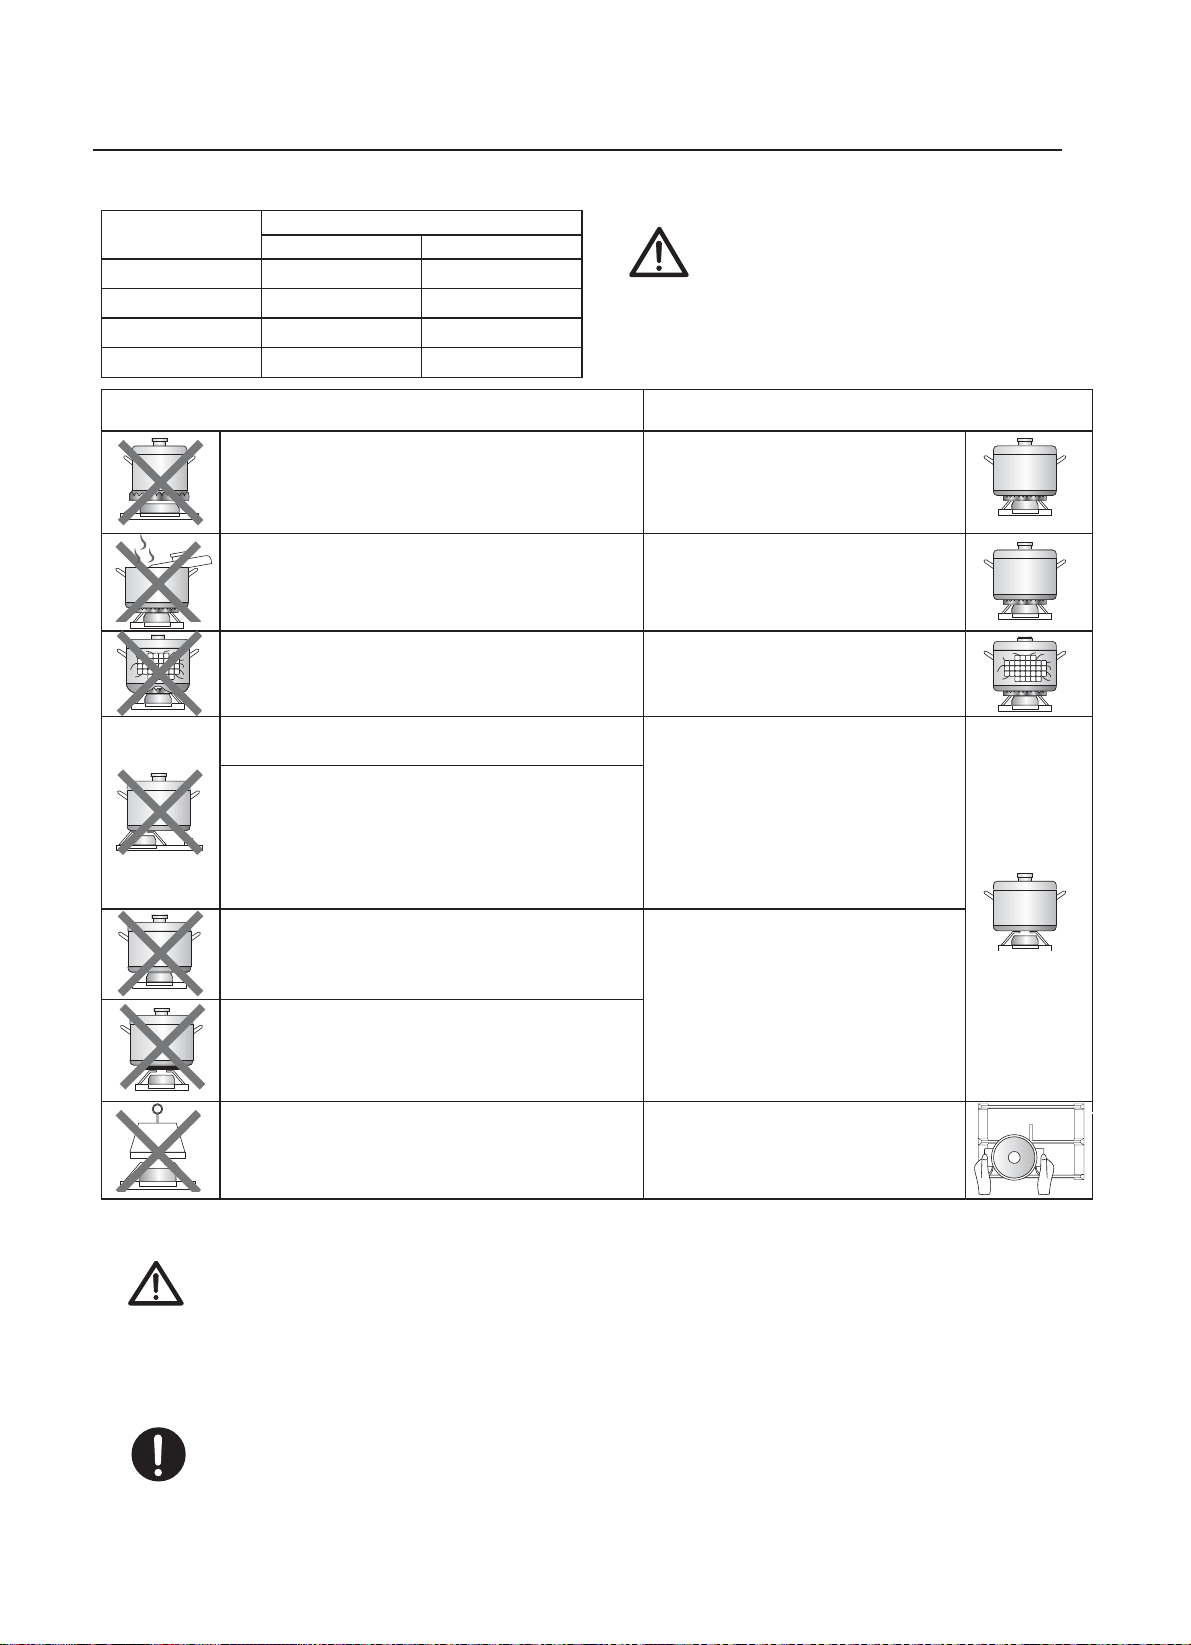
safety and energy saving advice
- The diameter of the bottom of the pan should correspond to that of the burner.
BURNERS
3$16
PLQ PD[
7ULSOH&URZQ
200mm 2 0mm
Rapid 200mm 240mm
Semi-Rapid 160mm
PP
$X[LOLDU\
NO YES
'RQRWXVHVPDOOGLDPHWHUFRRNZDUHRQ
ODUJHEXUQHUV
7KHÀDPHVKRXOGQHYHUFRPHXSWKH
VLGHVRIWKHFRRNZDUH
$OZD\VXVHFRRNZDUHWKDW
VXLWDEOHIRUHDFKEXUQHU
WR
DYRLGZDVWLQJJDVDQG
GLVFRORXULQJWKHFRRNZDUH
$YRLGFRRNLQJZLWKRXWDOLGRUZLWKWKH
lid half off
DVWKLVZDVWHVHQHUJ\
ODFH OLGRQWKH
FRRNZDUH
'RQRWXVHDSDQZLWKDFRQYH[RU
FRQFDYHERWWRP
2QO\XVHSRWVVDXFHSDQVDQG
IU\LQJSDQVZLWKDWKLFNÀDW
ERWWRP
'RQRWSODFHFRRNZDUHRQRQHVLGHRID
EXUQHUDVLWFRXOGWLSRYHU
$OZD\VSODFHWKHFRRNZDUH
ULJKWRYHUWKHEXUQHUVQRWWR
one side.
'RQRWXVHFRRNZDUHZLWKDODUJHGLDPHWHU
RQWKHEXUQHUVQHDUWKHFRQWUROVZKLFK
ZKHQSODFHGRQWKHPLGGOHRIWKHEXUQHU
PD\WRXFKWKHFRQWUROVRUEHVRFORVHWR
them that they increase the temperature in
this area and may cause damage.
1HYHUSODFHFRRNZDUHGLUHFWO\RQWRSRI
WKHEXUQHU
3ODFHWKHFRRNZDUHRQWRSRI
the trivet.
'RQRWSODFHDQ\WKLQJHJÀDPHWDPHU
DVEHVWRVPDWEHWZHHQSDQDQGSDQ
support as serious damage to the
appliance may result.
'RQRWXVHH[FHVVLYHZHLJKWDQGGRQRW
KLWWKH ZLWK KHDY\ REMHFWV
+DQGOHFRRNZDUHFDUHIXOO\
ZKHQWKH\DUHRQWKHEXUQHU
Ŷ'RQRWXVHFRRNZDUH
WKDW
RYHUODSVWKH
HGJH
is
3
D
cooktop
Ŷ,WLVQRW WRXVH URDVWLQJSDQV IU\LQJ SDQVRU JULOO VWRQHV
KHDWHG
VLPXOWDQHRXVO\ VHYHUDO EXUQHUV EHFDXVH WKH UHVXOWLQJ KHDW
EXLOGXS
PD\
GDPDJHWKH DSSOLDQFH
Ŷ
Ŷ$VVRRQDVDOLTXLGVWDUWVERLOLQJWXUQGRZQWKHÀDPHVRWKDWLWZLOO
EDUHO\NHHSWKHOLTXLGVLPPHULQJ
recommended
on
Do not touch the top plate and trivet whilst in use for a certain period after
use.
of the
burner.
120mm
160mm
180
4
12
cleaning and maintenance
Ŷ7DNHRIIWKH3DQVXSSRUW
Ŷ&OHDQWKHVHDQGWKHFRQWUROKDQGOHVZLWKDGDPSFORWKZDVKLQJXSOLTXLGDQGZDUP
water. For stubbon soiling, soak beforehand.
Ŷ'U\HYHU\WKLQJZLWKDFOHDQVRIWFORWK
Ŷ&OHDQLQJRSHUDWLRQVPXVWRQO\EHFDUULHGRXWZKHQWKHDSSOLDQFH
LV
FRRO
Ŷ7KHDSSOLDQFHVKRXOGEHGLVFRQQHFWHGIURP\RXUPDLQVVXSSO\EHIRUH
FRPPHQFLQJDQ\FOHDQLQJSURFHVV
Ŷ&OHDQWKHDSSOLDQFHUHJXODUO\SUHIHUDEO\DIWHUHDFKXVH
Ŷ$EUDVLYHFOHDQHUVRUVKDUSREMHFWVZLOOGDPDJHWKHDSSOLDQFHVXUIDFH
\RXVKRXOGFOHDQLWXVLQJZDWHUDQGDOLWWOHZDVKLQJXSOLTXLG
3DQVXSSRUW&RQWUROKDQGOHV
Ŷ5HJXODUO\ZLSHRYHUWKHWRSSODWHXVLQJDVRIWFORWKZHOO LQZDUPZDWHUWR
ZKLFKDOLWWOHZDVKLQJXSOLTXLGKDVEHHQDGGHG
Ŷ'U\WKHWRSSODWHWKRURXJKO\DIWHUFOHDQLQJ
Ŷ7KRURXJKO\UHPRYHVDOW\IRRGVRUOLTXLGVIURPWKHKREDVVRRQDVSRVVLEOHWRDYRLG
the risk of corrosion.
Ŷ6WDLQOHVVVWHHOSDUWVRIWKHDSSOLDQFHPD\EHFRPHGLVFRORXUHGRYHUWLPH7KLVLV
normal because of the high temperatures. Each time the appliance is used these
parts should be cleaned with a product that is suitable for stainless steel.
7RSSODWH
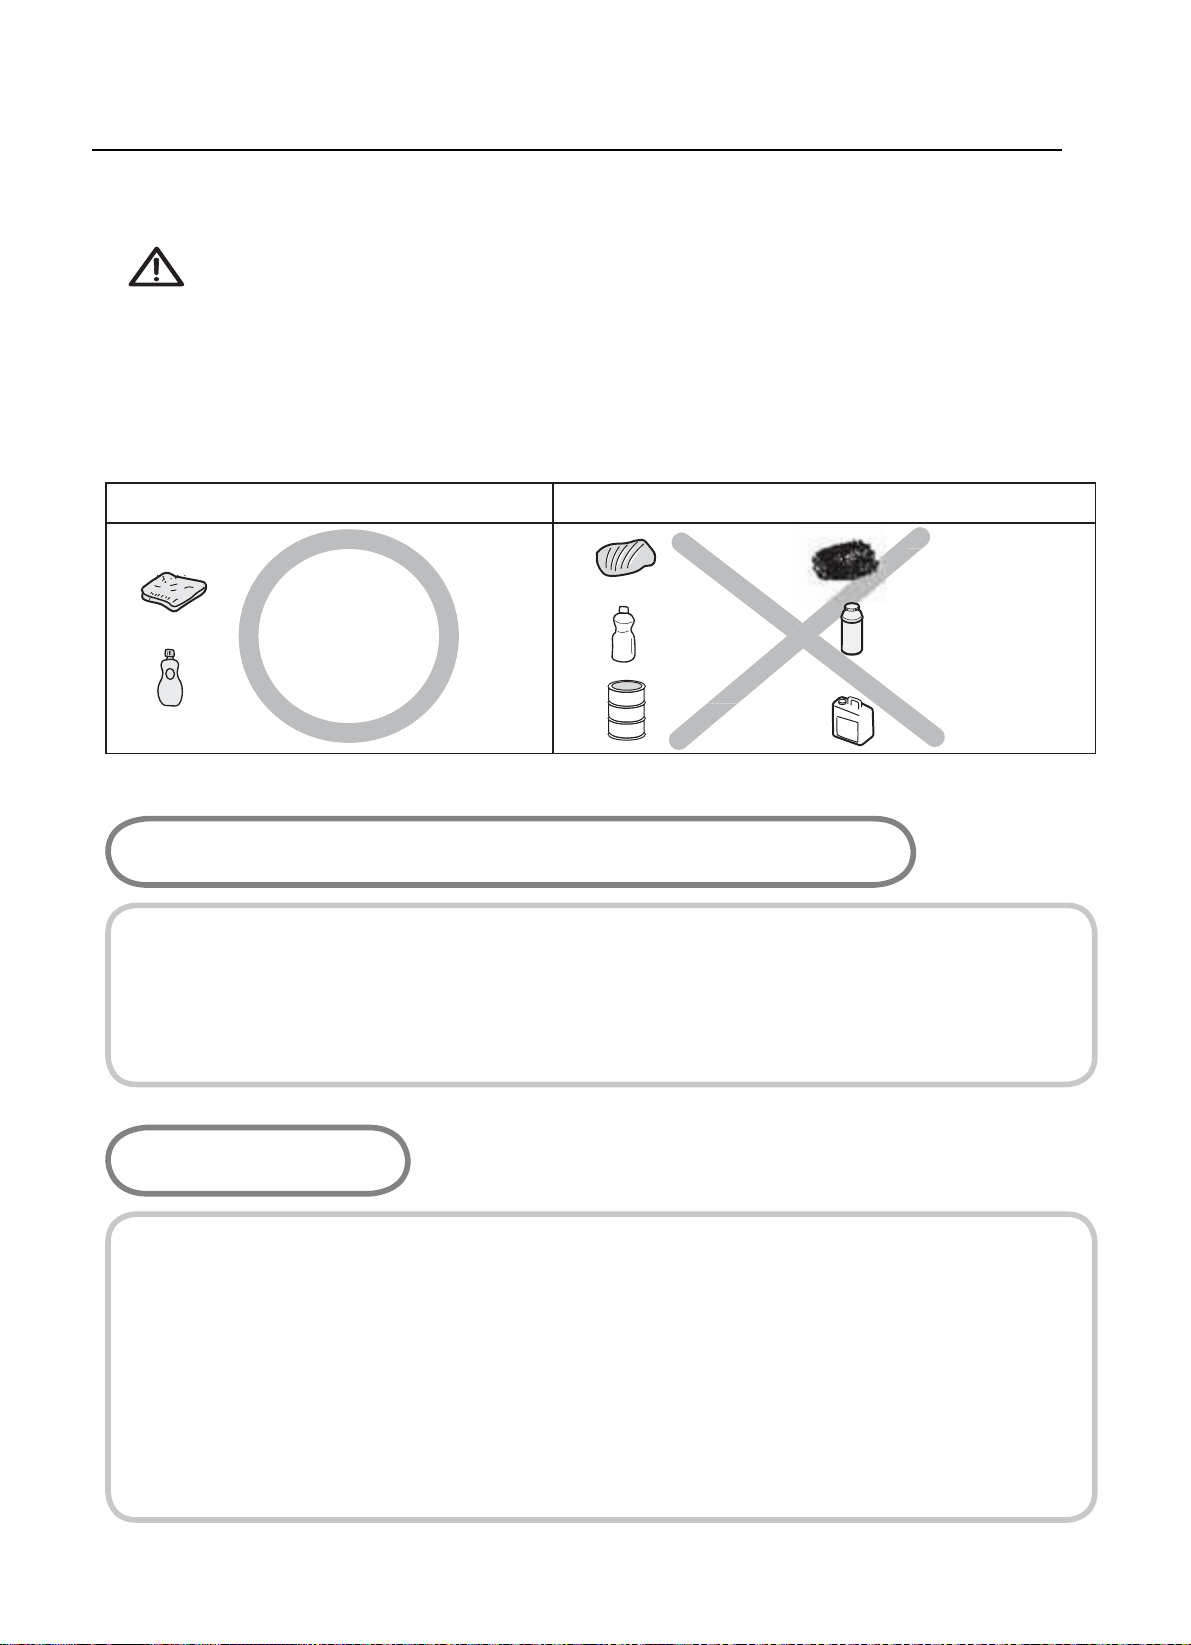
8VDEOH 8QXVDEOH
Metal Brush
(GLEOH2LO
$FLGLF$ONDOL
Detergent
$EUDVLYH 7KLQQHU%HQ]HQH
7K
M
UDVLYH
Soft cloth
Neutral Detergent
Nylon Brush
wrung
-
out
completely
13

cleaning and maintenance
ʄ5HDVVHPEOHWKH$X[LOLDU\6HPL5DSLG5DSLGDQG
7ULSOH&URZQEXUQHUVDVIROORZV
3ODFHWKHÀDPHVSUHDGHU RQWRWKHEXUQHUFXS VRWKDWWKHLJQLWLRQGHYLFHDQGWKHÀDPH
VXSHUYLVLRQGHYLFHH[WHQGWKURXJKWKHLUUHVSHFWLYHKROHVLQWKHÀDPHVSUHDGHU
7KHÀDPHVSUHDGHUPXVWFOLFNLQWRSODFHFRUUHFWO\
3RVLWLRQWKHEXUQHUOLG
RQWR WKH ÀDPH VSHDGHU VR WKDW WKH UHWDLQLQJ SLQV¿W
into
their respective recesses.
Ŷ5HPRYHWKHEXUQHUOLGVDQG)ODPH6SUHDGHUVE\SXOOLQJWKHPXSZDUGVDQGDZD\
from the top plate.
Ŷ6RDNWKHPLQKRWZDWHUDQGDOLWWOH
Ŷ$IWHUFOHDQLQJDQGZDVKLQJWKHPZLSHDQGGU\WKHPFDUHIXOO\0DNHVXUHWKDWWKH
ÀDPHKROHVDUHFOHDQDQGFRPSOHWHO\GU\
Ŷ:LSHWKH¿[HGSDUWVRIWKHEXUQHUFXSZLWKDGDPSFORWKDQGGU\DIWHUZDUGV
Ŷ*HQWO\ZLSHWKH JQLWLRQGHYLFHDQGÀDPHVXSHUYLVLRQGHYLFHZLWKDZHOOZUXQJRXW
cloth and wipe dry with a clean cloth.
Ŷ%HIRUHSODFLQJWKHEXUQHUVEDFNRQWKHWRSSODWHPDNHVXUHWKDWWKHLQMHFWRULVQRW
blocked.
%851(56
5HSODFHSDUWVLQWKHFRUUHFWRUGHUDIWHUFOHDQLQJ
'RQRWPL[XSWKHWRSDQGERWWRP
7KHORFDWLQJSLQVPXVW¿WH[DFWO\LQWRWKHQRWFKHV
L
4
5
1
2
3
4
1
2
3
4
5
6
7
washing up liquiddetergent or
2
3
4
5
6
7
14

Warnings
using instructions
Ŷ'RQRWPRGLI\WKLVDSSOLDQFH
Ŷ7KLVDSSOLDQFHPXVWEHLQVWDOOHGE\DQDXWKRULVHGWHFKQLFLDQRU
LQVWDOOHU
Ŷ3ULRUWRLQVWDOODWLRQHQVXUHWKDWWKHORFDOGLVWULEXWLRQFRQGLWLRQV
QDWXUHRIWKHJDVDQGJDVSUHVVXUHDQGWKHDGMXVWPHQWRIWKH
DSSOLDQFHDUHFRPSDWLEOH
Ŷ7KHDGMXVWPHQWFRQGLWLRQVIRUWKLVDSSOLDQFHDUHVWDWHGRQWKHODEHO
RUGDWDSODWH
Ŷ7KLVDSSOLDQFHLVQRWFRQQHFWHGWRDFRPEXVWLRQSURGXFWVHYDFXDWLRQ
GHYLFH,W
EHLQVWDOOHGDQGFRQQHFWHGLQDFFRUGDQFHZLWKFXUUHQW
LQVWDOODWLRQUHJXODWLRQV3DUWLFXODUDWWHQWLRQ EHJLYHQ WRWKH
UHOHYDQWUHTXLUHPHQWVUHJDUGLQJYHQWLODWRQ
Ŷ%HIRUHLQVWDOOLQJWXUQRIIWKHJDVDQGHOHFWULFLW\VXSSO\WRWKH
DSSOLDQFH
Ŷ$OODSSOLDQFHVFRQWDLQLQJDQ\HOHFWULFDOFRPSRQHQWVPXVWEHHDUWKHG
Ŷ(QVXUHWKDWWKHJDVSLSHDQGHOHFWULFDOFDEOHDUHLQVWDOOHGLQVXFKD
ZD\WKDWWKH\GRQRWWRXFKDQ\SDUWVRIWKHDSSOLD FQ HZKLFK
EHFRPH
KRW
Ŷ*DVSLSHRUFRQQHFWRUVKRXOGQ¶WEHEHQWRUEORFNHGE\DQ\RWKHU
DSSOLDQFHV
Ŷ&KHFNWKHGLPHQVLRQVRIWKHDSSOLDQFHDVZHOODVWKHGLPHQVLRQVRI
WKHJDSWREHFXWLQWKHNLWFKHQXQLW
Ŷ7KHSDQHOVORFDWHGDERYHWKHZRUNVXUIDFHGLUHFWO\QH[WWRWKH
DSSOLDQFHPXVWEHPDGHRIQRQÀDPPDEOHPDWHULDO%RWKWKHVWUDWL
¿HGVXUIDFLQJDQGWKHJOXHXVHGWRVHFXUHLWVKRXOGEHKHDWUHVLVWDQW
WRSUHYHQWGHWHULRUDWLRQ
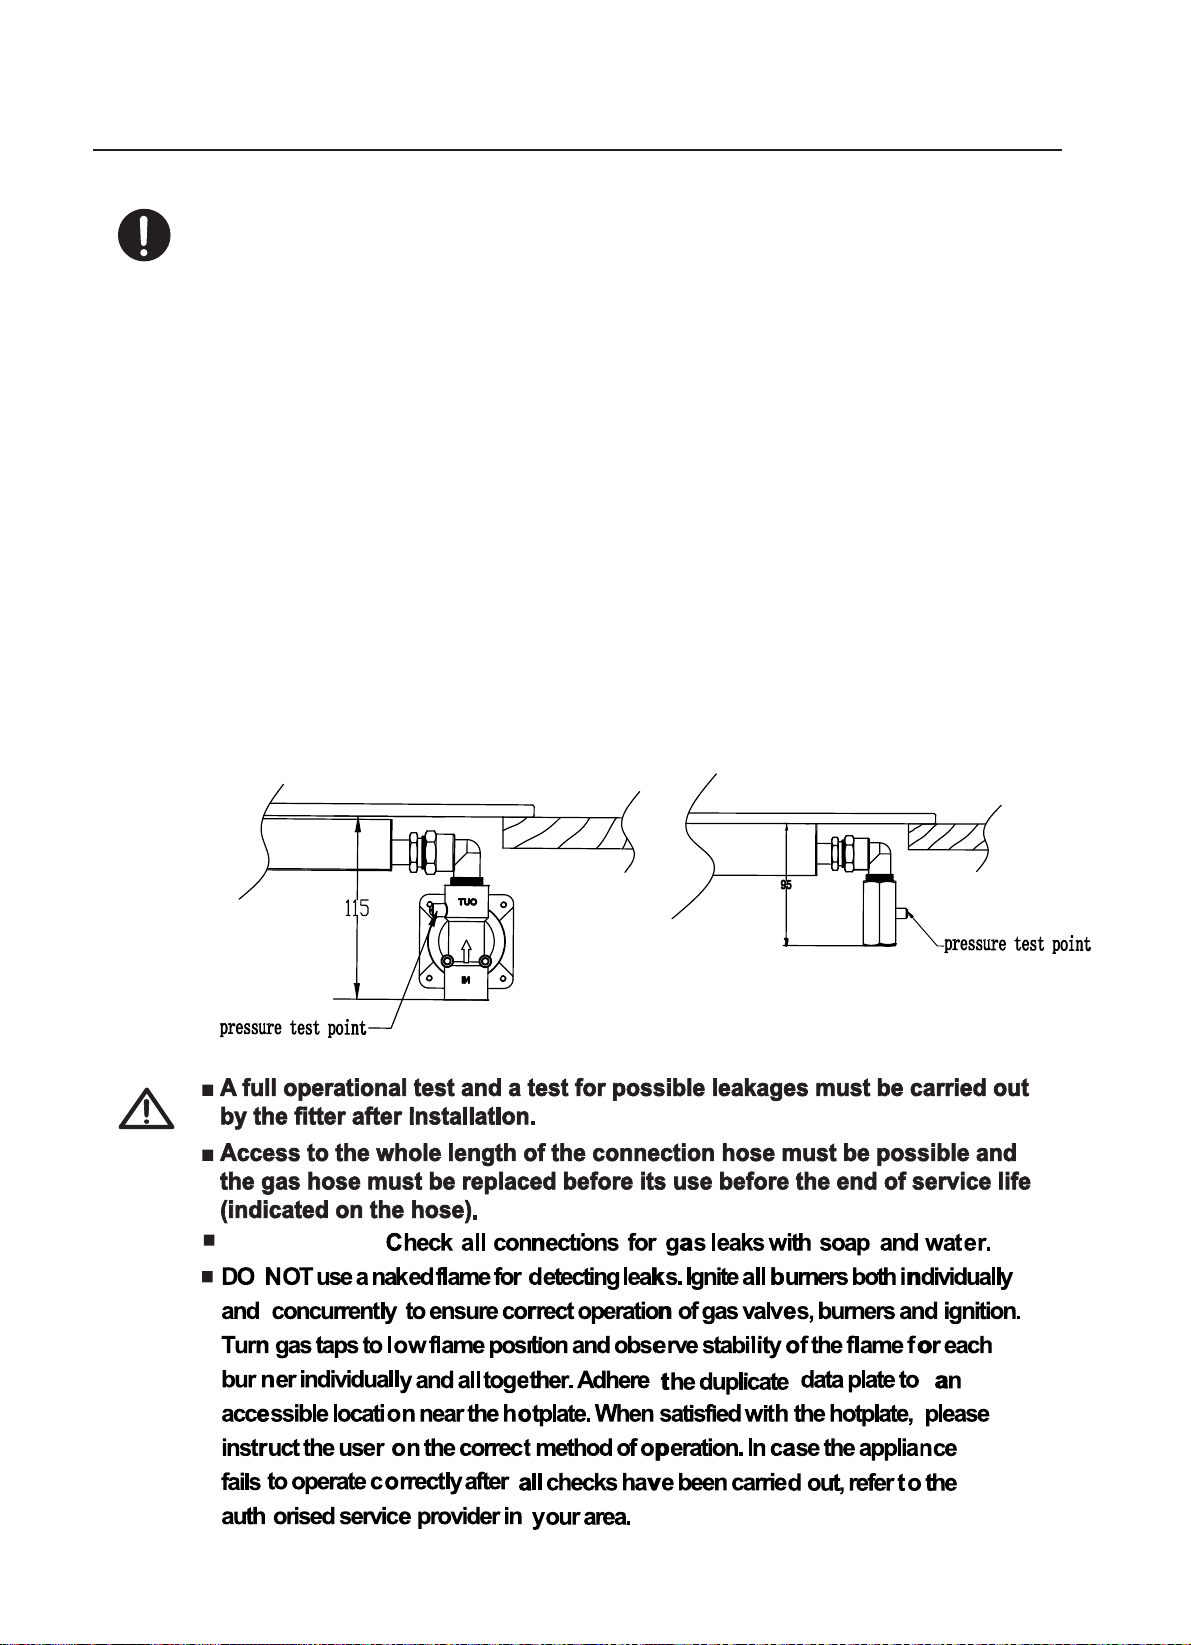
Ŷ7XUQRQDSSOLDQFHWDSDQGOLJKWHDFKEXUQHUV
&KHFNIRUDFOHDUEOXHÀDPHZLWKRXW\HOORZWLSSLQJ
,IEXUQHUVVKRZVDQ\DEQRUPDO WLHVFKHFNWKHIROORZLQJ
%XUQHUOLGRQFRUUHFWO\
)ODPHVSUHDGHUSRVLWLRQHGFRUUHFWO\
%XUQHUYHUWLFDOO\DOLJQHGZLWKLQMHFWRUQLSSOH
Ŷ$IXOORSHUDWLRQDOWHVWDQGDWHVWIRUSRVVLEOHOHDNDJHVPXVWEHFDUULHG
RXWE\WKH¿WWHUDIWHULQVWDOOD LRQ
Ŷ7KHÀH[LEOHKRVHVKDOOEH¿WWHGLQVXFKDZD\WKDWLWFDQQRWFRPHLQWR
FRQWDFWZLWKDPRYHDEOHSDUWRIWKHKRXVLQJXQLWDQGGRHVQRWSDVV
WKURXJKDQ\VSDFHVXVFHSWLEOHRIEHFRPLQJFRQJHVWHG
VKRXOG
VKRXOG
may
L
Grease cranes produced at the factory to meet the requirement of all
life hob.
Ŷ
15
W
positioning
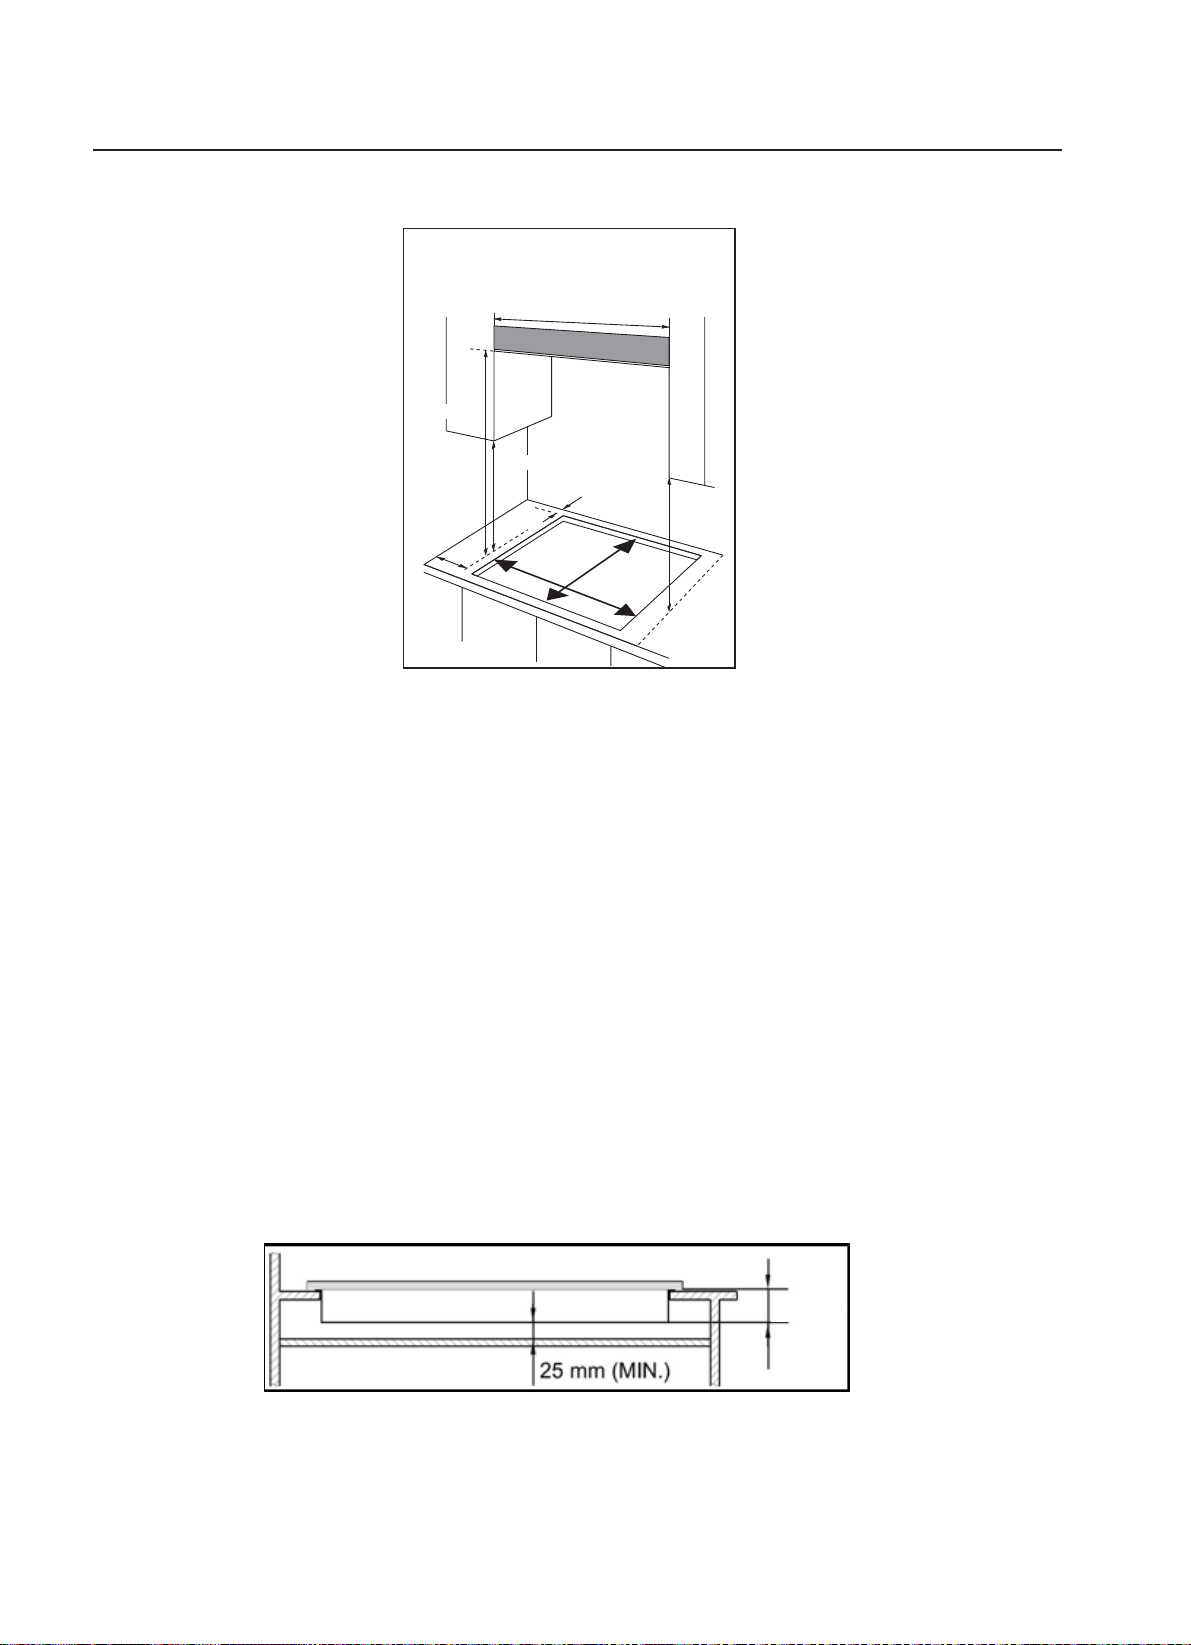
Ŷ7KLVDSSOLDQFHLVWREHEXLOWLQWRDNLWFKHQXQLWRU PPZRUNWRSSURYLGLQJWKH
IROORZLQJPLQLPXPGLVWDQFHVDUHDOORZHG
600
- An oven must have forced ventilation to install a hob above it.
- Check the dimensions of the oven in the installation manual.
- The cut out size must obey the indication.
o The edges of the hob must be a minimum distance of mm from a side or
rear wall.
o 700 mm between the highest point of the hob surface (including the burners)
and the underside of any horizontal surface directly above it
.
o 400 mm between the hob surfaces, providing that the underside of the
horizontal surface is in line with the outer edge of the hob. If the underside of
the horizontal surface is lower than 400 mm, then it must be at least 50 mm
away from the outer edges of the hob.
o 50 mm clearance around the appliance and between the hob surface and any
combustible materials.
45 mm
60
o You must have a gap of at least 25 mm and at most 74 mm between the
underneath of the appliance and any surface that is below it.
FO 0813
400mm
4 mm
400mm
700mm
0mm
Min.
&/($5$1&(65(48,5('
:+(1),77,1*7+(+2%
:,7+$&22.(5+22'$%29(
60mm
20
553mm
600mm
73
EV4BGSX
EV3WCTSFD
16
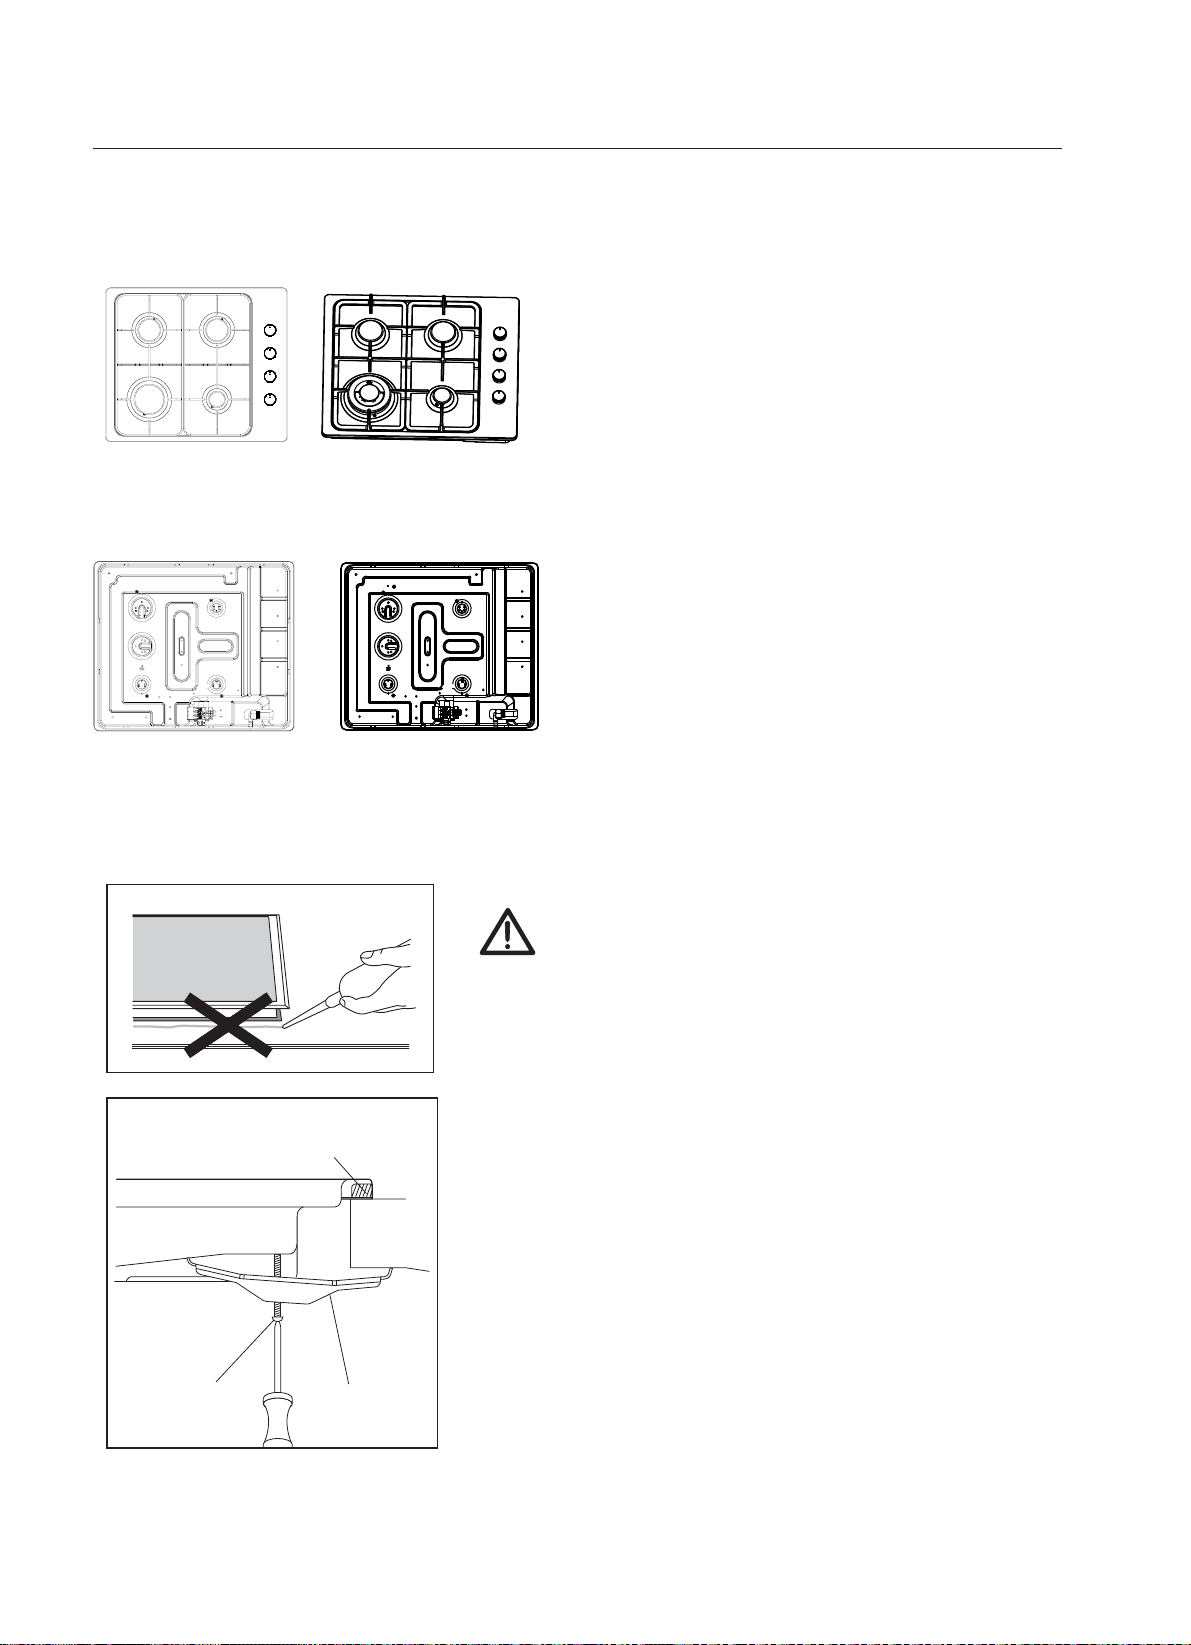
installing the appliance
Sponge
Bottom view
The thickness of the sponge is 3 mm.
The width of the sponge is 10 mm.
'RQRWXVHDVLOLFRQVHDODQWWRVHDOWKH
DSSOLDQFHDJDLQVWWKHDSHUWXUH
7KLVZLOOPDNHLWGLI¿FXOWWRUHPRYHWKH
DSSOLDQFHIURPWKHDSHUWXUHLQIXWXUH
SDUWLFXODUO\LILWQHHGVWREHVHUYLFHG
3ODFHWKHEUDFNHW%RYHUWKHKROHVWKDWPDWFKWKHVL]H
of the screws.There are one set of screw holes in each
corner of the hob(H).
Slightly tighten a screw(C) through the bracket(B) so
that the bracket is attached to the hob, but so that you
can still adjust the position
.
2. Carefully turn the hob back over and then gently lower it
into the aperture hole that you have cut out.
3. On the underneath of the hob, adjust the brackets into a
position that is suitable for your worktop.
Then fully tighten the screws(C) to secure the hob into
position.
(A) SEALING STRIP
(C) SCREW (B) BRACKET
5HPRYHWKHSDQVXSSRUWVWKHEXUQHUOLGDQG
ÀDPHVSUHDGHUDQGFDUHIXOO\WXUQWKH
appliance upside down and place it on a
cushioned mat.
7DNHFDUHWKDWWKH,JQLWLRQGHYLFHVDQGÀDPH
supervision devices are not damaged in this
operation.
2. Apply the sponge provided around the
edge of the appliance.
3. Do not leave a gap in the sealing agent or
overlap the thickness.
17
gas connection
Ŷ7KLVDSSOLDQFHPXVWEHLQVWDOOHGDQGFRQQHFWHGLQDFFRUGDQFHZLWKLQVWDOOD
WLRQUHJXODWLRQVLQIRUFHLQWKHFRXQWU\LQZKLFKWKHDSSOLDQFHLVWREHXVHG
Ŷ7KLVDSSOLDQFHLVVXSSOLHGWRUXQRQQDWXUDOJDVRQO\DQGFDQQRWEHXVHGRQ
DQ\RWKHUW\SHRIJDVZLWKRXWPRGL¿FDWLRQ&RQYHUVLRQIRUXVHRQ/3*DQG
RWKHUJDVHVPXVWRQO\EHXQGHUWDNHQE\DTXDOL¿HGSHUVRQ
Statutory requirements
This installation must conform with the following:
■ Manufacturer’s Installation instructions
■ Local Gas Fitting Regulations
■ Municipal Building Codes
■ Refer to AS/NZS 5601.1 for Gas Installations
■ S.A.A. Wiring Code
■ Local Electrical Regulations
■ Any other statutory regulations
Preparing to install
Refer to AS/NZS 5601.1 for piping size details. These built-in
cooktops are intended to
be inserted in a benchtop cutout.
Only an officially authorised technician should connect
the
appliance.
Before you begin, turn off the gas and electricity supply .
Bef
o
o
re Leaving-
Natural gas connection
Propane gas connection
18

gas
Flexible Ho
1869, 10 m
accordance
Ensure tha
dishwasher
to the hotp
permanent
length with
hose fitting
supply con
WARNING
contact with
se: If installing
m ID, class B
with AS/NZS
t the hose doe
r or any other
late. The hos
deformation a
the cooktop i
s must be us
nection point s
: Ensure that
the flue outle
with a hose a
or D, no mo
5601.1.
s not contact
appliance that
e should not
nd should be
n the installed
ed and all co
hall be access
the hose ass
t of an underb
ssembly, it mu
ore than 1 m
the hot surface
may be instal
be subjected t
able to be ins
position. Unio
onnections tes
sible with the ap
embly is restr
ench oven.
st comply with
m long and ins
s of the hotpla
led underneat
o abrasion, k
pected along
ns compatible
ted for gas le
pliance install
ained from a
AS/NZS
talled in
te, oven,
h or next
inking or
its entire
with the
aks.The
ed.
ccidental
■
■
■
connection
19

gas specification
Model No.
Gas type &
pressure
Electrical
power
Heat input and orifice size marked(mm)
Total Heat input
Work burner Rapid burner Semi-rapid
Auxiliary- rapid
220-240V~
50/60Hz
/ 10.8MJ/h 6.3 MJ/h 27.4 MJ/h
Propand
2.75kPa
/ 0.88 0.68 0.56
NA
Natural Gas
1.0kPa
/ 1.50 1.12 0.90
Model No.
Gas type &
pressure
Electrical
power
Heat input and orifice size marked(mm)
Total Heat input
Work burner Rapid burner Semi-rapid
Auxiliary- rapid
220-240V~
50/60Hz
12.96 MJ/h / 6.3 MJ/h 29.56 MJ/h
Propand
2.75kPa
0.97 / 0.68 0.56
NA
Natural Gas
1.0kPa
1.60 / 1.1 0.90
2
EV4BGSX
EV3WCTSFD
20
4.0 MJ/h
4.0 MJ/h

electrical connection
Ŷ7KLVDSSOLDQFHPXVWEHHDUWKHG
Ŷ7KLVDSSOLDQFHLVGHVLJQHGWREHFRQQHFWHGWRD
a9+]$&HOHFWULFLW\VXSSO\
Ŷ7KHZLUHVLQWKHPDLQVOHDGDUHFRORXUHGLQDFFRUGDQFHZLWKWKHIROORZLQJFRGH
- Green/yellow = Earth
- Blue = Neutral
- Brown = Live
Ŷ7KHZLUHZKLFKLVFRORXUHGJUHHQDQG\HOORZPXVWEHFRQQHFWHG
WRWKHWHUPLQDOZKLFKLVPDUNHGZLWKWKHOHWWHU(RUE\WKHHDUWK
V\PERO
22
21

gas conversion
Ŷ7DNHSUHFDXWLRQVRQWKHRSHUDWLRQVDQGDGMXVWPHQWVWREHFDUULHGRXWZKHQ
FRQYHUWLQJIURPRQHJDVWRDQRWKHU
Ŷ$OOZRUNPXVWEHFDUULHGRXWE\DTXDOL¿HGWHFKQLFLDQ
Ŷ%HIRUH\RXEHJLQWXUQRIIWKHJDVDQGHOHFWULFLW\VXSSO\WRWKHDSSOLDQFH
&KDQJHWKHLQMHFWRURIWKHEXUQHUV
1
5HPRYHWKHSDQVXSSRUW%XUQHUOLGDQG)ODPHVSUHDGHU
8QVFUHZWKHLQMHFWRUXVLQJDPPER[VSDQQHUDQGUHSODFHLWZLWK
WKHVWLSXODWHGLQMHFWRUIRUQHZJDVVXSSO\
&DUHIXOO\UHDVVHPEOHWKHDOOFRPSRQHQWV
$IWHULQMHFWRUVDUHUHSODFHGLWLVDGYLVDEOHWRVWURQJO\WLJKWHQWKH
injector in place.
2
Injector
Control handle
Tap
Sealing ring
Ŷ
'RQRWGLVPDQWOHWKHWDSVKDIW
Ŷ
%HIRUHSODFLQJWKHEXUQHUV
QRWEORFNHG
Ŷ
$IXOORSHUDWLRQDOWHVWDQGDWHVW
VXFKDVVRDSZDWHURUJDV
DTXDOL¿HGWHFKQLFLDQRULQVWDOOHU
KDVWRPDUN³9´
RQWKHULJKWJDV
FDWHJRU\
WRPDWFKZLWKWKH
LQUDWLQJSODWH
5HPRYHWKHSUHYLRXV
VHWWLQJ³9´PDUN
LQWKHHYHQWRIDPDOIXQFWLRQ
FKDQJHWKHZKROHWDS
EDFNRQWKHWRSSODFHPDNHVXUH
WKDWWKHLQMHFWRULV
IRUSRVVLEOHOHDNDJHVPXVWEH
FDUULHGRXWDIWHU
JDVFRQYHUVLRQ
Ŷ
$IWHUFRPSOHWLQJFRQYHUVLRQ
VHWWLQJ
GHWHFWRU
Tuurn the taps down to minimum
RRemove the knob from the tap and place a small
‐
‐
‐
turning
does then remove the control knob and make further
from maximum flow to minimum flow. If it
Adjustme
n
n
t of minimum l
e
e
vel of the flam
e
e
bladed screwdriver in the centre of the tap shaft.
The correct adjustment is obtained when the flame
has a length of about 3 - 4 mm.
/
must be tightly screwed in.
For butane propane gas, the adjusting screw
Refit the control knob.
ake sure that the flame does not go out by quickly
M
adjustments to the gas flow, testing it again once the
adjustment has been made.
Repeat this process for each one of the gas taps.
22
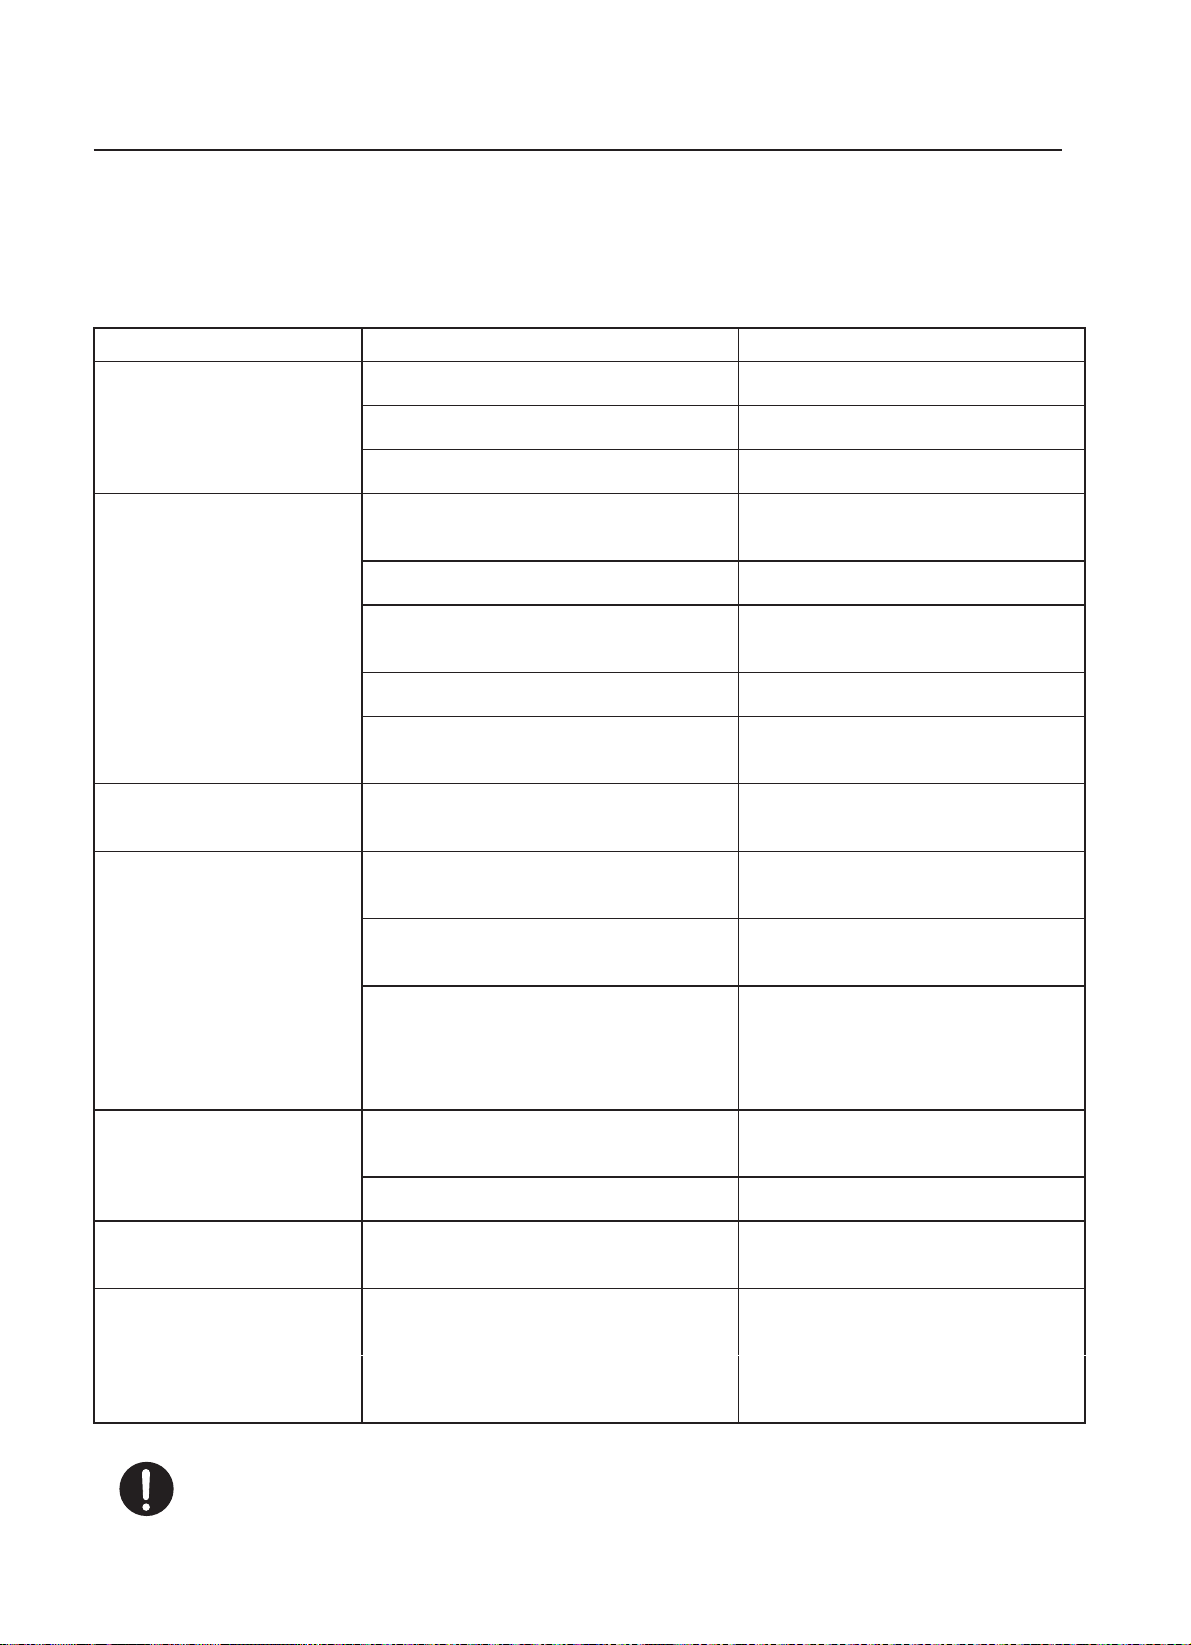
trouble shooting
Ŷ
Ŷ+RZHYHUVRPHPLQRUSUREOHPVFDQEHUHVROYHGDVIROORZV
3UREOHP 3UREDEOHFDXVH 6ROXWLRQ
Not ignited
No Spark. Check the electricity supply
7KHEXUQHUOLGLVEDGO\DVVHPEOHG $VVHPEOHWKHOLGFRUUHFWO\
The gas supply is closed. 2SHQWKHJDVVXSSO\FRPSOHWHO\
Badly ignited
The gas supply is not completely
open.
2SHQWKHJDVVXSSO\FRPSOHWHO\
7KHEXUQHUOLGLVEDGO\DVVHPEOHG $VVHPEOHWKHOLGFRUUHFWO\
The ignition plug is contaminated
ZLWKDOLHQVXEVWDQFH
7KHEXUQHUVDUHZHW 'U\WKHEXUQHUVOLGVFDUHIXOO\
7KHKROHVLQWKHÀDPHVSUHDGHUDUH
clogged.
&OHDQWKHÀDPHVSUHDGHU
Noise made when
combusted and ignited
7KHEXUQHUOLGLVEDGO\DVVHPEOHG $VVHPEOHWKHEXUQHUOLG
correctly.
Flame goes out when
in use.
7KHÀDPHVXSHUYLVLRQGHYLFHLV
FRQWDPLQDWHGZLWKDOLHQVXEVWDQFH
&OHDQWKHÀDPHVXSHUYLVLRQ
device.
3URGXFWEHLQJFRRNHGKDVERLOHG
RYHUDQGH[WLQJXLVKHGWKHÀDPH
7XUQRIIEXUQHUNQRE:DLW
DQGUHLJQLWH]RQH
$VWURQJGUDXJKWPD\KDYHEORZQ
WKHÀDPHRXW
3OHDVHWXUQRII]RQHDQGFKHFN
cooking area for draught such as
RSHQZLQGRZV:DLW
DQGUHLJQLWH]RQH
Yellow Flame
7KHKROHVLQWKHÀDPHVSUHDGHUDUH
clogged.
&OHDQWKHÀDPHVSUHDGHU
Different gas is used. Check the gas used.
Unstable Flame
7KHEXUQHUOLGLVEDGO\DVVHPEOHG $VVHPEOHWKHEXUQHUOLG
correctly.
Gas Smell
Ŷ,ISUREOHPLVQRWVROYHGSOHDVHFRQWDFWFXVWRPHUFDUH
Repairs should be performed by a licensed technician only. Improper repair may result in considerable
danger to you and others.
Wipe alien substance with a dry
cloth
one
minute
one
minute
cent er .
Gas leakage
Stop using the product and close
the
middle valve.
Open the window to ventilate.
Contact our service centre
by
using a phone outside.
23
PN.:16166200A07340
24
Head Office
Eurostyle Group Pty Ltd
65 Glynburn Road
Glynde S.A. 5070
Ph. 1800 440 335
Ph (08) 8165 1012
Fax: (08) 8165 1018
Two Year Warranty On Euro Appliances
Warranty
Subject to the exclusions and limitations set out below we warrant to you that if you purchase Euro Appliances from one of our authorised
retailers that they will not contain defects as a result of faulty manufacturer workmanship or materials.
This warranty subsists for the periods set out below:
Euro Appliances warranty applies for a period of 24 months (2 Years) from the original date of purchase. Proof of purchase must be produced
upon request to obtain benefit of this warranty.
Where any product is used for commercial purposes by the purchaser the warranty period is strictly 90 days (3 months) from the date of
purchase.
This warranty only applies to the original purchaser of the product and is not transferrable to any other person or party under any
circumstances.
Exclusions and Limitations
No warranty is offered and Eurostyle Group Pty Ltd (Eurostyle) will not be liable for any damage caused by foreign objects (e.g. coins,
underwire, nails, buttons or jewellery), any wearable component, factors beyond its control, unauthorised alteration, modification or
substitution of any parts of the appliance, installation or use not in accordance with the instructions provided with the product, abnormal,
unauthorised or negligent use.
Eurostyle will not be liable for any special, indirect, consequential or economic loss or damage or loss of profits (in contract or tort or arising
from any other cause of action) suffered by you or any other person resulting from any act or omission by Eurostyle including, but not
limited to, food loss or loss and damage as a result of non-operational appliances.
Total Liability
Eurostyle’s total liability in respect of this warranty is limited, at its option to, the replacement of the goods or repair of the goods.
Making a Claim
If your Eurostyle product is defective and covered by this warranty please contact Eurostyle on 1800 440 335. You must provide proof of
purchase to Eurostyle to make a claim under this warranty. Eurostyle may request that you return the defective product to Eurostyle or an
Authorised Service Agent for assessment. Eurostyle is not liable for any costs, loss or damage incurred in connection with transportation or
delivery of the product to Eurostyle or the cost of returning a new or repaired product to you. Eurostyle may organise for an Authorised
Service Agent to assess the product at your nominated address. In such circumstances you are liable for the reasonable travel costs of the
Authorised Service Agent to travel to your nominated address.
Statutory Guarantees
If you are a consumer for the purposes of the Australian Consumer Law this warranty is provided in addition to other rights you have at law.
Our goods come with guarantees that cannot be excluded under the Australian Consumer Law. You are entitled to a replacement or refund
for a major failure and for compensation for any other foreseeable loss or damage. You are also entitled to have the goods repaired or
replaced if the goods fail to be of acceptable quality and the failure does not amount to a major failure.
Appliance Service
Should you consider that your appliance requires service, please contact euro appliances directly on 1800 440 335.
In case of service or product enquiry, we suggest you record the following information shown on both the outside of the carton, and on the
rating plate. Please complete below and keep in a safe place. Attach your original receipt to this form.
Model Name: ……..…..…..…………….….. Serial Number: …….…………..……..……..……..
Model Number: …………………………………..