Loading ...
Loading ...
Loading ...
22
USING YOUR BARBECUE
Before you light the Barbecue
Perform the following checks:
• Make sure all connections are tight, and leak-tested. Gas
regulators fitted with a hand-tightened wheel must be
checked to ensure they are secured.
• Check that all control knobs are in the ‘Off’ position, and
that gas supply is turned off.
• Ensure that the Hood on the barbecue, and the Lid on the
side-burner are open. If lids are closed there is a risk of gas
accumulating inside, and creating a dangerous situation.
• The hose and regulator supplied with this barbecue must
be used at all times whilst operating this barbecue. Inspect
the hose and regulator regularly for cracks or any sign of
damage. If there is excessive abrasion or wear, replace only
with a genuine BeefEater regulator.
Grease Tray
Neatly line the grease tray with some aluminium foil sheeting to
aid in clean up. Cut the foil to shape, and make sure it sits on the
bottom of the tray.
Fill the tray with 6mm (1/4”) layer of dry sand or other non-
combustible absorbent material to absorb grease. Change the
foil and absorbent material regularly to reduce the likelihood of
grease tray fire.
Lighting the Barbecue
Ensure the appliance is placed on a flat, level, non-combustible
surface.
• Ensure the regulator is connected to the LPG cylinder (See
Regulator Connection page 4.), and the hose is not subject
to any twisting, and is not close to hot surfaces.
• Verify all joints are spanner tight and check for leaks after
turning on gas supply. See correct procedure on page 4.
• Ensure all knobs are in the ‘Off’ position.
• Ensure cooking plate and grill are in place.
• Open Gas Cylinder valve
NOTE: The barbecue is fitted with a safety feature that prevents
the burners from being accidentally turned on.
You must push the knob inwards to disengage the lock, and only
then start turning it.
Light each burner by following this procedure:
• Read all instructions before lighting.
• Open Hood before lighting.
• Push in and turn Right-Hand-Side knob counter-clockwise
to ‘High’.
• If ignition does not occur, return to ‘Off’ and repeat after 5
minutes.
Check for a clear blue flame with just a tip of yellow.
Once the right-hand-side burner is alight, light each successive
burner from right to left.
WARNING
Excess yellow tipping means the combustion is not right, if
that is observed, turn the Barbecue burners off, and refer to
troubleshooting at the end of this manual.
Do not use more than 2 burners on ‘High’ with the hood closed.
If the burner does not light
Keep the control knob pushed, and return the knob in the
clockwise direction to the ‘Off’ position. Wait 5 minutes, and
repeat the lighting procedure steps 1 – 4 above again. If after
a few attempts you still can not light the burners, contact your
retailer before proceeding.
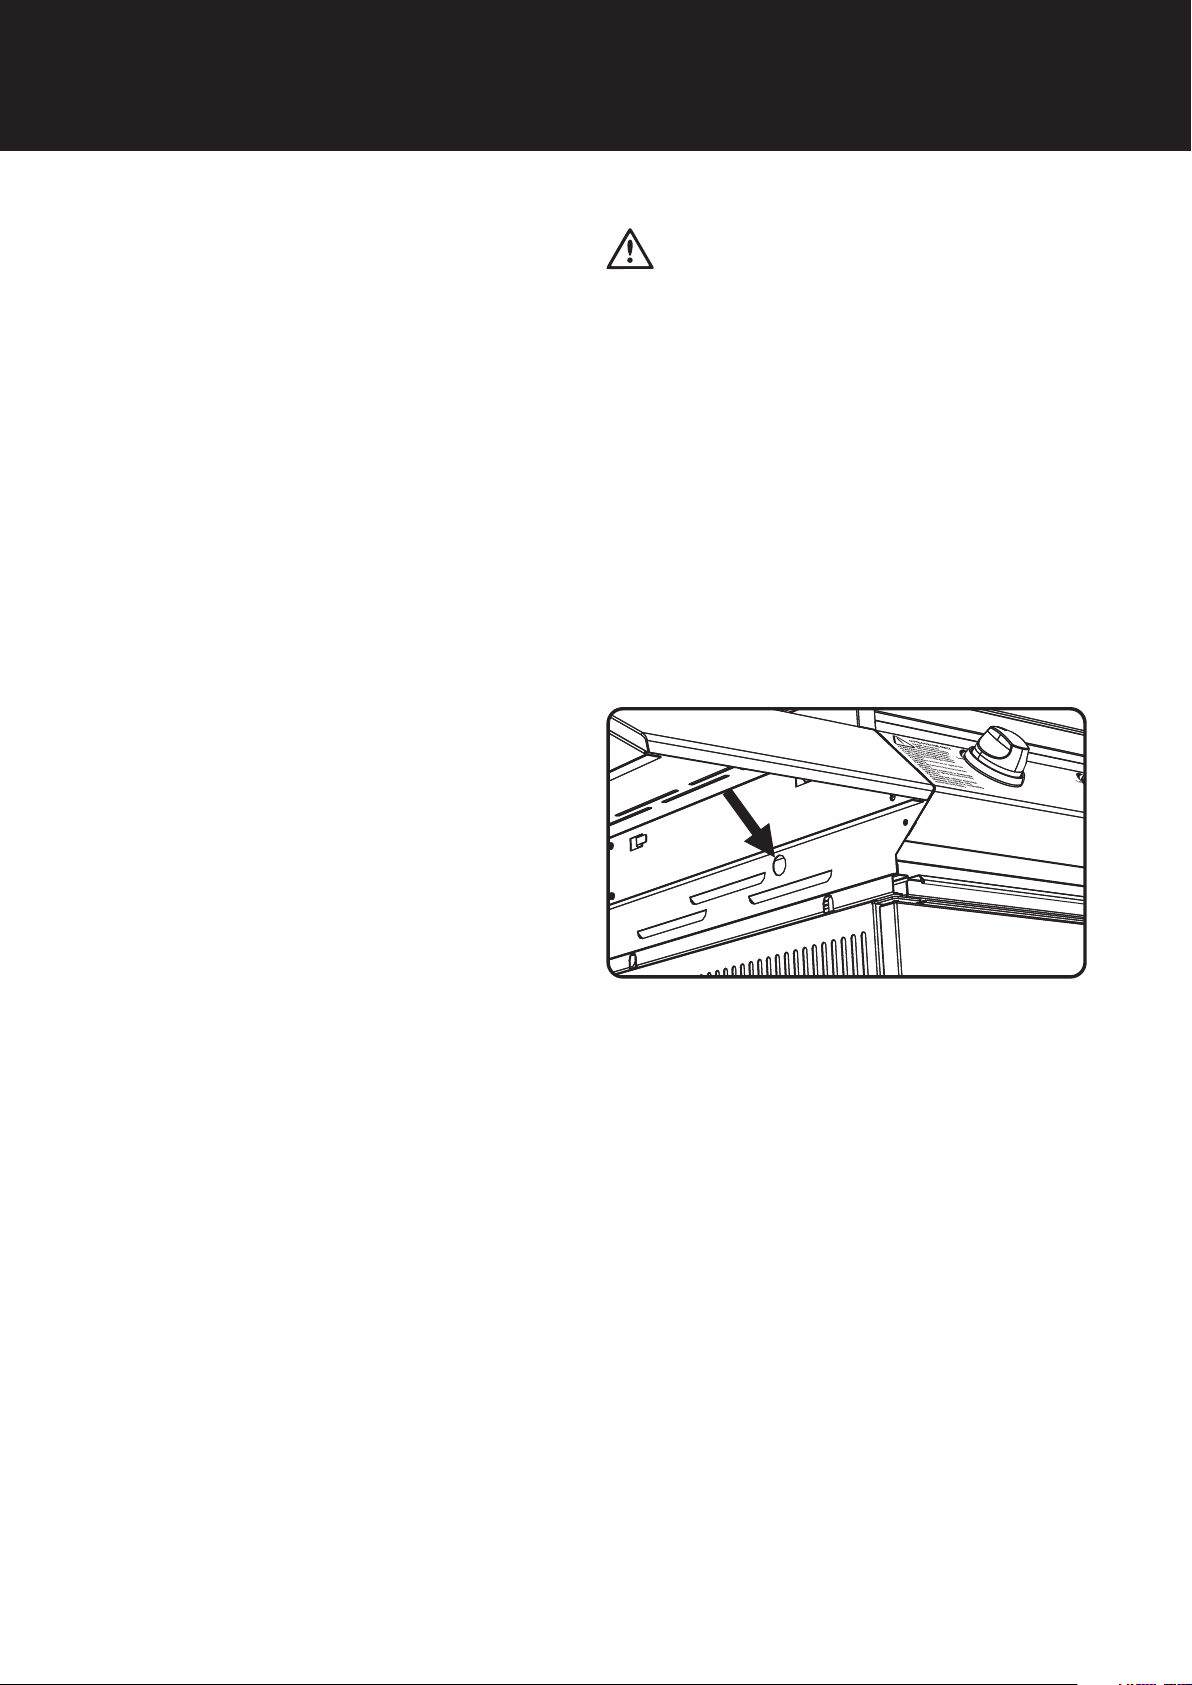
Manual Lighting
Press and turn the right hand control knob anti-clockwise to
the ‘High’ position, then light the right hand burner immediately
through a hole provided in the middle of the right hand barbecue
side panel.
Check for proper burner operation
Following operating instructions light each burner and check for
a clear blue flame with just a tip of yellow. Excess yellow tipping
can be adjusted using the screw on the side of the burner. If you
are unable to achieve correct operation, consult your dealer.
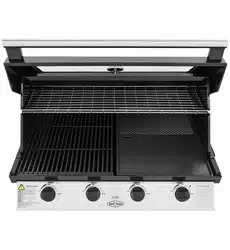
Preparing the Plate and Grill
Your barbecue has heavy duty enamelled Cast Iron plate and
grill. Enamel is a hard, non-rusting surface which will ensure the
long life of your cooking surface.
The plate and grill are ready to use, but it is recommended to
wash them with warm soapy water and a soft cloth, and rinse
before use.
To ensure the longevity of the enamel surface on the Cast Iron
plate and grill it is strongly advised to avoid impact with other
metal parts and sharp utensils.
To turn off a burner
Simply turn the knob (without pushing) clockwise to the ‘Off’
position.
USING YOUR BARBECUE
Loading ...
Loading ...
Loading ...