Loading ...
Loading ...
Loading ...
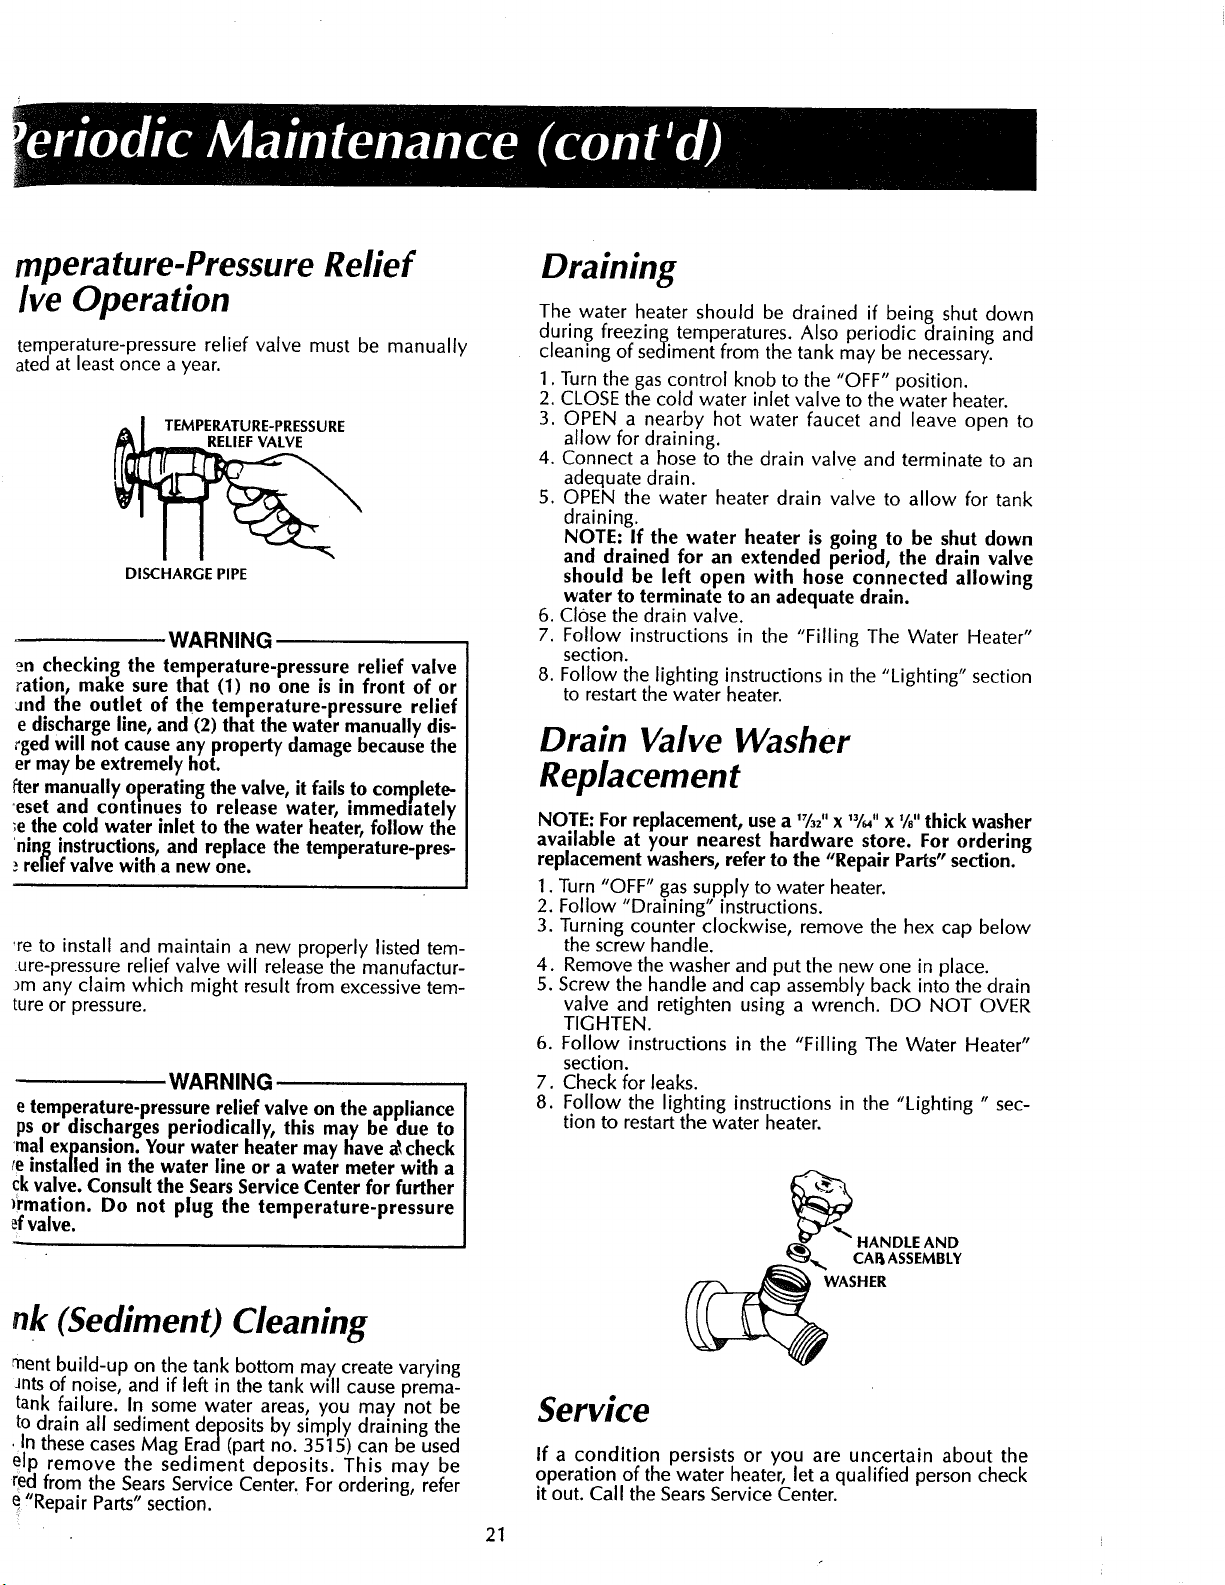
mperature-Pressure Refief
lye Operation
temperature-pressure relief valve must be manually
ated at least once a year.
DISCHARGE PIPE
WARNING
_n checking the temperature-pressure relief valve
ration, make sure that (1) no one is in front of or
Jnd the outlet of the temperature-pressure relief
e dischargeline, and(2) that the water manually dis-
_gedwill not causeanyproperty damagebecausethe
er maybe extremely hot.
fter manuallyoperatingthe valve, it failsto complete-
eset and continues to release water, immed|ately
;ethe cold water inlet to the water heater,follow the
ning instructions,and replace the temperature-prep
._reliefvalvewith a newone.
're to install and maintain a new properly listed tem-
:ure-pressure relief valve will release the manufactur-
_many claim which might result from excessive tem-
ture or pressure.
WARNING
._temperature-pressurerelief valveon the appliance
}s or discharges periodically, this may be'due to
hal expansion.Your water heater may have _ check
._installed in the water line or a water meter with a
ckvalve. Consultthe SearsServiceCenterfor further
)rmation. Do not plug the temperature-pressure
_fvalve.
nk (Sediment) Cleaning
ment build-up on the tank bottom may create varying
rots of noise, and if left in the tank will cause prema-
tank failure. In some water areas, you may not be
to drain all sediment deposits by simply draining the
.In these casesMag Erad(part no. 3515) can be used
elp remove the sediment deposits. This may be
red from the SearsService Center. For ordering, refer
e"Repair Parts" section.
Draining
The water heater should be drained if being shut down
during freezing temperatures. Also periodic draining and
cleaning of sediment from the tank may be necessary.
1. Turn the gascontrol knob to the "OFF" position.
2. CLOSEthe cold water inlet valve to the water heater.
3. OPEN a nearby hot water faucet and leave open to
allow for draining.
4. Connect a hose to the drain valve and terminate to an
adequate drain.
5. OPEN the water heater drain valve to allow for tank
draining.
NOTE: If the water heater is going to be shut down
and drained for an extended period, the drain valve
should be left open with hose connected allowing
water to terminate to an adequate drain.
6. Close the drain valve.
7. Follow instructions in the "Filling The Water Heater"
section.
8. Follow the lighting instructions in the "Lighting" section
to restartthe water heater.
Drain Valve Washer
Replacement
NOTE: Forreplacement, usea '%5"x "/," x %"thick washer
available at your nearest hardware store. For ordering
replacement washers,refer to the "Repair Parts"section.
1. Turn "OFF" gassupply to water heater.
2. Follow "Draining" instructions.
3. Turning counter clockwise, remove the hex cap below
the screw handle.
4. Remove the washer and put the new one in place.
5. Screw the handle and cap assembly back into the drain
valve and retighten using a wrench. DO NOT OVER
TIGHTEN.
6. Follow instructions in the "Filling The Water Heater"
section.
7. Check for leaks.
8. Follow the lighting instructions in the "Lighting " sec-
tion to restartthe water heater.
Service
__HANDLE AND
If a condition persists or you are uncertain about the
operation of the water heater, let a qualified person check
it out. Call the SearsService Center.
21
Loading ...
Loading ...
Loading ...