Loading ...
Loading ...
Loading ...
Before Using for The First Time
1. Read all instructions thoroughly.
2. Take the coffee urn and all accessories out of the packing carefully.
3. Clean the coffee urn with a clean damp cloth.
Note: Do not immerse the coffee urn in any liquid.
Operating Instructions
IMPORTANT: Never plug in the coffee urn without water or liquid inside or the appliance
will cutoff automatically for safety. If the appliance is cutoff unplug the appliance and let it
cool down before plugging into outlet again.
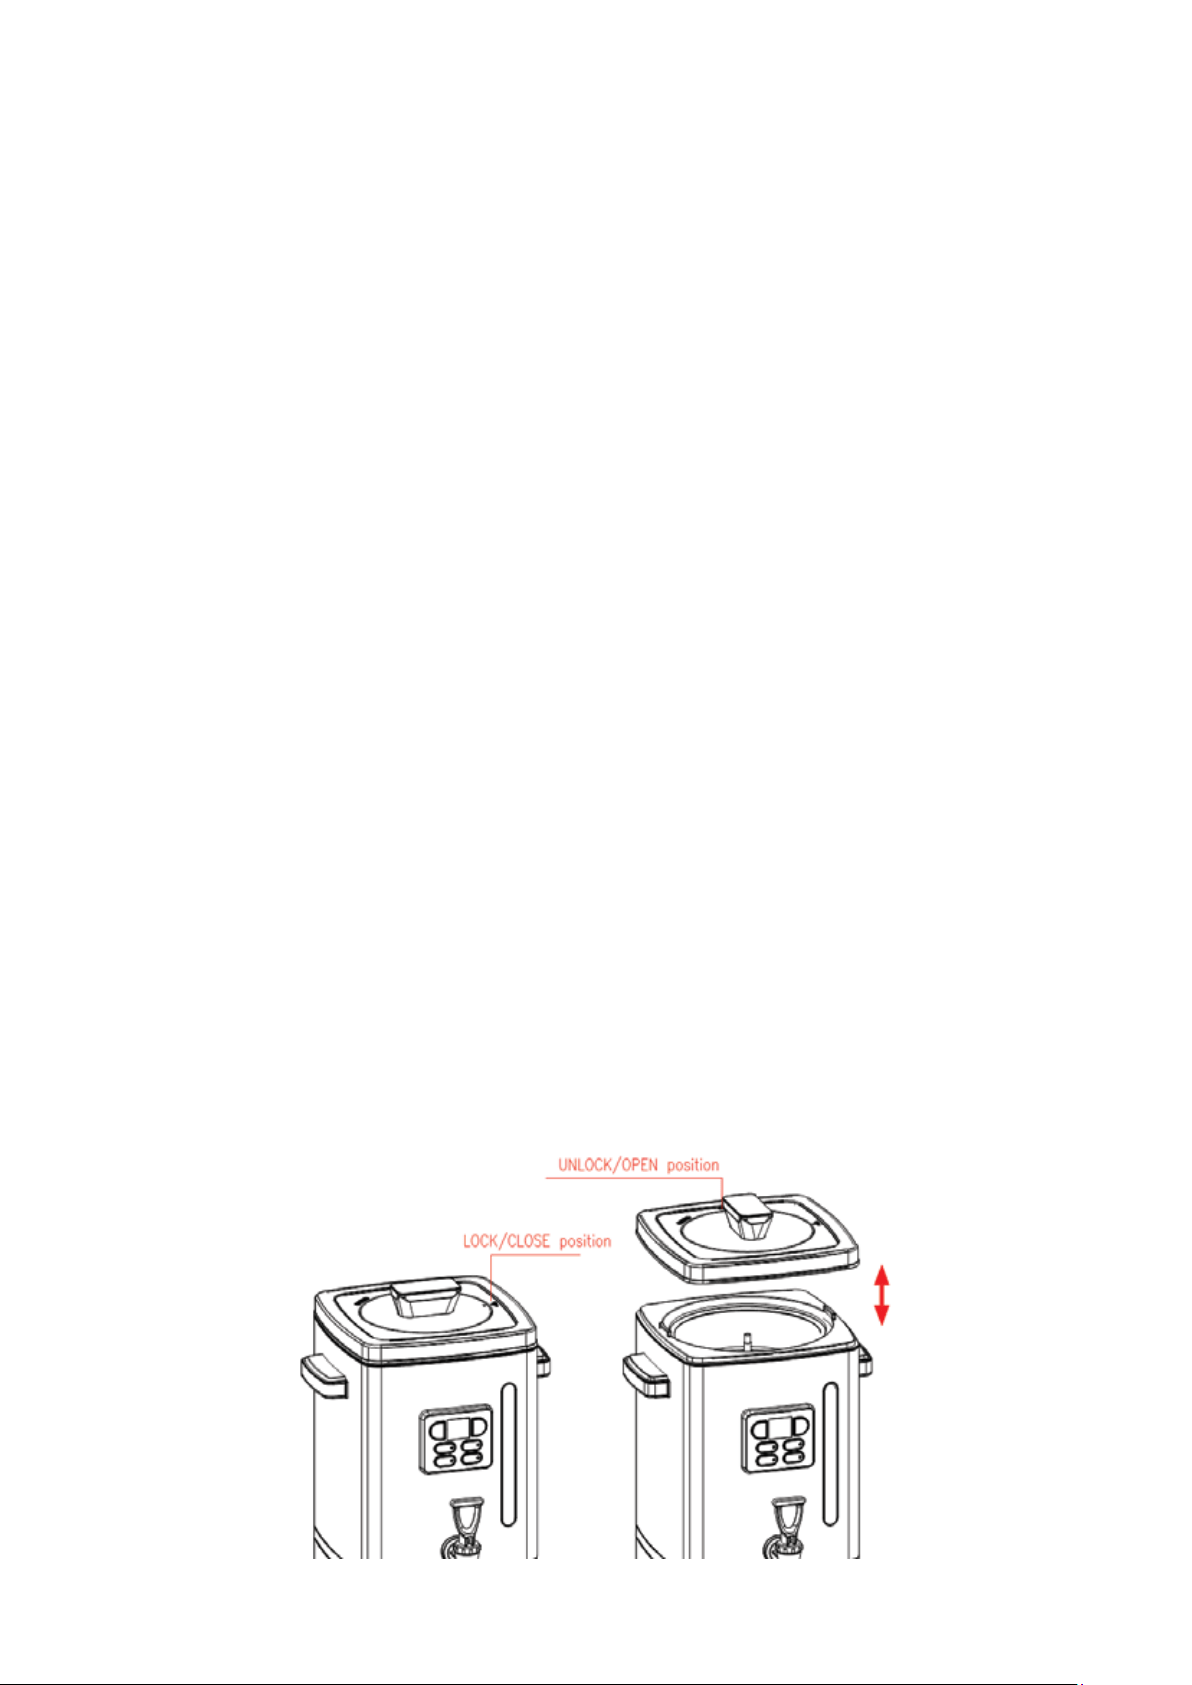
1. Rotate the lid
handle to “OPEN” position and remove the lid. Take out the coffee filter and
water pipe. Fill the coffee urn with COLD water corresponding to the number of cups of
coffee you will be making. Cup level markings are located on the water indicator tube.
NOTE: The coffee urn makes 20-50 cups (1 cup brewed coffee = 5 fluid ounces). DO
NOT OVERFILL OR UNDERFILL THE URN. Fill according to the markings on the water
indicator tube for number of cups desired. Use cold water.
2.
Moisten the coffee filter to keep small particles from sifting through. Add the desired
amount of ground coffee to the basket. The following chart suggests the amount of coffee
to use for medium brew amounts. It can be varied to suit personal taste and particular
types of coffee:
Cups to Amount of ground coffee Amount of ground coffee
Brew to Use (Tablespoons) to Use (Measuring Cups)
20 18-21 1
30 22-31 1
1
/
2
40 32-41 2
50 42-50 2
1
/
2
NOTE: 1 cup brewed
coffee = 5 fluid ounces
3. Fit the water pipe into the bottom of the coffee filter. Holding the top end and put them
into the coffee urn carefully until you fit the bottom base of the water pipe into the heating
element. If not properly positioned, coffee may not percolate.
4. Position the drip tray and the cup plate under the base.
5. Place the lid onto the unit in correct direction, then rotate the lid handle to “LOCK”
position. Make sure the lid is close correctly.
Loading ...
Loading ...
Loading ...