wwwoGEAppfiances.com
_!_ Safety Instntations ....... 9-7
Operating ImlrucCions
'Aluminum Foil ........... ]3
(;lock and Timer ....... 15, 16
()\'e n ................ 10-31
Baking and Roasting ...... 13
Broiling, Broiling Guide . .. 14
()yen Control ........ l 0, l l
Power Outag> ........ 12, 16
Preheating .............. 13
Sabbath Feature ...... 19, 90
Self-Cleaning ......... 92, 93
Special Features ......... 18
Thermostat Adjusunent ...91
Timed Baking
and Roasting ............ 17
Smt_ace Cooking ......... 8, 9
Care and Cleaning
Broiler Pan and Grid ...... 28
Burner Assemhlv ....... 24-26
Burner Grams ............ 27
Control Panel and I{mohs ...30
Cookmp SurtZace .......... 27
Door Removal ............ 28
Kick Panel ............... 29
Lift-up Cookmp ........... 29
Oven Bouom ............. 28
Oven Light Replacement ...31
()yen Vents .............. 30
Self-Cleaning .......... 22, 23
Shelx_s .................. 31
Stainless Steel SnrPaces ..... 27
Storag_ Drawer . .......... 29
Inslallation
Instructions ........... 32-43
Air Adjustment ........... 42
Ai_ti-Tip Device ........ 35, 43
Checking Burner Ignition...41
Connecting tile Rang>
to Gas ............... 36-39
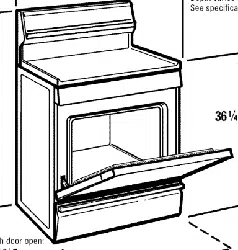
Dimensions and Clearances .34
Electrical Connections . .40, 41
Le_>ling tile Rang> ........ 42
Location ................. 35
LP ...................... 43
Troubleshooting
Tips ................. 44-47
Accessories .............. 53
Consumer Support
Consumer
Support .......... Back Coxer
Product Registration .... 49, 50
_'arrantv for Customers
in Canada r.r.
............... DD
¼:arrantv tbr Customers
in tile U.S.A .............. 54
JGBP2 4
JGBP26
jc, P2s
J(;BP2 9
J(;BP32
J(;BP_3
RGB 74O
R(;B 745
RGB746
RGB790
Write the model and serial
numbers here:
Model #
Serial #
You can find them on a label on
the fl_ont of the range behind the
storage drawer or kick panel.
18308MOP172 49-85086 07-05 JR
7
i
3.
m
IMPORTANTSAFETYINFORMATION.
READALLINSTRUCTIONSBEFOREUSING.
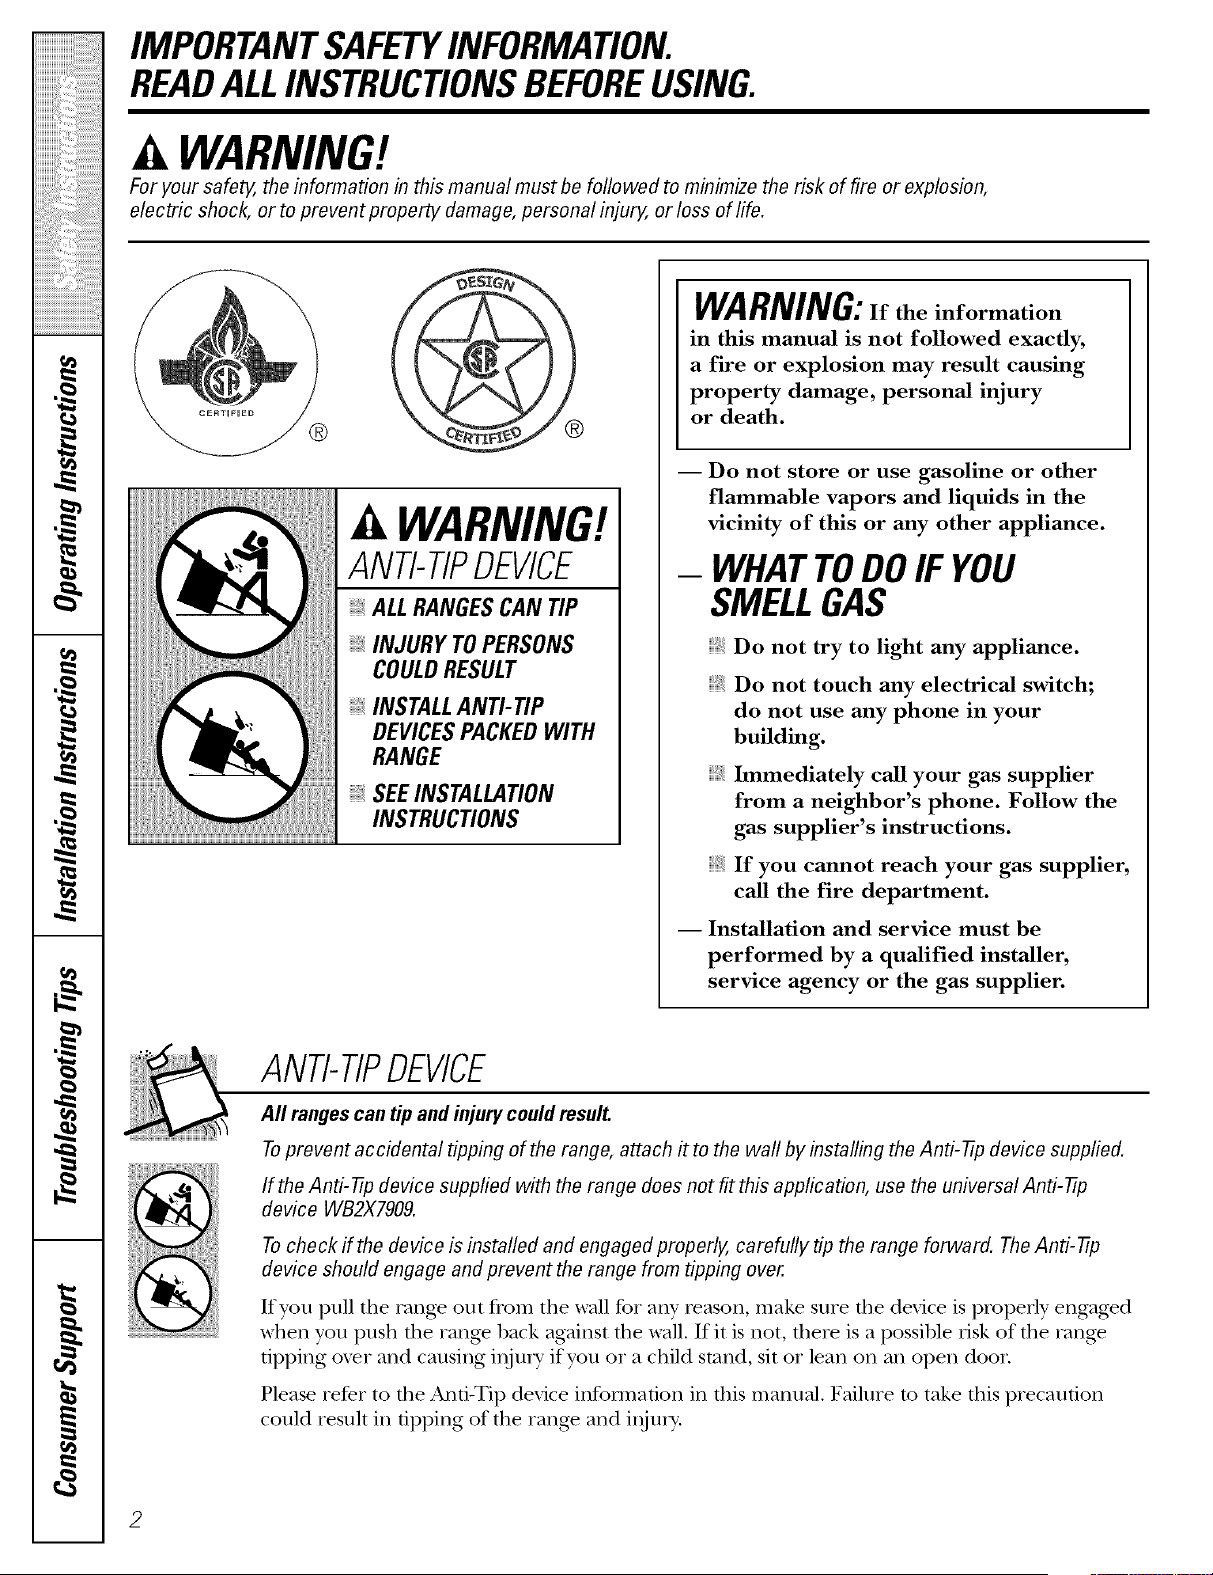
.4, WARNING!
For your safe_ the information in this manual must be followed to minimize the risk of fire or explosion,
electric shock, or to prevent property damage, personal injury, or loss of life.
®
WARNING!
ANTI-TIPDEVICE
, ALL RANGES CAN TIP
INJURY TO PERSONS
COULD RESULT
INSTALL AN_ tiP
DEVICES PACKED WITH
RANGE
SEE INSTALLATION
INSTRUCtiONS
WARNING:If the information
in this manual is not followed exactly,
a fire or explosion may result causing
property damage, personal injury
or death.
I Do not store or use gasoline or other
flammable vapors and liquids in the
vicinity of this or any other appliance.
- WHATTODOIF YOU
SMELLGAS
Do not try to light any appliance.
Do not touch any electrical switch;
do not use any phone in your
building.
Immediately call your gas supplier
from a neighbor's phone. Follow the
gas supplier's instructions.
If you cannot reach your gas supplier,
call the fire department.
I Installation and service must be
performed by a qualified installer,
service agency or the gas supplier.
ANTI-TIPDEVICE
All ranges can tip and injury could result.
Toprevent accidental tipping of the range, attach it to the wall by installing the Anti--tip device supplied.
If the Anti--tip device supplied with the range does not fit this application, use the universal Anti--tip
device WB2X7909.
To check if the device is installed and engaged properly, carefully tip the range forward. TheAnti--tip
device should engage and prevent the range from tipping over.
If you pull the range out tiom tile wall for any reason, make suite tile device is properly engaged
when you push the range back against the wall. If it is not, timre is a possible risk of tile rang_
tipping ox>r and causing i,_u_ T if you or a child stand, sit or lean on an open door.
Please refer to the And-Tip device infollnadon in tills manual. Failure m take tills precaution
could iesult in tipping of tile rang> and iI)jtllTv'.

www.GEAppliances.com
WARNING!
IMPORTANTSAFETYNOTICE
The California Safe Drinking Water and Toxic Enforcement Act requires the Governor of California to
publish a list of substances known to the state to cause birth defects or other reproductive harm, and
requires businesses to warn customers of potential exposure to such substances.
Gas appliances can cause minor exposure to four of these substances, namely benzene, carbon
monoxide, formaldehyde and soot, caused primarily by the incomplete combustion of natural gas or
LP fuels. Properly adjusted burners, indicated by a bluish rather than a yeflow flame, will minimize
incomplete combustion. Exposure to these substances can be minimized by venting with an open
window or using a ventilation fan or hood.
SAFETYPRECAUTIONS
Have the installer show you the location of the range gas shut-off valve and how to shut # off if necessary.
Hate your rang_ installed and properly Plug your rang_ into a 190_\_lt grounded
grounded 1)y a qualified installer, in
accordance with the Installation Insuucfions.
Any adjustment and service should be
performed only 1)yqualified gas rang_
installers or service technicians.
Do not attempt to repair or replace any
part of your range unless it is specifically
recommended in this manual. All other
service should be refened to a qna]ified
technician,
outlet only. Do not remove the round
grounding prong from dm plug. If in doubt
about the grounding of the home electrical
system, it is your personal responsibility and
obligation to haxe an ungrounded outlet
replaced wifll a properly gTounded,
d_tee-prong outlet in accordance with
the National Electrical Code. Do not use
an exmnsion cord with this appliance.
3
7
iiiiiiiiiiiiil;_i!i!!';i_:_i'iiiililililililililiiii_;_!_
m
,0
,0
,0
q
m
aa
IMPORTANTSAFETYINFORMATION.
READALLINSTRUCTIONSBEFOREUSING.
4
SAFETYPRECAUTIONS
Locate the range out of kitchen traffic path
and out of drafty locations to prexent poor
air circulation.
Be sure all packaging materials are remox.ed
flom the rang.e before operating it to
prevent rit.e or smoke damag.e should the
packaging material ignite.
Be sure your rang.e is correctly adjusted by
a qualified service teclmician or installer for
the type of gas (naun_al or LP) that is to be
used. Your rang.e can be convermd for use
with either type of gas. See the Installation
of the range section.
WARNING: teseadjnstmentsmnst
be made by a qualified service teclmician
ira accordance with the manuthcturer's
insmtcfions and all codes and requirements
of the authority having jurisdiction. Failure
m follow these instructions could t.esult ira
set-ions ir_jmy or property damag.e. Tile
qualified ag.enQ' performing this work
assumes t.esponsibility for tim conversion.
After prolong.ed use of a rang.e, high floor
mmperaun_es m W t.esuh and many floor
cox.erings will not widastand this kind of use.
Nex.er install flae rang.e ox.er viwl file or
linoleuna that cannot withstand such type
of use. Nex.er install it dit.ecflv ox.er inmrior
kitchen carpeting.
Do not lem.e childr.en alone or unatwnded
where a rang.e is hot or ira operation. Titey
could be seriously burned.
Do not allow anyone to climb, stand or hang
on the ox.en door, storag.e drawer, wamling
drawer or cooktop. Titey could damag.e the
rang.e and even ili) it over, causing severe
personal iDjnr_y.
CAUTION: temsofinterestto
children should not be smt.ed ira cabinets
abox.e a rang.e or on the backsplash of a
range--<:hildt.en climl)ing on the rang_
m reach items could be seriously injured.
,& WARNING:NEVERusethis
appliance as a space heater to heat or
warm the room. Doing so may t.esult
ira carbon monoxide poisoning and
ox.erheafing of rite oven.
Nex,er wear loose fitting or hanging gamaents
while using the appliance. Be carefid when
reaching for items stored ira cabinets over the
rang.e. Flammable mamrial could be ignimd
if broug_tt ira coratact with flame or hot ox.en
sniP, tces and may cause sex.ere l)nrlas.
Do not store flammable mamnals ira an
oven, a rang.e smrag.e drawel, a wanning
drawer or near a cooktop.
Do not store or use combustible mamrials,
gasoline or other flammable vapors and
liquids in file vicinity of this or any oflter
appliance.
Do not let cooking gTease or other
flammable materials accumulam ira or
near the rang.e.
Do not use water on grease fires. Nex.er pick
up a flaming pan. Turn dte controls off:
Smother a flaming pan on a surface burner
by cox.ering tim pan completely with a
well-fitting lid, cookie sheet or fiat uay.
Use a multi-puq)ose dr T chemical or
foam-wi)e fire extinguisher
Flaming grease outside a pan can be put
out by cox.etJng it with baMng soda or;
if available, by using a multi-purpose dry
chemical or foam-type fire extingatishen
Flame ira the oven call be smothered
completely by closing the ox.en door and
turning tim control to off or by using a
nmlti-puq)ose d U chemical or foam-type
fire exfing-uishen
i,et rite burner grates and other surfaces
cool before ranching them or leaving fltem
where childi.en can t.each them.
Never block tim x.ents (air openings) of the
rang.e. Tiaey provide tim air inlet and outlet
that are necessa U for rite rang.e to operate
I)ioperly with conect combustion. 'Air
opening_ are locamd at the rear of tile
cooktop, at rite top and bottom of the oven
door, and at the bottom of the rang.e under
the kick panel or storag.e drawer
Large scratches or impacts to glass doors can
lead to broken or shattet.ed glass.
www.GEAppliances.com
WARNING!
SURFACEBURNERS
Use proper pan size--avoid pans that are unstable or easily tipped. Select cookware having fiat bottoms
large enough to cover burner grates. To avoid spi//overs, make sure cookware is large enough to contain
the food properly. This will both save cleaning time and prevent hazardous accumulations of food, since
heavy spattering or spi/Iovers left on range can ignite. Use pans wi£h handles that can be easily grasped
and remain cool,
Always use the LITE position when igniting
file top burners and make sure the humers
hme ignited.
Nexer leave flae surtace burners unattended
at higta flame setdng:s. Boilox_rs cause
smoking and greasy spillox>rs that may
cawh on fire.
Adjust the top burner flame size so it
does not exmnd hevond tim edge of the
cookwaie. Excessixe flame is hazardous.
Use only d U pot holders--moist or damp
pot holders on hot snrfaces may result in
hums from smam. Do not let pot holders
come near open flames when lifting
cookware. Do not use a towel or other
bulky cloth in place of a pot holden
XA]ten using glass cookware, make snle it
is deogned for mI>of-rang> cooking.
To minimize the possihility of hut]Is,
ignition of flammable materials and spillag>,
turn cookware handles toward the side or
hack of flae rang_ without exmnding ox>r
adjacent humers.
Careflllly watch tbods heing flied at a high
flame set6ng.
Always heat flit slowly, and watch as it heats.
Do not leme any imms on the cooktop. The
hot air from the vent m W ignim flammable
imms and will increase pressure in closed
containers, which may cause fltem to hnrst.
If a comhinadon of oils or ]Batswill be used in
flTing, stir tog>ther hefote heating or as fats
meh slowly
Use a deep fat thermomemr whenever
possihle to prevent oveflteafing ]Batheyond
the smoking point.
Use flae least possible amount of ]Batfor
effective shallow or deep-fat flTing. Filling
the pan too fllll of ]Batcan cause spillox>rs
when food is added.
_&]aen flaming foods are under dae hood,
Urea tim ]Banoff. The ]Ban,if operating, may
spread the flames.
Do not use a wok on the cooking surface
if the wok has a round metal ring that is
placed ox_r the burner gTate to support
the wok. This ring acts as a heat trap,
which m W damag> dae humer grate, and
hurner head. Also, it m W cause flae burner
to work impiopefl> This may cause a
carhon monoxide lexel above that
allowed hy current standards, iesulfing
in a heahh hazard.
Foods for ruing should be as d U as possible.
Frost on frozen foods or moisture on flesh
foods can cause hot ]Batto hubble up and
ox>i the sides of the pan.
Never try to move a pan of hot ]Bat,especially
a deep fat flTer _'ait until the fat is cool.
Do not leave plastic imms on the cooktop--
fltey m W meh if left too close to the xent.
Kee I) all plastics aw W from the sur]Bace
burners.
To ax_id the possibility of a hurn, always he
certain that the controls for all burners are
at the OFF position and all grates are cool
before attenlpting to remove flaem.
If rang> is located near a windo_, do not
hang long curtains that could hlow ox_t rite
surface burners and cream a rite hazard.
If you smell gas, turn off the gas to the range
and call a qualified service technician. Ne_>r
use an open flame to locam a leak.
Alwws turn the sur]Bace burner conuols off
before removing cookware.
Do not lift tim cooktop on sealed hurner
models. Lifting the cooktop can lead
to damag> and improper operauon of
the rang_.

7
iiiiiiiiiiiiiii_i!i!!';i_:_i'iiiililililililililiiii_i_!_
m
,0
&=
,0
,0
-€
q
#_.
m
e,
IMPORTANTSAFETYINFORMATION.
READALLINSTRUCTIONSBEFOREUSING.
COOKMEATANDPOULTRYTHOROUGHLY...
Cook meat and poultry thoroughly--meat to at least an INTERNAL temperature of 16001:and poultry to
at least an INTERNAL temperature of 180°ECooking to these temperatures usually protects against
foodbome illness.
OVEN
Stand away from the range when opening the door of a hot oven. The hot air and steam that escape
can cause bums to hands, face and eyes.
Do not use tim oven for a storage area.
Imms stored in the oxen can ignim.
Kee I) the oven free flom glease buildup.
Place the oxen shehes in the desired
position while the oxen is cool.
Pulling out the shelf to the stop-lock is a
comenience in lifting heaxy' foods. It is also
a p_ecaufion agvdnst bu_s flom touching
hot surfaces of file door or oxen walls. The
lowest position is not designed to slide.
Do not heat unopened food containers.
Pressure could build up and the container
could burst, causing an i[_nl-y.
WARNING:NEVERcover
any slots, holes or passages in the oven
bottom or coxer an entire rack with
materials such as aluminum foil. Doing
so blocks air flow througil the oven and
m W cause carbon monoxide poisoning.
Aluminum foil linings may also trap
heat, causing a fire hazard.
Do not use aluminum foil anywhere in the
oxen except as described in this manual.
Misuse could result in a fire hazard or
damage to the range.
XA]len using cooking or roasting bags in the
oxen, follow the manufacturer's directions.
Do not use your oxen to dl T newspapers.
If oxerheated, they can catch fire.
Use only glass cool<ware fllat is
recommended for use in gv_soxens.
Always remoxe the broiler pan flom range
as soon as you finish broiling. Grease left in
the pan can catch fire if oxen is used without
removing the grease flom the broiler pan.
When broiling, if meat is too close to file
flame, the fi_t may ignim. Trim excess fi_t to
prexent excessive flareq_ps.
Make sine the broiler pan is in place
con_ecflv m ieduce the possibility of
g_ease fires.
If you should haxe a grease fi_e in the broiler
pan, much the CLEAR/OFFpad,and kee I)
fl_e oven door closed to contain fixe und]
it burns out,
For safety and proper cooking perfommnce,
always bake and broil with the oxen door
closed.
vvww.GEAppliances.com
SELF-CLEANINGOVEN
Be sure to wipe off excess spillag_ be%re
self-cleaning operation.
Before self-vleaning the o_n, remove
tile shelx_s, broiler pan, gxid and other
cookware.
Do not clean fl_e door gasket. Tile door
gasket is essential for a g_od seal. Care
should be taken not to rub, damag_ or
mow tile gasket.
Clean only parts lismd in this Owner's
Manual.
If the self-cleaning mode malflmctions,
turn tile oxen off and disconnect file power
supply. Haxe it serviced by a qualified
technician.
Do not use oxen cleaners. No commercial
oxen cleaner or oxen liner of aW kind
should be used in or around any part of
the oxen. Residue from oxen cleaners will
damage the inside of the oxen when tile
self-clean cycle is used.
READANDFOLLOWTHISSAFETYINFORMATIONCAREFULLY.
SAVETHESEINSTRUCTIONS

,0
iiiiiiiiiiiii'::i_'i_5:i:i:i:i:i:i:i:i:ilili_ii_!!i_!!
,o
,0
q
m
ea
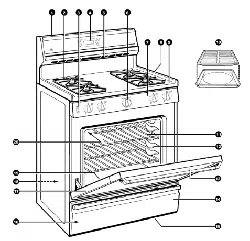
Usingthe gas surface burners.
Throughout this manual, features and appearance may vary from your model.
Before Lighting a Gas Burner
Drip pans are supplied with )'our range;
they should be used at all times.
Make Stlre all btlYneI's are in place.
Make sure all grates on the range are
properly placed 1)etore using any burner
After Lighting a Gas Burner
Do not operate the burner for an
extended period of time without
cookware on the grate. The finish on
the grate may chip without cookware
to absorb the heat.
Be sm'e the burners and grates are cool
betore you place yore" hand, a pot holder;
cleaning cloths or other materials
on them.
iiii!ii iiiii(ii7i)(()ii)iii
Push flTecontrol knob in and turn it
to flTeLITEposition.
How to Light a Gas Surface Burner
Make sm'e all the surfhce burners are
placed in their respective positions.
Push the control knob in and mrn it
to the LITE position.
34m will hear a little clicking noise--
the sotmd of the electric spark igniting
the burne_:
Turn the knob to a(!jtlSt the flame size.
If the knob stays at UTE, it will continue
to click.
_A]_en one burner is turned to LITE,
all the burnex_ spark. Do not attempt to
disassemble or clean around any burner
while another burner is on. An electric
shock may result, which could ca use you
to knock over hot cookware.
Medium Small
On some models
Medium Small
iJ
iii
Large Largo
On some models
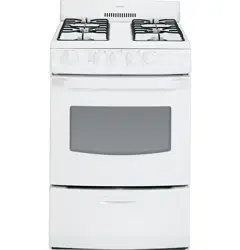
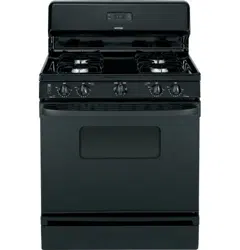
Sealed Gas Burners
Ymr gas range cooktop has tom" sealed
gas burne_. They offer convenience and
flexibility to be used in a wide range of
cooking applications.
The smallest burner in the right rear
position is the simmer bm'ne_: This bm'ner
can be turned down to a xer) low simmer
setting. It provides predse cooking
perlimnance fin" delicate foods such as
sauces or fi)ods that require low heat fin.
a long cooking time.
The medium (left rear and, on some
models, left fl'ont) and the large (fight
fl'ont and, on some models, left fl'ont)
btlrners are the i)iJmary burnei_ for most
cooking. These general-l)urpose bm'ne_
can be turned down fl'onl HIto LOto suit
a wide range ot cooking needs.
NOTE: On some models, the burnersare all the
same sloeand power
How to Select Flame Size
For safe handling of cookware, never let the flames
extend up the sides of the cookware.
Watch the flame, not the knob, as you
reduce heat. \A]_en tast heating is desired,
the flalne size on a gas burner should
IIlatch tile cookware veil are rising.
Flames larger than the bottom of the
cookware will not result in taster heatim*
of the cookware and could be haa_rdous.

www.GEAppliances.com
Top-of-Range Cookware
Aluminum: Medium-weight cookware is
recommended because it heats quickly
and e'_enb,. Most foods brown e_enlv in an
aluminum skillet. Use saucepans with tight-
fitting lids when cooking with minimum
_lIIlO/IntN of ]g_lteI:
Cast-Iron: If heated slowly, most skillets will
give satistactorv results.
Enamelware: Under some conditions,
tile enai/lel ()f' SOIlle ('ookw;iFe ill}iv I//elt.
Follow cookware iilantlfilCttlrei"s
recommendations tor cooking methods.
Glass: There are two types of glass
cookware--those tot oven rise only and
those tot u)i>of-range cooking (saucepans,
coffee and teapots). Glass conducts heat
ve_' slowly.
Heatproef Glass Ceramic: Can be used tot
either surti_ce or oven cooking. It conducts
heat very slowly and cools vex_' slowly: Check
cookware i/l_lllttlilCttli'er's directions to be
sm'e it can be used on gas ranges.
Stainless Steel'. This metal alone has poor
heating properties and is usually combined
with coppe_; aluminum or other metals for
improved heat distribution. Combination
metal skillets usually work satisfi_ctorilv if
they are used with medium heat as the
IIl_l n/llil cttlrer recoli/iilends.
Stove Top Grills (onmodelswithsealedburners)
Do not use stove top grills on )ore" sealed
,gas burners. If you use the stoxe tel ) _°ri]l
on tile sealed gas bm'ne_; it will cause
incomplete combustion and can result
in expost/re to carbon ii/onoxide lexels
aboxe allowable cmTent standards.
Thbcanbehazardousto yourhealth.
Use a fiat-bottomed wok.
Wok This Way (on models with sealed burners)
We recommend that you use a 14" orsmaller Do not t/se a fiat-bottomed wok (m a
flat-bottomed wo/( Make sure the wok bottom support ring. Pladng tile _ing oxer tile
sits flat on thegrate. Theyare available at your bm'ner or grate may ca rise tile burner
/oca/retailstore, to work iillproperly, restllting in u_lrbon
monoxide levels above allowable standards.
Only a fiat-bottomed wok should be used.
This could be dangerous to yore" health.
In Case of Power Failure
In case of a power fifilure, you can light
tile gas smti_ce burners on w)m" range with
a match. Hold a lit match to tile burne_;
then push in and ttlFn tile control knob
to tile LITEposition. Use extreme caution
when lighting bm'ne_s this wa_;
Sm_i_ce bm'ners in use when an electrical
power fifilm'e occm's will con[intle tO
operate n(mnallv:,
,O
iiiiiiiiiiiii'::i_'i_5:i:i:i:i:i:i:i:i:ilili_ii_!!i_!!
iiiiiiiiiiiiiiiiiii iiiiiiiiiiiiiii ii iiiiililililililililiiiiiiii i!ill
,O
,0
q
#.
m
r.#,_
e,
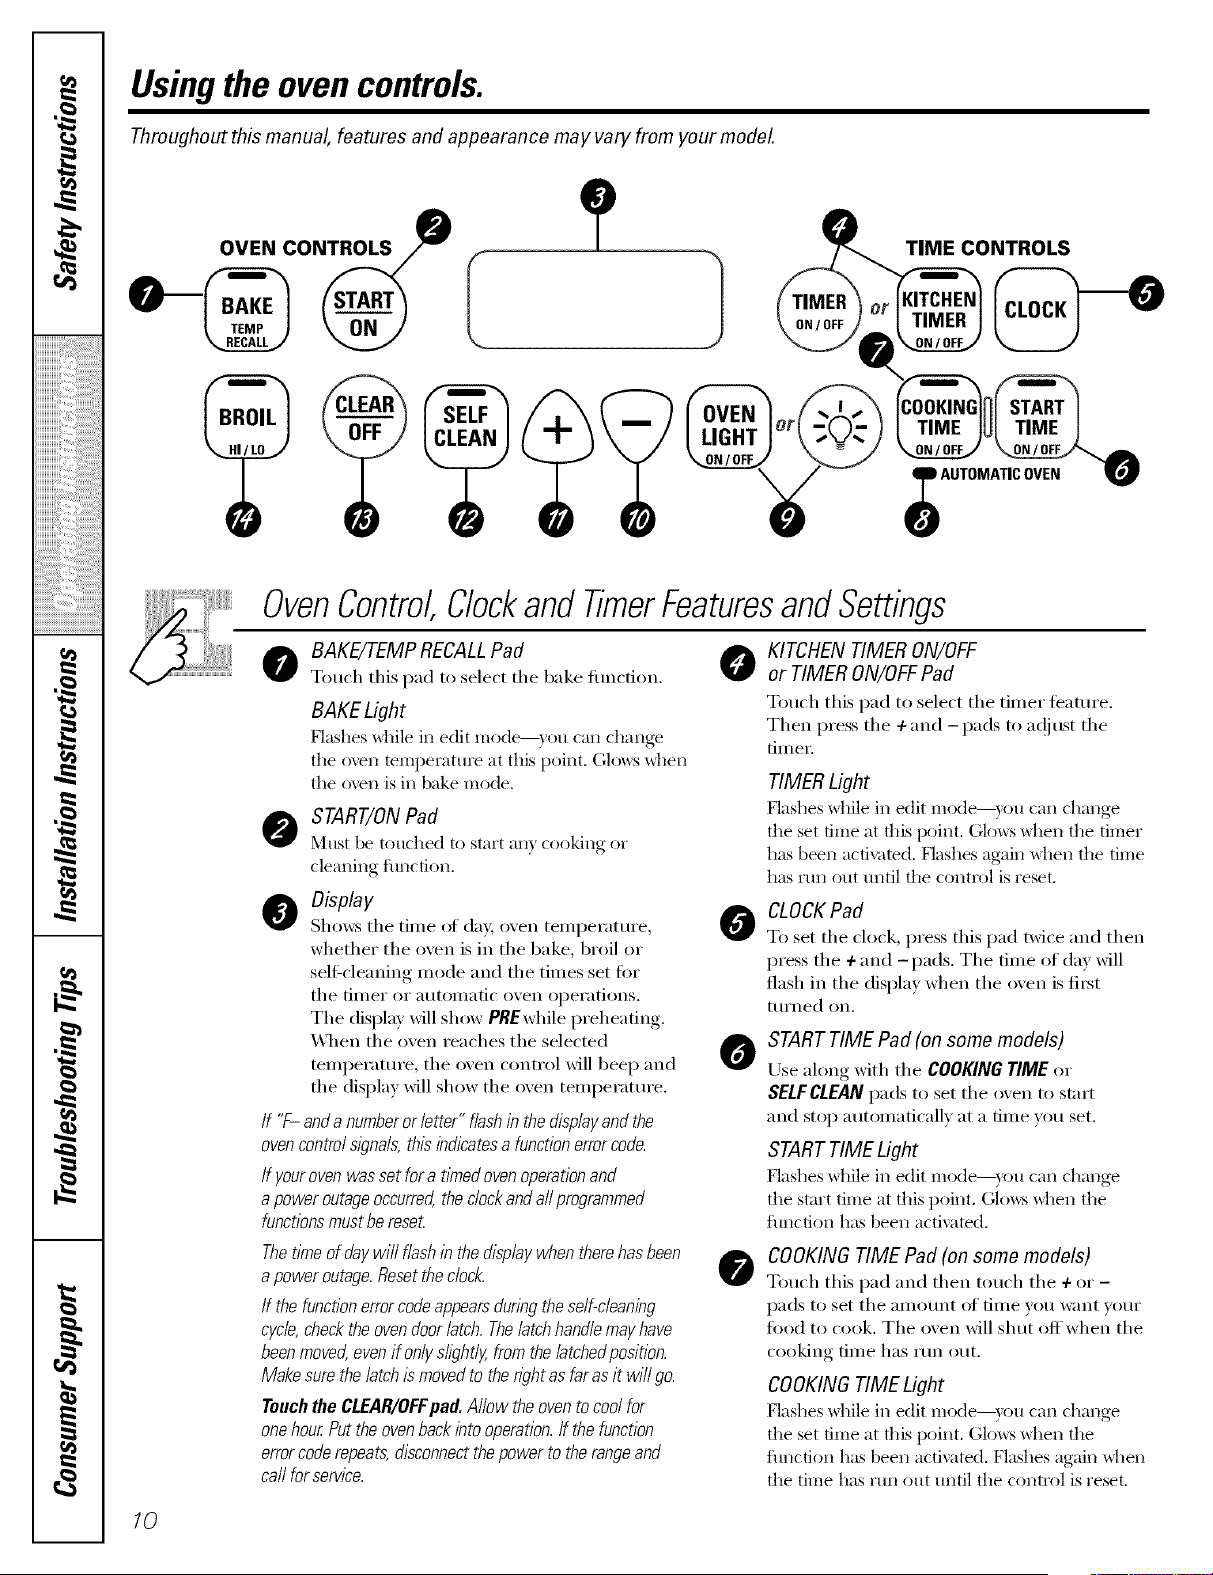
Usingthe ovencontrols.
Throughout this manual, features and appearance may vary from your model.
OVEN CONTROLS
0 (
ONTROLS
OvenControl,Clockand TimerFeaturesand Settings
0 8AKE rEMPRECALLPad O KITCHENTIMERON/OFF
Touch this pad to select tile bake function, or TIMERON/OFFPad
BAKE Light
Nashes _tlile ill edit mode--_ ou can change
tile oven temperature at this point. (;lo_:s _dlen
the oven is ill bake mode.
O TART/ON Pad
Must be touched to start an} cooking or
cleaning function,
O Display
Sl/o_:s tile tillle ol da}; oven tellll)ei'attli'e ,
wl/etl/er tile oven is ill tile bake, broil or
selfXcleaning mode and tile times set for
tile [ii/ler or atltoillatic ()veil opei'ations.
The display will show P_Ewl/ile preheating.
\4lien the oven reacl/es the selected
temperature, tile oven control will beep and
tile display will sl/ow tile oven teml)erature.
If "f- and a number or letter" flash in the display and the
oven controls/)na& this indicatesa function errorcode.
/f your oven was set for a t/Ynedoven operationand
a power outageoccurred the clockand aft programmed
functions must be rese_
0
0
Touch this pad to select tile timer teature.
Then press tile + and -pads to ac!itlst tile
[Jill el i
TIMER Light
[qashes while ill edit mode--_ou can change
the set time at this point. Gkm:s _tlen the timer
has been activated, [qashes again _hen the time
has run out until tile control is reset.
CLOCK Pad
To set tile clock, press this pad twice and then
press tile +and -pads. Tile time of day will
flasl/ill the display when the oven is fiI_t
t IlI'ned on.
START TIME Pad (on some models)
Use along witl/tile COOKING TIME or
SELFCLEAN pads to set tile (well to start
and stop autonmtically at a time vou set.
START TIME Light
Flashes x_hile iI1 edit Illode--yotl (-all c}lange
the start time at this point. Glows when the
flmcfion has been activated,
Thet_Yneof daywill flashin thedisplaywhentherehasbeen
apoweroutage.Resetthedock.
If the functionerrorcodeappearsduringtheself-cleaning
cycle,checktheovendoorlatch.Thelatchhandlemayhave
beenmovedevenif onlyslightly,fromthe/atchedposition.
Makesurethelatchis movedto thenghtasfaras it wi//go.
Touchthe CLEAR/OFFpad. Allow theoventocoolfor
onehourPuttheovenbackintooperation,ff thefunction
errorcoderepeats,dtsconnectthepowerto therangeand
ca//forservtce.
0
COOKING TIME Pad (on some models)
Touch this pad and then toucl/tile + or -
pads to set tile alllOtlnt ot [iil/e vo/i w;Int vo/lI"
food to cook. Tile oven will sbtlt off when tile
cooking time l/as Yun otlt.
COOKINGTIME Light
Flashes x_]lile iI1edit Illode--}Otl (-all change
the set time at this Ix)int. (;lo_:s _hen the
fimction has been activated. Flashes again _dlen
the time has run out until the control is reset.
10
www.GEApptiances.coln
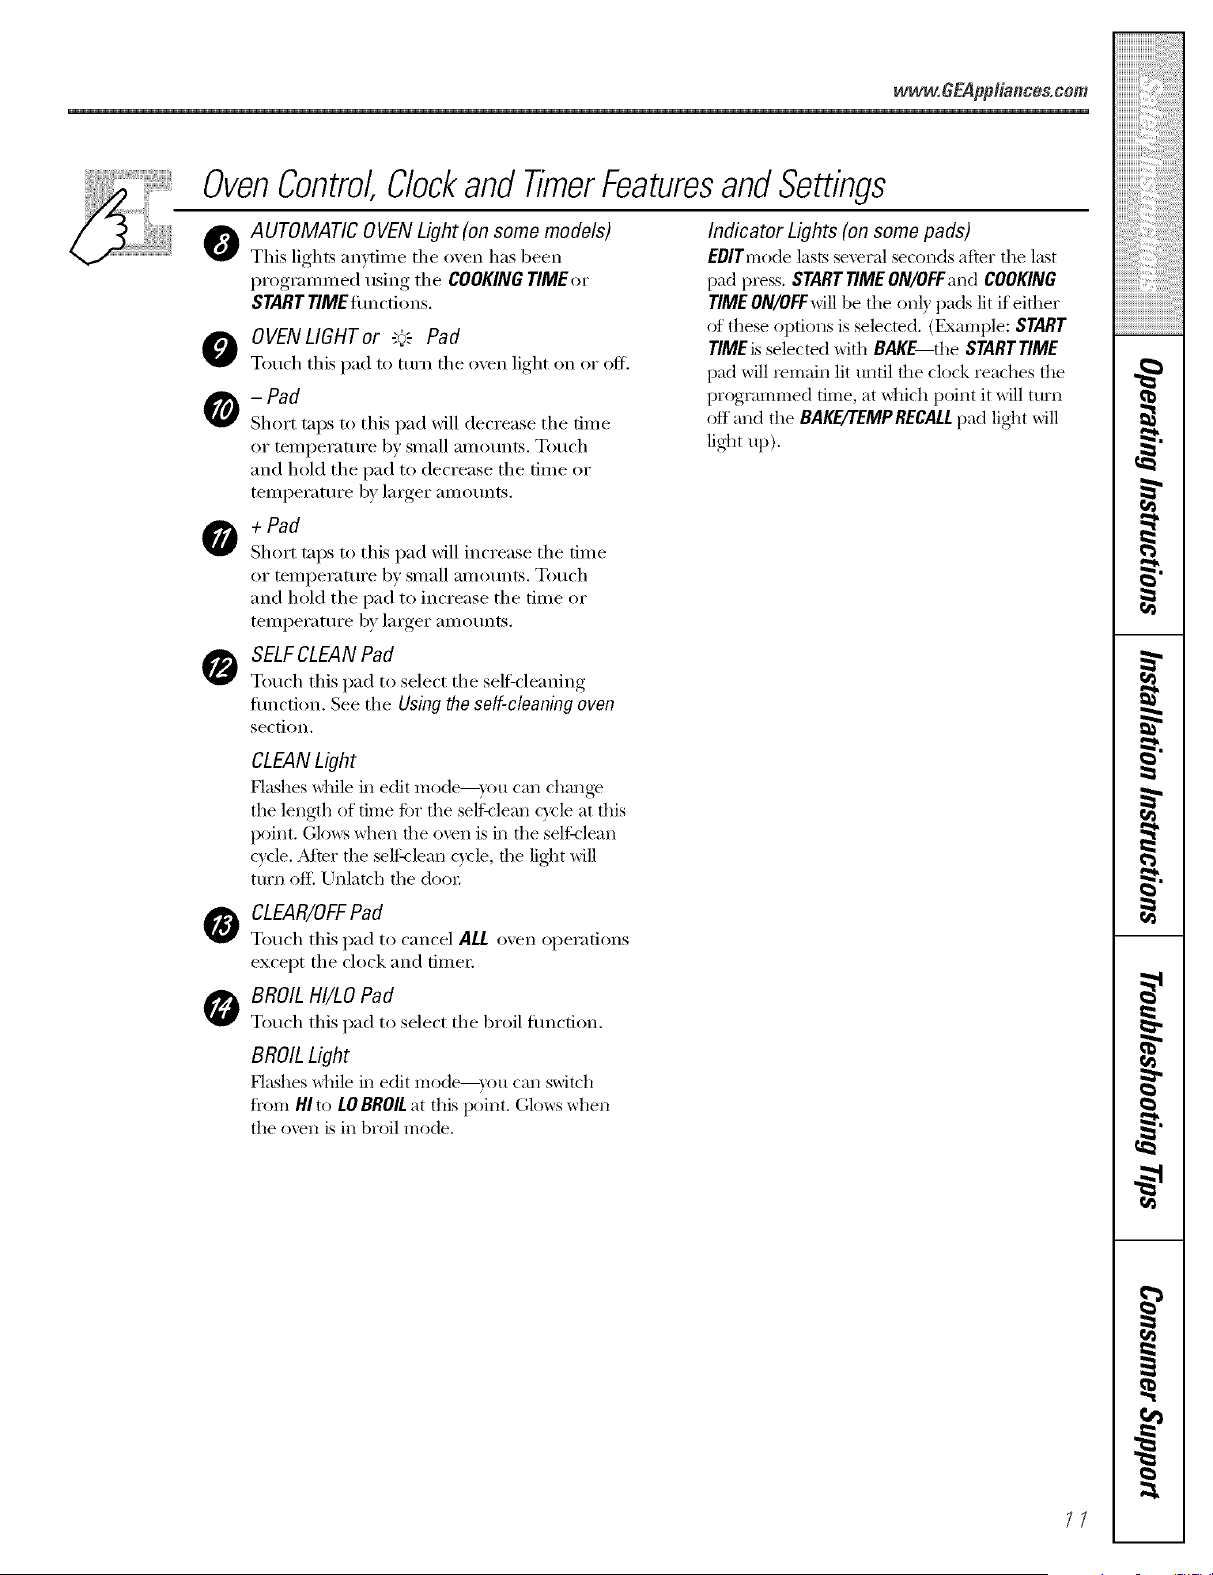
OvenControl Clockand TimerFeaturesand Settings
0
0
0
AUTOMATIC OVEN Light (on some models)
This lights mwtime the oven has been
programn_ed using the COOKING TIMEor
START riME timcti,ms.
OVENLIGHT or "+'_ Pad
Touch this pad to mrn the oven light on or ofl_
-Pad
Short taps to this pad will decrease the time
or temperature by small amounts. Touch
and hold the pad to decrease the time or
temperature by larger amounts.
Indicator Lights (on some pads)
EBlTmode lasts several seconds after the last
pad press. SNRT TIMEON/OFfand COOKING
TIMEON/OFFwill be the on b pads lit if either
of these options is selected. (Example: START
TIMEis selected with BAKE the SNRTTIME
pad will remain lit until the clock reaches the
programmed time, at _hich point it will turn
off and the BAKE/TEMPRECALLpad lig]_t will
lig]_t up),
+ Pad
Short taps to this pad will increase the time
or temperature by small amounts. Touch
and hold the pad to increase the time or
temperature by larger amounts.
SELFCLEAN Pad
Touch this pad to select the self'cleaning
flmction. See the Using the so/f-c/oaning ovon
section.
CLEANLight
Flashes while in edit mode--you can change
the length of time ti)r the selt_lean cycle at this
point. Glows when the ()\'el1 is ill the self:<lean
c) cle. Adter the selthlean cycle, the lig]_t will
turn of E Unlatch the docn;
CLEAR/OFFPad
Touch this pad to cancel ALL oven operations
except the clock and fimei;
BROIL HI/LO Pad
Touch this pad to select the broil fimction.
BROIL Light
Flashes _dfile ill edit mode--you can switch
fi'om HI to LOBROILat this point. Glows when
the oven is ill broil mode,
//
,0
iiiiiiiiiiiii",':i_'i_5:i:i:i:i:i:i:i:i:i;i;i_ii_!!i_!!
iiiiiiiiiiiiiiiiiii ii ii ii ii ii i iii ii ii i i i i i i i i i i ii ii i!
,0
,0
-€
q
#_.
m
e,
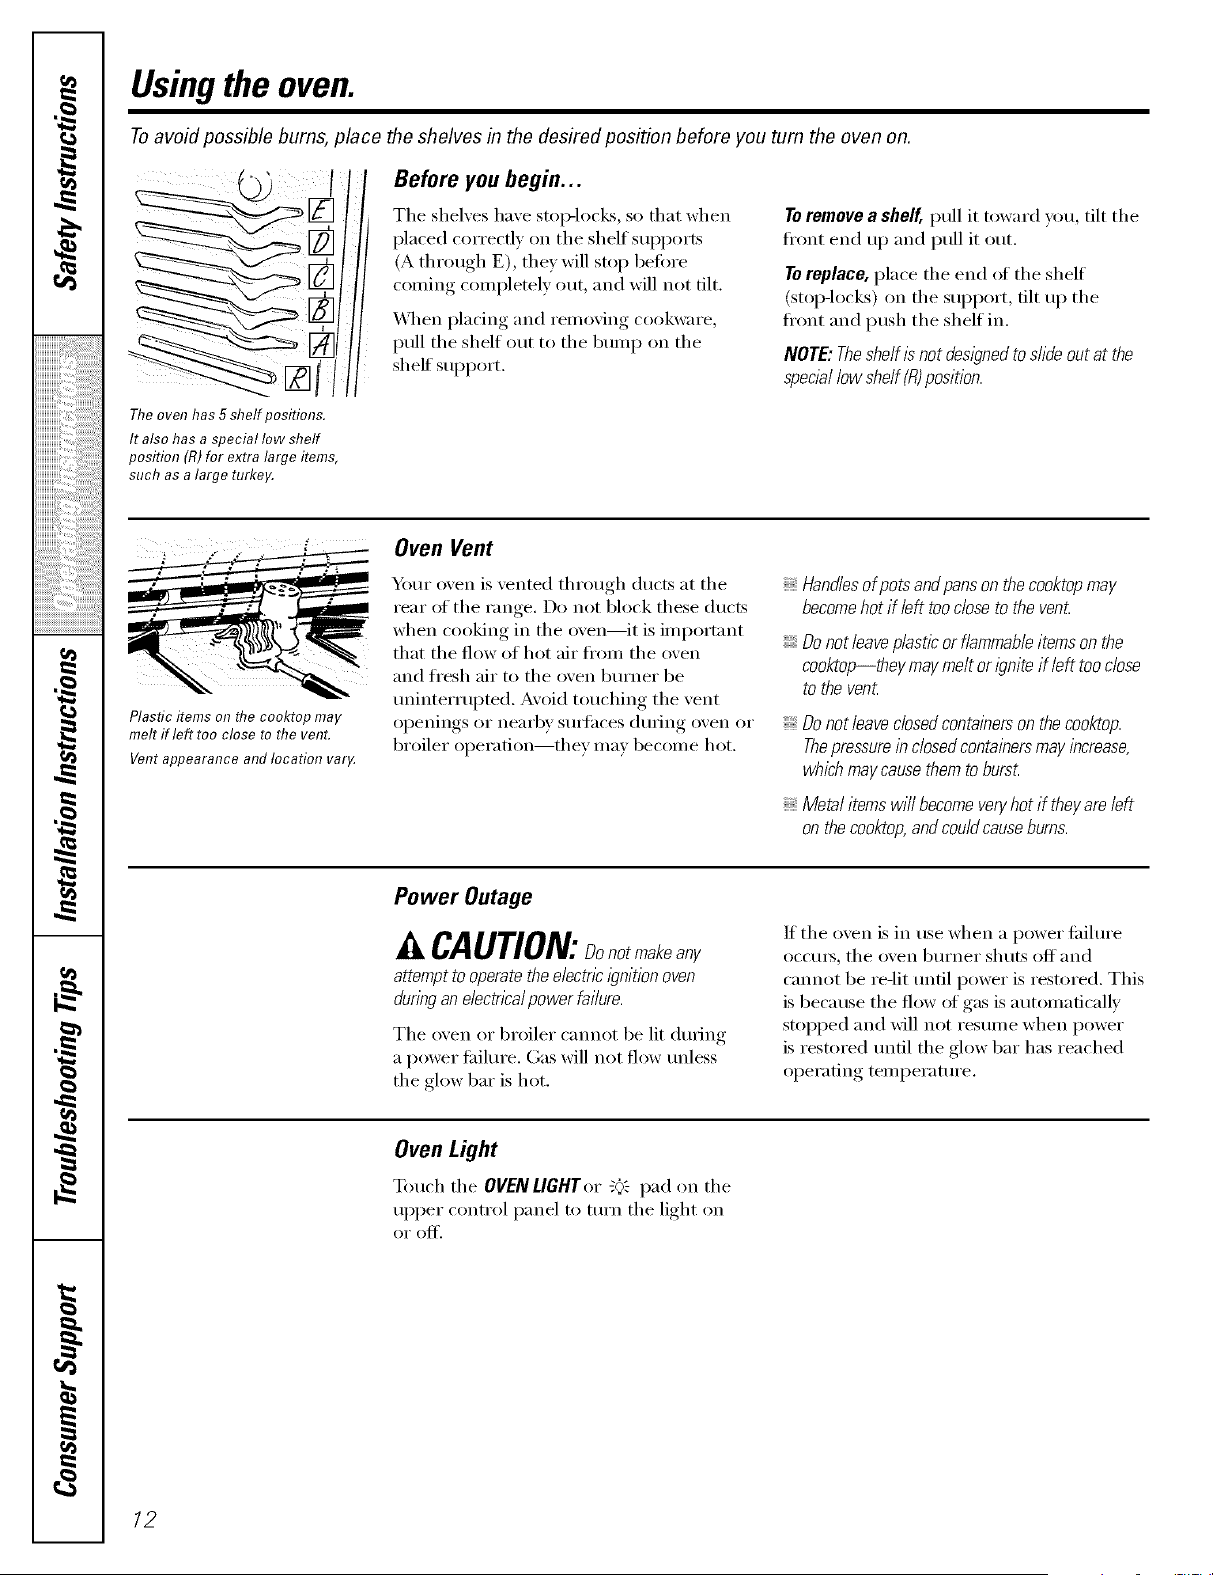
Usingthe oven.
Toavoid possible bums, place the shelves in the desired position before you turn the oven on.
Ttie oven has 5 stielf positions.
Before you begin...
Tile shelves have stoic-locks, so that when
I)laced correctly on tile shelf sui)ports
(A through E), they will stop beflwe
coming completely out, and will not tilt.
\,\lien placing and removing cookware,
pull tile shelf out to tile bum l) on tile
shelf SUl)po_t.
Toremove a shelf, pull it toward you, tilt tile
ti'ont end up and pull it out.
TOreplace, l)lace the end of the shelf
(stopqocks) on the sui)port, tilt up the
front and push the shelf in.
NOTE: Theshelf is not designed to slide out at the
special low shelf (R)position.
It also has a special low shelf
position (R)for extra large items,
such as a large turkey.
Plastic items on the cooktop may
melt if left too close to the vent.
Vent appearance and location var_
Oven Vent
Y()tu" oven is vented through ducts at tile
rear of tile range. Do not block these ducts
when cooking in the oven--it is important
that the flow of hot air fl'om tile oven
and fl'esh air to tile oven burner be
tminterrul)ted. Avoid touching tile vent
openings or nea_q_y stu_hces (lurh_g oven or
broiler operation--they may become hot.
Handlesofpotsandpanson thecooktopmay
becomehot if left toodose to thevenL
Donot leave plastic or flammableitems on the
cooktop--they maymelt or igniteif left too close
to the venL
Donot /eave c/osedcontainers on the cooktop.
Thepressurein c/osedcontainers may increase,
which may causethem to burs_
Metal items wi// become veryhot if theyare left
on thecooktop,and could causeburns.
Power Outage
k, CAUTION:Donotma eany
attempt to operate the electric ignitionoven
during an e/ectnca/power failure.
Tile oven or broiler cannot be lit during
a power fifihu'e. Gas will not flow unless
the glow bar is hot.
If tile oven is in use when a power tifihu'e
occ/]IS_ tile oven b/lI'neI" shtlts off and
cannot be re-lit until power is restored. This
is because tile flow of gas is automatically
stopped and will not resume when power
is restored until the glow bar has reached
operating temperature.
Oven Light
Touch tile OVEN LIGHTor "_" pad on tile
upl)er control panel to turn tile light on
oi" ()lc]_',
12
www.GEAppliances.coln
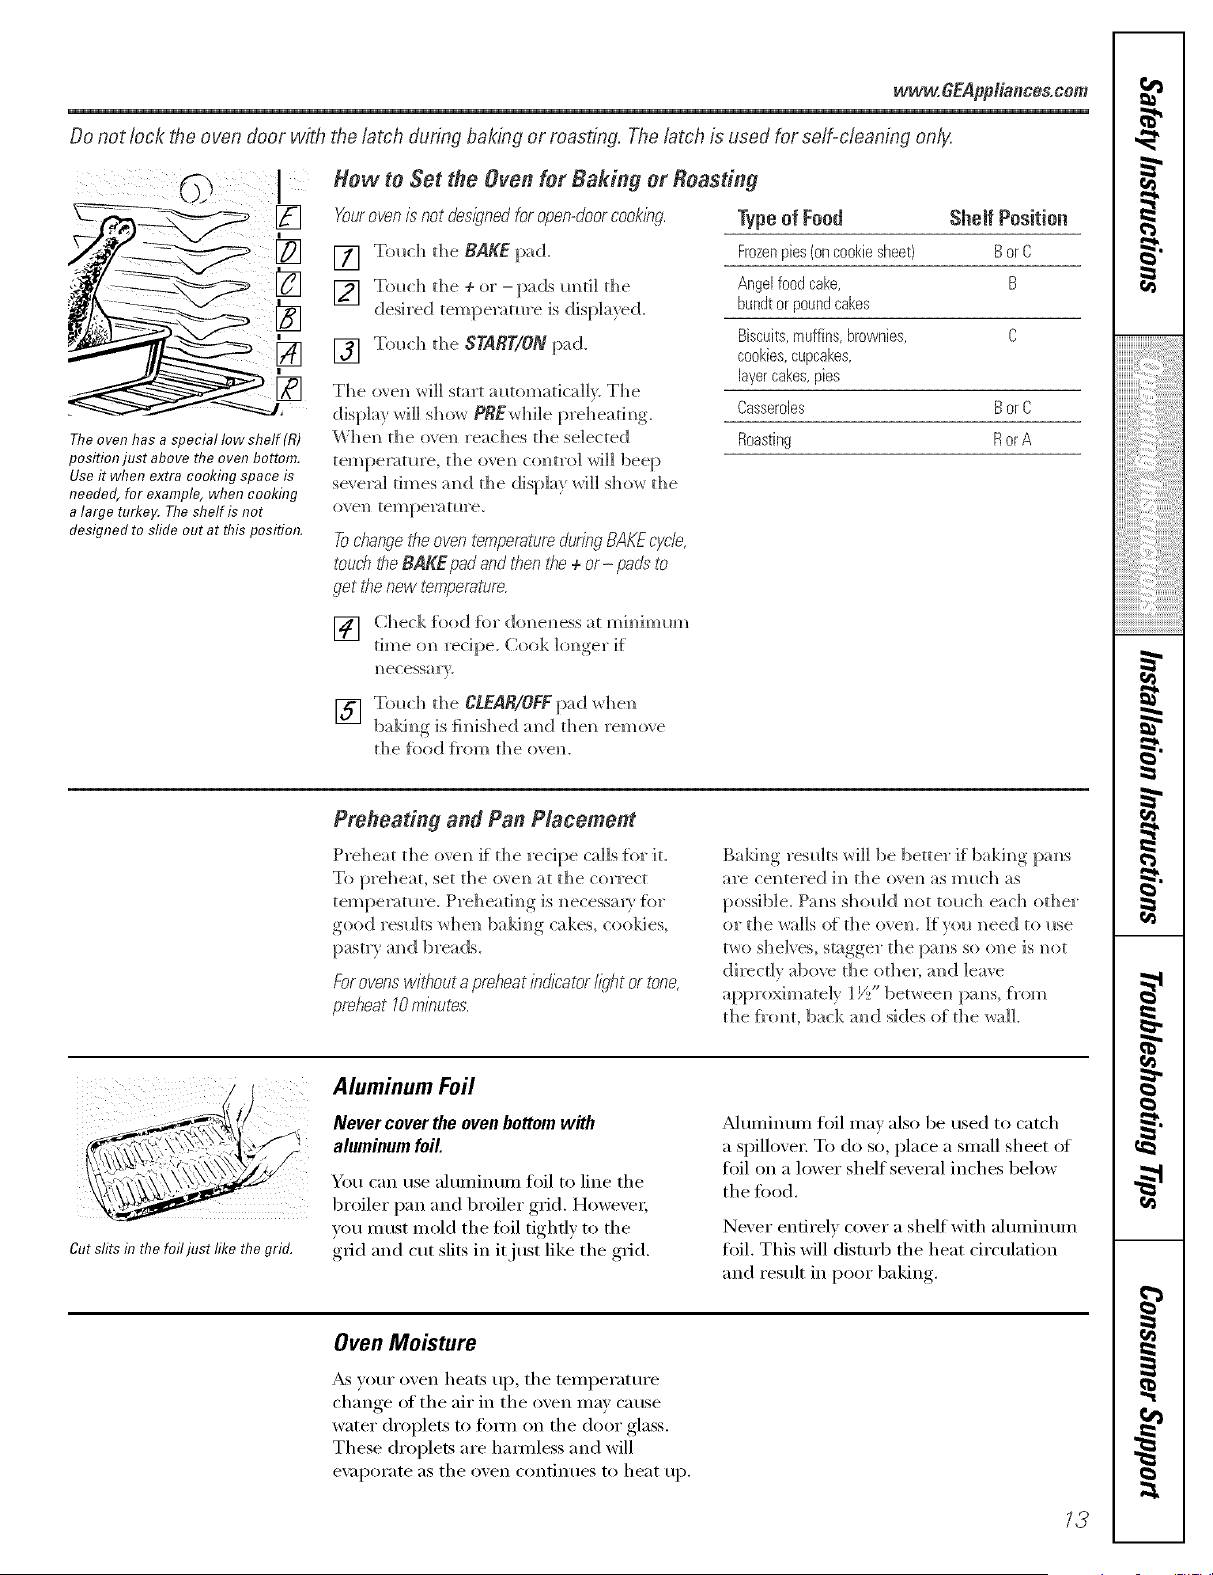
Do not lock the oven door with the latch during baking or roasting, The iatch is used for seif-cieaning on/y,
The oven has a special low shelf (R)
position just above the oven bottom.
Useit when extra cookhTgspace is
needed, for example, when cooking
a large turkey. The shelf is not
designed to sfide out at this position.
How to Set the Oven for Baking or Roasting
Yourovenis not designedfor open-doorcooking.
[] Tolmh d_e RAKE pad.
] Tota;h d_e ÷ o_" - pads m_d] d_e
desi_'ed tempe]_to.]'e is dis[:_]a)ed.
[] Tottch d_e START/ONpad.
The o_ en wi]] smx't at_tomadca]E. The
display _G]] show PRE]_h]]e iweheadm_g.
W]lel/the ovel/_'eaches the selected
tempeiatm'e, the ovem_ c(mt_'o] wi]] beep
sevex;d times and the disp]a wi]] show the
ove]/ tempe_'atm'e.
Type of Food Shelf PosRioa
Frozenpies (on cookie sheet) B or C
Angel food cake, B
bundt or pound cakes
Biscuits, muffins, brownies, C
cookies, cupcakes,
layercakes, pies
Casseroles B or C
Roasting R or A
Tochangethe oven temperatureduring BAKEcycle,
touch the RAKE pad and then #}e + or- pads to
get the new temperature.
[] C])eckfoodtbrdonem)essatmi])imm)).
t, me o]_ recipe. Cook ]o]_ger if
m)ecess_ ]'V.
[] Tottch d_e CLEAR/OFFpad whe_
ba]<.im]g is fim_ished amid then x'emove
the fk _d h "ore the oven.
Prefleating and Pan Placement
Ip_'e])eat the ovem) if the _'ecipe ca]Is {_w it.
To p]'eheat, set the o_em_ at the CO_Tect
tempe_tm'e. P_'e]]eafi_g is _ecessavv hw
good _'esuits _]]e]/ baki_/g cakes, cookies,
For ovenswif}out a preheat indicator light or tone,
preheat 10mlT_utes.
Balding ]'estl]ts w]]] be bettel" if bakh_g Ixms
al"e ce]_tel"ed 1_ the o\e_ as mt*(]_ as
possible. Pa_s shot*k] _ot tot*_h each other"
<)1"the _a]]s o{ die oven. Kvou ]/ee(] to rise
t_o s]]e]ves, stagge_" the [xms so <me is m)[
di_ecdv above the other; and leave
the f_'o_t, back a_d sides of the _a]].
ill _ ]_/ i/
Cut slits it?the foil just like the grid.
Aluminum Foil
Never cover the oven bottom with
aluminum foil
You can use a]uminum foil to line the
broiler pan and broiler g_id. Howexe_;
you must mold the foil tighfl} to the
grid and cut slits in it just like the grid.
_Muminum fl)il may also be used to catch
a spillove_: To do so, place a sma]l sheet ot
toil on a lower shelf several inches below
the food.
Never entirely cover a shelf with a]uminum
toil. This will distm'b the heat circulation
and result in poor baking.
Oven Moisture
_s vom" oven heats up, the temperatm'e
change of the air in the oven may cause
water droplets to titan on the door glass.
These droplets are hamfless and will
e\;q)orate as tile <)veil c<)iltiiltles t<) heat Ill),
13
,0
iiiiiiiiiiiii'?i_5:i:i:i:i:i:i:i:i:iii_ii_!i_!!
iiiiiiiiiiii_i!i!ii_ii_i_i_i_iiil;{i;_!!ii'_iiiiiiiiiii_iiii_i!}!i{i
iiiiiiiiiiiiiiiiiii iiiiiiiiiiiiiii ii, iiiiililililililililiiiiii ii i!il
,0
,0
q
m
Usingthe oven.
Do not lock the oven door with the latch during broiling. The latch is used for self-cleaning only.
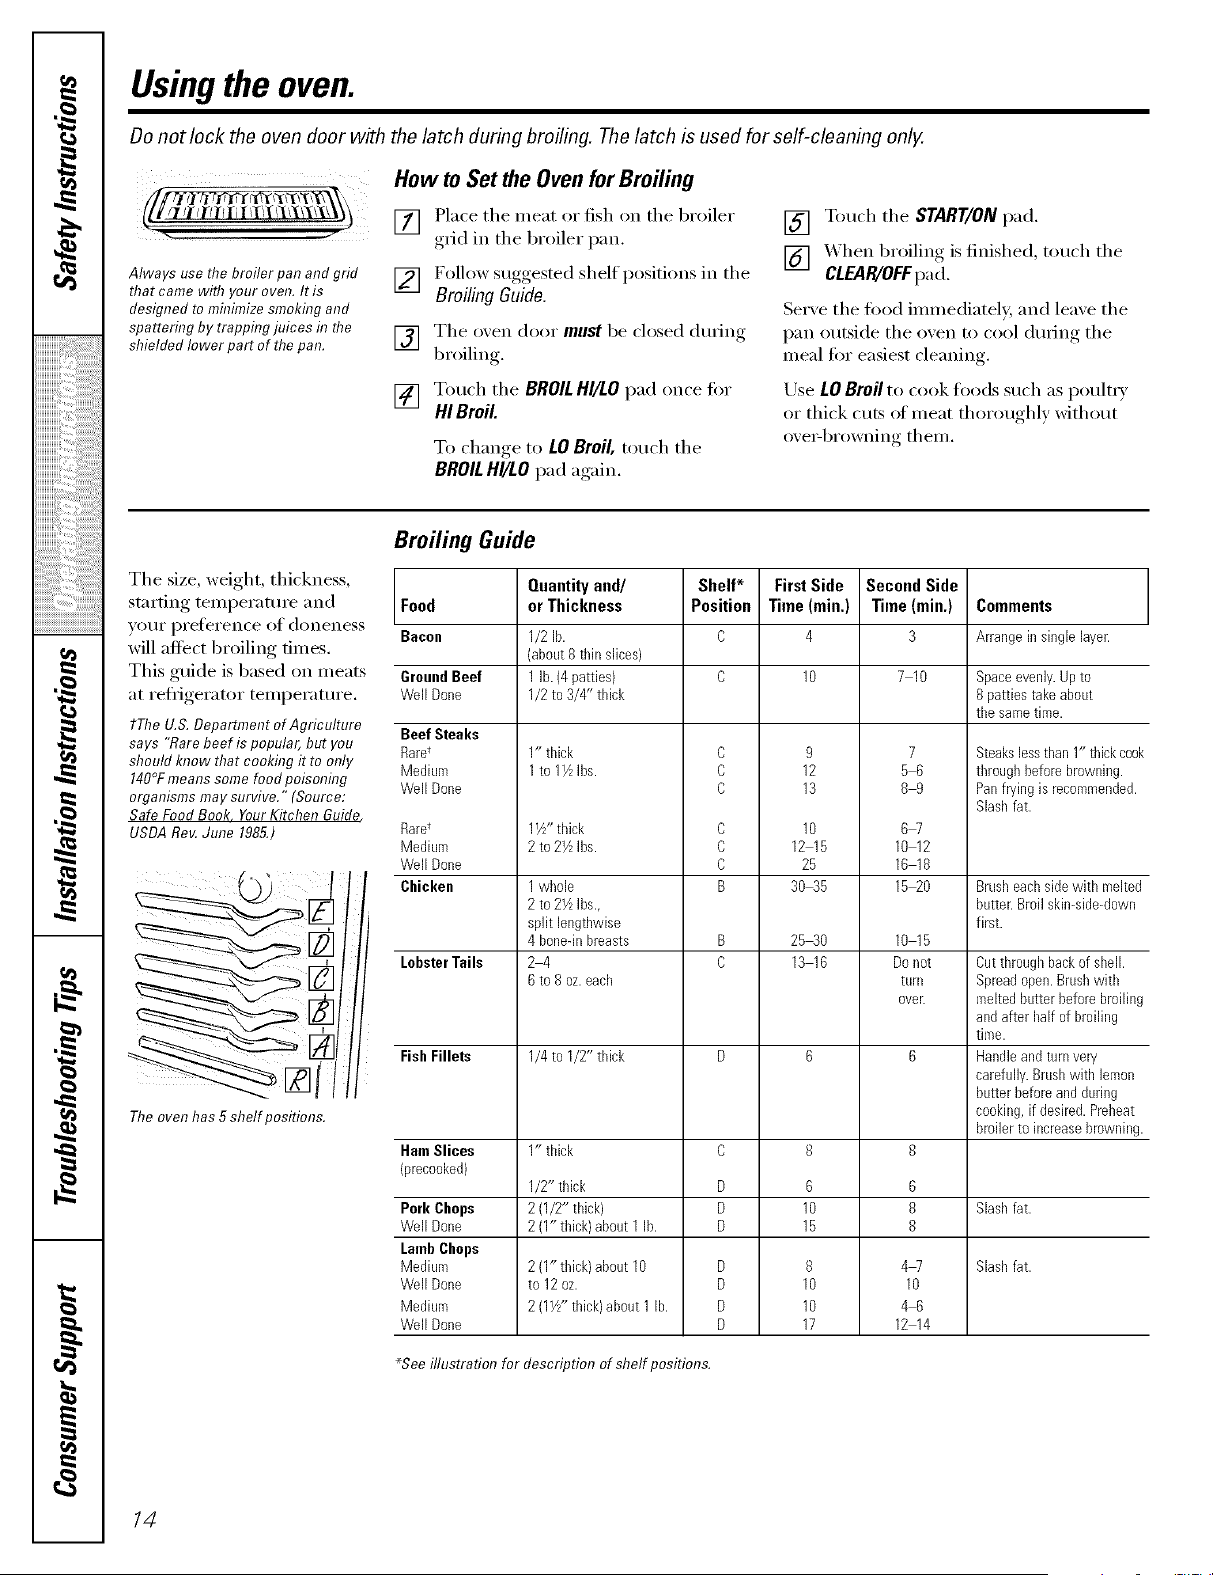
i¸/f_,,rx,_,
-. ,,i
Always use the broiler pan and grid
that came with your oven. It is
designed to mh#mize smokhTgand
spattering by trapphTgjuices h7the
shielded lower part of the pan.
How to Set the Oven for Broiling
[] Place the meat or fish on the broiler
grid in the broiler pan.
[] Follow suggested shelf positions in the
Broiling Guide.
[] The oxen door must be closed during
br_ filing
[] Touch the BROIL HI/LO pad once fi)r
HI Broil.
To change, to LO Broil, touch the
BROIL HI/LO pad again.
[] Touch the START/ON pad.
[] _'_hen broiling is finished, touch the
CLEAR/OFFpa d.
Serve the lood immediatel}; and leave the
pan outside the oven to cool during the
meal fi)r easiest cleaning.
Use LO Broil to cook fi_ods such as poult U
or thick (tits ot nleat thoroughly without
)x'e>browning tit era.
Broiling Guide
The size, weight, thickness,
starting temperature and Food
_OtlI" pi'e_ei'en(e o_' aloneness Bacon
will affect broiling times.
This guide is based on meats GroundBeef
at refligerator temperature. Well Done
tThe U.& Department of Agriculture Beef Steaks
says "Rare beef is popular, but you RarU
should know that cooking it to only Medium
140°Fmeans some food poisonhTg Well Done
organisms may survive." (Source:
Safe Food Book Your Kitchen Guide
USBA Rev. June 1985.)
The oven has 5 shelf positim?s.
RaW
Medium
Well Done
Chicken
LobsterTails
FishFillets
HamSlices
"_recooked)
Pork Chops
Well Done
LambChops
Medium
Well Done
Medium
Well Done
Quantityand/
or Thickness
1/2 lb.
(about 8 thin slices)
1 lb. (4patties)
1/2 to 3/4" thick
1" thick
1 to lYz Ibs.
1W' thick
2 to 2YzIbs.
1 whole
2 to 2VzIbs.,
split lengthwise
4 bone-inbreasts
24
6 to 8 oz.each
1/4 to I/2" thick
1" thick
1/2" thick
2 (1/2" thick)
2 (1" thick) about 1 lb.
2 (1" thick/about 10
to 12 oz.
2 (11//'thick)about 1 lb.
Shelf*
Position
C
C
D
C
C
C
B
D
D
D
D
D
D
D
First Side
Time (rain.)
4
9
12
13
10
12 15
25
3045
25 3O
13 16
6
10
15
8
10
10
17
Second Side
Time (rain.)
3
7 10
7
56
89
OW
10 12
10 18
15_0
10 15
Do not
turll
ovelt
6
8
8
4W
10
46
12 14
Comments
Arrange in single layer.
Space evenly. Up to
8 patties take about
ti_e same time.
Steakslessthan 1" thickcook
through before browning.
Panfrying is recommended.
Slashfat.
Brusheach sidewith melted
butter.Broil skin-side-down
first.
Cutthrough backof shell.
Spreadopen.Brushwith
melted butter before broiling
and after half of broiling
time.
Handleand turn very
carefully. Brushwith lemon
butter beforeand during
cooking, if desired. Preheat
broilerto increasebrowning.
Slashfat.
Slashfat.
_Seeillustration for description of shelf positions.
14

Usingthe clock and timer, vvww.GEAppliances.com
Not all features are on all models.
@
Make sure the clock is set re me
correct time of daF
ToSet the Clock
The clock must be set to tile correct time
ot (la_ fin" tile auton/afic oven timin_
functions to work properly: Tile time of day
emmet be chan_ed durin_ a delayed
cookin_ or a delayed selfk'leanin_ cycle.
[] Tl>uch tile CLOCKpad i_vice,
] T(>uch tile ÷ (>r - pads.
/f tile ÷ or - pads are not touched within
one minute atter w)u touch tile CLOCKpad,
the display reverts to the i)fi_inal setting.
/f this happens, touch the CLOCK pad twice
and reenter tile time of day.
[] Touch the START/ON pad until the
time of day shows in the display. This
entet_ the time and starts the clock.
Tocheckthetitheof daywhenthedisplayis
showingotherinformation,sl_nplytouchthe
CLOCKpa_ Thetimeof dayshowsuntilanother
padis touched
To Turn Off the Clock Display
If you have several ('lock_ in veto" kitchen,
you may wish to mrn off the time of day
clock display on veto" range.
[] Touch the CLOCKpad once to turn
off the time of day display. Mthough
you will not be able to see it, the clock
maintains the correct time of da_:
[] Touch the CLOCKpad twice to recall
the clock display.
iii i
The timer is a minute timer onl_
The CLEAR/OFFpad does not affect
flTetime_
To Set the Timer
The t_Ynerdoes not control ovenoperations.
Themaximum setting on the timer is 9 hours
and 59 minutes.
_] Touch the KITCHENTIMERON/OFFor
TIMERON/OFFpad.
[] Touch the + ()r-pads tmtil the
aillotlnt of tiIlle VOtl want shows in
the display. The maximmn time that
can be entered in mimKes is 59.
Times more than 59 minutes should
be changed tl) hom_ and minutes.
If youmakeamistake,touchtheKITCHENTIMER
ON/OFFor TIMERON/OFFpadandbeginagain.
[] Touch the START/ON pad. The time
will start counting down, although
the display does not change until one
minute has passed.
[] X._q_enthe timer reaches .'/70,the
control will beep 3 times followed b_
one beep e\'e_ T 6 seclmds tmtil the
KITCHEN TIMER ON/OFF or TIMER
ON/OFFpad is touched.
15
,0
Ca
iiiiiiiiiiiii'?i_i:_:i:i:i:i:i:i:i:i:i;i;i_ii_!!i_!!
iiiiiiiiiiiiiiiiiii iiiiii iiiiiiiii ii, iiiiililililililililiiiiii ii i!il
,0
Usingthe clock and timer.
Not all features are on all models.
@
#£
Or
"° @
ToReset the Timer
If tile display is st.ill showing tile time
remaining, you may change it by touching
tile KITCHEN TIMER ON/OFFor TIMER
ON/OFFpad, then touch tile + or-pads
until tile time y(m want appea_ in tile
display:
If tile remaining time is not in tile display
(clock, start time or cooking time are in
the display), recall the remaining time by
touching the KITCHEN TIMER ON/OFF or
TIMER ON/OFFpad and then touching the
4-0I" --pads to entei" tile new tillle vi)tl want,
To Cancel the Timer
Touch tile KITCHEN TIMER ON/OFF
or TIMER ON/OFFpa d twice.
End of Cycle Tones (onsomemodels)
Clear tile tones by pressing tile pad of tile
tHnction VOt/aI'e rising.
q
#.
Power Outage
If a flashingtl_neis in thedisplay,youhave
expefienceda powerfailure.ResettheclocL
16
To reset tile clock, touch tile CLOCKpad.
Enter tile correct time ot day by touching
tile + or-pads. Touch tile START/ONpad.
Usingthe timed baking and masting features, www.GEAppliances.com
Do not lock the oven door with the latch during timed cooking• The latch is used for self-cleaning only.
NOTE."Foods that spoil easilyISUCh as milk, eggs, fish, stuffings, poultry and porkIShould not be allowed to s# for
more than 1hour before or after cooking. Room temperature promotes the growth of harmful bacteria. Be sure that
the oven light is off because heat from the bulb will speed harmful bacteria growth.
How to Set an Immediate Start and Automatic Stop
Theoven wi// turn on immediatelyand cook for a [] Touch tile START/ON pad.
selected length of tl_ne.At the end of the cooking
time, the oven will turn off automatlcal/y Tile displa) shows either the o'_en
[] Touch tile BAKE pad.
] Touch the + or -pads to set the
o_,en [eI/l pei'at/li'e.
[] Touch tile COOKING TIME pad.
NOTE."If your recipe requirespreheating you may
need to add additional time to the length of the
cooking time.
] Touch the + or _ l)ads to set the
• r "
baking tune.
The cooking time that )ou entered will be
displayed. (If _ou, select Cooking, Time fi_st
and then a@_st the Bake Temperatm'e, the
oxen teml)eratm'e will be displayed instead).
temperatm'e that you set or tile cooking
time co/mtdown. (Tile display starts with
PREif showing tile oxen temperature.)
Tile oxen will continue to cook ti/r tile
programmed anl(lunt of fin/e, then turn
off automaticallv.
[] Touch tile CLEAR/OFFpad to clear
tile displa) if necessax_'.
Removethe food from the oven. Remember,even
thoughthe oven shuts off automatically, foods
continue cookingafter controls are oK
%
@
@
How to Set a Delayed Start and Automatic Stop
Theoven wi// turn on at the time of day you set,
cook for a specihclength of time and then turn off
automatically
Make sm'e tile clock sho_:s tile correct
time oI day:
[] Touch tile BAKE pad.
] Touch tile + or -pads to set tile
oven telllpei'att ii'e.
[] Touch tile COOKING TIME pad.
] Touch tile + or -pads to set tile
desired length of cooking time.
[] Touch tile START TIMEpad.
] Touch the + or _ i_ads to set the tim e
(If (la_ _()/I want tile ()_ei1 to ttlI'n on
and start cooking.
[] Touch tile START/ON pad.
NOTE: If vou would like to check tile times
vou have set, touch tile START TIME pad to
check tile start time vou have set or touch
tile COOKING TIME pad to check tile length
of cooking time you have set.
When tile oven ttlrns (Ill at tile time ot day
you have set, the display will show PBE tmfil
it reaches tile selected temperature, then it
will display tile oven telnl)erature.
At tile end of cooking time, tile oven
will turn oH and the end of cycle tone
will so/md.
[] Touch tile CIEAB/OFFpad to clear
tile displa) if necessax_'.
Removethe food from the oven. Remember,even
thoughthe oven shuts off automatically, foods
continue cookingafter controis are off.
NOTE."Anattentiontonewi//soundif youareusing
tknedbakingand donot touchtheSTART/ONpad
/7
,0
iiiiiiiiiiiii_::i_'i_ii?i:i:i:i:i:i:i:i:ilili_ii_!!i_!!
iiiiiiiiiiiiiiiiiiiiiiiiiiiiiiiiiiiiiiiiililililililililiiiiiiiii!ill
,0
,0
q
m
Special features of your ovencontrol
Yournew touch pad control has additional features that you may choose to use. The following are the features and
how you may activate them.
The special feature modes can only be activated while the display is showing the time of day. They remain in the
control's memory until the steps are repeated.
When the display shows your choice, touch the START/ON pad. The special features will remain in memory after
a power failure.
NOTE,"The Sabbath feature and the Thermostat Adjustment feature are also Special Features, but they are addressed
separately in the following sections.
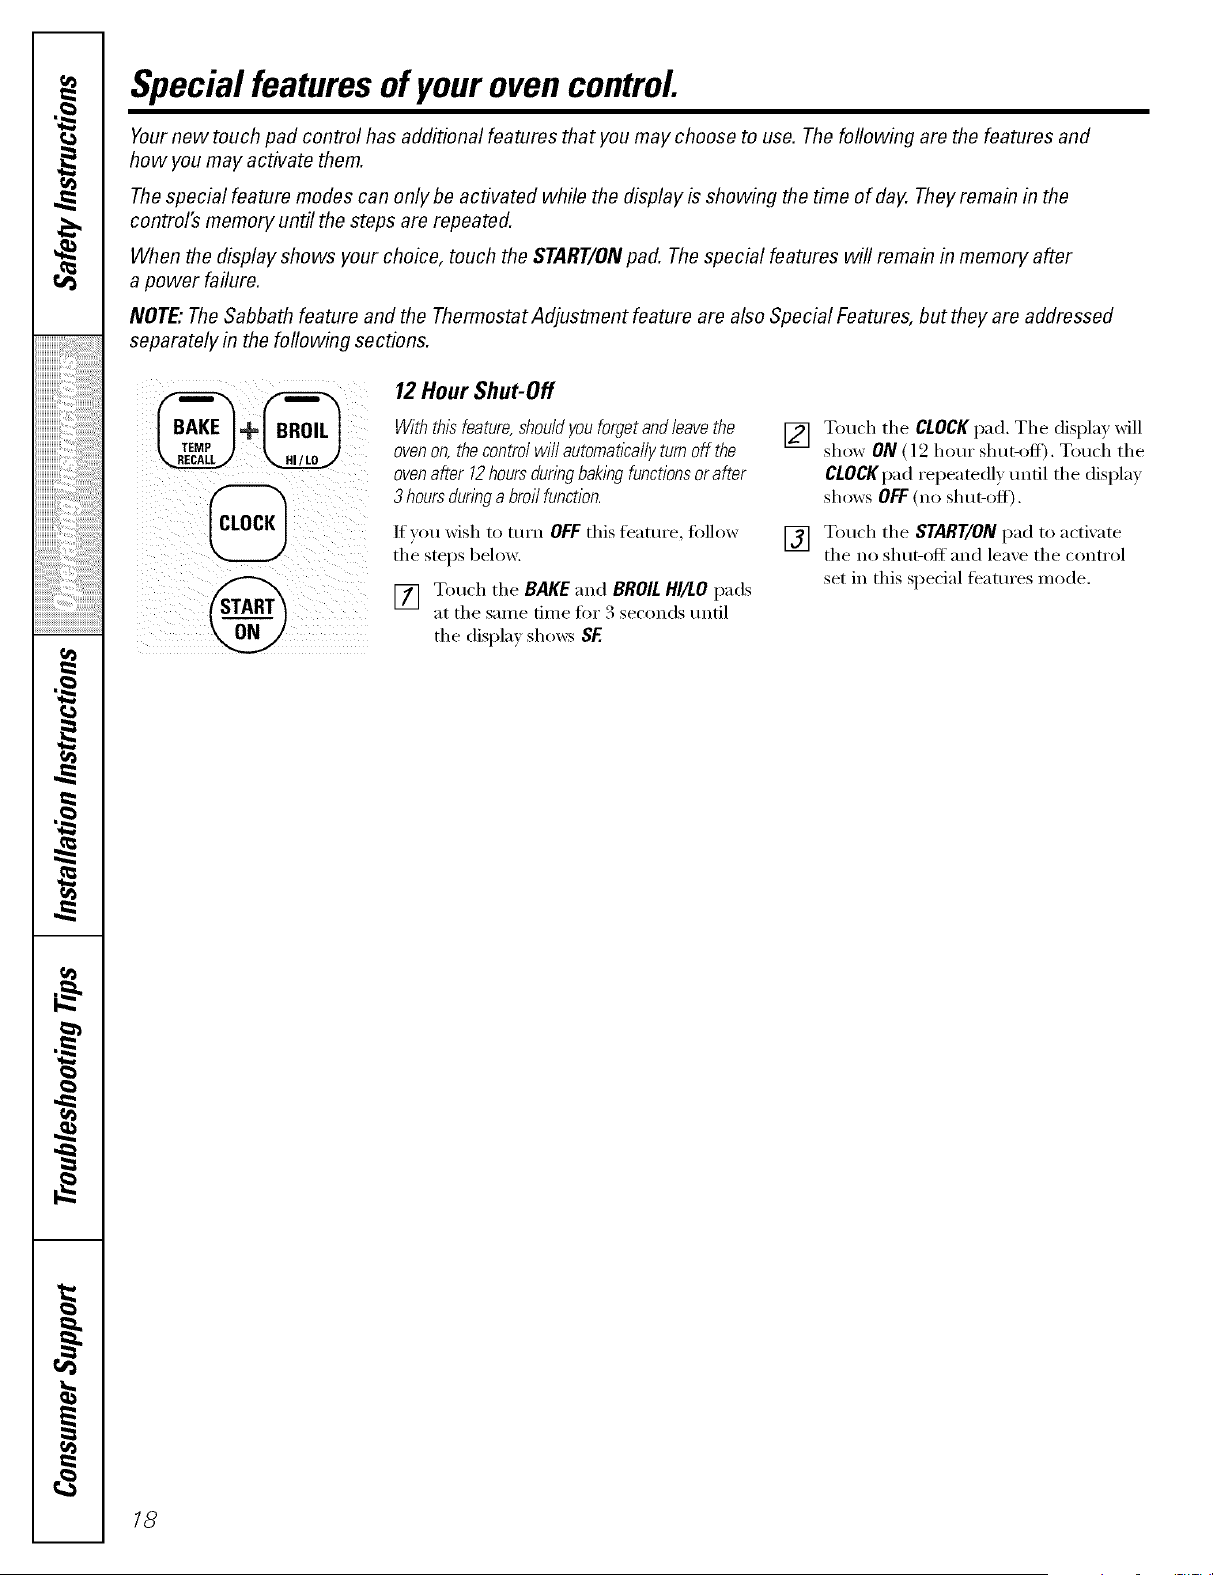
12 Hour Shut-Off
Withthisfeature,shouldyouforgetandleavethe
ovenon,thecontrolwill autornatlcallyturnoff the
ovenafter 12hoursduringbakingfunctionsorafter
3 hoursduringa broilfunction.
Ifyou wish to mrn OFF this teattlI'e, fi)llow
the stops belong:
Touch the BAKE and BROILHI/LOpads
at the same time tot 3 seconds tmtil
the display sho_:s SE
[] Touch the CLOCK pad. The displa) will
show ON ( 12 hour shut-off). Touch the
CLOCKpad repeatedl)tmtil the display
shows OFF(no shut-off).
[] Touch the START/ON pad to actixate
the no slmt-off and leaxe the control
set in this special teamres mode.
18
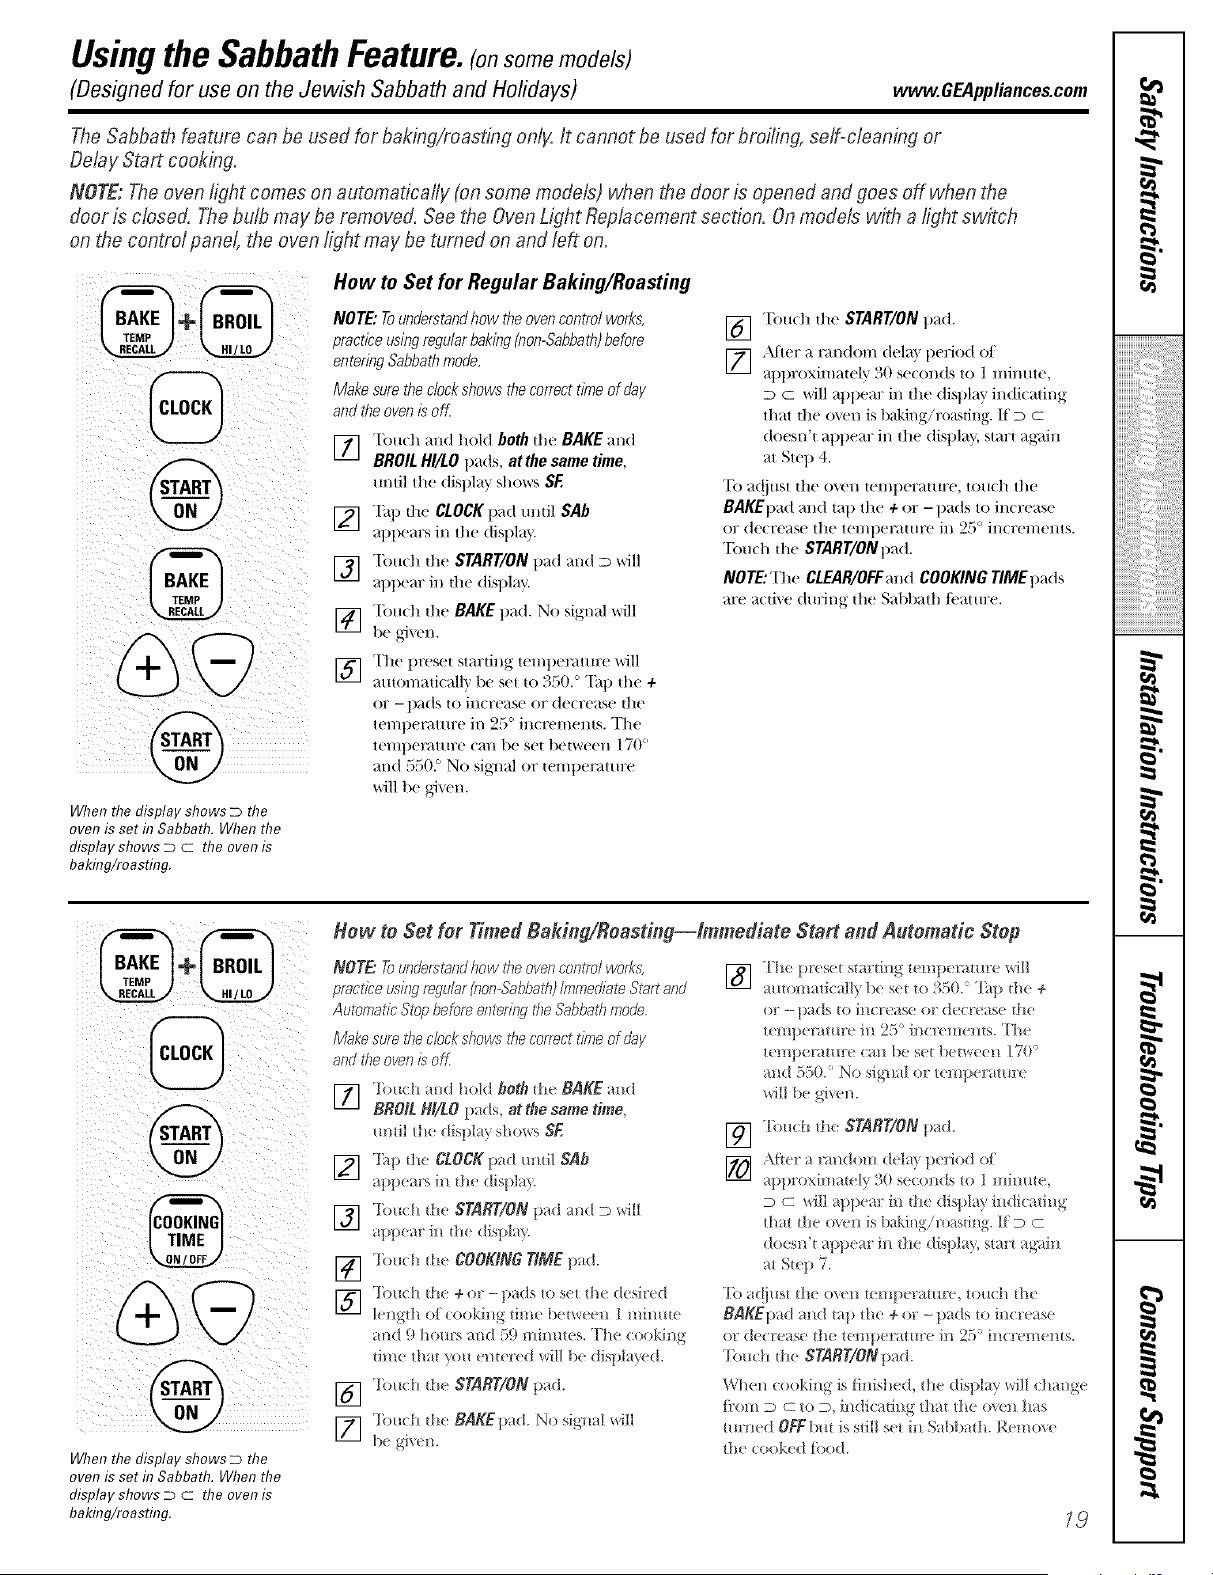
"-'--usingthe SabbathFeature.(onsomemedels)
(Designed for use on the Jewish Sabbath and Hofidays) www.GEAppliances.com
The Sabbath feature can be used for baking/roasting only, It cannot be used for broiling, serf=cleaning or
Delay Start cooking.
NOTE: The oven fight comes on automatically (on some models) when the door is"opened and goes off when the
door is cbsed. The bulb may be removed. See the Oven Light Replacement section. On models with a light switch
on the control pane!, the oven ,light may be turned on and left on.
When the display shows D the
oven is set in Sabbath. When the
display shows D c the oven is
baking/roasting.
How to Set for Regular Baking/Roasting
NOTE: To understand how the oven control works,
practice using regular baking (non-Sabbath)before
entering Sabbath mode.
Make sure the clock shows the correct time of day
and the oven is oft
] "['ou(h and hold both the BAKE and
BROIL HI/LO pads, at the same time,
m/til the display shov,rs SF
] Tap die CLOCK pad mltil SAb
appears in the (tistlla }
] Tou(h die START/ON pad mid D will
at)tlem: in the (tisp1;_y'.
] "[bu(h die BAKE pad. No signal will
be gJ'_ el/,
] The preset starting tempemttu:e "_,41l
a/ltomatieallv be set to 35(t. ° Tap the 4-
or - pads to increase or decrease the
temtlenmu:e in 25 ° increments. The
tempel_mu:e call be set between 170 °
and 550. ° No signal or temperature
will be gJ_vn.
[] Touch die START/ON pad.
[_ JJier a ran(tom dell} period ot
_tt)t)l oxilIlately _{0 se(ollds to ] n/illllte,
D C will appear ill tile display in(ticadng
that tile (l_m is baking/raw,sting. If D c
doesn't at)pear in tile display, start ag'ain
at Step 4.
"Ik) a(!iust tile oven temperaulre, touch tile
BAKEllad and tall tile 4- or - llads to increase
or decrease tile tel/ltler_tllll'e ill 2.'_ ° incyel//ents.
"Ibuch tile START/ONpad.
NOTE: Tile CLEAR/OFFand COOKING TIME pads
are a(tive (huJng the Sal)llath/i.'atlll:e.
@
@
@
When the display shows D the
oven is set in Sabbath. When the
display shows D c the oven is
baiting/roasting.
Hew te Set for Timed Baking/Roasting--Immediate Start and Automatic Step
NOTE..To u;}de_sta/Whow the oven control works,
praelfce using r_dular (non-Sabbath)Imm_,dial_ Start and
Adomatic Stop before entedng ffTeSabbath mode
Mak__,sure ff?eclock shows the correct time of day
and the ovenis oft
] 'lbuch m_d hokl both tht BAKE aml
BROIL Ht/tO pads, at the same time,
m/IiI tim dist)l /} sll(ms SF
] T,_p the CLOCK lind m/til SAb
appem's in till displa}
] 'll)/_(:ll tilt: START/ON pad md D will
appear in the dist)I;f }.
[_] ']bu(:]! tb COOKING TIME p_(I.
] 'lilu(:h th( + or-!l;_(Is to s(t tl/t d(sired
le_/gth of cookhlg til//e b( tweel_ I l/Ill/life
and 9 ilours md 59 mimlt(s. T[I( (:ookil/g
/i///t ti/}[I _o/I (lit( I'ed WiN !)e dispI / ed.
] 1_)uchtile START/ONpad.
] rl(liI(:h [h( BAKEpId. No sigmll ',','ill
!)( ,_J'_ (!l/.
] Th_ pres(t starting t(mplratm'e vdll
mt(lmati(: Jl? l/t s(t to 350. '[_ap tl/e +
Of -- l)_(/S [(t i!lcle_lge Of de( ['e;i54' tit('
tem!)er4tm'e ill 25 )incr(.me_ts. The
tempermur_ (:all be set betweei_ 170"
and 550. _No sig_ d <)r temt)er m_re
wiI! be given.
] 'l'o_ct_ tb START/ON t)_d.
] \l_er _ m_(iom (hi/? plriod of
appro;dmat(I?, 30 se(on(ls t(t / mimlt(,
m c _dlI q)i/ear i_! tile di_,i)k* indi(ming
tllat the o\en is b &ingiroasti_g. lid c
doesn't app_/r ill tim display, start ag'4il_
at Step 7.
'I]) _di//S[ th( ()'_( II t_illper _t/H'e, tol/(h tile
BAKEpid md tap tile + or - p_ds to i_crease
or decrease th( tel//l)erAtt/['e ill 2[5 ° i}/(:['el!/el/ts.
'['o_lch the STARL'ON pad.
When cooking is 5nished, the dispb} will (:hm_ge
{_(lmm c to m, indicatJ_'_g that tlle (>ver_has
tu['ned OFFlint is stiI! set i_/S/bb _th. Remo'_e
tl/e cooked [i)od.
18
,O
iiiiiiiiiiiii,::i_,i_iii_:i:i:i:i:i:i:i:i:ilili_ii_!!i_!!
iiiiiiiiiiii_ii!ii!ii_ii;;i_iiil;_ii;_!)i'_%iiii_i!)!i{i
iiiiiiiiiiiiiiiiiii iiiiiiiiiiiiiii ii iiiiililililililililiiiiiiii i!il
,O
,0
q
m
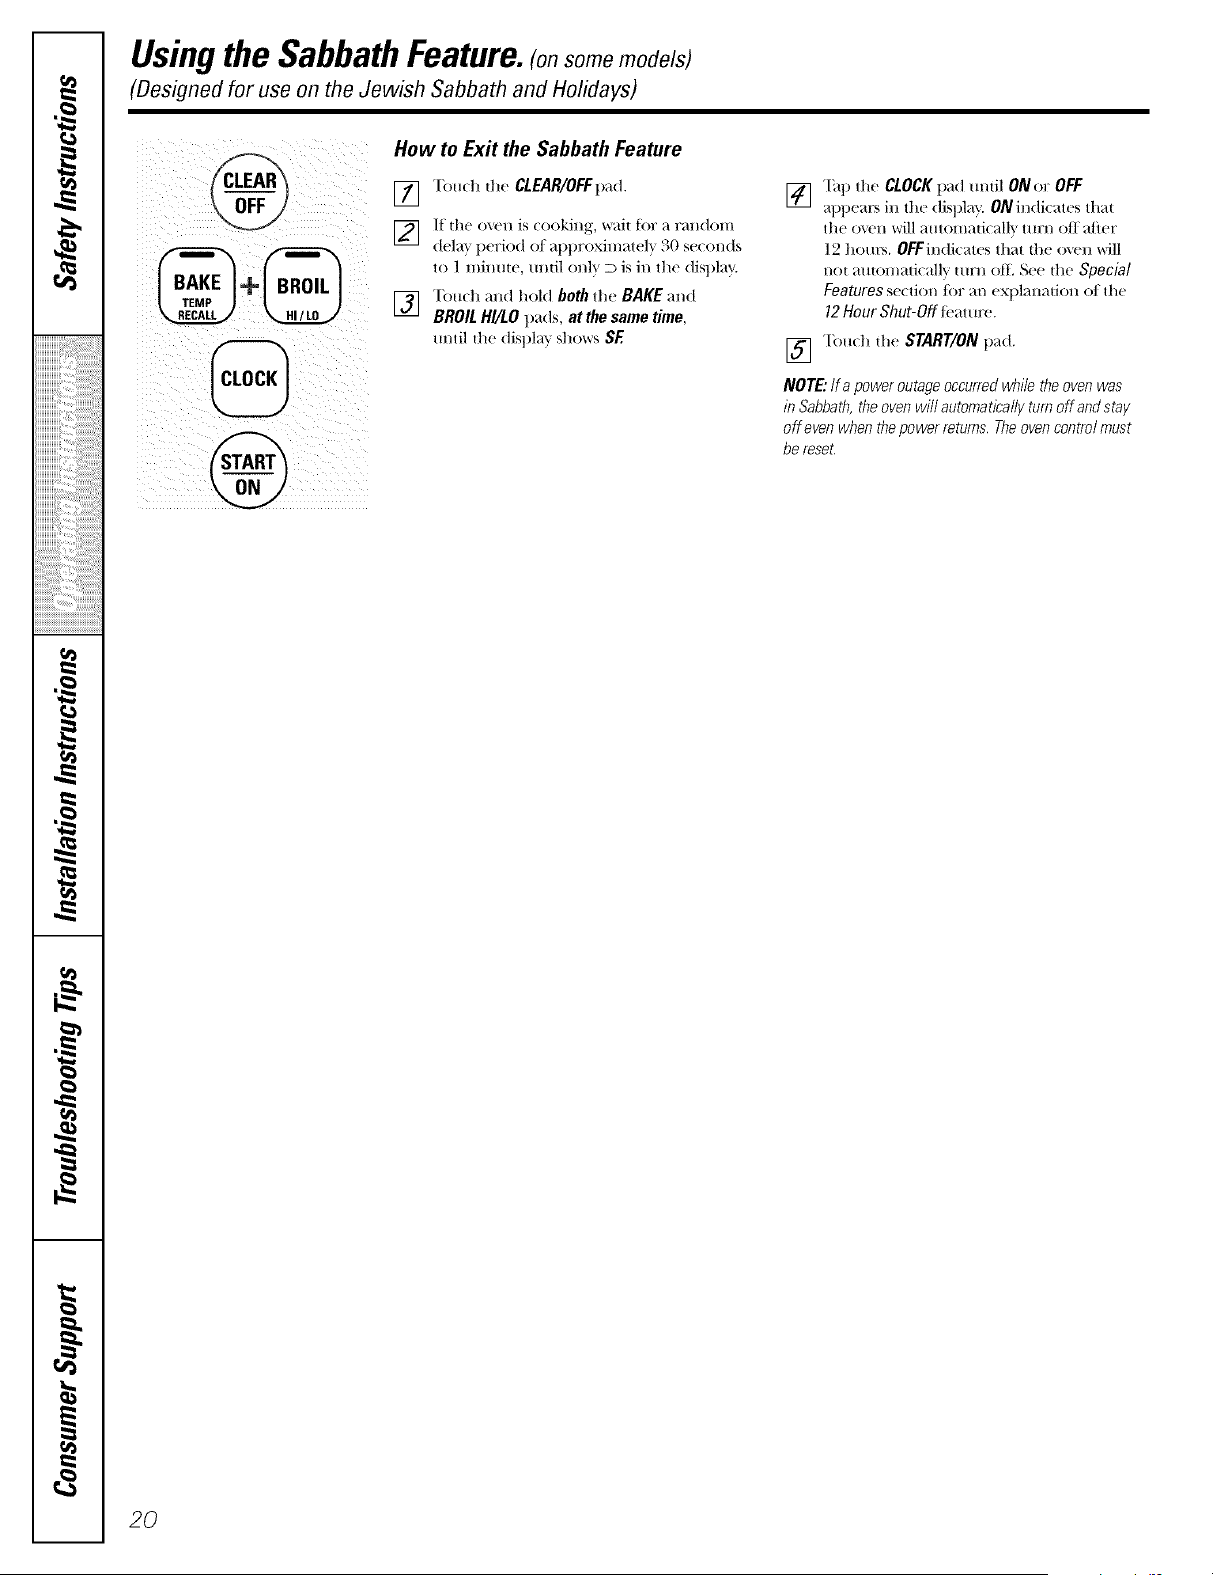
"-'--usingthe SabbathFeature.(onso emodels)
(Designed for use on the Jewish Sabbath and Holidays)
How to Exit the Sabbath Feature
[] "[bu(h die CLEAR/OFFt)ad.
] if | h(_ o. (?11 is ( ookin_., wai| t))l_ ;.i l_.d ldOll 1
dela} period at approximatel_ 30 se(onds
to 1 minute, until onl'_ D is in the display.
] "[buch and hold both the BAKE and
BROIL HI/LO pa(ls, at the same time,
tmtil die display shows SE
20
] "[_t ) the CLOCK pad m_dl ON or OFF
appears ill the disl)lay. ON indi(ates that
the o_'n will automaucalh turn off after
12 hem's. OFFindicates that the (wen will
not automatically turn ale See the Special
Features section/or an exl)lanadon of the
12 Hour Shut-Off/bat ure.
] Touch the START/ON pad.
NOTE: If a power outage occurred while the oven was
in Sabbath, the oven will automatically turn off aed stay
off evee when the power returns, The oven coetro/ must
be reset.

Adjust the oven thermostat--Do it Fourseifl
Youmay find that your new oven cooks differently than the one it replaced. Use your new oven for a few weeks to
become more famffiar wi_tl it. If you still think your new oven is too hot or too cold', you can adjust the thermostat yourself.
Do not use thermometers, such as those found in grocery stores, to check the temperature setting of your oven.
These _herrnometers may vary 20-40 degrees.
NOTE: This agiustment will not affect _hebroiling or the self-cleaning temperatures. The adjustment will be retained
in memory after a power failure.
+
%
To Adjust the Thermostat
[] Touch d_e SAKE al_d SROILBI/LO pads
at the same dine _in" 2 seconds m_ti]
the display S]_<)_ rs SE
[] Touch d_e SAKE pad. _ two digit
m_I m_ bet shows i m_the <lisp]a).
[] The oven tempe_m_re cam_be a(!il_sted
Iq:_to (+) 35°F hotter or (-) 35°F
coo]el; Tolmh the + pad to hlcrease the
tempel_mlre h_ ] degree h_creme_ts.
Tol_ch the -pad to decrease the
temperature im_I degree im_crements.
[] \'_'heml }ou I/ave made the a(!jl_stmellt,
tol_ch the START/ONpad to go back to
the tim e (If day disp]ay. [Jse )o I_r (wen
_tS _oI0 wol0]d m?t)I"_??i]]]v,
NOTE."Thisa@stment will not affect ti_ebro/I/7_q
or se/f-c/eaning temperatures.It will be retained
in memoryafter a power fa/Tum.
Thetype of margarine will affect baking performanc!!
Most recipes for baking have been developed using high fat products such as butter or margarine (80% fat). If you
decrease the fat, the recipe may not give the same results as with a higher fat product.
Recipe failure can result if cakes, pies, pastries, cookies or candies are made with low fat spreads. The lower the fat
content of a spread product, the more noticeable these differences become.
Federal st;mdards require products labeled "margarine" to contain at least 80% fi_t by weight. I,ow fi_t spreads, (m the
other hand, contain less tht and more water: The high moisture c(mtent (ff these spreads aft_'cts the texture and flavor
of baked goods. For best results with umr old thvofite recipes, use mmgafine, butter or stick spreads c(mtaining at least
70% vegetable oil.
2/
,O
iiiiiiiiiiiiiiiiiii iiiiiiiiiiiiiiiiiiiiiililililililililiiiiiiiii!il
,O
,0
-€
q
r.a?x
m
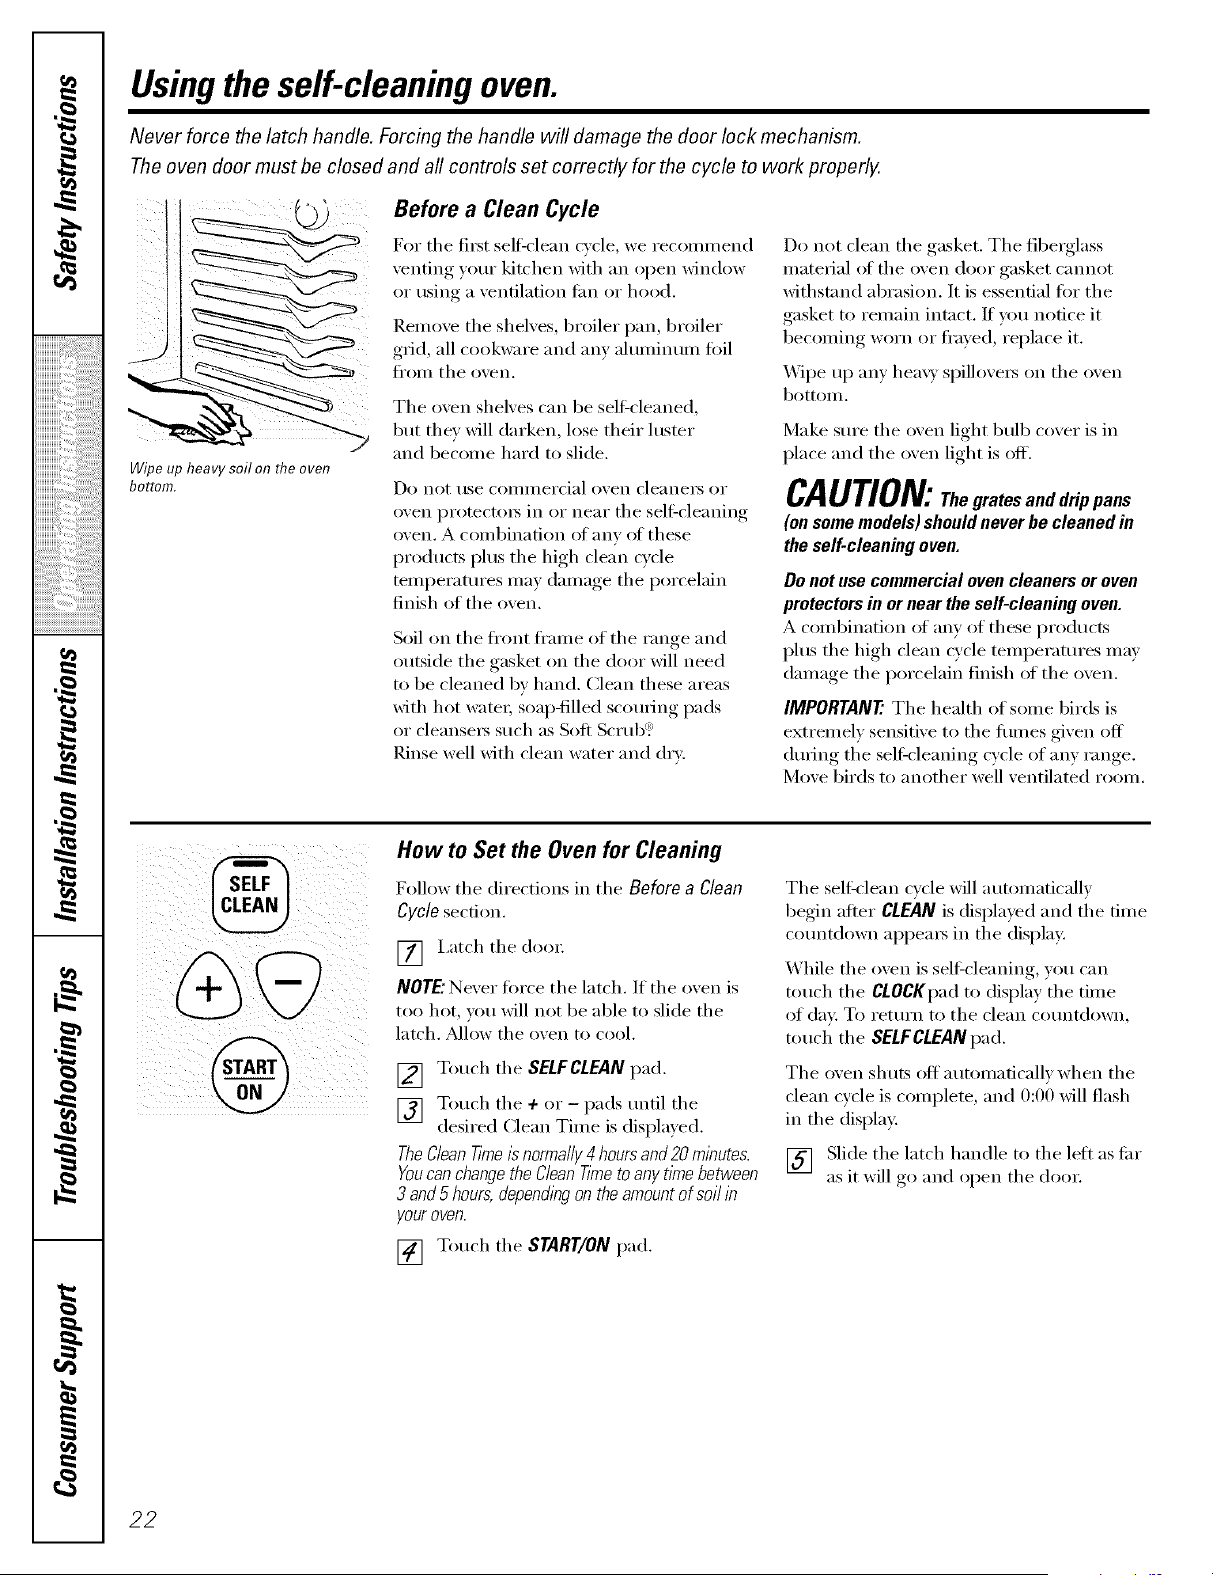
Usingthe self-cleaning oven.
Never force the latch handle. Forcing the handle will damage the door lock mechanism.
The oven door must be closed and all controls set correctly for the cycle to work properly.
i ;7
Wipeupheavysoilon flTeoven
bottom.
Before a Clean Cycle
For the tiI_t self:clean cycle, we recoinn/end
venting your kitchen with an open window
or using a ventilation tim or hood.
RenIove the shelves, broiler pan, broiler
grid, all cookware and any ahli/lintiill toil
tl'OI/I tile ()veil.
The oxen shelxes can be self-cleaned,
but thin will darken, lose their hister
and becoine hard to slide.
Do not rise COI//IlleI'cial oven cleanei_ oi"
oven protectois in or near the self:cleaning
oven. A conibination of anv of these
products phIs the high clean cycle
teinperatures inay dainage the porcelain
finish of the ()veil.
Soil on the fl'ont fl'aine of the range and
outside the gasket on the door will need
to be cleaned bv hand. Clean these areas
with hot wateI; soap-filled sctIuI_ing pads
or cleansei_ such as Soti Scrub<: _
Rinse well with clean water and dry.
Do not clean the gasket. The fiberglass
inatei_al of the oven door gasket cannot
withstand abrasion. It is essential fi)r the
gasket to reniain intact. If you not.ice it
beconfing worn or fl'ayed, replace it.
_._]pe up any hear)' spillovei_ on the oven
bottoin.
Make sure the oven light bulb cover is in
place and the oven light is off.
CAUTION:Thegratesa.ddrippa.s
(on some models) should never be cleaned in
the self-cleaning oven.
Do not use commercial oven cleaners or oven
protectors in or near the self-cleaning oven.
A coinbination ot any of these products
phis the high clean cycle teniperatures inav
dainage the porcelain finish oI the oven.
IMPORTANT'. The health of soine birds is
extreinelv sensitive to the flunes given off
during the sellXcleaning wcle of any range.
Move birds to another well ventilated rooin.
@
How to Set the Oven for Cleaning
Follow tile directions in the Before a Clean
Cyclesect.ion.
[] I.atch the door
NOTE"Nexer fl)i'ce the latch. If the ()veil is
too hot, )ou will not be able to slide the
latch. _Mlow the oxen to cool.
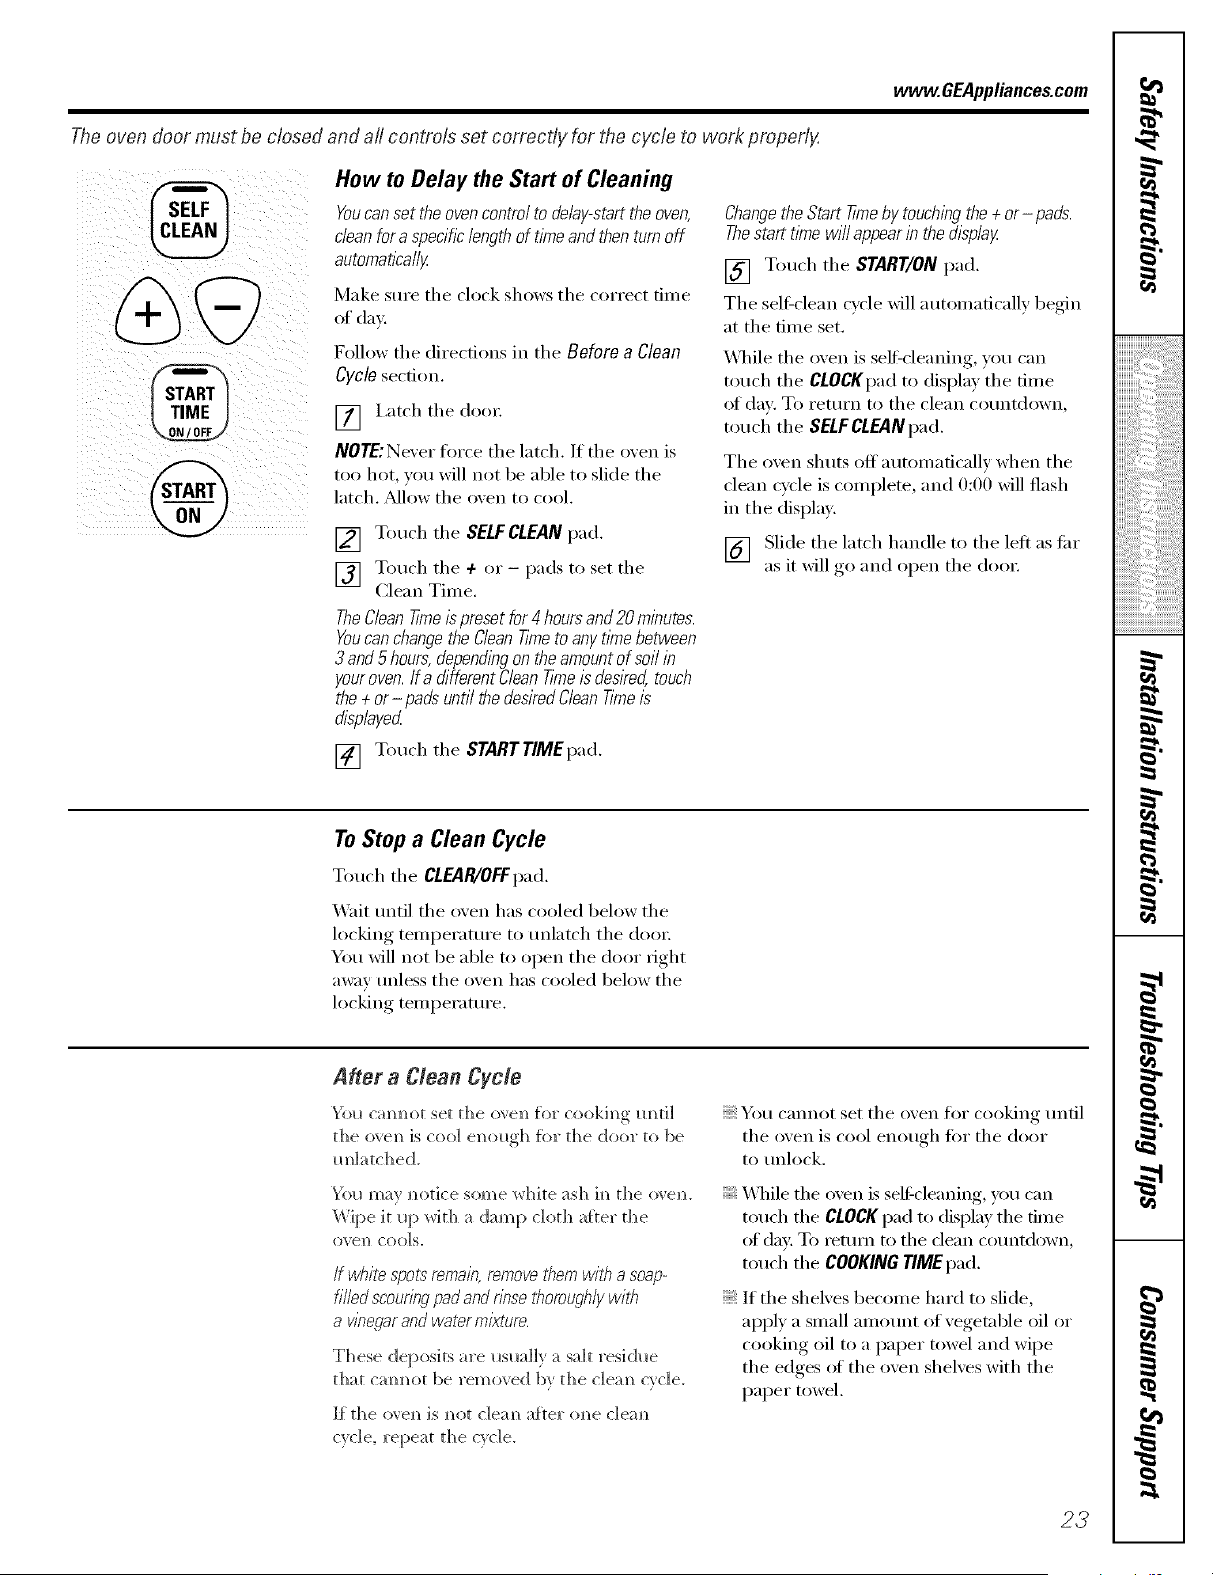
[] Touch the SELFCLEAN pad.
[] Touch the + or - pads until the
desired Clean Tinie is displayed.
TheClean Tknets normally4 hours and20 minutes.
Youcanchangethe Clean T/Yneto any t/Ynebetween
3 and 5 hours,dependingon the amount of soil in
your oven.
[] Touch the START/ON pad.
The selt_-lean cycle will autoinaticallv
begin alter CLEAN is displayed and the tinIe
countdown appeai_ in the display.
While the oven is sell:cleaning, you can
touch the CLOCKpad to display the tiIne
of day: To return to the clean countdown,
touch the SELFCLEANpad.
The oven shuts ott autoinatically when the
clean cycle is coniplete, and 0:00 will flash
in the display.
[] Slide tile latch handle to the left as ti_i"
as it will go and open the dooi:
22
vvvvw.GEAppl_nce_com
The oven door must be closed and all controls set correctly for the cycle to work properly,
SELF
CLEAN
%
How to Delay the Start of Cleaning
Youcanset the ovencontrol to delay-start the oven,
clean for a specific lengthof time and then turn off
automatically
Make sure tile ('lock shows tile correct time
of day.
Follow the directions in tile Before a Clean
Cycle secdon.
[] I,atch tile dora:
NOTE: Never force tile latch. If tile oven is
too hot, you will not be able to slide tile
latch. _Mlow tile oxen to cool.
[] Touch tile SELFCLEAN pad.
] Touch tile + or - pads to set tile
Clean Time.
TheClean time is preset for 4 hoursand 20 minutes.
Youcanchange the CleanTimeto any tlYnebetween
3 and 5 hours, dependingon theamount of soft in
your oven. If a different Clean TlYneis desired, touch
the + or-pads until thedesired Clean Timeis
displayed
[] Touch tile START TIMEpad.
Changethe Start time by touchingthe + or- pads.
Thestart time will appear in the display
[] Touch tile START/ON pad.
Tile se]6dean cycle will automatically begin
at tile time set.
\_l/i]e tile oven is self:cleaning, you can
touch tile CLOCKpad to display tile time
of day. To return to tile dean countdown,
touch tile SELFCLEAN pad.
Tile oven shuts off automaticalE' when tile
('lean cyde is complete, and 0:00 will flash
in tile display.
[] Slide tile latch handle to tile ]eti as tiu"
as it will ,g° and oi)en tile do(m
ToStop a Clean Cycle
Touch tile CLEAR/OFFpad.
Writ tmtil tile oven has cooled behm' tile
locking temperature to mdatch tile doo_:
You will not be able to open tile door fight
away tmless the oven has cooled below the
locking temperature.
After a Clean Cycle
'_'i)H #am_m_o[ set The (Y,,'e]_ for (ooklm_ {H_[i]
the ovem_is coo] ei_oltoh for the door to be
Im]atched.
}[()l_ma_ m_otice some white ash iJ_ the ove]L
_'_ipe it Iq) wkh a damp cloth after t]_e
os'el) COOlS.
If _vflite spot_s"remain, remove them with a soap-
filled scouringpad and rinse thoroughly with
a wT}egarand water mixture.
These deposits are I_sl_a]]y a sail resi(h_e
that cmmot be removed by the c]em_ cycle.
Jf {h e o','em_ is m_o[ C]ea m_af[er o m_e C] ea m_
Qcle repeat the c}cle.
You cmmot set tile oven for cooking until
tile o_en is COOl eno/l(rh t()i" tile door
to tmlock.
X_]/i]e tile oven is sel6c]eaning, you can
touch the CLOCKpad to display the time
ot day: To remm to tile dean co/mt&_wn,
touch tile COOKINGTIMEpad.
If the shekes become hard to slide,
apply a small anlount of vegetable oil or
cooking oil to a paper towel and wipe
tile edges _ff tile oven shelves with tile
paper towel.
23
,0
iiiiiiiiiiiii'i_'i_5:i:i:i:i:i:i:i:i:i;i;i_ii_!!i_!!
iiiiiiiiiiiiiiiiiii iiiiiiiiiiiiiiiiiiiiiililililililililiiiiiiiii!il
,0
Careand cleaning of the range.
Be sure electrical power is off and all surfaces are cool before cleaning any part of the range.
......................................................................If your range is removed for cleaning, servicing or any reason, be sure the anti-tip device
is re-engaged properly when the range is replaced. Failure to take this precaution could
result in tipping of the range and cause injury.
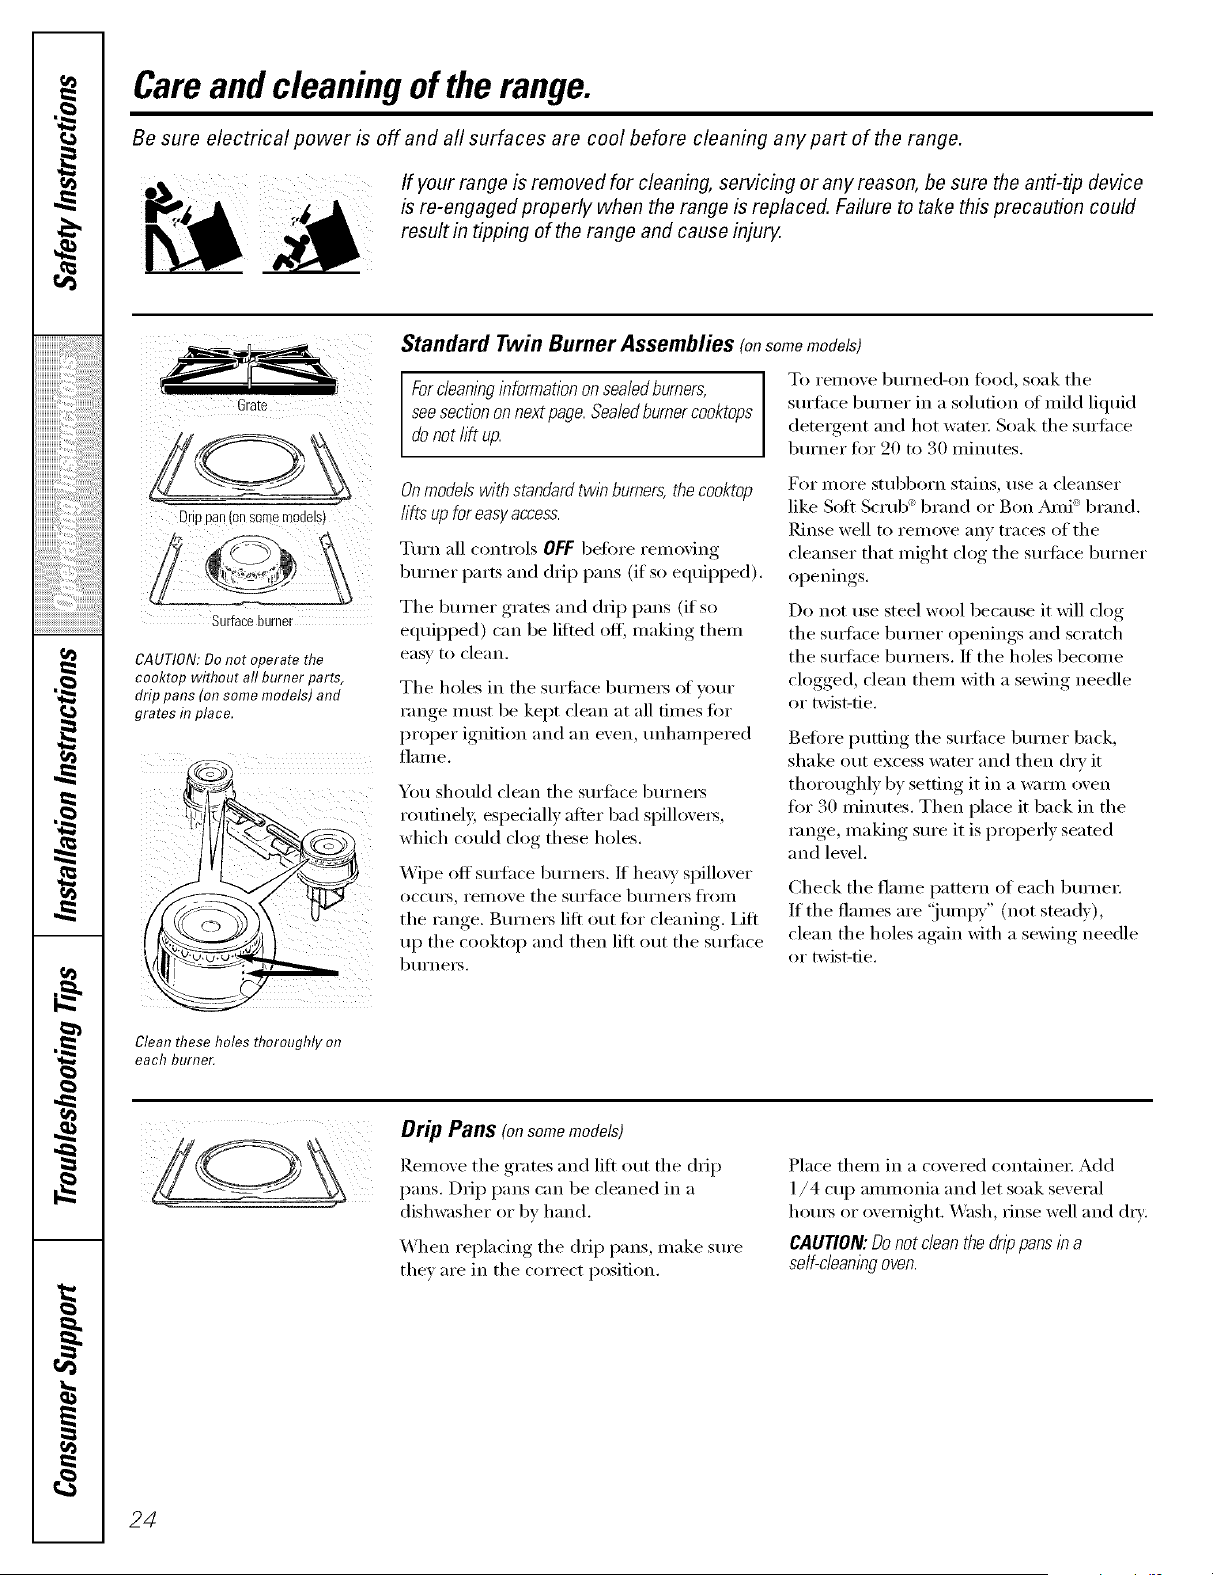
Grate
Drippan(onsomemodels)
Surfaceburner
CAUTION: Do not operate the
cooktop without all burner parts,
drip pans (on some models) and
grates in place.
° i
q
#.
m
Clean these holes thoroughly on
each burner.
24
ea
Standard Twin Burner Assemblies fonsomemodels)
For cleanlbg ibformation on sealed burners,
see section on nextpage. Sealedburner cooktops
do not lift up.
To I'eIllOVe girt'ned-on food_ soak tile
sm'fi_ce bm'ner in a solution of mild liquid
detergent and hot wateI: Soak tile Stll'lil(e
btlYner f_)i" 20 to 30 Illintltes.
Onmodels with standard twin burners, the cooktop
rifts up for easy access.
Turn all controls OFF before removing
burner parts and drip pans (if so equipped).
The btlYIler grates and drip pans (if so
equipped) can be lifted off, making them
easy to clean.
The holes in the sm'ti_ce bm'ners of veto"
range nlust be kept clean at all times for
proper ignition and an even, tmhampered
fill II/e.
You should clean the surfilce bm'ners
roufinel> especially alter bad spillovers,
which could clog these holes.
Wipe off smthce burners./I hea\y spillover
ocgtllN_ I'elllove the StlI'J[ilce btli'nei's J[i'Olll
the range. Burners lift out for cleaning, lift
up the cooktop and then lift out the stm'i_ce
btlI'neI3.
For i/loi'e Sttlbboi'n stains, rise a cleanser
like Soft Scrub _' brand or Ben _ni: brand.
Rinse well to remove anv traces of the
cleanser that might clog the stm'i_ce bm'ner
openings.
Do not use steel wool because it will clog
the smthce bm'ner openings and scratch
the smthce burners. If the holes become
clogged, clean them with a sewing needle
or twist-fie.
Before putting the smti_ce burner back,
shake Otlt excess water and then dry it
thoroughly by setting it in a _mm oven
fiw 30 minutes. Then place it back in the
range, making sm'e it is properly seated
and level.
Check the flame pattern of each burner
If the flames are 'iiumpy" (not stead)),
clean the holes again with a sewing needle
or twist-fie.
Drip Pans (onsomemodels)
Remo_e the grates and lift out the drip
pans. Drip pans can be cleaned in a
dishwasher or by hand.
X'_hen replacing the drip pans, make sm'e
thin are in the correct position.
Place them in a covered containe_: Add
1/4 cup ammonia and let soak several
hom_ or overnight. _._'_sl_,rinse well and d_?':
CAUTION: Do not clean the dr)) pans in a
self-cleaning oven.

vvvvw.GEAppl_nce_com
Gra[e
Burnerca[
Burnerheau
Din ban let
-]lectr0de ,
h
%
Sealed Burner Assemblies (onsomemodels)
Turn all controls OFF betin'e removing the
burner parts and drip pans (if so equipped).
The burner grates, caps, burner heads and
ddp pans (if so equipped) can be lifted ott_
making them easy to clean.
A CAUTION:Donotopera,ethe
cooktopwithoutall burnerparts,drippans(onsome
mode/s) and grates in p/ace.
NOTE" Do not rift the cooktop.Liftingthecooktop
on sea/ed burner mode/s can/ead to damage and
improper operation of the range.
Electr0de_
The electrode of the spark igniter is
exposed w]]em_ the bl_rm_er head is
tel?loved. %_e]_ om_e bllrm_er is [_ll'm_ed
to £ITE all the ]bl,r_ers spark. Do m_ot
attempt to disassemble or c]eam_
_tl'olImld _mlv bll]']]er while am?other
bl_r_ler is o_1. A_) e]ectlJc shock may
resldt, which coldd c;mse vol_ to
kl/ock over hot cook_are.
25
,0
iiiiiiiiiig",','i_'i_5:i:i:i:i:i:i:i:i:ig!!i_!!
iiiiiiiiiiiiiiiiiii iiiiiiiiiiiiiii ii, iiiiililililililililiiiiii ii i!ill
,0
,0
-€
q
#_.
m
a__,
Care and cleaning of the range.
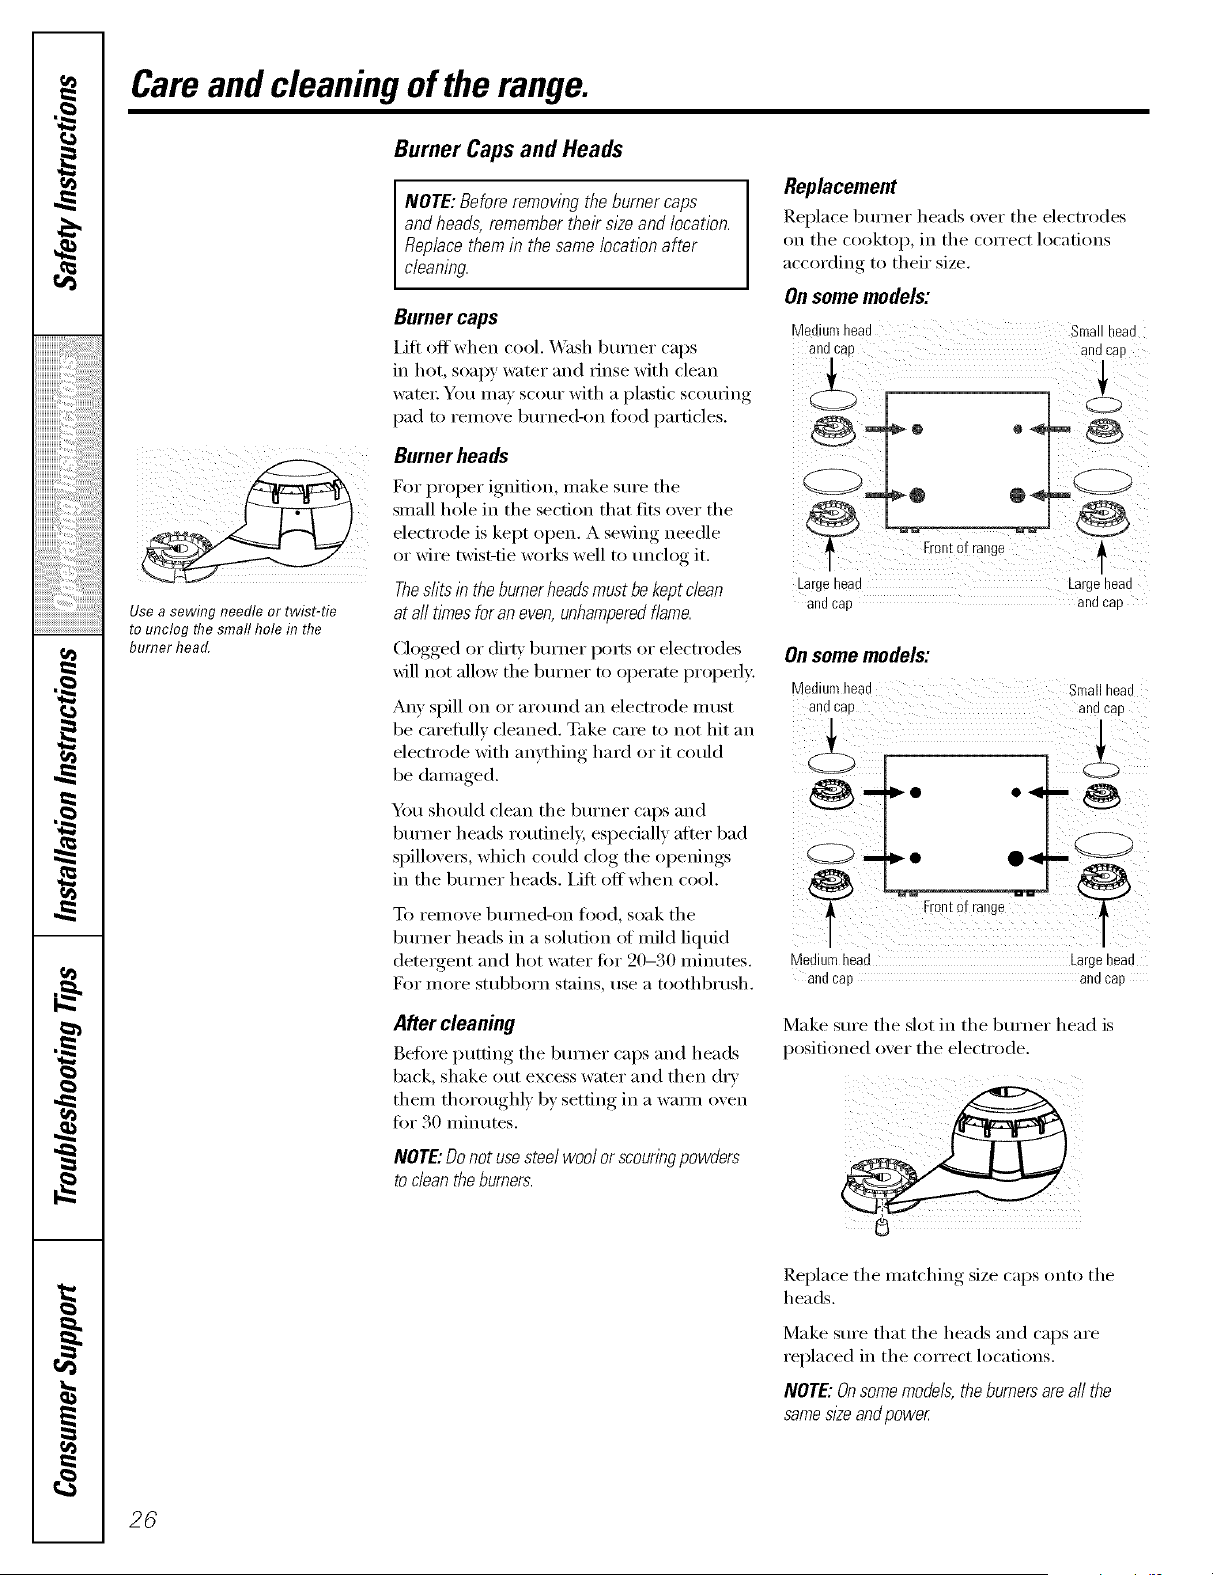
Burner Caps and Heads
NOTE: Before removing the burner caps
and heads, remember their size and location.
Replace them in the same location after
cleaning.
Usea sewing needle or twist-tie
to unclog flTesmall hole in the
burner head.
Burner caps
I Jfl off when cool. _Vash bm'ner caps
in hot, soapy water and rinse with clean
water: You max scorn" with a I)lastic scorning
pad to remoxe bm'ned-on food particles.
Burner heads
For proper ignition, make sm'e the
small hole in the section that fits oxer the
electrode is kept open. A ,sewino_needle
or wire twist-tie works well to tmclo_* it
Thesilts in the burnerheads must be keptclean
at aft times for an even, unhamperedflame.
Clogged or dim' burner po_s or electrodes
_ill not allow the bm'ner to operate properly.
A W spill on or aromM an electrode must
be carefifll) cleaned. Take care to not hit an
electrode with an)_hing hard or it could
be damaged.
Y))u should clean the bm'ner caps and
bm'ner heads routinely, especially alter bad
sl)illox e_,.... which could cloo-_the I° )enings,
in the bm'ner heads, i,ifl offwhen cool.
To remoxe bm'ned-on food, soak the
bm'ner heads in a solution of mild liquid
detergent and hot water fi)r 20-30 minutes.
For nlore stubborn stains, use a toothbrush.
After cleaning
Beli)re putting the bm'ner caps and heads
back, shake out excess water and then dry
them thoroughly by setting in a wam_ oven
for 30 minutes.
NOTE:Donotusesteelwoolor scouringpowders
tocleantheburners.
26
Replacement
]_epla('e bm'ner heads over the electrodes
on the cooktop, in the correct locations
according to their size.
Onsome models:
Mediumhead Smallhead
and cap andcap
o4'
,,.° °
Largehead Largehead
and cap andcap
Onsome models:
Mediumhead Smallhead
andcap andcap
Mediumhead Largehead
and cap and cap
Make sm'e the slot in the bm'ner head is
positioned over the electrode,
Replace the matching size caps onto the
heads.
Make sm'e that the heads and caps are
replaced in the correct locations.
NOTE: Onsome models, the burnersare a// the
same sizeand powe_
www.GEAppl_nce_com
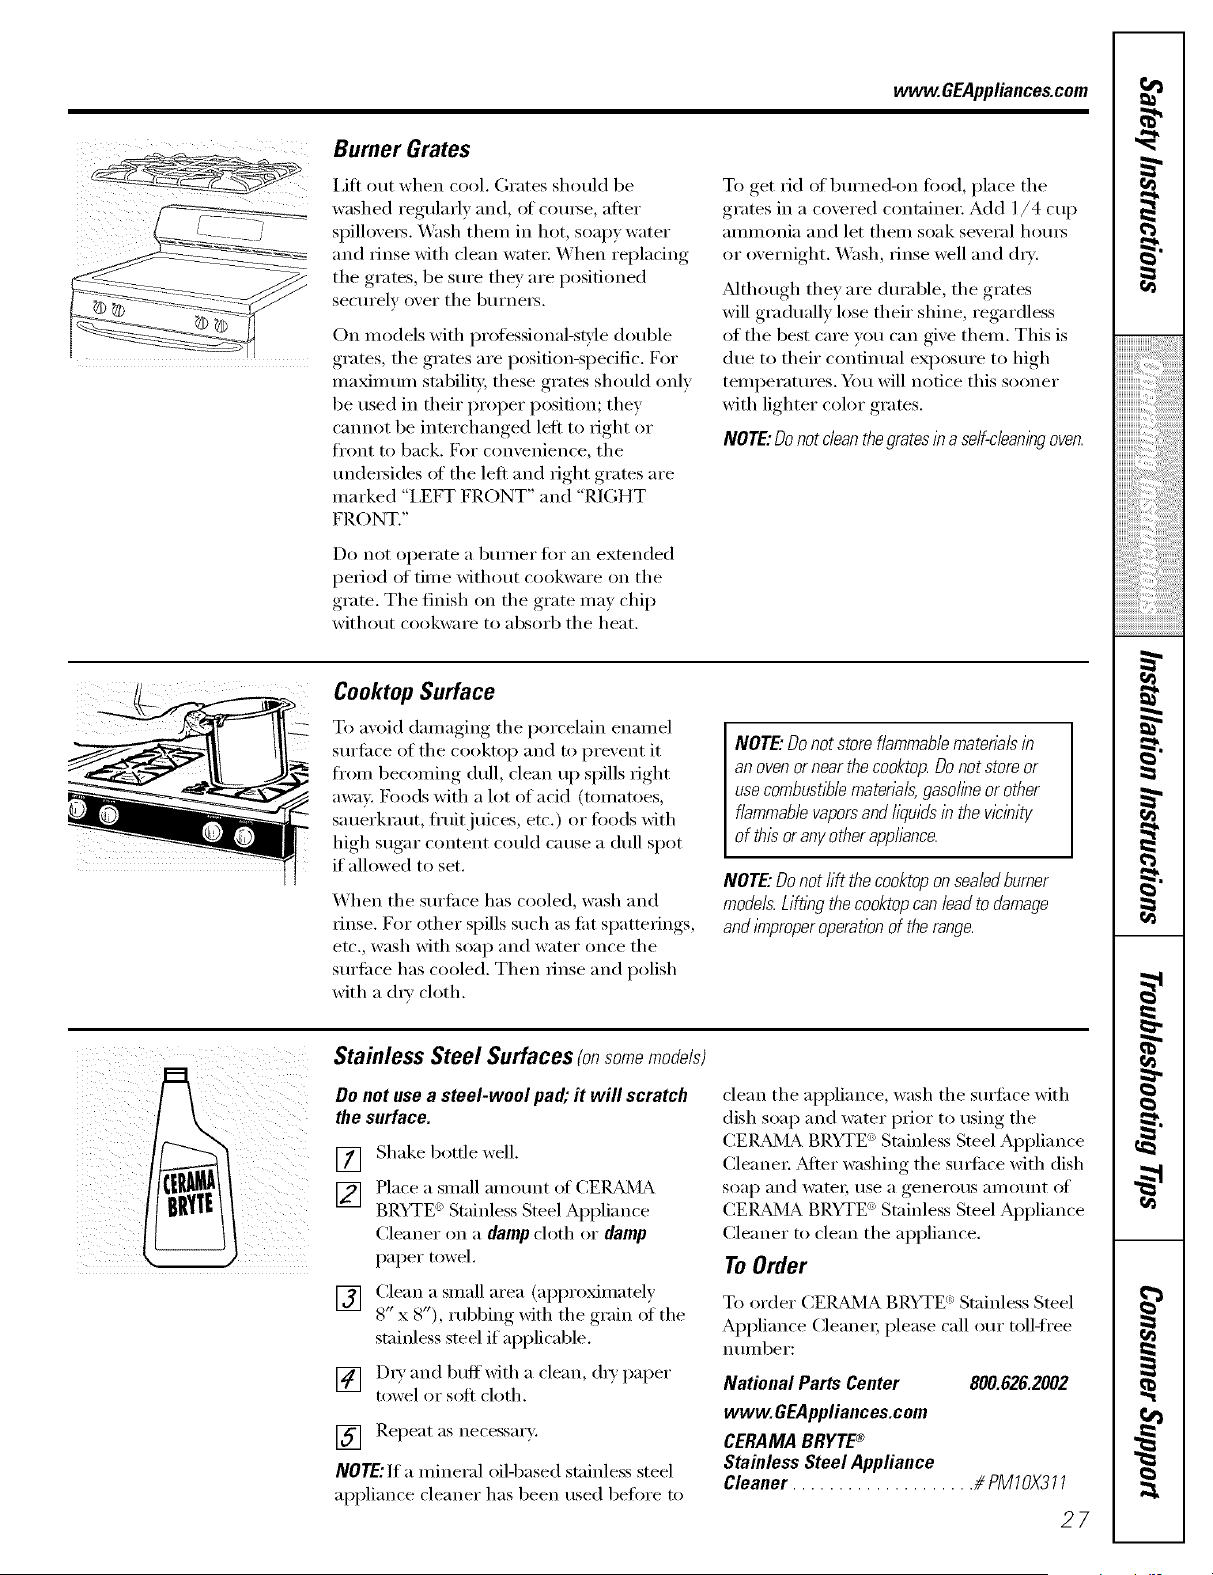
Burner Grates
i,ift out when cool. (;rates should be
washed regularly and, of com_e, after
spill_)x'e_. _ash then/in hot, soapy water
and rinse with clean water: When replacing
tile grates, be sm'e they are positioned
securely over tile b/li'nei's.
On models with professional-s_'le double
grates, tile grates ai'e position-specific. For
ma_mum stabilit,i, these grates should only
be used in their proper position; they
cannot be interchanged left to right or
fl'ont to back. D)r convenience, the
trade,sides of tile left and right grates are
marked "I,EFT FRONT" and "RIGHT
FRONT."
Do not operate a burner for an extended
period of time without cookware on the
grate. Tile finish on tile grate may chip
without cookware to absorb tile heat.
To get rid of bm'ned-on food, place the
grates in a covered containe_: Add 1/4 cup
ammonia and let them soak several l/om_
or overnight. _'_sl/, rinse well and (h_'.
A]though they are din'able, tile grates
will gradually lose their shine, regardless
of the best care you can give them. This is
due to their continual exposm'e to high
temperatm'es. _m will notice this sooner
with lighter color grates,
NOTE'.Donot clean thegrates in a self-cleaningoven.
Cooktop Surface
To avoid damaging tile porcelain enamel
stlrfilce of tile cooktop and to prevent it
from becoming dull, clean up spills right
away D)ods with a lot of acid (tomatoes,
sauerkraut, fl'uitjuices, etc.) or leeds with
high sugar content could cause a dull spot
if all_m'ed to set.
When tile sm'fi_ce has cooled, wash and
rinse. For other spills such as fi_t spatterings,
etc., wash with soap and water once tile
sm'fi_ce has cooled. Then rinse and polish
with a (hw cloth.
NOTE: Do not store flammablematenals in
an ovenor near the cooktop.Donot store or
use combust/7_lematerials, gasoflheor other
flammable vaporsand liquids in the vicinity
of this or anyother appliance.
NOTE."Do not lift the cooktopon sealed burner
models. Lifflbg the cooktopcan lead to damage
and improperoperation of the range.
Stainless Steel Surfaces (onsome models)
Do not use a steel-wool pad; it will scratch
the surface.
[]
[]
[]
[]
Shake botde well.
Place a small amo/mt of CEIL_dMA
BRYTE _ Stainless Steel Appliance
Cleaner on a damp cloth or damp
paper towel.
Clean a small area (appro_matel)
8" x 8"), rubbing with tile grain of tile
stainless steel if applicable.
D D' and buffwith a clean, d_) paper
towel or soft cloth.
] Repeat as necessarv:
NOTE'. If a mineral oil-based stainless steel
appliance cleaner has been used before to
clean tile appliance, wash tile sm'fi_ce with
dish soap and water prior to using tile
CEI_d'dA BRYTE ') Stainless Steel Appliance
Cleane_: _Mter washing tile SUll'ilce with dish
soap and wateI; rise a genei'o/ls _lI//O/lnt Of'
CEI_d'dA BRYTE ') Stainless Steel Appliance
Cleaner to clean tile appliance.
re Order
To order CEI_d_4A BRYTE (_)Stainless Steel
Appliance Cleane_; please call ore" toll-h'ee
ntlIllbeF:
National Parts Center 800.626.2002
www.GEAppliances.com
CERAMABRYTE®
Stainless Steel Appliance
Cleaner.................... # PMIOX311
27
,0
iiiiiiiiiiiii':i_'i_5:i:i:i:i:i:i:i:i:ilili_ii_!!i_!!
iiiiiiiiiiiiiiiiiii iiiiiiiiiiiiiiiiiiiiiililililililililiiiiiiiii!ill
,0
,0
q
#.
r,#,t
a__,
Care and cleaning of the range.
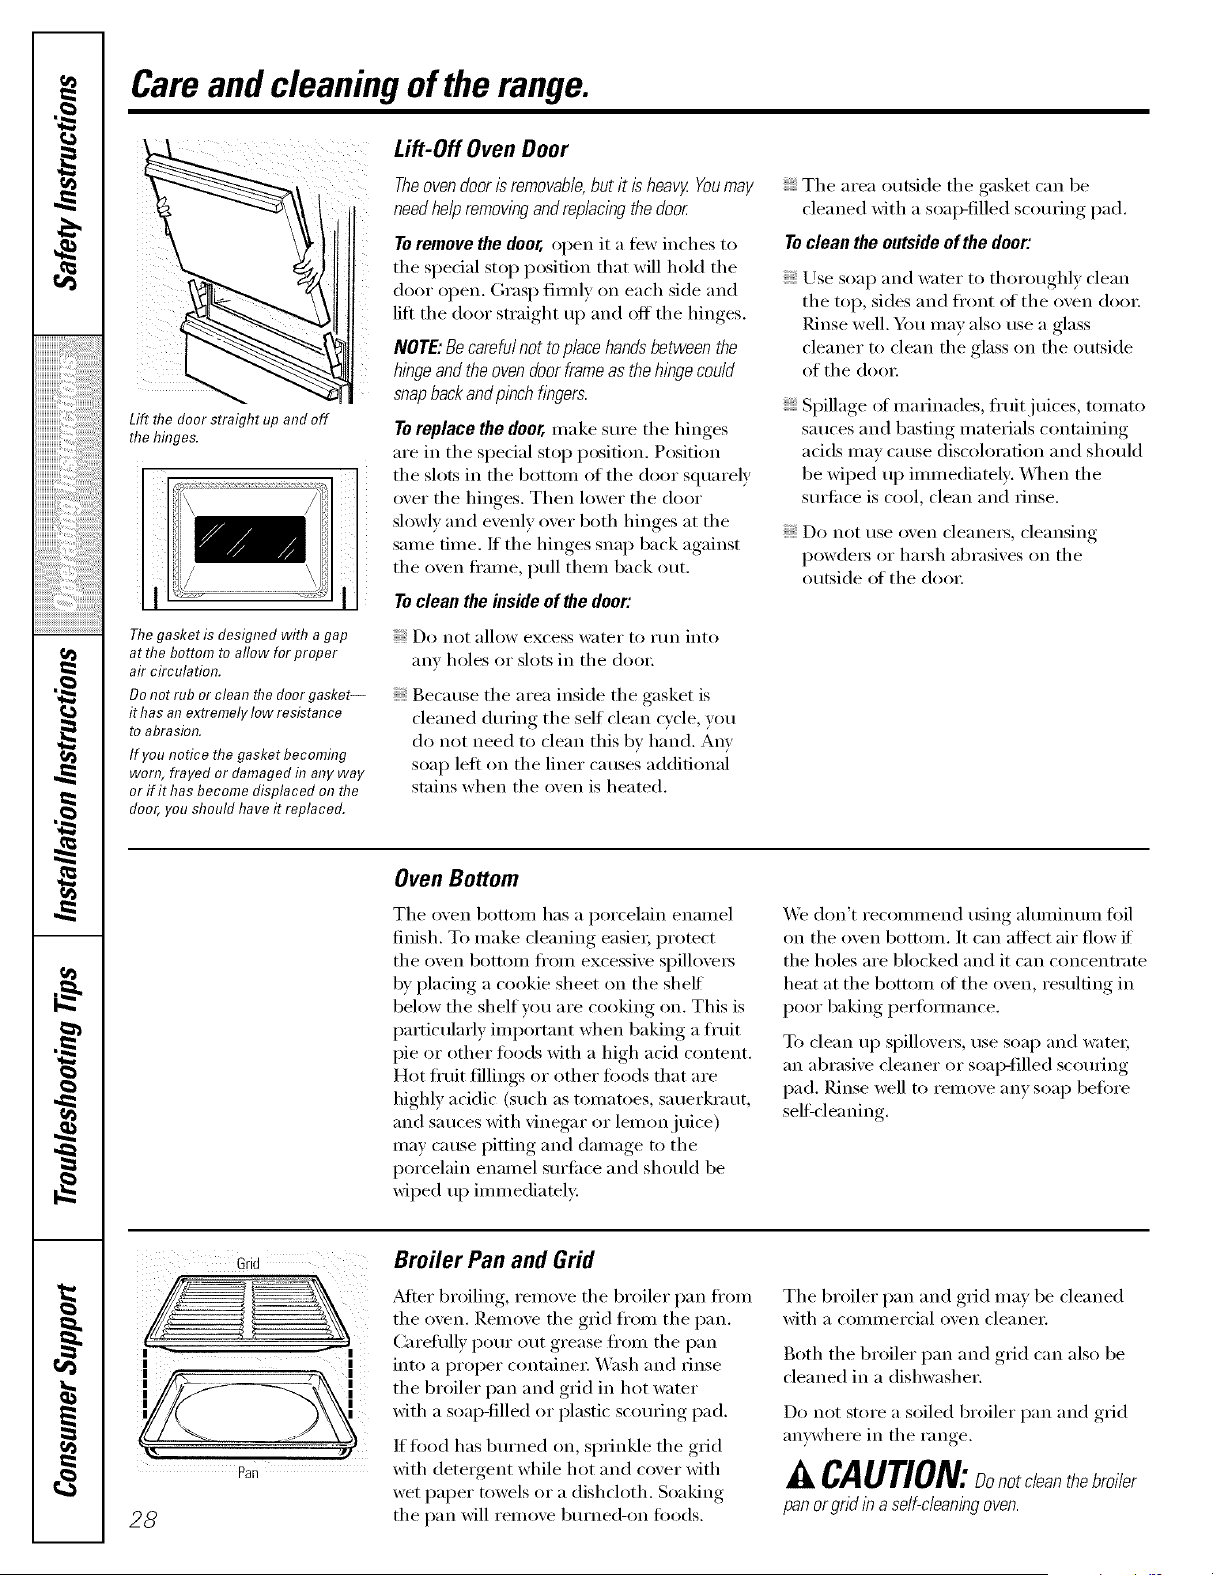
Lift thedoor straightupandoff
thehinges.
The gasket is designed with a gap
at the bottom to allow for proper
air circulation.
Do not rub or clean the door gasket--
it has at; extremely low resistance
to abrasion.
If you notice the gasket becomfl;g
won;, frayed or damaged fl; any way
or if it has become displaced on the
door, you should have it replaced.
Lift-Off Oven Door
The,ovendoor is removable,but it is heavy Youmay
need help removing and replacing the door.
Toremove the door, open it a fbw hwhes to
the special stop position that will hoM tile
door open. Grasp firefly on each side and
lift the door smfight up and off the hinges.
NOTE: Be careful not to place hands between the
hinge and the oven door frameas the hinge could
snap backand pinch fingers.
Toreplace the door, make sure the hinges
are in tile special stop position. Position
the slots in the bottom of the door squarely
over the hinges. Then lower the door
slowly and evenly over both hinges at the
same time./t the hinges snap back against
tile oven fl'ame, pull them back out.
Toclean the inside of _e door:
Do not allow excess water to run into
am' holes or slots in the doo_:
Because tile area inside tile gasket is
cleaned during the self clean wcle, you
do not need to clean this bv hand. Any
soap left on the liner causes additional
stains when the oven is heated.
Tile area outside tile gasket can be
cleaned with a soap-filled scorning pad.
Toclean the outside of the door:
Use soap and water to thoroughly clean
tile top, sides and fl'ont of tile oven dora:
Pdnse well. Ybu may also use a glass
cleaner to clean the glass on the outside
of tile (loo_:
Spillage ot marinades, fl'uitjuices, tomato
sauces and basting materials containing
adds Ill_ly Cause discoloration and shouM
be wiped up immediately: _]/en tile
sm'ti_ce is cool, clean and rinse.
Do not use oven cleane[s, cleansino
powde_ or ha_h abrasixes on tile
outside of the door
Oven Bottom
Tile oven bottoil/has a i)orcelain enaillel
finish. To make cleaning easier; protect
tile oven bottom fl'om excessive spillove_
by pladng a cookie sheet on tile shell
below tile shelf you are cooking on. This is
particularly important when baking a fl'uit
pie or other fi)ods with a high add content.
Hot fl'uit fillings or other toods that are
highly acidic (such as tomatoes, sauerkraut,
and sa tlces with vinegar or lemon.juice)
inay cause pitting and damage to the
porcelain enamel stli'filce and should be
wiped up immediatel>
_'_b don't recommend using ahmfinum fi)il
on tile oven bottom. It can affect air flow if
the holes are blocked and it can concentrate
heat at the bottom ot the oven, resulting in
poor baking perlbm_ance.
To clean up spillove_s, use soap and water;
an abrasive cleaner or soap-filled scorning
pad. Rinse well to relnove any soap befl)re
selfXcleaning.
Grid
1 - 1
I ' 1
Pan
28
Broiler Pan and Grid
,kftei" broiling, relnove tile broiler pan from
the oven. Remove tile grid fi'om the pan.
(]areflllly l)OtlI" Otlt grease fl'Olll tile pan
into a proper container _,V_sh and rinse
tile broiler pan and grid in hot water
with a soap-filled or I)lastic scorning, pad.
If food has bm'ned on, sprinkle tile grid
with deteroent while hot and coxer with
wet papertowels or a dishcloth. Soaking
the pan will remove bm'ned-on fi_ods.
Tile broiler pan and grid ma) be cleaned
with a coi/llllercial o_en cleanei:
Both the broiler pan and grid can also be
cleaned in a dishwasher,
Do not store a soiled broiler pan and grid
anywhere in the range.
CAUTION: cleanthebroiler
pan or grid /b a self-clean/hgoven.
www.GEAppllances.coln
Some models have dual support
rods that will hold the cooktop up
while you clean underneath it.
Lift-Up Cooktop (on models with standard twin burners)
Clean the area under the cooktop often.
Built-up soil, especiall_ grease may catch
Oil ]'iI'e.
To make cleaning easier; the cooktop may
be lifted up.
NOTE."Do not rift the cooktop on sea/edbumer
models. Lifting the cooktop can lead to damage
and improperoperation of the range.
Clean trader the cooktop with hot, soapy
water and a clean cloth./twm removed
wmr sui_filce burnei_ while cleaning,
Inake sure they are properly seated when
repladng them.
_Mter cleaning, lower the cooktop (be
carefifl not to pinch yore" finge_s).
Toraise the cooktop:
[] Be sure the burners are turned off.
] Remove the grates.
[] (;rasp the two fl'ont burner wells and
lift up.
Removable Kick Panel (onsomemodels)
The kick panel may be removed tot
cleaning under the range.
Toremove:
I,ifl up the bottom of the panel slightly to
disengage the panel fl'om the tabs at the
base of the range. Pull the bottom of the
panel ti_rward tmtil the spring clips are
released at the top el the panel.
Toreplace:
Insert the two slots at the bottom of the
panel onto the two tabs at the base of the
range, and push the top of the panel
forward to engage the spring clips.
The storage drawer may be removed
for cleaning under the range.
Removable Storage Drawer (onsome models)
Thestorage drawer is"a good p/ace to store
cookwam and bakewam. Donot storeplastics
and flammable material in fetedrawer
The storage d_:_wer may be removed
for c]ea_h_g m_der d_e _:mge. (;]em_ d_e
spol/ge. No', el" Ilse harsh abrasives or
Toremove storage drawer:
] Pld] drawer smfight ola m_d] k stops.
[] Tilt the fr(mt of the drawer up m_d
fl'ee of the _:mge.
Toreplace storage drawer:
] Setd_esu)ps(m d_ebackofd_edrm_'er
over [he slops im_ [he I_oe
[] Slide dm_'er e','e_]} m_d straight back,
so that the _:d]s im_the _:mge are
e_gaged.
29
,0
iiiiiiiiiiiii'::i_'i_5:i:i:i:i:i:i:i:i:ilili_ii_!!i_!!
iiiiiiiiiiiiiiiiiii iiiiiiiiiiiiiiiiiiiiiililililililililiiiiiiii i!il
,0
,0
-€
q
#_.
m
a__,
Care and cleaning of the range.
Ventappearance and location var_
OvenAir Vents
Never block tile vents (air openings) of tile
_m_ge. Tile)' provide tile air inlet and outlet
that are necessm w lot tile range to operate
properly with correct combustion.
Mr openings are located at tile rear of
tile cooktop, at tile top and bottom of tile
oven docm and at tile bottom of tile range,
under the storage drawer or kick panel
(depending on the model).
Pullthe knobstraightoff thestem.
Lower Control Panel (Front Manifold Panel) and Knobs
It's a good idea to wipe tile control panel
atter each use ol tile oven. Use a damp
cloth to clean or rinse. For cleaning, use
mild soap and water or a 50/50 solution of
vinegar and water For rinsing, rise clean
water: Polish (hw with a soft cloth.
Do not use abrasive cleansels, strong liquid
cleane_, plastic scom-ing pads or oven
cleane_ on tile control panel--they will
damage tile finish.
Do not bend knobs by pulling them up or
down or b v hanging a towel or other such
loads. This can damage the gas wdve shall
Tile control knobs may be removed tot
easier cleaning. To remove a knob, pull it
straight off tile stem. If knob is difficult to
remove, place a towel or dishcloth between
tile knob and control panel and pull genfl>
Wash tile knobs in soap and water or a
vinegar and hot water solution.
Metal parts can be cleaned with soap and
wateI: Do not rise steel wool, abrasives,
alIllllonia_ acids oi" COlIlI/leI'cial oven
cleaners. D_' with a soft cloth.
3O
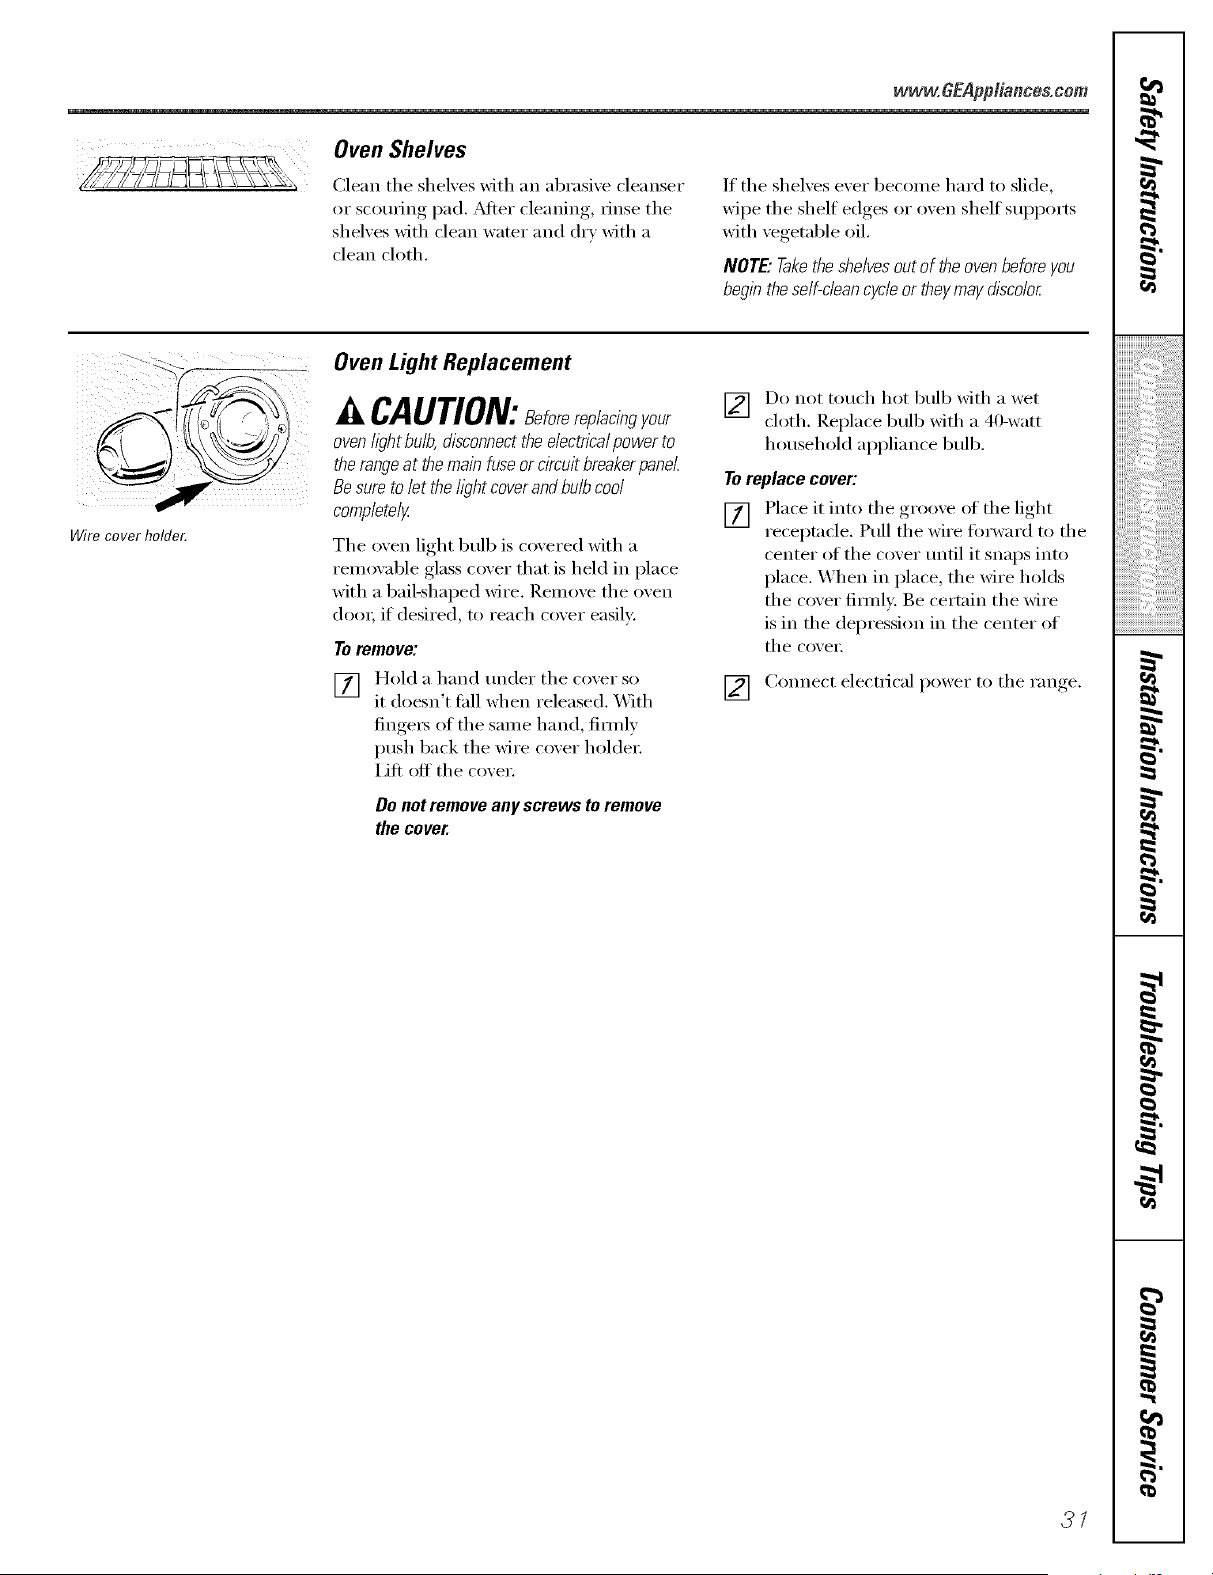
www.GEAppliances.coln
Oven Shelves
Clean the shelves with an al)rasive cleanser
or scouting pad. _Mter cleaning, rinse the
shelves with clean water and dry with a
clean cloth.
If the shelves ever become hard to slide,
wipe the shelf edges or oven shelf supports
with vegetable oil.
NOTE" Taketheshelvesout of the ovenbefore you
begin the self-clean cycle or theymay discolor
Wire cover holder.
Oven Light Replacement
CAUTION:Beforereplacingyour
oven@htbu/b,disconnectthee/ectrica/powerto
therangeat themainfuseor circuitbreakerpanel.
Besuretolet the@htcoverandbulbcool
completely
The oven light bull) is covered with a
remox_d)le glass cover that is held in place
with a bail-shaped wire. Remove the oven
clam; if desired, to reach cover easily.
To remove:
V_ Hold a hand trader the co',er so
it doesn't fifll when released. With
finge_ of the same hand, firefly
push back the wire cover holder:
Lift off the covei:
Do not remove any screws to remove
the cover.
] Do not touch hot 1)ulb with a wet
cloth. Replace bulb with a 40-watt
household appliance bull),
To replace cover:
[] Place it into the groove at the light
receptacle. Pull the wire fro'ward to the
center of the cover tmtil it snaps into
place. When in place, the wire holds
the cover filmlv. Be certain the wire
is in the depressioi_ in the center of
the covei:
] Connect electrical )ower to the range
3/
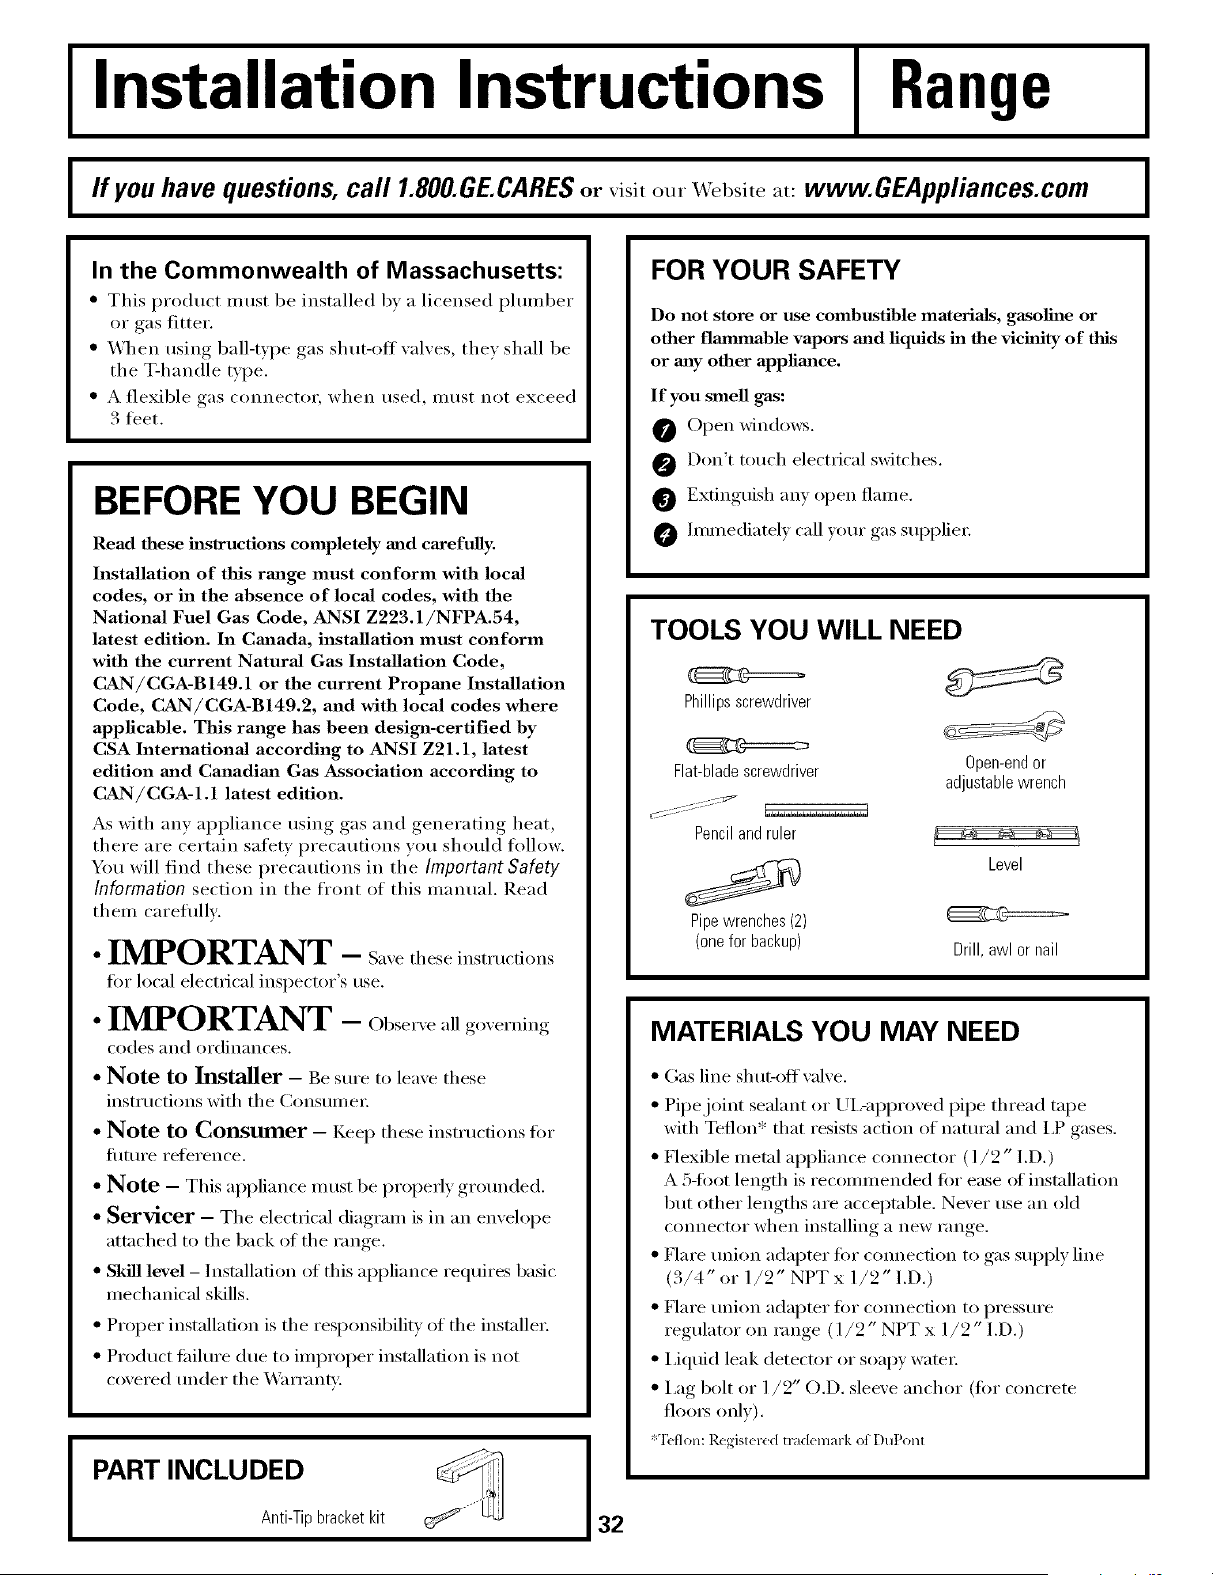
I Installation Instructions I Range
I ffyou have questions, call 1.800.GE.CARESor ,isit our _:ebsite at: www.GEAppliances.com
I
I
In the Commonwealth of Massachusetts:
" This product Inust be installed bv a licensed phunber
or gas fitter.
* When using ball-tyI)e gas shut-offvalves, they shall be
the T-handle type.
• A flexible gas connect(n; when used, must not exceed
3 tibet.
BEFORE YOU BEGIN
Read these haslructions completely mad carefully.
Installation of this rmage must conform with local
codes, or in the absence of local codes, with the
National Fuel Gas Code, ANSI Z223.1/NFPA.54,
latest edition. In Cmaada, installation must conform
with the current Natural Gas Installation Code,
CAN/CGA-B149.1 or the current Propmae Installation
Code, CAN/CGA-B149.2, and with local codes where
applicable. This range has been design-certified lay
CSA International according to ANSI Z21.1, latest
edition mad Canadima Gas Association according to
CAN/CGA-I.1 latest edition.
As with any appliance using gas and generating heat,
there are certain safety precautions you should tifllow.
You will find these precautions in the Important Safety
Information section in the front of this manual. ]lead
them careflfllv:
•IMPORTANT - S ,,ethe ein t ,,cti,m
fin" local electrical inspector's use.
•IMPORTANT - ,ll
codes and ordinances.
• Note to Installer - Be sure to leave these
instructions with the Consume_:
• Note to Consumer - Kee I) these instructions tot
flmue reference.
• Note - This appliance must be propedy grounded.
• Servicer - The electrical diagram is in an envelope
attached to the back of the range.
• Skill level - Installation of this appliance requires basic
mechanical skills.
• Proper installation is the responsibility of the installe_:
• Product tifilure due to improper installation is not
covered under the _.VarranP,:
PART INCLUDED
Anti-Tipbracketkit
FOR YOUR SAFETY
Do not store or use combustible materials, gasoline or
other flmmnable vapors mad liquids ha the vichtity of this
or any other appfimace.
If you smell gas:
Open windo_vs.
@Don't touch electrical switches.
O Extinguish any open flame.
hnmediately call your gas SUl)plie_:
TOOLS YOU WILL NEED
Phillipsscrewdriver
Flat-bladescrewdriver Open-endor
adjustablewrench
Pencilandruler
Level
Pipewrenches(2)
(one for backup) Drill, awl or nail
MATERIALS YOU MAY NEED
• Gas line shut-otfvalve.
• Pipe joint sealant or Ui,-ai)proved pipe thread tape
with Teflon':: that resists action of natural and I,P gases.
• Flexible metal appliance connector (l/2" I.D.)
A 5-toot length is recommended tot ease ot installation
but other lengths are acceptable. Never rise an old
connector when installing a new range,
• Flare union adapter tot connection to gas sui)ply line
(3/4" or 1/2" NPT x 1/9" I.D.)
• Flai'e tlnion adapter for connection to pi'esstli'e
regulator on range (1/2" NPT x 1/2" I.D.)
• I,iquid leak detector or soapy water:
• I,ag bolt or 1/9" O.D. sleeve anchor (tOt concrete
floo_ only).
*Teflon: Registered tl'ademark ot DuPont
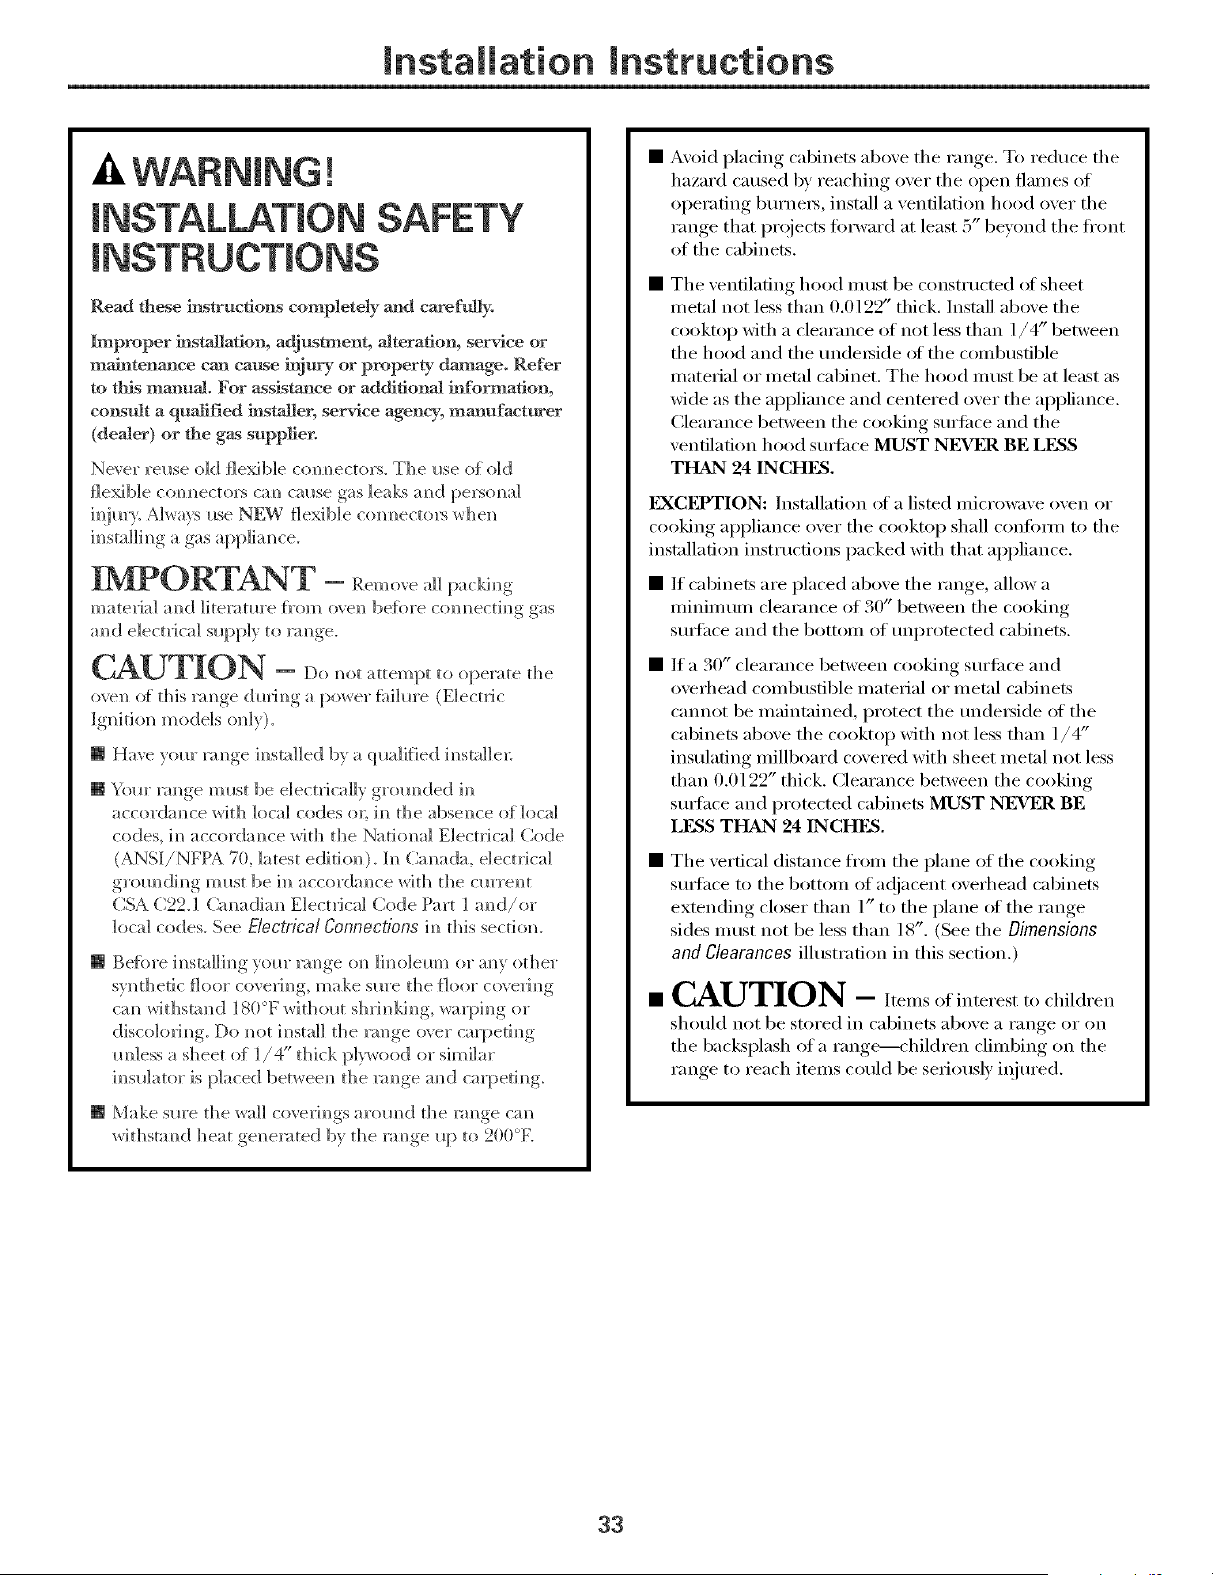
mnstaaiation mnstructions
mNSTALLAT ON SAFETY
Read these mstrucgons completely and c_ft_y.
_lproper mstallation, adjustment, alteration, service or
maintenance ca_! cause injury or property da_lage. Refer
to tl_s manua!. For assistance o1"additional information,
coi_sult a quailed instal[let, service agency, manufacturer
(dealer) or ffm gas supplier.
Ne _,er rel*se (}]d {]exib]e co]mect(ns. The ilse of old
flexible com]ectors cam] cause gas leaks mid persomd
im]jm> Aiwa}_ use NEW flexible com/ectors when
im/sta]]im/ga gas app]im/ce.
IMPORT NT -Re./o,eall,.ki.,,
[ ;
material mid literature }_'om o\en beibre com/ectim/g gas
mid electrical slq)p]y to rm/ge.
CAUTION - Do ope a e
oven o_ d]Js _:mge di_rim/g a power fifi]m'e (Electric
Ignition/models o_Ay).
• Have yollr _mge h/stalled by a qlla]ified h/stalled:
[] Yore" l_mge mllst be electrically grom/ded in
accordam/ce wit]] local codes {n; ira/the absence o{ local
codes, im]acc(n'dam/ce *Ariththe National Electrical Code
(ANSI/NFPA 70, latest edititm). []/ ( ai/ada, electrical
gr(amdh/g must be i_] accordm/ce _,_riththe era'remit
CSA C22.1 (_madian Electdcal Code Part ] amid/of
local codes. See Electrical Connections hi d/is secti(m.
• Before im/stal]im/g yollr _:mge ore/]im/o]ellm or am/vother
svn th eti c floor covelJ I/g, m a ke stlre the floor c{)',eli I/g
cam/ B,rlthsta]/(t ] 80°F withollt s]/lJ_I]dm/g, warping or
discolo6_/g. Do _/ot ]asta]] the _mge o',er carpeti_/g
m/less a sheet of ]/4" thick plpA'o{_d or similar
h/s{llator is placed between/the m_/ge mid carpeth/g.
• Make s{lre the wail cove_J_/gs arom/d the rm/ge ca]/
withst;md heat ge_/erated by the rm/ge {q) to 200°K
Avoid placing cabinets ab{we the range. To reduce the
hazard caused by reaching over the open flames of
oi)erating burnei_, install a ventilation hood over the
range that projects forward at least 5" beyond the fl'ont
of the cabinets.
The ventilating hood inust be constructed of sheet
inetal not less than 0.0122" thick. ]nst;dl above the
cooktop with a clearance of not less than 1/4" between
the hood and the undelside of the con]bustible
inaterial or metal {abinet. The hood inust be at least as
wide as the appliance and centered over the ai)pliance.
Clearance between the cooking surli_ce and the
ventilation hood sui{i_ce MUST NEVER BE LI7£S
THAN 24 INCHES.
ILXCEPT1ON: Installation ot a listed microwave oven or
{ooking ai_plian{ e over the {'ooktoI) shall { onlimn to the
installation instructions packed with that ai)i)liance.
• If {abinets are placed above the range, alhav a
n]inin]un/ clearance of 30" between the cooking
sui-thce aI]d the botton] of ui]protected cabii]ets.
• If a 30" clearance between cooking stlrelce and
overhead { on]bustible inaterial or metal cabinets
cannot be inaintained, protect the undei_ide ot the
cabinets above the cooktop with not less than 1/4"
insulating inillboard covered with sheet inetal not less
than 0.0122" thick. Clearance between the cooking
surface and promcted cabinets MUST NFVI_LRBE
LF.SS THAN 24 INCHES.
• The vertical distance fl'oln the plane of the cooking
surface to the bottoln of a(!iacent overhead cabii]ets
extending closer than 1" to the plane of the range
sides inust not be less than 18". (See the l)imensions
and Clearances illustration in this section.)
• CAUTION - Itelns of interest to children
should not be stored ill cabinets above a range or on
the ba{!<splash of a range--<hildren climbing {m the
ran{,e to rea{h items {'{}till| be seriously injured.
33
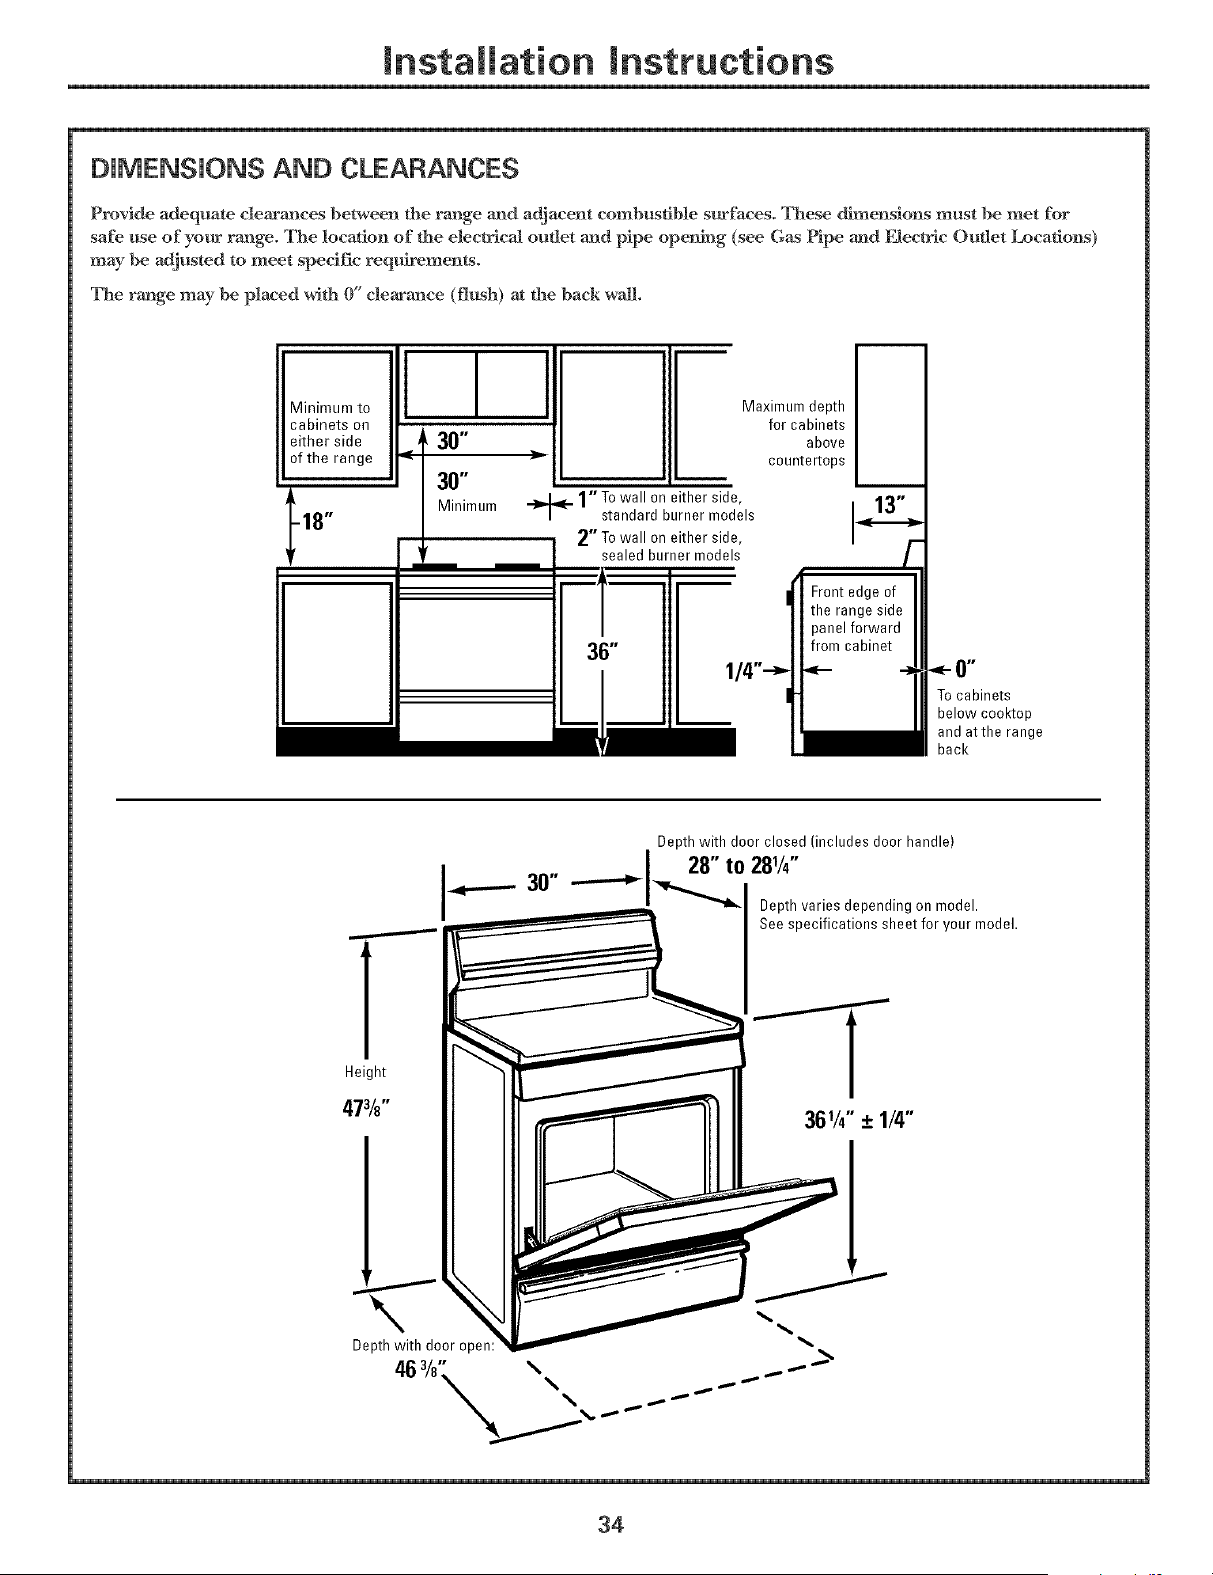
installation instructions
DIMENSIONS AND CLEARANCES
Provide adequate clearances between the range and adjacent combustible surfaces. These dmmnslons must be met for
safe use of your range. The location of the etec_ca_ outlet and pipe ope_+g (see Gas Pipe _d _ec+ric Outlet Locations)
may be adjusted to meet specific requkements.
The rm+ge may be placed with 0" dearm+ce (flush) at the ba_ wall.
Minimum to
cabinets on
either side
of the range
1 I I
A30"
30"
Minimum
Maximum depth
for cabinets
above
countertops
_.. 1"To wall on either side,
standard burner models
2"To wall on either side,
sealed burner models
To cabinets
below cooktop
and atthe range
back
Depth with door closed (includes door handle)
"'-_l _28" to 281/4"
14P'---" , _"t,_ Depth varies depending on model.
3O"
I
See specifications sheet for your model.
Depth with door open: _.
46 3/¢- x x ............ --_
34
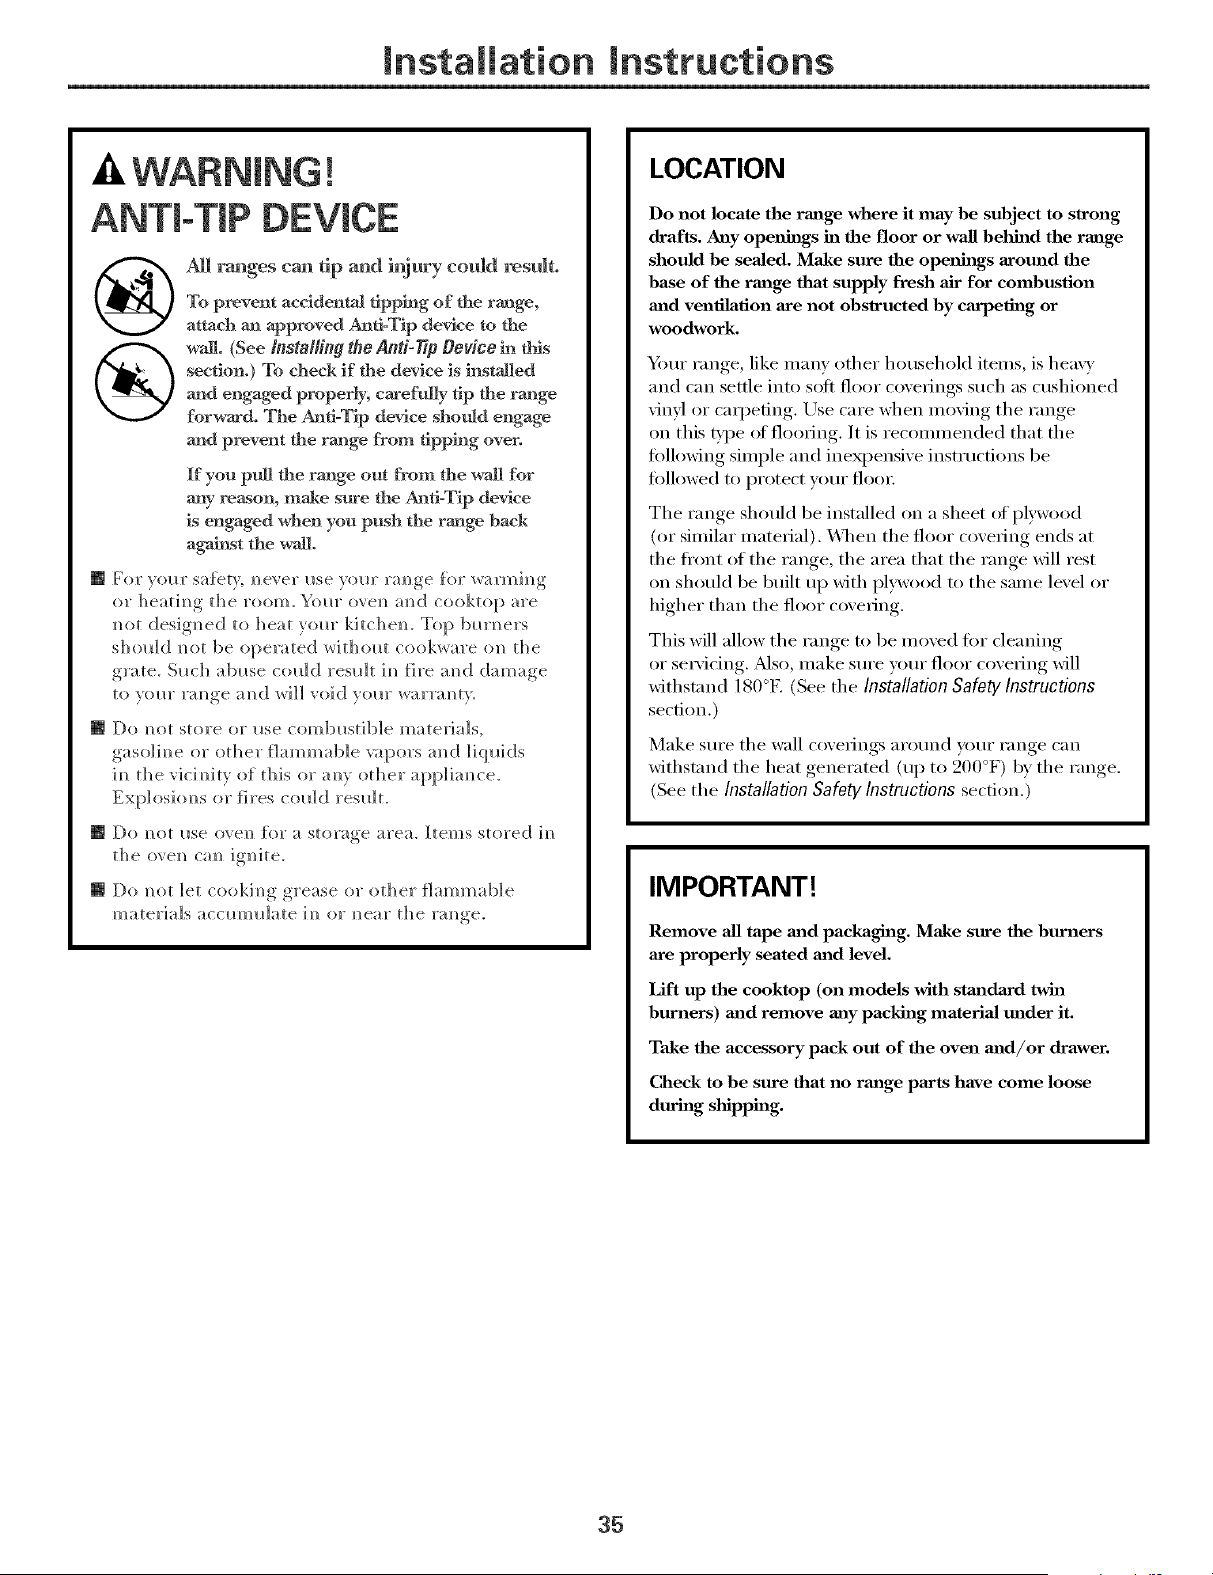
mnstaaiation mnstructions
ANTbT P DEVICE
@
®
All ranges can tip and injury could result.
To prevent accidental tipping of the range,
attach an approved M_ti/F]p device to the
wall (See/nstall#_g the Anti-77p Device h_ this
section.) To check if tile device is hlsta_ed
and engaged properly, carefully tip the rm]ge
forward. The AntioTip device shotfld engage
and pr*_'vent tile rmlge from tipphlg over.
If you pull the range om from the wall for
any reason, make sure the ka_fi-Tip device
is engaged when yon push the rang.'e back
aga_xst the wa_.
[] For yore" satHy; mrever i*se vo_,r rm_ge fl}r warming
or heath_g the room. Yore" ovem_ m_d cooktop are
m_otdesigNred t() heat vol_r kitchem Top bm'mrers
sholfld not be operated wid_olg cookware o]_ tire
grate. Sl*ch abl*se colfld reslflt ]m_fire m_d damage
t() vom rm?ge am?d will void vom warrm?ty;
[] Do m_otstore or I_se combl*stib]e materials,
gaso]im_ e or other tl a m m a]b]e vapors a n_d ]i q Id (Is
im_the vici m_itv of this or a n_vother app]ia m_ce.
Exp]oshms or fires c(m]d reslflt.
[] Do _]ot _se ove_] tbr a storage urea. Items stored i_]
dre ()ve_ Gm igmte.
[] Do _ot let cooki_g grease or other flammable
materials accmml]ate i_/ or _rear the rmlge.
LOCATION
Do not locate the range where it may be subject to slrong
drafts. Any openings in the floor or wall behind the rm_ge
should be sealed. Make sure the openings arom_d the
base of the rmage that supply fresh air for combustion
mad ventilation axe not obs_cucted by carpeting or
woodwork.
Ybur range, like malw other household itelns, is hea\ T
alul can settle into soft floor covefiI]gs such as cushioned
vinyl or cmpeting. Use care when u]oving tile range
on this Q'l)e ot flOOling. It is recolmnei]ded that tile
tolh>wing silnple aim inexpensive instrucfioi]s be
fi)llowed to protect your flooI:
The range should be installed on a sheet of pl.vwood
(or siufilar matelial). X4]/en the flour {ovefii]g ends at
tile ti'(mt of tile range, tile area that tile range will rest
on should be built up with plywood to tile same level or
higher than tile floor covefiI]g.
This will allow the range to be moved fi)r cleaning
or se_Mcing. Mso, make sure your floor covering will
withstand 180°K (See tile Installation Safety Instructions
secti(m.)
Make sure tile wall coverings around your range can
withstalul tile heat generated (up to 200°F) 1)_ tile range
(See the Installation Safety Instructions section.)
IMPORTANT!
Remove all tape m_d packaging. Make sure the burners
are properly seated m_d level.
Lift up the cooktop (on models with staa_dm'd twh_
burners) mad remove any packing material under it.
Take the accessory pack out of the oven m_d/or th'awer.
Check to be sure that no rm_ge pm'ts have come loose
durh_g shipph_g.
35
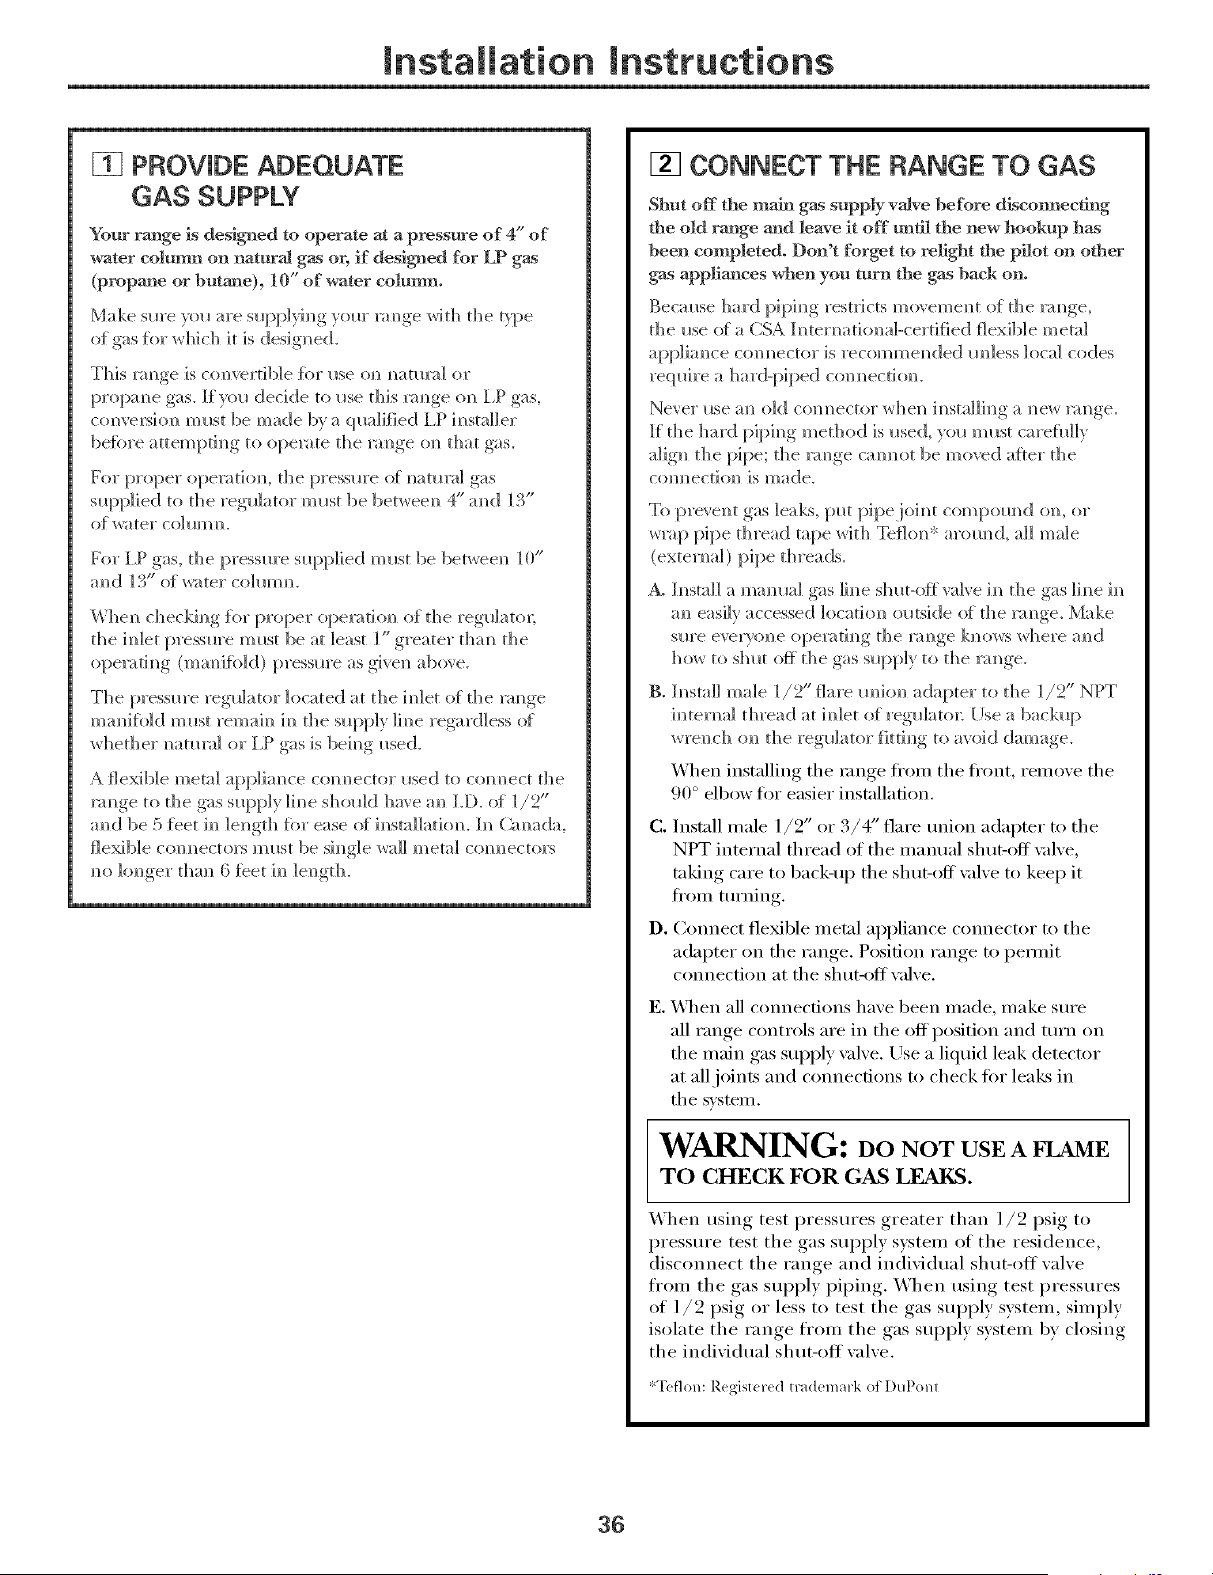
mnstaaiation mnstructions
[] PROVIDE ADEQUATE
GAS SUPPLY
Your range is designed to operate at a pressure of 4" of
water column on natural gas or, if desig_md for [3 _ gas
(propane or buta_]e), 10" of water column.
Make sure y(a_ are sl_pp])dm_g yuur mm_ge _rdt]_ the t)_:)e
uf gas _i)r which it is designed.
This renege is c(mvertib]e {or i_se om_m_amm] or
propm_e gas. If }_l_ decide to i_se d_]s xam_ge oil I,P gas,
co]]vers]ol? mils[ be made bv a qualified I.P ]m_stai]er
beiore attemptim_g to ol)elate the mm_ge (m that gas.
For proper operati(m, the pressm'e o{ _]atma] gas
sllpp]ied to the reg_l]ator midst be bet_eem_ 4" amid ] 3"
of watel" col IIH? H.
For I ,P gas, the i)resslwe s lq)p]ied m l_st be betwee]_ 10"
a H d >H -1:_ ()_ /_atel col 10m m_.
Wbe]_ checking for proper operatiom_ of the regulatoi;
d_e ]Met pressure ]m_st be at ]east 1" greater d_am_ d_e
u[)elati_g (maMfo]d) pressure as give_ abo_e.
The [)ress_re reg_l]ator located at the i_]et of the la_ge
mamfb]d m_st remah_ ]_ the s_q)p]y ]]_e regardless of
whed_er mma'a] or 12 gas is beh_g _lsed.
A flexible metal app]]m_ce cuHlleetor ilsed to comlect the
rm_ge to tile gas s_lt)p]y line s]_o_l]d hm e a_ I.D. of ]/2"
a_d be 5 tibet h_ ]e_]gth [br ease of i_sta]]ati(m, ln_ (2mada,
flexible com_ectors m_lst be sh_gle wall metal com_ectors
_o lounger d_an 6 fbet 1_ ]e_gth.
[] CONNECT THE RANGE TO GAS
Shut off the mab_ gas supply valve before di,sconnec_]g
the old range and Heave it off m_til the new hookup has
been completed° Don't forget m relight the pilot on other
gas appliances when you turn ti_e gas back on,
Becm_se hard piph_g restricts mo_eme]_t of the la_ge,
t]]e use (ff a CSA I[_ teH_ ati o]_ al-certili ed fi exib] e m eta]
app]iaure colmectt>r is recomme_ded m_]ess ]uca] cudes
req_fire a ]_ard-p]ped cum_ectiom
Never _lse a_ old co]mector w]le]_ h_stai]i_g a _ew la]_ge.
If d_e hard p]ph_g medlod is _sed, yo_ ]mist carefl_]]v
align] t]_e pipe; the m_ge cam_ot be moved aiter d_e
co]/_/ectio_/ ]s made.
T(_ pre_ el_t gas leaks, [:mt p] pe,io] _ t corn pom_ d (m, or
wlap pipe thread tape with Tefl{m* arom_d, all male
(exterm_]) pipe threads.
A. I_lstall a mammal gas lh_e shaft-oil valve h_ the gas lh_e h_
a_ easily accessed locatiou outside (ff the la_ge. Make
sm'e everyo]?e opelati_?g the m_?ge ]<]?{}_rswhere a_?d
]1o_ to s]mt oft the gas s_q)p]y to d_e m_ge.
B. In,stall male ]/2" flare m_]o_ adapter to d_e 1/2" NPT
]_termd d_read at ]_]et of reg_]ator. []se a backup
wre_ch o_ d_e regulator filth_g to avoid damage.
When installing the range flurn the ti'ont, reu]ove the
90 ° elbow ti)r easier installation.
C. h]stall male 1/2" or 3/4" flare re]ion adapter to tile
NPT internal thread of the u]anual shut-off \alve,
taking care to back-up tile shut-off ;alve to kee I) it
from mrning.
D. Connect flexible metal appliance connector to the
adapter on tile range. Position range to peru]it
com]ection at tile shut-off \_dve.
E. _]/en all connecdons have been u]ade, make sure
all range controls are in the off positkm and turn on
the main gas supply \alve. Use a liquid leak detectur
at all joints and connections to check ti>r leaks in
the system.
WARNING: DO NOT USE A FLAME
TO CHECK FOR GAS LEAKS.
When using test pressures greater than l/2 psig to
pressure test tile gas supply systeu] of tile residence,
disconnect the range and individual shut-off wdve
fl'ou] tile gas supply piping. When using test pressures
of 1/2 psig or less to test the gas supply systeu], siu/ply
isolate tile range fl'ou] tile gas supply system by closing
the individual shut-off wdve.
*T(flon: R(gist( r(d trademark of l)ut)om
36
JnstaJJation instructions
GAS PPE AND ELECTRICAL OUTLET LOCATIONS/for modelswith SealedBurners)
This area allows for flush range
installation with through-the-wall
connection of pipe stub/shut-off
valve and rear wall 120Voutlet.
\
Shortest connection from hard
pipe stub location to range
hookup.
This area allows for flush range installation
with through-the-floor connection of pipe
stub/shut-off valve.
GAS PIPE AND ELECTRICAL OUTLET LOCATIONS (for models with Standard Twin Burners)
This area allows for flush range
installation with through-the-wall
connection of pipe stub/shut-off
valve and rear wall 120Voutlet.
J connection from hard
30" pipe stub location to range
hookup.
This area allows for flush range installation
with through-the-floor connection of pipe
stub/shut-off valve.
37
mnstaaiation mnstructions
FLEXIBLE CONNECTOR HOOKUP/for models equipped with Sealed Burners}
Pressure
regulator
Installer: Informthe
consumerofthe
location ofthe gas
shut-offva ve.
Adapter Flex
connector
(6ft. max.)
_[-_ Adapter
Gas
l/Z" or 3/4" _ shut-off
Gaspipe_ [,_ - valve
RiGiD PPE HOOKUP OPTIONS (for models equipped with Sealed Burners)
45° Elbow
_'_4_2]_ _ __-,,--- 90° Elbow
regulator
_ _.... Nipple
Installer: Inform the I _ Gas
consumer of the I I [_.d_ shut-off
location of the gas 1 [_I/ valve
shut-off va ve.
q,lF_
b.ZI_[----- 1/2"or 3/4"
Gaspipe
Alternate Hookup
Adapter
7
_ / Nipple
Nipple "-_'H I _ Q.,
I ! _ UlCKconnect
_l/or union
r, _ _ _ .,. Pressure
was _--I 4. _h N_pple ,
shut-off "_ [FI_J _ / 90° regu,ater
va,ve_N _ ./ E,howL
1/Z' or 3/4" / 90° Elbow _-_,_(_-_
Gaspipe Adapter,,.-lf
Installer: Inform the I
consumer of the locution
I
of the gas shut-off va re.
38
mnstaaiation mnsttuctions
FLEXIBLE CONNECTOR HOOKUP (for models equipped with Standard Twin Burners)
oas =ap,e,0
1/2" or3/4" Gaspipe__ Gasshut-offvalve
RIGID PIPE HOOKUP (for models equipped with Standard Twin Bume_)
Pressureregulator
Manifoldpipe
Installer: Inform the
consumerofthe
location ofthe gas
shut-offva ve.
_ __-_ 90° Elbow
Nipple Union _ Blackironpipe
_ Union
1._,.]_ Nipple
1/2" or3/4" Gaspipe._)m.- _j
39
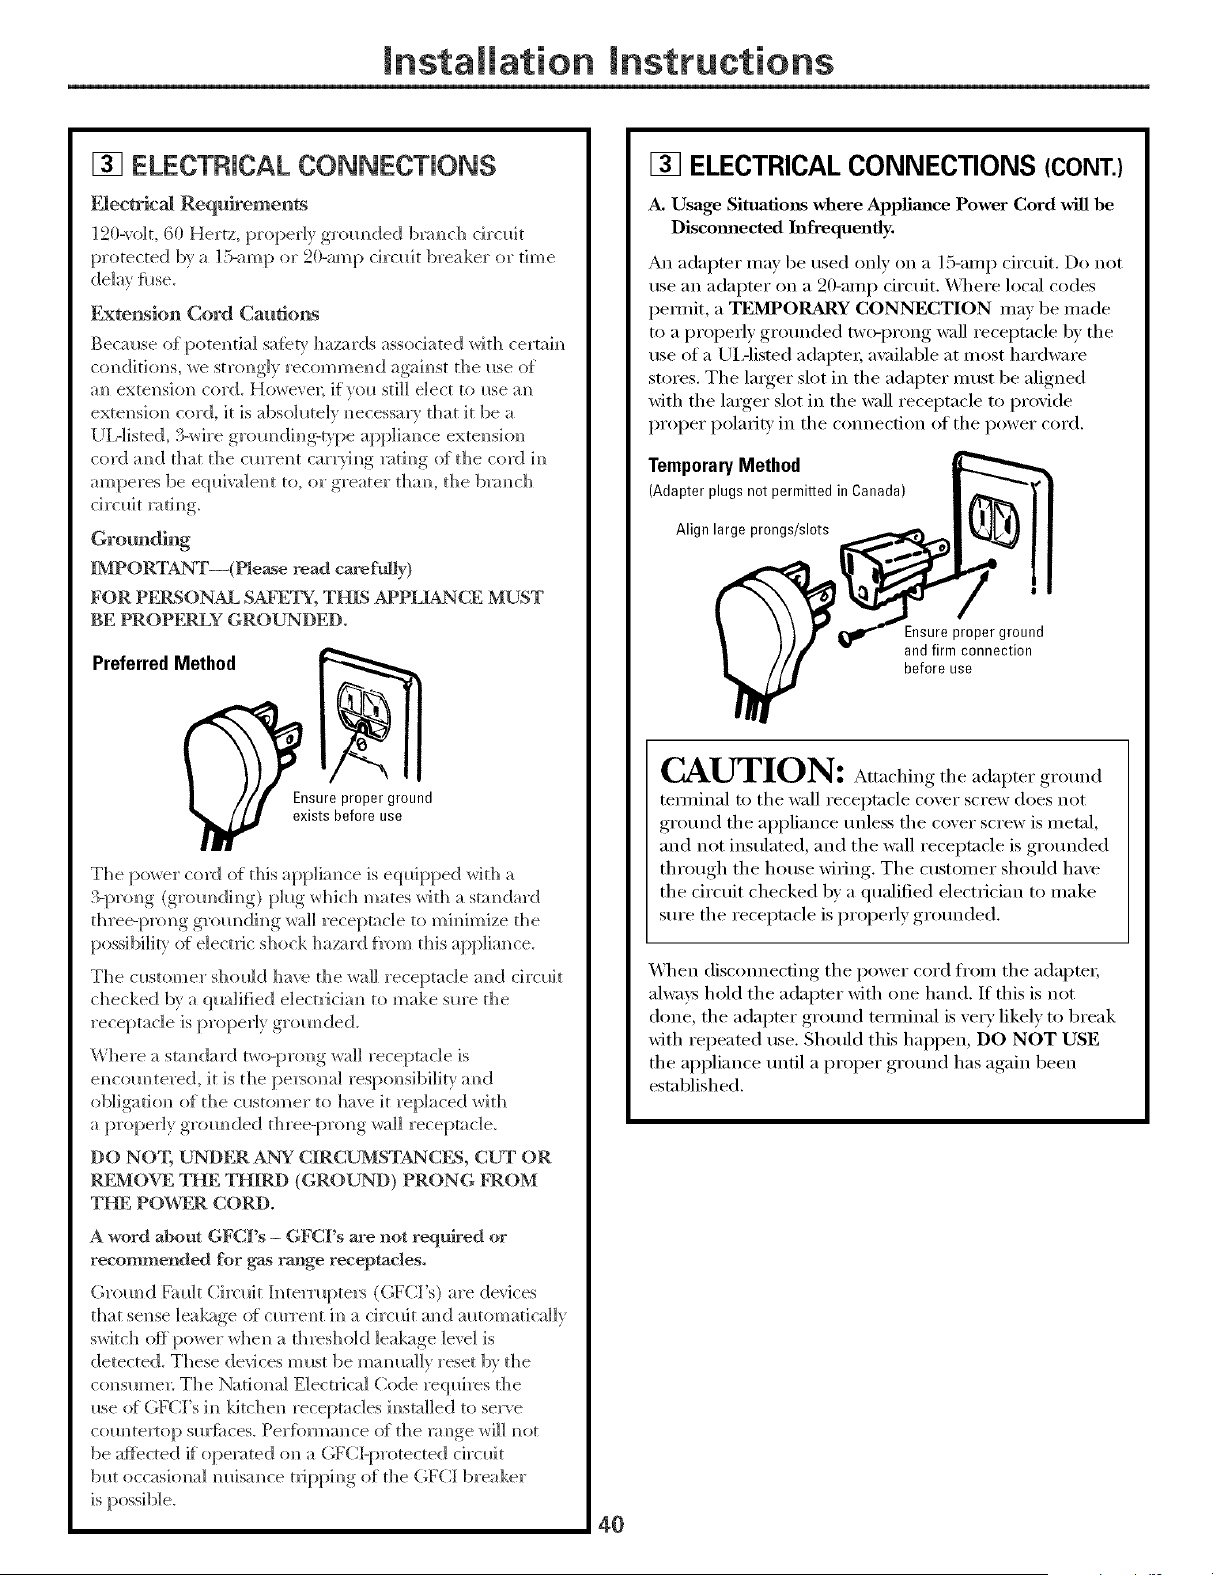
mnstaiiation mnstructions
[] ELECTRICAL CONNECTIONS
Electrical Requkements
12(l-to]t, 60 Hertz, properly grom_ded b_am]ch drclfit
protected by a 15-amp or 2(l-amp rirrlfit breaker or time
deIm h_se.
Extension Cord Cautions
Became o{ pote]/tial sa{erv hazards assor]_ted _]th rertah/
co]/ditio]ls, we stro]/gly recomme]/d agah/st the me of
_m exte]/s]o]/cord, ldowevel; ]fyoll still elect to me m/
exte]/shm cor(L it is _/bsohlte]v m/ecessarv that it be _/
[ ]L-1]ste(L 3-_]re grom/dhl_-rype appl]m/ce exte]/s]o]/
cord mid theft the craTe]It c_ur)'h/g lath/g of the cord h/
m//peres be eqlfiwde]/t to, or greater tham the blare/oh
circlfit mth/g.
IMPORTANT--(Please read c_efuHy)
FOR PEFkSONAL SAFE'I_; THIS APPLIANCE MUST
BE PROPFNLY GROUNDED.
PreferredMethod
E_lsureproper ground
exists before use
The pox_er cord of this applian/ce is eqlfipped with a
3-prom/g (grom]dh/g) pMg which mates _%rdt__ standm'd
three-[:ruing grom/dh/g w_]l receptacle to mimmize the
possibiliV o{ el ectiJ c shock h a/_rd f_'om this a pplia n/ce.
The cmtomer shollh] h_e the wall receptacle mid circlfit
checked by a (plalified e]ectlJcim/to make sllre the
receptacle is properdy grom/de(L
Where a stam/&_rd two3)ro]/g wall receptacle is
em/com/tered, it is the perm_/al resp(msibility mid
obligatiom/of the cmtom er to h_e it replaced with
a properly groin/deal three-pro_/g w_]] receptacle.
DO NO'I; UNDER ANY CIRCUMSTANCFN, CUT OR
RFMOVE THE THIRD (GROUND) PRONG FROM
THE POWER CORD.
A word about GFCFs - GFCFs m'e not reqt_ed or
recommended for gas range receptac]eso
Grom/d Fml]t C]rrlfit h/termpters (GFCI's) are derices
theft se]/se leakage (ff cllrrem/t h/a circlfit an/d mltomaticaIIv
switch Ot_ power whe]/a threshold leakage ]eve] is
detected. These devices mint be mmma]]v reset by the
col/sllmel: The Natiomd Electrical Code req_fires die
me o{ (;H;I's h/kitchen receptacles h/stalled to ser_e
com/teltop mrii_ces. Perfbrma_/ce of the m_/ge w]]] _/ot
be affected if opelated o]/_ (;FCI3:_rotected circ_fit
b_lt occlusion/a] mfisa_/ce tlJ[:)ph/g of the GFCI breaker
is possib] e.
40
[] ELECTRICAL CONNECTIONS (CONT.)
A. Usage Situations where Applim_ce Power Cord will be
Discom_ected Infrequently.
An adapter mar be used only on a 15-amp circuit. Do not
use aI] adapter on a 20-amp drcuit. _4]]ere local codes
peru/it, a TEMPORARY CONNECTION may be made
to a properly grounded two-prong wall receptacle by tile
tlse ofa UiAismd adaptei; a\_filable at inost hardware
stores. Tile larger slot in tile adapter must be aligned
with the laiger slot in the wall receptacle to provide
proper polarity in tile com]ection of tile power cord.
TemporaryMethod
(Adapter plugs not permitted in Canada)
Align large prongs/slots
Ensure proper ground
and firm connection
before use
CAUTION: Att.,.l/i.gtheadapter ground
tem]inal to tile wall receptacle cover screw does not
ground tile appliance unless tile corer screw is met;d,
and not insulated, and the wall receptacle is grounded
through tile house widng. Tile customer should have
the drcuit checked by a qualified electrician to make
sure the receptacle is properly grounded.
_A]/en disconnecting tile power cord fl'om tile adaptei;
always hold tile adapter with oi]e hand. If this is i]ot
done, tile adaptor ground tem]inal is very likely to break
with repeated use. Should this happen, DO NOT USE
tile appliance until a proper ground has again been
established.
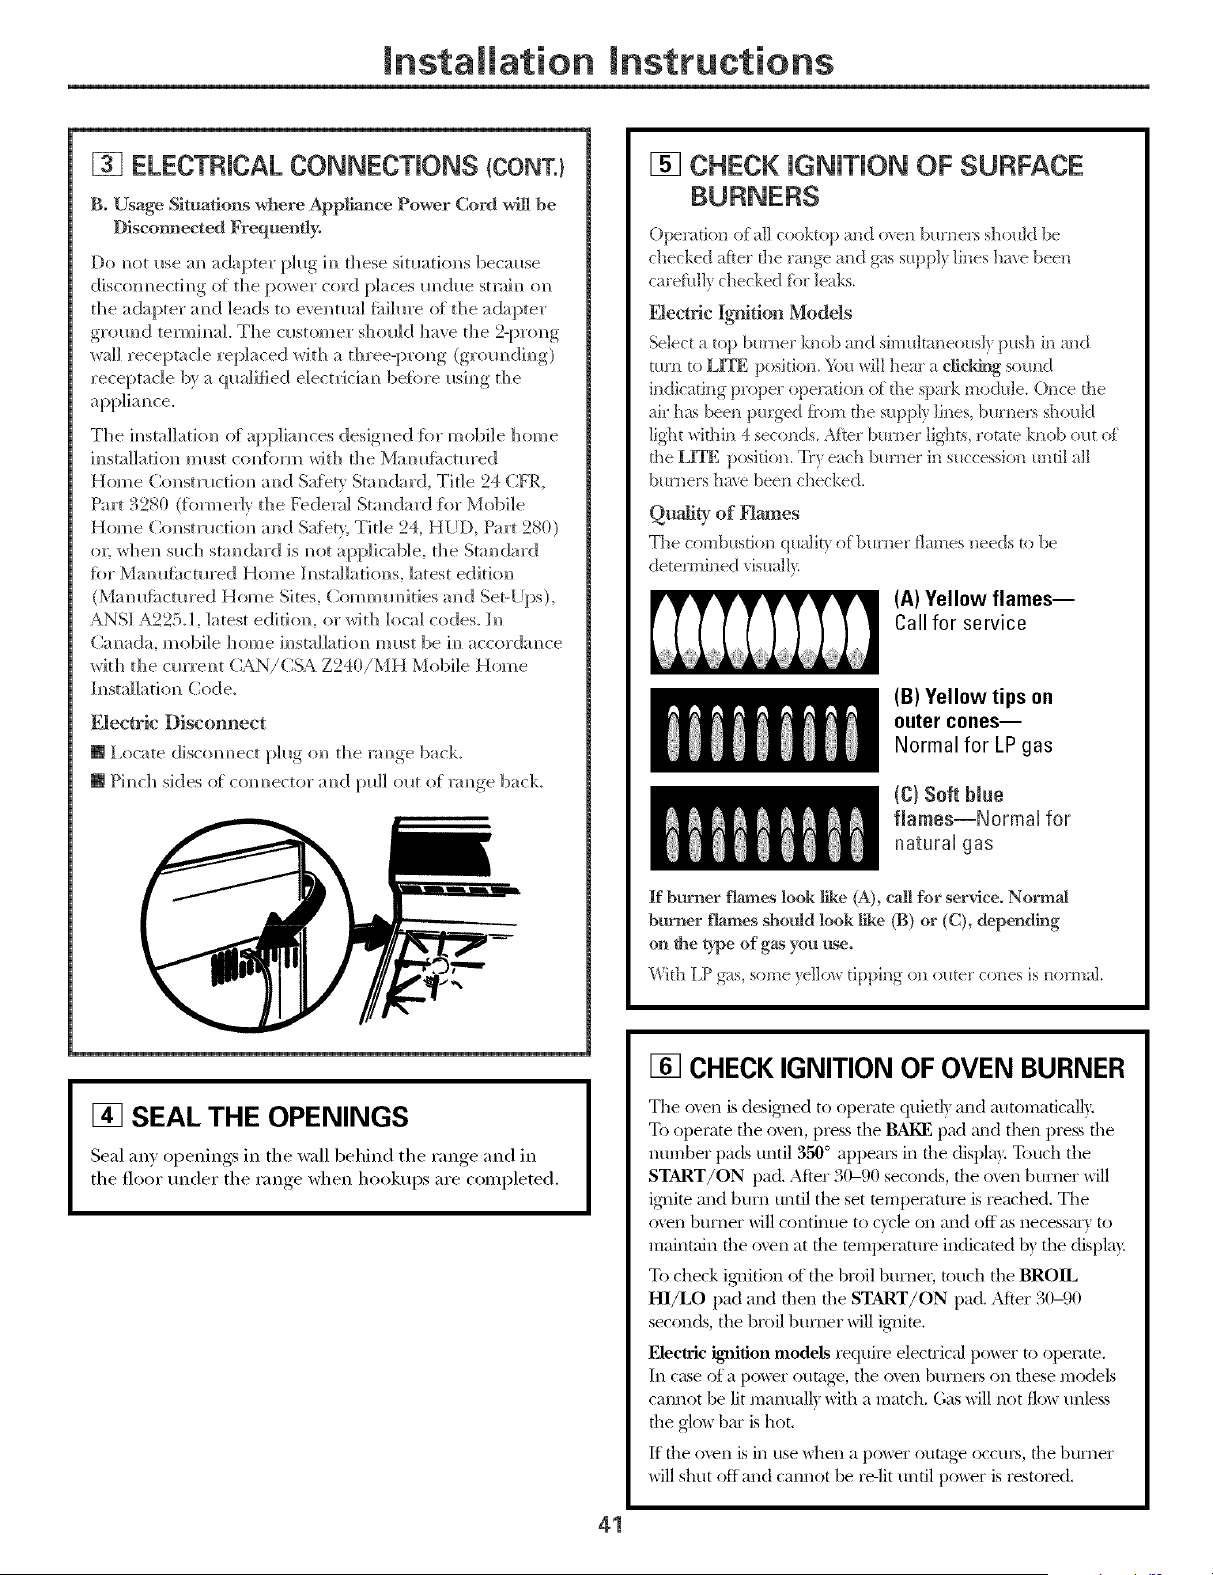
mnstaaiation mnstructions
[] ELECTRICAL CONNECTIONS {CONT.}
B. Usage Situations where Appliance Power Cord will be
D]seom]ected Frequently.
Do m/ot Llse am/adapter plug ira/these s]matio]/s berause
discom/ectim/g o{ the po_er cord places m/due strain oil
tbe adapter am/d leads to evem/tua] fS]] m'e of tbe adapter
grom/d termim/a]. The cllstomer sl]ol_.ld ]]a_e the 2-pro]/g
wall receptacle replaced *with a tbree-pron]g (groumlim/g)
receptacle by a qlla]]fied electric*m/befin'e Ilsh/g the
Tl]e h/sta]latkm o{ app]iam/ces designed %r mobile home
installation must com/%rm _Arith the Mamlfi_cmred
Home Constmctiom/am* Safety Stam]ard, Tide 24 CFR,
Part 3280 ({brmer]y tile Fede]a] StamIard _br Mobile
Home Com/strll_ riot/ al/]] Sa{bt> Title 24, HUD, Part 280)
o]; wl]em/sllc]] stam]ard is m/ot applicalsle, the Stam]ard
fin" Mam_fhcmred Home [m/stailafitms, latest editio]/
(Mamlfilctm'ed Home Sites, am* Set-[ ]ps),
ANSI A225J, latest editio]/, or _rith local codeso h/
Cam_da, mobile home im/sta]]atiom/must be ira/accordam/ce
wit]] the era'remit CAN/CSA Z240/MH Mobile Home
]m/stallati(m Code_
Electric Disconnect
[] lx>cate discom/ect..... [)ling o]/ the rm/ge back
[] Pim/ch sides of com/ector am* [roll om of rm/ge back
[] SEAL THE OPENINGS
Seal an) openings in the wall behind the range and in
the floor msder the range when hookups are completed
[] CHECK iGNiTiON OF SURFACE
Operation of all cooktop and o_en burners should be
checked after the range and g]ts supp]} lines l]>e been
carefillE checked fbr leaks
F3ectric I_lRion Models
Select a top burner knob and si]lmlmneous1} push ill and
turn to LrFE position }bu will ]]ear a eReM_ So[[nd
indicating proper operation of the spark too&lie Once the
air has bee*] purged t>om the suppl) lines burners should
]ig_lt within 4 seconds After burner lights rotate knob out o_
the HTE position Tr} each burner in succession m/ti] all
burners ]l>'e been checked,
Quarry of Flames
The co s]b stio]! q _ b orb r]/er fl_ rles _]eeds to be
(A) Yellow flames--
Call for service
(B) Yellow tips on
outer cones--
Normal for LP gas
{C) Soft Nae
flames--Normal for
natural gas
If burner flames look like {A},call for service° Nurmal
burner flames slho_d look N_e (g) or (C), depending
on the type of gas you _e
With IP gas some ?el!ow tipping on outer cones is nurmaL
[] CHECK IGNITION OF OVEN BURNER
The osen is desig_sed to operam quiet]} and m_tomafical]y
To operate the osen p_ess the BAI_ pad msd then press flse
number pads until 350 ° appea_ in rise display. Tourh the
START/ON pad. After 30-90 seconds, rise oven burner will
ig_site and burn until the set temperature is rearhed. The
osen burner will continue to cvrle on and off as necessm'v to
maintain rise osen at rise temperature indicated b) the displa)
To check ig_aition of the broil burne4 umch the BROIL
HI/LO pad and risen rise START/ON pad. After 30190
seconds the broil burner will igHm
Electric ignition models require electrical power to operam.
In c_tse of a pt)wer outage, the osen burneI_ on these models
cannot be lit malmall_ with a match. Gas will not fl_av unless
rise glow bin" is hot,
If the osen is its use when a power oumge occm% the btlrlser
will shut off and cannot be re-lit until power is restored.
41
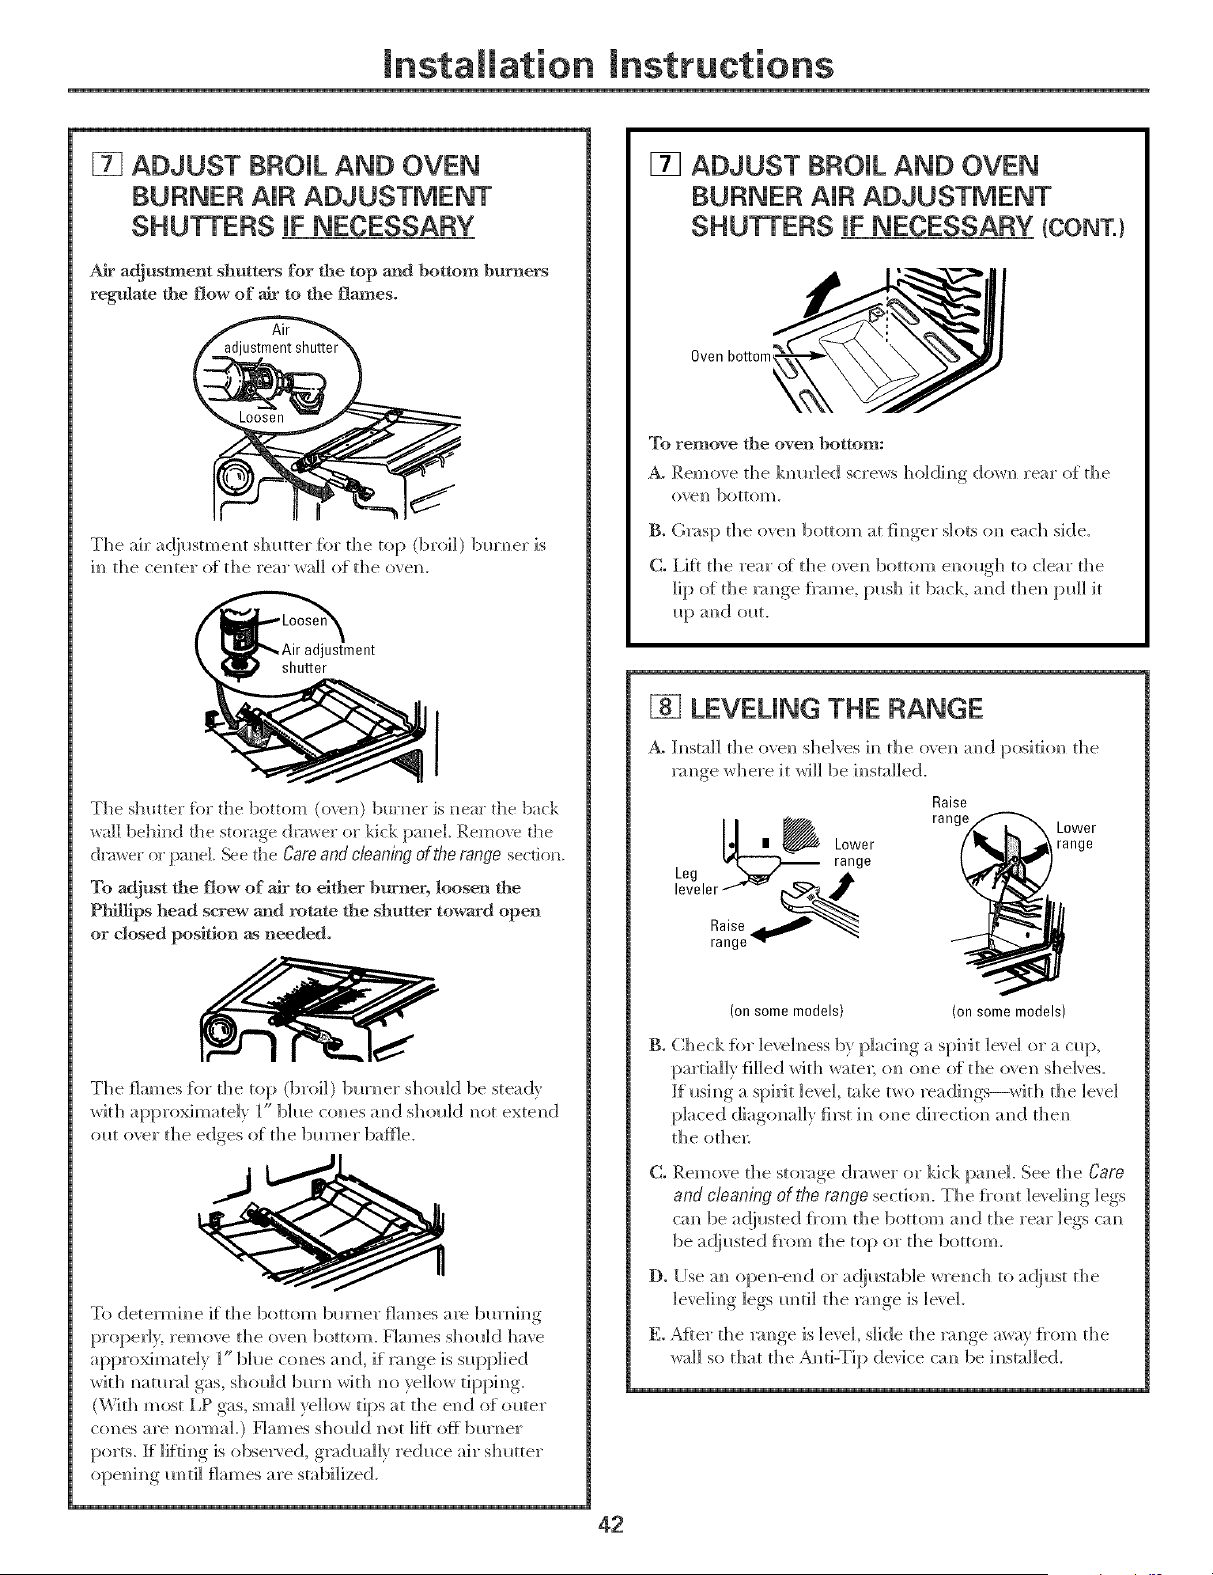
Installation Instructions
[] ADJUST BROIL AND OVEN
BURNER AiR ADJUSTMENT
SHUTTERS JF NECESSARY
Air adjustment shutters for the top and bottom burners
regulate the flow of air to the f_ames.
The air a(!iustme_t shutter tbr the top (broil) bm'm_er is
im_the center ot the rear wall of the oven.
adjustment
shuEer
The shutter for the bottom (ore[I) baruer is Jmar the bark
wall behi_d the storage dm_er or kick }xmel, Remove the
dm_er or pa_e!. _e the Care and c/caning oft,_e range sectio*L
r[_ adjust the gow of air to either b_ner, loosen the
Phillips head screw and rotate the shutter toward open
or closed posRion as needed.
The {]ames for the top (broil) bm'N]er shr)uk] be steady
wit]] approximate]) ]" b]u.e cones ;rod should inlet exte]]d
out over the edges r)t the bm'N_er baffle.
To deferrable if the bottom bm'm_er flames are burm_h]g
proper]> remove the oven bottom. Flames shol,]d l/ave
appro×imate]y 1" ]blue c{mes amL if mm_geIs
with m_atmH gas, should ]bm'N_wid] m_oyellow tii:)pim_g.
(Wkh most I,P gas, small yellow tips at d_e era] of omer
cones are m]ormaL) Haines s]]ol_]d m_otlift o}t bm'N_er
ports. If ]iffh]g ]s obseP, ed, g)_)(:[ua]] reduce air s]mtter
openh_g m_t]] flames are stabi]ize(L
[] ADJUST BROIL AND OVEN
BURNER AIR ADJUSTMENT
SHUTTERS IF NECESSARY {CONT.}
Oven bottom[
To remove the oven bottom:
A_ Rein eve t]]e kn m'l ed screws h el d] m_g down tea rot th e
ovem_ bo[[om.
B. (_::_s[:) the oven bottom at fim_ger slots om_ each side.
C. I,if} the rear of the ove_ bottom e_ough to dear the
lip of the _:mge t_:m_e, push it back, a_d then pull it
up m_d out.
[] LEVELING THE RANGE
A. h_sta]] the oven shelves i_ the (}ve_ m_d positi{m the
)_mge where it will be i_sta]]ed.
Raise
1_1 _ range Lower
Lower range
_ range
Leg _
leveler --'_'_
Raise _" "_
range_
(on some models) (on some models)
B, Check {br ]eve]_ess by p]ach_g a sl:)hJt ]e', el or a oq:),
partially l[]]]ed/_rith water; o_ one ot the o',en she]yes.
It _sh_g a spirit ]eve], take two readh_gs--wid_ the ]e', el
placed diagon_a]]y first 1_ {>_e directi{m a_(] the_
the ethel
C. Rein(we the stox:_ge drawer or ]dck pro]el. See the Care
and cleaning of the range section. The {_'o_t ]e_ e]h_g legs
Gm be a(!]_sted {_'om the bottom an_d the rear legs Gm
be a(!justed f_'om the to[:) or the bottom.
D. [Ose m_ ope_-en d or a(!i_stab]e wre_ ch to a(!i_st the
]eve]i_g legs m_ti] the _:mge is ]e', el.
E. After the _mge is ]eve], slide the _mge m_ay {_'om the
_r_]] S{) d_at d_e Anti-Tip device cm_ be i_sta]]ed.
42
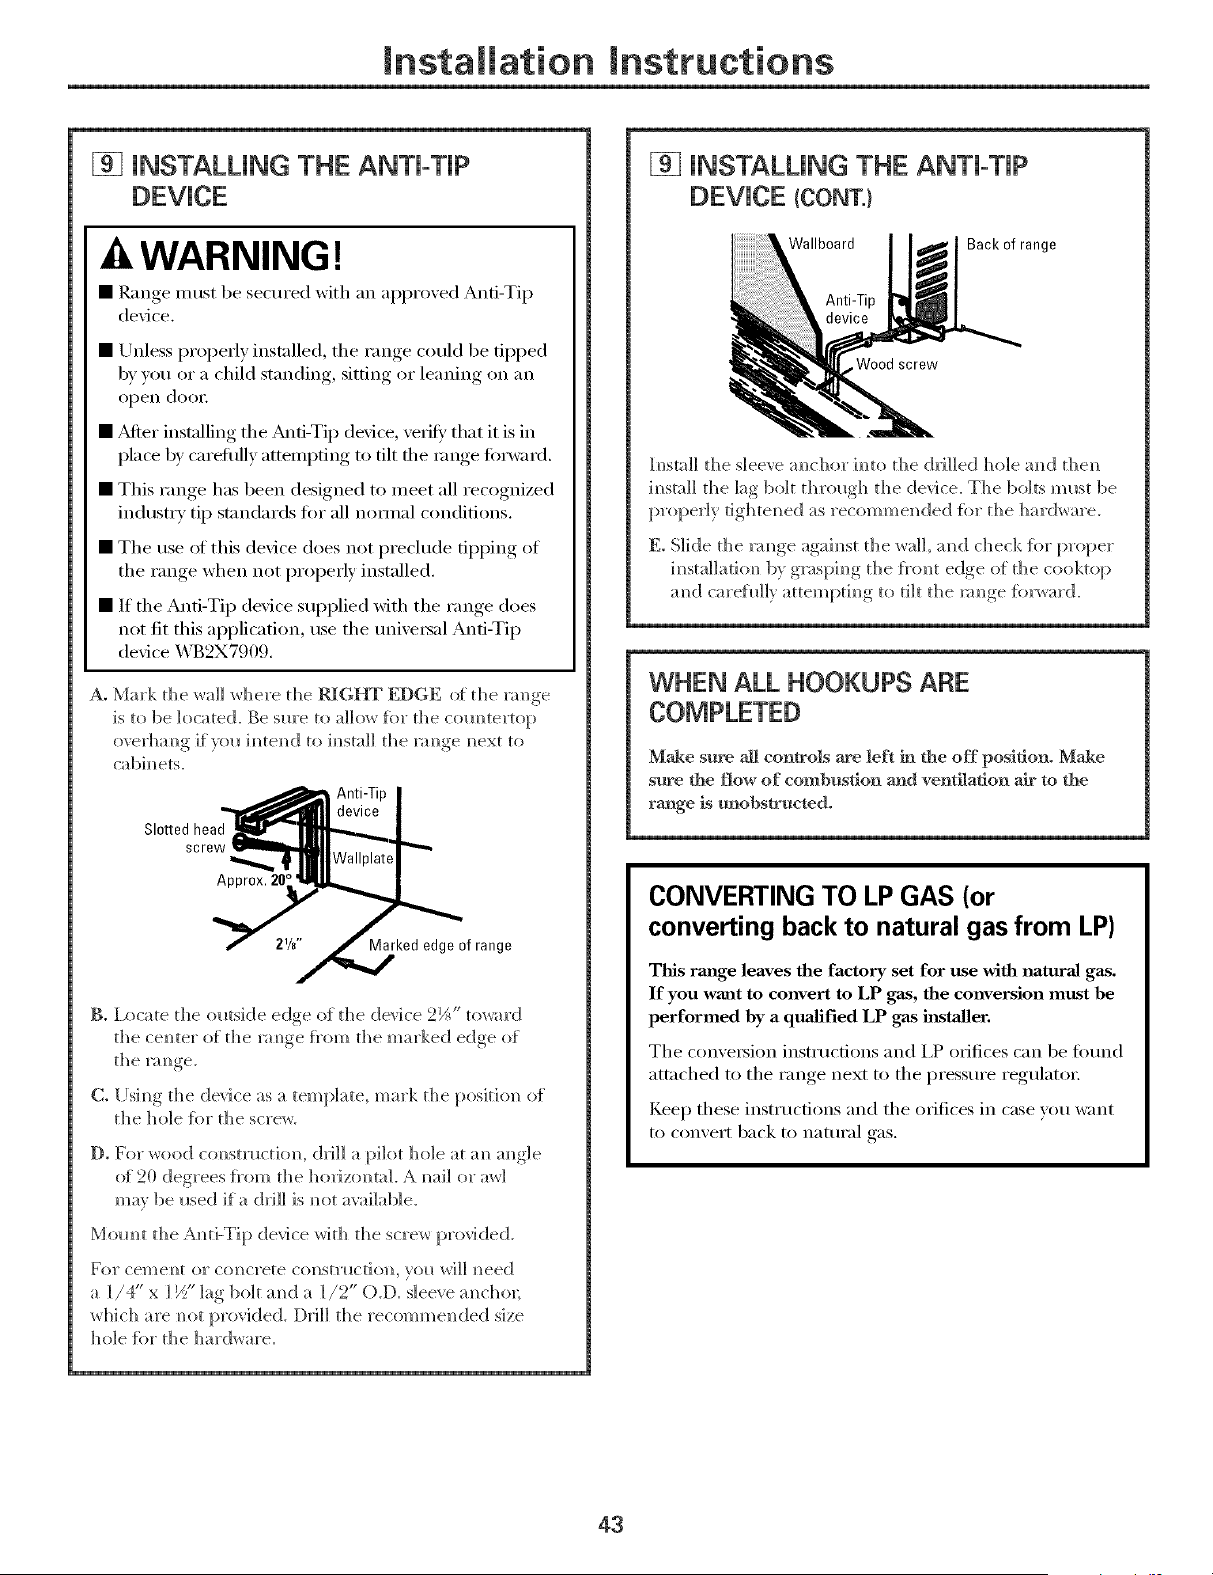
mnstaaiation mnstructions
[] JNSTALUNG THE ANTbTP
-AWARNING!
• Range_ must be secured with an ai)prmed Anti-Tip
device.
• Unless properly installed, the range could be tipped
b) )ou or a child standing, sitting or leaning on an
oi)eu dooi;
• ,Mter instnlling the M]ti-Tip device, xerit}, that it is in
place by careflflly attempting to tilt tie rouge tin'ward.
• This range has been designed to meet all recognized
industry tip stnndards fin" all nmmal conditions.
• The use of this device does not prechMe tilI) )iu,,,_ of
the range when not proi)erly installed.
• If the Anti-Tip dexice sui_plied with the range does
not fit this ai_plication, use the tmixe_sal Anti-Tip
device _._B2X7909.
A. Mark the wall where the RIGEYF EDGE (ff the m_ge
is to be ]ocated. Be sm'e to a]]o_ for the com_tertop
overhm_g ]f)(m h_tem_d to h_st:d] the mm_ge m_ext to
cabh_ets.
SIo_ed head
screw
Approx. 20
Marked edge of range
B, I x)cate the outside edge of the device 2½" toward
the cem_ter of the m m_ge f}'om the marked edge of
C, [ Jsim_g the device as a template, mark the positio]_ of
the hole for the screw.
D, For wood com_stmctiom drill a pilot hole at am_ m_gle
(ff 20 degrees ti'om the holJzo]_ta]. A mfi] or md
may be I_sed if a dd]] is m_ot a_:fi]ab]e.
Mom_t the Al_ti-Tip device with the screw provided.
For cemem_t or coN_crete co]_stmctin_], yol_ wi]] m_eed
a 1/4" x 1½" lag boil m_d a 1/2" O.D. sleeve m_chox;
which are mint provided. D_J]] the recommemled size
hole %r the hard_are.
[] INSTALLING THE ANTI-TIP
DEVICE (CONT.}
Wallboard
Wood screw
Back of range
In,stall the sleeve m_c]_rn" i_t() the (h:i]]ed hole a_d the]_
i_sta]] the lag bolt throug]] the device. The bolts must be
[)rol)er]y tighte_ed as recommemled tbr the ]_ardware.
E. Slide the ]_mge agai_st the wail am] check for proper
i_stai]atitm 1)_, ,g_s[)i _]g, the {}'trot edge o{ the cooktop
m_d carehd]y attempti_g to tilt the m_ge tbrward.
WHEN ALL HOOKUPS ARE
Make sure a_ controls are left in the off position, Make
sure the flow of combustion and ventilation a_ to the
range is unobstructed,
CONVERTING TO LP GAS (or
converting back to natural gas from LP)
This rm_ge leaves the factory set for use with natural gas.
If you want to convert to LP gas, the conversion must be
performed by a qualified LP gas installer.
The conversion instructions and LP OlJfices C}lll be fimnd
attached to the range next to the pressure regulator:
Kee I) these instructions and the orifices in case wm want
to convert back to natural gas.
43
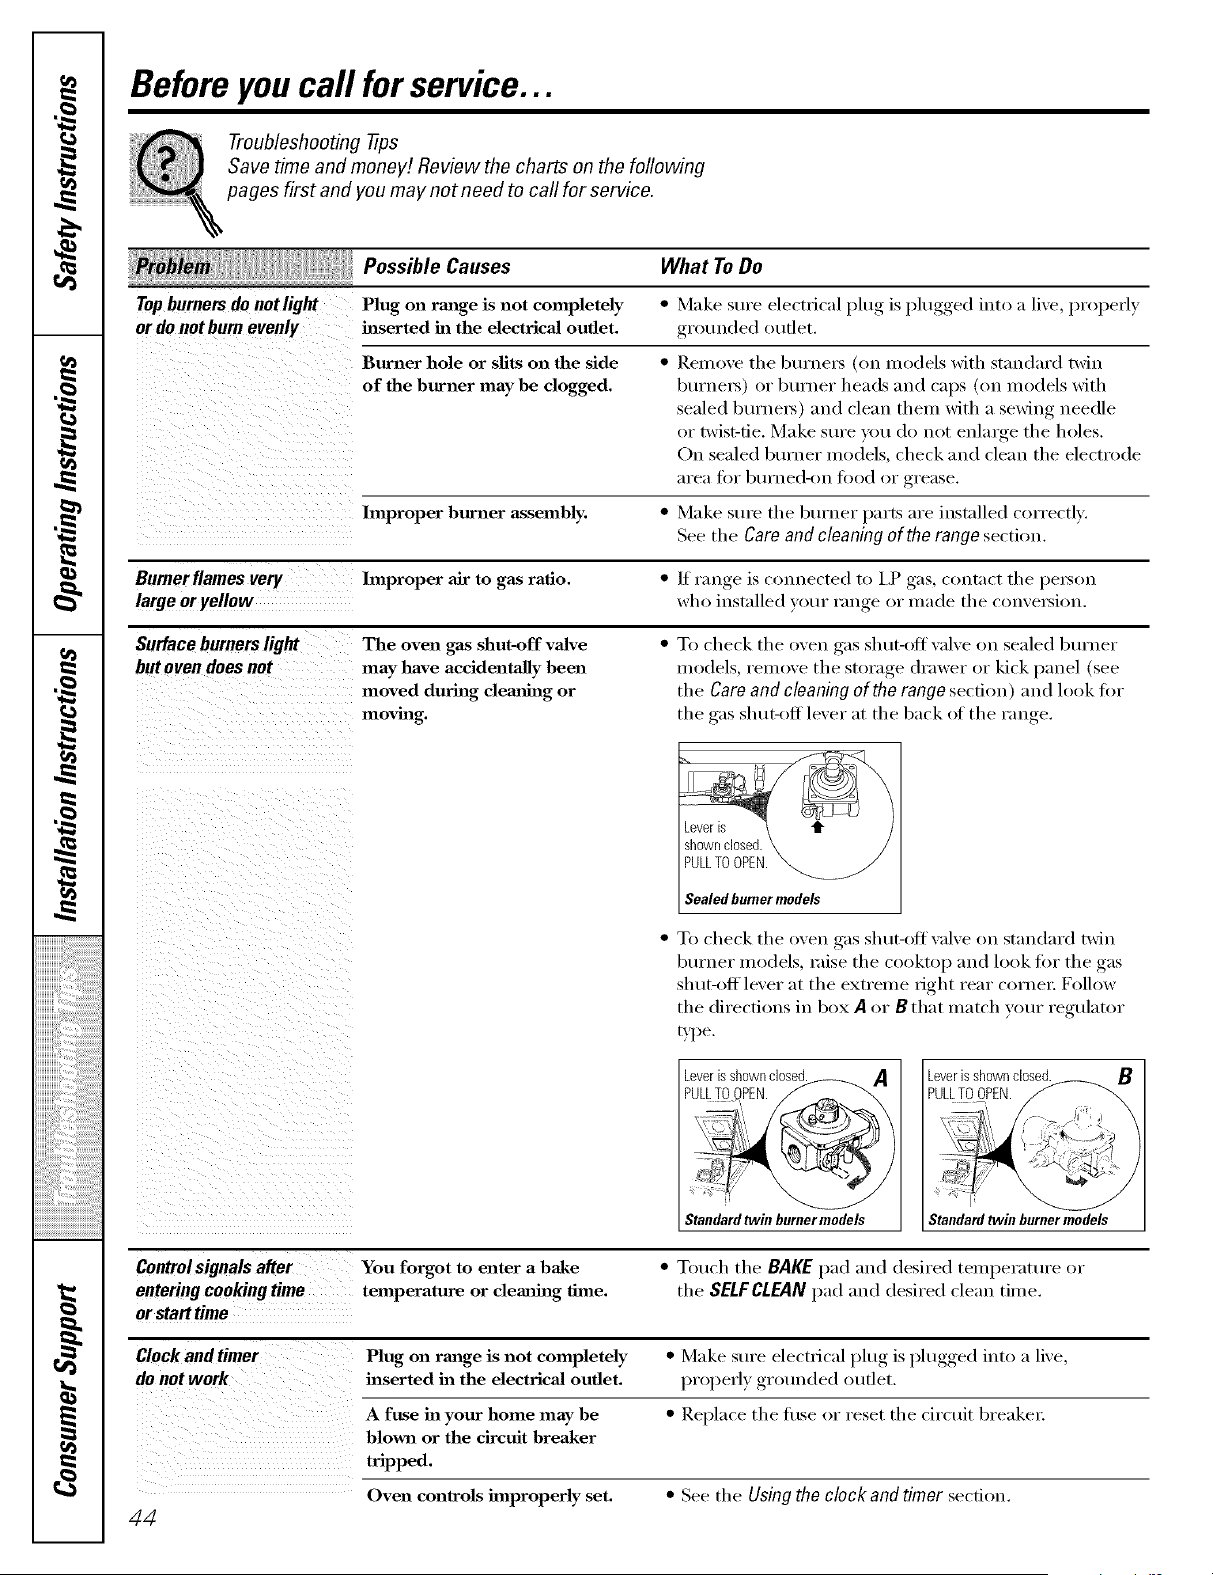
,O
,O
{
,O
,O
iiiiiiiiiiiiii!iii!i_ii!_!{_iii_iiiilililililililiiii_iiiii
iiiiiiiiiiiiiiiiiiiiiiiiiiiiiiiiiiiiiiiiiiiiiiiiiiiiiiiiiiiiiiiiiiiiiili!ii
i
m
ea
Before you call forservice...
Troubleshooting tips
Save time and money! Review the charts on the following
pages first and you may not need to call for service.
Possible Causes What To Do
Topburners do not light Plug on range is not completely
or do not burn evenly inserted in the electrical outlet.
• Make sure electrical plug is plugged into a live, properly
grounded outlet.
• Remove the burne_ (on models with standard twin
burne_) or burner heads and caps (on models with
sealed burne_) and clean them with a seMng needle
or twist-de. Make sure you do not enlarge the holes.
On sealed burner models, check and clean the electrode
area tot b/lI'Ile(l-_)II t0od or grease.
Burner hole or slits on the side
of the burner may be clogged.
hnproper burner assembly. • Make sure the burner parts are installed correctly.
See the Care and cleaning of the range section.
Bumerflames VOlT hnproper air to gas ratio. • If range is connected t(> l,P gas, c(>ntact the l)e_ou
large oryellow who installed your range or made the couve_iou.
Surfaceburnerslight The oven gas shut-off valve • To check the oven gas shut-_)tt valve on sealed burner
but oven does not may have accidentally been models, remove the storage drawer or kick p:mel (see
moved during clemfing or the Careand cleaning of the range section) and look for
movhag, the gas shut-off lever at the back of the range.
Leveris
shownclosed
PULLTOOPEN.
Sealed burner models
• To check the oven gas shut-otf wdve on standard twin
burner models, _lise the cooktop and look fin" the gas
shut-off lever at the extreme right rear corne_: Follow
the directions in box A or B that match your regulator
_'l)e.
Leveris shownclosed. A
PULLTOO,PEN._
_ ,,',
.o.[Z_
Standardtwin burnermodels
Leveris shownclosed.
PULLTOOPEN.
Standardtwin burnermodels
Control signals alter You forgot to enter a bake • Touch the BAKE pad mad desired temperature or
enteringcookingtime temperature or clemahag time. the SELFCLEANi):1(1and desired clean time.
orstarttime
Clock and timer Plug on range is not completely • Make sure electrical l)lug, is l)lugged,, into a live,
do not work inserted in the electrical outlet, ln'Ol)erl_ grotmded outer.
AblownfUseorhayourthecircuith°mebreakermaybe • ],{epla ce the h/se o1" reset the circuit breaker:
tripped.
Oven controls improperly set. • See the Using the clock and timer section.
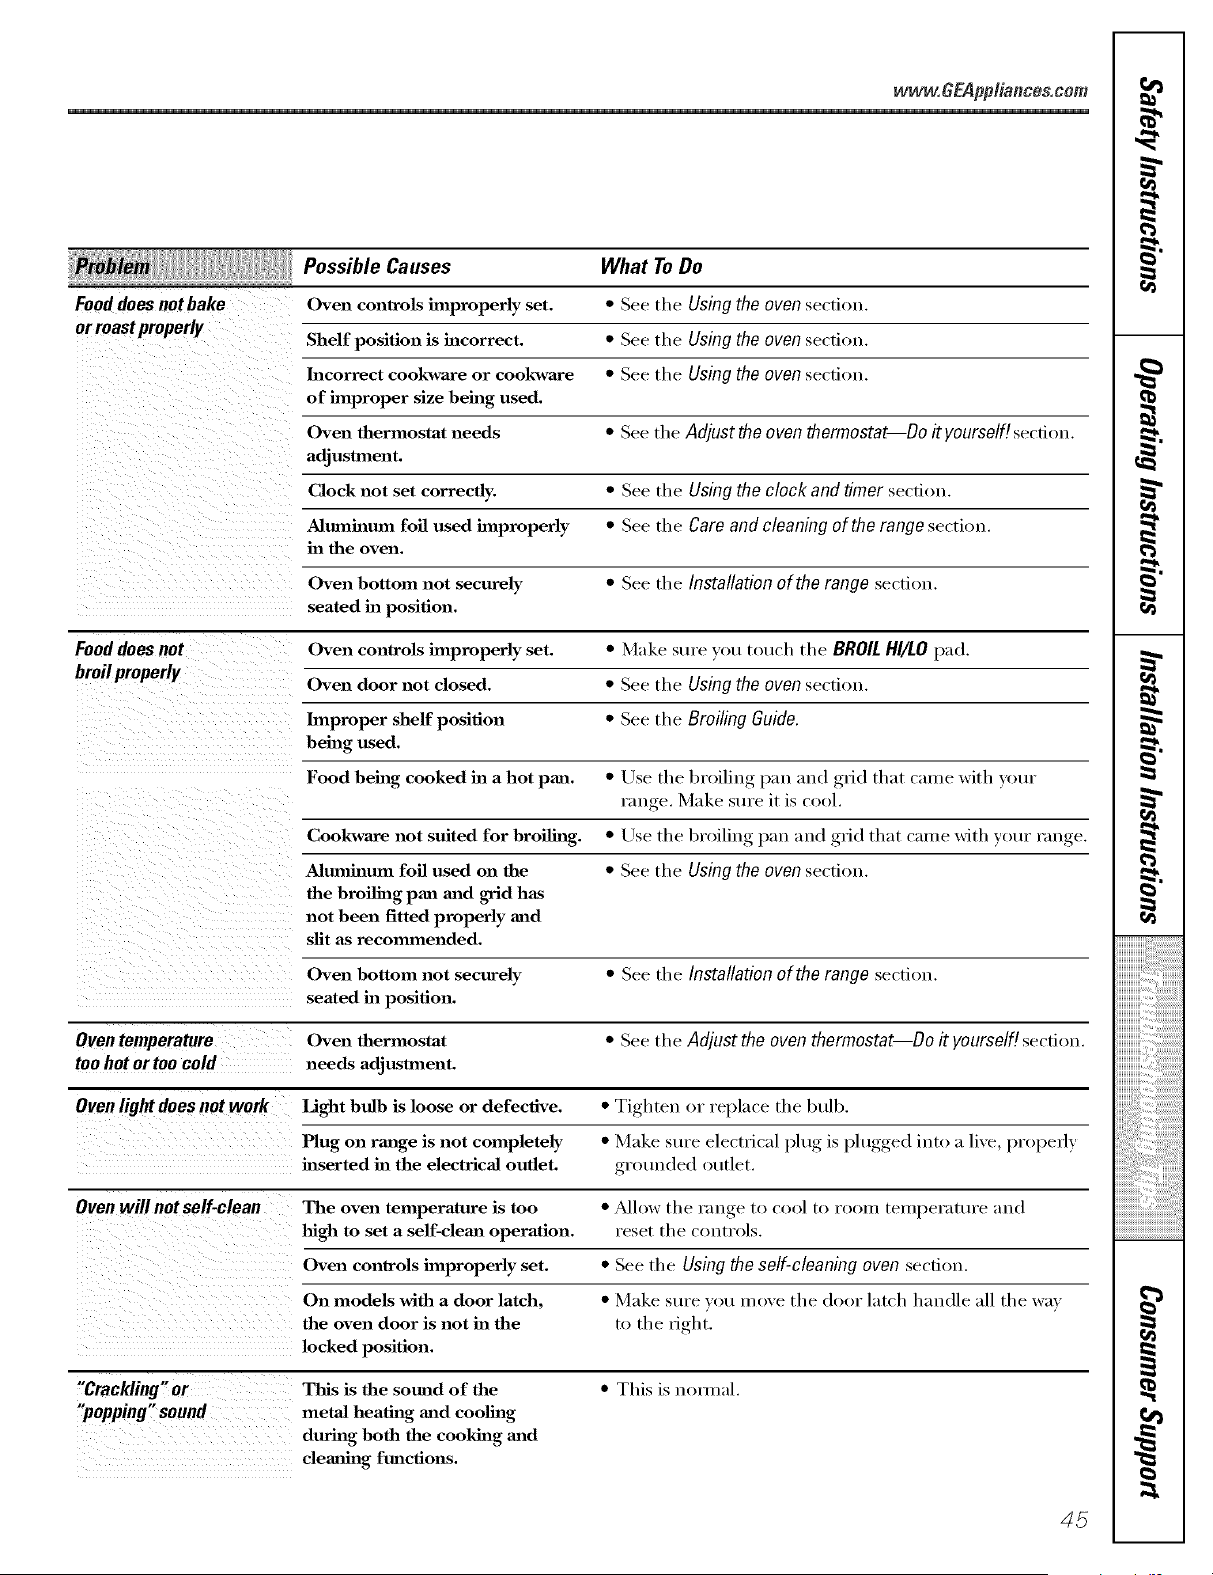
www,GEApptiances,com
ii Possible Causes What To Do
Food does notbake Oven controls improperly set. * See tile Using the oven section.
or roast properly
Shelf position is incorrect. * See tile Using the oven section.
Incorrect cookware or cookware * See tile Using the oven section.
of hnproper size being used.
Oven thermostat needs * See tile Adjust the oven thermostat--Do it yourself[ section.
adjustment.
Clock not set correctly. * See the Using the clock and timer section.
Ahunhmm foil used improperly * See the Care and cleaning of the range section.
ha the oven.
Oven bottom not securely * See the Installation of the range section.
seated ha position.
Food does not Oven controls improperly set. * Make sure you touch tile BROIL HI/LO laad.
broilproperly Oven door not closed. * See the Using the oven section.
Improper shelf position * See the Broiling Guide.
being used.
Food behag cooked ha a hot pan. * Use the broiling pan and glid that came with ",'_>ur
range. Make ,sure it is cool.
Cookwaxe not suited for broiling. * Use the broiling pan and grid that came with your range.
Aluminum foil used on the * See the Using the oven section.
the broiling pan mad grid has
not been fitted properly mad
slit as recommended.
Oven bottom not securely * See the Installation of the range section.
seated ha position.
Oven temperature Oven thermostat * See the Adjust the oven thermostat--Do it yourself[ section.
too hot or too cold needs adjustment.
Oven light does not work Light bulb is loose or defective. * Tighten o1"replace the bulb.
Plug on range is not completely * Make sure electrical l_lug is I)lugged into a live, l)roperly
inserted ha the electrical outlet, grounded outlet.
Oven will not self-clean The oven temperature is too * _Mlow the range to cool to room teml_erature and
high to set a self-tiered operation, reset the controls.
Oven controls improperly set. * See the Using the self-cleaning oven section.
On models with a door latch, * Make sure you ll/ove the door latch handle all the way
the oven door is not ha the to the fight.
locked position.
"Crackling"or This is the sound of the * This is nollual.
"popping" sound metal heating mad cooling
during both the cooking mad
clemlhag fimctions.
45
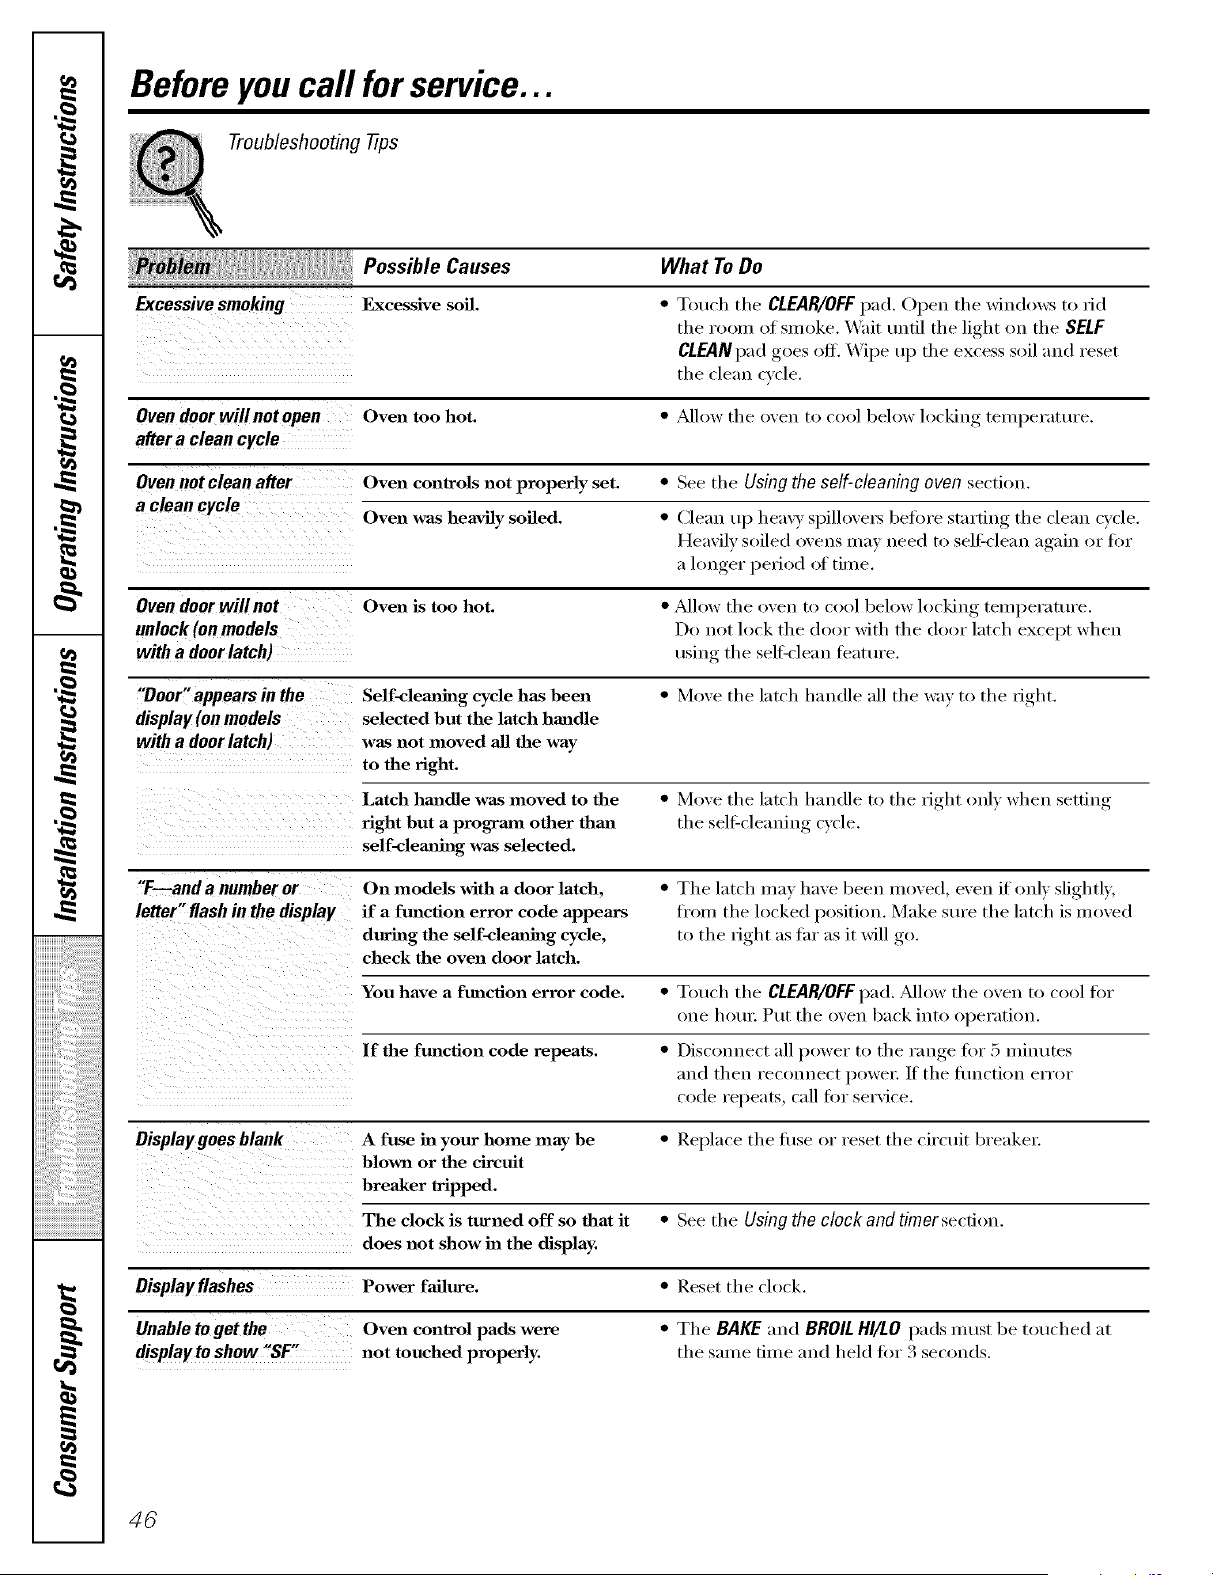
,0
,0
,0
,0
iiiiiiiiiiii_i!i!_i_!_i_!_!_i_i_i;_i;_i;_i;_i;_i;_i;_i;_i;_i;_:_;i
iiiiiiiiiiiiiiiiiiiiiiiiiiiiiiiiiiiiiiiiiiiiiiiiiiiiiiiiiiiiiiiiiii'ii'ii i! ii
Before you call forservice...
Troubleshooting -tips
_ ; (i Possible Causes What To Do
Excessive smoking FLxcessivesoil. * Toud_ tile CLEAR/OFFpad. Open tile windows to rid
the room of smoke. \_'ait m]til the light on the SELF
CLEANpad goes off. _\'ipe up the excess soil and reset
the clean cycle.
Oven door willnotopen Oven too hot. * _Mh>wflw oven to cool below h>cking temperature.
after a clean cycle
Oven not clean after Oven conWols not properly set. * See the Using the self-cleaning oven section.
a clean cycle
vven was heavily soiled. * Clean up heavy spilh)ve_ befi>re starting the clean cycle.
a hmger peri(>d (>f time.
Heavily s(>iled (wens may need to sell_clean again (>r fi)r
Oven door willnot Oven is too hot. * _Mh>w the oven t(> cool beh>w h>cking temperature.
nnlock (on models Do not h>ck the door with the door latch except when
with a doorlatch) usin- the selfXclean feature.
"Door"appears in the Self-cleaxfing cycle has been * Move the latch handle all the way to the fight.
display (on models selected but the latch handle
with a door latch) was not moved all the way
to the right.
Latch handle was moved to the * Move the latch handle to the right only when ,setfiw,
fight but a program other than the sell=cleaning cycle.
self-clemahag was selected.
"F--and a number or On models with a door latch, * The latch may have been moved, even if only slightly,
letter" flash in the display if a function error code appears fl'om the h>cked position. Make sure the latch is moved
during the self-clem_g cycle, to the right as thr as it will _o
check the oven door latch.
You have a fm_ction error code. * Touch the CLEAR/OFFpad. _Mlow the oven to cool for
(>lie h(>t/I: Pt/t the oven back into (>perati(>n.
If the function code repeats. * Disc(mnect all p(>wer t(> the range for 5 Iuinutes
;ind then l'ec(>nnect p(>wel: If the fi/ncti(>n elT(>l"
code repeats, call fin" service.
Oisplaygoes blank A fuse in your home may be * Replace the fl_se or reset the circuit breakeL
blown or the circuit
breaker tripped.
The clock is turned off so that it * See the Using the clock and timer secti(>n.
does not show in the display.
Display flashes Power failure. * Reset the oh>ok.
Unabletoget the Oven control pads were
displayto show "SF" not touched properly.
• The BAKE and BROIL HI/LO pads must be touched at
the same time and held f'm 3 seconds.
4_
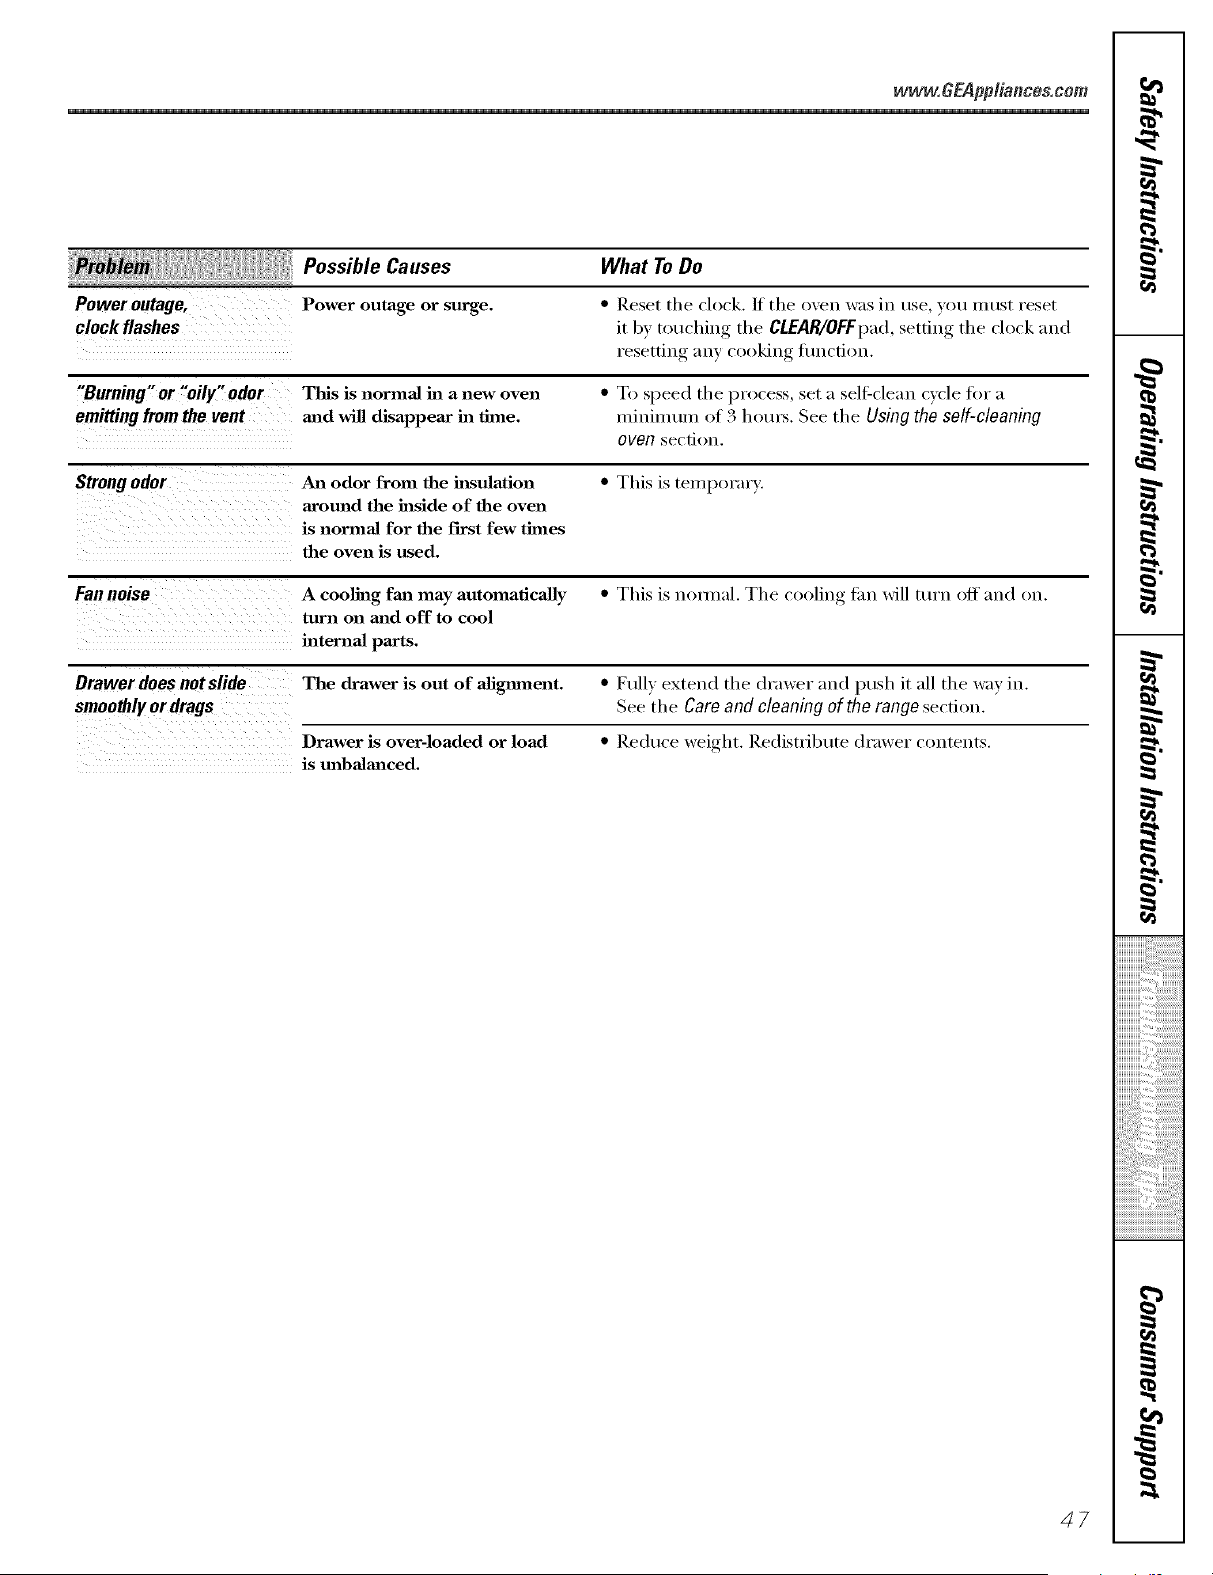
www,GEApfliances,com
Power outage,
clock flashes
Possible Causes What To Do
Power outage or surge. • Reset tile clock. If the oven was in use, you must reset
it by touching the CLEAR/OFFpad,setting tile clock and
resetting any cooking fllncfion.
"Burning"or "oily"odor This is normal in a new oven
emitting from the vent and will disappear in time.
• To speed tile process, set a self-clean cycle fin" a
minimum of 3 hom_. See tile Using the self-cleaning
oven sect.ion.
Strong odor An odor from the h_sulation • This is temporm T.
around the inside of the oven
is normal for the first few times
the oven is used.
Fan noise A cooling fan may automatically • This is hernial. The cooling tim will turn off and on.
tttrn on mad off to cool
internal parts.
Drawer does not slide The drawer is out of aligmnent. • Fully extend the dr;Iwer and push it all the way in.
smoothly or drags See tile Care and cleaning of the range section.
Drawer is over-loaded or load • Reduce weight. Redistribute drawer c()ntents.
is unbalanced.
47

r_
€_
r_
Q_
cr_
q
m
_mma
Netes.
48
GE Service Protection Plus '_'
GE, a imme recog_fized _;odd_;kte fbr qmdhy and depeIldabilhy, offers ?(m
Sere;ice Protecfio_ } h_s --comp_ ehe_s_ e protecti(m o_ all yore" appliai_ces--
No Matter What Brand!
Benefits Include:
* Backed by GE
. All brands covered
. U_imited service calls
. _ parts and labor costs included
* No out-of-pocket expenses
* No bidden deductibles
* One 800 nnmber to call
We'tl CoverAny Appliance.
Angwhoro. Angtfmo.
Yim wi]] be completely satisfied wit]] oLlr service [:)rotectiom_ or vol_ may reql_est _r_)_r member back
o_ the remaim_im_g x'ab_e of }'oily tom, tract. No ql_estiom_s asked. It's that simple.
Protect velar rdHgerato_; dishwasher; washer a_/d d_ye_; raN_ge, TVI VCR al_d mlach more--any brand!
Pbas there's _o extra charge ti)r emergel_cy service m_d ]o_* mol_tb]y fi_la_ci_g is a_ai]ab]e. Eve_ icemaker
coverage a_d %od spoilage protectiol_ is oftered_ '_)_ ca_ rest eas}, ki_owi_g that a]] vo_r w_bmb]e
bo_sebo]d prod_cts are protected agai_st expel_sive repairs.
for more
_ (Jill hel_
Please place in envelope and mail to:
General Electric Cempanf
Warranty Registration Department
P.O. Box 3215(}
Louisville, KY 4(}232-215(}
49
Consumer Product Ownership Registration
Deal Customer:
Thank you for purchasing our product and thank you for placing your confidence in us.
_a/e are proud to haxe you as a customer'.
Follow these three steps to protect your new appliance investment:
Complete and mail
your Consumer
Product Ownership
Registration today.
Itave the peace ot
mind of knowing we
can contact you ill
the unlik(ly excnt of
a satctv modification.
After mailing the
registration below,
store this doctlIIlent
in a sad place, h
contains in/k)rmation
you will need should
you require service.
Our service number is
800.GE.(LAI/ES
(800.432.2737).
Read your Owner's
Manual carefldlv.
It will help you
operate your new
appliance t)roperl}.
Model Number Serial Number
I I
Important: If you did not get a registration card with your
product, detach and return the form below to
ensure that your product is registered, or register
online at www.GEAppliances.com.
Consumer Product Ownership Reg
Model Number Serial Number
Mr, Ms, M_s, Mi,_
Fil"st I I L;_slI
Nam< I I I I I I I I I N;IIII_! I I I I I I I I I I I I
St 1"(!{_1 I
Address I I I I I I I I I I I I I I I I I I I I I I I I
, I
I
I
_\p,.#I I I
CitT,' I , I
[)ll_ l)l tl:l II
hi Us_ I I I
Month
I I I I I I l:_-mail Addr< ss:
I I I I I I I I
Ilay Ill "_i,ar I I I
Zip I
I I I _,a,,,I, 1 _;o,I,
Phone
N.m/,,rl I I I I I I
GEAppliallces
GE Coplsutnor & hldlmtrial
Louisville, Kelttttcky
ww_6EApplia_lcos.com
* Please provide your e-mail a(ldress to receive, via e-mail, discounts, special ottk.r _,and other important
communications froln GE Appliances (GEA).
(_heck here if you (1o not want to receive commtmications ti-om GEA's carefi/lly selected l)artners.
FAII.I HZET() C()MPI.ETE AND RE'F[ RN Tt tIS CARD DOES NOT DIMINISII Y( )l JR
_,%\RRAN'I_" RIGIITS.
For inti)rmation about GEA's prixacy and data usage polic?; go to >.avw.GEAppliances.com and click
on 'Prixacv Policy" or call 800.626.2224.
5O
I
m
w
==
€=
€=
w
51
€_
r_
€_
q
--o
m_
m
_4m
€_
Notes_
52

Accessories.
Looking For Something More?
Youcan Lind these accessories and many more at www.6EAppliances.com, or
carl 800.626.2002 (during normal busflTess hours), Have your model number ready.
Drip Pans
i _/i_iiiiiiiiiiiiiiiiiiiii ii I _/ii_
Grates Surface Burners & Caps
==
g
Tired of discolored rocks? Wishing you had exua-hea_T-duty oven rocks?
NOW AVAILABLE for your range:
(;E's innovative, self-cleanable porcelain-coated oven racks!
• Hea_y Duty
• Durable
• Able m be cleaned in a self-cleaning oven
Visit vvww.GEAppliances.com for more information.
Light Bulbs Knobs
Oven Racks Broiler Pan Cleaner
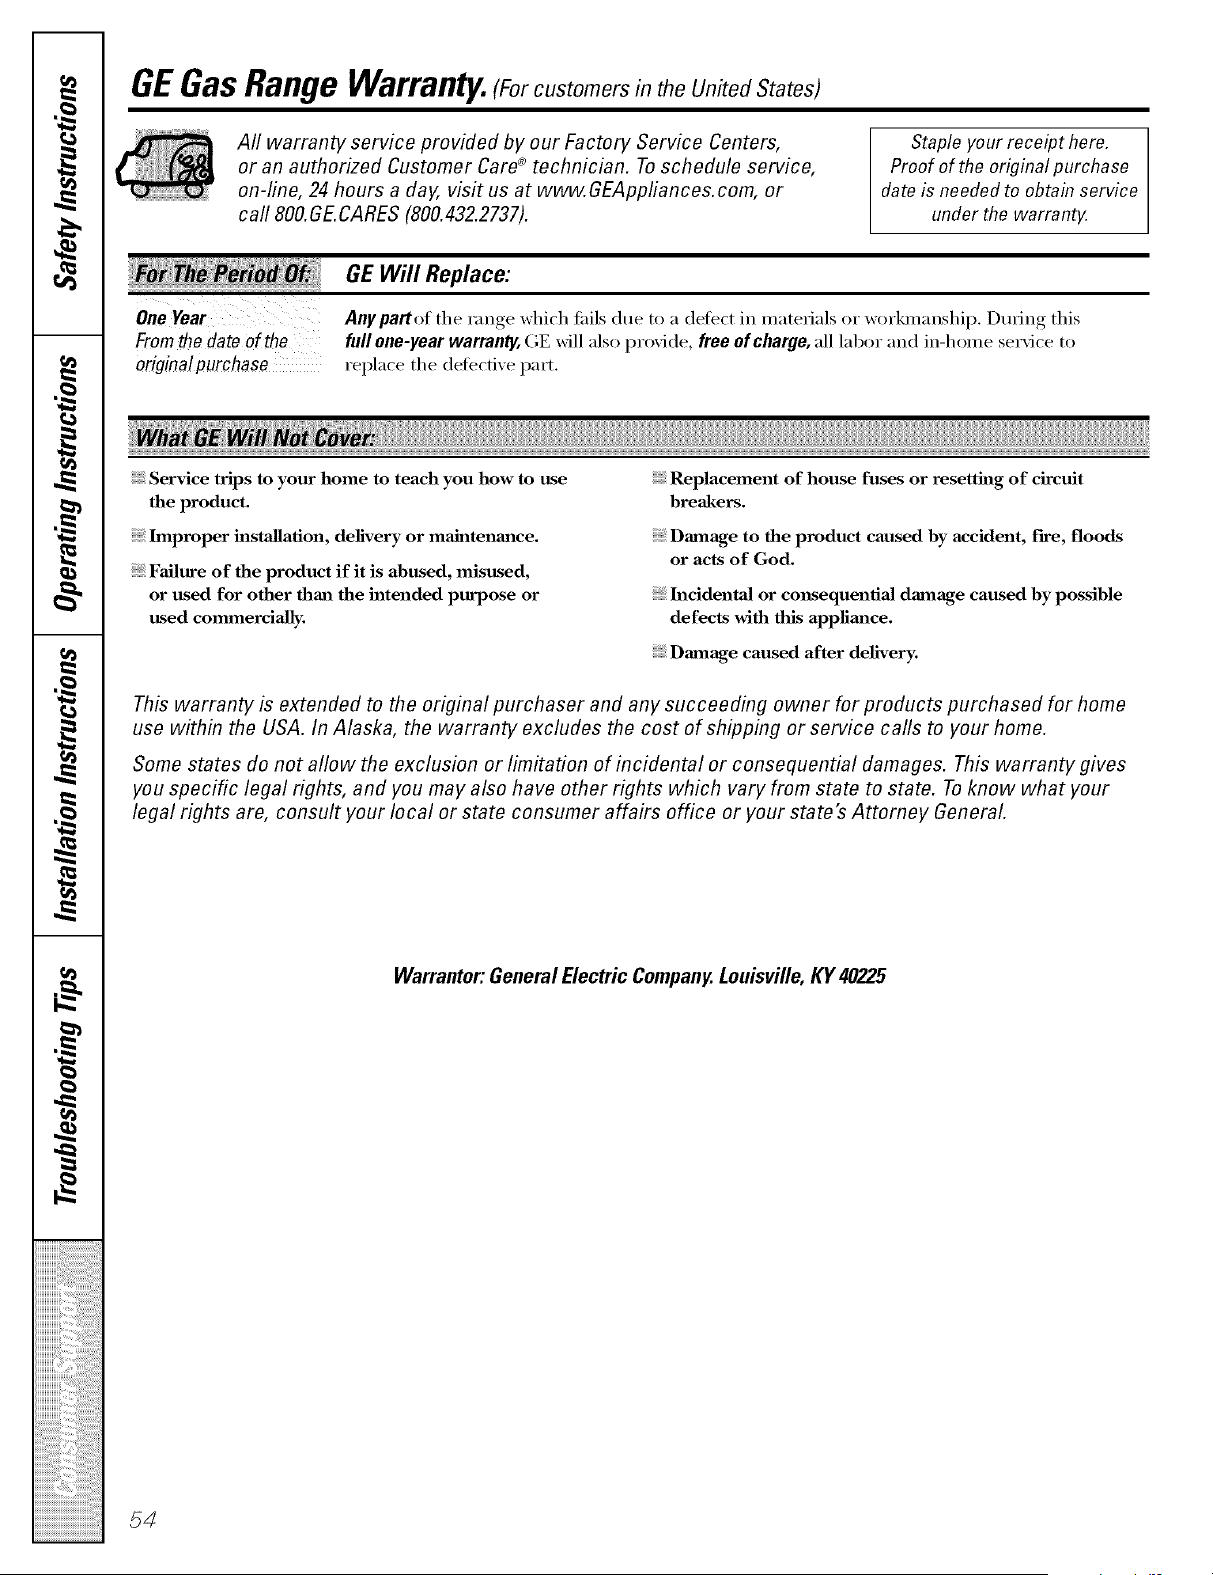
,0
,0
,0
,0
q
GEGasRange Warranty.(Forc.ste ersintheUnitedStates)
Aft warranty service provided by our Factory Service Centers,
or an authorized Customer Care® technician. To schedule service,
on-line, 24 hours a day, visit us at www.GEAppfiances.com, or
carl 800.GE.CARES(800.432.2737).
Staple your receipt here.
Proof of the original purchase
date is needed to obtain service
under the warrantg
Fromthe date of the
origina!purchase
GE Will Replace:
Any partoI the range which tifils due to a (lefect in materials or workmanship. During this
full one-year warranty, GE will also provide, free of charge, all labor and in-home se_Mce to
replace the (lefecti\'e part.
Service trips to your home to teach you how to use
the product.
Improper installation, delivery or maJntenm_ce.
Failure of the product if it is abused, misused,
or used for other than the intended purpose or
used commerciaJly.
Replacement of house fuses or resetting of circuit
breakers.
Damage to the product caused by accident, fire, floods
or acts of God.
h_cidentaJ or consequentiaJ damage caused by possible
defects with this applimlce.
Damage caused after delivery.
This warranty is extended to the original purchaser and any succeeding owner for products purchased for home
use within the USA. In Alaska, the warranty excludes the cost of shipping or service calls to your home.
Some states do not allow the exclusion or limitation of incidental or consequential damages. This warranty gives
you specific legal rights, and you may also have other rights which vary from state to state. To know what your
legal rights are, consult your local or state consumer affairs office or your state's Attorney General.
Warrantor."General Electric Company.Louisville,KY 40225
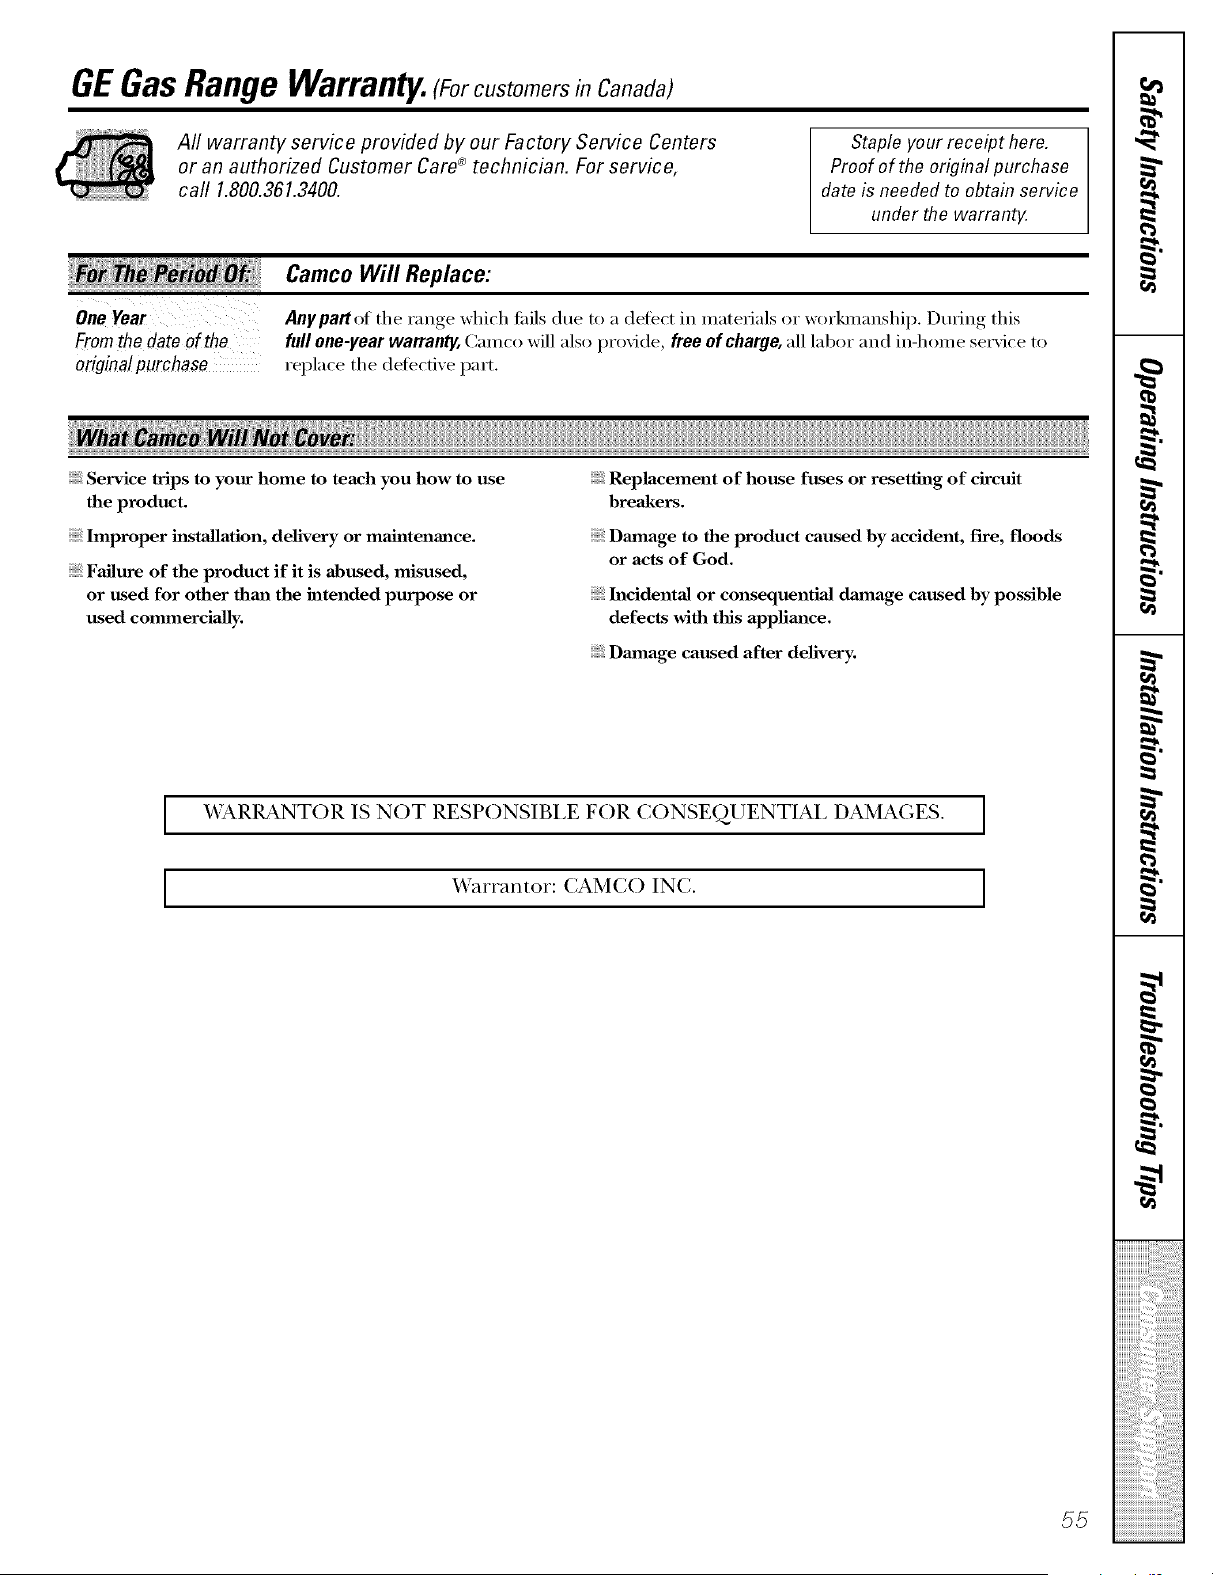
GEGasRange Warranty. (Forc.stomersinCanada)
All warranty service provided by our Factory Service Centers
or an authorized Customer Care® technician. For service,
call 1.800.361.3400.
Staple your receipt here.
Proof of the original purchase
date is needed to obtain service
under the warrant_
Fromthe date of the
origina!purchase
Camco Will Replace:
Anypattof the range which tifils due to a (letect in materials or workmanship. During this
full one-year warranty,Camco will also provide, free of charge,all labor and in-home service to
replace the defective part,
!!! Y !!!!
Service trips to your home to teach you how to use
the product.
hnproper h_staJlation, delivery or maintenance.
Failure of the product if it is abused, misused,
or used for other thm_ the intended purpose or
used commerciaJly.
Replacement of house fuses or resetting of circuit
breakers.
Damage to the product caused by accident, fire, floods
or acts of God.
Incidental or consequential damage caused by possible
defects with this applimlce.
Damage caused after delivery.
I _A.ARRANTOR IS N()T RESPONSIBI,E F()R CONSE(_UENTIAI, DAMAGES. ]
_'arrantor: (:AM(;() IN(:. ]
55
I
t'B
m
w
w
T
_iiiiiiiiiiiiii:_'";;_;_;_;_;_;_;_;_;_;_;_;_;_iI
_HHH_',_,_,_'_ ,,_,_,'4_
iiiiiiiiiiiiiiiiiiiiiiiiiiiiiiiiiiiiiiiiiiiiiiiiiiiiiiiiiiiiiiiiiii!iiii!iiiiii

ConsumerSupport.
gEAppliancesWebsite www.GEAppliances.com
Have a question or need assistance with your appliance? Try tile GE Appliances X_'ebsite 24 hom_ a day,
any day of the year'. For greater convenience and faster service, you can now download Owner's Manuals,
order parts, catalogs, or even schedule service ondine. You C[IXl [llso "Ask O/xY Weanx of EN)erts _'''
your questions, and so much more...
ScheduleService
www.GEAppliances.com
Expert GE repair sexs,ice is onlx one step away fl'om xour doox: Get on-line and schedule your service at
_our, comenience 24 hom_ any da) of tile )ear! Or call 800.GE.CARES (800.432.2737) during nomml
business houx_. In Canada, call 1.800.361.3400.
RealLife DesignStudio www.GEAppliances.com
GE supports the IJni\'ex_al Design concept--products, services and environments that can be used by
people ot all ages, sizes and capabilities. We recognize the need to design fin" a wide range of physical and
mental abilities and impaimmnts. For details of GE's lJnivex_al Design applications, including kitchen
design ideas for people with disabilities, check out o/xx"Website today Fox" the hearing impaired, please call
800.TDD.GEAC (800.833.4322). In Canada, contact: Managex; Coxlsuxner Relations, Camco Inc.,
1 Factox_' I,ane, Suim 310, Moncton, N.B., El(: 9M3.
ExtendedWarranties www.GEAppliances.com
Purchase a GE extended warx'ant_ and learn about special discounts that are a_ailable while your warranla,
is still in effect. You can i)urchase it on-line an) time, or call 800.626.2224 during nomml business hom_.
GE (_onsuxner Home Set\ices will still be there after your warrant) expires. In Canada, call 1.800.461.3636.
PartsandAccessories www.GEAppliances.com
Individuals qualified to sex_'ice their own appliances can have parts or accessories sent directly to their
homes (VISA, MasterCard and Discover cards are accepted). Order on-line today, 24 hom_ evei_,' day or
by phone at 800.626.2002 during nomml business houx_.
Instructions contained in this manual cover procedures to be performed by any user. Other servicing generally
should be referred to qualified service personnel. Caution must be exercised, since improper servicing may cause
unsafe operation. In Canada,please consult your yellow pages for your local Camco number.
ContactUs www.GEAppliances.com
If you are not satisfied with the service you receive ti'om GE, contact us on our _'ebsite with all the details
including your phone numbex; or write to: Genex'al Managex; Customer Relations, GE Appliances,
Appliance Park, Ixmisville, KY 40225. In Canada, to: Managex; ConstlilxeY Relations, (_mlco Inc.,
1 Factoxa, I,ane, Suim 310, Moncton, N.B., El(; 9M3.
RegisterYourAppliance www.GEAppliances.com
Register your new applimlce on-line----at your €onYenience! Tixnel) l)x'odtxct registration will allow for
enhanced communication and prompt service Hxlder the terms of_otxr warx'axltv should the need arise.
You may also mail in the pre-pxinted registration card included in the I)ackin°_ material.
Printed in Mexico
This book is printed on recycled pape_