Loading ...
Loading ...
Loading ...
Page 11 L023
A. Light Bulb Replacement
WARNING: To reduce the risk of personal injury, turn o power
and allow lights to cool before proceeding.
LED Bulbs
Replace the bulb with a genuine factory replacement part (Vent-A-
Hood P/N: P1350).
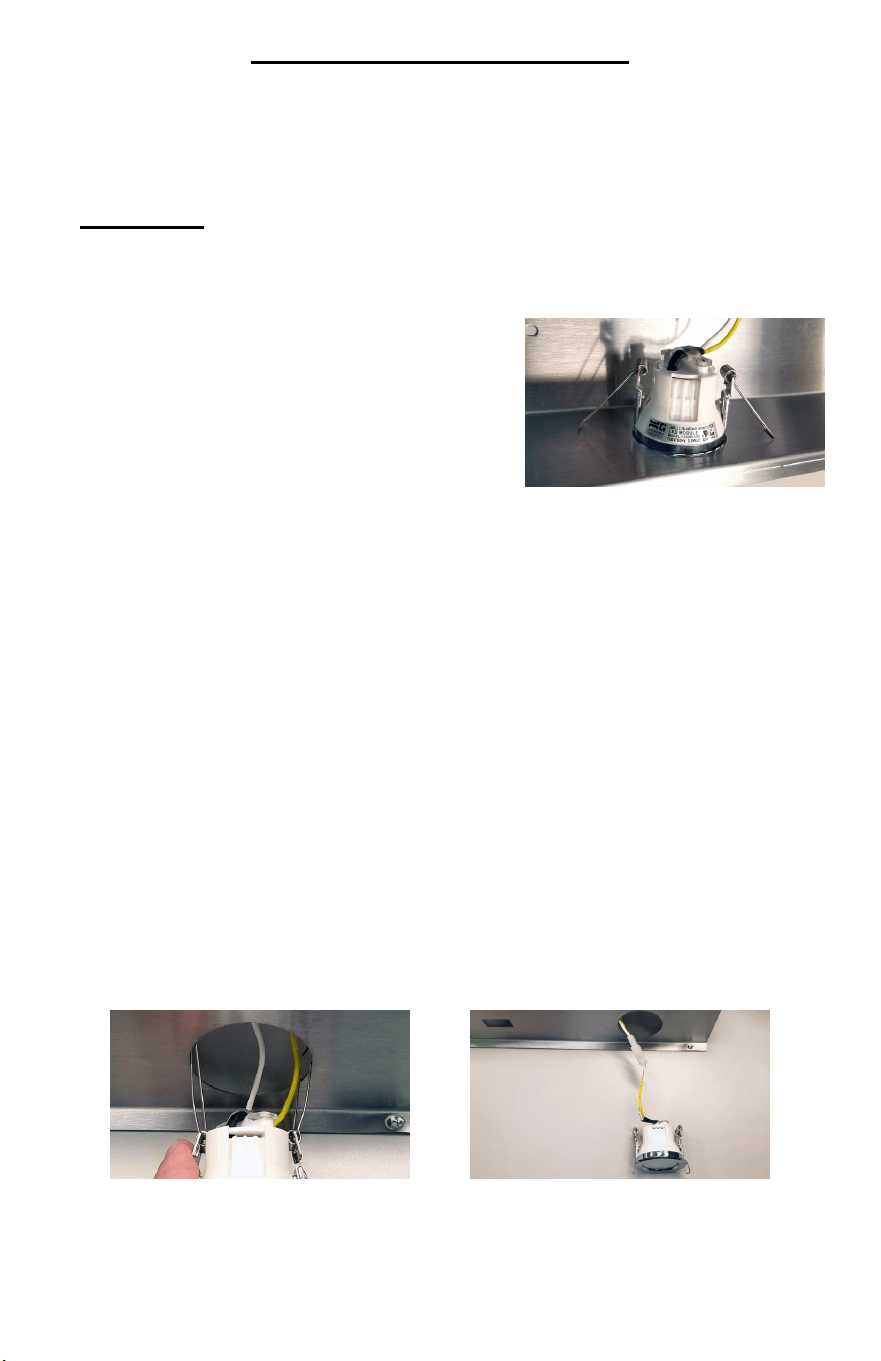
1. Use caution when pulling down on
the old bulb to prevent the springs from
snapping back against your hand. See
Fig. 1 and Fig. 2.
2. Once the bulb is hanging beneath the
light panel (Fig. 3), simply disconnect the
old bulb from the harness via the quick
connect adapter.
3. Remove and discard the wire and plug section from the harness
on the new bulb. Connect the new bulb to the hood wiring harness
via the quick connect adapter.
4. While securing the slack in the wires, feed the wires into the light
panel and insert the new bulb into the panel opening. You will need
to press the springs on the bulb far enough backward to be able
to t them into the light panel. Use caution when inserting the new
bulb to prevent the springs from snapping back against your hand
or the light casing.
5. Turn the power on at the service disconnecting means on the
service panel and test all blower and light functions to ensure they
are operating properly.
Maintenance/Troubleshooting
Fig. 1
Fig. 2 Fig. 3
Loading ...
Loading ...
Loading ...