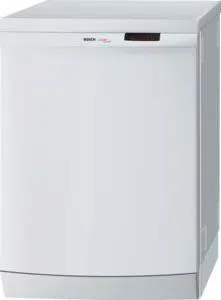
User Guide Bosch SHU43C05UC/17 Dishwasher
Table of contents
- Introduction
- Product Information
- Operation
- Special Features
- Care and Cleaning
- Self Help
- Technical Information
- Warranty Information
- Customer Service
PLEASE READ
- To get the best use from your
- Bosch dishwasher, you must do four very important things:
- KEEP THIS MANUAL!
- Don't throw it away!
READ THIS MANUAL!
- Even if you've used other dishwashers in the past, this manual has the information you will need to safely and properly use the dishwasher you NOW have.
- Besides, it won't take that long to read it, and it could save you a lot of trouble!
- This manual covers many different models of Bosch dishwashers.
- Since different models have different features, you will need to know which model you have. Open your dishwasher door and find the
- Model and Serial Number Label on the right edge of the door. Figure A will show you where to look and what the label looks like. On the label you will see a large-print number that begins with "SH".
- That's the model number of your
COVER OF THIS MANUAL.
- Turn to the Model Features Chart on page 6 of this manual. Find and mark your model number on the top row of the chart.
- This will enable you to quickly identify your dishwasher's features as they are explained in this manual.
BOSCH DISHWASHER FEATURES DESCRIPTION
- LED Sequence Indicator: indicates the current point in the wash cycle, so you'll know if it's okay to add a last-minute dish.
- Nylon Racks: Eliminate cuts and nicks, and have a five-year warranty.
- OptiMISERTM: Available on some models, used with another program cycle to reduce wash time.
- Refill Rinse Agent" Light: Lets you know that you need more rinse agent.
- Water Shut-Off: A safety feature that stops the flow of incoming water if water is detected in the base of the dishwasher.
- Stainless Steel Tall TubTM: Provides a rust-free, hygienic interior surface with a lifetime warranty.
- Filter System: Three filters (four on some models) ensure distribution of clean water and protect the main pump and the drain pump from foreign material.
- Wash Cycles - (see the Models Features Chart to find out which cycles your dishwasher has)
- Delicate/Economy: Saves water and energy while removing Ioosety attached food from delicate dishware.
- Power Scrub Plus: A 125°F pre-wash that soaks and loosens stuck-on food, even on large loads.
- Quick Wash: A 29-minute cycle that cleans lightly soiled items such as glasses and coffee cups.
- Regular Wash: For normal, everyday loads with loosely attached food.
- Rinse and Hold: Rinses and holds smaller loads until you have a full toad.
- Scrub Wash: Uses less water than Power Scrub. Removes stuck-on food that requires no soaking.
- Top Rack Only TM Wash: Washes small loads that fill only the upper rack.
IMPORTANT SAFETY INSTRUCTIONS
- To reduce the risk of fire, electric shock, and/or personal injury when operating the dishwasher, follow basic safety precautions, including the following:
- Bosch dishwashers are provided with two manuals; one Installation Instruction Manual, and one Use and Care Manual. Read and understand all instructions before using the dishwasher.
- Use the dishwasher only for its intended function.
- Use only detergents or wetting agents recommended for use in a dishwasher, and keep them out of the reach of childen.
- When loading items to be washed: a. Locate sharp items so that they are not likely to damage the door seal and, b. Load knives and other sharp utensils with HANDLES UP to reduce the risk of cut-type injuries.
- Do not wash plastic items unless marked "dishwasher safe" or the equivalent. For plastic items not so marked, check the manufacturer's recommendations.
- Do not operate your dishwasher unless all enclosure panels are in place.
- Do not tamper with controls.
- Do not abuse, sit on, or stand on the door or dish racks of the dishwasher.
- To reduce risk d injury, do not allow children to play in or on the dishwasher.
Usually Safe
- Aluminum: Colored anodized aluminum may fade over time. Minerals in your water may cause the aluminum to darken or spot. This can usually be removed by using a soap-filled steel wool pad.
- China, Crystal, Stoneware: Some hand-painted peices may discolor, fade, or spot.
- Hand-wash these pieces. Position fragile glassware so that it will not topple over or contact other pieces during the wash cycle.
- Glass: Milk glass may yellow.
- Non-Stick Coatings: Apply a light coating of vegetable oil to non-stick surfaces after drying.
- Plastics: Ensure the piece is dishwasher safe.
- Stainless Steel, Sterling Silver, and Silver Plate: Place these pieces so that they do not contact dissimiliar metals.
BOSCH DISHWASHER
- There are basically 6 steps to washing dishes in your Bosch dishwasher. They are:
- Dishware Preparation
- Loading Your Dishwasher
- Adding Dishwasher Detergent and
- Rinse Aid
- Starting Your Dishwasher
- Drying your Dishes
Untoading Your Dishwasher t. Dishware Preparation
- Rinsing your dishes is not necessary, but do remove large food particles, bones, seeds, toothpicks, and excessive grease. Items with bumed-on or hard, stuck-on material may require pre-soaking and hand-scouring.
- Separate dishes that are not dishwasher safe. Check the Materials section on pages 12 and 13 of this manual if you have questions about an item's dishwasher suitability.
Loading Your Dishwasher
Loading your dishwasher properly witl resutt inthoroughly cleaned dishes. Toproperty toad your dishwasher, you need to be familiar with:
A. General Guidelines
B. Loadingthe Upper Rack
C. Loading the Lower Rack
D. Accomodating BxtraTall Items
E. Loading the Silverware Baskets
A. General Guidelines
- Load the dishwasher so that water can circulate freely and reach every part of every item. Place items so that nothing protrudes from the bottoms of the racks. Place pots, pans, cups, bowls, and glasses upside-down in the racks as shown in Figure 2. Check the
- Materials section on pages 12 and 13 of this manual ifyou have questions about an item's dishwasher suitability. Do not allow delicate or heirloom items to contact other items. Separate items of dissimilar metals. Do not place objects such as paper products, plastic bags, or packaging materials into your dishwasher!
Loading the Upper Rack
- Glasses, cups, ptates, bowts, and smatl pots may be loaded in many different positions.
- Figure 3 shows a typical mixed load in the upper rack. Figure 4 shows the top rack load pattern for 10 place settings with the knife rack, and Figure 5 shows load pattern for 12 ptace settings.
Loading the Lower Rack
- Depending on the modet dishwasher you have, the tower rack may have features and accessories that witl add to its toading versatility. These features and accesories inctude fold-down flip tines and various silverware baskets. Check with the Model
- Features Chart on page 6 in this manuat to find out which features and accessories your dishwasher has.
- Place large bowts, pots, and pans upsidedown in the lower rack. If your dishwasher has lower rack flip tines, fold them down to accommodate large utensits such as serving spoons and large knives. Figure 11 shows the toad pattern for 10 place settings, and
- Figure 12 shows the toad pattern for 12 place settings.
Accomodating Extra Tall Items
- If an item to be loaded into the tower rack interferes with the upper spray arm or isblocked by the upper rack, simply remove the upper rack and install the Extra Talt Item
Remove the Upper Rack
- The same procedure is used for removing the Standard and RackMatic TM upper racks.
- Putt the empty upper rack out of the dishwasher to the point that it can be tilted upward.
- Putl the rack outward and up until the rolters are completely free of the roller guides.
- Stide the rolter guides back into the dishwasher tub.
Install the Sprinkler
- Insert the Sprinkler into the upper rack spray outtet at the back of the dishwasher tub as shown in Figure 13, and turn the Sprinkler clockwise.
- Place your extra tall item(s) in the tower rack as in Figure 14.
- Setect a wash cyle and start the dishwasher.
Note:
- When the cycle is complete, remove the Sprinkler by turning it counter-clockwise until it comes toose from the upper rack spray outlet. Do this before you reinstall the upper rack.
- Otherwise, your dishwasher coutd be damaged.
Reinstall the Upper Rack
- Tittthe upper rack upwards and position the upper rack roIters onto the rotler guides.
- Continue pushing the upper rack until the rollers are on the guide.
- Push the upper rack into the dish washer tub.
- Loading the Silverware Baskets
- All Bosch dishwashers have one of two types of silverware baskets for the lower rack: 1) the Standard Silverware Basket, or the Flexible Silverware Basket. You can find more information on the Flexible
- Silverware Basket in the Accessories
Section of this manual.
- Both baskets have tops that can be folded up to accomodate large or oddly-shaped items.
- However, your silverware will receive a more thorough cleaning if you toad the silverware baskets with the tops down and use a load pattern similar to the one suggested by Figure 15.
Adding Dishwasher
To get the very best resutts from your Bosch dishwasher, you need to know about:
A. General Dispenser Information
B. Detergents and RinseAids
C. The Standard Dispenser
D. The Premium Dispenser
A. General Dispenser Information
- Your Bosch dishwasher is equipped with one of two types of Detergent and Rinse Aid
- Dispensers: 1)the Standard Dispenser, which you must fill while the dishwasher door is fully open, or 2) the Premium
- Dispenser, which you can fill while the dishwasher door is either fully open or from a more comfortable posture while the dishwasher door is half-open. Check with the Model Features Chart on page 6 in this manual to find out which dispenser your dishwasher has.
- Regardless of which dispenser is on your dishwasher, it will be located on the inside of the dishwasher door, as shown in Figure
- The detergent chamber of each dis- enser has lines that measure dishwashing detergent to 15 milliliters (ml) and 25 ml, as shown in Figure 17.45 mt of detergent will completely fill the detergent chamber.
Detergents and Rinse Aids
- For thoroughly clean dishes, use the correct type and amount of dishwashing detergent.
- Use only detergents specifically designed for automatic dishwashers. Do not use hand dishwashing products, as they may cause excessive suds and possibly damage your Bosch dishwasher.
- Do not use owder detergents that contain a drying additive. Important: Too much detergent in soft water may cause etching in glassware.
Filling With Detergent
- If the detergent dispenser cover is closed, open it by pressing the blue retease tab into the dispenser as shown by arrowA in Figure 18. Note: Pushing down on the release tab will not open the cover
- Using the measunng tines in the detergent chamber as a guide, fill the detergent chamber with the amount of detergent recommended in Table 1.
- Close the detergent dispenser cover by sliding the cover in the direction of the arrow on the cover, as shown in Figure 19, and firmly pressing down on it, as shown by arrowA in Figure 19, untit it snaps shut.
Filling With Rinse Aid
- Open the rinse aid dispenser by pressing the star on the cover with your index finger white lifting the tab with your thumb, as shown in Figure 20.
- Add tiquid rinse aid to the dispenser, as shown in Figure 21, until the Ievel indicator
- Close the rinse aid dispenser cover by returning it to its closed position and pressing it firmly until snaps shut.
- Refill the rinse aid dispenser when the level indicator shows a silver background with black lines as shown in Figure 21B.
Note:
- Some Bosch dishwasher models have an additional Refill RinseAid indicator light that glows when the rinse aid dis3enser is empty.
- Check the Model Features Chart on page 6 in this manual to see if your dishwasher has this feature.
- When this light comes on, refill the rinse aid dispenser until the level indicator turns dark, and shut the dishwasher door. The light wilt go out in a few minutes after the door is shut.
Standard Rinse Aid Dispenser Regulator
- The Standard RinseAid Dispenser comes with a regulator that controls the amount of rinse aid dispensed.
- If your dishes are spotted or streaked after after washing, see the Special Features section in this manuat to adjust the amount of rinse aid dispensed.
Filling with Detergent
- I. if the detergent dispenser cover is closed, open it by pressing the blue release tab into the dispenser as shown in
- Figure 22. The cover will slide open to the left. Note: Pushing down on the release tab will not open the cover.
- With the dishwasher door fully open, fill the detergent chamber with the amount of detergent recommended in Tabte 1, using the measurement lines in the chamber as a guide. OR...
- With the dishwasher door half-open, ress the btue button on the right side of the dispenser, as shown in Figure 23. The dispenser cover and chamber will swing upward. F
- ill the detergent chamber with the amount of detergent recommended inTable using the measurement lines in the chamber as a guide.
- To ctose the cover, stide the cover in the direction of the arrow on the cover, as shown in Figure 24 arrow 1, and press down firmly as shown in Figure 24 arrow until the release tab catches.
Filling With Rinse Aid
- Open the Rinse Aid Dispenser cover by pressing the release button, as shown in
- With the dishwasher door fully open, add liquid rinse aid to the dispenser, as shown in
- Figure 26A, until the level indicator is dark.
- Diswasher door half open, putt the filling trough upward, as shown in Figure
- Close the dispenser cover by returning it to its closed position and pressing it firmly until it snaps shut.
- Refill the rinse aid dispenser when the level indicator shows a silver background with black lines, as shown in Figure 21B, page 24, or when the Refill Rinse Aid indicator light glows.
- When this light glows, refill the rinse aid dispenser until the level indicator is dark, and shut the dishwasher door. The light will go out in a few minutes.
Note:
- The amount of rinse aid dispensed by the Premium Dispenser can be regulated for the best results. If your dishes are spotted or streaked after after washing, see the
- Special Features section in this manual to adjust the amount of rinse aid dispensed.