Loading ...
Loading ...
Loading ...

5
5.4 DC AMPS
A
A
400A
400A
If the fuse burns out during measurement, the meter may be damaged or personal injury may occur. To avoid possible damage to the
meter or to the equipment under test, check the meter’s fuses before measuring current. Use the proper terminals, function, and range
for the measurement. Never place the test leads in parallel with any circuit or component when the leads are plugged into the current
terminals. Do not attempt to measure current exceeding 10Amps DC. If you are not sure if the current exceeds 10Amps do not attempt to
measure current with this meter.
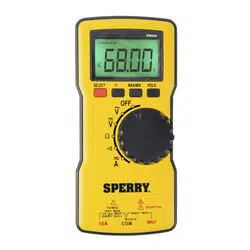
1. Insert the black test (negative) lead into the COM input terminal.
2. Insert the red (positive) test lead into the 10A terminal to the left of the COM terminal.
3. Set the Rotary Switch to
A
A
400A
400A
.
4. Press the “SELECT” button until DC is shown on the display.
5. Turn off power to the circuit to be measured.
6. Open the circuit to be measured.
7. Touch the red test lead to the positive side of the break in the circuit and the black test lead
to the negative side of the break in the circuit for DC Amp measurement.
8. Return power to the circuit.
9. Read the amps on the display.
Note: When the measured current is <5 amps continuous measurement is acceptable. When the measured current is 5–10 amps
do not exceed 10 seconds of continuous measurement. Wait 15 minutes before performing additional current measurements.
Always turn of power to circuit and remove the leads from the circuit before removing and reinserting the leads into the meter’s
input terminals. Once the measurement is complete, immediately remove the test leads from the circuit under test and remove the
test leads from the input terminals of the meter.
5.5 RESISTANCE
When measuring resistance always make sure the power to the circuit is off.
1. Insert the black (negative) test lead into the COM input terminal.
2. Insert the red (positive) test lead into the INPUT terminal to the right of the COM terminal.
3. Set the Rotary Switch to Ω (ohms).
4. Touch the test leads to the resistor or non-energized component to be measured.
5. Read the value of the measurement displayed. With resistance measurements, the polarity of the test leads is not a factor.
6. Typical resistance measurements include resistors, potentiometers, switches, extension cords and fuses.
Note: For measurements > 1MΩ, the meter may take a few seconds to stabilize reading. This is normal for high
resistance measurements. When the input is not connected, i.e. at open circuit, “ OL” will be displayed as an overrange indication.
5.6 CONTINUITY
To avoid damages to the Meter or to the devices under test, disconnect circuit power and discharge all
the high-voltage capacitors before measuring resistance.
Do not input 60V DC or 30V AC to avoid personal harm. Do not use on energized circuits.
1. Insert the black (negative) test lead into the COM input terminal.
2. Insert the red (positive) test lead into the INPUT terminal to the right of the COM terminal.
3. Set the Rotary Switch to
.
4. Connect the test leads across with the object being measured.
5. The buzzer sounds continuously if the resistance of a circuit under test is <~30Ω. It indicates the circuit connection is good.
6. The buzzer does not sound if the resistance of a circuit under test is >100Ω. It indicates a possible broken circuit.
7. The buzzer may or may not sound if the resistance of a circuit under test is 30Ω -100Ω.
8. Read the resistance value on the display.
9. Typical continuity measurements include switches, extension cords and fuses.
Note: Open circuit voltage is around 2.2V. When the input is not connected, i.e. at open circuit,
“ OL” will be displayed as an overrange indication.
6.0 BATTERY REPLACEMENT
To avoid false readings, which could lead to possible electric shock or personal injury,
replace the battery as soon as the battery indicator
1.8.8.8
Autorange MAX
MIN
AC
DC
appears.
1. Disconnect the connection between the test leads and the circuit under test, and remove the
test leads from the input terminals of the meter.
2. Turn the Meter power off.
4. Remove the screw from the battery cover on the back of the meter. Slide the battery cover off.
5. Replace the old batteries with 2 fresh AAA batteries.
Note: Do not use rechargeable batteries in this unit.
6. Carefully slide on the battery cover and tighten the screw.
Do not overtighten the screw as this may strip the threads in the meter housing.
Loading ...