Loading ...
Loading ...
Loading ...
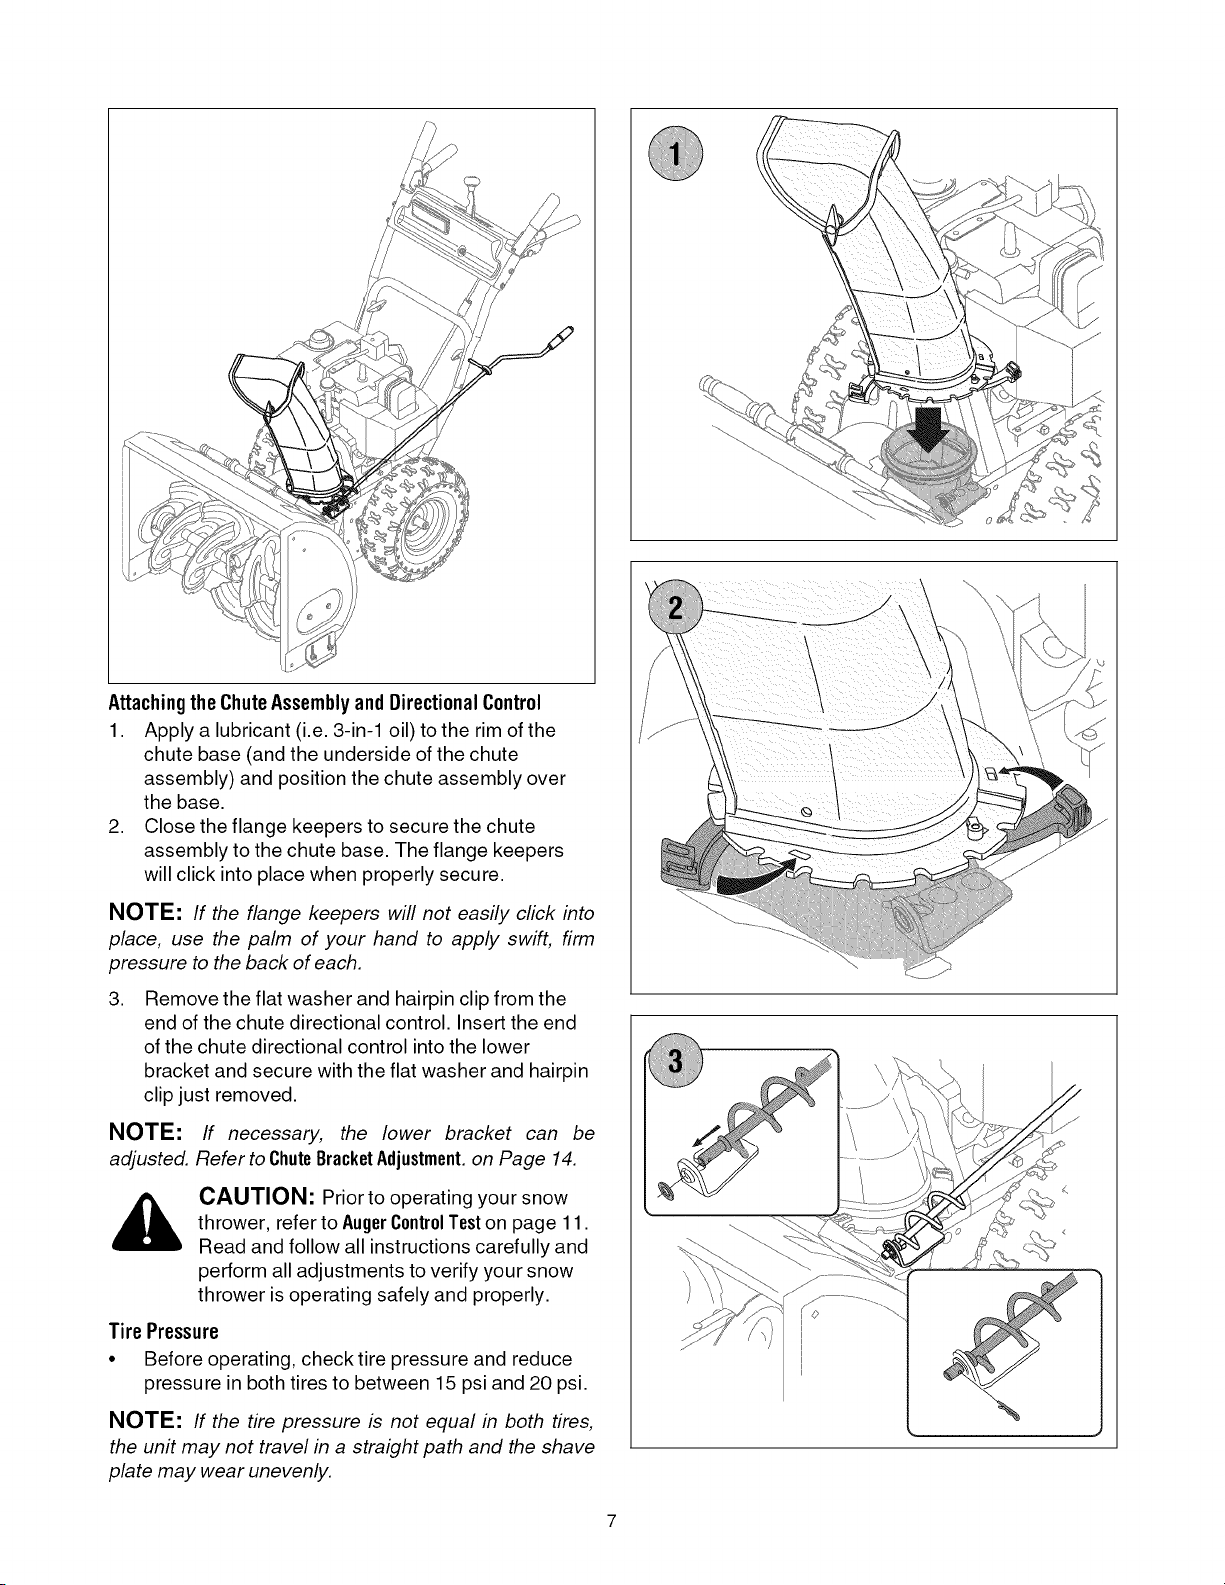
AttachingtheChuteAssemblyandDirectionalControl
1. Apply a lubricant (i.e. 3-in-1 oil) to the rim of the
chute base (and the underside of the chute
assembly) and position the chute assembly over
the base.
2. Close the flange keepers to secure the chute
assembly to the chute base. The flange keepers
will click into place when properly secure.
NOTE: If the flange keepers wifl not easily click into
place, use the palm of your hand to apply swift, firm
pressure to the back of each.
,
Remove the flat washer and hairpin clip from the
end of the chute directional control. Insert the end
of the chute directional control into the lower
bracket and secure with the flat washer and hairpin
clip just removed.
NOTE: If necessary, the lower bracket can be
adjusted. Refer to ChuteBracketAdjustment.on Page 14.
CAUTION: Prior to operating your snow
thrower, refer to AugerControlTeston page 11.
Read and follow all instructions carefully and
perform all adjustments to verify your snow
thrower is operating safely and properly.
Tire Pressure
• Before operating, check tire pressure and reduce
pressure in both tires to between 15 psi and 20 psi.
NOTE: If the tire pressure is not equal in both tires,
the unit may not travel in a straight path and the shave
plate may wear unevenly.
\
\
\
\
Loading ...
Loading ...
Loading ...