Loading ...
Loading ...
Loading ...
Before you begin en-us
5
Before you begin
2 Before you begin
Before you begin
Read these instructions before you begin to install your
appliance.
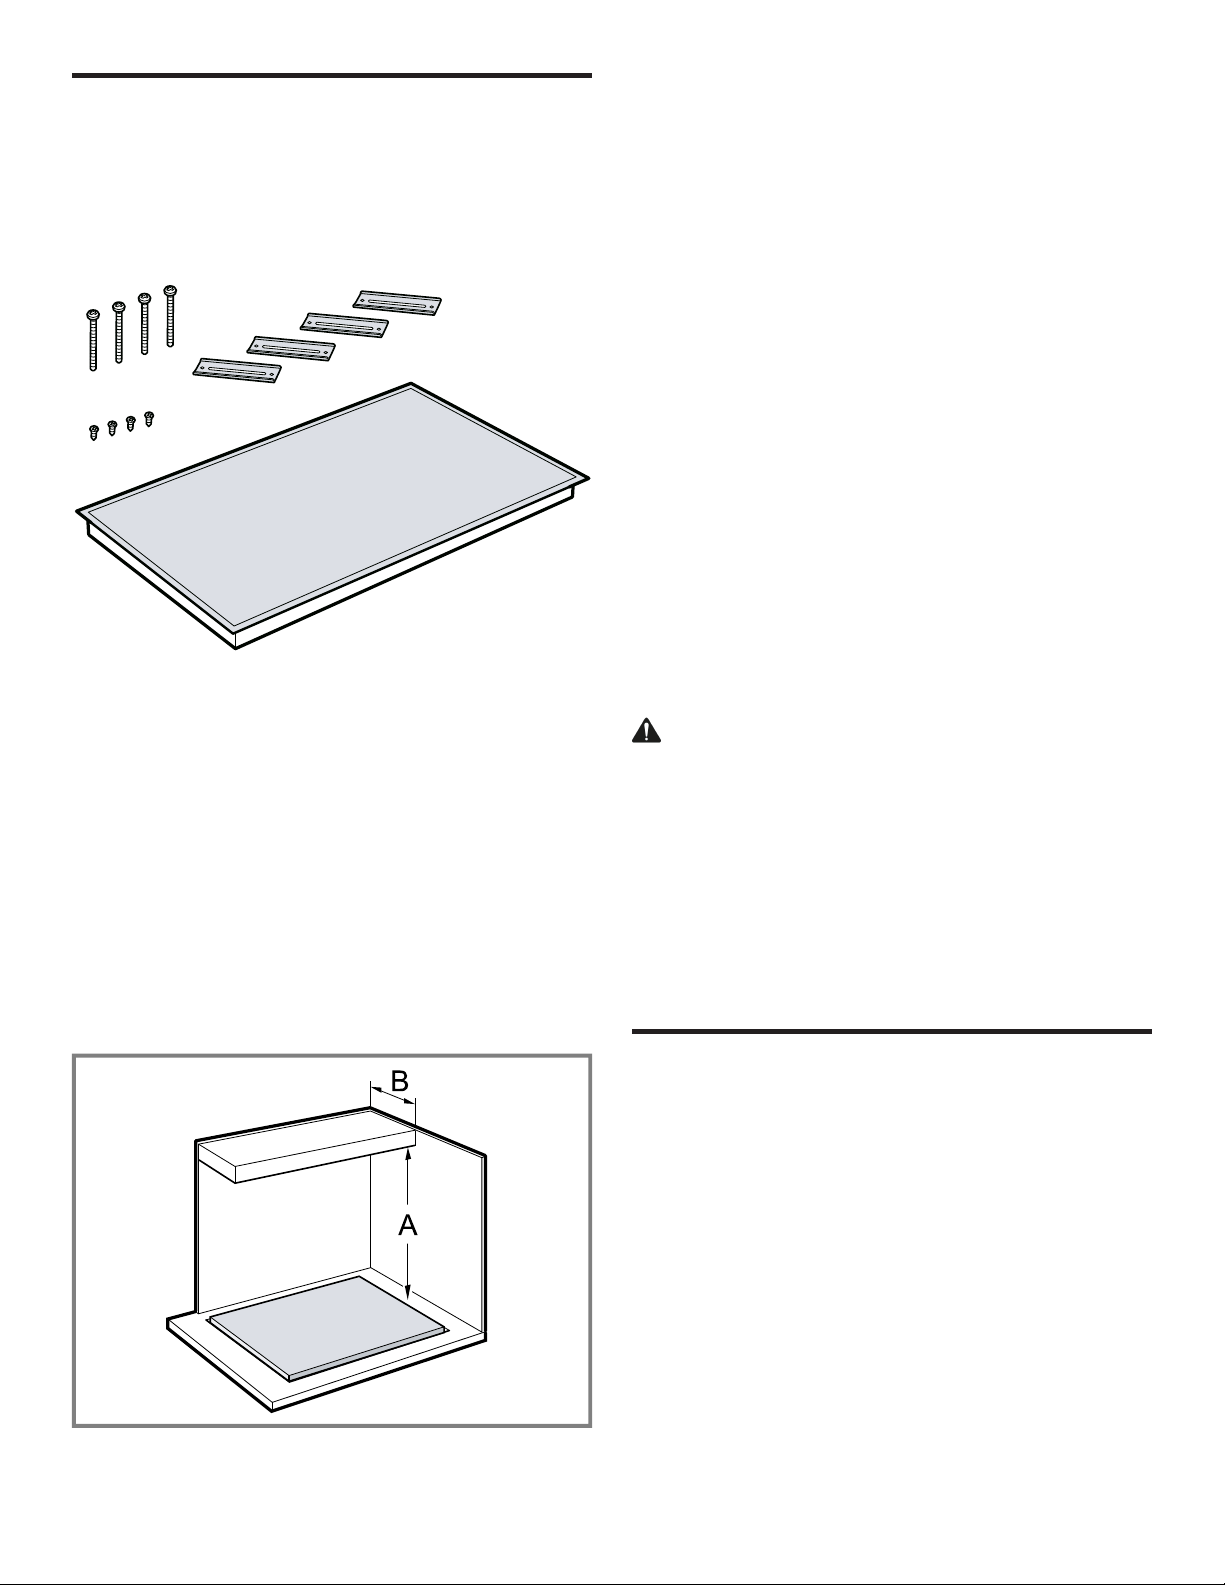
2.1 Parts included
After unpacking all the parts, check for any damage in
transit and for completeness of delivery.
2.2 Tools and parts needed
Prepare these tools and accessories before you start to in-
stall your appliance.
¡ Pencil
¡ Measuring tape
¡ Cross head screwdriver
¡ Drill with bit 1/4" (6mm)
¡ Jigsaw
Note:Additional materials may be necessary for installa-
tion in solid surface countertops. Contact the countertop
manufacturer.
2.3 Cabinet requirements
Ensure that the cabinetry at the installation location meets
the requirements for a safe installation.
¡ The distance from the top of the cooktop to the bottom
of cabinets above must be a minimum of
A=30" (762mm).
¡ This distance can be reduced to A=24" (610mm) when
the bottom of the wood or metal cabinet is protected by
not less than ¼" (6.35mm) flame-retardant millboard
covered with not less than no.28 gauge sheet metal,
0.015" (0.4mm) stainless steel, 0.024" (0.6mm) alu-
minum or 0.020" (0.5mm) copper.
¡ Verify that unprotected cabinets above the cooktop are
a maximum of B=13" (330mm) deep.
Installation in combination with other products
Both products must be installed according to their specific
product installation instructions.
Installing a cooktop over ovens and microwaves:
Only certain models may be installed over oven and mi-
crowave. Verify the Approved Combination Guide supplied
with these instructions for approved installation combina-
tions. Both products will have a label stating Approved
Combination Guide.
Installing a range hood or a microwave hood above the
cooktop:
Follow the range hood or microwave hood installation in-
structions for dimensional clearance above the cooktop
surface.
2.4 Countertop requirements
Ensure that the countertop into which the cooktop is to be
installed meets these requirements for a safe installation.
WARNING
To reduce the risk of ignition of surrounding combustible
materials, install at least 2" (51mm) from both sidewalls
and the rear wall.
¡ The countertop must be level and horizontal.
¡ The stability of the countertop must be maintained after
the cut-out has been made.
¡ Solid surface countertops often require special installa-
tions. For example, heat-reflective tape and rounded
corners may be necessary.
¡ Contact the countertop manufacturer for instructions
specific to your countertop.
Prepare installation space
3 Prepare installation space
Prepare installation space
Create the cutout in the countertop according to the in-
structions.
General countertop requirements:
¡ The angle of the cut surface to the countertop must be
90°.
¡ With multi-layered countertops, secure strips laterally in
the cutout if necessary.
¡ After creating the cutout, remove all shavings.
¡ Seal the cut surfaces in a heat- and water-resistant
manner.
¡ Observe the minimum distance between device under-
side and cabinet surfaces of ⅜" (10mm).
¡ The countertop into which the cooktop is installed must
be heat-resistant up to 140°F (90°C).
¡ The countertop into which the cooktop is installed must
be at least ¹³/₁₆" (20mm) thick.
Loading ...
Loading ...
Loading ...