Loading ...
Loading ...
Loading ...
M
o
un
t
i
n
g
O
p
t
i
o
n
s
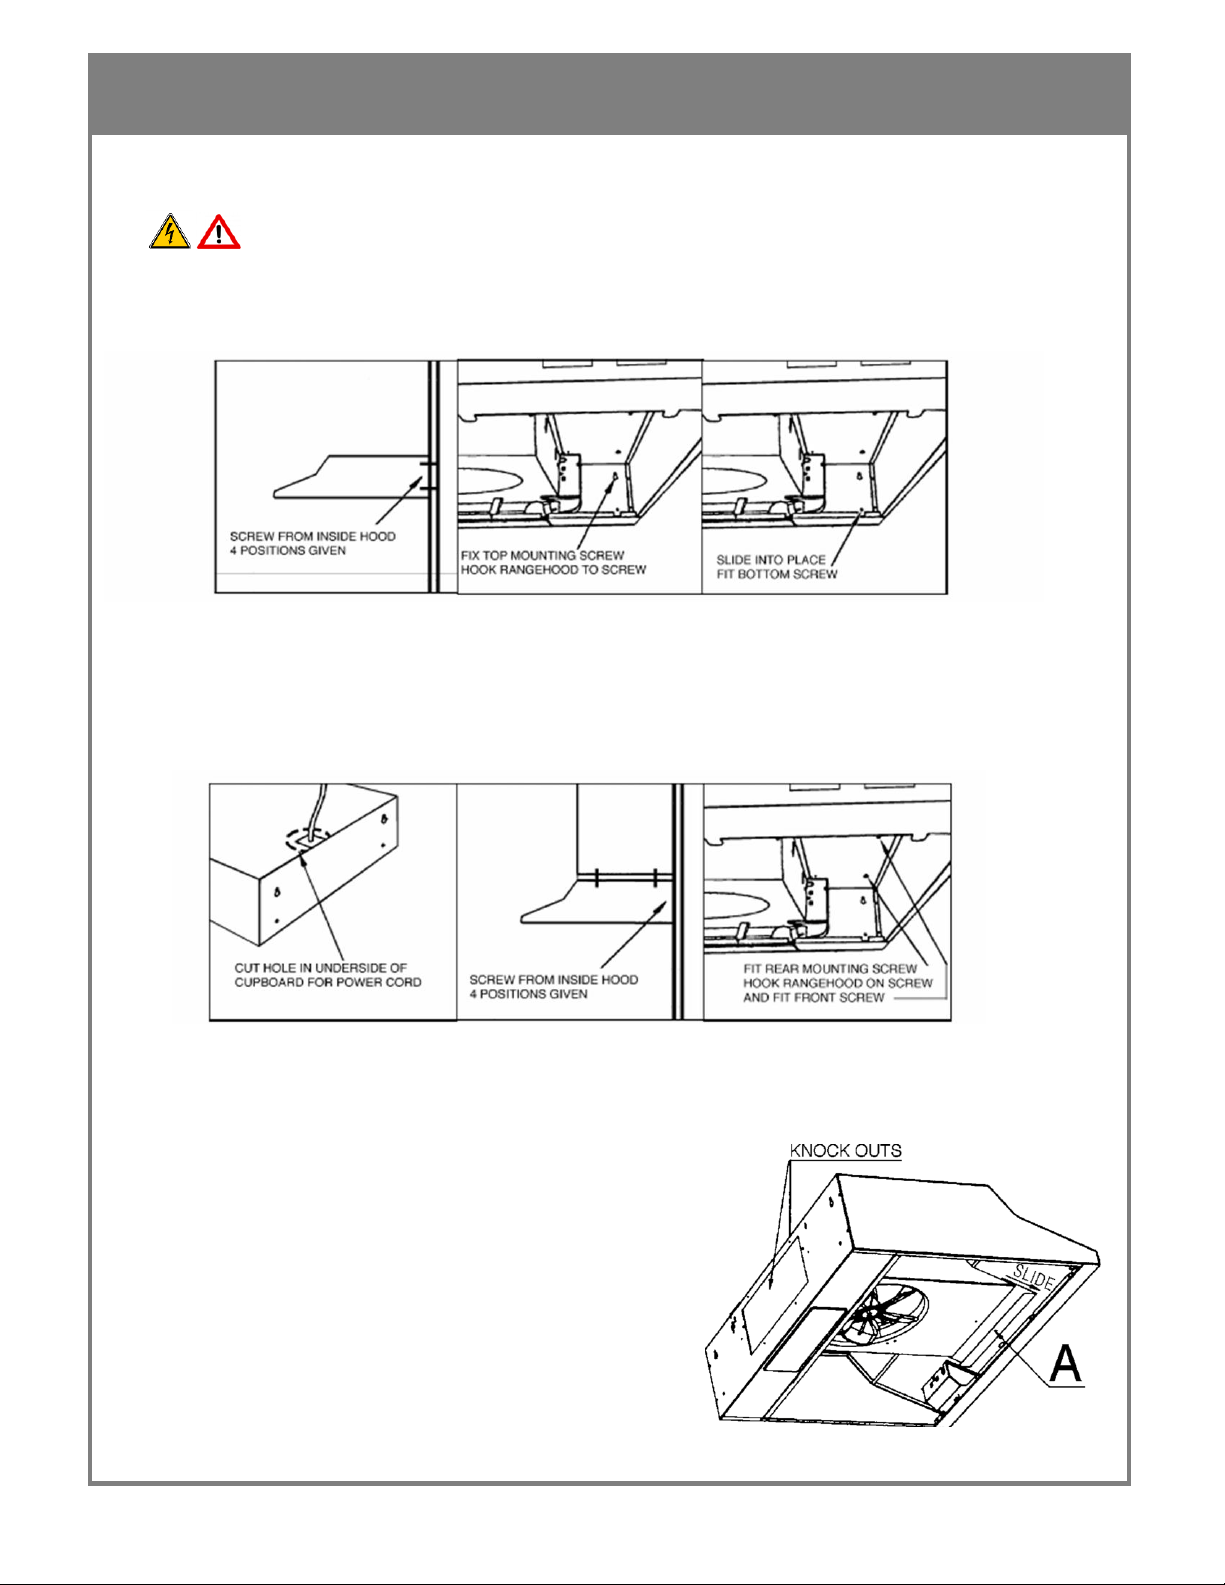
Once
m
o
un
t
i
n
g
o
p
t
i
o
n
has
b
ee
n
d
e
c
i
d
e
d
,
follow the instructions below
.
NO
TE
:
Mounting
screws are not
s
u
pp
li
e
d
.
Use the
a
pp
r
o
p
r
i
a
t
e
m
o
un
t
i
n
g
screws for each m
o
un
t
i
n
g
o
p
t
i
o
n
.
WARNING: Failure to install the screws or fixing device in accordance
with these instructions may result in electrical hazards!
For
M
o
un
t
i
n
g
to Rear
W
a
ll
M
o
un
t
i
n
g
to a stud
i
s
r
e
c
o
mm
e
n
d
e
d
.
However
if
f
i
tt
e
d
to
gyprock
board, a wall
p
l
u
g
i
s
r
e
q
u
i
r
e
d
.
Use the
a
pp
r
o
p
r
i
a
t
e
wall
p
l
u
g
for the
a
pp
r
o
p
r
i
a
t
e
type
of
w
a
ll
.
For
M
o
un
t
i
n
g
Under
C
u
pb
o
a
r
d
Check the screw
l
e
n
g
t
h
w
i
t
h
t
h
i
ck
n
ess
of
c
a
b
i
n
e
t
p
a
n
e
l
s
.
The power
p
l
u
g
must be
a
cc
ess
i
b
l
e
a
f
t
e
r
i
n
s
t
a
ll
a
t
i
o
n
of
the product to allow the unit
t
o
b
e
d
i
s
c
o
nn
e
c
t
e
d
from
the power for
c
l
ea
n
i
n
g
and
m
a
i
n
t
e
n
a
n
c
e
.
Du
c
t
i
n
g
If the
r
a
n
g
e
h
oo
d
i
s
i
n
s
t
a
ll
e
d
in the
r
e
c
i
r
c
u
l
a
t
i
n
g
mode,
unscrew and
s
li
d
e
out the vent cover
“
A
”
.
I
f
the
r
a
n
g
e
h
oo
d
i
s
to be
i
n
s
t
a
ll
e
d
as a
d
u
c
t
e
d
un
i
t
,
remove the
a
pp
r
o
p
r
i
a
t
e
duct
k
n
o
ck
-
o
u
t
(
t
o
p
or rear) and ensure the vent cover
i
s
f
as
t
e
n
e
d
i
n
p
l
a
c
e
.
Refer
a
l
s
o
to
D
u
c
t
i
n
g
O
p
t
i
o
n
s
(Next
p
a
g
e)
.
Loading ...
Loading ...
Loading ...