Loading ...
2
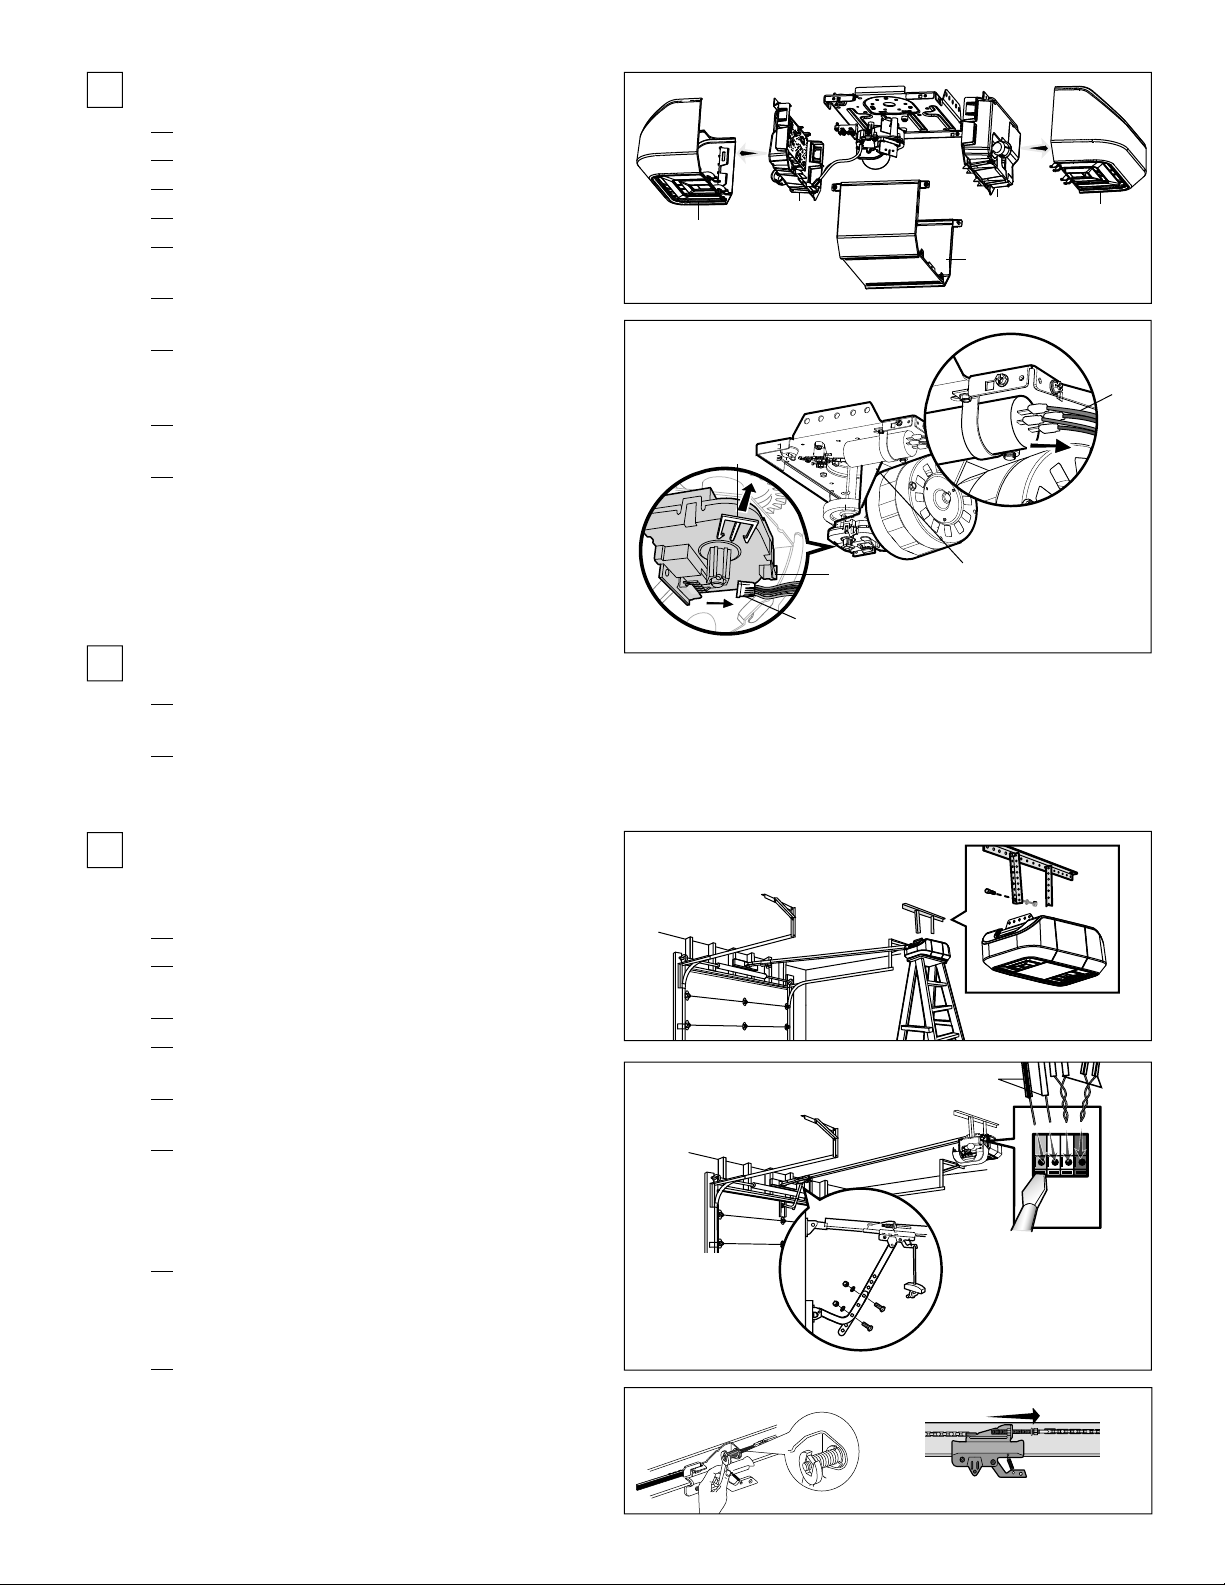
4. Reinstall the garage door opener:
NOTE: Trolley must be in the down position before installing
chain/belt.
Fasten the rail to the garage door opener.
Attach the garage door opener to the hanging
brackets (4a).
Attach the door arm from the rail (4b).
Reconnect wires for the door control (4c) and the
safety reversing sensors (4d) at the logic board.
Remove tape from chain/belt and rail. Reinstall
chain/belt and sprocket cover on sprocket.
To tighten the chain, turn outer nut in the direction
shown. When the chain is approximately 1/4"
(square rail) or 1/2" (T-rail) above the base of the rail
at its midpoint, re-tighten the inner nut to secure the
adjustment (4e).
To tighten the belt, manually thread the spring trolley
nut on the threaded shaft until it is finger tight. Place
a 7/16" open end wrench on the square end. Tighten
spring to a 1-1/4" tension (4e).
Reconnect power to the garage door opener.
Proceed to Adjustments
3. Install the new motor:
Install the new motor and motor bracket to the
opener chassis.
Reverse steps in part 2 to reassemble the opener.
2. Disassemble opener:
Remove the light lens (2a).
Remove the cover (2b).
Remove the logic board and end panel (2c).
Remove the front end panel (2d).
Remove retainer clip (2e), and wire harness (2f)
from the travel module (2g).
Disconnect the capacitor (red and blue wires) (2h)
and the terminal block (white wire) from the motor.
If your garage door opener has a gear case, remove
the top cover by pushing in the tabs on the front and
back of the case.
Remove hardware securing the motor bracket (2i)
to the chassis.
Discard the old motor and bracket assembly.
2a
2e
2h
2i
2f
2g
2a
2b
2c
2d
1/2"
4b
4a
4c
4d
4e
Loading ...
Loading ...
Loading ...