Loading ...
Loading ...
Loading ...
Electrical Connection/Door Tension Adjustment/Base and Toe Panel
. ELECTRICAL CONNECTION (continued)
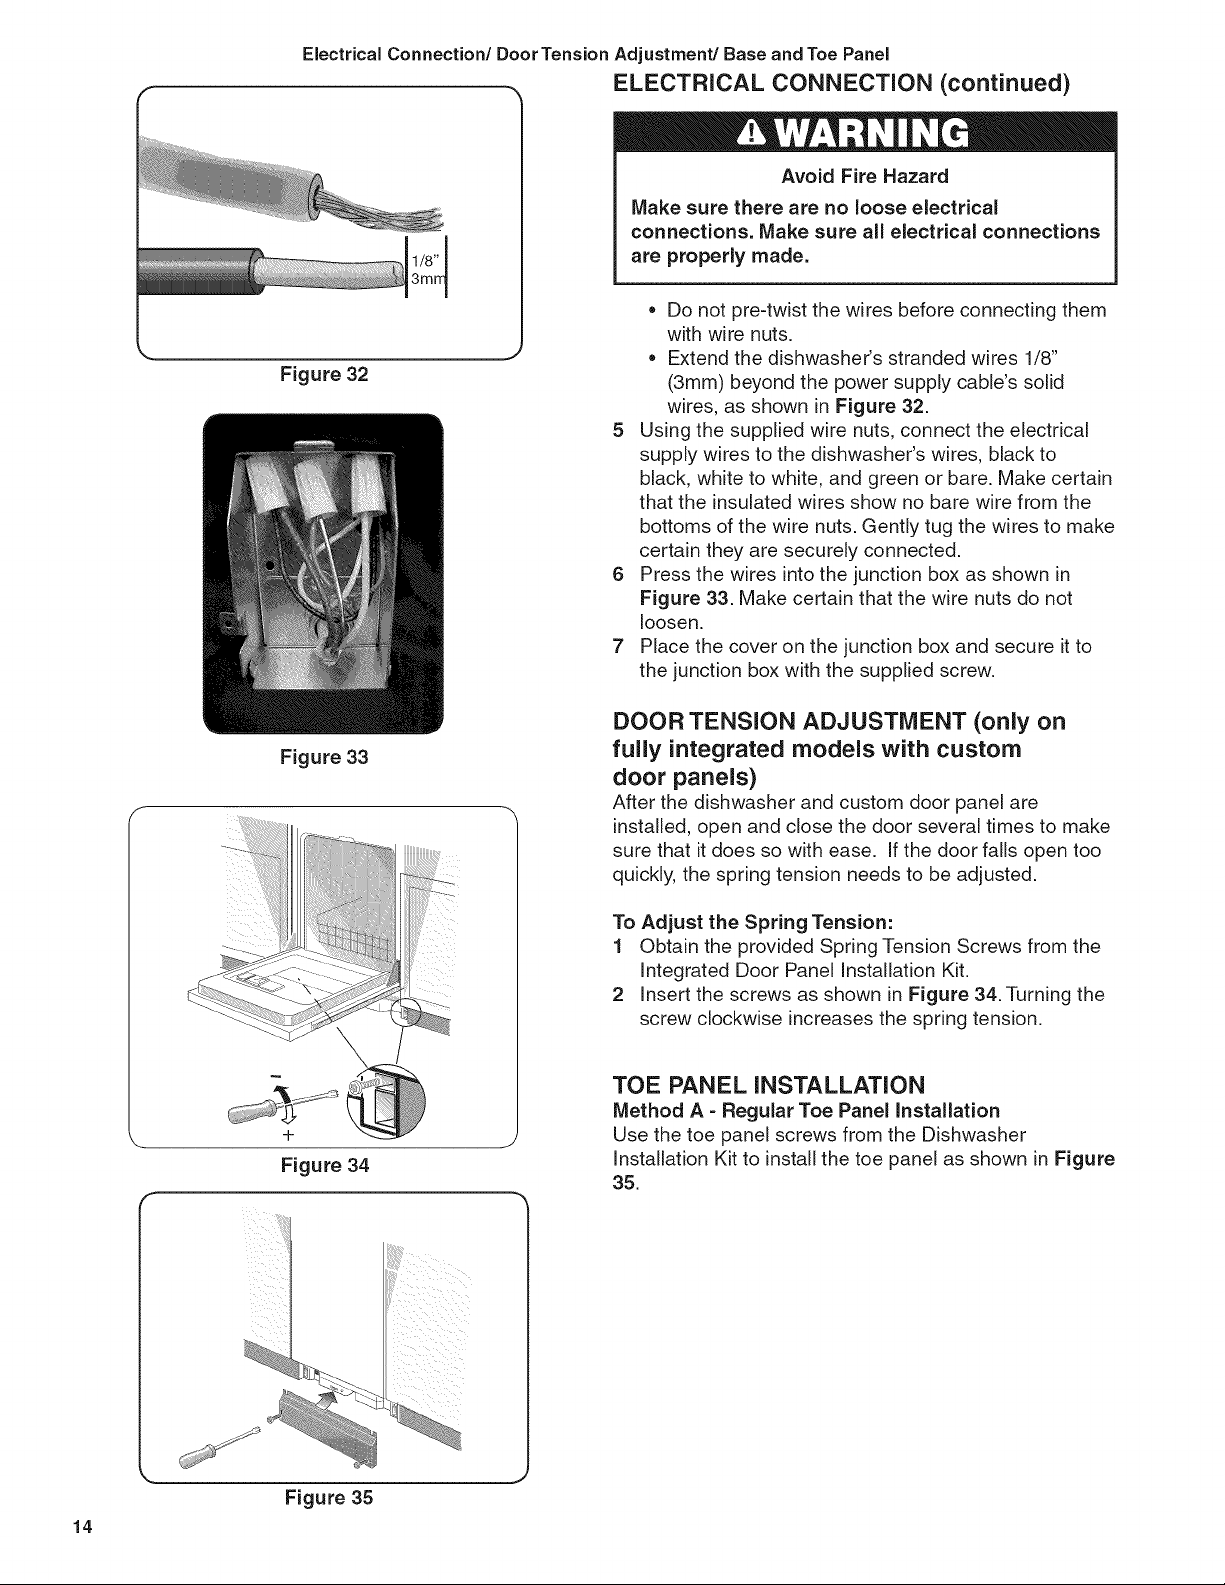
Figure 32
Figure 33
Avoid Fire Hazard
Make sure there are no loose electrical
connections. Make sure all electrical connections
are properly made.
= Do not pre-twist the wires before connecting them
with wire nuts.
Extend the dishwasher's stranded wires 1/8"
(3mm) beyond the power supply cable's solid
wires, as shown in Figure 32.
5 Using the supplied wire nuts, connect the electrical
supply wires to the dishwasher's wires, black to
black, white to white, and green or bare. Make certain
that the insulated wires show no bare wire from the
bottoms of the wire nuts. Gently tug the wires to make
certain they are securely connected.
6 Press the wires into the junction box as shown in
Figure 33. Make certain that the wire nuts do not
loosen.
7 Place the cover on the junction box and secure it to
the junction box with the supplied screw.
4-
Figure 34
DOOR TENSION ADJUSTMENT (only on
fulJy integrated models with custom
door panels)
After the dishwasher and custom door panel are
installed, open and close the door several times to make
sure that it does so with ease. If the door falls open too
quickly, the spring tension needs to be adjusted.
To Adjust the Spring Tension:
1 Obtain the provided Spring Tension Screws from the
Integrated Door Panel Installation Kit.
2 Insert the screws as shown in Figure 34. Turning the
screw clockwise increases the spring tension.
TOE PANEL iNSTALLATiON
Method A = Regular Toe Panel Installation
Use the toe panel screws from the Dishwasher
Installation Kit to install the toe panel as shown in Figure
35,
_i iii
ill _iii ii
iiii iii_
14
Figure 35
Loading ...
Loading ...
Loading ...