Loading ...
Loading ...
Loading ...
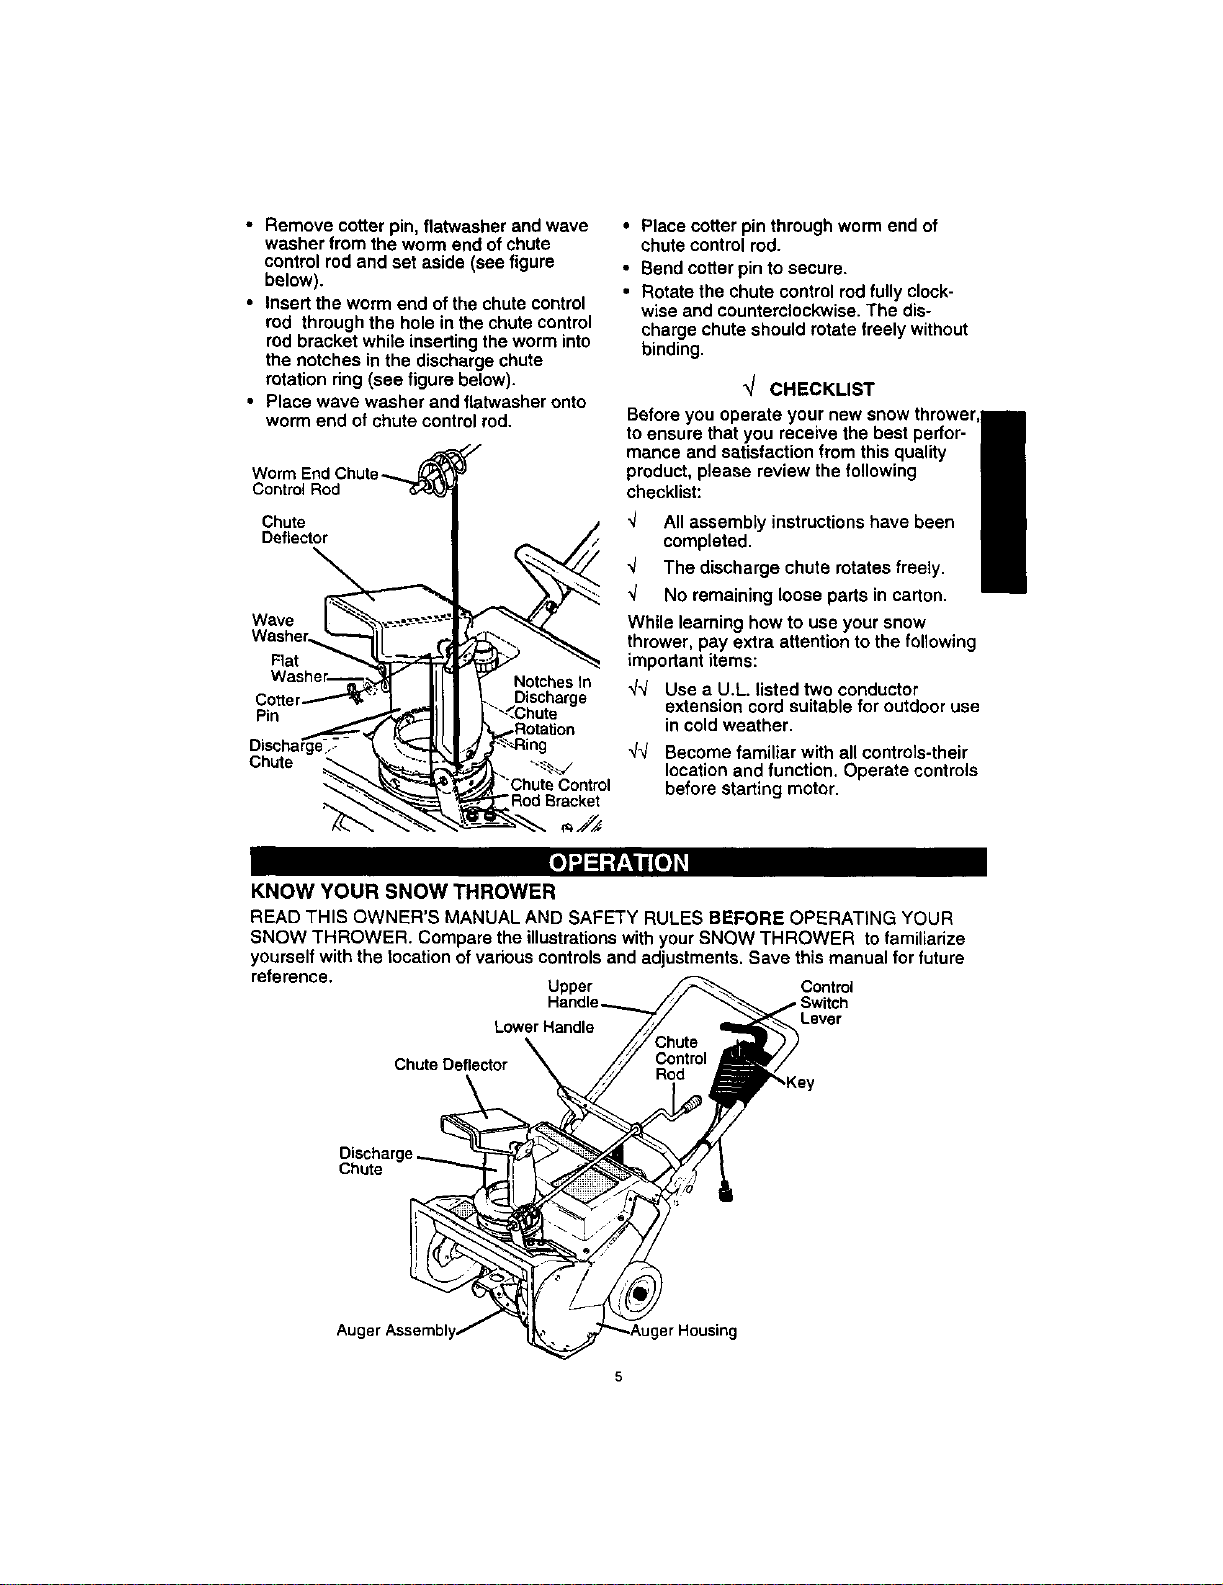
• Remove cotter pin, flatwasher and wave
washer from the worm end of chute
control rod and set aside (see figure
below).
• Insert the worm end of the chute control
rod through the hole in the chute control
rod bracket while inserting the worm into
the notches in the discharge chute
rotation ring (see figure below).
• Place wave washer and flatwasher onto
worm end of chute control rod.
WormEnd Chute_
Control Rod _1
Chute / J
Flat _
III1 F" Notoheeln
.Jl,II L "arQe
Pin _,-_'_,,,_]1 | l "-".Chute
Discharge-..-_'_,_L _I _ =_'-_Ring
Chute w _" _'_---.v
"C u;'; ontro,
_ _Rod Bracket
• Place cotter pin through worm end of
chute control rod.
• Bend cotter pin to secure.
• Rotate the chute control rod fully clock-
wise and counterclockwise. The dis-
charge chute should rotate freely without
binding.
CHECKLIST
Before you operate your new snow thrower
to ensure that you receive the best perfor-
mance and satisfaction from this quality
product, please review the following
checklist:
All assembly instructions have been
completed.
"_ The discharge chute rotates freely.
_/ No remaining loose parts in carton.
While learning how to use your snow
thrower, pay extra attention to the foUowing
important items:
_/_/ Use a U.L. listed two conductor
extension cord suitable for outdoor use
in cold weather.
qq Become familiar with all controls-their
location and function. Operate controls
before starting motor.
I
KNOW YOUR SNOW THROWER
READ THIS OWNER'S MANUAL AND SAFETY RULES BEFORE OPERATING YOUR
SNOW THROWER. Compare the illustrations with your SNOW THROWER to familiarize
yourself with the location of vadous controls and adjustments. Save this manual for future
reference.
Upper Control
Lower Handle
Lever
Chute Deflector
Chute
Loading ...
Loading ...
Loading ...