Loading ...
Loading ...
Loading ...
49-2000381 Rev. 3 21
Oven Door
French Oven Doors
The French oven doors are not removable or consumer serviceable. Please schedule service on-line at
cafeappliances.com/service
Oven Handle Replacement
Some models have custom handles. Please follow the instructions with the handle for proper installation.
French Oven Door Center Seals
If you notice discoloring of the two door center seals that
cannot be removed with warm sudsy water and a soft
cloth, use a stainless steel cleaner that removes heat
discoloration and/or tarnishing.
Do not use abrasive cleaners, metal scouring pads,
commercial oven cleaners or sharp objects to try and
clean the center seals since this can damage these
door parts.
Oven Door Center Seals
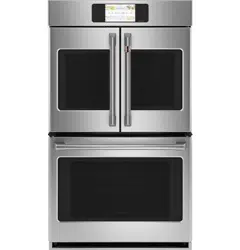
Lower Oven Door Removal (Recommended)
NOTE: Door removal is not a requirement for installation
of the product but is an added convenience.
To remove the door:
1. Open the oven door as far as it will go.
2. Push both hinge locks down toward the door frame to
the unlocked position. This may require a flat-blade
screwdriver. DO NOT LIFT THE DOOR BY THE
HANDLE!
3. Place hands on both sides of the door and close the
oven door to the removal position (approximately
1”–2” [2.5 cm–5.1 cm] from the closed position).
4. Lift the door up and out until the hinge arms clear the
slots. NOTE:7KHRYHQGRRULVYHU\KHDY\%HVXUH
you have a firm grip before lifting the oven door off
WKHKLQJHV8VHFDXWLRQRQFHWKHGRRULVUHPRYHG
Do not lay the door on its handle. This could cause
dents or scratches.
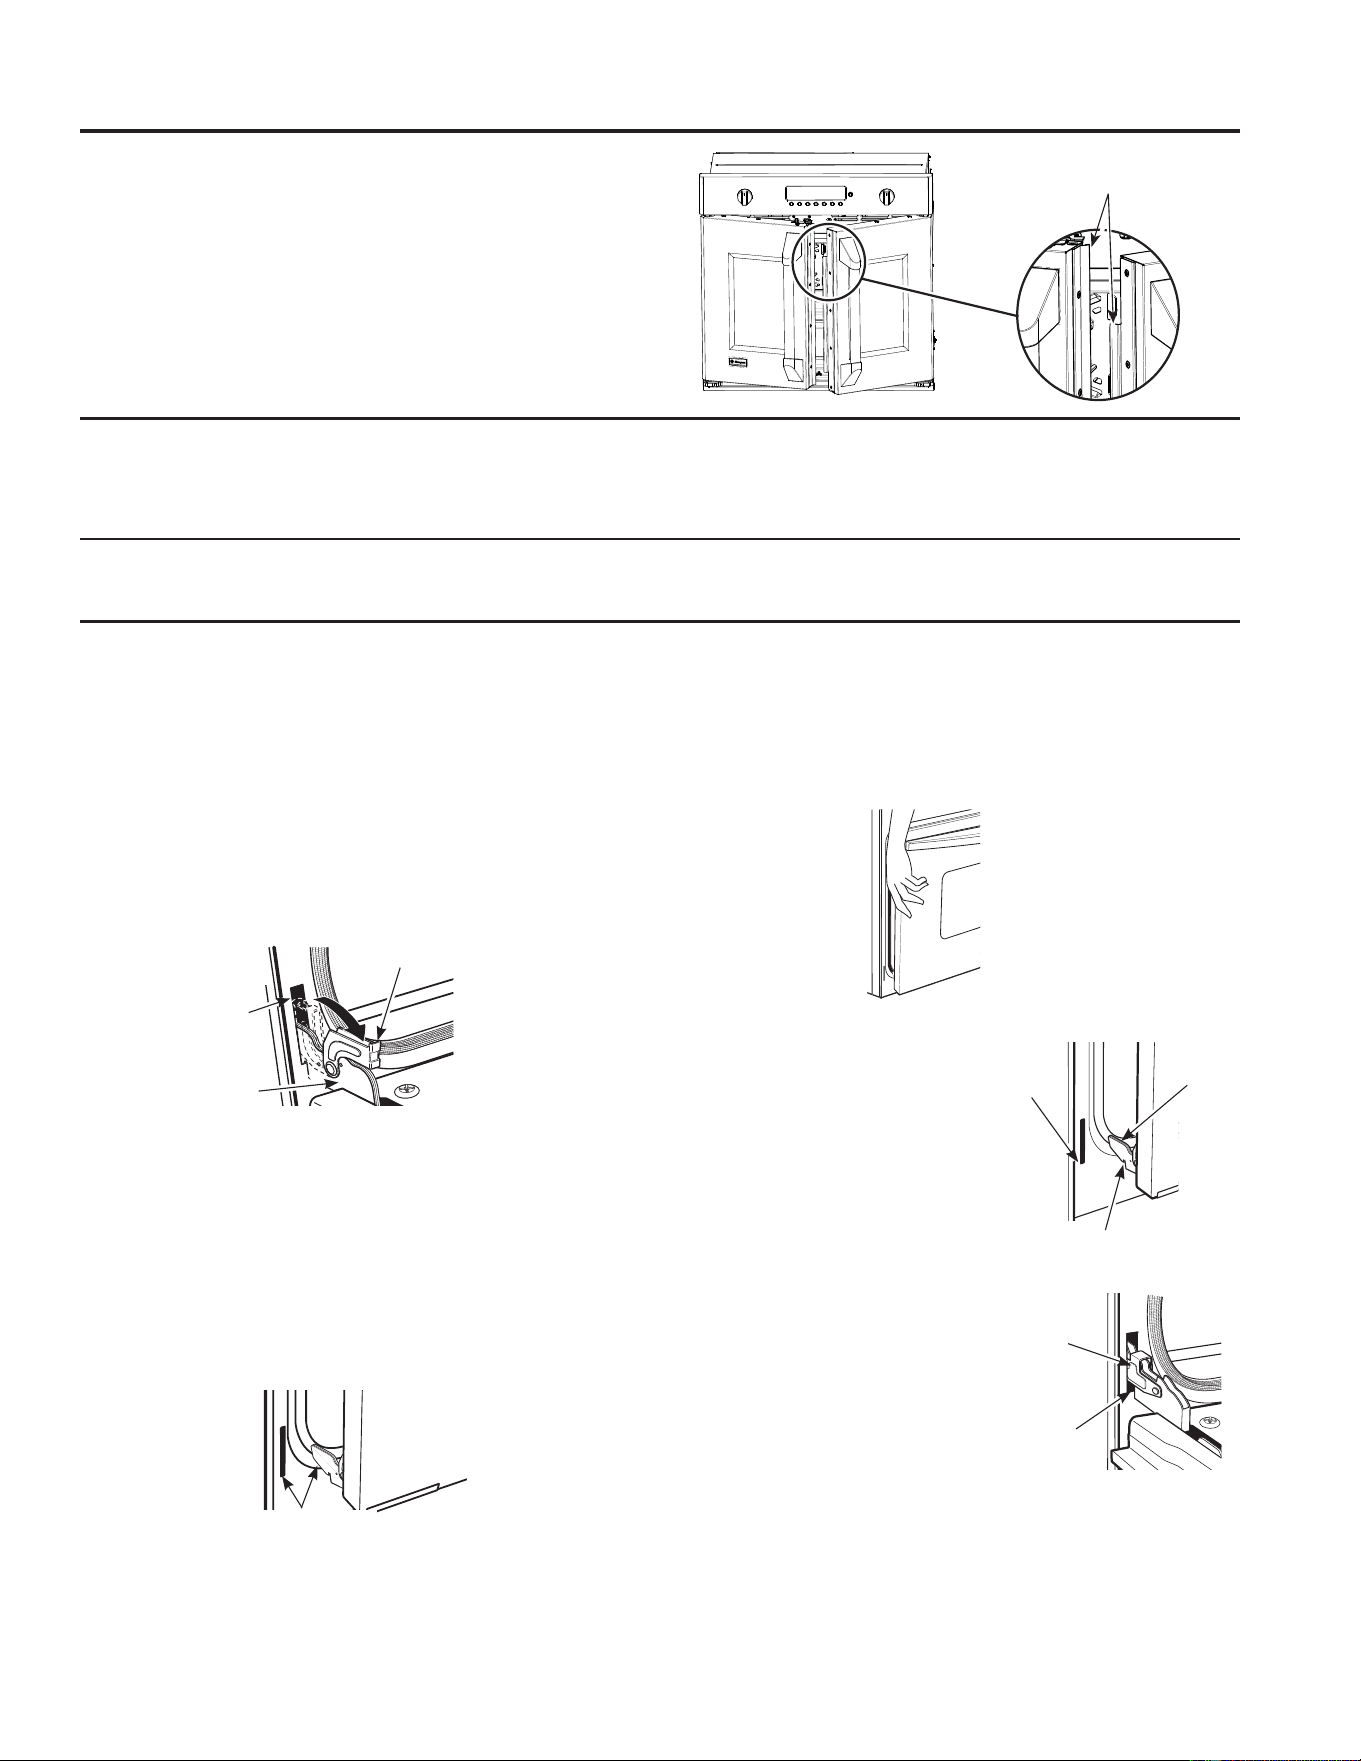
Replacing the Lower Oven Door
NOTE: The oven door is heavy. You may need help
lifting the door high enough to slide it into the hinge slots.
Do not lift the door by the handle.
1. Lift the oven door by grasping each side.
2. With the door at the same
angle as the removal
position (approximately
1”–2” [2.5 cm–5.1 cm] from
the closed position), seat
the notch of the hinge arm
into the bottom edge of the
hinge slot. The notch of
the hinge arm must be fully
seated into the bottom of
the slot.
3. Fully open the door. If
the door will not fully
open, the indentation is
not seated correctly in
the bottom edge of the
slot.
4. Push the hinge locks up against the front frame of the
oven cavity, to the locked position.
5. Close the oven door.
Hinge in
Locked
Position
1RWFKRI+LQJH
Securely Fitted
,QWR%RWWRPRI
Hinge Slot
%RWWRP
Edge of
Slot
Hinge
Arm
+LQJH1RWFK
Hinge
Slot
Hinge
Arm
+LQJH8QORFNHG
Position
Hinge Clears Slot
CARE AND CLEANING: Oven Door
Loading ...
Loading ...
Loading ...