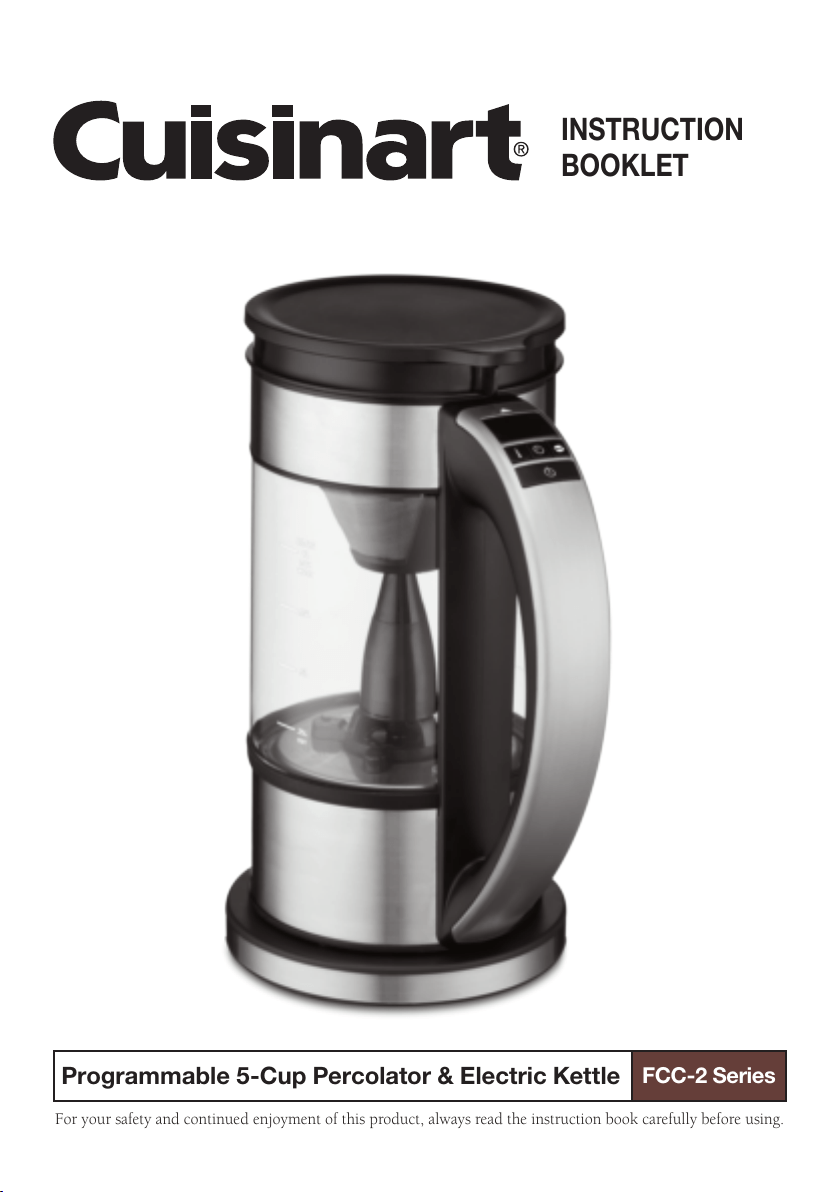
For your safety and continued enjoyment of this product, always read the instruction book carefully before using.
INSTRUCTION
BOOKLET
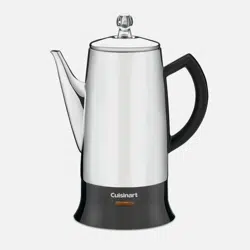
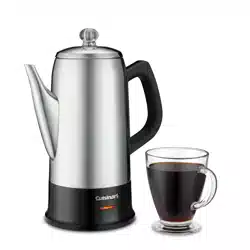
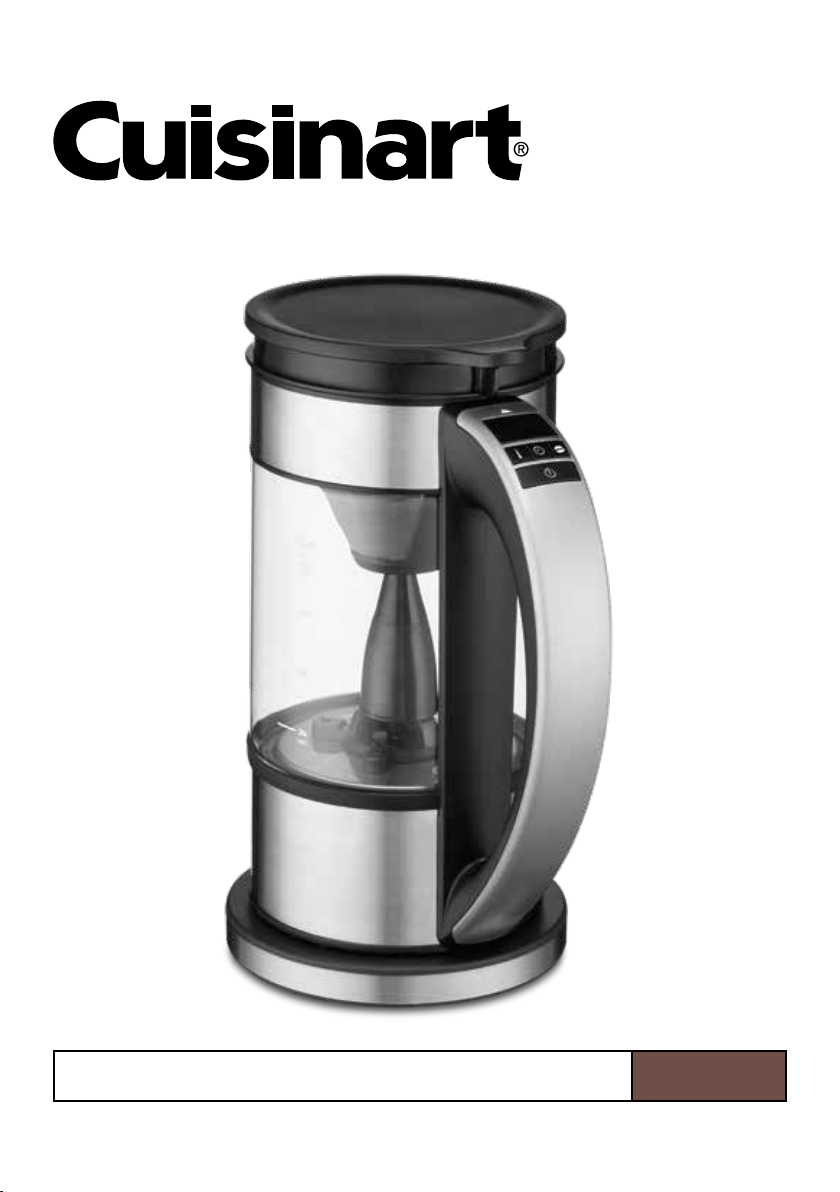
Programmable 5-Cup Percolator & Electric Kettle
FCC-2 Series

2
IMPORTANT
SAFEGUARDS
When using an electrical appliance, basic
safety precautions should always be followed,
including the following:
1. READ ALL INSTRUCTIONS.
2. Unplug from outlet when either the
appliance or the display clock is not in use
and before cleaning. Allow to cool before
putting on or taking off parts, and before
cleaning appliance.
3. Before connecting the Electric Kettle to the
power supply, check that the voltage
indicated on the appliance corresponds with
the voltage in your home. If this is not the
case, contact your dealer and do not use
the Electric Kettle.
4. Do not touch hot surfaces. Use handle or
knobs.
5. To protect against fire, electric shock and
injury to persons, DO NOT IMMERSE
CORD, PLUG, CONTROL PANEL, BASE,
GLASS KETTLE in water or other liquids.
6. This appliance is not intended for use by
children or by persons with reduced
physical, sensory, or mental capabilities, or
lack of experience and knowledge, unless
they have been given supervision or
instruction concerning use of the appliance
by a person responsible for their safety.
Children should be supervised to ensure
that they do not play with the appliance.
The appliance is not a toy.
7. Do not operate the appliance without water
in it to avoid damaging the heat elements.
8. Do not operate any appliance with a
damaged cord or plug, or after the
appliance has malfunctioned or has been
damaged in any manner. Return appliance
to the nearest Cuisinart Authorized Service
Facility for examination, repair or
adjustment.
9. Ensure that the Electric Kettle is used on a
firm and flat surface out of reach of children
– this will prevent the kettle from overturning
and causing damage or injury.
10. The use of accessory attachments not
recommended by Cuisinart may result in
fire, electric shock or injury to persons.
11. The Electric Kettle is for household use
only. Do not use outdoors.
12. Do not let power cord hang over edge of
table or counter, or touch hot surfaces.
13. Always take care to pour boiling water
slowly and carefully without tipping the
kettle too fast.
14. Do not place on or near a hot gas or
electric burner, or in a heated oven.
15. Be careful when refilling the Programmable
5-Cup Percolator & Electric Kettle if it is
hot.
16. Always put kettle on power base, then
plug cord into wall outlet. To disconnect,
turn control to OFF, then remove plug from
wall outlet.
CAUTION: Do not operate your appliance in
an appliance garage or under a wall cabinet.
When storing any appliance in an appliance
garage, always unplug the unit from the
electrical outlet. Be sure the appliance does
not touch the interior wall of the appliance
garage, and the door does not touch the unit
as it closes. Contact could cause the unit to
turn on, creating a risk of fire. CAUTION: In
order to avoid a hazard due to inadvertent
resetting of the THERMAL CUT-OUT, this
appliance must not be supplied through an
external switching device, such as a timer, or
connected to a circuit that is regularly
switched on and off by the utility.
17. Do not use appliance for other than its
intended purpose.
18. While water is boiling, or just after the
water has been boiled, avoid contact with
steam from the spout. Always ensure the
lid is closed and do not lift it while the
water is boiling. Scalding may occur if the
lid is removed during the brewing cycle.
19. Twist-lock lid securely onto kettle before
serving any beverages.
20. The kettle is designed for use with this
appliance. It must never be used on a
range top.
3
21. Extreme caution must be used when
moving an appliance containing hot water.
22. Do not set a hot kettle on a wet or
cold surface.
23. Do not use a cracked/broken kettle or a
container having a loose or weakened
handle.
24. Do not clean kettle with cleaners, steel
wool pads, or other abrasive material.
25. Do not detach filter during normal use to
avoid spilling over.
26. The kettle can only be used with the base
provided.
27. If the kettle is overfilled, boiling water may
spill out.
28. Avoid spillage on the connector.
29. The heating element surface is subject to
residual heat after use.
30. If the supply cord is damaged, it must be
replaced by the manufacturer, its service
agent or similarly qualified persons in
order to avoid a hazard. Potential injury
from misuse.
SAVE THESE
INSTRUCTIONS
FOR HOUSEHOLD
USE ONLY
SPECIAL CORD SET
INSTRUCTIONS
A short power-supply cord is provided to
reduce the risks of injury resulting from
becoming entangled in or tripping over
a longer cord. A longer extension cord may be
used if care is exercised in its use. If a longer
extension cord is used:
1. The marked electrical rating of the cord set
or extension cord should be at least as
great as the electrical rating of the
appliance.
2. The longer cord should be arranged so
that it will not drape over the countertop or
tabletop where it can be pulled on by
children or tripped over unintentionally.
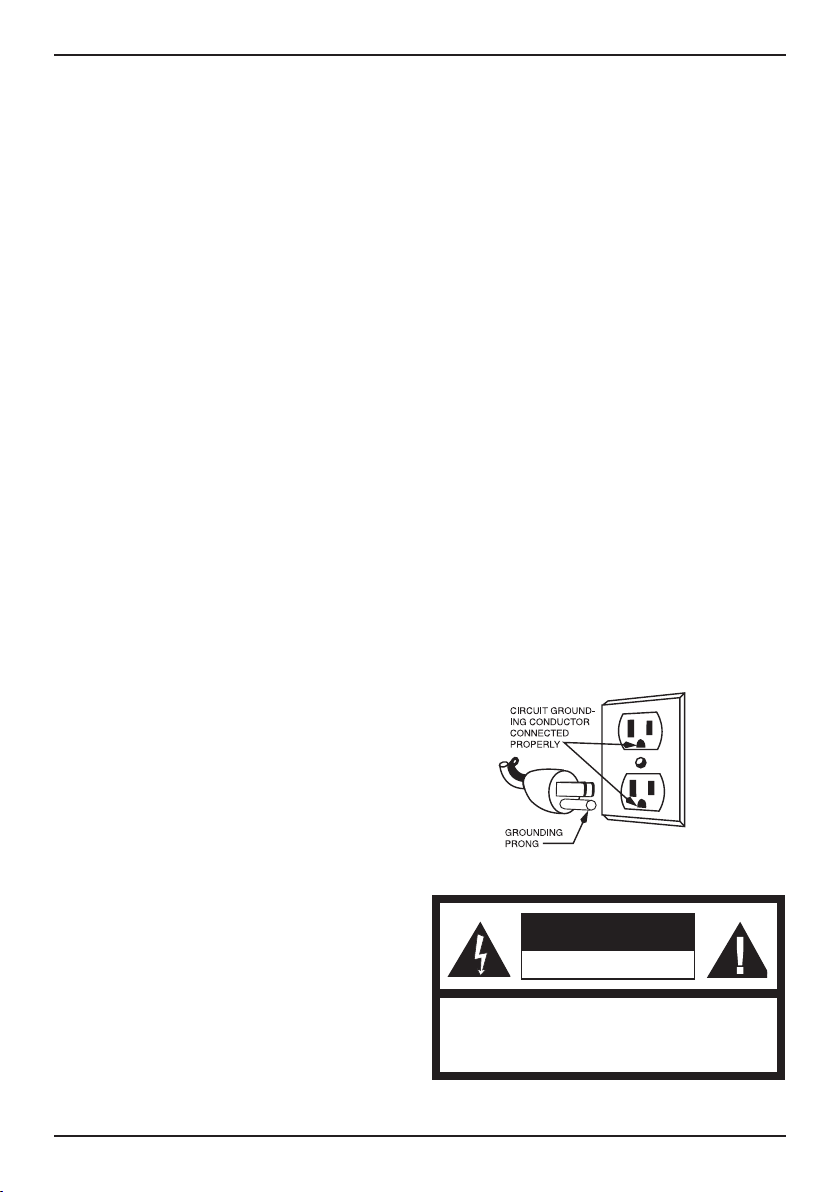
3. The extension cord should be a grounding
type 3-wire cord.
NOTICE
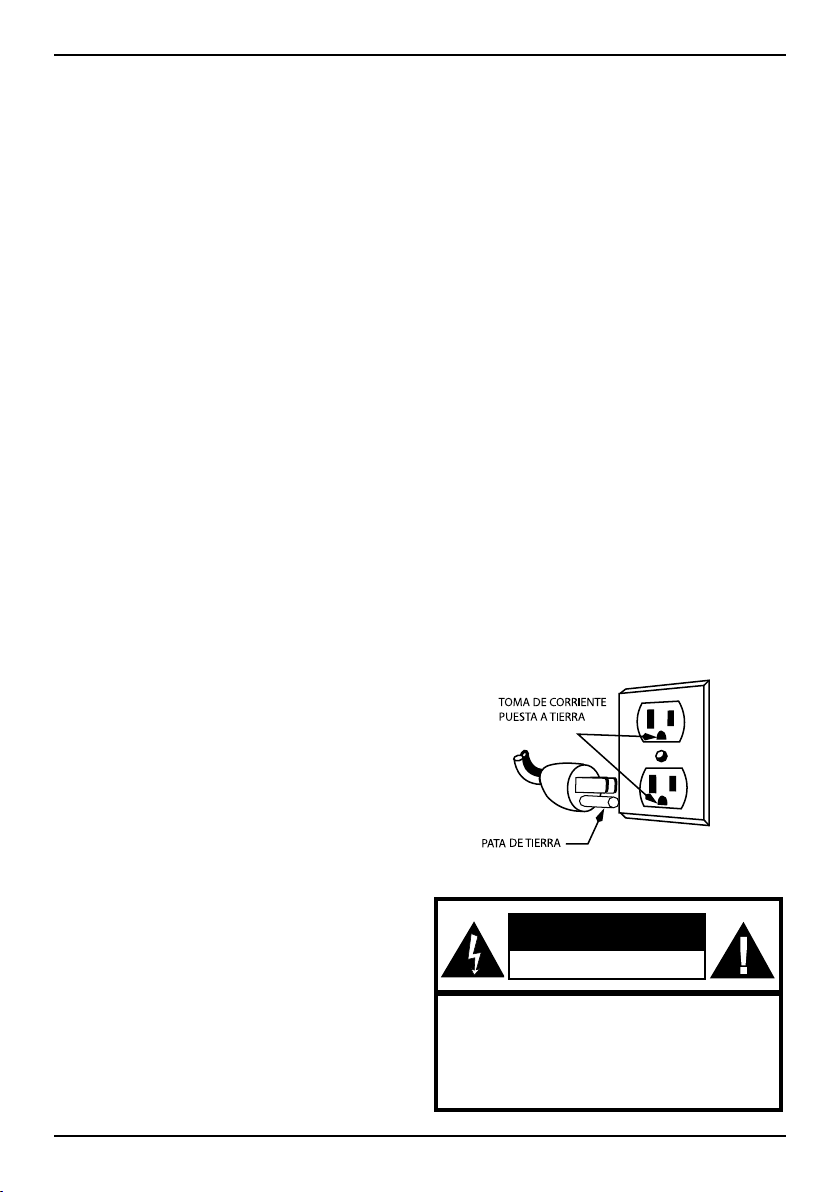
This appliance has a grounding plug. To
reduce the risk of electric shock, this plug will
fit into a grounding outlet only one way. If it still
does not fit, contact a qualified electrician. Do
not modify the plug in any way.
WARNING: TO REDUCE THE RISK OF FIRE OR ELECTRIC SHOCK,
DO NOT REMOVE COVER
NO USER-SERVICEABLE PARTS INSIDE
REPAIR SHOULD BE DONE BY AUTHORIZED SERVICE PERSONNEL ONLY
WARNING
RISK OF FIRE OR ELECTRIC SHOCK
DO NOT OPEN

4
TABLE OF CONTENTS
Important Safeguards...................2
Special Cord Set Instructions ............3
Unpacking Instructions .................4
The Quest for the Perfect Cup of Coffee....4
All About Tea .........................5
Features and Benefits ..................6
Getting to Know Your Control Panel .......6
Install Coffee Basket ...................7
Operation: Heating Water................7
Operation: Brewing Coffee...............8
Cleaning and Maintenance ..............9
Troubleshooting ......................10
Warranty ............................11
UNPACKING
INSTRUCTIONS
1. Place the box on a large, sturdy, flat
surface.
2. Remove the instruction book and any
other literature.
3. Lift the power base from the box and
remove the polybag.
4. Remove the packing material on top.
5. Lift the kettle from the box and remove
the polybag.
We suggest you save all packing
materials in the event that future
shipping of the machine is needed.
Keep all plastic bags away from children.
THE QUEST FOR THE
PERFECT CUP OF
COFFEE
ELEMENT 1: WATER
Coffee is 98% water. The quality of that
water is as important as the quality of your
coffee. If water doesn’t taste good from the
tap, it won’t taste good in your coffee.
ELEMENT 2: COFFEE
While coffee is 98% water, most of the
flavor comes from the beans. To achieve
the same great taste you enjoy at a coffee
bar, you need to use the same quality of
coffee. If you choose to grind your own
beans, buy them fresh and whole. Buy only
about a two-week supply at a time,
because once the bean is broken, its flavor
degrades quickly.
ELEMENT 3: PROPORTION
Coffee that is too strong or too weak is
always a disappointment. Follow the
recommended portions of ground coffee
in the instructions under Brewing Coffee,
page 8, adjusting the amount to suit
your taste.
NOTE: The maximum capacity for ground
coffee is 30 g or 5 tablespoons. Exceeding
this amount may cause overflow.
5
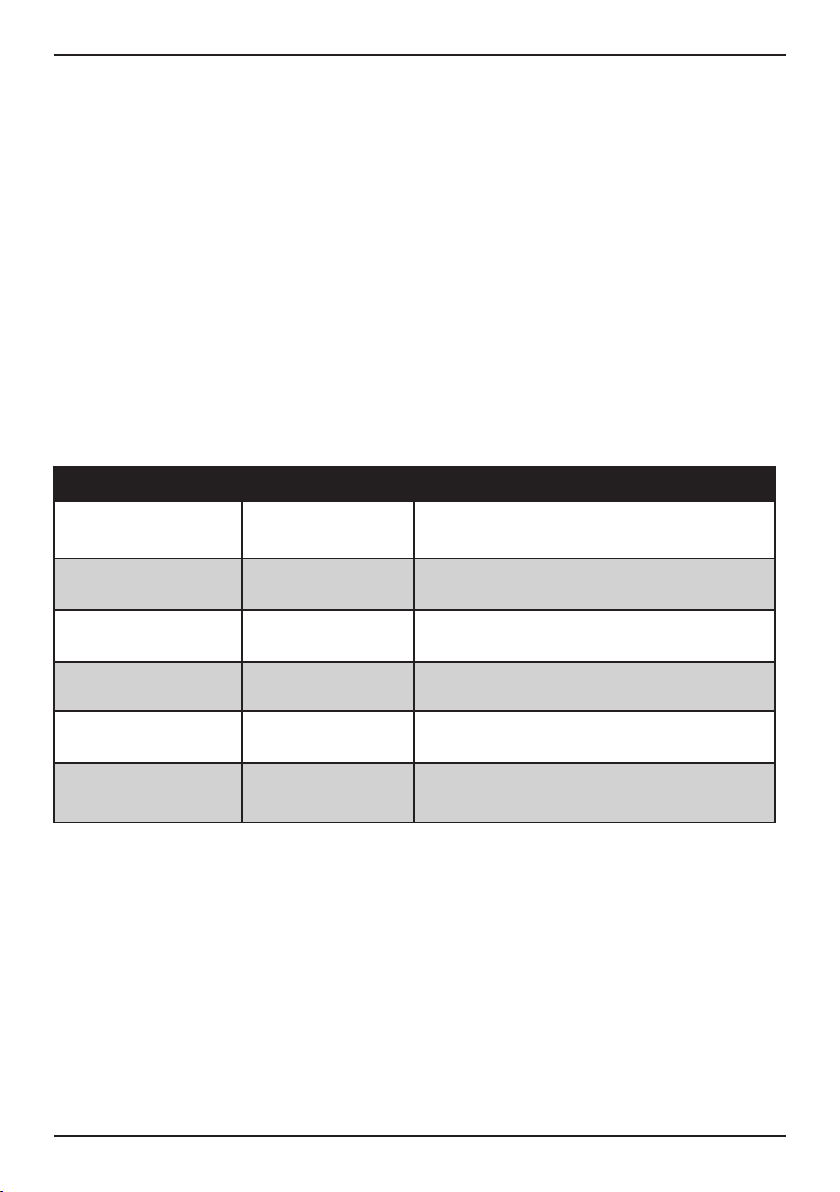
THE ART OF STEEPING TEA
Great care is taken to create a tea’s unique
character. Each type of tea should be
brewed at the right temperature to properly
savor and appreciate all the natural and
aromatic avors and benets. More
delicate teas risk burning at general
steeping temperatures and should be
steeped at a lower temperature to
optimize avors. Below is a chart with
our suggested steeping temperatures
and times.
TYPES OF TEA
There are many types of teas, with the
most popular being black, oolong, green
and white. All teas come from the same
warm-weather evergreen plant: the
Camellia sinensis, or tea plant. Tisane or
“herbal” teas can be a mixture of just about
anything: herbs, owers, spices, seeds,
etc. There are also varieties of tea that are
real teas with spices or other avorings
blended in. Earl Grey, for instance, is black
tea with bergamot peel or oil added.
TYPE TEMPERATURE STEEP TIME
Delicate Tea 160°F 1–2 min.
Green Tea 175°F 2–3 min.
White Tea 185°F 2–3 min.
Oolong Tea 190°F 3–4 min.
Herbal 200°F 4–5 min.
Black 212°F (full boil) 3–5 min.
TEA STEEPING CHART
6
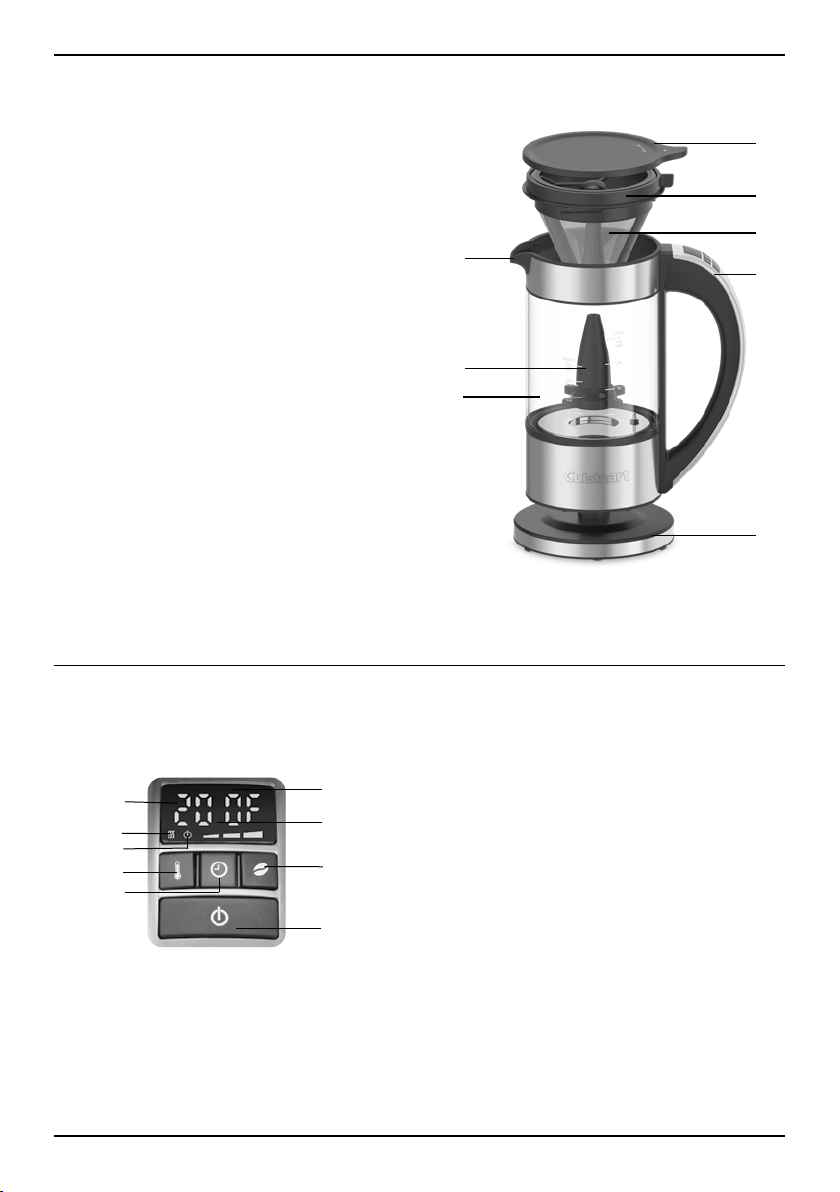
1.
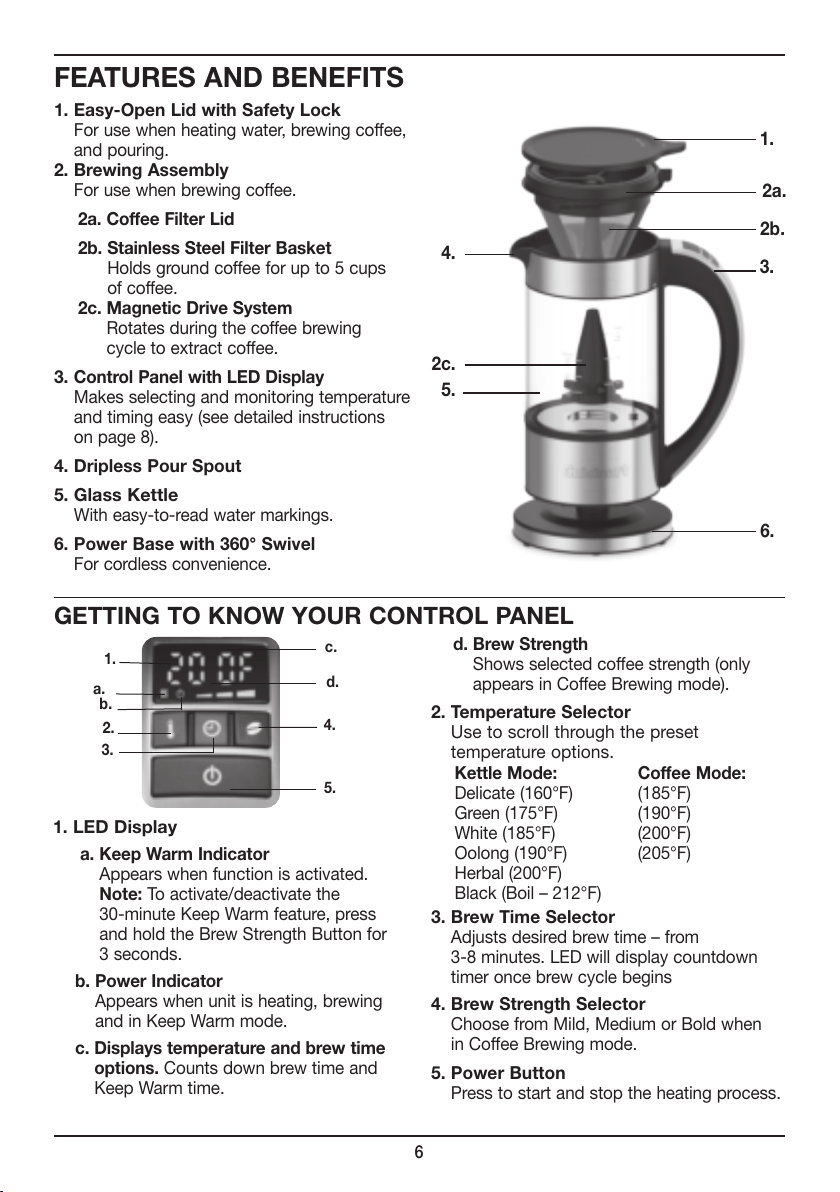
LED Display
a. Keep Warm Indicator
Appears when function is activated.
Note: To activate/deactivate the
30-minute Keep Warm feature, press
and hold the Brew Strength Button for
3 seconds.
b. Power Indicator
Appears when unit is heating, brewing
and in Keep Warm mode.
c. Displays temperature and brew time
options. Counts down brew time and
Keep Warm time.
d. Brew Strength
Shows selected coffee strength (only
appears in Coffee Brewing mode).
2. Temperature Selector
Use to scroll through the preset
temperature options.
3. Brew Time Selector
Adjusts desired brew time – from
3-8 minutes. LED will display countdown
timer once brew cycle begins
4. Brew Strength Selector
Choose from Mild, Medium or Bold when
in Coffee Brewing mode.
5. Power Button
Press to start and stop the heating process.
FEATURES AND BENEFITS
1. Easy-Open Lid with Safety Lock
For use when heating water, brewing coffee,
and pouring.
2. Brewing Assembly
For use when brewing coffee.
2a. Coffee Filter Lid
2b. Stainless Steel Filter Basket
Holds ground coffee for up to 5 cups
of coffee.
2c. Magnetic Drive System
Rotates during the coffee brewing
cycle to extract coffee.
3.
Control Panel with LED Display
Makes selecting and monitoring temperature
and timing easy (see detailed instructions
on page 8).
4. Dripless Pour Spout
5.
Glass Kettle
With easy-to-read water markings.
6. Power Base with 360° Swivel
For cordless convenience.
1.
3.
2a.
2b.
2c.
6.
4.
5.
Kettle Mode:
Delicate (160°F)
Green (175°F)
White (185°F)
Oolong (190°F)
Herbal (200°F)
Black (Boil – 212°F)
Coffee Mode:
(185°F)
(190°F)
(200°F)
(205°F)
GETTING TO KNOW YOUR CONTROL PANEL
a.
c.
d.
b.
2.
4.
3.
1.
5.
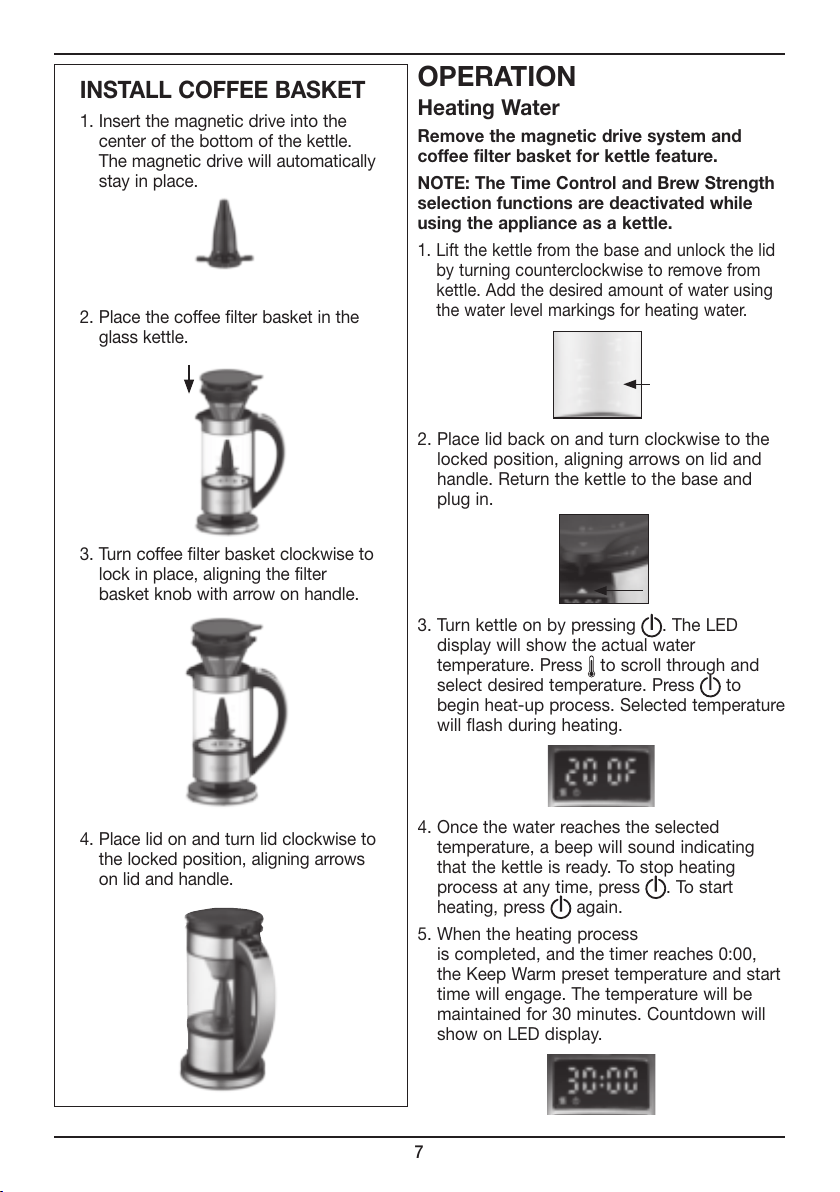
OPERATION
Heating Water
Remove the magnetic drive system and
coffee filter basket for kettle feature.
NOTE: The Time Control and Brew Strength
selection functions are deactivated while
using the appliance as a kettle.
1. Lift the kettle from the base and unlock the lid
by turning counterclockwise to remove from
kettle. Add the desired amount of water using
the water level markings for heating water.
2. Place lid back on and turn clockwise to the
locked position, aligning arrows on lid and
handle. Return the kettle to the base and
plug in.
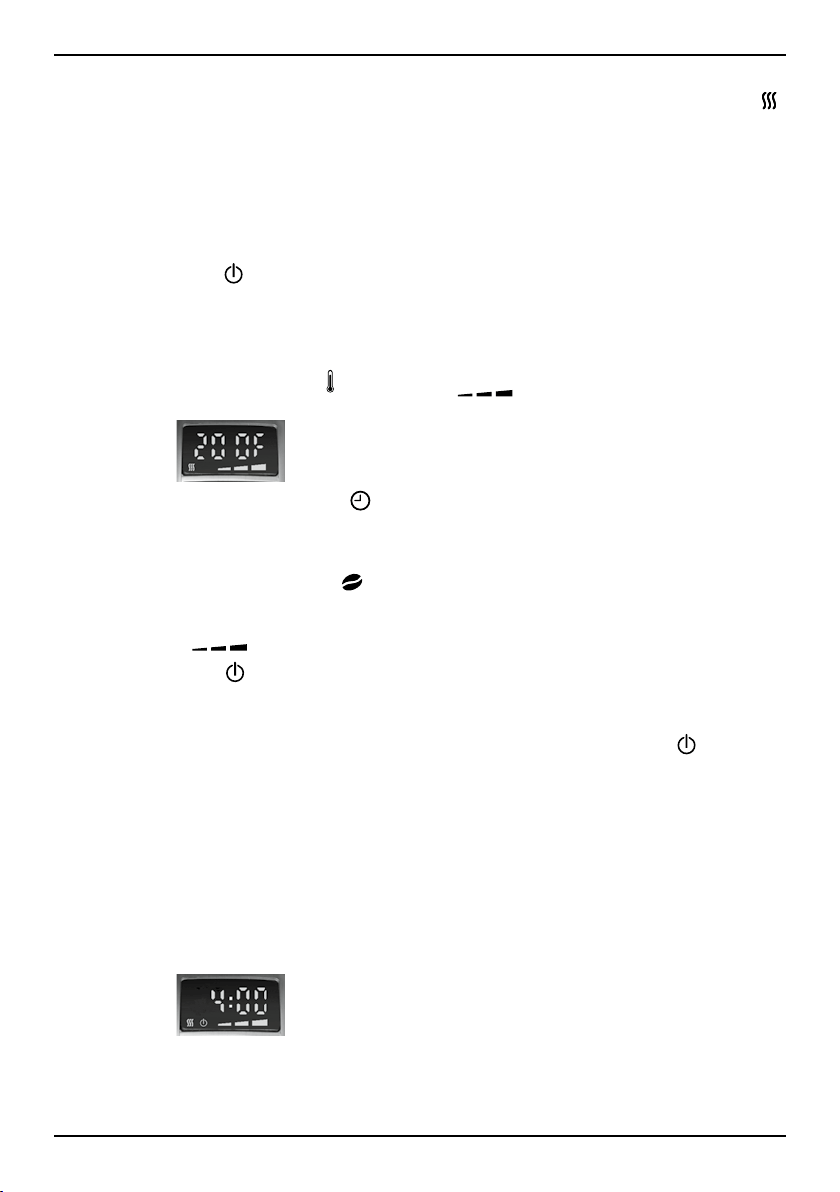
3. Turn kettle on by pressing . The LED
display will show the actual water
temperature. Press
to scroll through and
select desired temperature. Press
to
begin heat-up process. Selected temperature
will flash during heating.
4. Once the water reaches the selected
temperature, a beep will sound indicating
that the kettle is ready. To stop heating
process at any time, press
. To start
heating, press
again.
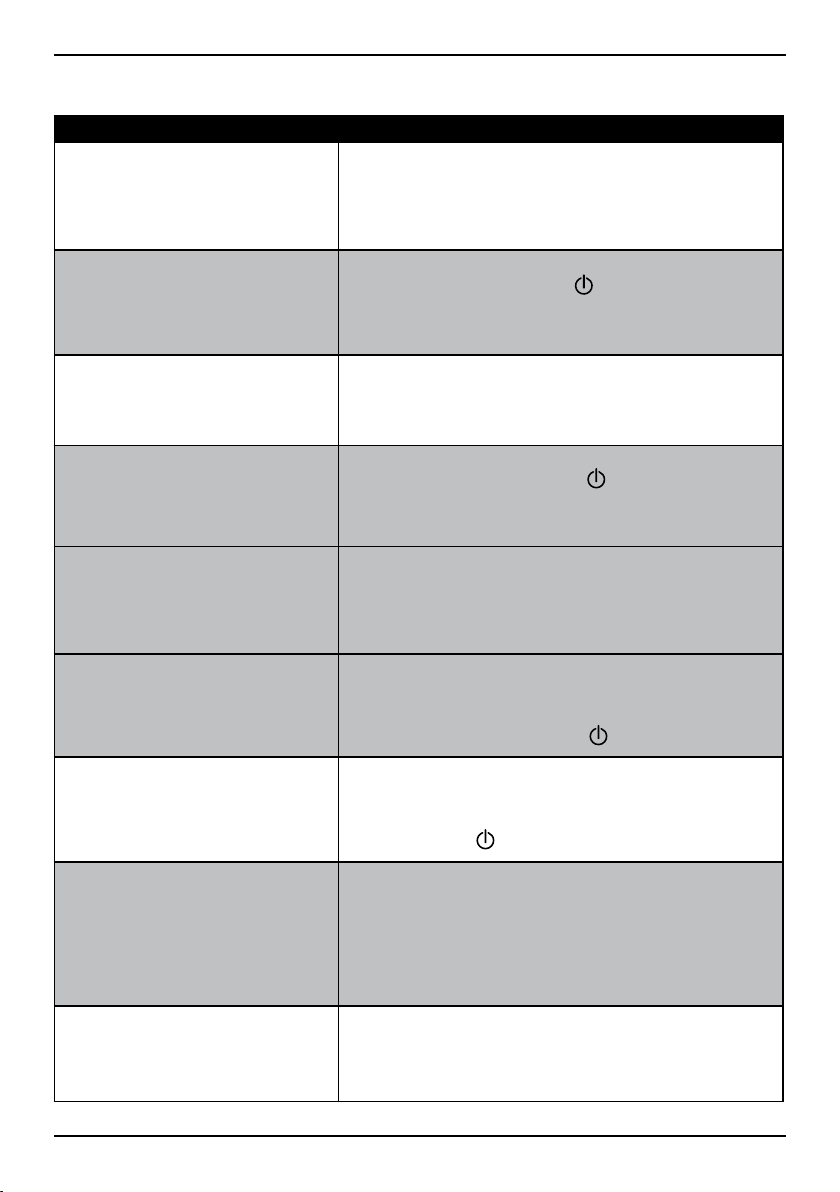
5. When the heating process
is completed, and the timer reaches 0:00,
the Keep Warm preset temperature and start
time will engage. The temperature will be
maintained for 30 minutes. Countdown will
show on LED display.
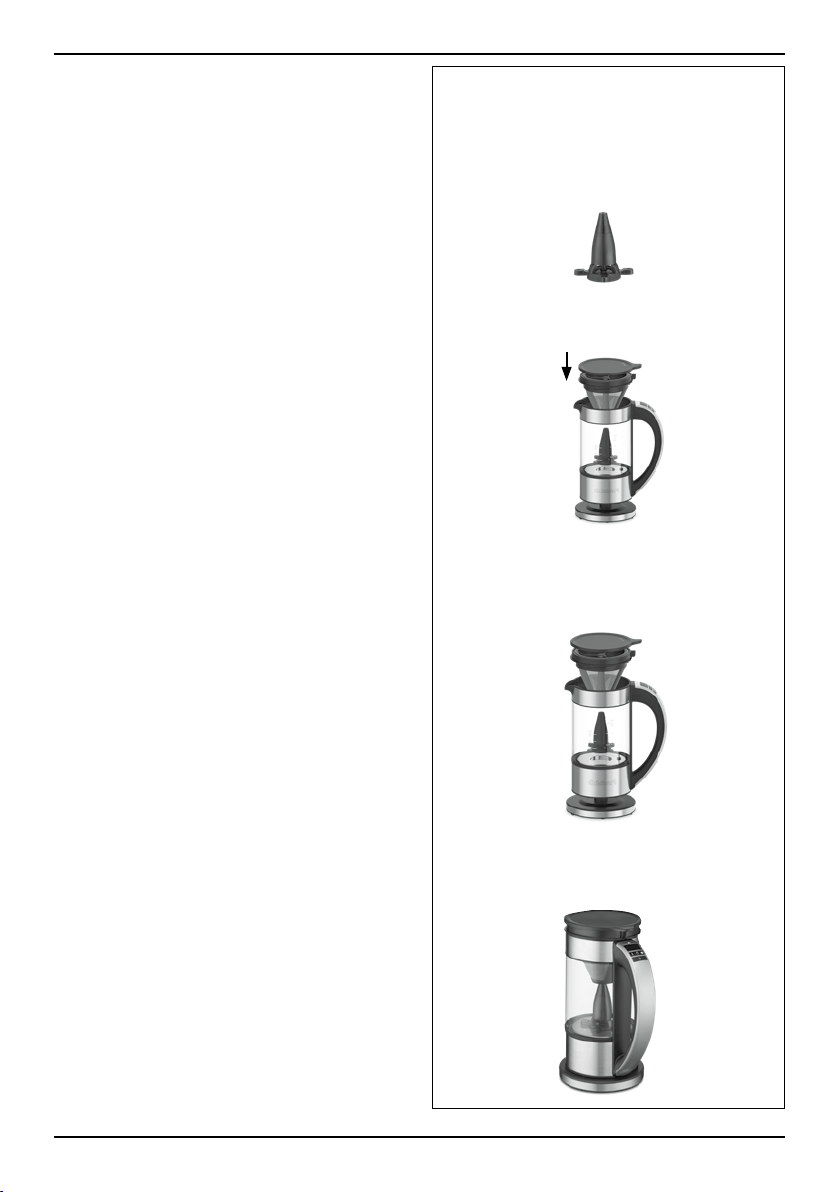
INSTALL COFFEE BASKET
1. Insert the magnetic drive into the
center of the bottom of the kettle.
The magnetic drive will automatically
stay in place.
2. Place the coffee filter basket in the
glass kettle.
3. Turn coffee filter basket clockwise to
lock in place, aligning the filter
basket knob with arrow on handle.
4. Place lid on and turn lid clockwise to
the locked position, aligning arrows
on lid and handle.
7
8
6. Lift the kettle off the base to pour water.
All lights will turn off while the kettle is off
the base. Note: There is a 2 minute
standby mode when kettle is removed from
base while Keep Warm mode is on. Keep
Warm will resume if the kettle is returned to
base within 2 minutes.
If the kettle enters standby mode while
on the power base, press the
to select
the needed temperature and press
to restart.
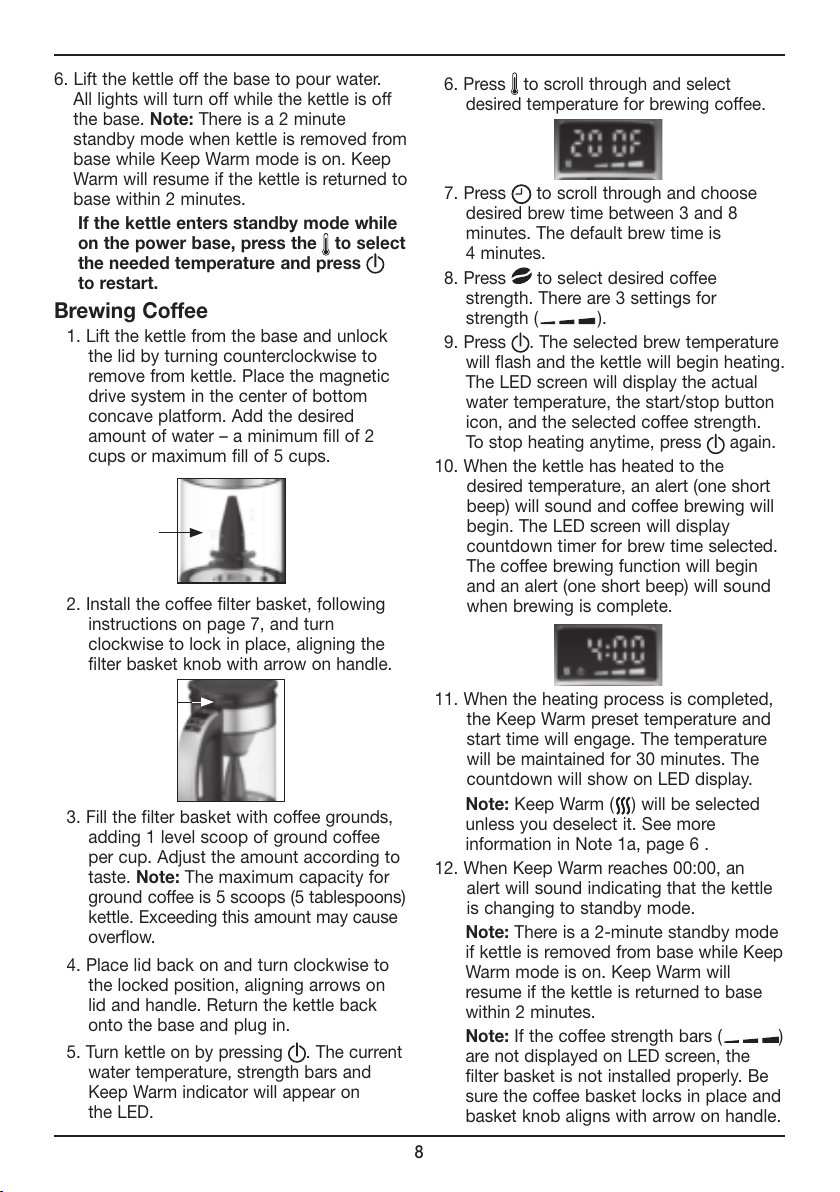
Brewing Coffee
1. Lift the kettle from the base and unlock
the lid by turning counterclockwise to
remove from kettle. Place the magnetic
drive system in the center of bottom
concave platform. Add the desired
amount of water – a minimum fill of 2
cups or maximum fill of 5 cups.
2. Install the coffee filter basket, following
instructions on page 7, and turn
clockwise to lock in place, aligning the
filter basket knob with arrow on handle.
3. Fill the filter basket with coffee grounds,
adding 1 level scoop of ground coffee
per cup. Adjust the amount according to
taste. Note: The maximum capacity for
ground coffee is 5 scoops (5 tablespoons)
kettle. Exceeding this amount may cause
overflow.
4. Place lid back on and turn clockwise to
the locked position, aligning arrows on
lid and handle. Return the kettle back
onto the base and plug in.
5.
Turn kettle on by pressing . The current
water temperature, strength bars and
Keep Warm indicator will appear on
the LED.
6. Press
to scroll through and select
desired temperature for brewing coffee.
7. Press to scroll through and choose
desired brew time between 3 and 8
minutes. The default brew time is
4 minutes.
8. Press
to select desired coffee
strength. There are 3 settings for
strength ( ).
9. Press
. The selected brew temperature
will flash and the kettle will begin heating.
The LED screen will display the actual
water temperature, the start/stop button
icon, and the selected coffee strength.
To stop heating anytime, press again.
10. When the kettle has heated to the
desired temperature, an alert (one short
beep) will sound and coffee brewing will
begin. The LED screen will display
countdown timer for brew time selected.
The coffee brewing function will begin
and an alert (one short beep) will sound
when brewing is complete.
11. When the heating process is completed,
the Keep Warm preset temperature and
start time will engage. The temperature
will be maintained for 30 minutes. The
countdown will show on LED display.
Note: Keep Warm (
) will be selected
unless you deselect it. See more
information in Note 1a, page 6 .
12. When Keep Warm reaches 00:00, an
alert will sound indicating that the kettle
is changing to standby mode.
Note: There is a 2-minute standby mode
if kettle is removed from base while Keep
Warm mode is on. Keep Warm will
resume if the kettle is returned to base
within 2 minutes.
Note: If the coffee strength bars (
)
are not displayed on LED screen, the
filter basket is not installed properly. Be
sure the coffee basket locks in place and
basket knob aligns with arrow on handle.
9
MEMORY FEATURE
The appliance features an internal “memory”
that lets you leave the kettle off the base for
up to 2 minutes without it going into standby
mode. When returned to the base, it will
resume the heating and/or Keep Warm cycles
right where they left off.
Note: If appliance goes into standby mode
before it’s returned to base, simply reselect
your preset temperature and press
to turn
it back on.
BOIL-DRY PROTECTION
1. This appliance is equipped with boil-dry
protection. If it starts heating without
enough water in the unit, the heater will
automatically shut off to avoid damaging the
heating element. Once the kettle has cooled
down, lift it off the base, then replace it to
reset and restart the heating cycle.
2. The quickest way to cool down the heater is
to fill the kettle with cold water; however,
you can also wait for it to cool down by
itself.
CHANGE OF TEMPERATURE
SETTING
The temperature of this unit can be changed
from Fahrenheit to Celsius. Press the
Temperature Control (
) for more than
3 seconds. The temperature is factory preset
at Fahrenheit.
CLEANING AND
MAINTENANCE
Always turn
this appliance
off and remove the
plug from the electrical outlet before cleaning.
Lift up the filter basket lid. Remove and
discard the ground coffee from the coffee filter
basket. The filter basket can be washed in
warm, soapy water and rinsed thoroughly, or
cleaned in the upper rack of the dishwasher.
Dry all parts after use.
Do not put any water in the unit once the
filter basket has been removed. Wipe the
area under the filter basket with a damp
cloth. Remove the kettle from the base.
Discard any remaining coffee. The kettle and
lid can be washed in warm, soapy water and
rinsed thoroughly, or placed in a dishwasher.
The kettle and kettle lid should be placed on
the upper rack only.
Do not use any scouring agents or harsh
cleaners on any part of the
coffeemaker.
Never immerse power base in water or other
liquids. To clean base, simply wipe with a
clean, damp cloth and dry before storing.
Fingerprints and other blemishes on the
housing can be washed off with soap and
water or a nonabrasive cleaning solution.
Wipe base with a clean, damp cloth. Never
use rough, abrasive materials or cleaners to
clean the base.
Do not dry the inside of the kettle with a
cloth, as lint may remain.
Maintenance
Any other servicing should be performed by
an authorized service representative.
10
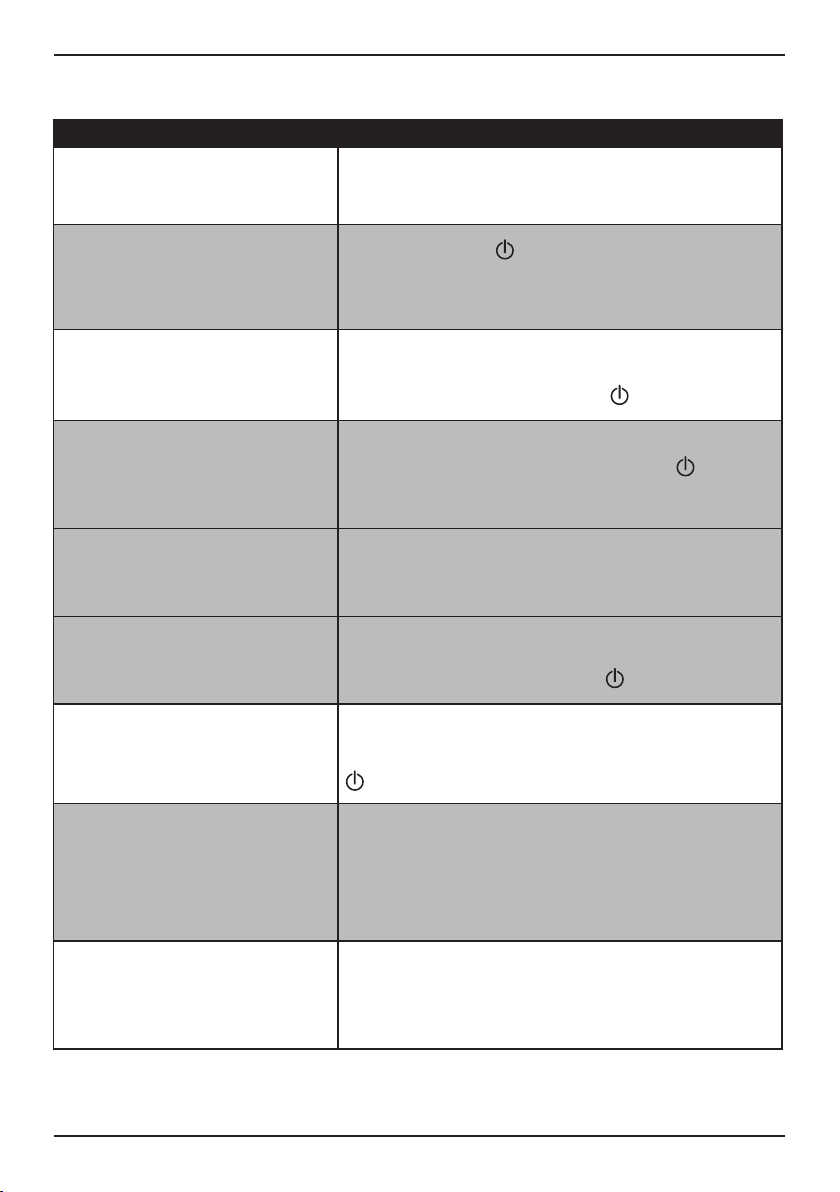
TROUBLESHOOTING
Problem Solution
Coffee Mode is not working
If the coffee mode is not enabled, the filter basket is not
installed properly. Be sure the coffee basket locks in place
and basket knob aligns with arrow on handle.
Coffee Brew Time not on
Be sure to press the
Button after pressing your temper-
ature selection. If you are pressing the Power Button and
kettle is still not heating, call our toll-free Consumer Service
Center at 1-800-726-0190.
No lights are on
Be sure the unit is plugged in and the kettle is securely on
the power base. Then use the control panel to make your
temperature selection and press the
Button.
Water is not heating up
Be sure to press the Power Button after pressing your
temperature selection. If you are pressing the Button
and kettle is still not heating, call Cuisinart Customer
Service.
Keep Warm function is
not working
The Keep Warm function is the default setting. The icon on
LED Display indicates whether it is on or off. To activate/
deactivate the 30-minute Keep Warm feature, press and
hold the Brew Strength Button for 3 seconds.
Goes into standby mode instead
of remembering settings when
kettle is back on base
If the kettle is off the base for more than 2 minutes, the
internal memory turns off. Simply put it back on the base,
reselect your settings and press the Button.
“Err” is displayed on the LED and
all the lights are flashing
The water level in the glass kettle is too low for heating.
To avoid damaging the heating element, remove the kettle
from base, add water, return it to the base and press the
Button again.
Water is taking longer than
usual to heat”
Several variables can affect heat-up time, including room
temperature, how much water is in the glass kettle, and the
temperature of the water. If you’ve recently heated water to
a higher temperature than your current selection, the kettle
will appear to be heating, but is actually waiting for water to
cool down. Add cold water to speed up the process.
Pressed the wrong button
Change your selection at any time by simply pressing
the temperature selection button. When the LED stops
flashing, the selected temperature has been reached.

11
Problem Solution
Coffee Mode is not working
If the coffee mode is not enabled, the filter basket is not
installed properly. Be sure the coffee basket locks in place
and basket knob aligns with arrow on handle.
Coffee Brew Time not on
Be sure to press the
Button after pressing your temper-
ature selection. If you are pressing the Power Button and
kettle is still not heating, call our toll-free Consumer Service
Center at 1-800-726-0190.
No lights are on
Be sure the unit is plugged in and the kettle is securely on
the power base. Then use the control panel to make your
temperature selection and press the
Button.
Water is not heating up
Be sure to press the Power Button after pressing your
temperature selection. If you are pressing the Button
and kettle is still not heating, call Cuisinart Customer
Service.
Keep Warm function is
not working
The Keep Warm function is the default setting. The icon on
LED Display indicates whether it is on or off. To activate/
deactivate the 30-minute Keep Warm feature, press and
hold the Brew Strength Button for 3 seconds.
Goes into standby mode instead
of remembering settings when
kettle is back on base
If the kettle is off the base for more than 2 minutes, the
internal memory turns off. Simply put it back on the base,
reselect your settings and press the Button.
“Err” is displayed on the LED and
all the lights are flashing
The water level in the glass kettle is too low for heating.
To avoid damaging the heating element, remove the kettle
from base, add water, return it to the base and press the
Button again.
Water is taking longer than
usual to heat”
Several variables can affect heat-up time, including room
temperature, how much water is in the glass kettle, and the
temperature of the water. If you’ve recently heated water to
a higher temperature than your current selection, the kettle
will appear to be heating, but is actually waiting for water to
cool down. Add cold water to speed up the process.
Pressed the wrong button
Change your selection at any time by simply pressing
the temperature selection button. When the LED stops
flashing, the selected temperature has been reached.
WARRANTY
Limited Three-Year
Warranty
This warranty is available to U.S. consumers only.
You are a consumer if you own a Cuisinart
®
Programmable 5-Cup Percolator
& Electric Kettle
that was purchased at retail for
personal, family or household use. Except as
otherwise required under applicable law, this
warranty is not available to retailers or other
commercial purchasers or owners. We warrant that
your Cuisinart
®
Programmable 5-Cup Percolator &
Electric Kettle will be free of defects in materials
and workmanship under normal home use for 3
years from the date of original purchase. We
recommend that you visit our website, https://
cuisinart.registria.com, for a fast, efficient way to
complete your product registration. However,
product registration does not eliminate the need for
the consumer to maintain the original proof of
purchase in order to obtain the warranty benefits.
In the event that you do not have proof of purchase
date, the purchase date for purposes of this
warranty will be the date of manufacture.
CALIFORNIA RESIDENTS ONLY
California law provides that for In-Warranty Service,
California residents have the option
of returning a nonconforming product (A) to
the store where it was purchased or (B) to another
retail store that sells Cuisinart products of the same
type. The retail store shall then, according to its
preference, either repair the product, refer the
consumer to an independent repair facility, replace
the product, or refund the purchase price less the
amount directly attributable to the consumer’s prior
usage of the product. If neither of the above two
options results in the appropriate relief to the
consumer, the consumer may then take the
product to an independent repair facility, if service
or repair can be economically accomplished.
Cuisinart and not the consumer will be responsible
for the reasonable cost of such service, repair,
replacement, or refund for nonconforming products
under warranty. California residents may also,
according to their preference, return nonconforming
products directly to Cuisinart for repair or, if
necessary, replacement by calling our Consumer
Service Center toll-free at 1-800-726-0190.
Cuisinart will be responsible for the cost of the
repair, replacement, and shipping and handling for
such nonconforming products under warranty.
HASSLE-FREE REPLACEMENT WARRANTY
Your ultimate satisfaction in Cuisinart products is
our goal, so if your Cuisinart
®
Programmable 5-Cup
Percolator & Electric Kettle should fail within the
generous warranty period, we will repair it or, if
necessary, replace it at no cost to you. To obtain a
return shipping label, email us at https://www.
cuisinart.com/customer-care/product-
assistance/product-inquiry/. Or call our toll-free
Consumer Service Center at 1-800-726-0190 to
speak with a representative.
Your Cuisinart
®
Programmable 5-Cup Percolator &
Electric Kettle has been manufactured to the
strictest specifications and has been designed for
use only in 120-volt outlets and only with
authorized accessories and replacement parts. This
warranty expressly excludes any defects or
damages caused by attempted use of this unit with
a converter, as well as use with accessories,
replacement parts or repair service other than
those authorized by Cuisinart. This warranty does
not cover any damage caused by accident, misuse,
shipment or other than ordinary household use.
This warranty excludes all incidental or
consequential damages. Some states do not allow
the exclusion or limitation of these damages, so
these exclusions may not apply to you. You may
also have other rights, which vary from state to
state.
Important: If the nonconforming product is to
be serviced by someone other than Cuisinart’s
Authorized Service Center, please remind the
servicer to call our Consumer Service Center at
1-800-726-0190 to ensure that the problem is
properly diagnosed, the product is serviced with
the correct parts, and the product is still under
warranty.
CW IB-17407-ESP
©2022 Cuisinart
Glendale, AZ 85307
Printed in China
22CE080212

12
NOTES
_______________________________________________________________________________________
_______________________________________________________________________________________
_______________________________________________________________________________________
_______________________________________________________________________________________
_______________________________________________________________________________________
_______________________________________________________________________________________
_______________________________________________________________________________________
_______________________________________________________________________________________
_______________________________________________________________________________________
_______________________________________________________________________________________
_______________________________________________________________________________________
_______________________________________________________________________________________
_______________________________________________________________________________________
_______________________________________________________________________________________
_______________________________________________________________________________________
_______________________________________________________________________________________
_______________________________________________________________________________________
_______________________________________________________________________________________
_______________________________________________________________________________________
_______________________________________________________________________________________
_______________________________________________________________________________________
_______________________________________________________________________________________
_______________________________________________________________________________________
_______________________________________________________________________________________
_______________________________________________________________________________________
_______________________________________________________________________________________
_______________________________________________________________________________________
_______________________________________________________________________________________
_______________________________________________________________________________________
_______________________________________________________________________________________
_______________________________________________________________________________________
_______________________________________________________________________________________
_______________________________________________________________________________________
Para su seguridad y para disfrutar plenamente de este producto, siempre lea atentamente
las instrucciones antes del uso.
MANUAL DE
INSTRUCCIONES
Cafetera percoladora programable de 5 tazas / Hervidor
Serie FCC-2

2
MEDIDAS DE
SEGURIDAD
IMPORTANTES
Al usar aparatos eléctricos, siempre se deben
tomar precauciones básicas de seguridad,
entre ellas las siguientes:
1. LEA TODAS LAS INSTRUCCIONES.
2. Desenchufe el aparato cuando este o el
reloj no estén en uso y antes de la limpieza.
Permita que se enfríe antes de instalar/
sacar piezas y antes de limpiarlo.
3. Antes de enchufar el aparato, compruebe
que el voltaje indicado en la placa de
especificaciones técnicas del mismo
corresponde con el voltaje de su casa. De
no ser el caso, no use el aparato y póngase
en contacto con la tienda donde lo compró.
4. No toque las superficies calientes; use el
asa o los botones/perillas.
5. Para reducir el riesgo de incendio, descarga
eléctrica o lesiones personales, NO
SUMERJA EL CABLE, EL ENCHUFE, EL,
DE CONTROL, LA BASE , NI EL HERVIDOR
en agua u otros líquidos.
6. Los niños o las personas que carezcan de
la experiencia o de los conocimientos
necesarios para manipular el aparato, o
aquellas cuyas capacidades físicas,
sensoriales, o mentales estén limitadas, no
deben usar el aparato sin la supervisión o la
dirección de una persona responsable por
su seguridad. No permita que los niños
jueguen con este aparato. Este aparato no
es un juguete.
7. Para evitar dañar las resistencias, no haga
funcionar el aparato sin agua.
8. No use este aparato si el cable o el enchufe
están dañados, después de un mal
funcionamiento, después de una caída, o si
está dañado; devuélvalo a un centro de
servicio autorizado para su revisión,
reparación o ajuste.
9. Para evitar que el aparato se vuelque,
causando daños o lesiones, colóquelo
sobre una superficie llana y firme, fuera del
alcance de los niños.
10. El uso de accesorios no recomendados
por Cuisinart presenta un riesgo de
incendio, descarga eléctrica o lesiones
personales.
11. Para uso doméstico solamente. No lo use
en exteriores.
12. No permita que el cable cuelgue del borde
de la encimera o de la mesa, ni que tenga
contacto con superficies calientes.
13. Procure siempre verter el agua hirviendo
lentamente y con cuidado, sin inclinar el
hervidor demasiado rápido.
14. No coloque el aparato sobre o cerca de un
quemador a gas o de un hornillo eléctrico
caliente, ni en un horno caliente.
15. Tenga cuidado al rellenar el hervidor
cuando esté caliente.
16. Siempre coloque el hervidor en la base
antes de enchufar el cable. Para
desconectar, ponga todos los controles en
“OFF”, y luego desenchufe el aparato.
PRECAUCIÓN: No haga funcionar el aparato
debajo o dentro de un armario/gabinete.
Siempre desenchufe el aparato antes de
guardarlo en un armario/gabinete. Compruebe
que el aparato no toca la pared del armario/
gabinete y que la puerta del armario/gabinete
no toca el aparato al cerrarla. El contacto con
la puerta podría encender el aparato,
presentando un riesgo de incendio.
PRECAUCIÓN: Para evitar los riesgos
inherentes al reinicio intempestivo del
cortocircuito de seguridad (el dispositivo de
protección térmica), este aparato no debe ser
alimentado mediante un dispositivo de
encendido/apagado exterior, tal como un
temporizador, ni deber estar conectado a un
circuito eléctrico que el proveedor de energía
enciende y apaga a intervalos regulares.
17. Solo use este aparato para el uso previsto.
18. Evite el contacto con el vapor que sale de
la boca mientras el agua está hirviendo o
inmediatamente después. Siempre
compruebe que la tapa esté cerrada antes
de encender el aparato, y no la levante
mientras el agua está hirviendo. Para evitar
las quemaduras, no retire la tapa durante
el funcionamiento.
3
19. Compruebe que la tapa del hervidor está
seguramente cerrada antes de servir.
20. El hervidor ha sido diseñado para ser
usado con este aparato solamente; nunca
lo coloque en un hornillo caliente
21. Tenga sumo cuidado al mover un aparato
que contenga agua caliente.
22. No coloque un envase caliente sobre una
superficie húmeda o fría.
23. No use el hervidor si está rajado/roto o si
el asa está suelta o dañada.
24. No limpie el hervidor con limpiadores
abrasivos, lana de acero u otros materiales
abrasivos.
25. Para evitar los derrames, no retire el filtro
durante el uso.
26. Use el hervidor solamente con la base
provista.
27. No sobrellene el hervidor; el agua hirviendo
puede desbordarse.
28. Evite regar agua en el conector.
29. La superficie de la resistencia permanece
caliente después del uso; no la toque.
30. Para su seguridad, el cable debe ser
reemplazado por el fabricante, un centro
de servicio autorizado u otra persona
calificada. El incumplimiento de estas
instrucciones puede causar lesiones.
GUARDE ESTAS
INSTRUCCIONES
PARA USO
DOMÉSTICO
SOLAMENTE
USO DE ALARGADORES
El cable provisto con este aparato es corto,
para reducir el riesgo de que alguien se
enganche o tropiece con un cable más largo.
Puede usarse un cable alargador/de
extensión, pero con cuidado. Si usa un cable
alargador/de extensión:
1. La clasificación nominal del cable
alargador/de extensión debe ser por lo
menos igual a la del aparato.
2. El cable más largo debe ser acomodado
de tal manera que no cuelgue de la
encimera/mesa, donde puede ser jalado
por niños o causar tropiezos.
3. Compruebe que el cable alargador/de
extensión tiene puesta a tierra (tipo de
cable con 3 conductores).
AVISO
Este aparato está equipado con un enchufe
con puesta a tierra. Como medida de
seguridad, este enchufe se podrá enchufar de
una sola manera en las tomas de corriente
puestas a tierra. Si aun así no entra
completamente, comuníquese con un
electricista. No intente modificarlo.
ADVERTENCIA: PARA REDUCIR EL RIESGO DE DESCARGA ELÉCTRICA,
NO DESARME LA CARCASA DEL APARATO.
ESTE APARATO NO CONTIENE NINGUNA PIEZA QUE PUEDA SER
REPARADA/CAMBIADA POR EL USUARIO.
LAS REPARACIONES DEBEN SER EFECTUADAS POR TÉCNICOS
AUTORIZADOS SOLAMENTE.
ADVERTENCIA
RIESGO DE INCENDIO O DESCARGA
ELÉCTRICA – NO LO ABRA
4
ÍNDICE
Medidas de seguridad importantes ........2
Uso de alargadores ....................3
Instrucciones de desembalaje ........... 4
Sugerencias para la preparación
de un buen café .......................4
Todo acerca del té .....................5
Piezas y características ................ 6
Panel de control .......................6
Instalación del portafiltros ...............7
Cómo hervir agua......................7
Cómo preparar café....................8
Limpieza y mantenimiento ............. 10
Resolución de problemas ..............11
Garantía ............................12
DESEMBALAJE
1. Coloque la caja en una superficie
espaciosa, plana y segura.
2. Retire el manual de instrucciones y otros
folletos de la caja.
3. Retire la base de la caja y quite la bolsa
de plástico.
4. Quite el material de embalaje de la parte
superior.
5. Retire el hervidor de la caja y quite
la bolsa de plástico.
Le sugerimos que conserve la caja y el
material de embalaje en caso de que sea
necesario enviar el aparato en el futuro.
Mantenga las bolsas de plástico fuera del
alcance de los niños.
SUGERENCIAS PARA
LA PREPRACIÓN DE
UN BUEN CAFÉ
ELEMENTO 1: EL AGUA
El café está constituido por un 98% de
agua. Por lo tanto, la calidad del agua es
tan importante como la del café. Si el
agua tiene mal sabor, el café tendrá mal
sabor.
ELEMENTO 2: EL CAFÉ
Aunque la mayor parte del brebaje es
agua, el sabor proviene del café. Para
preparar un brebaje de calidad, debe
usar ingredientes de calidad. Elija café
fresco, en granos enteros. Compre un
suministro de aprox. dos semanas a la
vez, no más, porque una vez molidos los
granos, su sabor se deteriora
rápidamente.
ELEMENTO 3: LAS
PROPORCIONES
Para que el café sea perfecto, ni muy
débil ni muy fuerte, se debe usar la
proporción adecuada de café y agua.
Siga las pautas en la sección “CÓMO
PREPARAR CAFÉ” y ajuste las
proporciones al gusto.
NOTA: Esta cafetera tiene una capacidad
máxima de 30 g o 5 cucharadas de café
molido. No exceda esta cantidad, ya que
esto puede causar un derrame.
5
EL ARTE DE PREPARAR TÉ
El carácter de cada té es único y debe ser
tomado en cuenta para preparar té. Para
liberar sus sabores aromáticos naturales y
aprovechar sus beneficios para la salud,
cada tipo de té debe remojarse a una
temperatura precisa. Los tés más
delicados requieren una temperatura más
baja para optimizar su sabor. Encontrará a
continuación una tabla con nuestras
temperaturas y tiempos de remojo
recomendados.
TIPOS DE TÉ
Hay numerosos tipos de té. Los más
populares son el té negro, el té Oolong, el
té verde y el té blanco. Todos los tés
provienen de la misma planta de clima
cálido y hoja perenne: la planta de té o
Camellia Sinensis. Las infusiones (también
llamadas tisanas o tés de hierba) no son
tés, sino una mezcla de hierbas, flores,
especias, semillas, etc. También hay
variedades de té con especias. El té Earl
Grey, por ejemplo, es una variedad de té
negro aromatizado con cáscara o aceite
de bergamota.
PAUTAS DE PREPARACIÓN DEL TÉ
TIPO TEMPERATURA TIEMPO DE REMOJO
Té delicado 160 °F (71 °C) 1 a 2 min.
Té verde 175 °F (79 °C) 2 a 3 min.
Té blanco 185 °F (85 °C) 2 a 3 min.
Té Oolong 190 °F (88 °C) 3 a 4 min.
Infusión 200 °F (93 °C) 4 a 5 min.
Té negro
212 °F (100 °C)
(punto de ebullición)
3 a 5 min.
PIEZAS Y
CARACTERÍSTICAS
1. Tapa fácil de abrir con cierre de
seguridad
Úsela para calentar agua, preparar café y
servir.
2. Mecanismo de preparación del café
Úselo para preparar café.
2a. Tapa del portafiltros
2b. Portafiltros de acero inoxidable
Con capacidad para suficiente café
molido como para preparar hasta 5
tazas (725 ml) de café.
2c. Sistema de propulsión magnética
Gira durante la preparación del café
para extraer el máximo sabor.
3.
Panel de control con pantalla LED
Permite seleccionar y monitorear
fácilmente la temperatura y el tiempo
(véase las instrucciones de programación
en la página 8).
4. Pico vertedor antigoteo
5.
Hervidor de vidrio
con indicador de nivel de agua fácil
de leer.
1.
3.
2a.
2b.
2c.
6.
4.
5.
6
1.
Pantalla LED
a. Ícono de la función “mantener
caliente”
Aparece en la pantalla cuando se activa
esta función. Nota: Para activar/
desactivar la función “mantener
caliente” (de 30 minutos), mantenga
presionado el botón de selección de la
intensidad del café por 3 segundos.
b. Ícono de encendido
Aparece en la pantalla cuando el
aparato se está calentando, durante el
funcionamiento, y en el modo
“mantener caliente”.
c. Opciones de temperatura y tiempo.
Indica la temperatura usada, el tiempo
de preparación restante y el tiempo de
“mantener caliente” restante.
FAMILIARÍCESE CON EL PANEL DE CONTROL
a.
c.
d.
b.
2.
4.
3.
1.
5.
INSTALACIÓN DEL
PORTAFILTROS
1. Coloque el sistema de propulsión
magnética en el centro del hervido;
se mantendrá automáticamente en
su sitio.
2. Coloque el portafiltros en el
hervidor.
3. Gire el portafiltros en sentido
horario hasta que la patita del
portafiltros y la flecha en el asa
queden alineadas.
4. Cierre la tapa, girando en sentido
horario hasta que las flechas en el
asa y la tapa queden alineadas.
d. Indicador del nivel de intensidad
Muestra la intensidad del café elegida
(cuando usa el modo de preparación
del café)
2. Selector de temperatura
Presiónelo repetidamente para elegir
la temperatura deseada.
3. Selector de tiempo
Presiónelo repetidamente para elegir el
tiempo de preparación, desde 3 hasta 8
minutos. El tiempo restante aparecerá en la
pantalla al iniciarse el cico de preparación.
4. Selector del nivel de intensidad
Presiónelo repetidamente para elegir la
intensidad del café: suave, regular o fuerte.
5. Botón de encendido/apagado
Presiónelo para iniciar o parar el proceso
de calentamiento.
7
Modo hervidor:
Té delicado: 160 °F (71 °C)
Té verde: 175 °F (79 °C)
Té blanco: 185 °F (85 °C)
Té Oolong: 190 °F (88 °C)
Infusión: 200 °F (93 °C)
Té negro: 212 °F (100 °C)
(punto de ebullición)
Modo cafetera:
185 °F (85 °C)
190 °F (88 °C)
200 °F (93 °C)
205°F (96 °C)

8
INSTRUCCIONES DE USO
Para hervir agua
Para usar el hervidor, quite el sistema
de propulsión magnética y el portafiltros.
NOTA: Cuando usa el aparato como
hervidor, las funciones de tiempo y de
control de intensidad están desactivadas.
1. Retire el hervidor de la base y gire la tapa en
sentido antihorario para quitarla. Agregue la
cantidad deseada de agua, fijándose en las
marcas de nivel de agua.
2. Cierre la tapa, girando en sentido horario
hasta que las flechas en el asa y la tapa
queden alineadas. Coloque el hervidor en
la base y enchufe el aparato.
3. Presione el botón para encender el
hervidor; la temperatura de agua aparecerá
en la pantalla LED. Presione repetidamente
el botón
hasta llegar a la temperatura
deseada. Presione el botón
para iniciar
el ciclo de calentamiento. Nota: La
temperatura seleccionada parpadeará
durante el calentamiento.
4. Cuando el agua alcance la temperatura
elegida, el aparato emitirá un pitido, lo que
indica que el agua está lista para la
infusión. Para detener el ciclo de
calentamiento en cualquier momento,
presione el botón
. Para volver a iniciar
el ciclo de calentamiento, presione el
botón
otra vez.
5. Al final del ciclo de calentamiento (el
tiempo estará en “0:00”), el ciclo
“mantener caliente” se iniciará
automáticamente y permanecerá activado
por 30 minutos.
Nota: El tiempo restante aparecerá en la
pantalla LED.
6. Retire el hervidor de la base para servir.
Al retirar el hervidor de la base, todas las
luces se apagarán.
Nota: El aparato ingresará el modo de
espera por 2 minutos al retirar el hervidor
de la base. Volverá a activarse si se vuelve
a colocar el hervidor en la base dentro de
2 minutos.
Nota: Si el aparato ingresa el modo de
espera mientras el hervidor está en la
base, presione repetidamente el botón
para elegir la temperatura, luego
presione el botón
para iniciar el ciclo
de calentamiento otra vez.
CÓMO PREPARAR CAFÉ
1. Retire el hervidor de la base y gire la
tapa en sentido antihorario para quitarla.
Coloque el sistema de propulsión
magnética en el centro del hervidor.
Agregue la cantidad deseada de agua,
desde un mínimo de 2 tazas (290 ml)
hasta un máximo de 5 tazas (725 ml).
2. Instale el portafiltros según las
instrucciones en la página anterior,
girándolo en sentido horario hasta que la
patita del portafiltros y la flecha en el asa
queden alineadas.
3. Agregue la cantidad deseada de café
molido, usando 1 cucharada de café por
taza. Ajuste la cantidad de café molido a
gusto.
9
Nota: Esta cafetera tiene una capacidad
máxima de 5 tazas (725 ml) de agua y 5
cucharadas de café molido. No exceda esta
cantidad, ya que esto puede causar un
derrame.
4. Cierre la tapa, girando en sentido horario
hasta que las flechas en el asa y la tapa
queden alineadas. Coloque el hervidor
en la base y enchufe el aparato.
5.
Presione el botón para encender el
hervidor; la temperatura actual del agua,
las barras de nivel de intensidad y el
indicador de “mantener caliente”
aparecerán en la pantalla.
6. Presione repetidamente el botón
hasta
llegar a la temperatura deseada.
7. Presiones repetidamente el botón
para elegir el tiempo de infusión, desde
3 minutos hasta 8 minutos. Nota: El
tiempo por defecto es 4 minutos.
8. Presione repetidamente el botón
para
elegir el nivel de intensidad del café. Hay
3 niveles de intensidad, representados
por 3 barras:
.
9. Presione el botón
; la temperatura
seleccionada empezará a parpadear y el
agua empezará a calentarse. La
temperatura actual del agua, el ícono de
encendido/apagado y el nivel de
intensidad elegidos aparecerán en la
pantalla. Para detener el ciclo de
calentamiento en cualquier mo
10. Cuando el agua alcance la temperatura
deseada, el aparato emitirá un pitido
breve y la preparación empezará; el
tiempo restante (dependiendo del tiempo
elegido) aparecerá en la pantalla LED. Al
final de la preparación, el aparato emitirá
otro pitido breve.
11. El modo “mantener caliente” se activará
automáticamente al final del ciclo de
preparación y permanecerá activado por
30 minutos. Nota: El tiempo restante
aparecerá en la pantalla LED.
Nota: La función “mantener caliente” ( )
estará activa a menos que la desactive
(véase el punto 1a en la página 6).
12. Cuando el tiempo llegue a “0:00”, el
aparato emitirá un pitido breve e
ingresará al modo de espera.
Nota: El aparato ingresará el modo de
espera por 2 minutos al retirar el hervidor
de la base mientras está en el modo
“mantener caliente”. El modo “mantener
caliente” volverá a activarse si se vuelve
a colocar el hervidor en la base dentro
de 2 minutos.
Nota: Si las barras de nivel de intensidad
( ) no aparecen en la pantalla LED,
esto significa que el portafiltros no está
instalado correctamente. Cerciórese de
sujetar el portafiltros, girándolo en sentido
horario hasta que la patita del portafiltros y
la flecha en el asa queden alineadas
FUNCIÓN DE MEMORIA
El aparato cuenta con una “memoria”
integrada que lo mantiene encendido por 2
minutos al retirar el hervidor de la base. Al
volver a colocar el hervidor en la base, el ciclo
de calentamiento o el ciclo “mantener
caliente” continuarán.
Nota: Si el aparato ingresa el modo de espera
antes de volver a colocar el hervidor en la
base, simplemente vuelva a seleccionar la
temperatura y presione el botón
para volver
a encender el aparato.
PROTECCIÓN CONTRA HERVIDO
EN SECO
1. El aparato cuenta con un dispositivo de
protección contra hervido en seco
(funcionamiento sin agua) que lo apaga
automáticamente si el nivel de agua está
bajo o si no hay agua en el hervidor, para
evitar dañar la resistencia. Para reiniciar el
aparato, permita que el hervidor se enfríe,
retírelo de la base, y luego vuelva a
colocarlo en esta.
2. Para enfriar el hervidor más rápidamente,
llénelo con agua fría.

10
CÓMO CAMBIAR LA UNIDAD DE
TEMPERATURA
Para cambiar la unidad de temperatura
de Fahrenheit a Celsius y viceversa,
mantenga presionado el botón
por
más de 3 segundos. Nota: La unidad
de temperatura por defecto es el grado
Fahrenheit.
LIMPIEZA Y
MANTENIMIENTO
Siempre apague y desenchufe el aparato
antes de limpiarlo.
Abra la tapa del portafiltros. Retire el
portafiltros y tire los posos de café. Lave el
portafiltros y la tapa del hervidor a mano, con
detergente y agua tibia, y enjuáguelos bien.
Nota: También los puede colocar en la bandeja
superior del lavavajillas. Permita que todas las
piezas se sequen.
No vierta agua en el depósito después de
haber retirado el portafiltros. Limpie el área
bajo el portafiltros con un paño húmedo.
Retire el hervidor de la base. Tire el café
restante. Limpie el hervidor con un paño
limpio humedecido con agua.
No use productos o materiales abrasivos para
limpiar el aparato.
Nunca sumerja la base en agua u otros
líquidos. Limpie la base con un paño húmedo
y séquela antes de guardar el aparato.
Las huellas dactilares y otras manchas pueden
quitarse con agua y detergente, o con una
solución limpiadora no abrasiva. Limpie la
base con un paño húmedo. Nunca use
materiales ásperos o limpiadores abrasivos
para limpiar la base.
No seque el interior del hervidor con un paño
ya que esto puede dejar pelusas en el mismo.
Mantenimiento
Cualquier otro servicio debe ser realizado por
un técnico de servicio autorizado.
Problema Solución
El modo “cafetera” no funciona
Si las barras de nivel de intensidad no aparecen en la
pantalla LED, esto significa que el portafiltros no está
instalado correctamente. Cerciórese de sujetar el
portafiltros, girándolo en sentido horario hasta que la patita
del portafiltros y la flecha en el asa queden alineadas.
El tiempo de preparación no
aparece en la pantalla
Cerciórese de presionar el botón después de haber elegido
la temperatura. Si esto no soluciona el problema, llame a
nuestro centro de atención al cliente al 1-800-726-0190.
Ningún indicador está encendido
Compruebe que el aparato está enchufado y coloque el
hervidor en la base. Elija la temperatura deseada, luego
presione el botón de encendido/apagado.
El agua no se está calentando
Cerciórese de presionar el botón
después de haber
elegido la temperatura. Si esto no soluciona el problema,
llame a nuestro centro de atención al cliente.
La función “mantener caliente”
no funciona
La función “mantener caliente” está activada por
defecto. El ícono en la pantalla indica si está activada
o desactivada. Para activar/desactivar la función “mantener
caliente” (de 30 minutos), mantenga presionado el botón
de selección de la intensidad del café por 3 segundos.
El aparato ingresa al modo de
espera en vez de guardar la
selección al volver a colocar el
hervidor en la base
La memoria se reinicia automáticamente cuando el hervidor
permanece fuera de la base por más de 2 minutos.
Simplemente vuelva a presionar el botón de temperatura
deseado, luego presione el botón .
“Err” aparece en la pantalla y
todos los indicadores parpadean
El nivel de agua en el hervidor está demasiado bajo. Para
evitar dañar la resistencia, retire el hervidor de la base,
agregue agua, vuelva a colocar el hervidor en la base y
presione el botón .
El aparato se está demorando
más que de costumbre para
calentar el agua
Varios factores, tales como la temperatura ambiente, la
cantidad de agua y la temperatura inicial del agua, pueden
afectar el tiempo de calentamiento. Si acaba de calentar
agua a un nivel de temperatura más alto que el nivel
deseado, el hervidor deberá esperar hasta que el agua se
enfríe. Agregue agua fría para acelerar el proceso.
He seleccionado la temperatura
equivocada
Simplemente presione el botón de selección de la
temperatura cambiar su selección. Cuando se alcance la
temperatura seleccionada, el ícono dejará de parpadear.
11
RESOLUCIÓN DE PROBLEMAS
Problema Solución
El modo “cafetera” no funciona
Si las barras de nivel de intensidad no aparecen en la
pantalla LED, esto significa que el portafiltros no está
instalado correctamente. Cerciórese de sujetar el
portafiltros, girándolo en sentido horario hasta que la patita
del portafiltros y la flecha en el asa queden alineadas.
El tiempo de preparación no
aparece en la pantalla
Cerciórese de presionar el botón después de haber elegido
la temperatura. Si esto no soluciona el problema, llame a
nuestro centro de atención al cliente al 1-800-726-0190.
Ningún indicador está encendido
Compruebe que el aparato está enchufado y coloque el
hervidor en la base. Elija la temperatura deseada, luego
presione el botón de encendido/apagado.
El agua no se está calentando
Cerciórese de presionar el botón
después de haber
elegido la temperatura. Si esto no soluciona el problema,
llame a nuestro centro de atención al cliente.
La función “mantener caliente”
no funciona
La función “mantener caliente” está activada por
defecto. El ícono en la pantalla indica si está activada
o desactivada. Para activar/desactivar la función “mantener
caliente” (de 30 minutos), mantenga presionado el botón
de selección de la intensidad del café por 3 segundos.
El aparato ingresa al modo de
espera en vez de guardar la
selección al volver a colocar el
hervidor en la base
La memoria se reinicia automáticamente cuando el hervidor
permanece fuera de la base por más de 2 minutos.
Simplemente vuelva a presionar el botón de temperatura
deseado, luego presione el botón .
“Err” aparece en la pantalla y
todos los indicadores parpadean
El nivel de agua en el hervidor está demasiado bajo. Para
evitar dañar la resistencia, retire el hervidor de la base,
agregue agua, vuelva a colocar el hervidor en la base y
presione el botón .
El aparato se está demorando
más que de costumbre para
calentar el agua
Varios factores, tales como la temperatura ambiente, la
cantidad de agua y la temperatura inicial del agua, pueden
afectar el tiempo de calentamiento. Si acaba de calentar
agua a un nivel de temperatura más alto que el nivel
deseado, el hervidor deberá esperar hasta que el agua se
enfríe. Agregue agua fría para acelerar el proceso.
He seleccionado la temperatura
equivocada
Simplemente presione el botón de selección de la
temperatura cambiar su selección. Cuando se alcance la
temperatura seleccionada, el ícono dejará de parpadear.

12
GARANTÍA
Garantía limitada
de tres años
Esta garantía es para los consumidores que residen
en los EE.UU. solamente. Usted es un consumidor
si posee una cafetera percoladora programable de 5
tazas / hervidor eléctrico Cuisinart
®
que fue
comprada en una tienda para uso personal, familiar
o casero. A menos que la ley aplicable exija lo
contrario, esta garantía no es para los minoristas u
otros consumidores/compradores comerciales.
Cuisinart garantiza este producto contra todo
defecto de materiales o fabricación durante 3 años
después de la fecha de compra original, siempre
que el aparato haya sido usado para uso doméstico
y según las instrucciones. Se recomienda llenar el
formulario de registro disponible en https://cuisinart.
registria.com a fin de facilitar la verificación de la
fecha de compra original de este producto Sin
embargo, no es necesario registrar el producto para
recibir servicio bajo esta garantía. En ausencia de
prueba de la fecha de compra, el período de
garantía será calculado a partir de la fecha de
fabricación del producto.
RESIDENTES DE CALIFORNIA
La ley del Estado de California ofrece dos opciones
adicionales de servicio de garantía. Los residentes
del Estado de California pueden (A) devolver el
producto defectuoso a la tienda donde lo
compraron, o (B) a otra tienda que venda productos
Cuisinart del mismo tipo. La tienda podrá, a su
elección, reparar el producto, referir el consumidor a
un centro de servicio independiente, sustituir el
producto, o reembolsar al consumidor el precio de
compra menos la cantidad directamente atribuible al
uso anterior del producto por el consumidor. Si
estas dos opciones no satisfacen al consumidor,
podrá llevar el aparato a un centro de servicio
independiente, siempre que se pueda arreglar o
reparar el aparato de manera económica. Cuisinart
(no el consumidor) será responsable por los gastos
de servicio, reparación, sustitución o reembolso de
los productos defectuosos bajo garantía. Los
residentes de California también pueden, si lo
desean, mandar el producto defectuoso
directamente a Cuisinart para que lo reparen o lo
cambien. Para esto, se debe llamar a nuestro
servicio posventa al 1-800-726-0190. Cuisinart será
responsable por los gastos de reparación,
reemplazo, manejo y envío de los productos
defectuosos durante el período de garantía.
GARANTÍA DE REEMPLAZO SIN DIFICULTADES
Su máxima satisfacción es nuestra prioridad, así
que si este producto Cuisinart
®
falla dentro del
generoso período de garantía, lo repararemos o, de
ser necesario, lo reemplazaremos, sin costo alguno
para usted. Para obtener una etiqueta de
devolución, envíenos un correo electrónico,
visitando https://www.cuisinart.com/customer-
care/product-assistance/product-inquiry/. O
llame sin cargo a nuestro servicio de atención al
cliente, al
1-800-726-0190, para hablar con un
representante.
Este producto satisface las más altas exigencias de
fabricación y ha sido diseñado para funcionar con
120 V, usando accesorios y repuestos autorizados
solamente. Esta garantía excluye expresamente los
defectos o daños causados por accesorios, piezas
o reparaciones no autorizados por Cuisinart, así
como los defectos o daños causados por el uso de
un convertidor de voltaje. Esta garantía no cubre el
uso comercial o industrial del producto, y no es
válida en caso de daños causados por mal uso,
negligencia o accidente. Esta garantía excluye todos
los daños incidentales o consecuentes. Algunos
Estados no permiten la exclusión o limitación de
daños incidentales o consecuentes, de modo que
las limitaciones mencionadas pueden no regir para
usted. Usted puede tener otros derechos que varían
de un Estado a otro.
Importante: Si debe llevar el aparato defectuoso a
un centro de servicio no autorizado, por favor
informe al personal del centro de servicio que deben
llamar al Centro de Servicio al Cliente de Cuisinart,
al 1-800-726-0190 a fin de diagnosticar el problema
correctamente, usar las piezas correctas para
repararlo, y comprobar que el
IB-17407-ESP-A
©2022 Cuisinart
Glendale, AZ 85307
Printed in China
22CE080212