Loading ...
Loading ...
Loading ...
Installation
48" Built-In Refrigerator
18
PRODUCT
INSTALLATION
Step 4
Roll Refrigerator
Into Opening
Step 5
Level
Refrigerator
• Gently push refrigerator into opening with hands
against front corners. The cardboard protective pad
should be beneath the refrigerator.
• Roll refrigerator into the opening until it is flush with
adjacent cabinets.
All models have 4-point leveling. The front is supported
by leveling legs, the rear is supported by wheels.
• To level the back of the refrigerator, turn the 7/16" hex
nut located above the front wheels. Turn to raise or
lower the refrigerator.
• For front leveling, use a 1-1/2" open-end wrench.
• Adjust carefully, the refrigerator should be level and
plumb with cabinetry, and should align with toekick
height.
Hex Nut Adjusts
Rear Wheels
Leveling Leg
If you are using 3/4" thick custom panels, SKIP THIS
STEP. See
Custom Panel Dimensions
pages for panel
sizes with ZKT48 trim kit and other kits. Refer to trim kit
installation instructions in this booklet.
If you are using the custom collar
dispenser trim, order ZWCD2 trim kit.
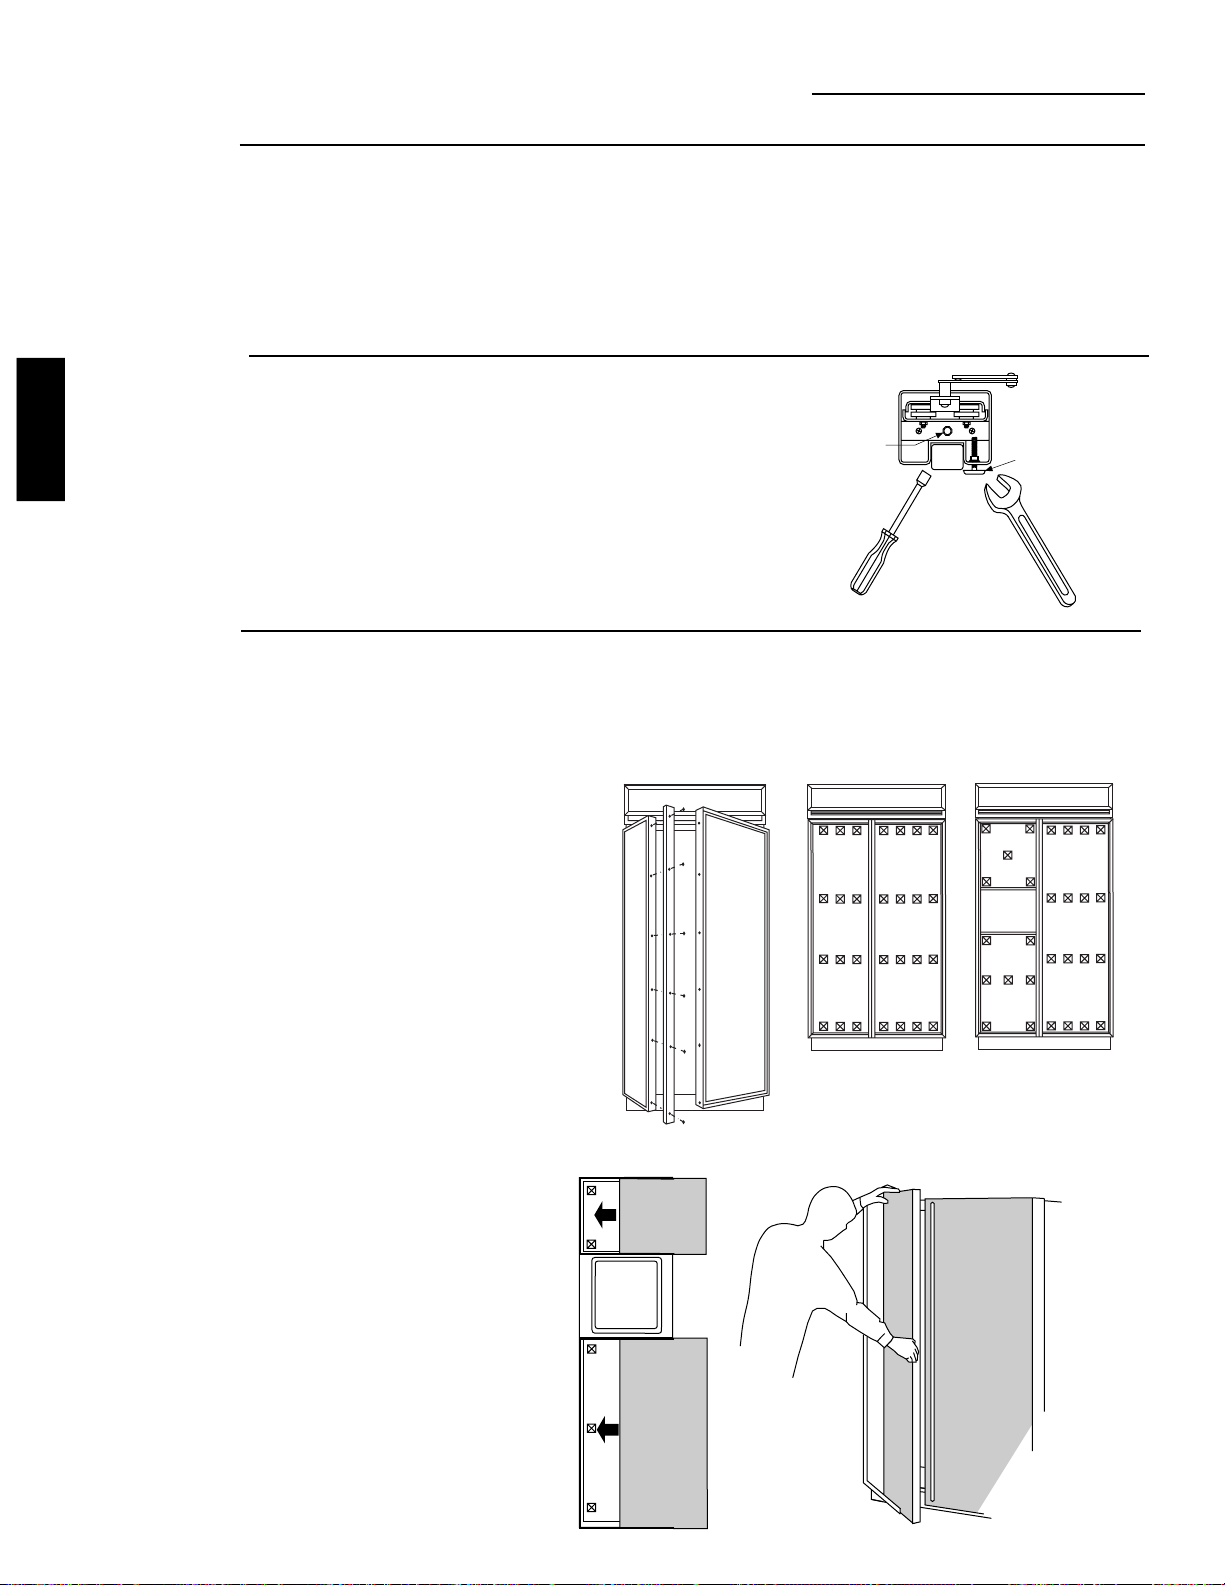
To install 1/4" door panels:
• Open door to 90° stop. Remove the
Phillips head screws from the
aluminum trim door handles.
Retain all screws.
• Attach 2" x 2" adhesive backed foam pads
to the door. These fillers are shipped with
literature package in snack pan.
• Slide panel into the door
trim.
• Replace door handles
and secure with original
screws.
• Again, check to be sure
unit is level and that
panels align with
cabinetry. Doors will not
close properly if unit is
not level.
• Check for noises caused
by incomplete alignment
(rubbing of panels, trim
or screws).
Step 6
Install
1/4" Door
Panels
Loading ...
Loading ...
Loading ...