0
ge.com
©
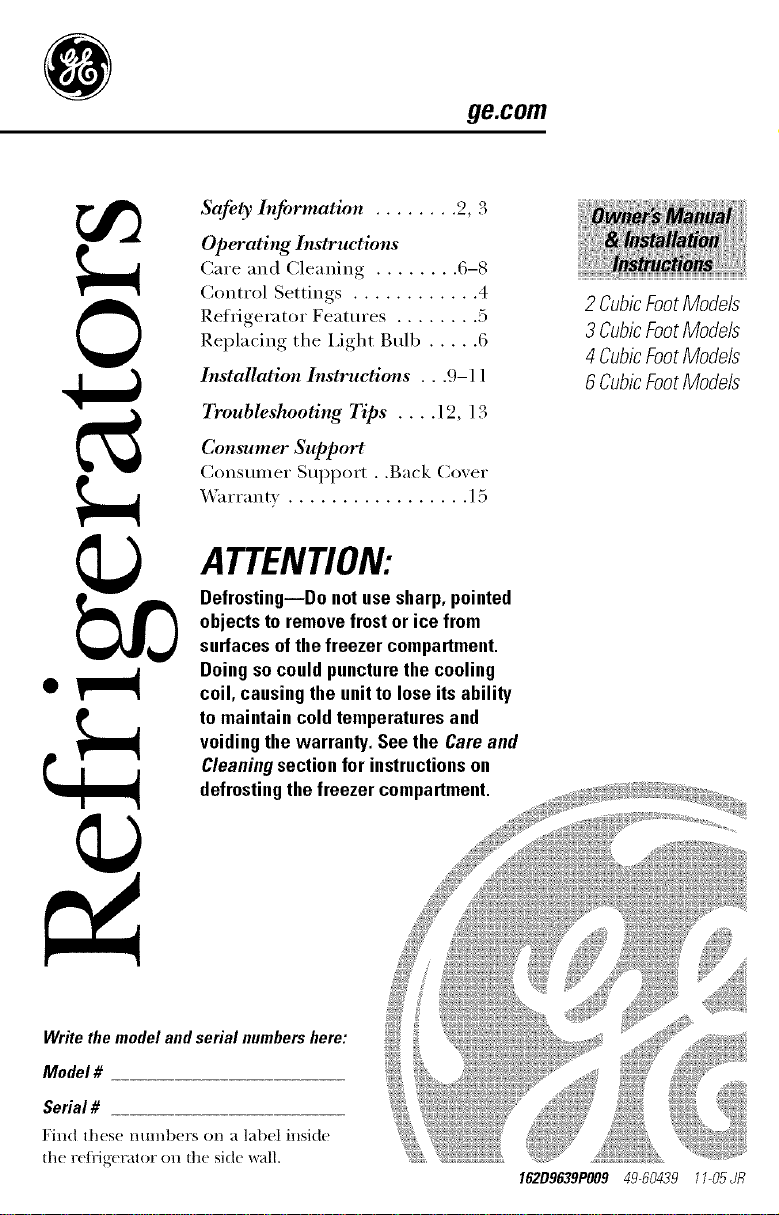
Safety lnfinnnation ........ 2, g
Operating Instructions
Care and Cleaning ........ 6-8
Control Settings ............ 4
Refrigerator Features ........ 5
Replacing the I,ight Bulb ..... 6
Installation Instructions . . .9-11
7)'oubleshooting Tips .... 12, 13
Consumer Support
(3onsulner SulWm..Back Cover
X4'arrantx . ................ l5
ATTENTION:
Defrosting--Do notusesharp,pointed
objectsto removefrostor ice from
surfacesofthefreezercompartment.
Doingsocouldpuncturethe cooling
coil, causingthe unitto loseitsability
to maintaincoldtemperaturesand
voidingthe warranty.Seethe Careand
Cleaningsectionfor instructionson
defrostingthefreezercompartment.
2 CubicFootModels
3 CubicFootModels
4 CubicFootModels
6 CubicFootModels
Write the model and serial numbers here:
Model #
Serial #
Find these numbers on a label inside
tl_e re/i'igerator on die side wall.
162D9639PO0949-60439 11-05JR
iMPORTANTSAFETYiNFORMATiON.
READALLiNSTRUCTIONSBEFOREUSING.
WARNING!
Use this appliance only for its intended purpose as described
in this Owner's Manual.
SAFETYPRECAUTIONS
When using electrical appliances, basic safety precaufions
should be followed, including the following:
ii::This refiSg-('l_ltor must t)e
t)mt)erly installed ;rod located in
accordance with the Installation
Instructions betim' it is used.
N Do not allow t hildren to climb,
stand or hang on d_e shelves
in the teRrycrater: They could
dmnage the re/iJgcrator mid
seriously in jm:e thenlselves.
i_?;Do not store or use gasoline or
other flammable vapors and
liquids ill the vicinity of this or
all'vrother al/t)liance.
_i: Before replacing a burned-out
light bulb, the refrigerator should
be unpluggedin order to axoid
contact with a live wire tilmn('nt.
(A burnct/-out light bulb nla}
break \_,hen being rctllaced. )
ii::Keep fing-ct_ out of die "pinch
t)oin[" _tt't';-L_,; cl('_lt_tl/C('S 1X't'¢vr('('n
the doors and cabinet are
net ex'<nilv small, ge carcfitl
dosing doors when t hildren
arc ill the at'ca.
i;i: Lint)lug tile re/iigemtor l)e/brc
cleaning and making repairs.
NOTE: We stroegly recommend
thatany servicingbe performed by
a qualified individual
i_i; Tllrtling th(' t('l//pCl:_ttlll°( '
control dial to the OFFllosition
stops cooling but does not shin
off power t() the re/iJgcratot;
DANGER!RISKOFCHILDENTRAPMENT
PROPERDISPOSALOFTHEREFRIGERATOR
Child entmlm_ent and
su/ti)cation as'(' not t/roblems of
tile l/ast..]m/ked or abm/ttoned
re/iige_lmrs are still dangerous...
c_.en if dlev will sit ti)l? 'ijust a ti'w
days." If'am arc getting rid of
your old re/i'igcnHor, please
tollow the instructions below to
help llr('_vm accidents.
Before You ThrowAway Your
Old Refrigerator or Freezer:
i;::Take oil the doors.
i_i;I ,ea\'c die shelves in l/lace so
that children nmv not easily
climb inside.
Refrigerants
All rc/iigcmtion prothu ts (ontain
re/i'igctm/ts, \dfich m/tter tbdeml
l_lw ill/let lie ren/ovt,d prior to
product disposal./l_m are
geuing dd of an old retiigcrafion
l/roduct, check with the company
handling the disposal at/out
what to do.

ge.com
USEOFEXTENSIONCORDS
Because of potential safety hazards under certain conditions,
we strongly recommend against the use of an extension cord.
t ]()_r_'_¢_'_ ityou must use an extension (ord, it is absohm,ly necessary
that it be a UI Aisted, 3-wire grounding t}pe applian( e extension cord
having a grounding type plug and olttlet and that the electrical rating
of tile cord be 15 ampet'cs (mininmm) and 120 vohs.
HOWTOCONNECTELECTRICITY
Donot, under any circumstances, cut or remove the third
(ground) prong from the power cord. Forpersonal safety,
this appliance must be properly grounded.
The power cord of this _q)pliance
is equipped with a 3-prong
(g_:ounding) plug which
mates with a stan/ta_x/3-prong
(g3:ounding) wall omlet to
minimize the possibilit_ of elecUJc
shock hazard ti'om this appliance.
t tax e tile wall outlet and circuit
checked by a qualitied ele( tdcian
to make Sill'{+tile outlet is
properly grounded.
If you ha_e only a standard
2-prong wall outlet, it is g)tn:
personal responsibility and
obligation to have it replaced
with a properly gTounded
3-prong wall outlet.
The retiigerator should always 1)e
phtgged into its own individual
elecu'ical outlet \vhich has a
voltage rating that matches tile
rating plate.
This provides tile best
pertormance and also pro\ ents
overloading house Wiling (ircuits
_hich could cause a fire hazard
ti'()m overheated wires.
Never unlllug your reflJgcrator
by trolling on tile power cord.
Always grip t)lug/innly and pull
straight out/i'om tile outlet.
Repair or tvlllace immediately all
power cords that hay(, becon/e
ti_p_'ed or odlerwise damaged.
Do not use a cord thai shows
cracks or abrasion damage along
its lengdl or at eidler end.
When moving tile re/iigemtor
not to roll o\er or damage tile
t)()Vv (T coFd+
READANDFOLLOWTHISSAFETY
INFORMATIONCAREFULLY.
SAVETHESEINSTRUCTIONS
!illi!iiii,,iiii HHii
3

Aboutthecontrol
on therefrigerator.
COLD
COLDEST
The control will look like one of the above.
ControlSettings
The tel//l)er_tttlre control l/l_lint_tins tile tel//l)el_tttll;e ill tile
reliige_;itor. Setting tile co]m:ol at COOL is tile wamlest setting. Setting
tile control at COLDESTis tile coldest setting. Set tile control at COLD.
Allow 24 hours/(_r tile reti'igerator to reach tile COLD tenlpemture.
[t VO/I want a coldel: or wail/let telill)eT_tttlre , i/love the dial olle setting
at a time. Mo_ng tile control to OFFstolls cooling but does not turn
off tile power to tile reli+igemtol: Setting tile co]ltrol to one of tile
snowflake positio]ls may cause/i'eezing in tile reti+igerator depending
on tile FOOl// telili)el;_tttll'e.
How ToTestTemperatures
Use tilt' milk test. Plate _ t ontainer oI milk on ;_shell mid che(k it
+1(l_l} l_lter. It' tilt' it/ilk is too x+_r_trlll Of tOO t ()]d, _t(!itlSt tilt' tel//I)t't_lttll:e
control.
After changing thecontrol, allow 24 hours for therefrigerator to reach the
temperatureyou haveset.

About the refrigerator features. ge.com
Shelves
To remove a shell lift up tile back slightly and pull t()l_W}tlT(t.
Some models hm e muhi-l)o_ition shelv('s that can be mo\ed
to di/tbrent levels.
Ice Tray Compartment
"Itlis (Oml)m'm_cnt is (t('sigll('(t tot t)rodu(tion ot i(e (ul)cs and
short-term stor_lge (a/bw (1_1F, at most) ot some (ommer(-iallv-
/i'ozen toods when in ( ont:+l(-t with the ('\ at)orator ((old sm'/i_(e
ill COl/It )_IITIIII(HII. )
Door Shelves
Shelves on the door t)rovide convenient storage lot ti'equently
used items. Some models ha\'(' doors that are deep enough to
store large boules.
Key-Ejecting Lock (on some models)
The k(\_/_)r the sl)ring-loa(ted lo(k is ram)maritally (jecte(t--
k('v will not remain in lock in either the open or closed t)o.',ition.
Keep thekeyout of reach of childree and away from therefrigerator,
If a r('l)lacement k(\v is needed, it can t)e order('d l)y visiting our
'lW,bsite ge.eom, or calling GE Parts and_ \(cessories, 800.626.2002.
()rder part WR05X10006.
iiii!i!!i+ ii+i++iiii!ili
iiii:i iiiii iiiiiiii+i
_iiiii_+!i_iiiii+ii!l
5
Care and cleaning
of the refrigerator.
Cleaning the Outside
Keep the outside clean. Wipe Wi|h _ ( le_l]l (]oth ]i_]'e|_ r (|_Illl)e]l(_d
with kit(hen al)plian( e wax or mild liquid dish dewrgem. Dry and
t)olish with a (leml, soft cloth.
Do not wipe therefrigerator with a soiled dishcloth or wet towel. Thesemay
leavea residue that can erode thepaleL Donot use scouringpads, powdered
cleaners, bleachor cleanerscontaining bleachbecausetheseproducts can
scratchand weaken thepaint finish.
Protect the paint finish. "Ille finish on the outside of the reJiiger?dor
is a high quality, baked-on paint tinish. With prol)er care, it will
stay new-looking and rust-/i'ce fi)r years. Apply a coat of kitchen/
appliance wax when the reJiigen_tor is new, and then at least
twice a year.
Cleaning the Inside
To help prevent odors,lea\ e an open box ()_baking soda in the
i'_'Ii:igerator.
Unplug the refrigerator before cleaning, ff this is not t)ractical,
Wrl]/g eX(CSSmoisture out oJ sponge or cloth when (lemling
at(rand the (ontroL
Use warn/_s_,ter and baking soda solution-about a mblesl)oon
(15 nil) of baking soda to a (luart (1 liter) ()f _ter. This bofll
(leans and nemmlizes odors. Rinse mid wipe dr}.
()ther parts el the re/iJgenltot=in( luding door g,_askets, ti:uit
m_d vegetable (trmvers, and all plastic parts--can be cleaned
tile SalIle W_I_.
Do not wash any plastic refrigerator partsin the dishwashec
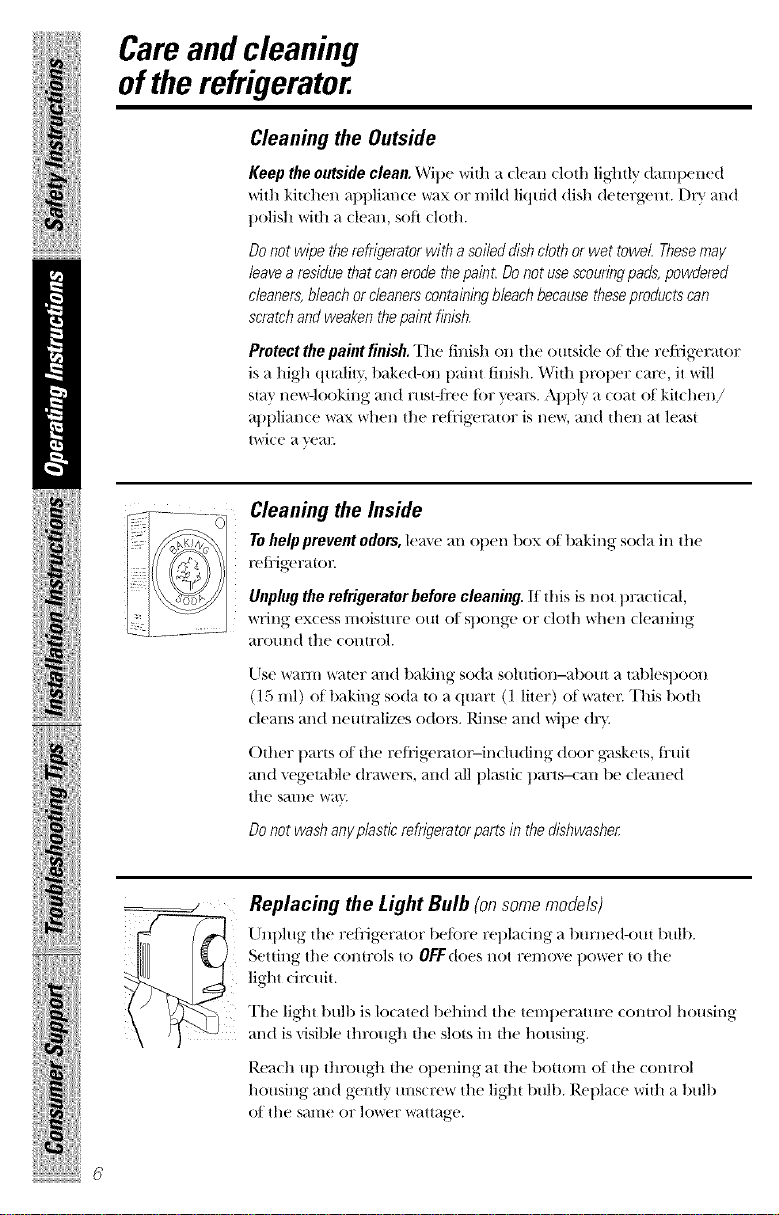
Replacing the Light Bulb (onsome models)
[lnl)hlg the refligerator beti_re repla(ing a burned-o/u bulb.
_ettill_ the (Olltl?OlS to OFFdoes lint l_el//ove power to the
light (Jr( uit.
The light t)tdt) is lo(ated 1)ehin(1 the teml)erattu:e (ontrol housing
m_d is visible through the slots ill the hotlsing.
Rea(h u1) through the opening at the bottom of the (ontrol
housing and gemly unscre_ the light bulb. Repla(e wifll a bulb
of the same or lower w;-ittage.
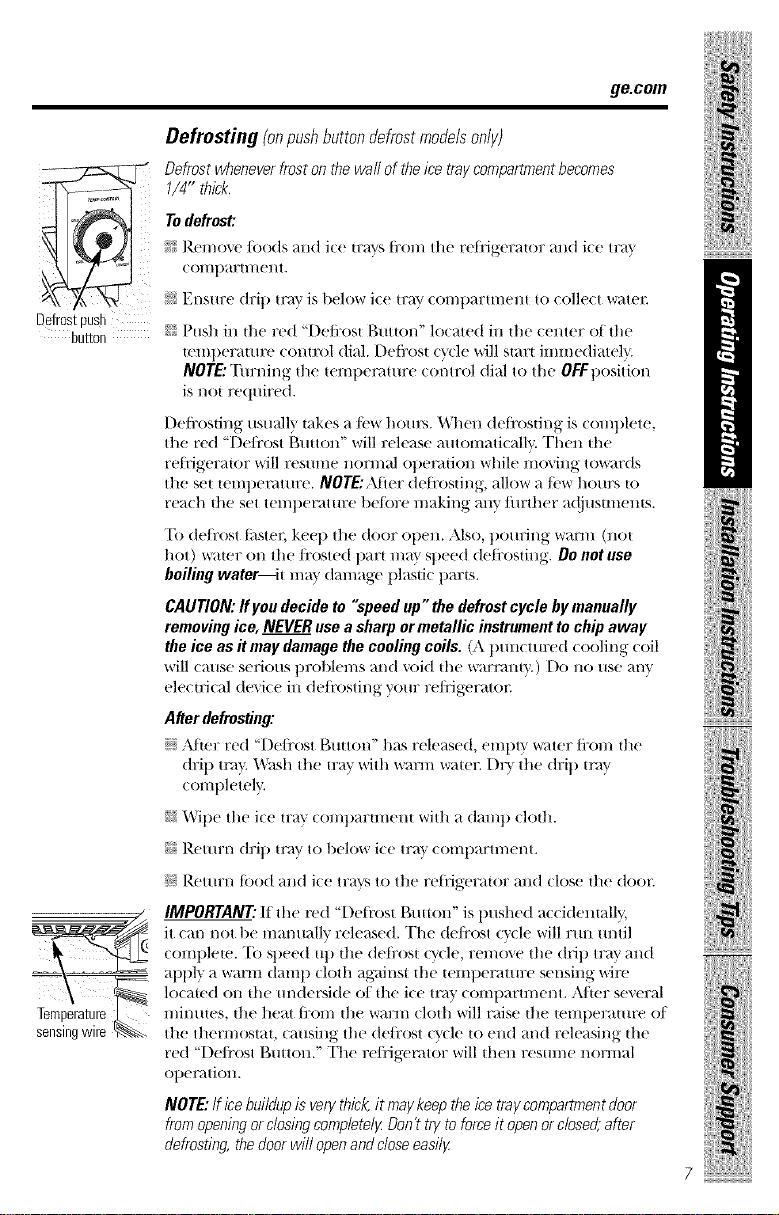
Defrostpush
button
............................... /
ge.com
Defrosting (onpushbuttondefrostmodelsonly)
Defrost whenever frost on the wall of the ice traycompartment becomes
1/4" thick.
To defrost:
2:' Rcmo+,e foods and ire u:m,'s fi'on_ the rcIiigcrator and i(c tray
( orilt)_.l'[]//(!l)[.
7_:_; Ens[I]7(: (hTi t) |i_l_ r is 1)(_](}_ r i((_ t]7_l_ ) (ol//t)3]TtrIl(!ll| |o (ol](x t WXt(?E
_! Push in the red "Defrost Button" ]rxated in the (enter of the
telnl)erature ( ontrol dial. [')efi'ost ('_(]e v_ril] start ilnlnediate]x,
NOTE: Tm:ning the tClnl)enlttlre control died to the OFFposition
is not F(!(I/IiF(xt.
I)effosdng usu;flly takes a low horn's. When deti'osting is complete,
the red "Deli'ost Breton" will release automatically. Then tl_e
retiigerator will resume norm_d ot)eration while moving towards
the set temt)enuure. NOTE:AJler deti'osfing, allow a low hours to
reach die set temperature betbre making m U timber a@lsunems.
To deJ'rost thstet\ kec 1) the door open. Also, poming _r_ (_l(_t
hot) _r_t(_l"()l_ the ti'r)sted part ma} Sl)ecd defi'r)sdng. Oo not use
boiling water--it may damage 1)lasti( parts.
CAUTION: ff you decide to "speed up" the defrost cycle by manually
removing ice, NEVER use a sharp ormetallic instrument to chip away
the ice as it may damage the cooling coils. (A t)tm_ turcd cooling coil
will CallS( St ViO/lS t)roblcms and void the _%r_'_lt}'.) I)() _() /lS(' _V
elecu-i(al (h'_i(e in de/i'osting _r()_]: re/iJgeraton
After defrosting:
J_ ARcr red "Dc/i'ost Button" has rch'ascd, empty v+_m'rfi'om the
drip tm_. V_bsht]w u:ay with wm-m water, l)r_ t]w drip m_y
oomph'rely.
_ &_;]l)e the ice tl:_ty'COml)artrnent with a dam t) (loth.
?? Rcttm) drip troy to l)(_low ice tray cornl)artment.
Return tood and ire tra'_:'_to the reIiigcrator and close die (loon
IMPORTANT."If the red "I)eti'ost t_uuon" is pushed ac(idemally,
it cm_ not t)e mammlly released. The deti'ost cy(le will rml m_til
(Oml)l('te "[b speed uq>the defrost ()(lc remove the dtJ t) tray and
at)l)l"_ a x_r_t_ damp cloth against the teml)enutlre sensing wire
located r)ll tl/e tlndersi(te oI the ire till}' (r)ii/l)artn/ent. Altel; several
l//in/l[(!s, the heat t]7()1/1the Wal?rll (loth will raise the t(!rIll)(!l?_ttllr(! ()t
the thermostat, (ausing the defi:ost c'v:le to end m_d releasing d_e
red "I)cti'ost t_mton." The retiJgemtor will d_en resmnc normal
ot)el_HiOll.
NOTE: If icebuildup is verythick, it may keep the ice traycompartment door
from opening or closingcompletel_ Don't try to forceit open or closed, after
defrosting, the door will open andclose easilF
il +I
il+ I
!!!!!!I+!!!!W!I
!illi!iiii.,+iiii HH+i
+
7
Care and cleaning of the refrigerator.
Defrosting (onmanualdefrostmodelsonly)
Defrost whenever frost on the wall of the ice traycompartment becomes
1/4" thick. Never use a sharp or metallic instrument to remove frost as
it may damage the cooling coils, (,4punctured cooling coil will cause
seriousproblemsand void the warrant}/.)We recommendusing aplastic scraper.
Do not useany electrical device in defrosting your refrigerator.
Todefrost:
J} S('t the tempet_mu:e control di_fl at OFFpositJon.
_: ()n models wid_om a drip raft, place a pan ben('adl 11_('ic(' tl::_x
comparm_em to collect wat('t_
I)efl:osting usu_dly t;ik(,s a tk'w hours. "Ib defrost tk_st('l_,keep th('
door open. Also, pouting w;u:m (not hot) water on th(' fl:()st('(] part
m_l} speed del_'osdng. Do not use boiling water-_t _ly r (t_age
plastJ( parts.
After defrosting:
_} El//l)t _r I**_'_t_t(,r ]_-ol(_l in(, (|rJ}) t]:_|_' o]: ]i:oIll th(' [)_._l l)l_l(('(| [)('n('_l_t]i
ill(' ic(' till}' COlIIp_l'tl//t'11t, _'tISl/ tilt' t]7_l} O17 ])_l]l with w_]_l//w_ltt'£.
_} /_'ip(' in(' ic{' tl:_l_ r coml)annwnt wi{l/ a damp clodL
_: Tm:H die wmp(,ramrc com_x)l in die desired scttiHg and
return food and ic(' tr_s to tile reffig(,_:aio_:
NOTE: If ice buildup is verythick,it may keep the ice traycompartment door
from opening or closing completely Don't try to forceit open; after defrosting,
the door will openandcloseeasily
Preparing for Vacation
For long w_(_ltions or _d)scn(('s, remov(, {ood mid unplug- th(•
rcfi:i_('ra{ol _.Mov(' {]le (omro] to the OFFposidon, and (leml tile
interior with a baking soda soludon of one tablespoon (15 ml) of
baking soda to one quart (] liter) of ware1 _.I_e_\e tile door open.
Preparing to Move
So( urc ;dl loose iwms su(h ;_ssh('lv('s and i((' rows by taping them
s(,( urclv in pla((' to prc\ cm (t_ml_g-('.
Besure therefrigerator stays in an upright position during moving.
Preparingtoinstall
the refrigerator. 9e.oo,,
Read these instructionscompletely and carefully.
RefrigeratorLocation
_! Do Hot illSt_{]] t]le Fe{i'l_e]?ato]? %_rl_[e['e the teH/l)e£_lttll?e %_rjl] _,_'() _)(_]()%_r
50°F (10°C) because it will llOt r/ill ()lien enough to maintain
prot)er temperatures.
_: Install it on a floor strong enough to sut)t)ort it fldly loaded.
J? [/the ,2cubic/L)ot model is placed on a com_tertop or stand,
the ti'ont sur/i_ce of tile door should be 3" or more back ti'om the
edge of tile counterto l) or stand to avoid accidental til)l)ing of the
apl)liance dining normal use.
J? Do not install it closer than 5" (13 cm) next to a hinge.
The following applies only to the 2, 3 and # Cubic Foot Models:
J? Do not install it in a recessed area.
_: Do not build in the reli'igerato_;
Clearances
,\llow the/L)llowing clearances/k)r ease ofinstalladon and t)rol)er
air circulation.
2,3and4 6CubicFoot
CubicFootModels Model only
Sides l/2" (l 3 ram) 0" (0 ram)*
Top 2" (51 ram) 0" (0 ram)
Back 2" (51 ram)** 0" (0 ram)
*l-l!4" (32 ram) lot hinge side clearance
**From the rear cabinet surli_( e to the wall
Turncounterclockwisetoraise,
clockwisetoIoweE
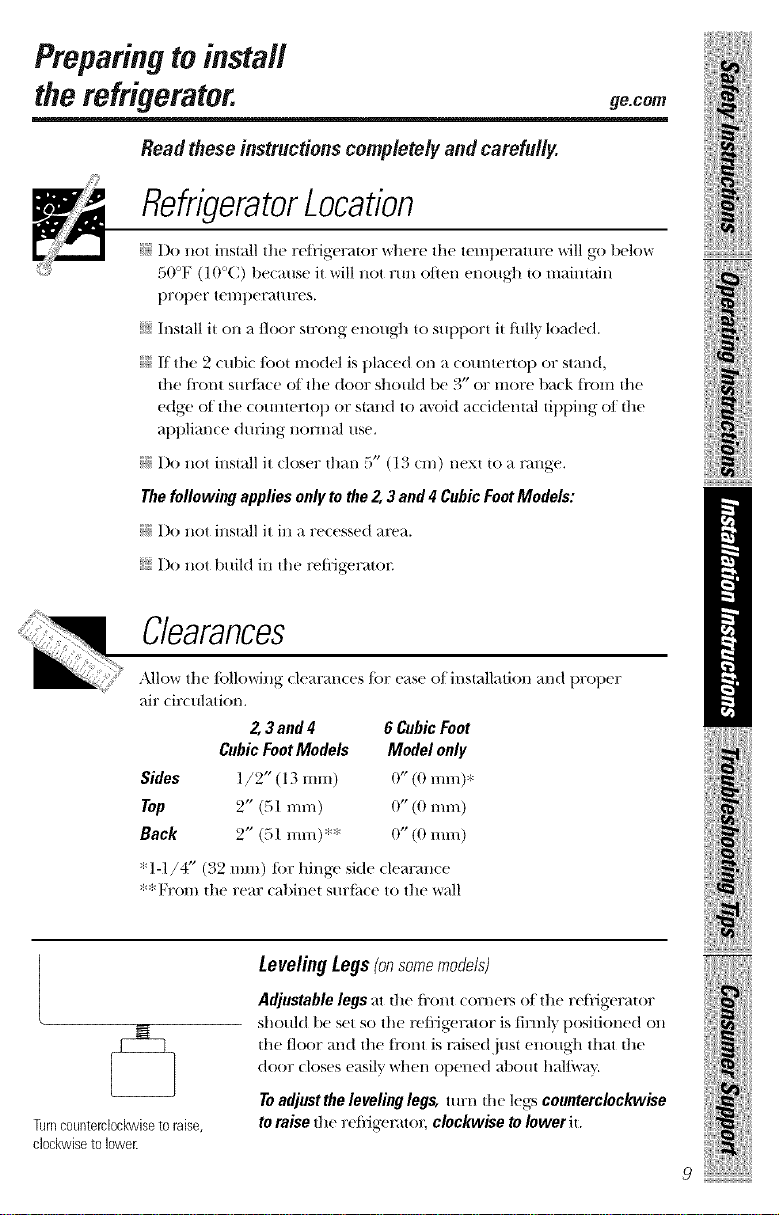
LevelingLegs(onsomemodels)
Adjustable legs at the flx)nt corners ot the r(Ii-igerator
should be set so the reflJgerator is tirm b t)ositioned on
the tloor and the ti'ont is raised just enough that the
Toadjustthe leveling legs, mrn the legs countercloclowise
to raise the refl4gemt(m clockwise to Iowerit.
9
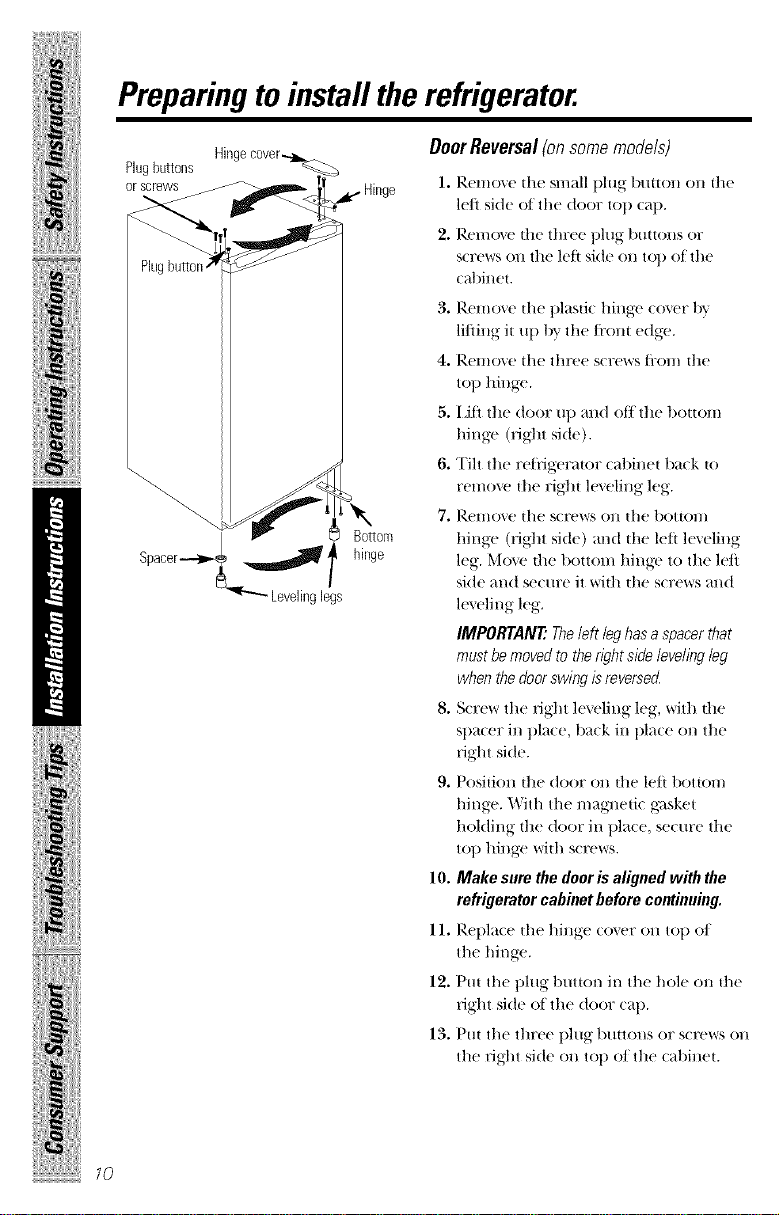
Preparingto install the refrigerator.
Plugbuttons
orscrews
Spacer---I_,
Hingecover.
Bottom
i I hinge
Levelinglegs
DoorReversa/(onsomemode/s)
1. Renlo\ e tile mnall plug button on tile
left side of tile door top cap.
2. l_el//oVe tile three phlg btlttons Or
screws on the left side on top of the
cM)inet.
3. Remo\ e tile plastic hinge cover by
lJ/iing it up by tile/i'ont edg-e.
4. Retno\e tile thrt,e screws Ken/ tile
top hingt,.
5. I ,ifl tile door up and off tile bottOlll
hinge (right side).
6. Tilt tile retiigerator cabinet back to
reH/ove tile right It", eling Meg.
7. Renlo\ e tile screws on tile bottol//
hinge (right side) and tile left h'\ eling
leg. MtI_x' tile l)ottol//hinge to tile left
side and secure it with tile screws and
h'_vling Meg.
IMPORTANT_ Theleft leg has a spacer that
must be moved to thedght side leveling leg
when thedoor swing isreversed.
8. Screw tile right h'veling Meg-,with tile
spacer in ))lace, back in place on tile
dght side.
9. Position tile door on tile leti botton/
hinge. With tilt' maglletic g_lsket
holding the door in place, secure tile
top hinge with screws.
10. Make sure the door is aligued with the
refrigerator cabiuet before continuing.
11. Replate the hinge to_vr on top el
tile hinge.
12. Put tile plug tmtton in tile hole on the
right side of tile door cap.
13. Put tile three plug buttons or screws on
tile right side on top of tile cabinet.
10
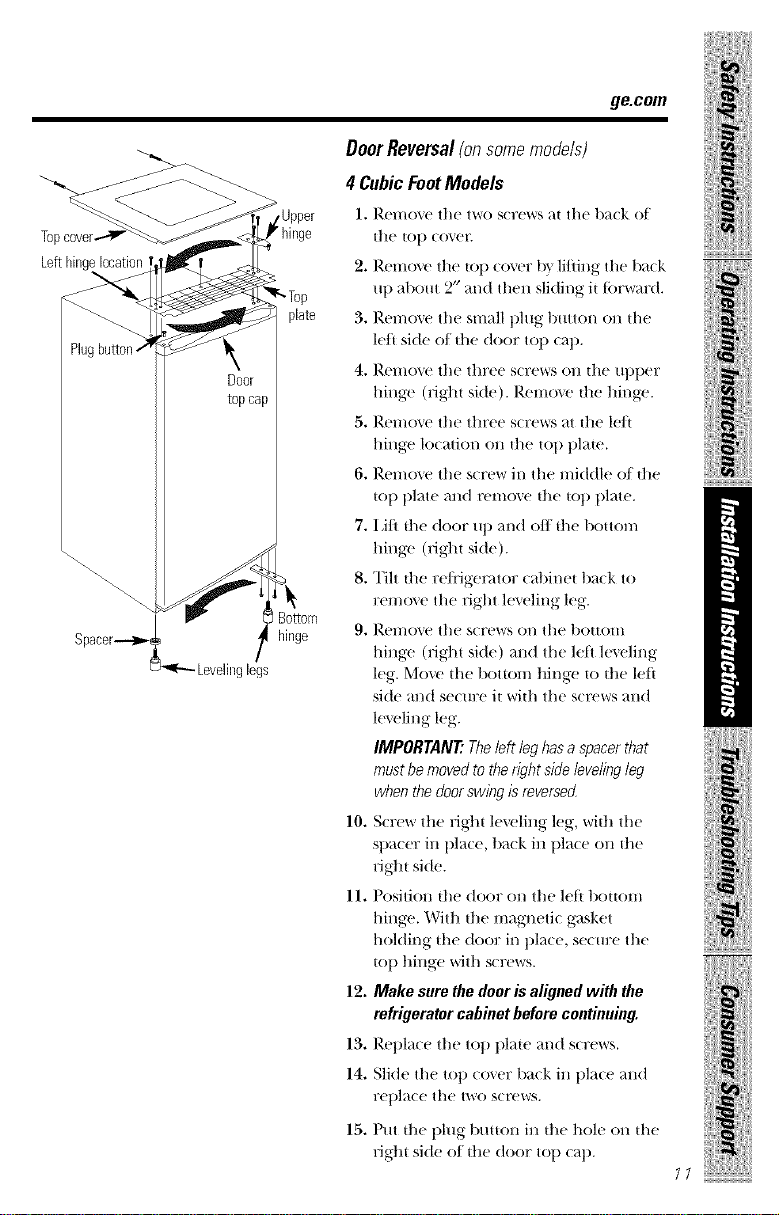
ge.com
,Upper
Tol
Lefthiugelocation
Door
topcap
pJate
Spacer--'l_LLeveliug le! hhlge
DoorReversal(onsomemode/s)
4 CubicFootModels
1, Remo_t' the two screws at the back of
the top coveE
2. Remove the top cover It)}lifting the back
up about 2" and then sliding it ibrwmxt.
3. Remedy the smM1 plug button on the
left side of the door top c_lp.
4. Remo_e the three screws on the upper
hillge (lJgllt side). Remo_._' the ]linge.
5. Remove tile three screws at the lelt
hinge location on the top plate.
6. Remo_e the screw in the middle of the
top plate and remo_+v the top plate.
7. I,ili the door up and off the botton/
hinge 0ight side).
8. Tilt the retiigemtor cabinet back to
remo\e the right h'_elJng leg.
9. P.emo_v tile screws on tile bottom
hinge (right side) mid the left h'_vling
leg. Move the bottom hinge to the left
side and secure it with tile screws and
leveling leg.
IMPORTANT: Theleft leg hasa spacer that
must be moved to the right side levelingleg
when the doorswing is reversed
10. Screw the lJg']l| leveling leg, with the
sl)acer in place, back in place on the
+ight side.
11. Position the door on tile ]e]_ bottom
hinge. With the magneti_ gasket
holding the door in ])lace, secm:e the
top hinge with screws.
12. Make sure the door is aligned with the
refrigerator cabinet before continuing.
14, Slide the top co\er back in place mid
re])]ace tile two sc£ews.
15, Put the plug buuon in flw hob' on the
fight side o] the door top c_lp.
!illi!iiii++iiii HH+i
+
11
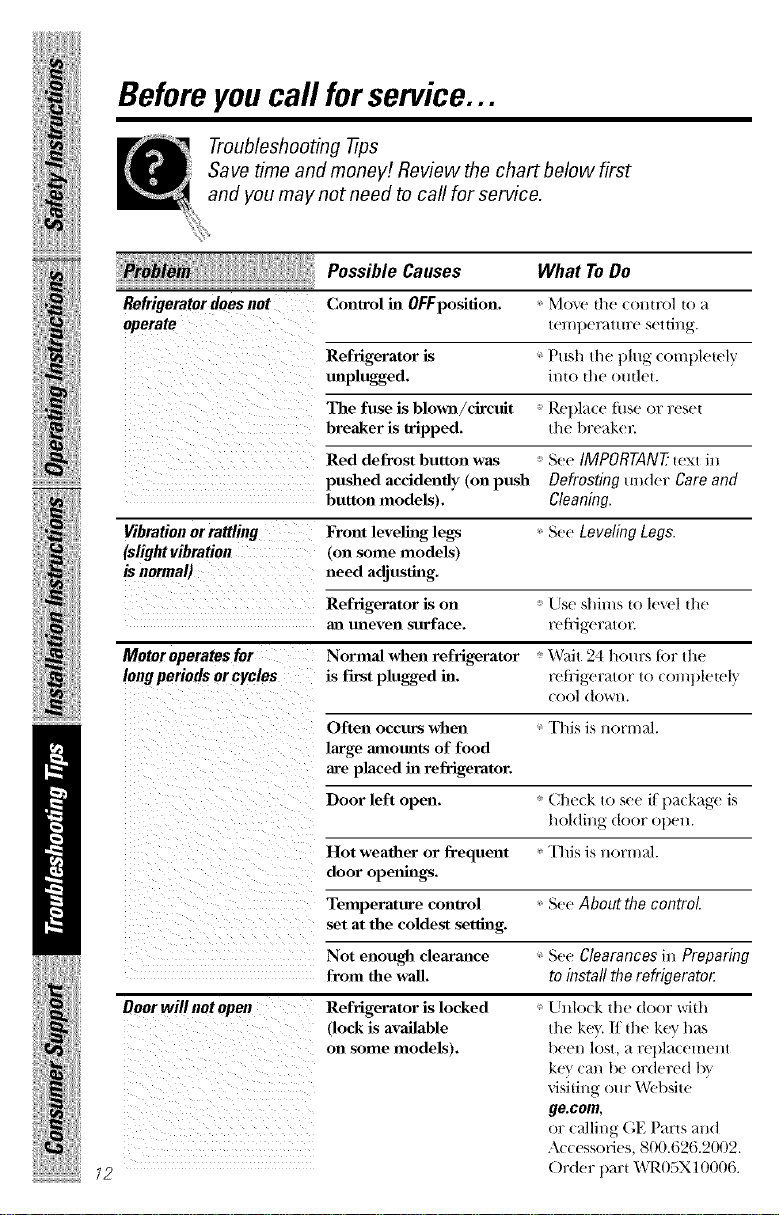
Beforeyou call for service...
Troubleshooting -tips
Save time and money! Review the chart below first
and you may not need to call for service.
Refrigerator does not
operate
Possible Causes What ToDo
Vibrationorrattling
(slightvibration
isnormal)
Motoroperatesfor
longperiodsorcycles
Control hi OFFposillon.
Refrigerator is
tmplugged.
The fuse is bloval/circuit
breaker is tripped.
Red defrost button was
pushed accidenfly (on push
button models).
F_ont levelitlg legs
ion some models)
need adjusting.
Refrigerator is on
all uneven surface.
Normal when refrigerator
is first plugged hi.
Move t]'t(' COHtFO] tO +1
tcl//])cF_lttWc s(qthlg.
Push the plug completely
into the outlet.
Replace disc or reset
the breaker.
See IMPORTAN??text in
Defrostingraider Careand
Cleaning.
S,.,(,LevelingLegs.
Llse shims to level the
_x'li'igerat o_:
Wait 24 hom:s t6r the
ruliJgerator to coml)lctcl }
cool down.
Door will not open
12
Often occurs when This is Horm_d.
large amounts of food
are placed hi refi_eratur.
Door left open. Check 1o see il parkagc is
ho|di}tg door ()})cn.
Hot weafller or frequent lifts is Hormal.
door openhlgs.
Temperature control Sec About the control.
set at the coldest setling.
Not enough dearmlce
from die wall.
Refrigerator is locked
dock is available
on some models).
See Clearances in Preparing
to install the refrigerato_
' Unlock tile door with
the kcL If tllc k(w"ha_,
|)Cell lost, a rci)lacclIlCllt
kc_ can be ordered by
_siting our Wcb_,itc
ge.com,
or calling (;E Parts _md
•\(-ccssorics, 800.626.2002.
()rdcr part WR05X10006.
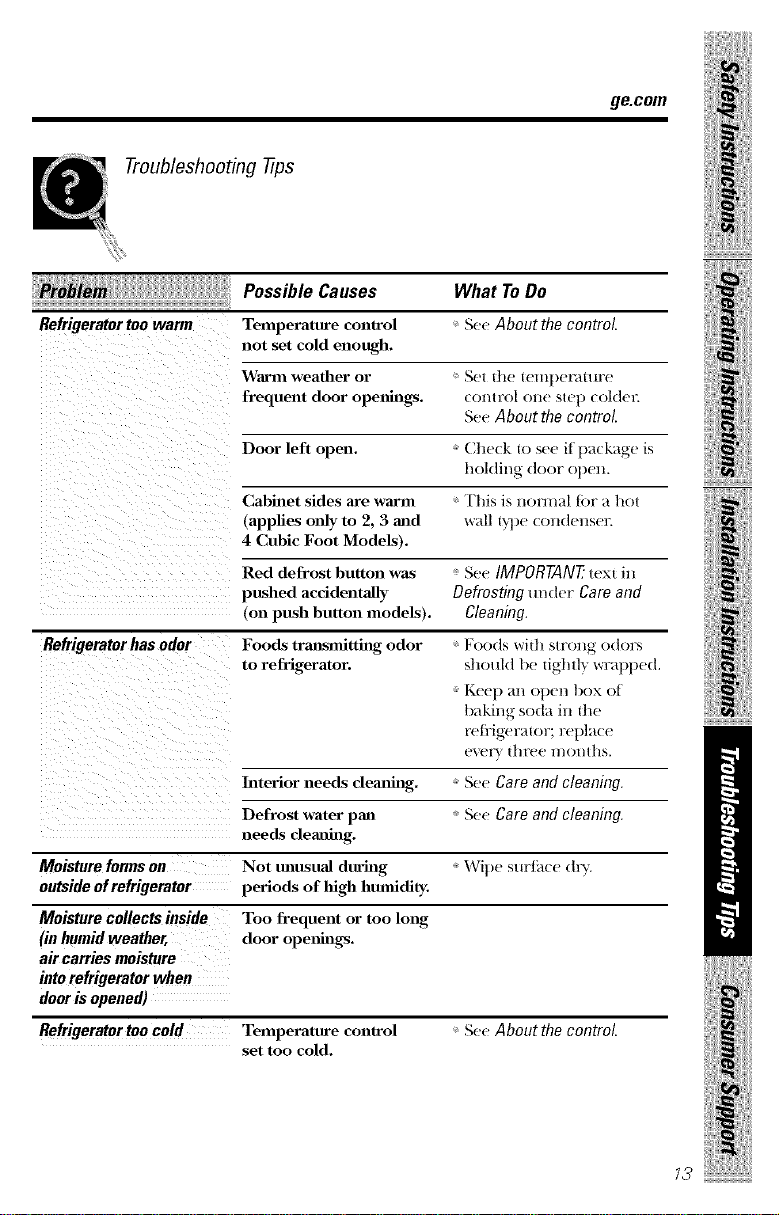
ge.com
Troubleshooting -tips
Possible Causes
Refrigerator too warm Temperature con_ol
not set cold enough.
What ToDo
SeeAboutthe control.
_¥arln weather or Set tlle telIll)et_tt/IFe
frequent door openhlgs. COl/trol one stc l) colder.
See About the control.
Door left open. Cbc(k to see it package is
holding door open.
Cabhlet sides are warm ' This is normal t0r a hot
(applies olfly to 2, 3 and wall ty])c (olldellscr.
4 Cubic Foot Models).
Refrigeratorhasodor
Red defrost button was
pttshed accidentally
(on push button models).
Foods trmlsmitth ,_g odor
to refrigerator.
See IMPORTANT7 text ill
Defrosting tinder Care and
Cleaning.
Foods widl strong odors
should be ughtly wrapped.
Keep m_ open box of
b_&ing soda in the
reli'igcrator; rcpla( c
eVeFV [hi'('(' I//OI/tNs.
Interior needs clemlhN. See Care and cleaning.
Defrost water pro1 See Care and cleaning.
needs clealhlg.
Moistureformson
outsideof refrigerator
Not tmttsual durhlg
periods of lfigh htmfidity.
Moisture collects inside
(in bmnid weather,
air carries moisture
into refrigerator when
door is opened)
Too frequent or too lo_g
door opeohlgs.
Refrigeratortoocold Temperature control
set too cold.
Wipe sur/scc dry.
' See Aboutthe control
_i!ii;iiiiiii:ii;i!i:iiiiiii'iiiii!iii
illiiiii!H li
13
Netes.
14
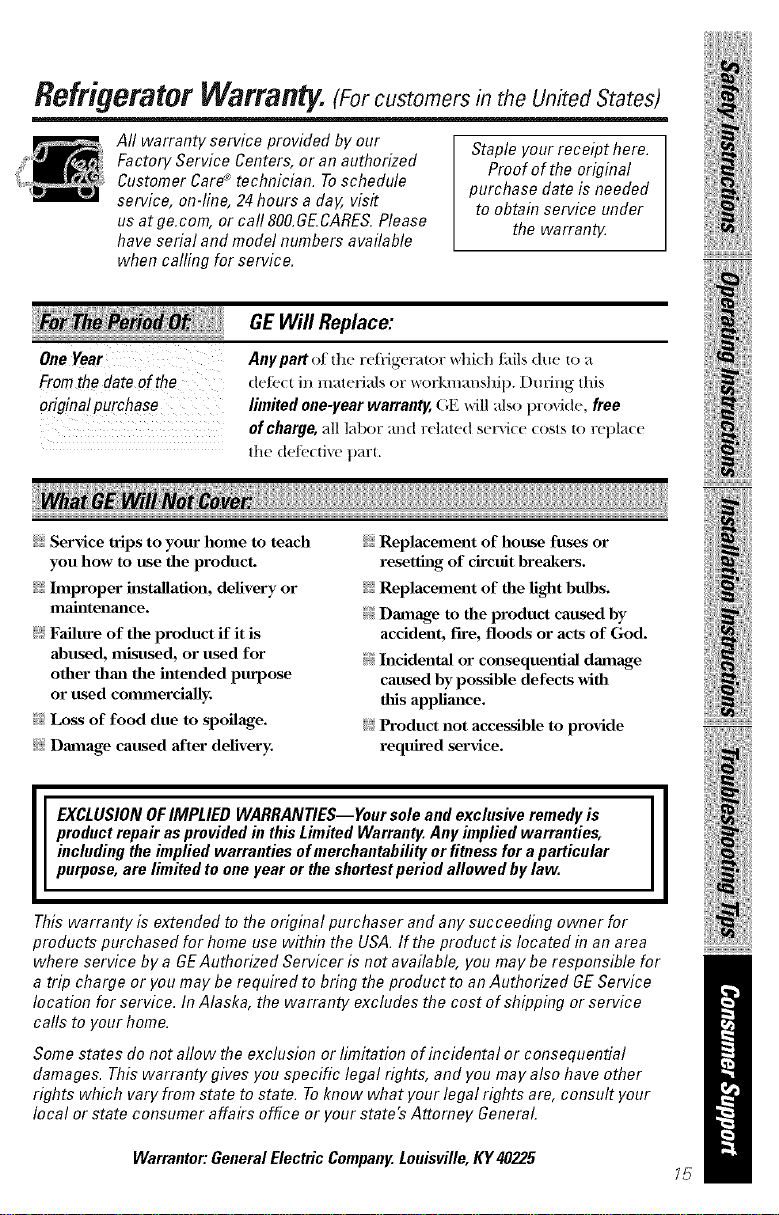
Refrigerator Warfarin. (For customers in the United States)
All warranty service provided by our Staple your receipt here.
Factory Service Centers, or an authorized Proof of the original
Customer Cares technician. To schedule purchase date is needed
service, on4ine, 24 hours a day, visit to obtain service under
us at ge.com, or call 800.GECARES. Please the warranty
have serial and model numbers available
when calling for service.
iiiiii,lii!,!ili_;!iiil!:liiii_,
ii! i iiiiiiiiiiliiiH
From the date of the
original purchase
GE Will Replace:
Anypart o/the retiigerator which/i_ils due to a
dell'( t in materials or workn/ansllip. [)Hring this
limited one-year warren_ (;E x,_il]_dsoproxide, free
of charge, all lal)or and related servi(e (osts to repla(e
the de/_'ctive par{.
l iiii i I
_: Service trips to your home to teach
you how to use die product.
_: Improper hlstallafion, delivery or
llaalntenance.
_?_Failure of the product if it is
abused, misused, or used for
oilier than die hltended purpose
or used colmnercially.
_:_Loss of food due to spoilage.
_: Damage caused after delivery.
_: Replacement of house fuses or
resetlh ._gof drcuit breakers.
_!_!Replacement of ille light bulbs.
_!}Damage to the product caused by
accident, fire, floods or acts of God.
_!}Incidental or consequential damage
caused by possible defects with
tlfis appliance.
_5_Product not accessible to provide
required service.
EXCLUSION OF IMPLIED WARRANTIES--Your sole and exclusive remedy is
product repair as provided in this Limited Warranty. Any implied warranties,
including the impfied warranties ofmerchantability or fitness for a particular
purpose, are limited to one year or the shortest period allowed by law.
This warranty is extended to the original purchaser and any succeeding owner for
products purchased for home use within the USA. If the product is located in an area
where service by a GEAuthorized Servicer is not available, you may be responsible for
a trip charge or you may be required to bring the product to an Authorized GE Service
location for service. In Alaska, the warranty excludes the cost of shipping or service
calls to your home.
Some states do not aflow the exclusion or limitation of incidental or consequential
damages. This warranty gives you specific legal rights, and you may also have other
rights which vary from state to state. Toknow what your legal rights are, consult your
local or state consumer affairs office or your state's Attorney General
¸1111111¸111:1%
Warrantor:GeneralElectricCompany.Louisville,KY40225
75
ConsumerSupport.
GEAppliancesWebsite ge.co,,
Have a question or n(_d assistance widl your appliance? "I]y the GE Appliant es Websiw
24 hours a tla 5 any t/a} of the year! For greater t OllVt'lli( lice and thster self, it e, }/Oll C[!ll
now (/Owlllo_!d ()WlleY'S Manuklls, OI'(]eI" parts, t alahtgs, iti evtn st hedule selvi( e on-Ill1( .
"l)_tl can also ",\sk Otlr "I;'am of Expert2"" your questilms, and sit much mor_....
ScheduleService
ge.com
Expert GE repair service is only one sttp away fl'om your doon Get on-line and scheduh
your servit t at your eom_ nience 24 hours any day of tht war! ()r call 800.(;E.(L\RES
(800.432.2737) during normal business hours.
RealLifeDesignStudio
ge.com
GE supports the I hfivcrsal Design tont ept-produets, selsJces and etrdronment.s that
tan be used I)) people of all ages, sizes and capabilities. We ret ognize tile need to
design tot a wide nmge of ph?:sical and nlental abilities and impairments. For details
of GE's I hfi'vcrsal I)esign applications, inchlding kitcht n design ideas tot peopk with
disabilities, check out our DA'bsite toda}; For the hearing impaired, please call
800.TDD.GEAC (800.833.4322).
ExtendedWarranties
ge.com
Purchase a GE extended warranw and learn about special discoum5 that are awtilable
while v(mr wanantv is still in etib_ t. Yhu tan purl hase it on-line anytime, or call
800.626.2224 during normal business hours. GE Consunler Itome Sel_.J( es will
still be there after your warramy expires.
PartsandAccessories
ge.com
hldixidtmls qualified to ser'dce their own appliant es tan have [)arts or at t essories
sent directly to their homes (VISL\, MasterCard and Dist over cards are at t epmd).
Order on-line to(la B 24 hours eveW (lay or b? phone at 800.626.2002 during normal
bl/silleSS hours.
Instructionscontainedin this manual cover procedures tobe performed byany user.Other
servicing generally should he referred toqualified service personnel. Cautionmust be
exercised, since improperservicing may causeunsafe operation.
ContactUs go.co,.
If you arc not satisfied with the servitx you r_ceivt fiom (;E, contact us on our Websiw
with all the details int luding your phone nmnbec or wriw to:
General Manager; Customer Relations
GE Appliant es, Appliant e Park
Louisville, KY 40225
RegisterYourAppliance
ge.com
Register your new appliance on-line-at your convenience! Timely product registration
will allow flu" enhant ed t Otlltlllltli( ation and prompt serxit e trader the terms ofvolII
warranty, should tile need arise. You ma', also nlail in the pre-primed registration card
included in the packing material.
Printedin China

