TM
Electric Range
Slide-in models
L::_ FP ( <! d
b<: ...... <. J
Estufa el_ctrica
Modelos deslizables
t_',!7<"fI ':::_ .................. <_7C; <_7<,3
',+JC7 C/{::_{j () _7/( ]7 '''_'<__+_
Models/Modelos 790.46802, 790.46803, 790.46804,
790.46809
318200821(0104)Rev.D Sears Roebuck and Co,, Hoffman Estates, IL 601 79 U,S,A, www.sears.com
Table of Contents
Product Record ................................................................ 2
Slide-in Range Warranty ................................................. 2
IMPORTANT SAFETY INSTRUCTIONS .............................. 3-5
Selecting Surface Cooking Utensils ................................ 6
Specialty Pans & Trivets ................................................... 6
Canning Tips & Information ........................................... 7
Range Features ................................................................ 8
Control Pad Functions ..................................................... 9
Setting the Clock ....................................................... 10-11
• Clock ......................................................................... 10
• Energy Saving Mode ................................................... 10
• Timer Reminder .......................................................... 11
• Kitchen Timer ............................................................. 11
Consumer Defined Control Feature ............................... 12
Surface Cooking ........................................................ 13-15
• Setting Surface Controls .............................................. 13
• Ceramic GlassCooktop ......................................... 13-14
• Settign Warmer Zone Controls (some models) ............. 15
Setting Warmer Drawer Controls (if equipped) ............ 16
Oven Vent(s) and Racks .................................................. 17
Changing Oven Light ..................................................... 17
Setting Oven Controls ............................................... 18-28
• Preheat ...................................................................... 18
• Bake ..................................................................... 19-22
• Broil ...................................................................... 23-25
• Convection Bake & Roast ....................................... 26-28
Oven Cleaning ........................................................... 29-31
General Cleaning ....................................................... 32-36
Adjusting Oven Temperature ......................................... 36
Avoid Service Checklist ............................................. 37-38
Espa6ol ........................................................................... 39
Sears Service .................................................... Back Cover
Product Record
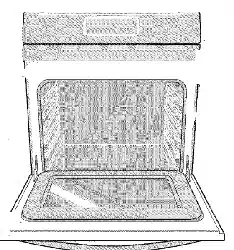
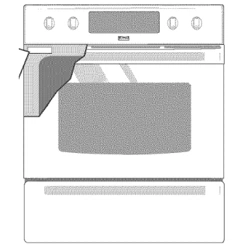
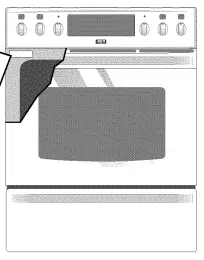
In this space below, record the date of purchase, model and serial number of your product. You will find the model and serial
number printed on an identification plate. The identification plate is located on the left side of the range and are visible when
the oven door is open or on the inside of the drawer along the side of the frame.
Model No. 790. Date of Purchase
Serial No. Save these instructions and your sales receipt for reference.
Slide-in Range Warranty
FULL ONE YEAR WARRANTY ON ALL PARTS
If, within one year from the date of installation, any part of this product fails to function properly due to a defect in material or
workmanship, Sears will repair or replace it, at our option, free of charge.
If the product is subjected to other than private family use, the above warranty is effective for only 90 days.
WARRANTY SERVICEIS AVAILABLE BY CONTACTING THE NEARESTSEARSSERVICECENTERIN THE UNITED STATES.
This warranty gives you specific legal rights, and you may also have other rights which vary from state to state.
Sears Roebuck and Co. Dept. 817 WA Hoffman Estates, IL 60179
To Further Add To The Value Of Your Range, Buy a Sears Maintenance Agreement.
"We Service What We Sell" is our assurance to you that you can depend on Searsfor service. Your Kenmore appliance has
added value when consider that Sears has service units nationwide, staffed with professional technicians trained on all
appliances Sears sells. They have the knowledge and skills, tools, parts and equipment to ensure our pledge to you that "We
Service What We Sell".
Maintain the value of your purchase with a Sears Maintenance Agreement. Kenmore appliances are designed,
manufactured, and tested for years of dependable operation. Yet any major appliance may require service from time to time.
The Sears Maintenance Agreement offers you an outstanding service program for your product.
The Sears Maintenance Agreement:
• Isyour way to buy tomorrow's service at today's prices.
• Eliminates repair bills resulting from normal use.
• Allows for as many service calls as you need.
• Provides an annual Preventive Maintenance Check at your request
to keep your Kenmore Appliance in proper running condition.
For more information, call 1-800-827-6655
IMPORTANT SAFETY INSTRUCTIONS
Read all instructions before using this appliance.
Save these instructions for future reference.
This manual contains many important safety messages. Always read and obey all safety messages.
The safety symbol _ calls your attention to safety messages that inform you of hazards that can kill or hurt you or others, or
cause damage to the product.
Indicates an imminently hazardous situation which, if not avoided may result in death or serious injury.
Indicates an imminently hazardous situation which, if not avoided may result in minor or moderate injury, or
product-damage-only.
All safety messageswill identify the hazard, tell you how to reduce the chance of injury, and tell you what can happen if the
instructions are not followed.
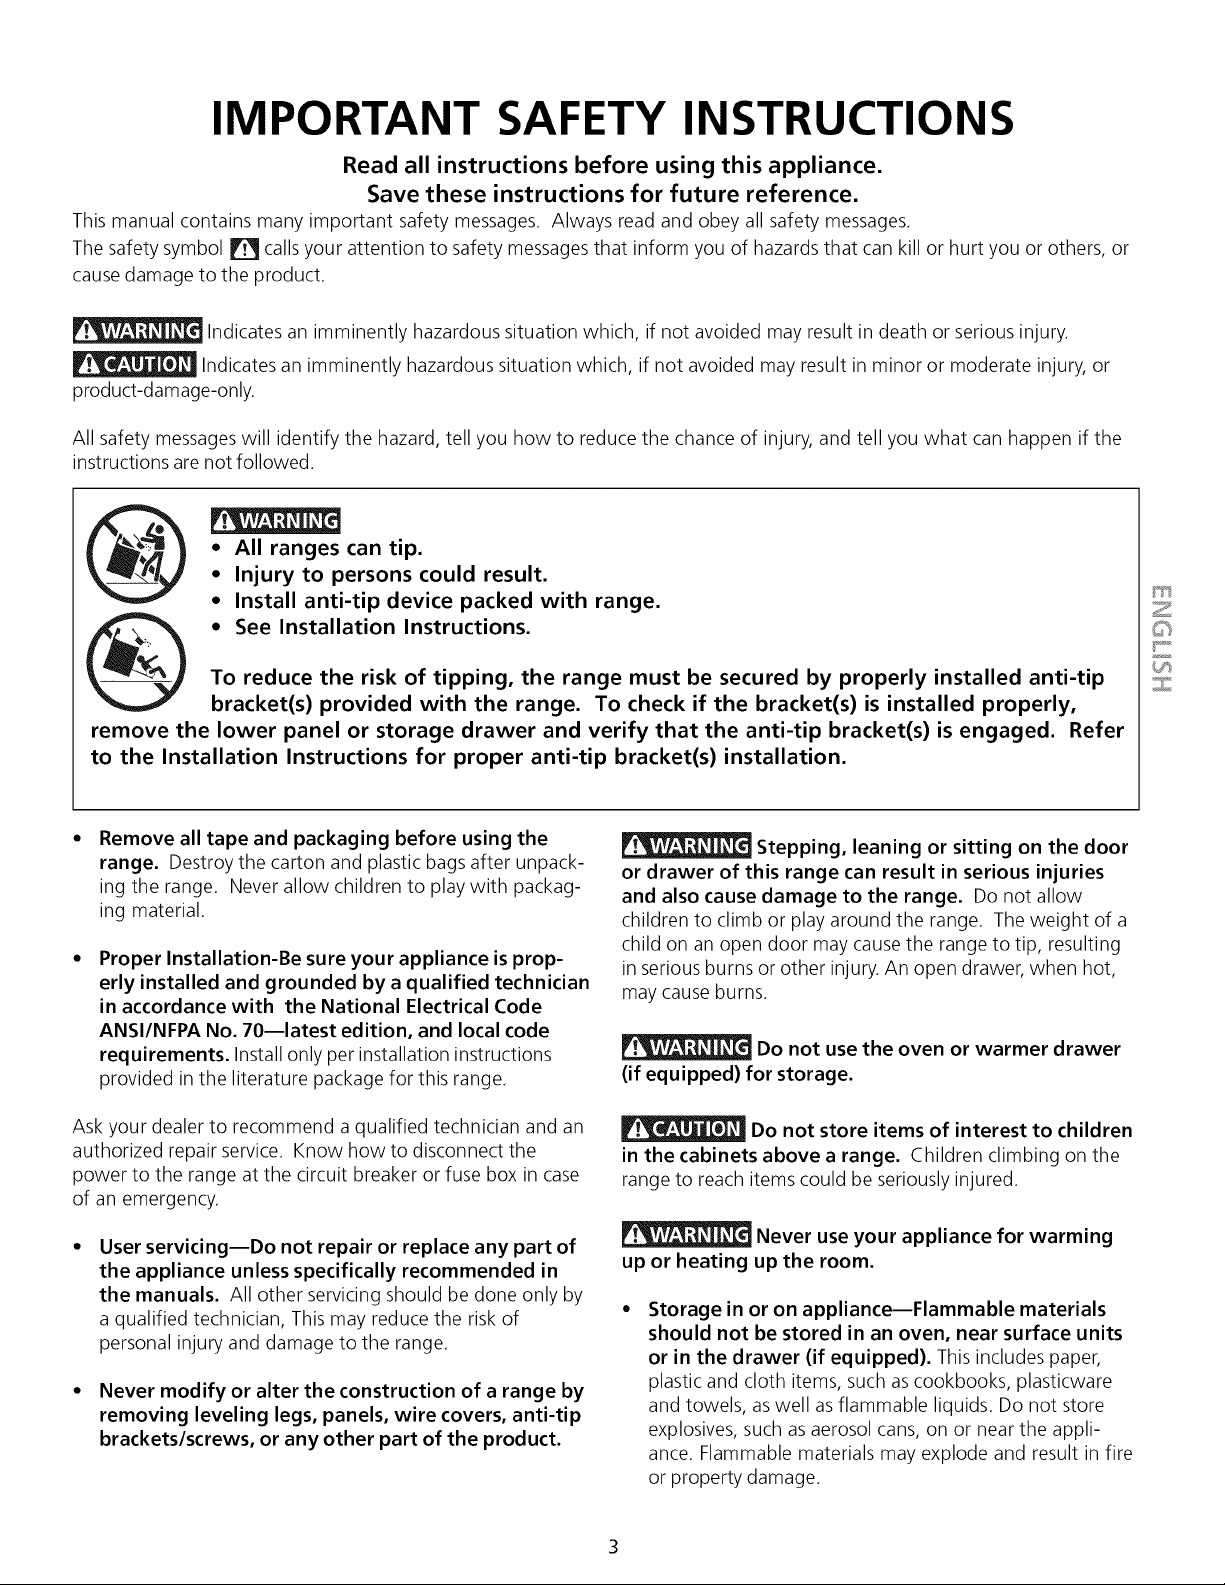
= All ranges can tip.
• Injury to persons could result.
= Install anti-tip device packed with range.
= See Installation Instructions.
To reduce the risk of tipping, the range must be secured by properly installed anti-tip
bracket(s) provided with the range. To check if the bracket(s) is installed properly,
remove the lower panel or storage drawer and verify that the anti-tip bracket(s) is engaged. Refer
to the Installation Instructions for proper anti-tip bracket(s) installation.
Z
©
Remove all tape and packaging before using the
range. Destroy the carton and plastic bags after unpack-
ing the range. Never allow children to play with packag-
ing material.
Proper Installation-Be sure your appliance is prop-
erly installed and grounded by a qualified technician
in accordance with the National Electrical Code
ANSI/NFPA No. 70--latest edition, and local code
requirements. Install only per installation instructions
provided in the literature package for this range.
Ask your dealer to recommend a qualified technician and an
authorized repair service. Know how to disconnect the
power to the range at the circuit breaker or fuse box in case
of an emergency.
User servicing--Do not repair or replace any part of
the appliance unless specifically recommended in
the manuals. All other servicing should be done only by
a qualified technician, This may reduce the risk of
personal injury and damage to the range.
• Never modify or alter the construction of a range by
removing leveling legs, panels, wire covers, anti-tip
brackets/screws, or any other part of the product.
Stepping, leaning or sitting on the door
or drawer of this range can result in serious injuries
and also cause damage to the range. Do not allow
children to climb or play around the range. The weight of a
child on an open door may cause the range to tip, resulting
in serious burns or other injury. An open drawer, when hot,
may cause burns.
Do not use the oven or warmer drawer
(if equipped) for storage.
Do not store items of interest to children
in the cabinets above a range. Children climbing on the
range to reach items could be seriously injured.
Never use your appliance for warming
up or heating up the room.
Storage in or on appliance--Flammable materials
should not be stored in an oven, near surface units
or in the drawer (if equipped). This includes paper,
plastic and cloth items, such as cookbooks, plasticware
and towels, as well as flammable liquids. Do not store
explosives, such as aerosol cans, on or near the appli-
ance. Flammable materials may explode and result in fire
or property damage.
IMPORTANT SAFETY INSTRUCTIONS
Do not leave children alone--Children should not be
left alone or unattended in the area where appliance
is in use. They should never be allowed to sit or stand
on any part of the appliance.
DO NOT TOUCH SURFACE UNITS, AREAS NEAR THESE
UNITS, OVEN HEATING ELEMENTS OR INTERIOR
SURFACESOF THE OVEN OR WARMER DRAWER (if
equipped). Both surface and oven heating elements
may be hot even though they are dark in color. Areas
near surface units may become hot enough to cause
burns. During and after use, do not touch, or let clothing
or other flammable materials touch these areas until they
have had sufficient time to cool. Among these areas are
the cooktop, surfaces facing the cooktop, the oven vent
openings and surfaces near these openings, oven door
and window.
Wear proper apparel--Loose-fitting or hanging
garments should never be worn while using the
appliance. Do not let clothing or other flammable
materials contact hot surfaces.
• Do not use water or flour on grease fires--Smother
the fire with a pan lid, or use baking soda, a dry
chemical or foam-type extinguisher.
• When heating fat or grease, watch it closely. Fat or
grease may catch fire if allowed to become too hot.
Use only dry potholders--Moist or damp potholders
on hot surfaces may result in burns from steam. Do
not let potholders touch hot heating elements. Do not
use a towel or other bulky cloth instead of a potholder.
• Do not heat unopened food containers--Buildup of
pressure may cause container to burst and result in
injury.
• Remove the oven door from any unused range if it
is to be stored or discarded.
IMPORTANT--Do not attempt to operate the oven
during a power failure. If the power fails, always turn
the oven off. If the oven is not turns off and the power
resumes, the oven may begin to operate again. Food left
unattended could catch fire or spoil.
Electronic controllers can be damaged by
cold temperatures. When you use your appliance for
the first time, or if it has not been used for a long
period of time, make sure that it has been exposed to a
temperature above 0°C/32°F for at least 3 hours before
connecting it to the power supply.
IMPORTANT INSTRUCTIONS FOR USING YOUR
COOKTOP
• Know which knob controls each surface heating unit.
Use proper pan size. This appliance is equipped with one
or more surface units of different sizes. Select utensils
having flat bottoms large enough to cover the surface unit.
The use of undersized utensils will expose a portion of the
surface heating unit to direct contact and may result in
ignition of clothing. Proper relationship of utensil to the
surface unit will also improve efficiency.
Utensil handles should be turned inward and not
extend over adjacent surface units--To reduce the risk
of burns, ignition of flammable materials, and spillage due
to unintentional contact with the utensil. The handle of the
utensil should be positioned so that it is turned inward, and
does not extend over adjacent surface unit.
• Never leave surface burners unattended at high heat
settings--Boilovers cause smoking and greasy spillovers
that may ignite, or a pan that has boiled dry may melt.
Protective liners--Do not use aluminum foil to line oven
bottom or any other part of the appliance. Only use
aluminum foil as recommended for baking if used as a
cover placed on the food. Any other use of protective liners
or aluminum foil may result in a risk of electric shock or fire
or short circuit.
Glazed cooking utensils--Only certain types of glass,
glass/ceramic, ceramic, earthenware, or other glazed
utensils are suitable for rangetop service without breaking
due to the sudden change in temperature. Check the
manufacturer's recommendations for cooktop use.
Do not use decorative surface element covers, If an
element is accidentally turned on, the decorative cover will
become hot and possibly melt. Burns will occur if the hot
covers are touched. Damage may also be done to the
cooktop.
FOR GLASS COOKTOPS ONLY
• Do not clean or operate a broken cooktop--lf cooktop
should break, cleaning solutions and spillovers may
penetrate the broken cooktop and create a risk of electric
shock. Contact a qualified technician immediately.
Clean cooktop glass with caution--If a wet sponge or
cloth is used to wipe spills on a hot cooking area, be
careful to avoid a steam burn. Some cleaners can produce
harmful fumes if applied to a hot surface.
• Do not place hot cookware on cold cooktop glass.
This could cause glass to break.
4
IMPORTANT SAFETY INSTRUCTIONS
• Avoid scratching the cooktop glass with sharp
objects.
IMPORTANT INSTRUCTIONS FOR USING YOUR
OVEN
• Use care when opening oven door or warmer drawer
(if equipped)--Stand to the side of the range when
opening the door of a hot oven. Let hot air or steam
escape before you remove or replace food in the oven /
warmer drawer.
Keep oven vent ducts unobstructed. The oven vent is
located at the rear of the cooktop on the right side.
Touching the surfaces in this area when the oven is
operating may cause severe burns. Also, do not place
plastic or heat-sensitive items on or near the oven vent.
These items could melt or ignite.
Placement of oven/warmer drawer (if equipped)
Racks. Always place oven racks in desired location while
oven/warmer drawer (if equipped) is cool. If rack must be
moved while oven is hot use extreme caution. Use
potholders and grasp the rack with both hands to reposi-
tion. Do not let potholders contact the hot heating
elements in the oven/warmer drawer (if equipped).
Remove all utensils from the rack before moving.
• Do not use the broiler pan without its insert. The
broiler pan and its insert allow dripping fat to drain and be
kept away from the high heat of the broiler.
• Do not cover the broiler insert with aluminum foil.
Exposedfat and grease could ignite.
Do not touch a hot light bulb with a damp cloth.
Doing so could cause the bulb to break. Disconnect the
appliance or turn off the power to the appliance before
removing and replacing light bulb.
IMPORTANT INSTRUCTIONS FOR CLEANING
YOUR RANGE
• Clean the range regularly to keep all parts free of
grease that could catch fire. Exhaust fan ventilation
hoods and grease filters should be kept clean. Do not
allow grease to accumulate on hood or filter. Greasy
deposits in the fan could catch fire. When you are flaming
food under the hood, turn the fan on. Refer to the hood
manufacturer's instructions for cleaning.
Kitchen cleaners and aerosols--Always follow the
manufacturer's recommended directions for use. Be
aware that excess residue from cleaners and aerosols may
ignite causing damage and injury.
SELF CLEANING OVENS
• In the self-cleaning cycle, only clean the parts listed
in this Use and Care Guide. Before self cleaning the
oven, remove the broiler pan and any utensils or foods
from the oven.
• Do not use oven cleaners--No commercial oven
cleaner or oven liner protective coating of any kind should
be used in or around any part of the oven.
• Do not clean door gasket--The door gasket is essential
for a good seal. Care should be taken not to rub, damage
or move the gasket.
• Remove oven racks. Oven racks color will change if left
in the oven during a self-cleaning cycle.
The health of some birds is extremely
sensitive to the fumes given off during the self-cleaning
cycle of any range. Move birds to another well ventilated
room.
Z
©
SAVE THESE SAFETY INSTRUCTIONS
Selecting Surface Cooking Utensils
For best result and energy conservation, choose cooking utensils that have these caracteristics:
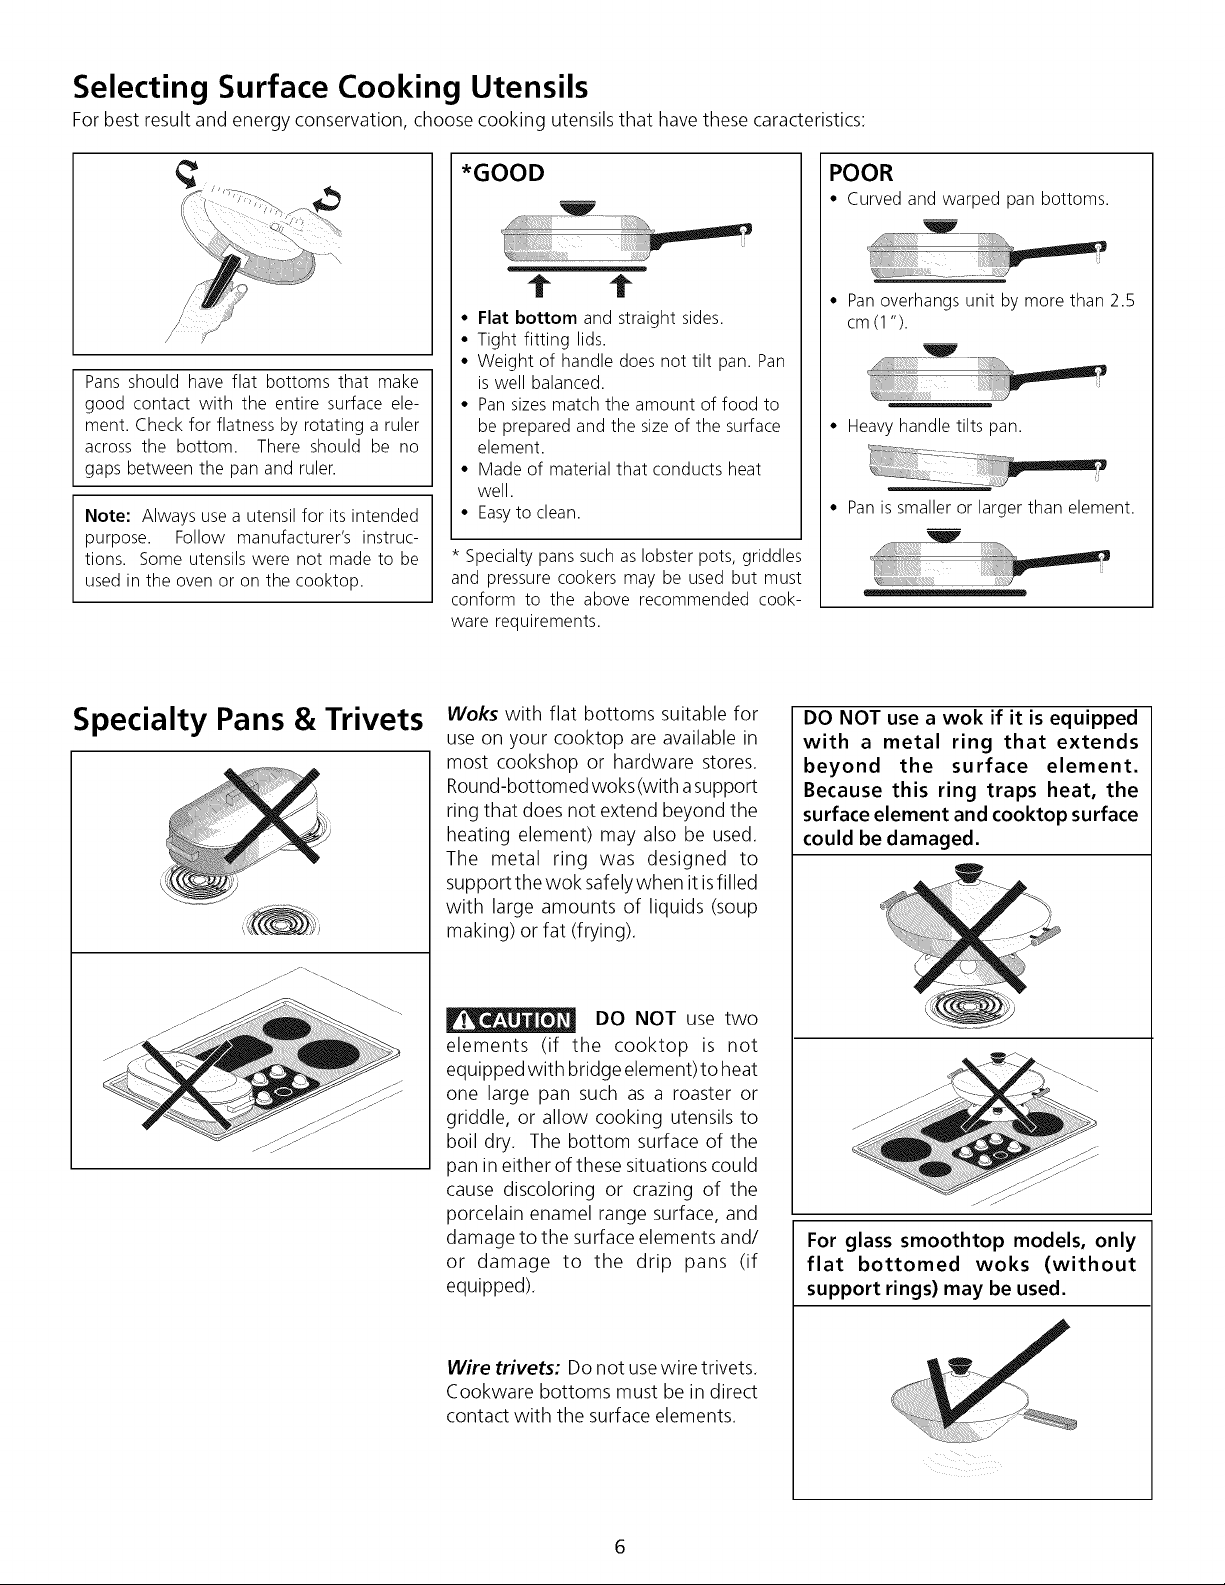
Pans should have flat bottoms that make
good contact with the entire surface ele-
ment. Check for flatness by rotating a ruler
across the bottom. There should be no
gaps between the pan and ruler.
Note: Always use a utensil for its intended
purpose. Follow manufacturer's instruc-
tions. Some utensils were not made to be
used in the oven or on the cooktop.
*GOOD
t t
• Flat bottom and straight sides.
• Tight fitting lids.
• Weight of handle does not tilt pan. Pan
is well balanced.
• Pansizesmatch the amount of food to
be preparedand the size of the surface
element.
• Made of material that conducts heat
well.
• Easyto clean.
* Specialty pans such as lobster pots, griddles
and pressure cookers may be used but must
conform to the above recommended cook-
ware requirements.
POOR
• Curved and warped pan bottoms.
• Pan overhangs unit by more than 2.5
cm (1").
• Heavy handle tilts pan.
• Pan is smaller or larger than element.
Specialty Pans & Trivets
Woks with flat bottoms suitable for
use on your cooktop are available in
most cookshop or hardware stores.
Round-bottomed woks (with a support
ring that does not extend beyond the
heating element) may also be used.
The metal ring was designed to
support the wok safely when it is filled
with large amounts of liquids (soup
making) or fat (frying).
DO NOT use two
elements (if the cooktop is not
equipped with bridge element) to heat
one large pan such as a roaster or
griddle, or allow cooking utensils to
boil dry. The bottom surface of the
pan in either of these situations could
cause discoloring or crazing of the
porcelain enamel range surface, and
damage to the surface elements and/
or damage to the drip pans (if
equipped).
Wire trivets: Do not use wire trivets.
Cookware bottoms must be in direct
contact with the surface elements.
DO NOT use a wok if it is equipped
with a metal ring that extends
beyond the surface element.
Because this ring traps heat, the
surface element and cooktop surface
could be damaged.
.....,XL "'-.
.............¢5::;- -S_-"........
zzz ...........
For glass smoothtop models, only
flat bottomed woks (without
support rings) may be used.
1. Usetestedrecipesandfollowinstructionscarefully.Checkwithyourlocal
CooperativeAgriculturalExtensionServiceoramanufacturerofglassjarsfor
thelatestcanninginformation.
2. Useflat-bottomedcannersonly.Heatisspreadmoreevenlywhenthe
bottomsurfaceisflat.
3. Centercanneronthesurfaceelement.
4. Startwithhotwaterandahighheatsettingto reducethetimeittakesto
bringthewatertoa boil;thenreducetheheatsettingaslowaspossibleto
maintainaconstantboil.
5. Itisbesttocansmallamountsandlightloads.
Preventdamageto cooktop:
1. Donotusewaterbathorpressurecannersthatextendmorethanone inch
beyond the edge of the surface element.
2. Do not leave water bath or pressure canners on high heat for an extended
amount of time.
3. Alternate surface elements between each batch to allow the units and
surrounding surfaces to cool down. Tryto avoid canning on the same
element all day.
Safe canning requires that harmful micro-organisms are
destroyed and the jars are sealed completely. When canning in a water bath
canner, a gentle but steady boil must be maintained continuously for the
required time.
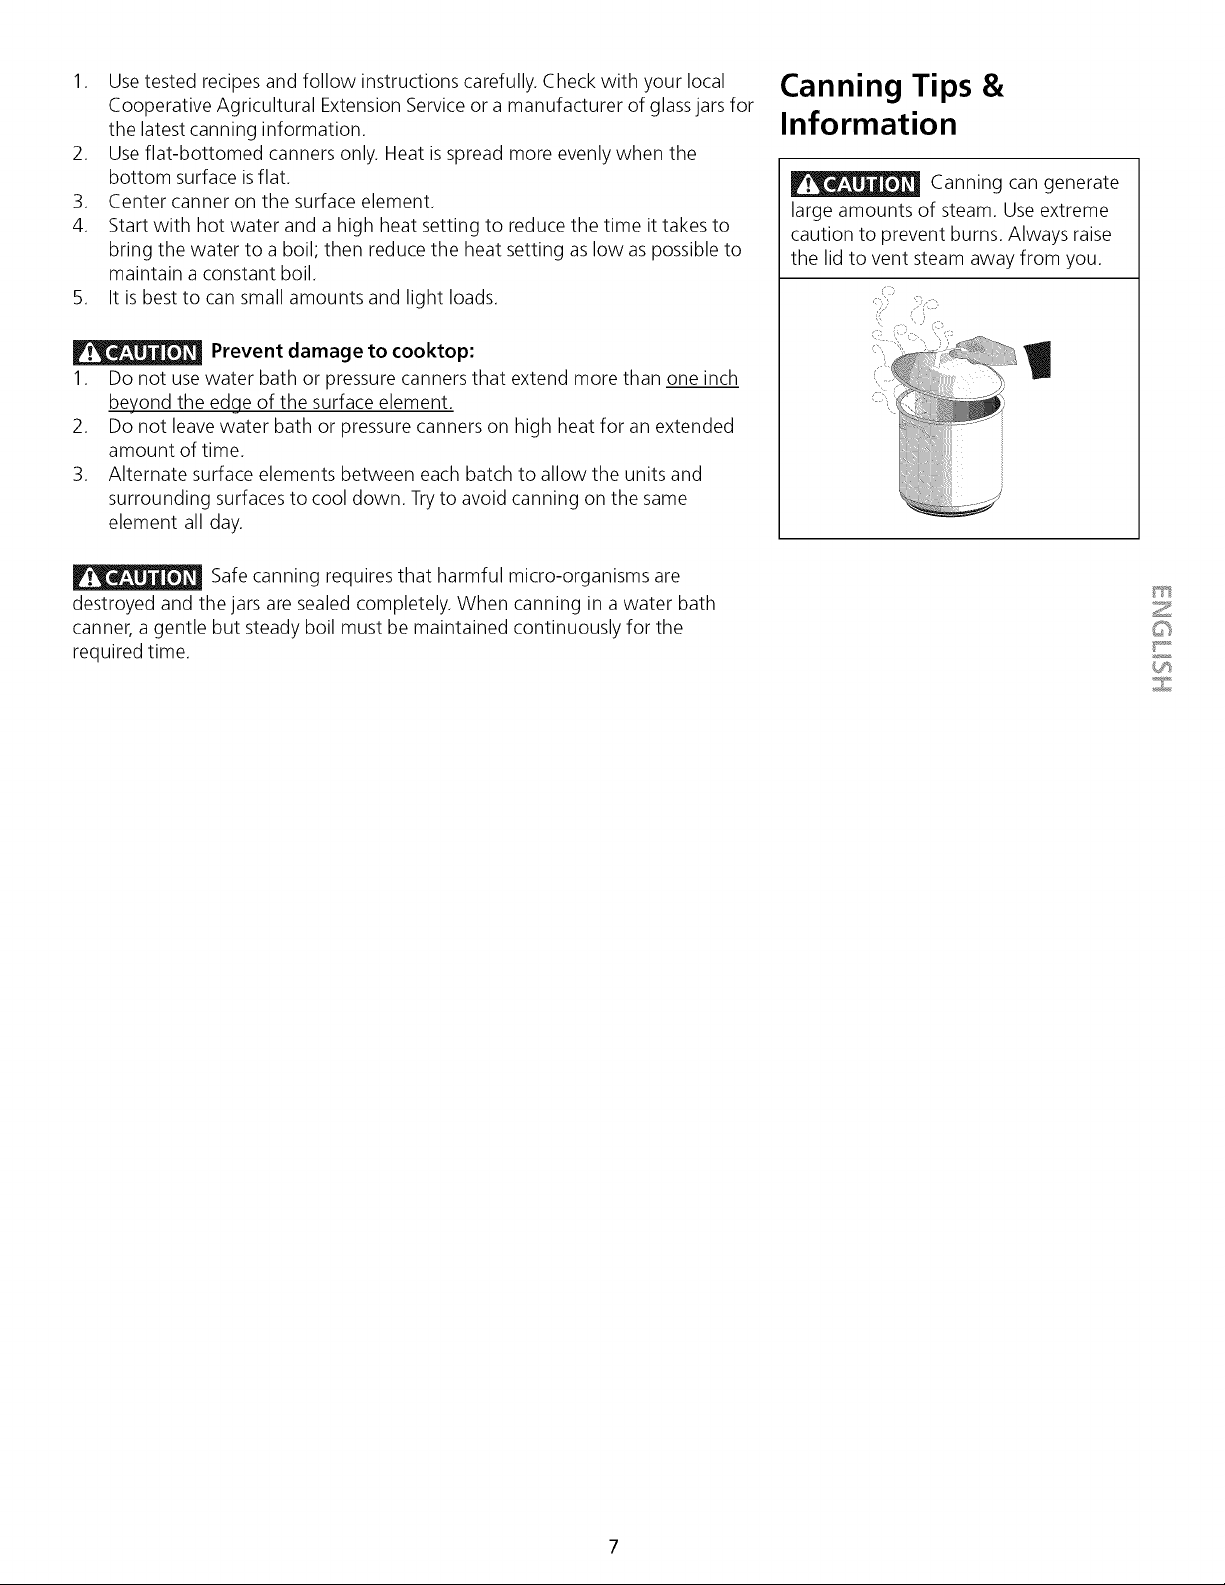
Canning Tips &
Information
Canning can generate
large amounts of steam. Use extreme
caution to prevent burns. Always raise
the lid to vent steam away from you.
Z
©
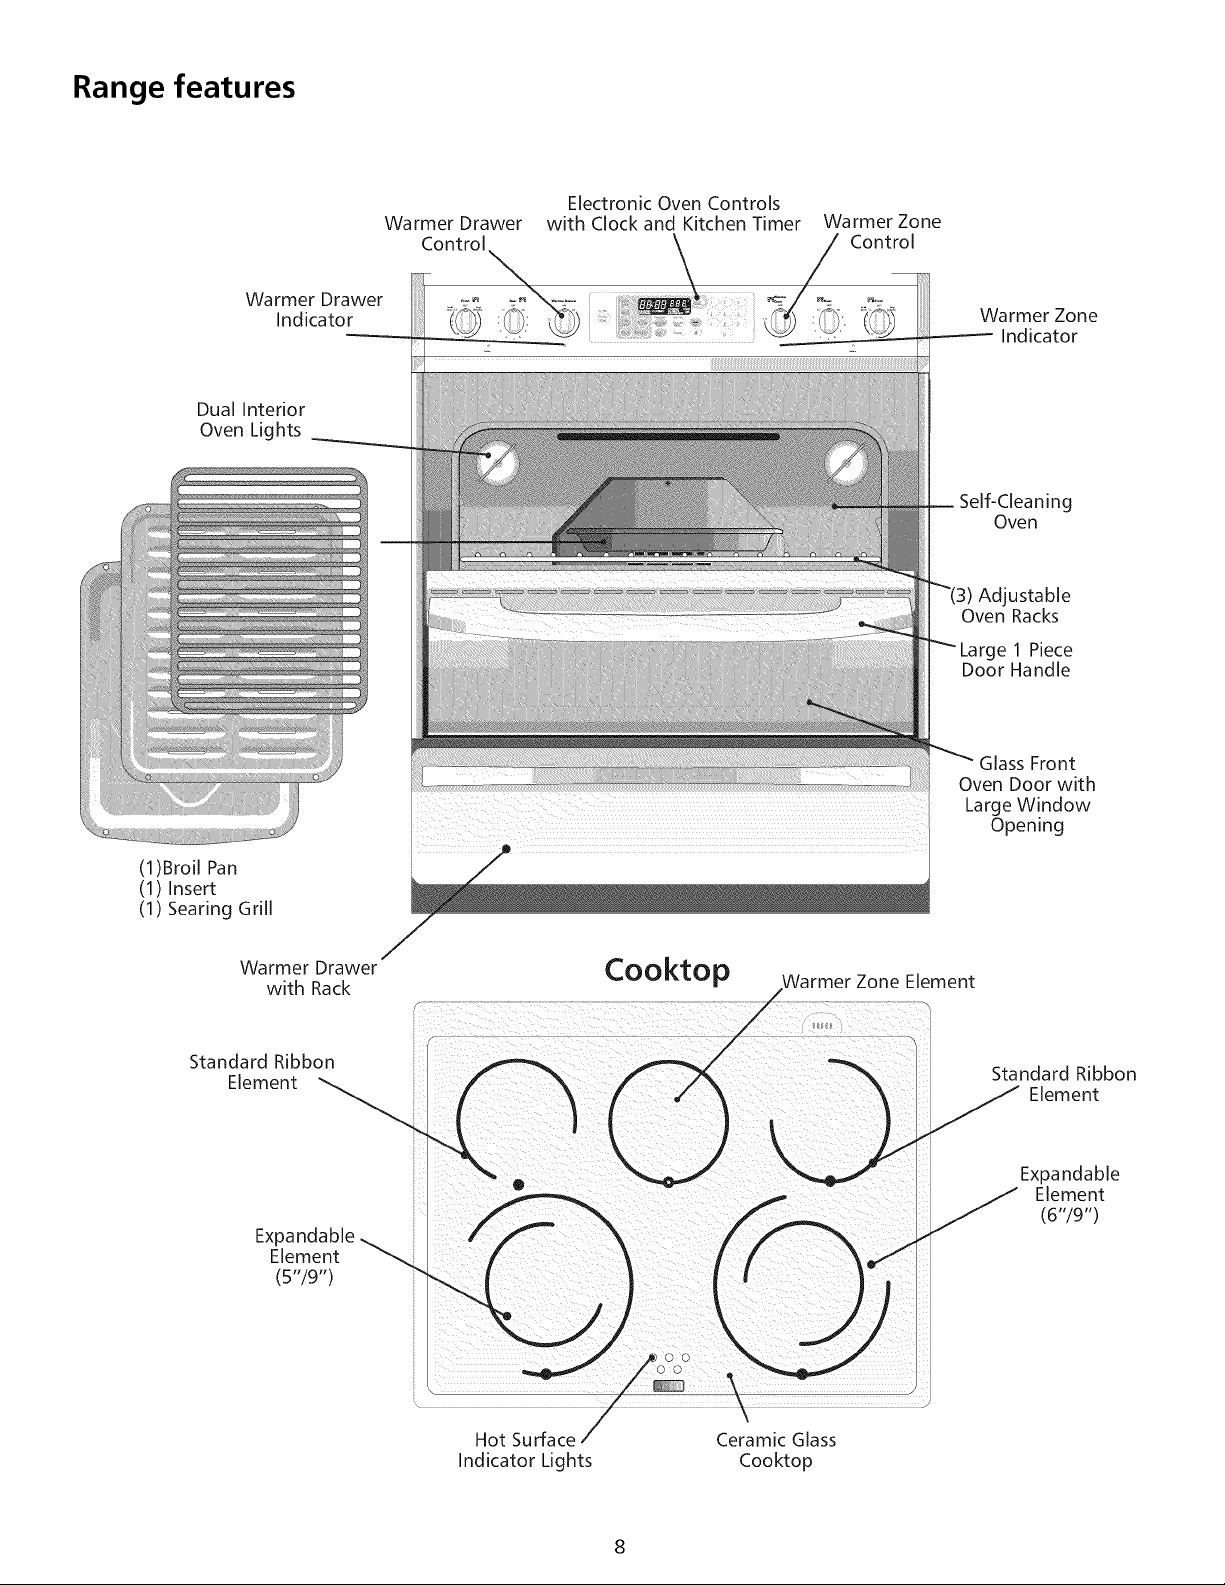
Range features
Electronic Oven Controls
Warmer Drawer with Clock and Kitchen Timer Warmer Zone
Dual Interior
Oven Lights
(1)Broil Pan
(1) Insert
(1) Searing Grill
Warmer Zone
.... Indicator
J
Oven
Adjustable
Oven Racks
Large 1 Piece
Door Handle
Glass Front
Oven Door with
Large Window
Opening
Warmer Drawer
with Rack
Standard Ribbon
Element
Ex
Element
(5"/9")
Standard Ribbon
Element
Expandable
Element
(6"/9")
i
Hot Surface _'
Indicator Lights
Ceramic Glass
Cooktop
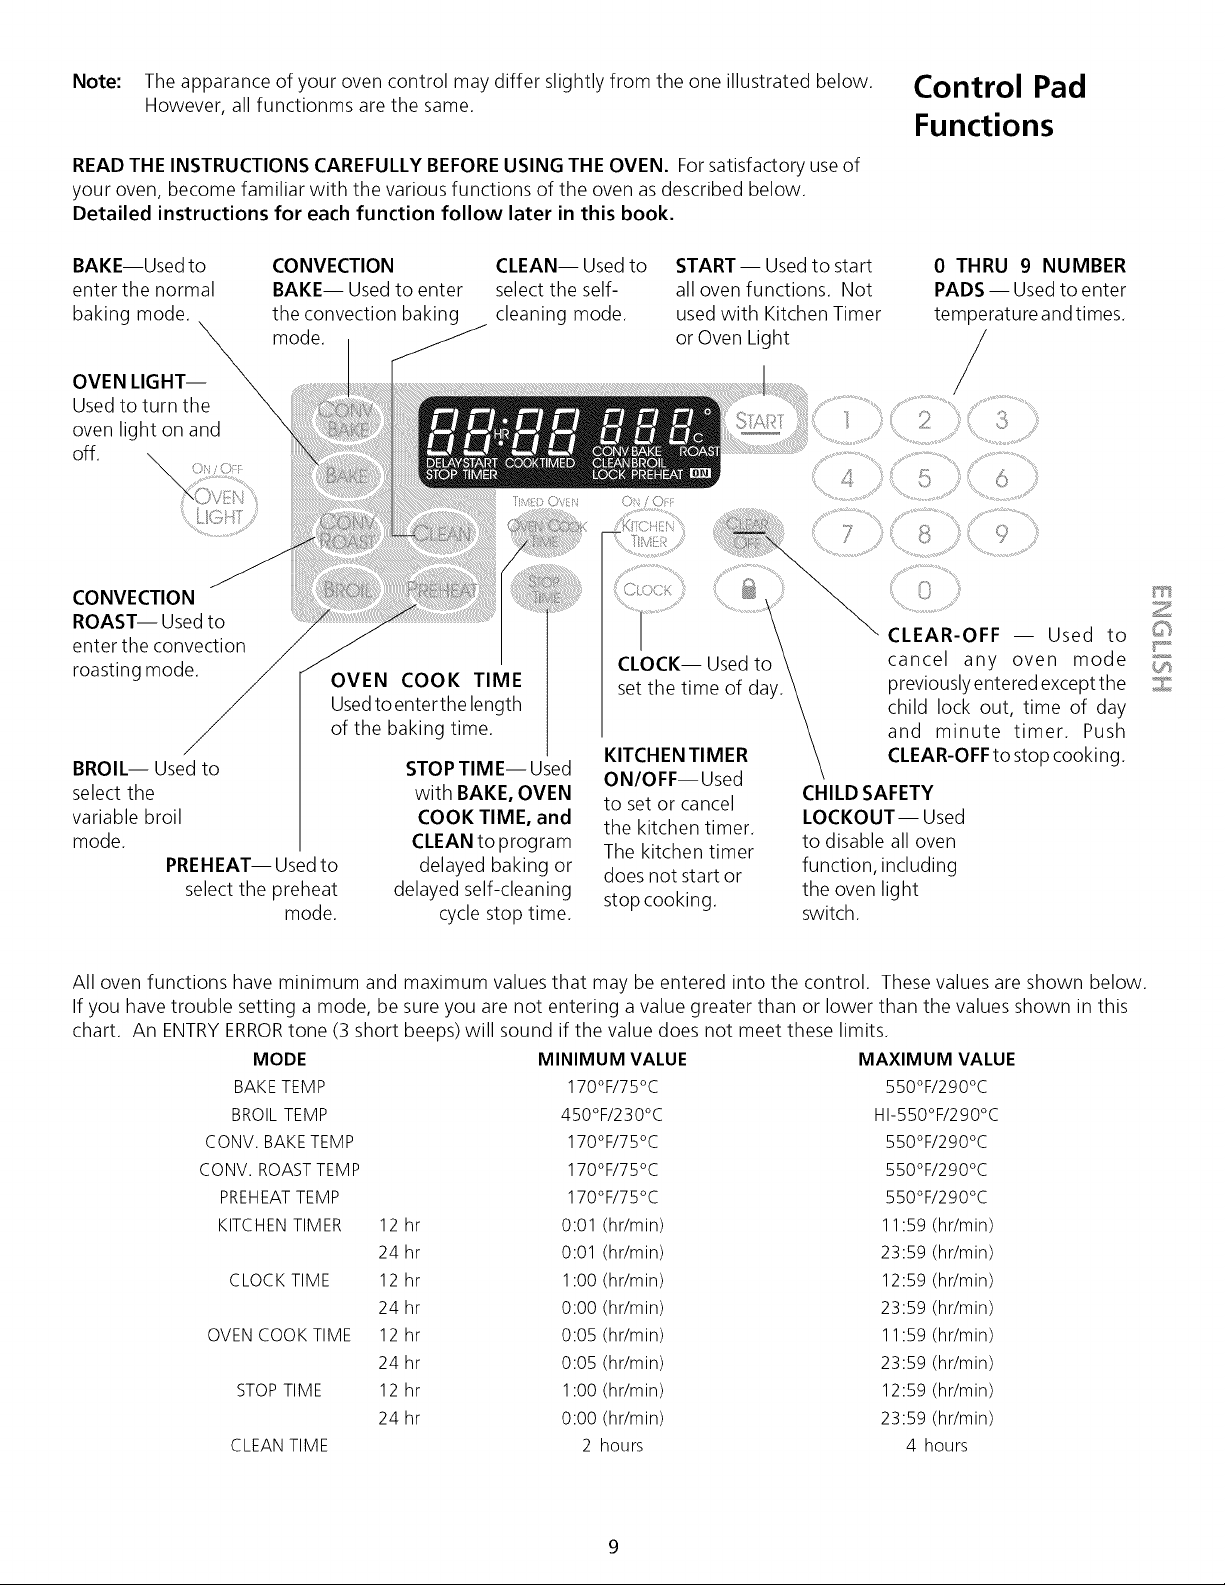
Note: The apparance of your oven control may differ slightly from the one illustrated below.
However, all functionms are the same.
READ THE INSTRUCTIONS CAREFULLY BEFORE USING THE OVEN. For satisfactory use of
your oven, become familiar with the various functions of the oven as described below.
Detailed instructions for each function follow later in this book.
Control Pad
Functions
BAKE--Used to CONVECTION
enter the normal BAKE-- Used to enter
baking mode. the convection baking
_ mode.
OVEN LIGHT--
Used to turn the
oven light on and \
off.
CLEAN-- Used to
select the self-
cleaning mode.
START-- Used to start
all oven functions. Not
used with Kitchen Timer
or Oven Light
0 THRU 9 NUMBER
PADS -- Used to enter
temperature and times.
CONVECTION
ROAST-- Usedto
enter the convection
roasting mode.
BROIL-- Used to
select the
variable broil
mode.
PREHEAT-- Used to
select the preheat
mode.
OVEN COOK TIME
Usedto enter the length
of the baking time.
STOP TIME-- Used
with BAKE, OVEN
COOK TIME, and
CLEAN to program
delayed baking or
delayed self-cleaning
cycle stop time.
CLOCK-- Used to
set the time of day
KITCHEN TIMER
ON/OFF--Used
to set or cancel
the kitchen timer.
The kitchen timer
does not start or
stop cooking.
CLEAR-OFF -- Used to
cancel any oven mode
previously entered except the
child lock out, time of day
and minute timer. Push
CLEAR-OFF to stop cooking.
CHILD SAFETY
LOCKOUT-- Used
to disable all oven
function, including
the oven light
switch.
F_
Z
C_
All oven functions have minimum and maximum values that may be entered into the control. These values are shown below.
If you have trouble setting a mode, be sure you are not entering a value greater than or lower than the values shown in this
chart. An ENTRY ERRORtone (3 short beeps) will sound if the value does not meet these limits.
MODE
BAKE TEMP
BROIL TEMP
CONV. BAKE TEMP
CONV. ROASTTEMP
PREHEATTEMP
KITCHEN TIMER
CLOCK TIME
OVEN COOK TIME
STOP TIME
CLEAN TIME
12 hr
24 hr
12 hr
24 hr
12 hr
24 hr
12 hr
24 hr
MINIMUM VALUE MAXIMUM VALUE
170°F/75°C 550°F/290°C
450°F/230°C HI-550°F/290°C
170°F/75°C 550°F/290°C
170°F/75°C 550°F/290°C
170°F/75°C 550°F/290°C
0:01 (hr/min) 11:59 (hr/min)
0:01 (hr/min) 23:59 (hr/min)
1:00 (hr/min) 12:59 (hr/min)
0:00 (hr/min) 23:59 (hr/min)
0:05 (hr/min) 11:59 (hr/min)
0:05 (hr/min) 23:59 (hr/min)
1:00 (hr/min) 12:59 (hr/min)
0:00 (hr/min) 23:59 (hr/min)
2 hours 4 hours
Setting the
Clock
FEATURE OVERVIEW
• Clock
• Energy Saving Mode
NOTE: The oven will not
work until the clock has
been set.
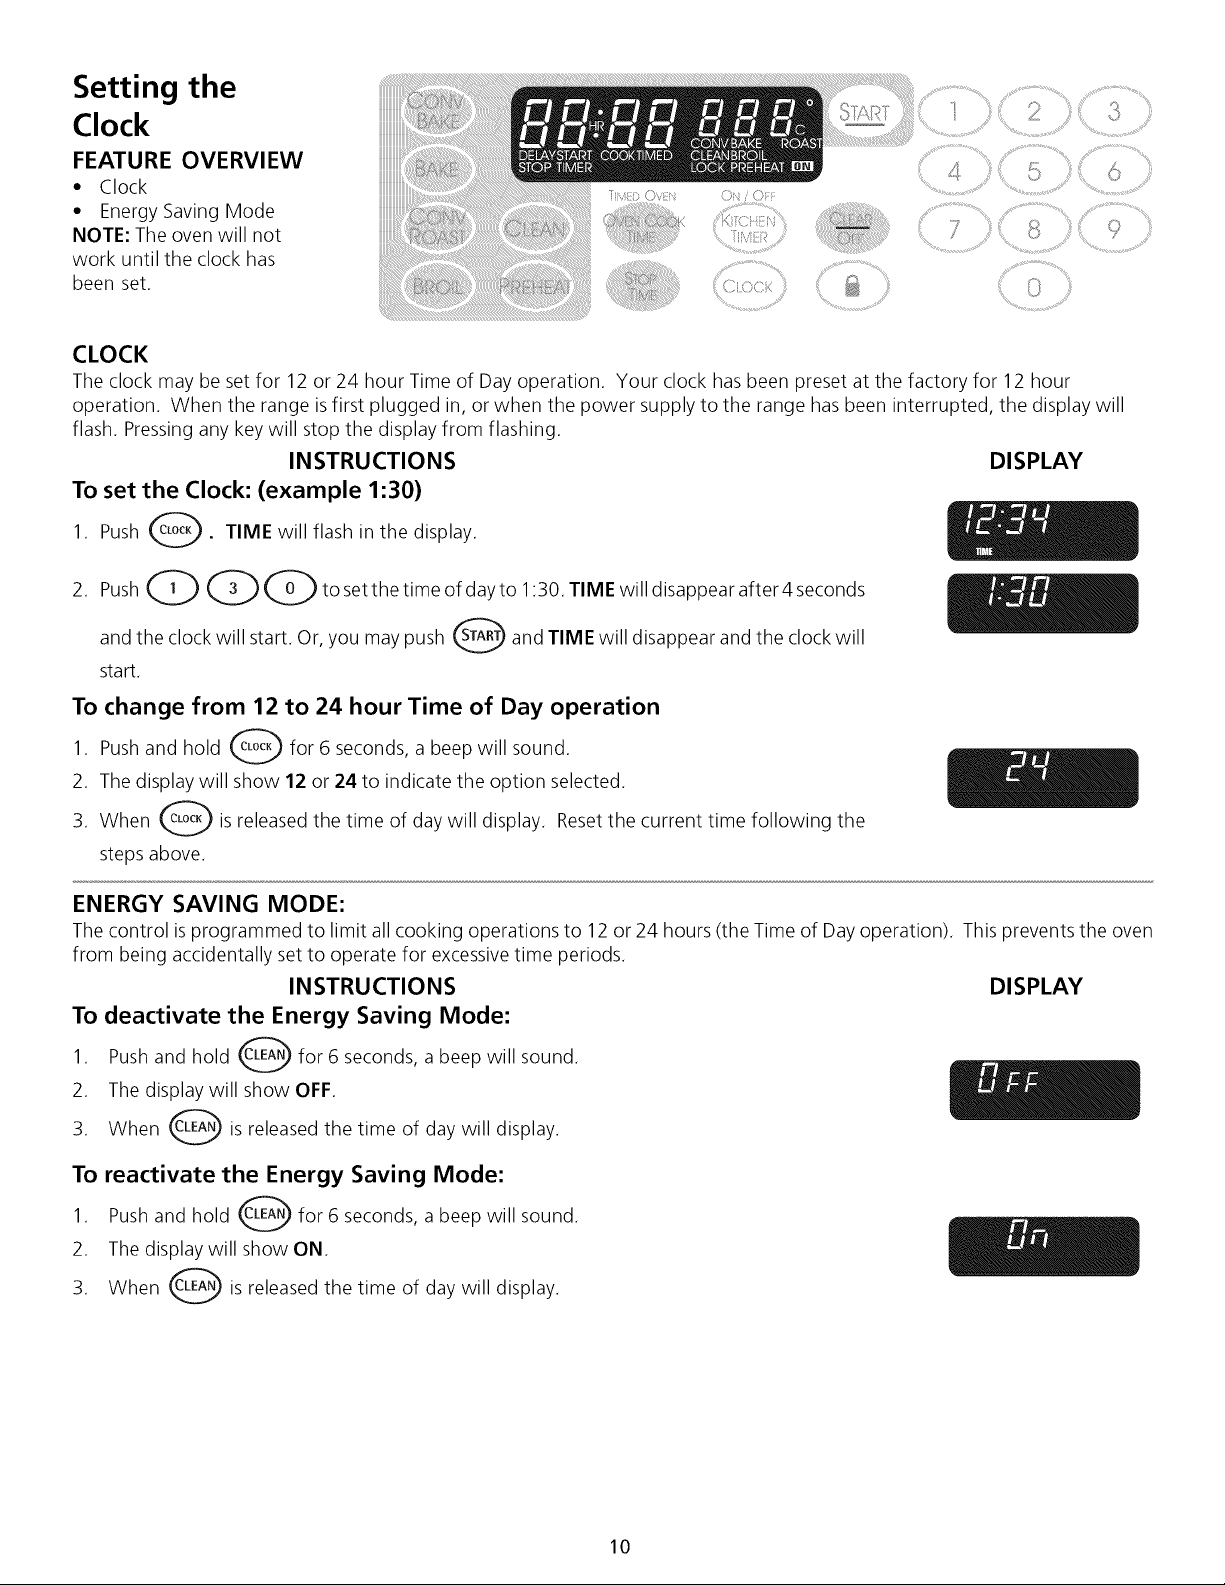
CLOCK
The clock may be set for 12 or 24 hour Time of Day operation. Your clock has been preset at the factory for 12 hour
operation. When the range is first plugged in, or when the power supply to the range has been interrupted, the display will
flash. Pressing any key will stop the display from flashing.
INSTRUCTIONS
To set the Clock: {example 1"30)
1. Push G • TIME will flash in the display.
.
Push Q Q Q to set the time of day to 1 _30. TIME will disappear after 4 seconds
and the clock will start. Or, you may push 0 and TIME will disappear and the clock will
start.
DISPLAY
To change from 12 to 24 hour Time of Day operation
1. Push and hold G for 6 seconds, a beep will sound.
2. The display will show 12 or 24 to indicate the option selected.
3. When _ is released the time of day will display. Reset the current time following the
steps above.
ENERGY SAVING MODE:
The control is programmed to limit all cooking operations to 12 or 24 hours (the Time of Day operation). This prevents the oven
from being accidentally set to operate for excessive time periods.
INSTRUCTIONS DISPLAY
To deactivate the Energy Saving Mode:
1. Push and hold O for 6 seconds, a beep will sound.
2. The display_will show OFF.
3. When _ is released the time of day will display.
To reactivate the Energy Saving Mode:
1. Push and hold O for 6 seconds, a beep will sound.
2. The display will show ON.
3. When _ is released the time of day will display.
10
Setting the
/
Clock
FEATURE OVERVIEW
...................................................... • Timer Reminder
• Kitchen Timer
....................................>,.,, % ........... .,,,¸¸¸¸9
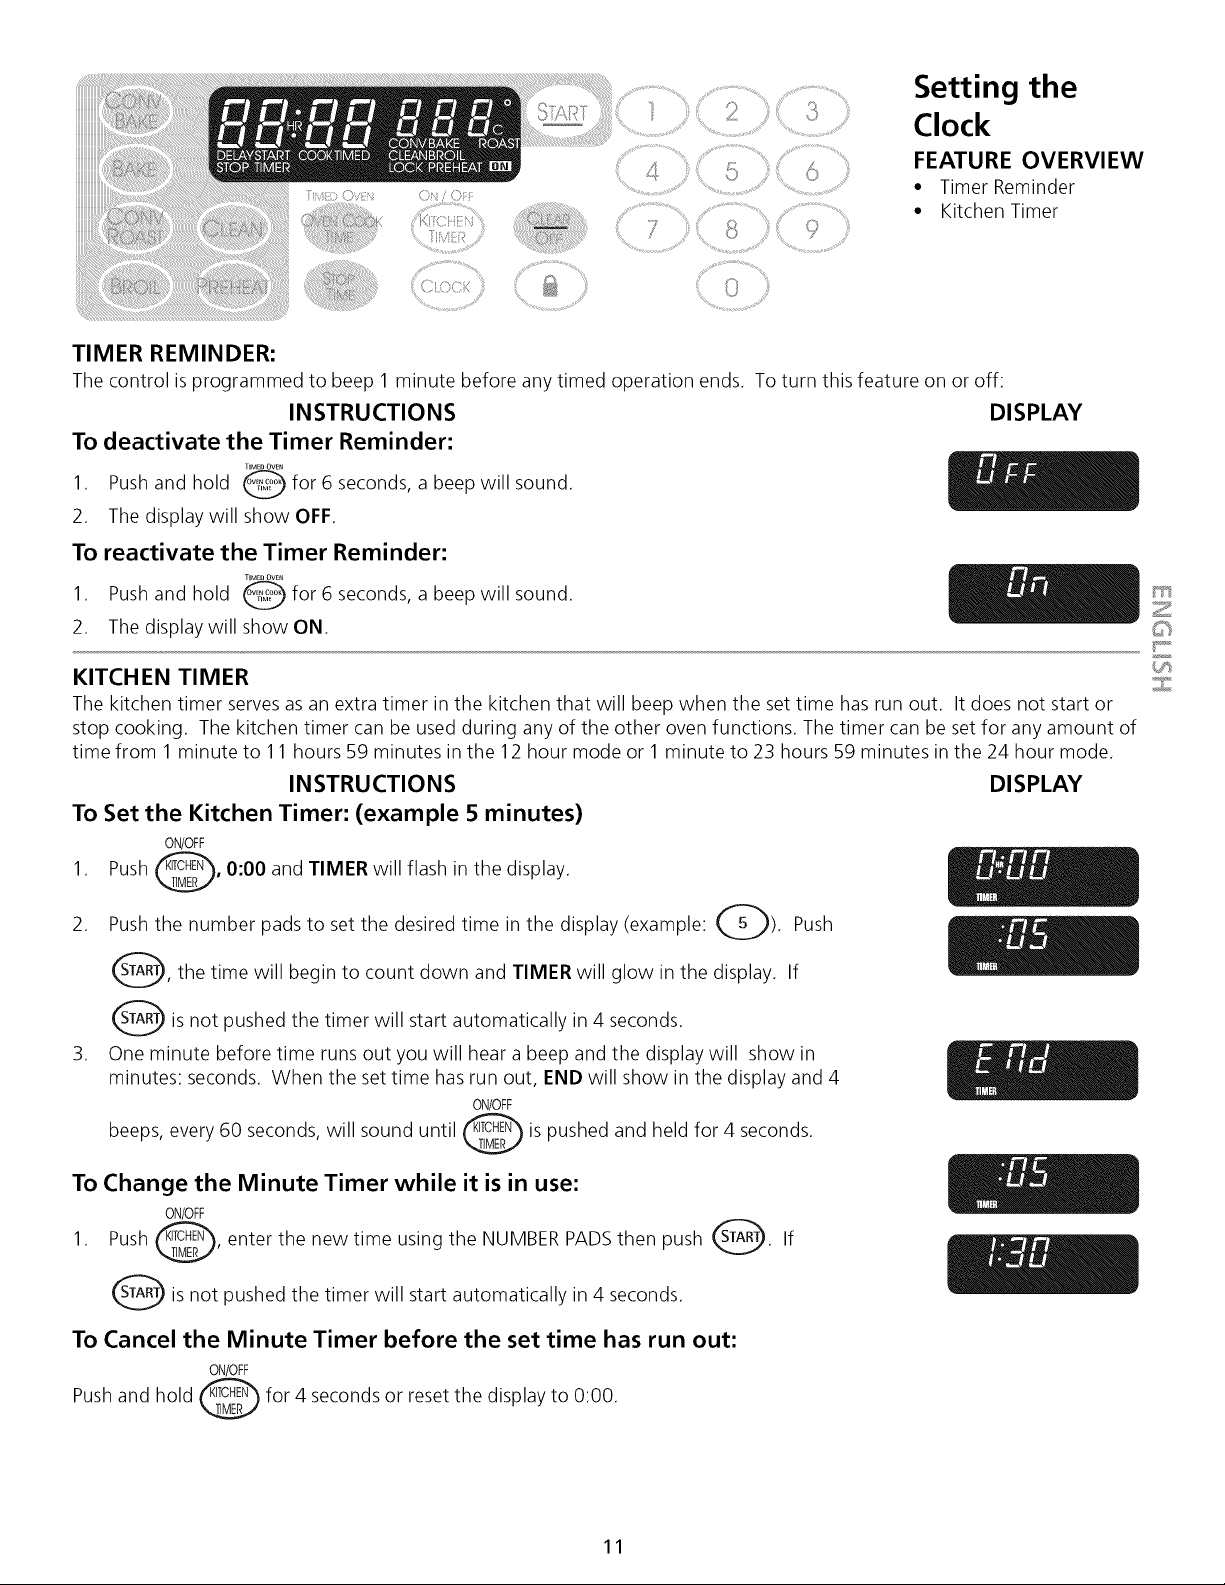
TIMER REMINDER:
The control is programmed to beep 1 minute before any timed operation ends. To turn this feature on or off:
INSTRUCTIONS DISPLAY
To deactivate the Timer Reminder:
TIMEDOVEN
1. Push and hold _ for 6 seconds, a beep will sound.
2. The display will show OFF.
To reactivate the Timer Reminder:
1. Push and hold _ for 6 seconds, a beep will sound.
2. The display will show ON.
KITCHEN TIMER
The kitchen timer serves as an extra timer in the kitchen that will beep when the set time has run out. It does not start or
stop cooking. The kitchen timer can be used during any of the other oven functions. The timer can be set for any amount of
time from 1 minute to 11 hours 59 minutes in the 12 hour mode or 1 minute to 23 hours 59 minutes in the 24 hour mode.
C_
DISPLAYINSTRUCTIONS
To Set the Kitchen Timer: (example 5 minutes)
ON!OFF
1. Push _,O:OO and TIMER will flash in the display.
2. Push the number pads to set the desired time in the display (example: Q). Push
, the time will begin to count down and TIMER will glow in the display. If
is not pushed the timer will start automatically in 4 seconds.
3. One minute before time runs out you will hear a beep and the display will showin
minutes: seconds. When the set time has run out, END will show in the display and 4
ON/OFF
beeps, every 60 seconds, will sound until _ is pushed and held for 4 seconds.
To Change the Minute Timer while it is in use:
ON/OFF
1. Push d_' enter the new time using the NUMBER PADS then push ST(S_. If
_is not pushed the timer will start automatically in 4 seconds.
To Cancel the Minute Timer before the set time has run out:
ON/OFF
Push and hold I@CHEN_for 4 seconds or reset the display to 0:00.
TIMX4£_/
11
Consumer
Defined Control
Feature
FEATURE OVERVIEW
• Child Safety Lockout
Feature
• Temperature Display-
Farenheit or Celsius
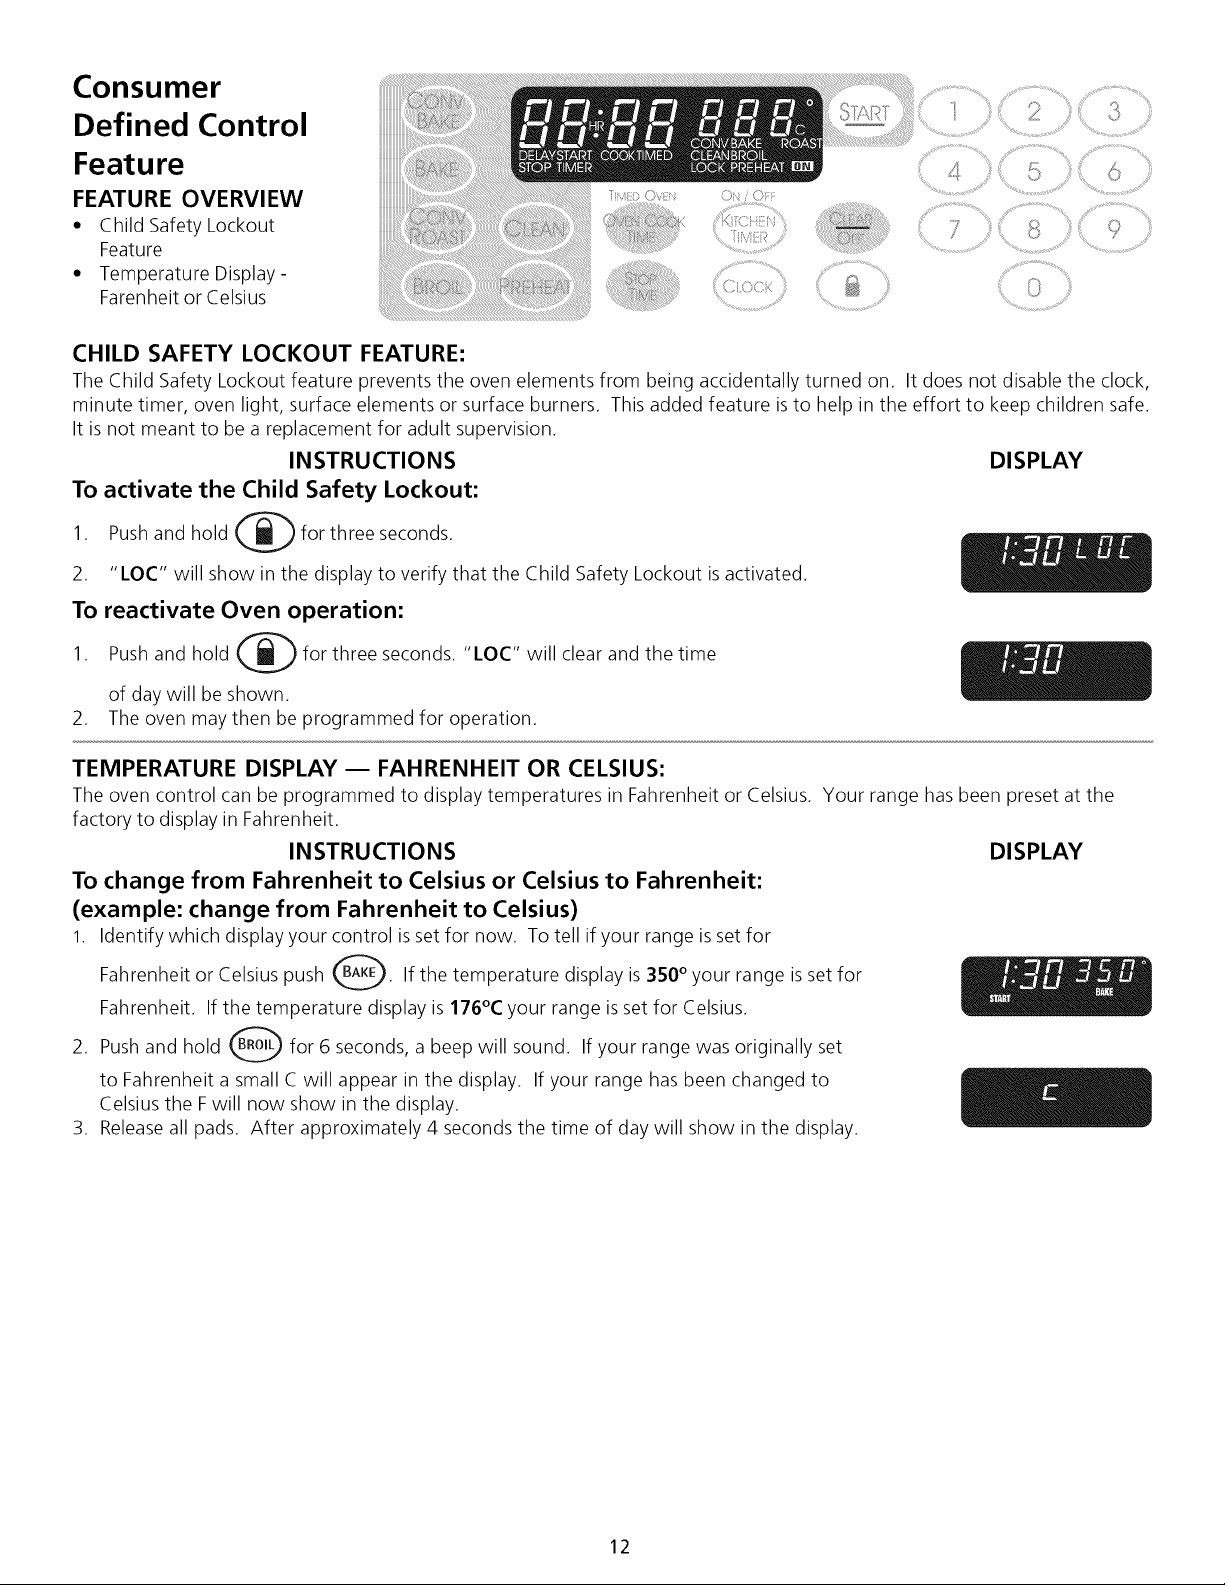
CHILD SAFETY LOCKOUT FEATURE:
The Child Safety Lockout feature prevents the oven elements from being accidentally turned on.
minute timer, oven light, surface elements or surface burners.
It is not meant to be a replacement for adult supervision.
INSTRUCTIONS
To activate the Child Safety Lockout:
1. Push and hold i_ for three seconds.
2. "l_OC" will show in the display to verify that the Child Safety Lockout is activated.
To reactivate Oven operation:
1. Push and hold (_ for three seconds. "l_OC" will clear and the time
of day will be shown.
2. The oven may then be programmed for operation.
It does not disable the clock,
This added feature is to help in the effort to keep children safe.
DISPLAY
TEMPERATURE DISPLAY -- FAHRENHEIT OR CELSIUS:
The oven control can be programmed to display temperatures in Fahrenheit or Celsius. Your range has been preset at the
factory to display in Fahrenheit.
INSTRUCTIONS DISPLAY
To change from Fahrenheit to Celsius or Celsius to Fahrenheit:
(example: change from Fahrenheit to Celsius)
1. Identify which display your control is set for now. To tell if your range is set for
Fahrenheit or Celsius push _. If the temperature display is 350 ° your range is set for
Fahrenheit. If the temperature display is 176°C your range is set for Celsius.
2. Push and hold _ for 6 seconds, a beep will sound. If your range was originally set
to Fahrenheit a small C will appear in the display. If your range has been changed to
Celsius the F will now show in the display.
3. Releaseall pads. After approximately 4 seconds the time of day will show in the display.
12
Setting Surface Controls
1. Place the pan on the surface element.
2. Push in and turn the surface element control knob to desired setting.
3. The surface signal light will glow when one or more elements are turned on. Always turn the
element off before removing the pan.
Note: The size and type of utensil used, and the amount and type of food being
cooked will influence the setting needed for best cooking results.
Setting Type of Cooking
MAX (HI) Start most foods, bring water to a boil, pan broiling.
MED (5) Maintain a slow boil, thicken sauces and gravies, steam vegetables.
MED-LOW (2-4) Keep food cooking, poach, stew.
MIN (1-SIM) Keep warm, melt, simmer.
*The suggested settings found in the chart above are based on cooking in medium thickness
aluminum pans with lids. Settings may vary when using other types of pans.
Do not place items such as salt and pepper shakers, spoon holders or
plastic wrappings on top of the cooktop when it is in use. These items could melt or
ignite. Potholders, towels or wood could catch fire if placed too close to the element.
Ceramic Glass Cooktop
The ceramic-glass cooktop has electric heating coils located below the ceramic glass surface.
The design of the glass cooktop outlines the area of the surface heating unit below. Most
importantly, make sure the diameter of the pan matches the diameter of the surface unit. Heat
is transferred up through the surface of the cooktop. Only flat-bottomed pans should be used.
The type and size of cookware, number of surface units in use and the settings of the surface
units are factors that will affect the amount of the heat that will spread to areas surrounding
the units. The areas surrounding the units may become hot enough to cause burns.
The cooktop should not be used as a cutting board or work surface. Dropping heavy or hard
objects on the cooktop may crack it. Pans with rough bottoms may scratch the cooktop surface.
Placing foods directly on the smoothtop surface (without utensils) is not recommended as
difficult cleaning will result and foods may smoke and cause a potential fire hazard. Never use
the griddle or similar cooking sheet on the ceramic glass cooktop.
Surface
Cooking
FEATURE OVERVIEW
• Setting Surface Controls
• Ceramic GlassCooktop
F_
NOTE: Due to the high _2:_,..
intensity of heat generated _......
by the surface elements, _j:_
the glass surface willturn _:
green when the element
will be turned off. This
phenomenon is normal
and the glass will come
back to its original white
color after it has com-
pletely cooled down.
(White glass cooktops
only).
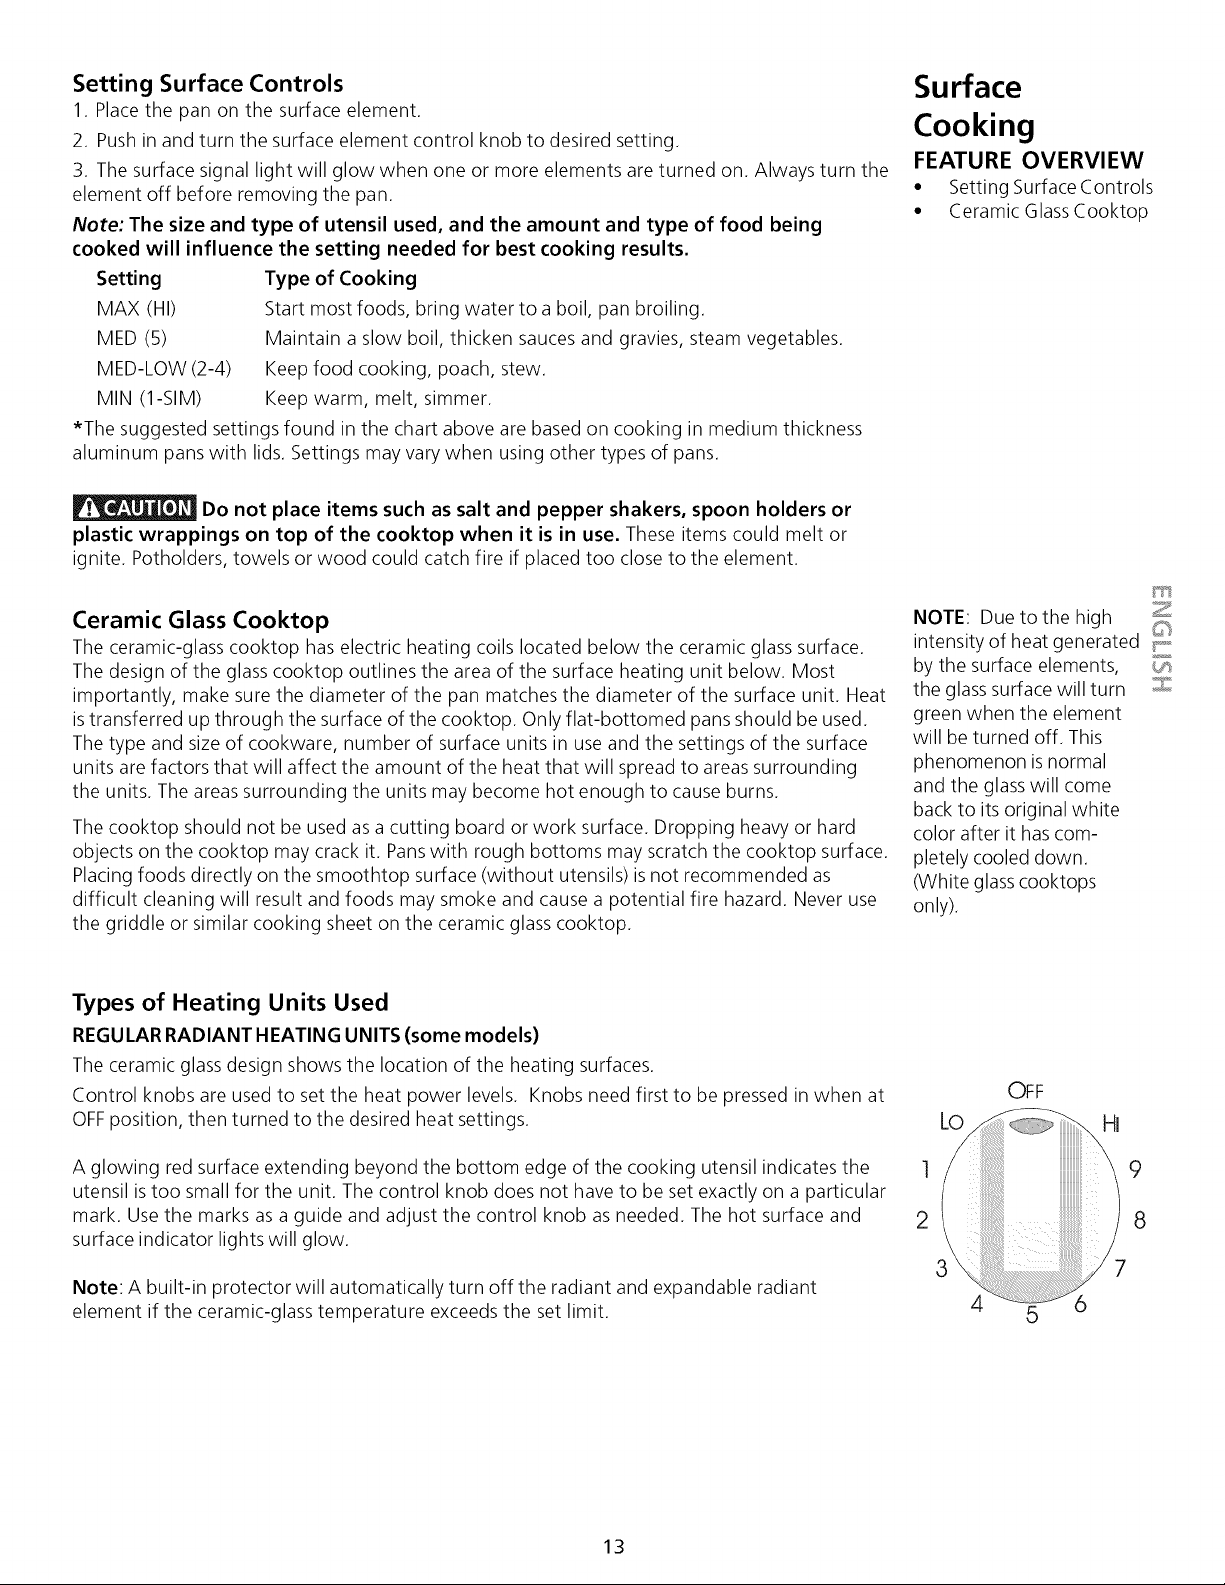
Types of Heating Units Used
REGULAR RADIANT HEATING UNITS (some models)
The ceramic glass design shows the location of the heating surfaces.
Control knobs are used to set the heat power levels. Knobs need first to be pressed in when at
OFFposition, then turned to the desired heat settings.
A glowing red surface extending beyond the bottom edge of the cooking utensil indicates the ]
utensil is too small for the unit. The control knob does not have to be set exactly on a particular
mark. Use the marks as a guide and adjust the control knob as needed. The hot surface and 2
surface indicator lights will glow.
Note: A built-in protector will automatically turn off the radiant and expandable radiant
element if the ceramic-glass temperature exceeds the set limit.
LO
3
OFF
4 5
HI
9
8
7
6
13
Surface
Cooking
FEATURE OVERVIEW
• Ceramic-Glass Cooktop
Lo
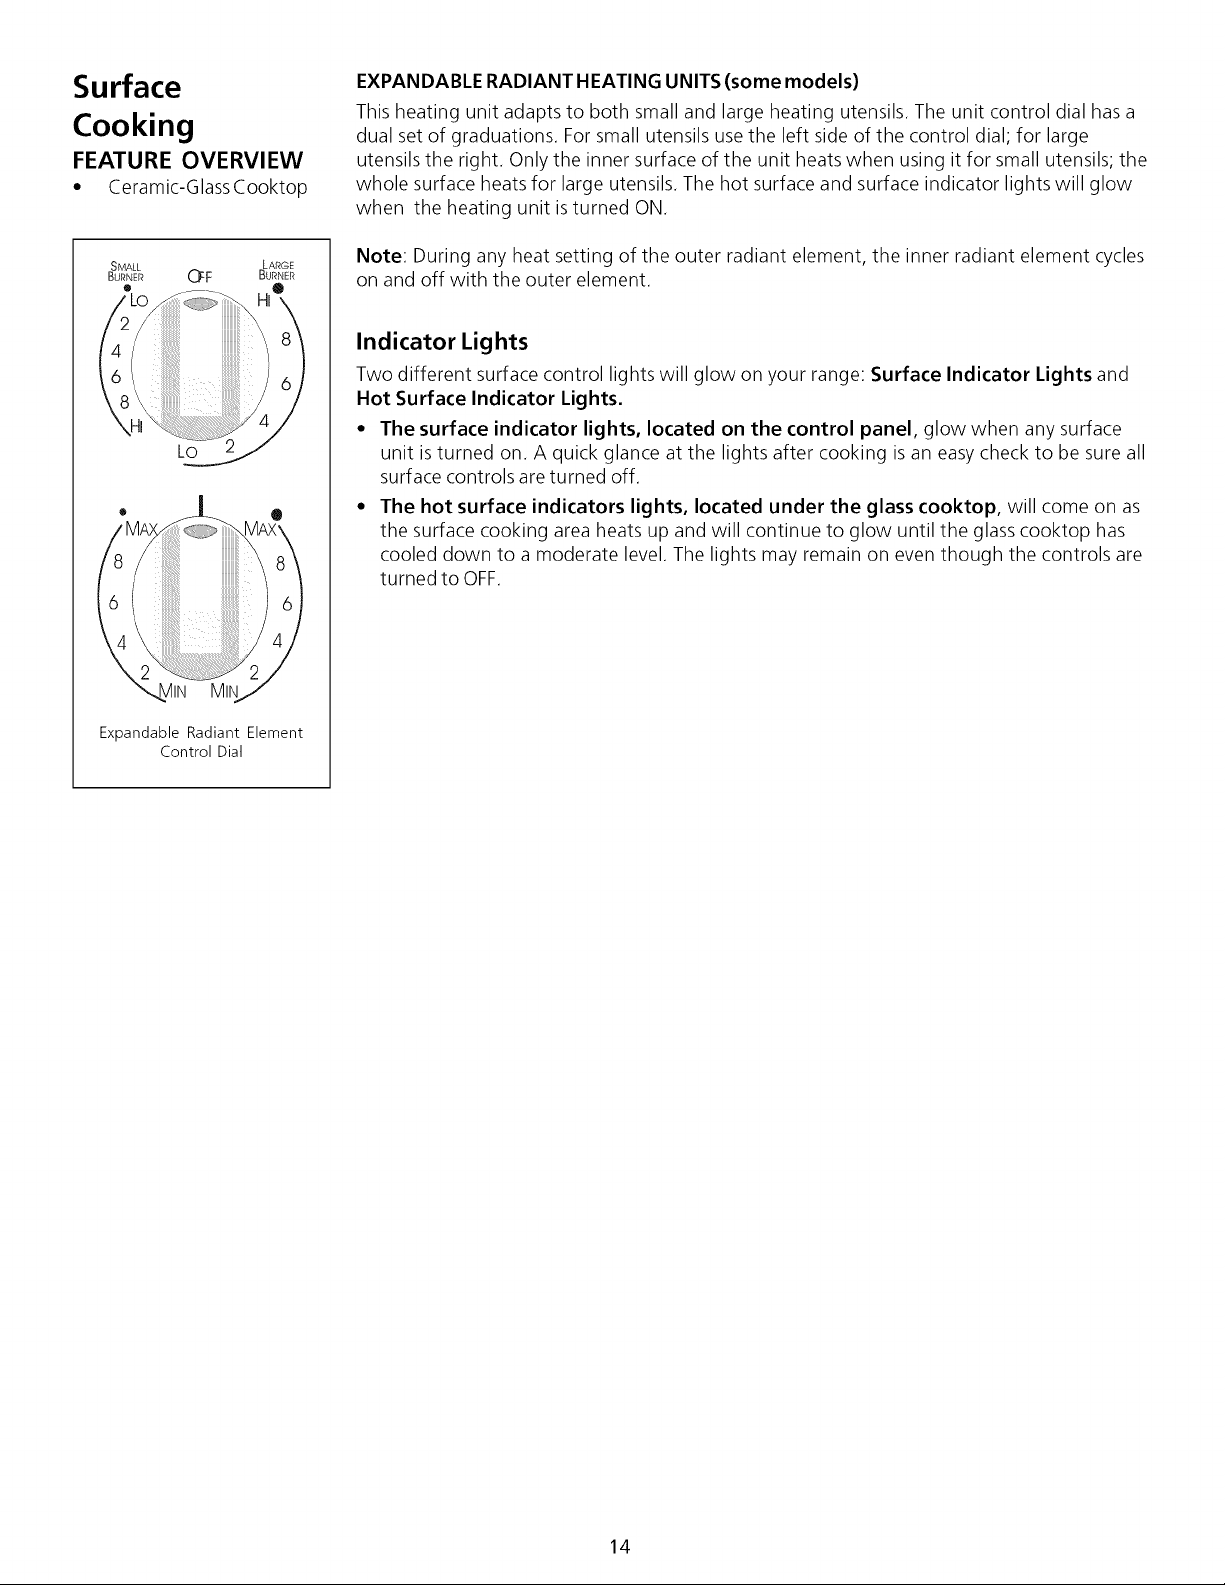
Expandable Radiant Element
Control Dial
EXPANDABLE RADIANT HEATING UNITS (some models)
This heating unit adapts to both small and large heating utensils. The unit control dial has a
dual set of graduations. For small utensils use the left side of the control dial; for large
utensils the right. Only the inner surface of the unit heats when using it for small utensils; the
whole surface heats for large utensils. The hot surface and surface indicator lights will glow
when the heating unit is turned ON.
Note: During any heat setting of the outer radiant element, the inner radiant element cycles
on and off with the outer element.
Indicator Lights
Two different surface control lights will glow on your range: Surface Indicator Lights and
Hot Surface Indicator Lights.
• The surface indicator lights, located on the control panel, glow when any surface
unit is turned on. A quick glance at the lights after cooking is an easy check to be sure all
surface controls are turned off.
• The hot surface indicators lights, located under the glass cooktop, will come on as
the surface cooking area heats up and will continue to glow until the glass cooktop has
cooled down to a moderate level. The lights may remain on even though the controls are
turned to OFF.
14
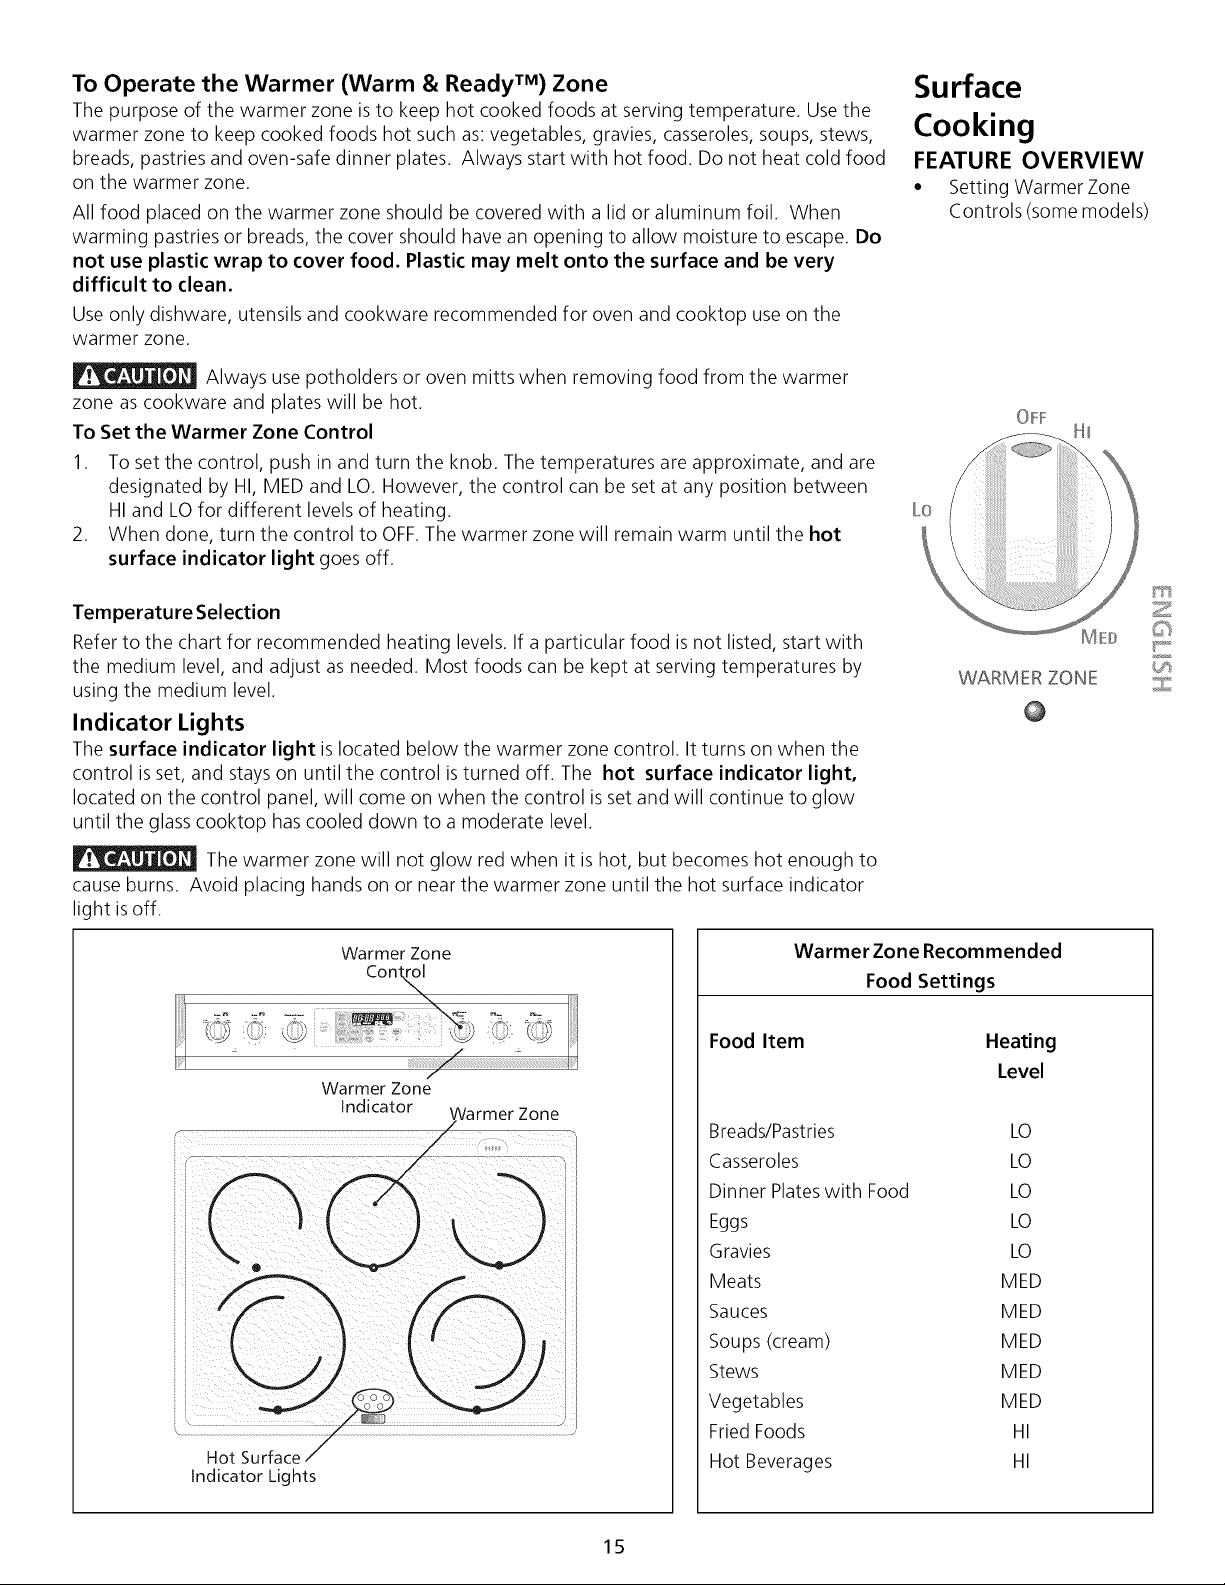
To Operate the Warmer (Warm & Ready TM) Zone
The purpose of the warmer zone is to keep hot cooked foods at serving temperature. Use the
warmer zone to keep cooked foods hot such as: vegetables, gravies, casseroles, soups, stews,
breads, pastries and oven-safe dinner plates. Always start with hot food. Do not heat cold food
on the warmer zone.
All food placed on the warmer zone should be covered with a lid or aluminum foil. When
warming pastries or breads, the cover should have an opening to allow moisture to escape. Do
not use plastic wrap to cover food. Plastic may melt onto the surface and be very
difficult to clean.
Use only dishware, utensils and cookware recommended for oven and cooktop use on the
warmer zone.
Always use potholders or oven mitts when removing food from the warmer
zone as cookware and plates will be hot.
To Set the Warmer Zone Control
1. To set the control, push in and turn the knob. The temperatures are approximate, and are
designated by HI, MED and LO. However, the control can be set at any position between
HI and LO for different levels of heating.
2. When done, turn the control to OFF.The warmer zone will remain warm until the hot
surface indicator light goes off.
Temperature Selection
Refer to the chart for recommended heating levels. If a particular food is not listed, start with
the medium level, and adjust as needed. Most foods can be kept at serving temperatures by
using the medium level.
Indicator Lights
The surface indicator light is located below the warmer zone control. It turns on when the
control is set, and stays on until the control is turned off. The hot surface indicator light,
located on the control panel, will come on when the control is set and will continue to glow
until the glass cooktop has cooled down to a moderate level.
The warmer zone will not glow red when it is hot, but becomes hot enough to
cause burns. Avoid placing hands on or near the warmer zone until the hot surface indicator
light is off.
Surface
Cooking
FEATURE OVERVIEW
• Setting Warmer Zone
Controls (some models)
OFF
H_
Mf_J
WARMER ZONE
Y'_'t
Z
©
'_:WJ ;tD_
Warmer Zone
Cont_l
Warmer Zone
Indicator _/armer Zone
Hot Surface
Indicator Lights
Warmer Zone Recommended
Food Settings
Food Item
Heating
Level
Breads/Pastries
Casseroles
Dinner Plates with Food
Eggs
Gravies
Meats
Sauces
Soups (cream)
Stews
Vegetables
Fried Foods
Hot Beverages
LO
LO
LO
LO
LO
MED
MED
MED
MED
MED
HI
HI
15
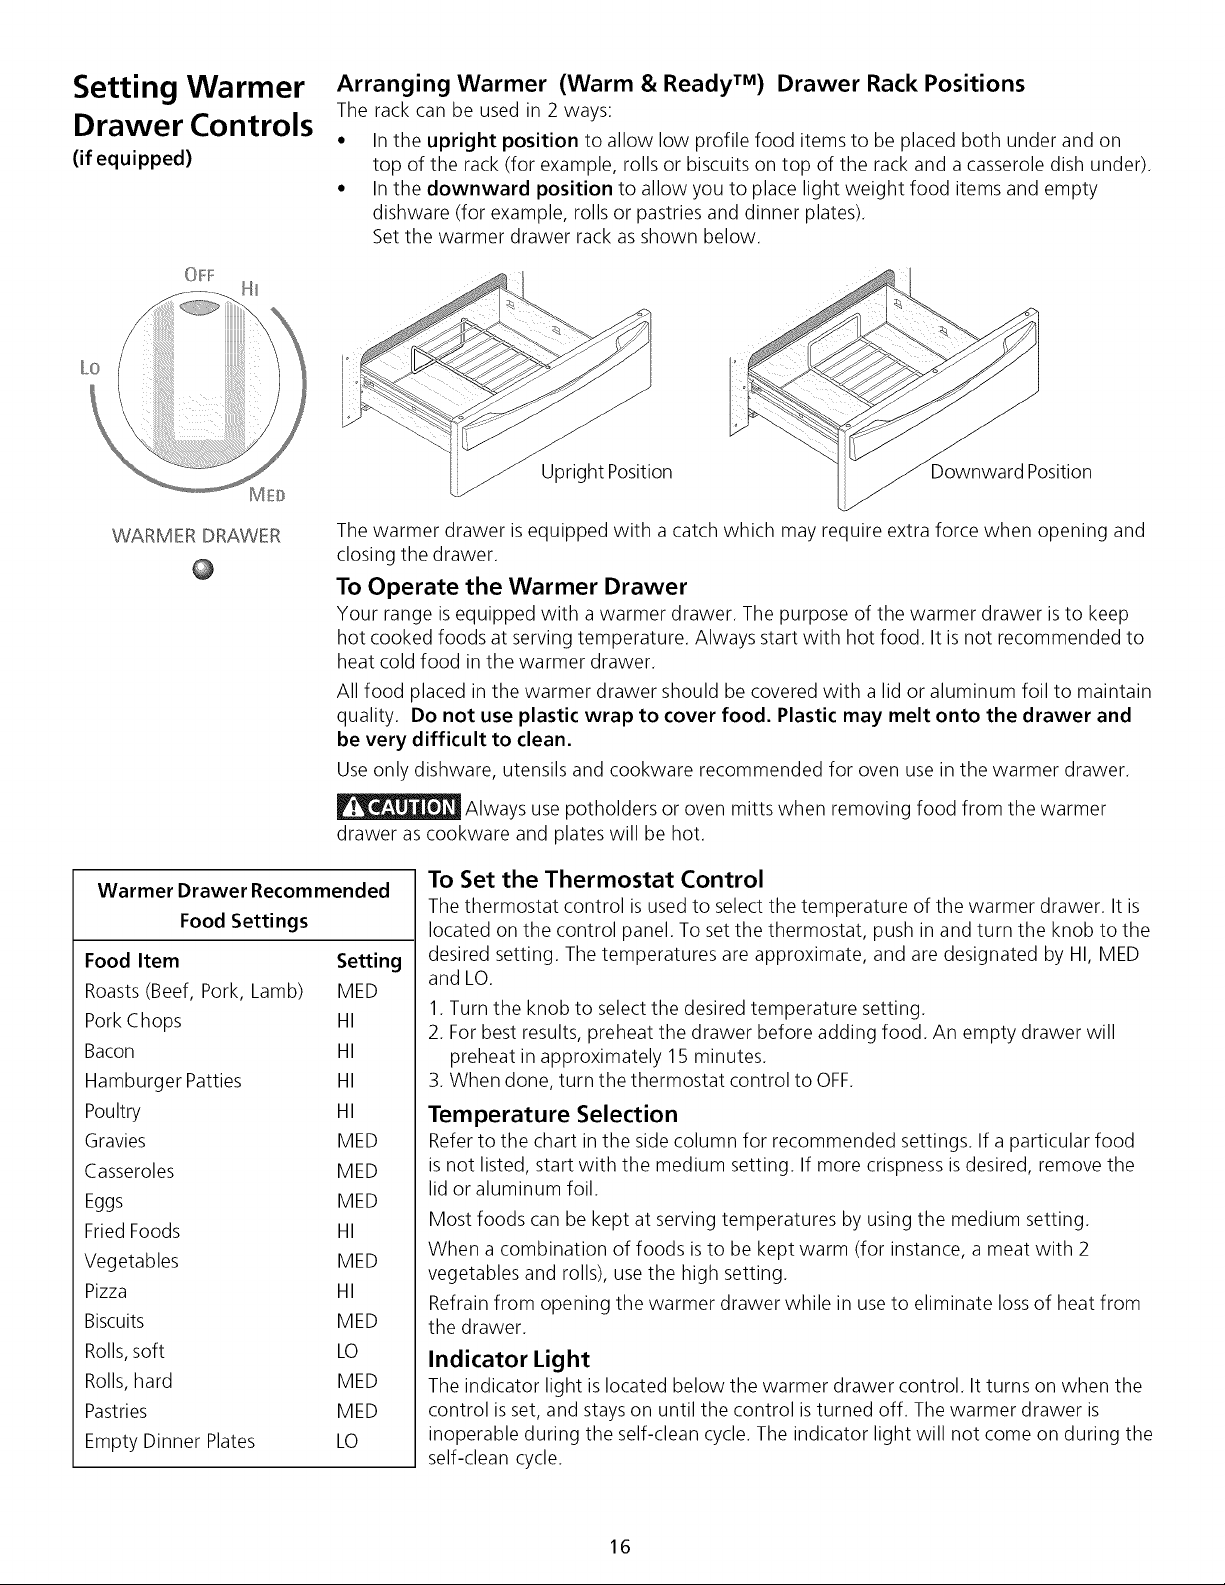
Setting Warmer
Drawer Controls
(if equipped)
Arranging Warmer (Warm & Ready TM) Drawer Rack Positions
The rack can be used in 2 ways:
• In the upright position to allow low profile food items to be placed both under and on
top of the rack (for example, rolls or biscuits on top of the rack and a casserole dish under).
• In the downward position to allow you to place light weight food items and empty
dishware (for example, rolls or pastries and dinner alates).
Set the warmer drawer rack as shown below.
Lo
Upright Position
Downward Position
WARMER DRAWER
The warmer drawer is equipped with a catch which may require extra force when opening and
closing the drawer.
To Operate the Warmer Drawer
Your range is equipped with a warmer drawer. The purpose of the warmer drawer is to keep
hot cooked foods at serving temperature. Always start with hot food. It is not recommended to
heat cold food in the warmer drawer.
All food placed in the warmer drawer should be covered with a lid or aluminum foil to maintain
quality. Do not use plastic wrap to cover food. Plastic may melt onto the drawer and
be very difficult to clean.
Use only dishware, utensils and cookware recommended for oven use in the warmer drawer.
_ Always use potholders or oven mitts when removing food from the warmer
drawer as cookware and plates will be hot.
Warmer Drawer Recommended
Food Settings
Food Item Setting
Roasts (Beef, Pork, Lamb) MED
Pork Chops HI
Bacon HI
Hamburger Patties HI
Poultry HI
Gravies MED
Casseroles MED
Eggs MED
Fried Foods HI
Vegetables MED
Pizza HI
Biscuits MED
Rolls, soft LO
Rolls, hard MED
Pastries M ED
Empty Dinner Plates LO
To Set the Thermostat Control
The thermostat control is used to select the temperature of the warmer drawer. It is
located on the control panel. To set the thermostat, push in and turn the knob to the
desired setting. The temperatures are approximate, and are designated by HI, MED
and LO.
1. Turn the knob to select the desired temperature setting.
2. For best results, preheat the drawer before adding food. An empty drawer will
preheat in approximately 15 minutes.
3. When done, turn the thermostat control to OFF.
Temperature Selection
Refer to the chart in the side column for recommended settings. If a particular food
is not listed, start with the medium setting. If more crispness is desired, remove the
lid or aluminum foil.
Most foods can be kept at serving temperatures by using the medium setting.
When a combination of foods is to be kept warm (for instance, a meat with 2
vegetables and rolls), use the high setting.
Refrain from opening the warmer drawer while in use to eliminate loss of heat from
the drawer.
Indicator Light
The indicator light is located below the warmer drawer control. It turns on when the
control is set, and stays on until the control is turned off. The warmer drawer is
inoperable during the self-dean cycle. The indicator light will not come on during the
self-clean cycle.
16

Oven vent(s) and racks
Oven Vent Location
The oven is vented at the rear of the cooktop. When the oven is on, warm air is released
through the vent(s). This venting is necessary for proper air circulation in the oven and good
baking results. DO NOT block the vent(s). Doing so may cause cooking failures, fire or damage
to the appliance.
Arranging Oven Racks
ALWAYS ARRANGE OVEN RACKS WHEN THE OVEN IS COOL (PRIORTO OPERATINGTHE
OVEN). Always use oven mitts when using the oven.
To remove an oven rack, pull the rack forward until it stops. Lift up front of rack and slide
out.
To replace an oven rack, fit the rack onto the guides on the oven walls. Tilt the front of the
rack upward and slide the rack back into place.
Oven Vent(s)
and Racks
Be sure the oven is unplugged and all parts are COOL before replacing the oven
light bulb. Do not turn the oven light on during a self-cleaning cycle. High temperature will
reduce lamp life.
On some models an interior oven light will turn on automatically when the oven is opened.
The oven light may be turned on when the door is closed by using the oven light switch located
on the Electronic Oven control.
On a self-cleanning oven the lamp is covered with a glass shield held in place by a wire holder.
THIS GLASSSHIELD MUST ALWAYS BE IN PLACE WHEN THE OVEN IS IN USE.
To Replace the Light Bulb:
BE SURE OVEN IS COOL
1. Turn the power off at the main source.
2. Wear a leather-faced glove for protection against possible broken glass.
3. Replace bulb with a 40 Watt appliance bulb only.
4. For self-cleaning oven, press wire holder to one side to release glass shield, change bulb
and be sure to replace glass shield.
Changing Oven
Light
Z
©
17
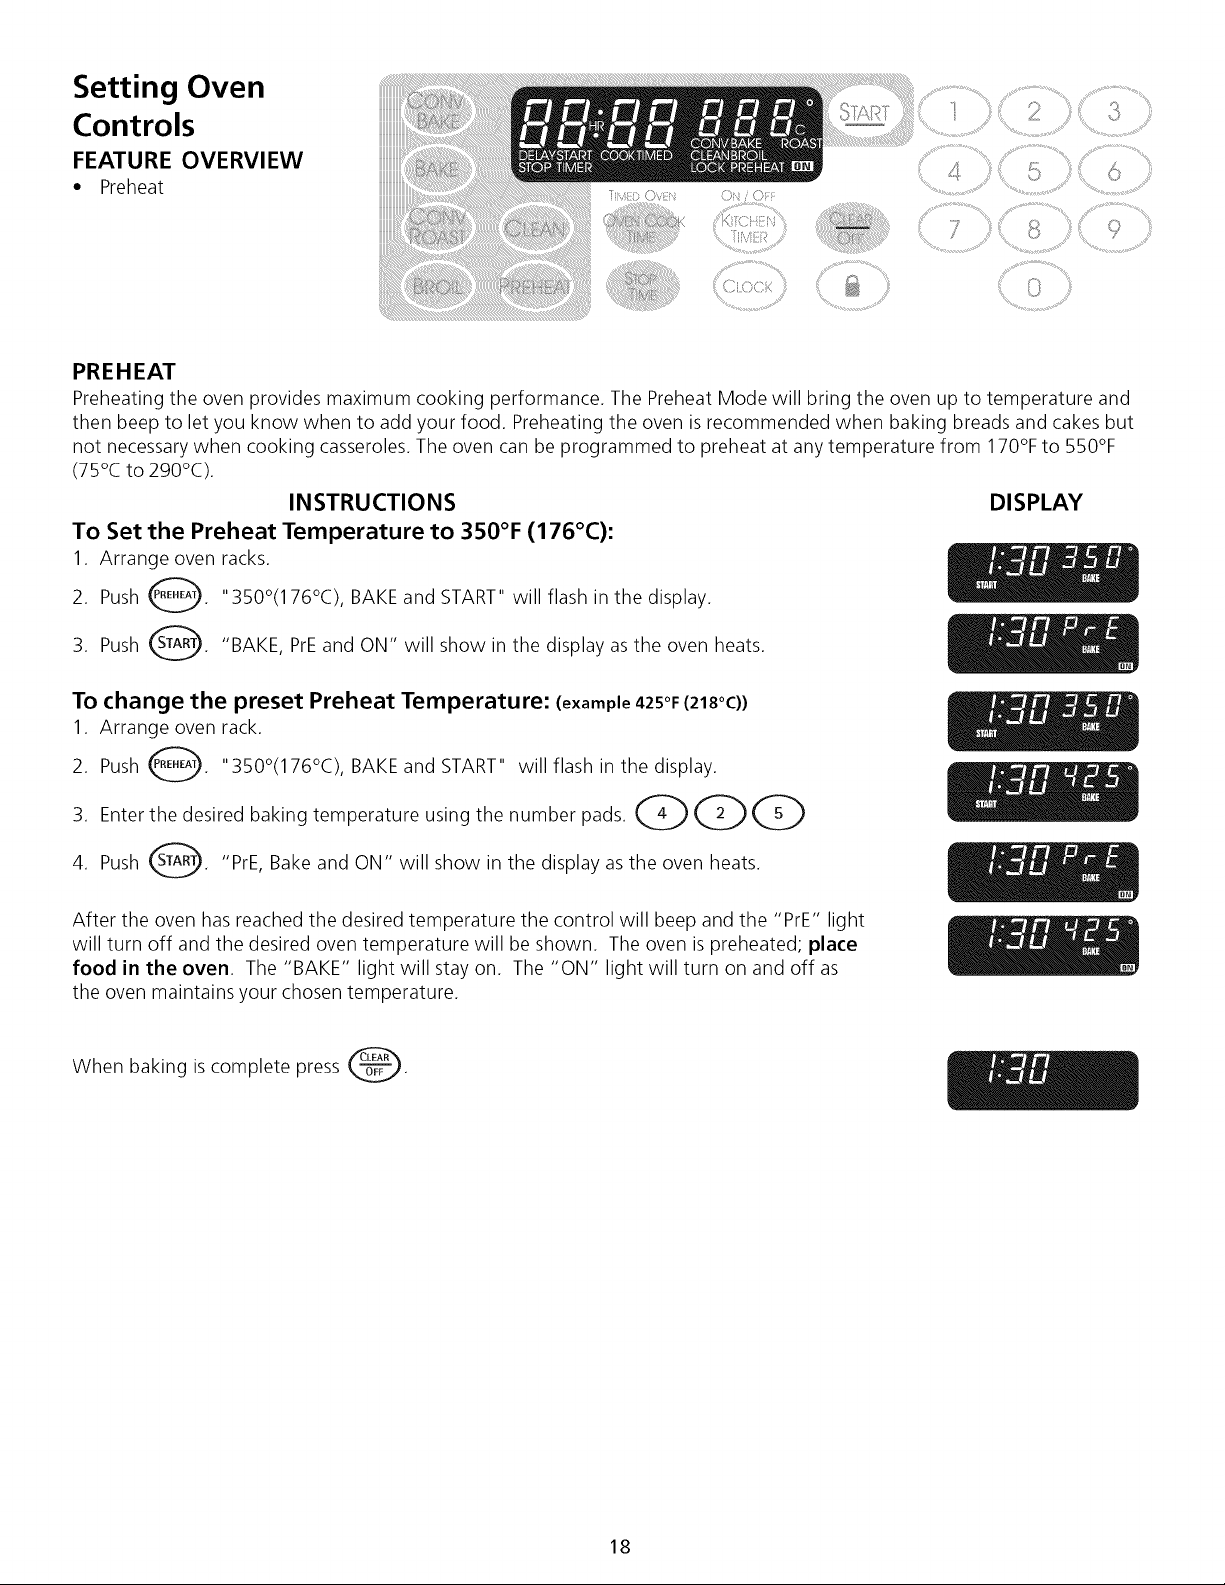
Setting Oven
Controls
FEATURE OVERVIEW
• Preheat
PREHEAT
Preheating the oven provides maximum cooking performance. The Preheat Mode will bring the oven up to temperature and
then beep to let you know when to add your food. Preheating the oven is recommended when baking breads and cakes but
not necessary when cooking casseroles. The oven can be programmed to preheat at any temperature from 170% to 550%
(75°C to 290°C).
INSTRUCTIONS
To Set the Preheat Temperature to 350°F (176°C):
1. Arrange oven racks.
2. Push _. "350°(176°C), BAKE and START" will flash in the display.
3. Push _. "BAKE, PrEand ON" will show in the display as the oven heats.
DISPLAY
To change the preset Preheat Temperature: (example 425°F(218°C))
1. Arrange oven rack.
2. Push _. "350°(176°C), BAKE and START" will flash in the display.
3. Enter the desired baking temperature using the number pads. QQQ
4. Push _. "PrE, Bake and ON" will show in the display as the oven heats.
After the oven has reached the desired temperature the control will beep and the "PrE" light
will turn off and the desired oven temperature will be shown. The oven is preheated; place
food in the oven. The "BAKE" light will stay on. The "ON" light will turn on and off as
the oven maintains your chosen temperature.
When baking is complete press @.
18
....................................>,.,, % ........... .,,,¸¸¸¸9
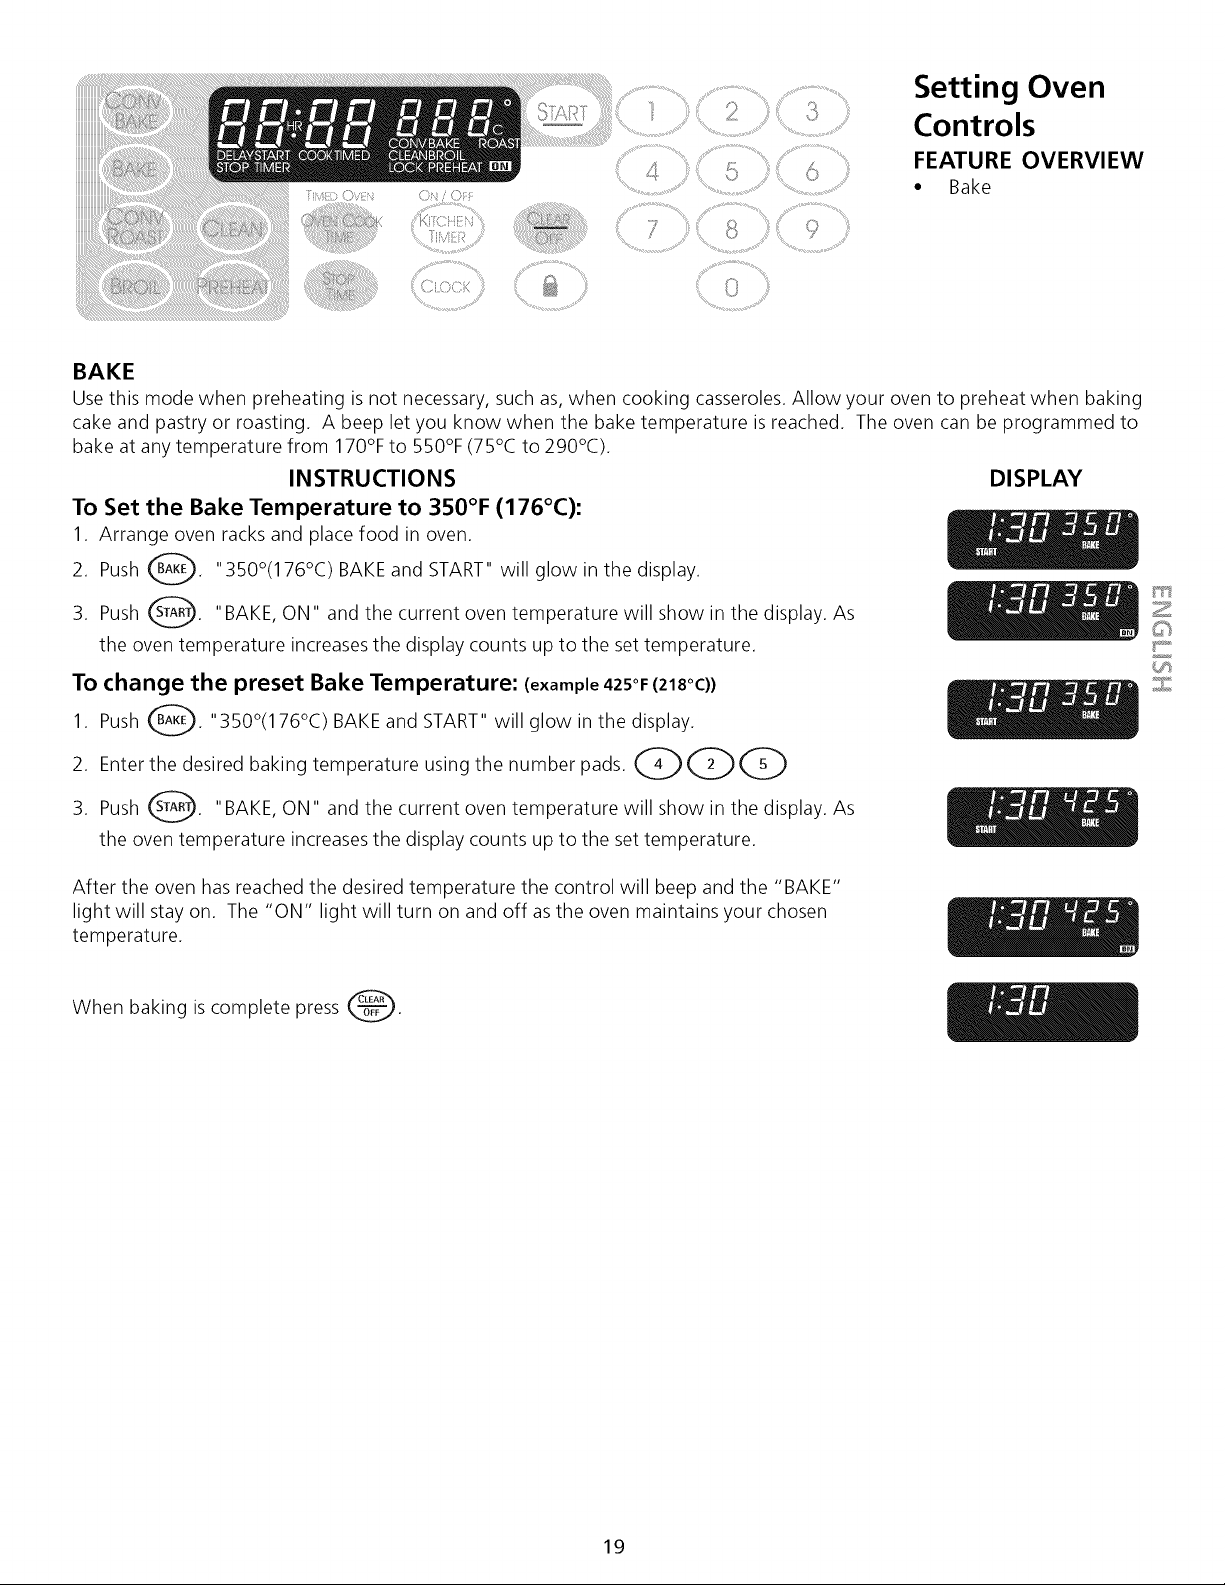
Setting Oven
Controls
FEATURE OVERVIEW
• Bake
BAKE
Use this mode when preheating is not necessary, such as, when cooking casseroles. Allow your oven to preheat when baking
cake and pastry or roasting. A beep let you know when the bake temperature is reached. The oven can be programmed to
bake at any temperature from 170% to 550% (75°C to 290°C).
INSTRUCTIONS
To Set the Bake Temperature to 3S0°F (176°C):
1. Arrange oven racks and place food in oven.
2. Push _. "350°(176°C) BAKE and START" will glow in the display.
3. Push _. "BAKE, ON" and the current oven temperature will show in the display. As
the oven temperature increases the display counts up to the set temperature.
To change the preset Bake Temperature: (example425°F(218°C))
1. Push @__._. "350°(176°C) BAKE and START" will glow in the display.
2. Enter the desired baking temperature using the number pads. Q Q Q
3. Push _. "BAKE, ON" and the current oven temperature will show in the display. As
the oven temperature increases the display counts up to the set temperature.
DISPLAY
After the oven has reached the desired temperature the control will beep and the "BAKE"
light will stay on. The "ON" light will turn on and off as the oven maintains your chosen
temperature.
When baking is complete press _.
19
Setting Oven
Controls
FEATURE OVERVIEW
• Timed Bake
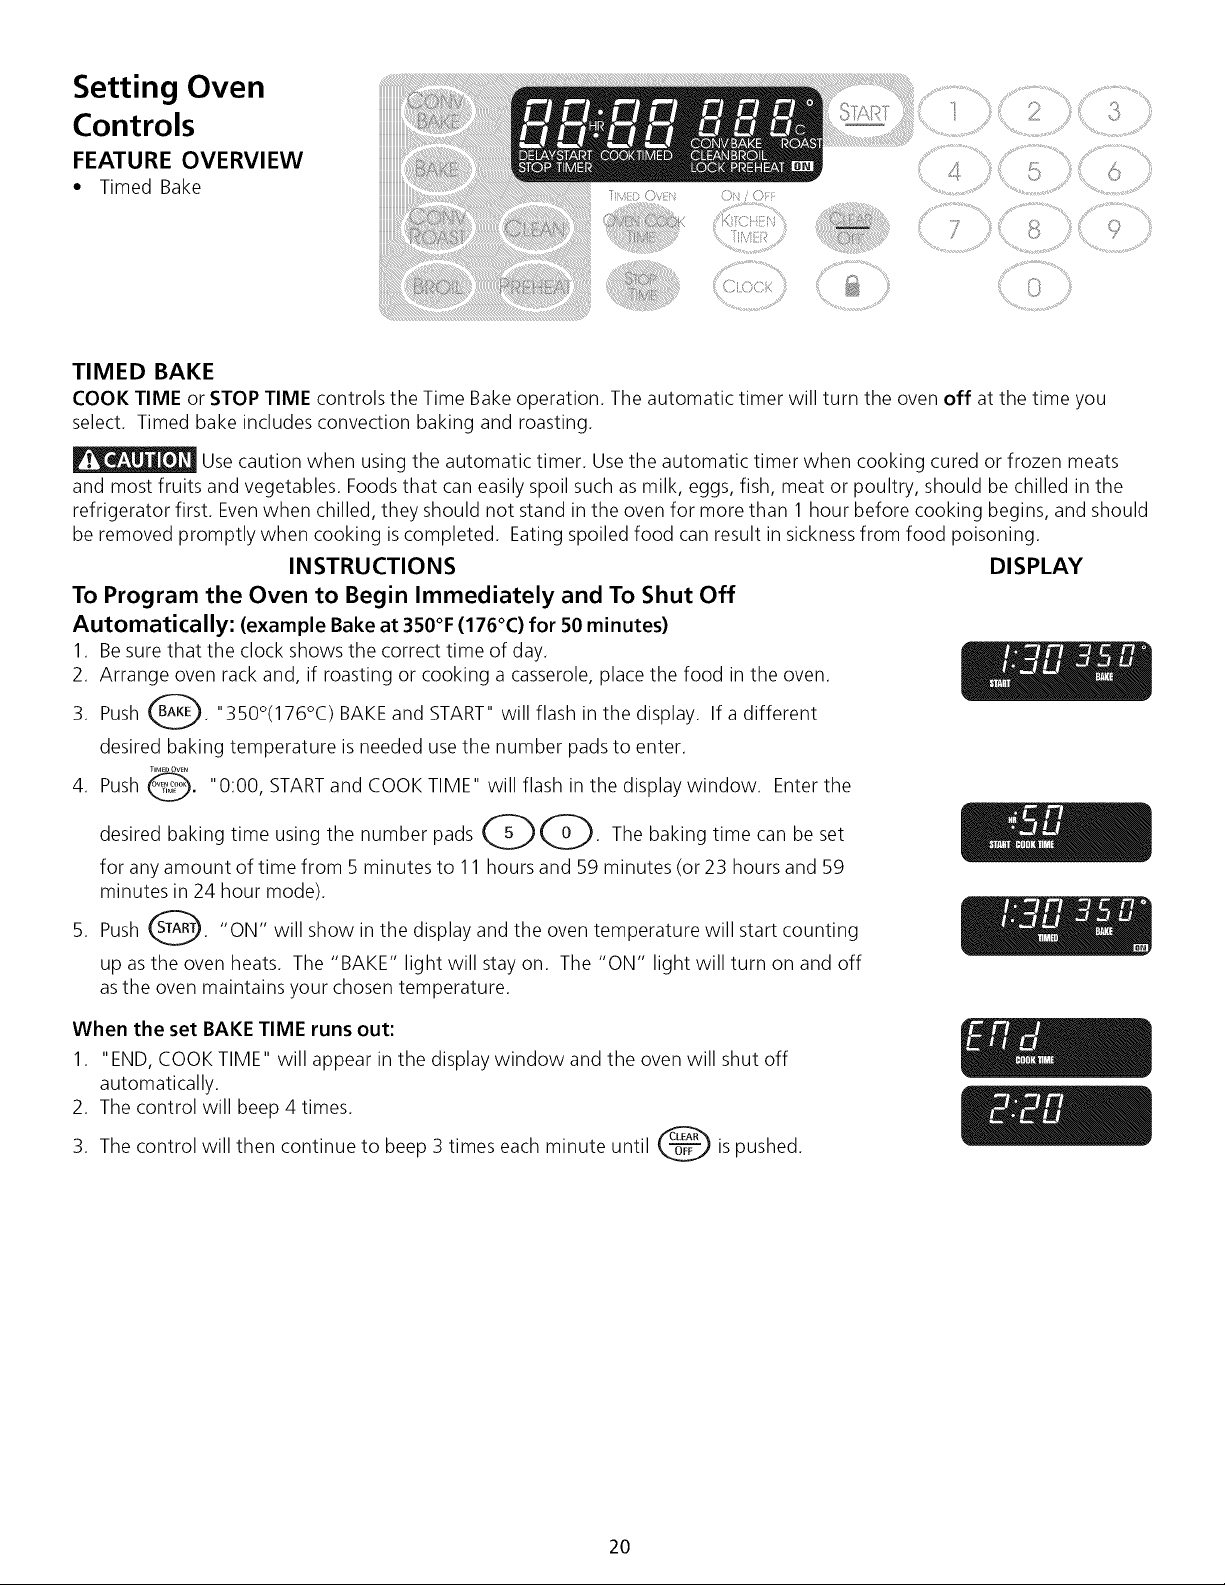
TIMED BAKE
COOK TIME or STOP TIME controls the Time Bake operation. The automatic timer will turn the oven off at the time you
select. Timed bake includes convection baking and roasting.
Use caution when using the automatic timer. Use the automatic timer when cooking cured or frozen meats
and most fruits and vegetables. Foods that can easily spoil such as milk, eggs, fish, meat or poultry, should be chilled in the
refrigerator first. Even when chilled, they should not stand in the oven for more than 1 hour before cooking begins, and should
be removed promptly when cooking is completed. Eating spoiled food can result in sickness from food poisoning.
INSTRUCTIONS DISPLAY
To Program the Oven to Begin Immediately and To Shut Off
Automatically: (example Bake at 350°F (176°C) for 50 minutes)
1. Be sure__thatthe clock shows the correct time of day.
2. Arrange oven rack and, if roasting or cooking a casserole, place the food in the oven.
3. Push _. "350°(176°C) BAKE and START" will flash in the display. If a different
desired baking temperature is needed use the number pads to enter.
TIMEDOVEN
4. Push @. "0:00, STARTand COOK TIME" will flash in the display window. Enter the
desired baking time using the number pads QQ. The baking time can be set
for any amount of time from 5 minutes to 11 hours and 59 minutes (or 23 hours and 59
minutes in 24 hour mode).
5. Push _. "ON" will show in the display and the oven temperature will start counting
up as the oven heats. The "BAKE" light will stay on. The "ON" light will turn on and off
as the oven maintains your chosen temperature.
When the set BAKE TIME runs out:
1. "END, COOK TIME" will appear in the display window and the oven will shut off
automatically.
2. The control will beep 4 times.
3. The control will then continue to beep 3 times each minute until _ is pushed.
2O
Setting Oven
Controls
FEATURE OVERVIEW
• Delayed Timed Bake
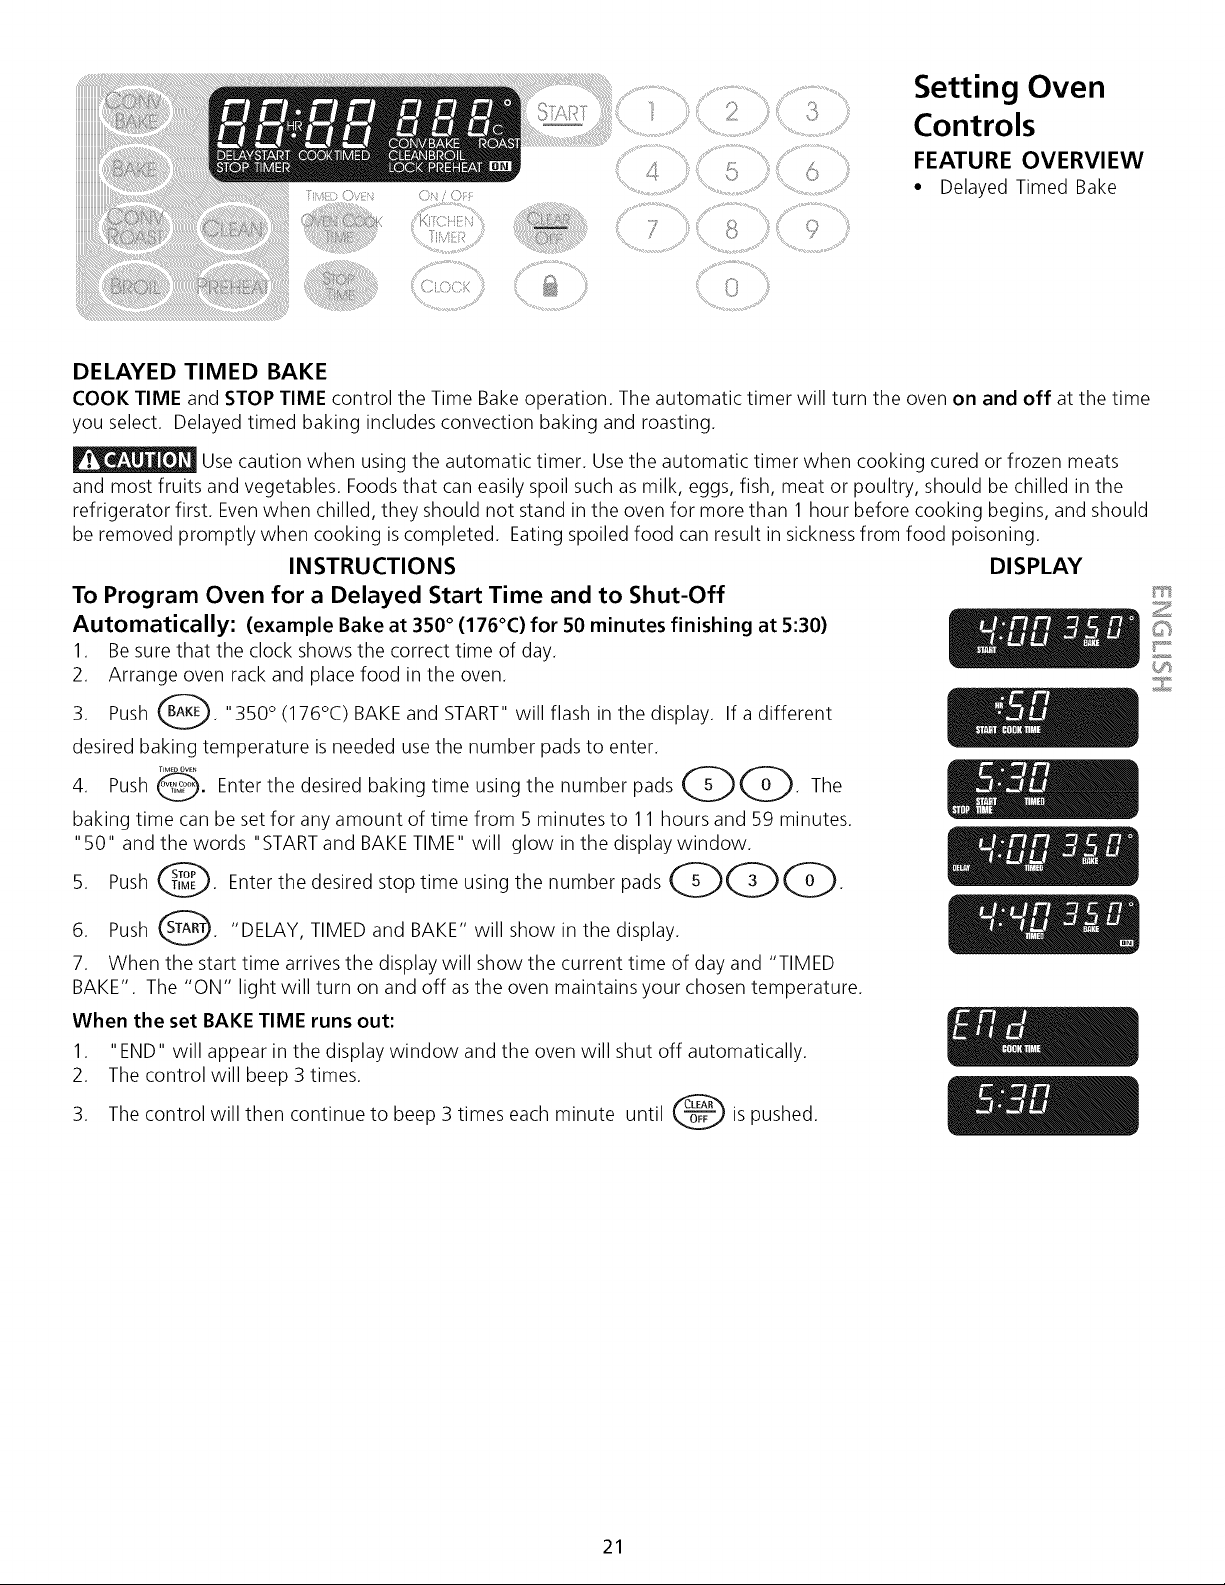
DELAYED TIMED BAKE
COOK TIME and STOP TIME control the Time Bake operation. The automatic timer will turn the oven on and off at the time
you select. Delayed timed baking includes convection baking and roasting.
Use caution when using the automatic timer. Use the automatic timer when cooking cured or frozen meats
and most fruits and vegetables. Foods that can easily spoil such as milk, eggs, fish, meat or poultry, should be chilled in the
refrigerator first. Even when chilled, they should not stand in the oven for more than 1 hour before cooking begins, and should
be removed promptly when cooking is completed. Eating spoiled food can result in sickness from food poisoning.
INSTRUCTIONS
To Program Oven for a Delayed Start Time and to Shut-Off
Automatically: (example Bake at 350° (176°C) for 50 minutes finishing at 5:30)
1. Be sure that the clock shows the correct time of day.
2. Arrange oven rack and place food in the oven.
3. Push _. "350 ° (176°C) BAKE and START" will flash in the display. If a different
desired baking temperature is needed use the number pads to enter.
......... QQ4. Push _. Enter the desired baking time using the number pads . The
baking time can be set for any amount of time from 5 minutes to 11 hours and 59 minutes.
"50" and the words "START and BAKE TIME" will glow in the display window.
5. Push @. Enter the desired stop time using the number pads_._____ 0_.
6. Push _. "DELAY, TIMED and BAKE" will show in the display.
7. When the start time arrives the display will show the current time of day and "TIMED
BAKE". The "ON" light will turn on and off as the oven maintains your chosen temperature.
When the set BAKE TIME runs out:
1. "END" will appear in the display window and the oven will shut off automatically.
2. The control will beep 3 times.
3. The control will then continue to beep 3 times each minute until _ is pushed.
DISPLAY
Z
©
21
Setting Oven
Controls
FEATURE OVERVIEW
• Oven Baking
Informations
• Air Circulation in the
Oven
Oven Baking Informations
For best results, preheat the oven before baking cookies, breads, cakes, pies or pastries, etc.
There is no need to preheat the oven for roasting meat or baking casseroles.
The cooking times and temperatures needed to bake a product may vary slightly from your
previously owned appliance.
Baking problems and solutions
Baking Problems Causes Corrections
Cookies and
biscuits burn on
the bottom.
Cakes too dark on
top or bottom.
Cakes not done in
the center.
Cakes not level.
Foods notdone
when cooking
time is up.
Cookies and biscuits put into
the oven before the pre-heating
time is completed.
Oven rack overcrowded.
• Dark pan absorbs heat too fast.
• Cakes put into the oven before
preheating time is completed.
• Oven rack position too high or
low.
• Oven too hot.
• Oven too hot.
• Incorrect pan size.
• Pan not centered in the oven.
• Range not level.
• Pan too close to oven wall or
rack overcrowded.
• Pan warped.
• Oven too cool.
• Oven overcrowded.
• Oven door opened too
frequently.
• Allow oven to preheat to the selected temperature
before placing food in oven.
• Choose pan sizes that will permit 5.1 cm to 10.2 cm
(2" to 4") of air space on all sides when placed in the
oven.
• Use a medium-weight aluminum baking sheet.
• Allow oven to preheat to the selected temperature
before placing food in the oven.
• Use proper rack position for baking needs.
• Set oven temperature 25°F/12°C lower than
recommended.
• Set oven temperature 25°F/12°C lower than
recommended.
• Use pan size suggested in recipe.
• Use proper rack position and place pan so there is 5.1
cm to 10.2 cm (2" to 4") of space on all sides of pan.
• Place marked glass measuring cup filled with water
on the center of the oven rack. If water level is
uneven, refer to the installation instructions for
leveling the appliance.
• Be sure to allow 5.1 cm to 10.2 cm (2" to 4") of
clearance on all sides of each pan in the oven.
• Do not use pans that are dented or warped.
• Set oven temperature 25°F/12°C higher than
suggested and bake for the recommended time.
• Be sure to remove all pans from the oven except the
ones to be used for baking.
• Open oven door only after shortest recommended
baking time.
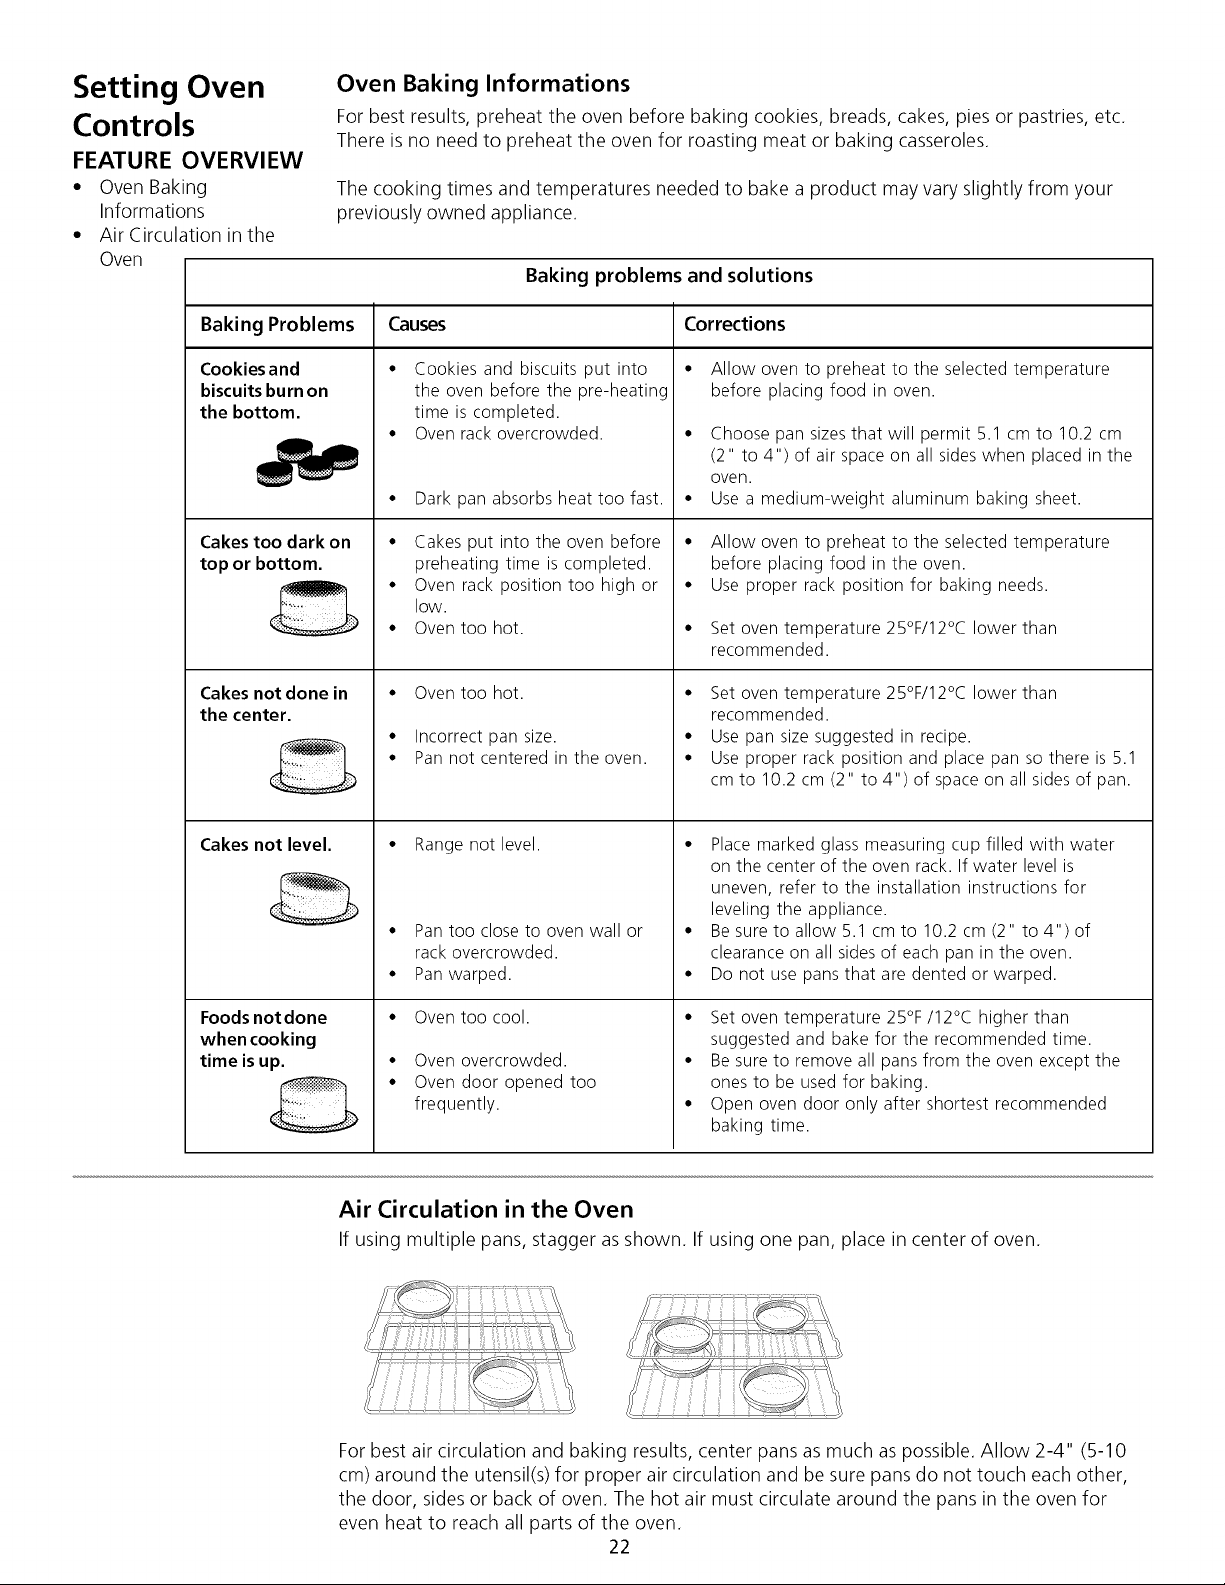
Air Circulation in the Oven
If using multiple pans, stagger as shown. If using one pan, place in center of oven.
For best air circulation and baking results, center pans as much as possible. Allow 2-4" (5-10
cm) around the utensil(s) for proper air circulation and be sure pans do not touch each other,
the door, sides or back of oven. The hot air must circulate around the pans in the oven for
even heat to reach all parts of the oven.
22

....................................>,.,, % ........... .,,,¸¸¸¸9
Setting Oven
Controls
FEATURE OVERVIEW
• Broil
BROIL .....×
Broiling is a method of cooking tender cuts of meat by direct heat under the broil element of the oven.
A beep lets you know when the broil temperature is reached. Be sure you center the broiler pan
directly under the broil element for best resuks.. _ >:_
Arrange oven rack while oven is still cool. Position the rack as needed.
The broiler pan and its insert allow dripping grease to drain and be kept away from the high heat of _iz.___>
the broiler. DO NOT use the pan without its insert. DO NOT cover the insert with foil. The exposed
grease could ignite.
Should an oven fire occur, close the oven door and turn off the oven. If the fire continues, throw baking soda
on the fire or use a fire extinguisher. DO NOT put water or flour on the fire. Flour may be explosive and water can cause a
grease fire to spread and cause personal injury.
INSTRUCTIONS
To Set the oven to Broil at HI 550°F (290°C):
1. Place the insert on the broiler pan, then place the food on the insert. DO NOT use the
broiler pan without the insert, or cover the insert with aluminum foil; the exposed fat
could ignite.
2. Arrange oven rack and place the pan on the oven rack. Be sure to center the broiler pan
directly under the broil element. Open the oven door to the "Broil Stop" position
when broiling.
3. Push _. "HI and BROIL" will glow in the display.
4. Push 0 "ON" will show in the display and the oven temperature will start counting
up as the oven heats. After the oven has reached the desired temperature the control
will beep.
5. Broil on one side until food is browned; turn and cook on the second side. Season and
serve.
Note: Always pull the rack out to the stop position before turning or removing food.
6. The "BROIL" light will stay on. The "ON" light may turn on and off as the oven
maintains your chosen temperature.
To change the preset Broil Temperature: (example 450°F (232°C))
1. Push _. "HI and BROIL" will glow in the display.
2. Enter the desired broiling temperature using the number pads. Q Q Q
3. Push @.
When broiling is complete press _.
DISPLAY
Z
©
23
Setting Oven
Controls
FEATURE OVERVIEW
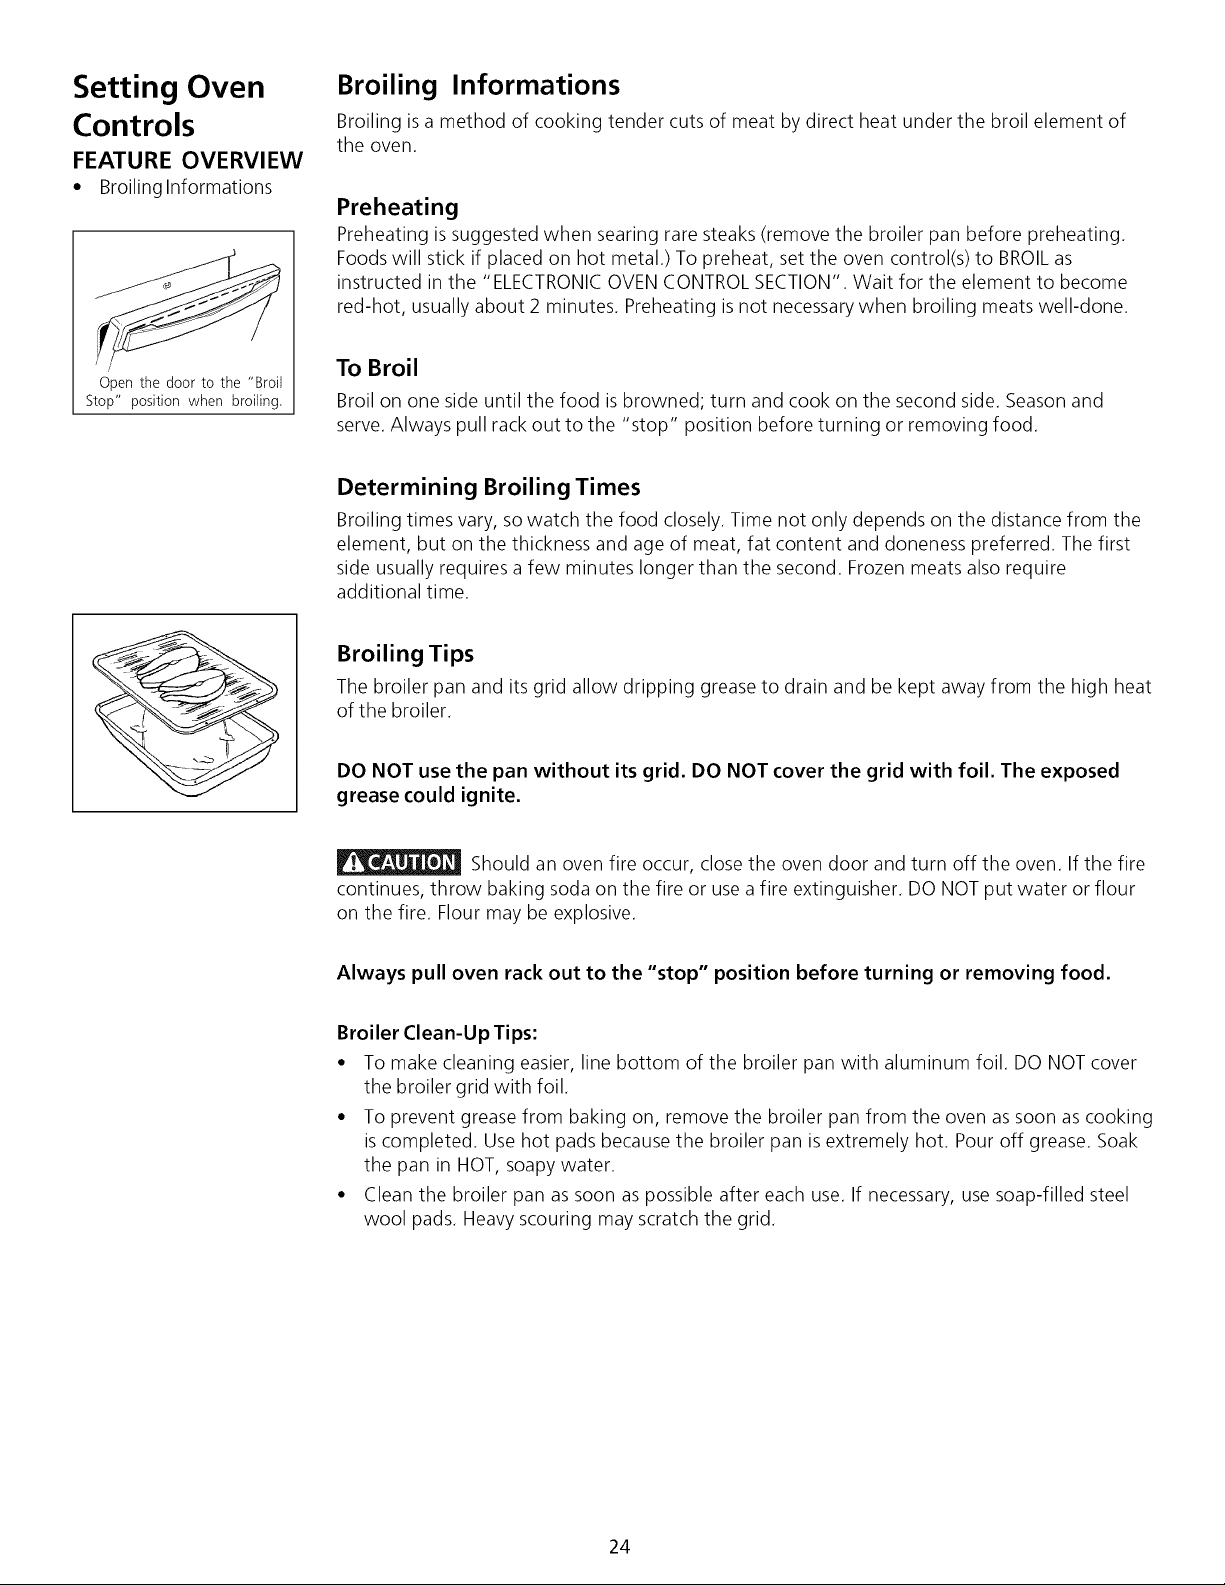
• Broiling Informations
Open the door to the "Broil
Stop" position when broiling,
Broiling Informations
Broiling is a method of cooking tender cuts of meat by direct heat under the broil element of
the oven.
Preheating
Preheating is suggested when searing rare steaks (remove the broiler pan before preheating.
Foods will stick if placed on hot metal.) To preheat, set the oven control(s) to BROILas
instructed in the "ELECTRONICOVEN CONTROL SECTION". Wait for the element to become
red-hot, usually about 2 minutes. Preheating is not necessary when broiling meats well-done.
To Broil
Broil on one side until the food is browned; turn and cook on the second side. Season and
serve. Always pull rack out to the "stop" position before turning or removing food.
Determining Broiling Times
Broiling times vary, so watch the food closely. Time not only depends on the distance from the
element, but on the thickness and age of meat, fat content and aloneness preferred. The first
side usually requires a few minutes longer than the second. Frozen meats also require
additional time.
Broiling Tips
The broiler pan and its grid allow dripping grease to drain and be kept away from the high heat
of the broiler.
DO NOT use the pan without its grid. DO NOT cover the grid with foil. The exposed
grease could ignite.
Should an oven fire occur, close the oven door and turn off the oven. If the fire
continues, throw baking soda on the fire or use a fire extinguisher. DO NOT put water or flour
on the fire. Flour may be explosive.
Always pull oven rack out to the "stop" position before turning or removing food.
Broiler Clean-Up Tips:
• To make cleaning easier, line bottom of the broiler pan with aluminum foil. DO NOT cover
the broiler grid with foil.
• To prevent grease from baking on, remove the broiler pan from the oven as soon as cooking
is completed. Use hot pads because the broiler pan is extremely hot. Pour off grease. Soak
the pan in HOT, soapy water.
• Clean the broiler pan as soon as possible after each use. If necessary, use soap-filled steel
wool pads. Heavy scouring may scratch the grid.
24
Setting Oven
Controls
FEATURE OVERVIEW
• Searing Grill
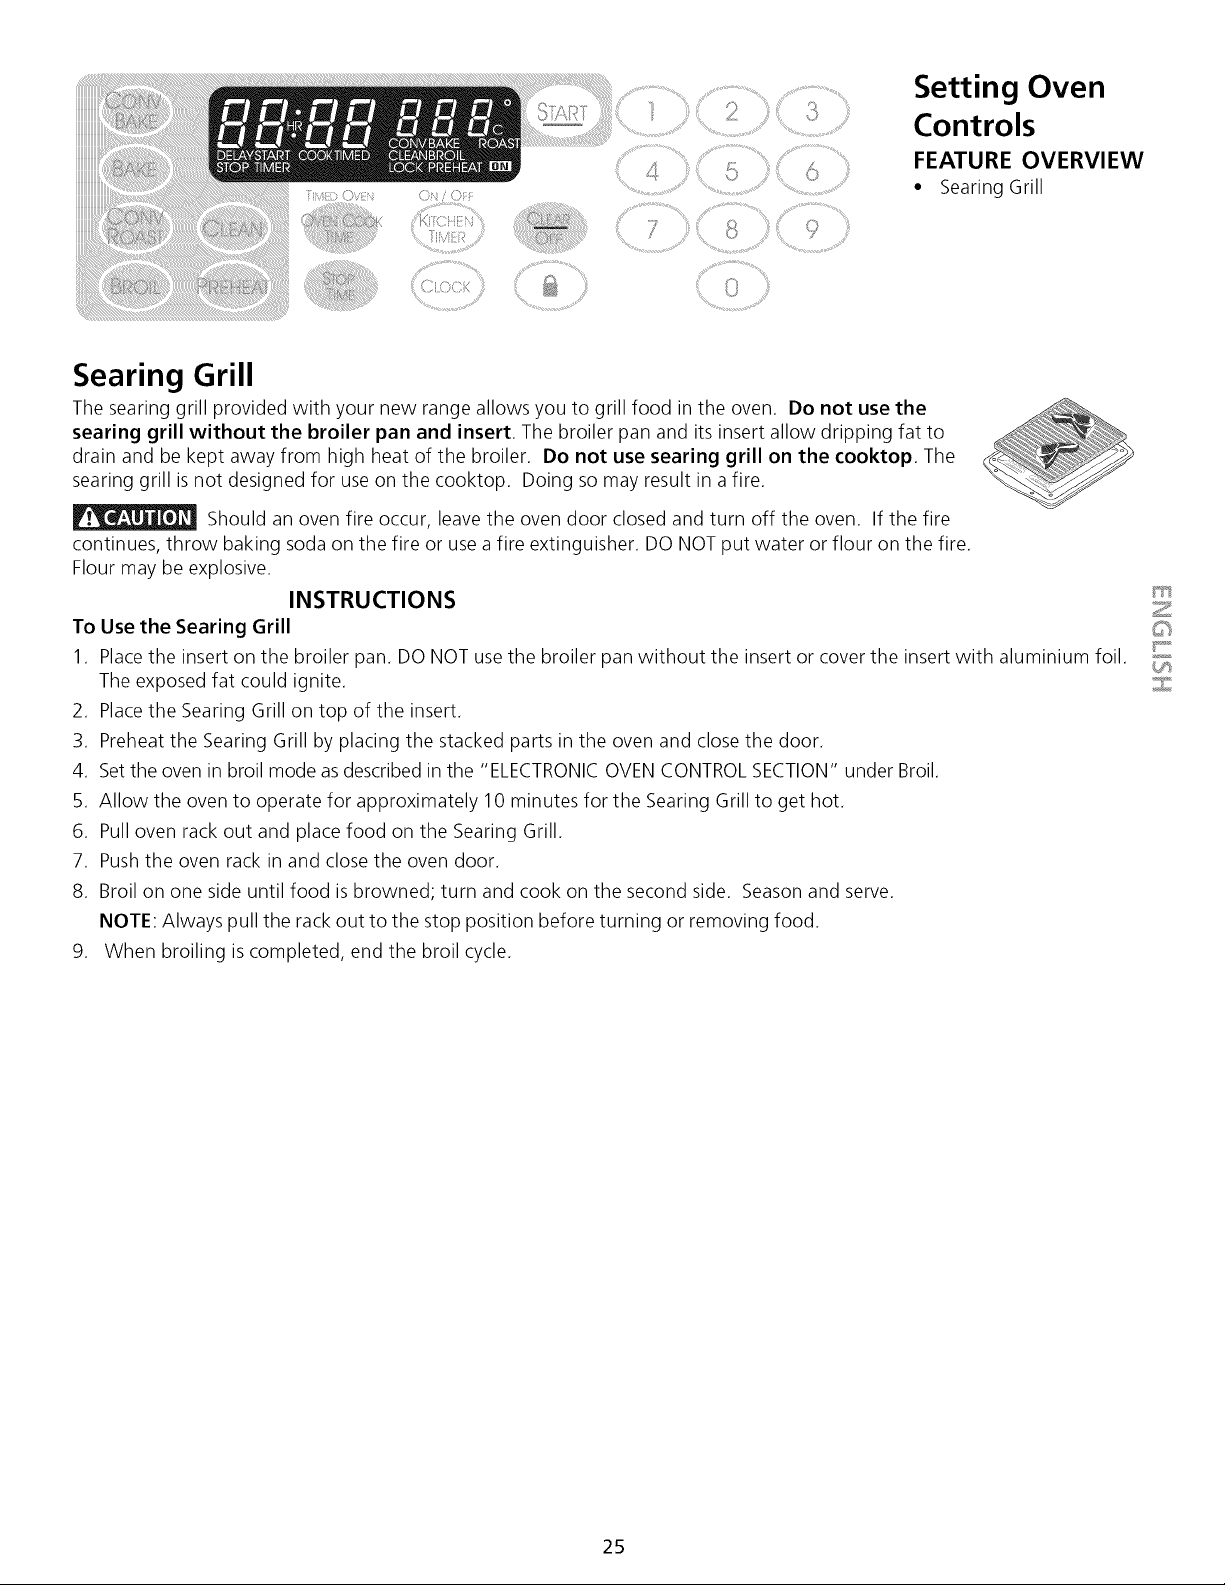
Searing Grill
The searing grill provided with your new range allows you to grill food in the oven. Do not use the
searing grill without the broiler pan and insert. The broiler pan and its insert allow dripping fat to
drain and be kept away from high heat of the broiler. Do not use searing grill on the cooktop. The
searing grill is not designed for use on the cooktop. Doing so may result in a fire.
Should an oven fire occur, leave the oven door closed and turn off the oven. If the fire
continues, throw baking soda on the fire or use a fire extinguisher. DO NOT put water or flour on the fire.
Flour may be explosive.
INSTRUCTIONS
To Use the Searing Grill
1.
.
3.
4.
Z
©
Place the insert on the broiler pan. DO NOT use the broiler pan without the insert or cover the insert with aluminium foil. !}_
The exposed fat could ignite. _3;
Place the Searing Grill on top of the insert.
Preheat the Searing Grill by placing the stacked parts in the oven and close the door.
Set the oven in broil mode as described in the "ELECTRONICOVEN CONTROL SECTION" under Broil.
5. Allow the oven to operate for approximately 10 minutes for the Searing Grill to get hot.
6. Pull oven rack out and place food on the Searing Grill.
7. Push the oven rack in and close the oven door.
8. Broil on one side until food is browned; turn and cook on the second side. Season and serve.
NOTE Always pull the rack out to the stop position before turning or removing food.
9. When broiling is completed, end the broil cycle.
25
Setting Oven
Controls
FEATURE OVERVIEW
• Convection Bake
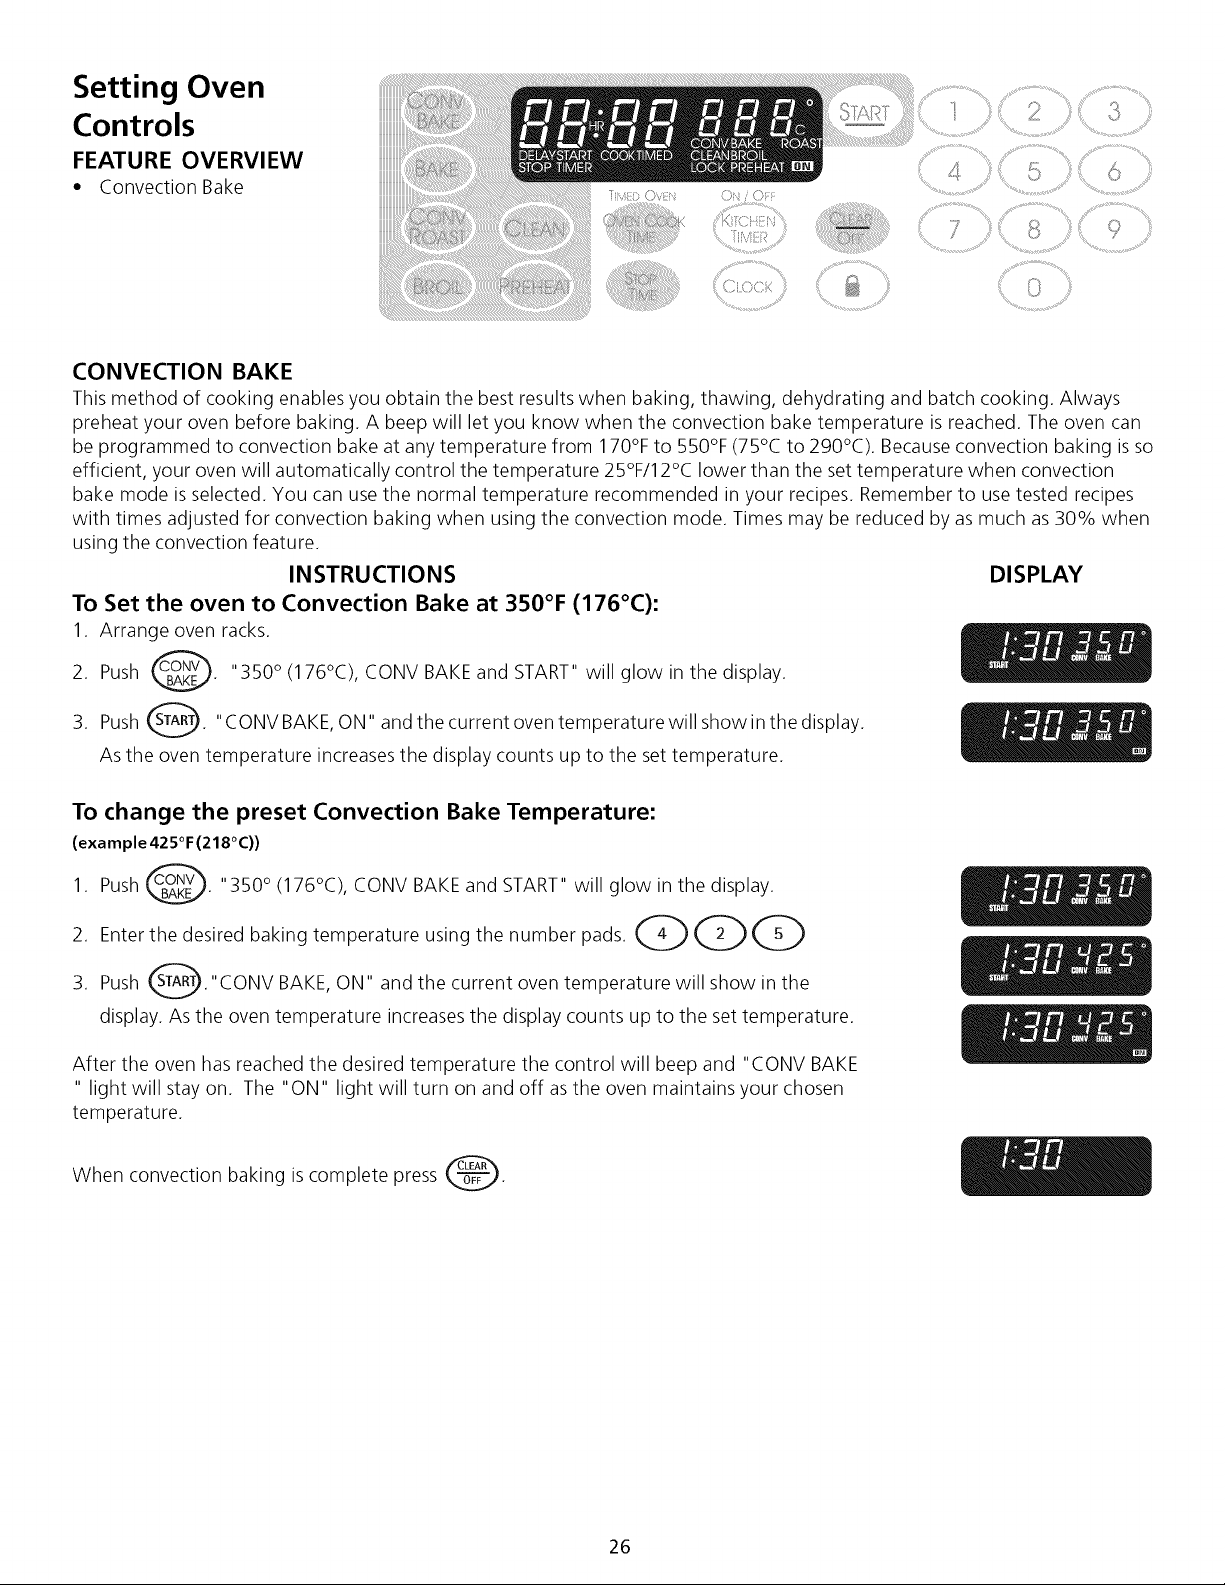
CONVECTION BAKE
This method of cooking enables you obtain the best results when baking, thawing, dehydrating and batch cooking. Always
preheat your oven before baking. A beep will let you know when the convection bake temperature is reached. The oven can
be programmed to convection bake at any temperature from 170% to 550% (75°C to 290°C). Because convection baking is so
efficient, your oven will automatically control the temperature 25°F/12°C lower than the set temperature when convection
bake mode is selected. You can use the normal temperature recommended in your recipes. Remember to use tested recipes
with times adjusted for convection baking when using the convection mode. Times may be reduced by as much as 30% when
using the convection feature.
INSTRUCTIONS
To Set the oven to Convection Bake at 350°F (176°C):
1. Arrange oven racks.
2. Push _. "350 ° (176°C), CONV BAKE and START" will glow in the display.
3. Push _. "CONV BAKE, ON" and the current oven temperature will show in the display.
As the oven temperature increases the display counts up to the set temperature.
DISPLAY
To change the preset Convection Bake Temperature:
(example 425°F (218°C))
1. Push _. "350 ° (176°C), CONV BAKE and START" will glow in the display.
2. Enter the desired baking temperature using the number pads. QQQ
3. Push O"CONV BAKE, ON" and the current oven temperature will show in the
display. As the oven temperature increases the display counts up to the set temperature.
After the oven has reached the desired temperature the control will beep and "CONV BAKE
" light will stay on. The "ON" light will turn on and off as the oven maintains your chosen
temperature.
When convection baking is complete press _.
26
....................................>,.,, % ........... .,,,¸¸¸¸9
Setting Oven
Controls
FEATURE OVERVIEW
• Convection Roast
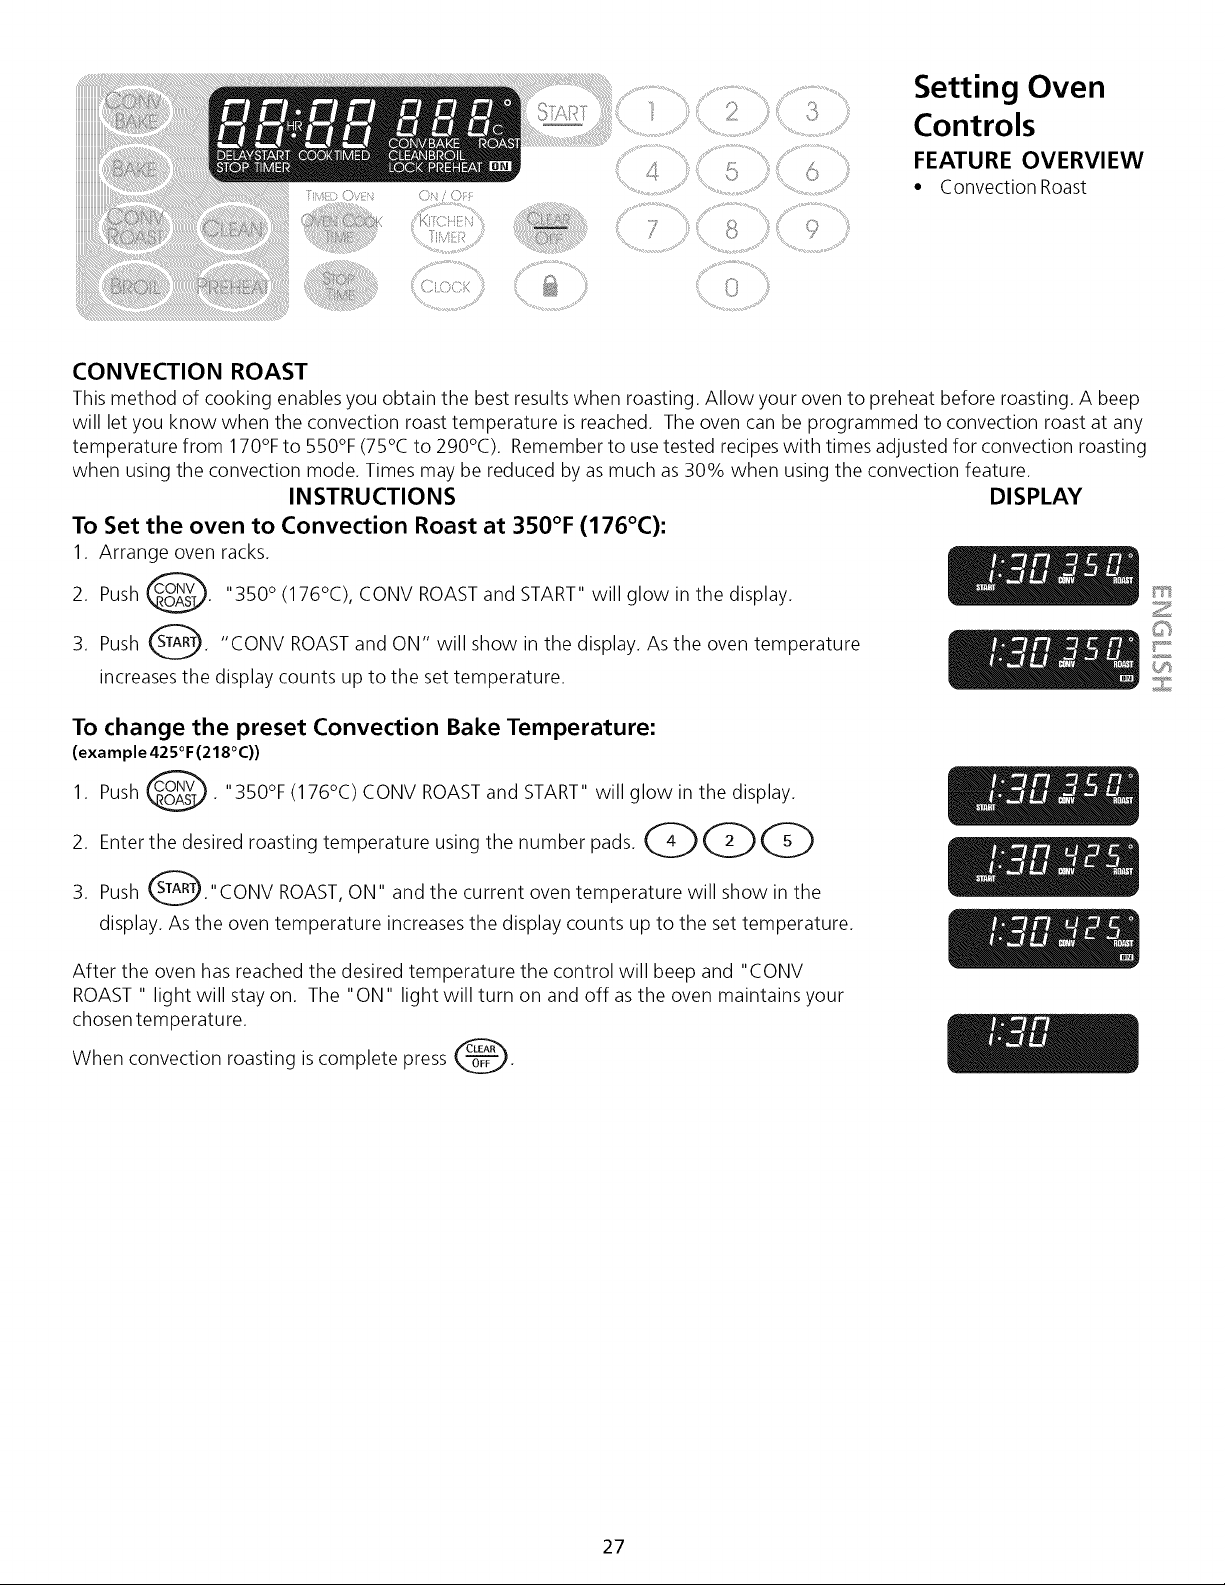
CONVECTION ROAST
This method of cooking enables you obtain the best results when roasting. Allow your oven to preheat before roasting. A beep
will let you know when the convection roast temperature is reached. The oven can be programmed to convection roast at any
temperature from 170% to 550% (75°C to 290°C). Remember to use tested recipes with times adjusted for convection roasting
when using the convection mode. Times may be reduced by as much as 30% when using the convection feature.
INSTRUCTIONS
To Set the oven to Convection Roast at 350°F (176°C):
1. Arrange oven racks.
2. Push @. "350 ° (176°C), CONV ROAST and START" will glow in the display.
3. Push _. "CONV ROASTand ON" will show in the display. As the oven temperature
increases the display counts up to the set temperature.
DISPLAY
C
To change the preset Convection Bake Temperature:
(example 425°F (218°C))
1. Push @. "350% (176°C) CONV ROASTand START" will glow in the display.
3. Push _."CONV ROAST, ON" and the current oven temperature will show in the
display. As the oven temperature increases the display counts up to the set temperature.
After the oven has reached the desired temperature the control will beep and "CONV
ROAST " light will stay on. The "ON" light will turn on and off as the oven maintains your
chosen temperature.
When convection roasting is complete press _.
27
Setting Oven
Controls
FEATURE OVERVIEW
• Convection Cooking
• Convection Roasting
Convection
Cooking (some models)
NOTE: The convection fan automatically turns off when the oven door is opened while oven is
in a convection mode and resumes when the door is closed again.
The convection oven uses a fan and a convection element located in the rear wall oven to
circulate heated air around the food to be cooked. The convection mode reduces the cook
time. It retains the natural food juice and allows the food to keep more flavors. This method of
cooking enables you obtain the best results when baking, thawing, dehydrating and roasting
foods.
Convection Notes:
1. Batch cooking is more convenient with better results.
2. Defrosting is quicker in convection mode when compared to regular radiant cooking.
3. Remember to use tested recipes with times adjusted for convection baking/roasting when
using the convection mode. Times may be reduced by as much as 30% when using the
convection feature.
Roastinc Rack
N
Convection
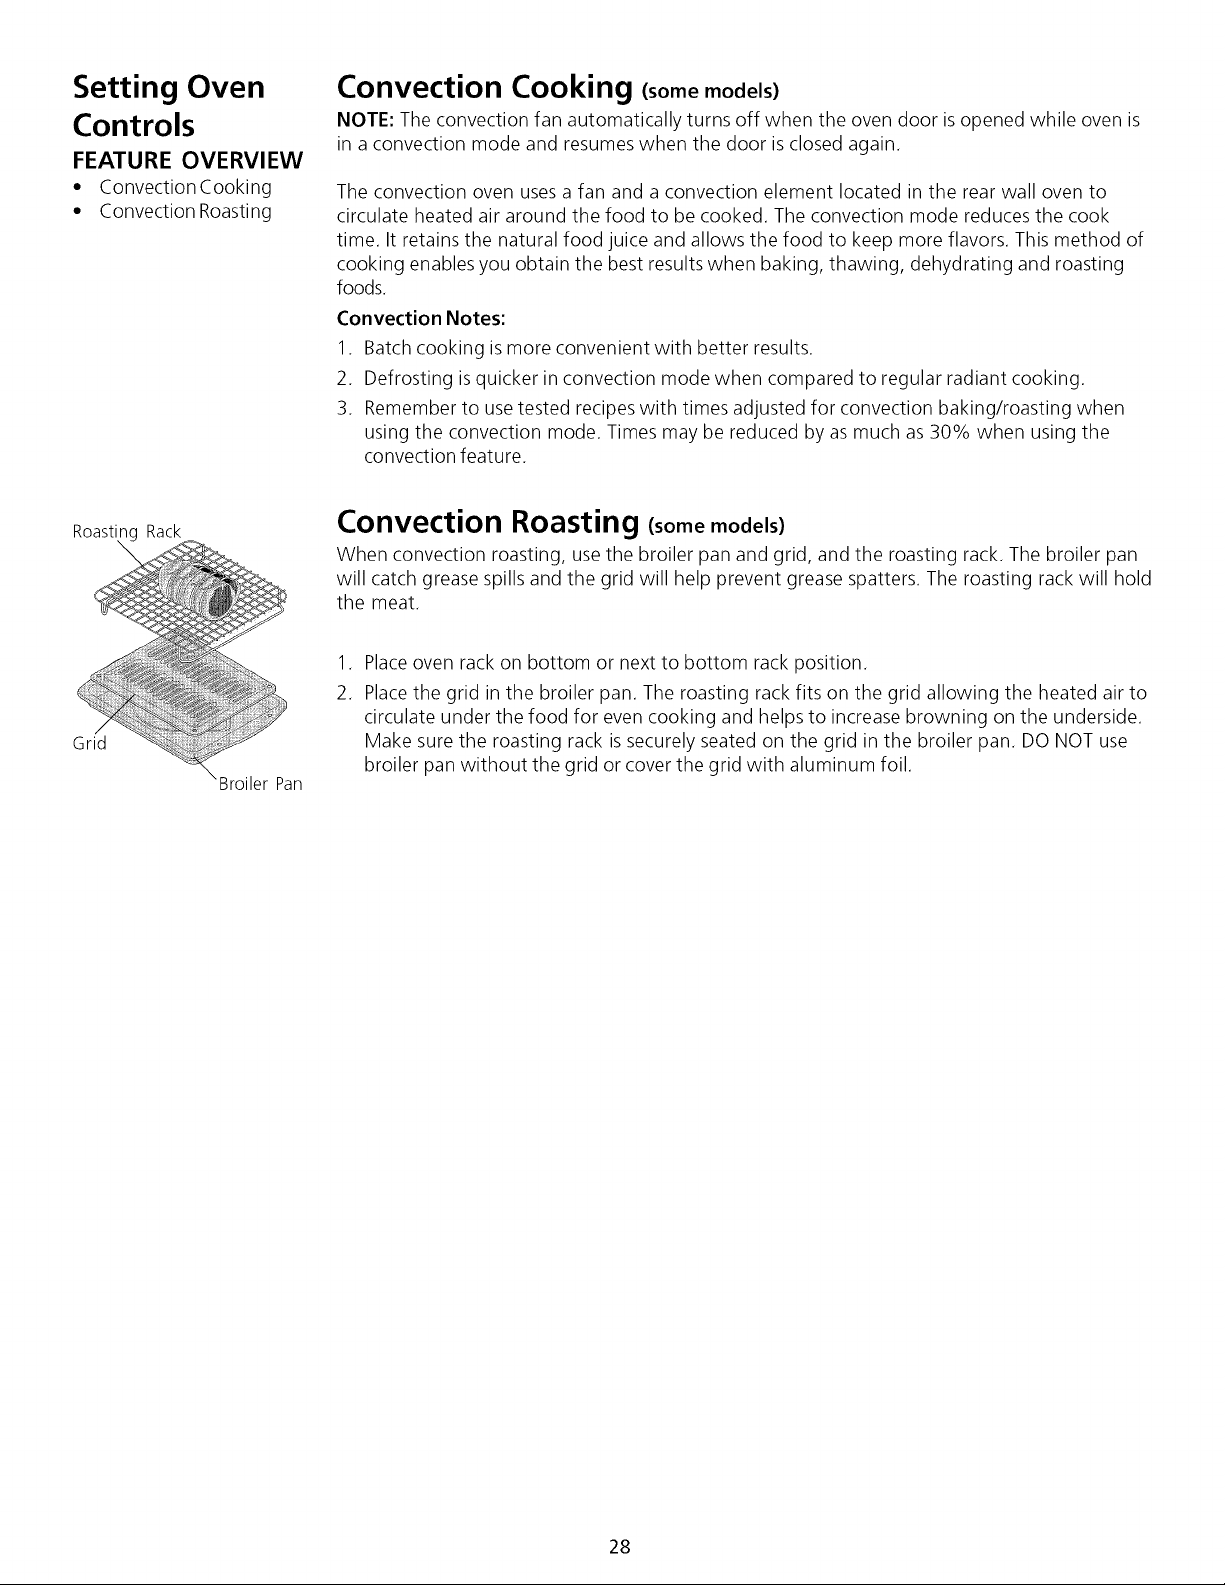
Roasting (some models)
When convection roasting, use the broiler pan and grid, and the roasting rack. The broiler pan
will catch grease spills and the grid will help prevent grease spatters. The roasting rack will hold
the meat.
Grid
.
2.
Pan
Place oven rack on bottom or next to bottom rack position.
Place the grid in the broiler pan. The roasting rack fits on the grid allowing the heated air to
circulate under the food for even cooking and helps to increase browning on the underside.
Make sure the roasting rack is securely seated on the grid in the broiler pan. DO NOT use
broiler pan without the grid or cover the grid with aluminum foil.
28

Self-Clean Oven Cycle
Adhere to the Following Precautions:
Allow the oven to cool before cleaning.
Wear rubber gloves when cleaning any exterior part of the oven manually.
During the self-clean cycle, the outside of the wall can become very hot to
touch. DO NOT leave small children unattended near the appliance.
Before cleaning any part of the oven, be sure the electronic oven control is
turned off or else push CANCEL pad. Wait until the oven is cool.
DO NOT use commercial oven cleaners or oven protective coatings in or around any part of the
self-cleaning oven. DO NOT clean the oven door gasket. The gasket on the oven door is
essential for a good seal. Care should be taken not to rub, damage or move the gasket. DO
NOT use aluminum foil to line the oven bottom. This may affect cooking, or the foil could melt
and damage the oven surface.
A self-cleaning oven cleans itself with high temperatures (well above cooking temperatures)
which eliminate soil completely or reduce it to a fine powdered ash you can wash away with
damp cloth.
Preparing the Oven for Self-Cleaning
1. Remove excess spillovers in the oven cavity before starting the self-clean cycle. To clean,
use hot soapy water and a cloth. Large spillovers can cause heavy smoke or fire when
subjected to high temperatures. DO NOT allow food spills with a high sugar or acid content
(such as tomatoes, sauerkraut, fruit juices or pie filling) to remain on the surface as they
may cause a dull spot even after cleaning.
2. Clean any soil from the oven frame and the inner door (see illustration to left). These areas
heat sufficiently during self-cleaning cycle to burn soil on. Clean with soap and water. Do
not clean door seal because doing so can permanently damage it.
3. Remove the broiler pan and insert, all utensils and any foil. These items do not withstand
high cleaning temperatures.
4. Oven racks may be left in the oven or may be removed. If they go through the clean cycle,
their color will turn slightly dull. After the cycle is completed and the oven has cooled, rub
the sides or the racks with wax paper or a cloth containing a small amount of baby oil or
salad oil. This will make the racks glide easier.
What to Expect During Cleaning
While the oven self-cleans, it heats to temperatures much higher than those used in normal
cooking. Sounds of metal expansion and contraction are normal. Odor is also normal as the
food soil is being removed. Smoke may appear through the oven vent, located on the top of
the control panel.
If heavy spillovers are not wiped up before cleaning, they may flame and cause more smoke
and odor than usual. This is normal and safe and should not cause alarm. If available, use an
exhaust fan during the self-cleaning cycle.
NOTE: A smoke eliminator in the oven vent converts the smoke from the self-cleaning process
into a colorless vapor.
The health of some birds is extremely sensitive to the fumes given off
during the self-cleaning cycle of any range. Move birds to another well ventilated
room.
Oven Cleaning
FEATURE OVERVIEW
• Adhere tothe Following
Precautions
• Preparing the Oven for
Self-Cleaning
• What to Expect during
Cleaning
F_
Z
"-. DO HAND
C%
"× .....::_ Ct.EAN
_ _t ME _......
DO HAND CLEAN SEAL
CLEAN DOOR
29
Oven Cleaning
FEATURE OVERVIEW
• To Start the Self-Clean
Cycle
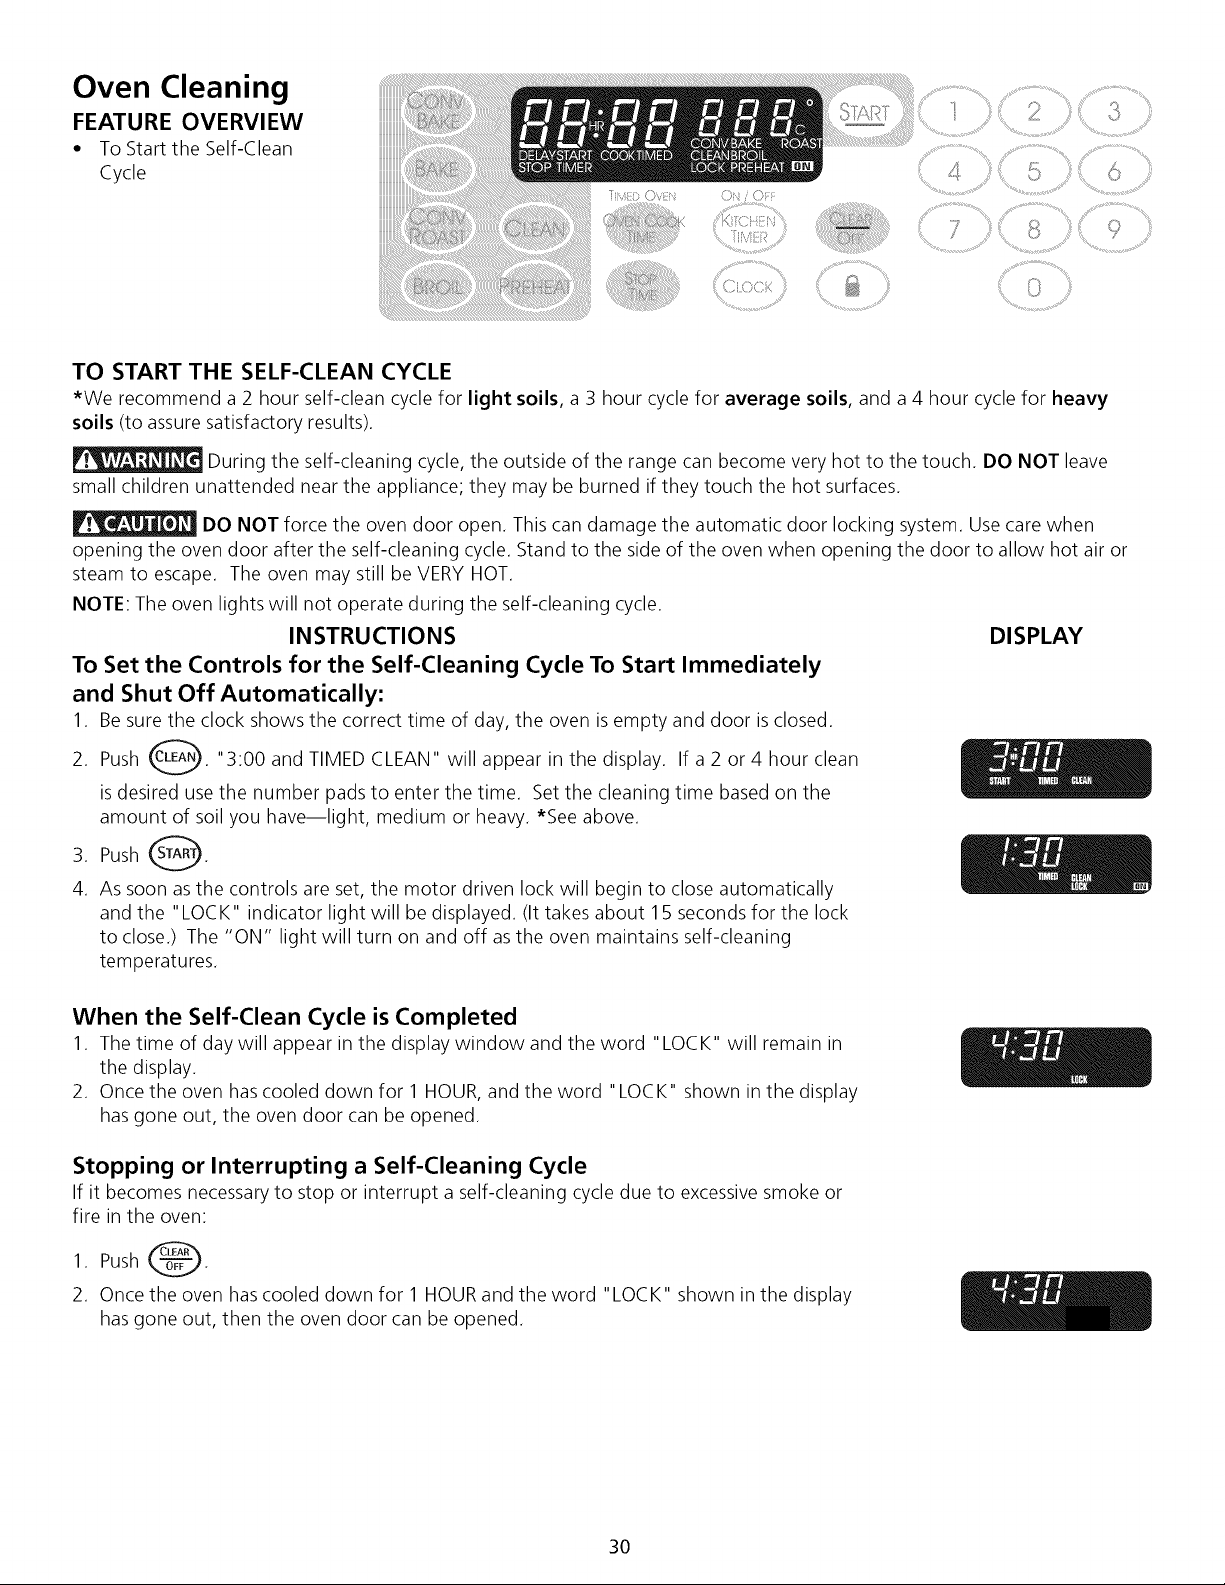
TO START THE SELF-CLEAN CYCLE
*We recommend a 2 hour self-clean cycle for light soils, a 3 hour cycle for average soils, and a 4 hour cycle for heavy
soils (to assure satisfactory results).
During the self-cleaning cycle, the outside of the range can become very hot to the touch. DO NOT leave
small children unattended near the appliance; they may be burned if they touch the hot surfaces.
DO NOT force the oven door open. This can damage the automatic door locking system. Use care when
opening the oven door after the self-cleaning cycle. Stand to the side of the oven when opening the door to allow hot air or
steam to escape. The oven may still be VERY HOT.
NOTE: The oven lights will not operate during the self-cleaning cycle.
INSTRUCTIONS DISPLAY
To Set the Controls for the Self-Cleaning Cycle To Start Immediately
and Shut Off Automatically:
1. Be sure the clock shows the correct time of day, the oven is empty and door is closed.
2. Push 0 "3:00 and TIMED CLEAN" will appear in the display. If a 2 or 4 hour clean
is desired use the number pads to enter the time. Set the cleaning time based on the
amount of soil you have--light, medium or heavy. *See above.
3. Push @.
4. As soon as the controls are set, the motor driven lock will begin to close automatically
and the "LOCK" indicator light will be displayed. (It takes about 15 seconds for the lock
to close.) The "ON" light will turn on and off as the oven maintains self-cleaning
temperatures.
When the Self-Clean Cycle is Completed
1. The time of day will appear in the display window and the word "LOCK" will remain in
the display.
2. Once the oven has cooled down for 1 HOUR, and the word "LOCK" shown in the display
has gone out, the oven door can be opened.
Stopping or Interrupting a Self-Cleaning Cycle
If it becomes necessary to stop or interrupt a self-cleaning cycle due to excessive smoke or
fire in the oven:
1. Push _.
2. Once the oven has cooled down for 1 HOUR and the word "LOCK" shown in the display
has gone out, then the oven door can be opened.
3O
....................................>,.,, % ........... .,,,¸¸¸¸9
Oven Cleaning
FEATURE OVERVIEW
• To Start the Delayed
Self-Clean Cycle
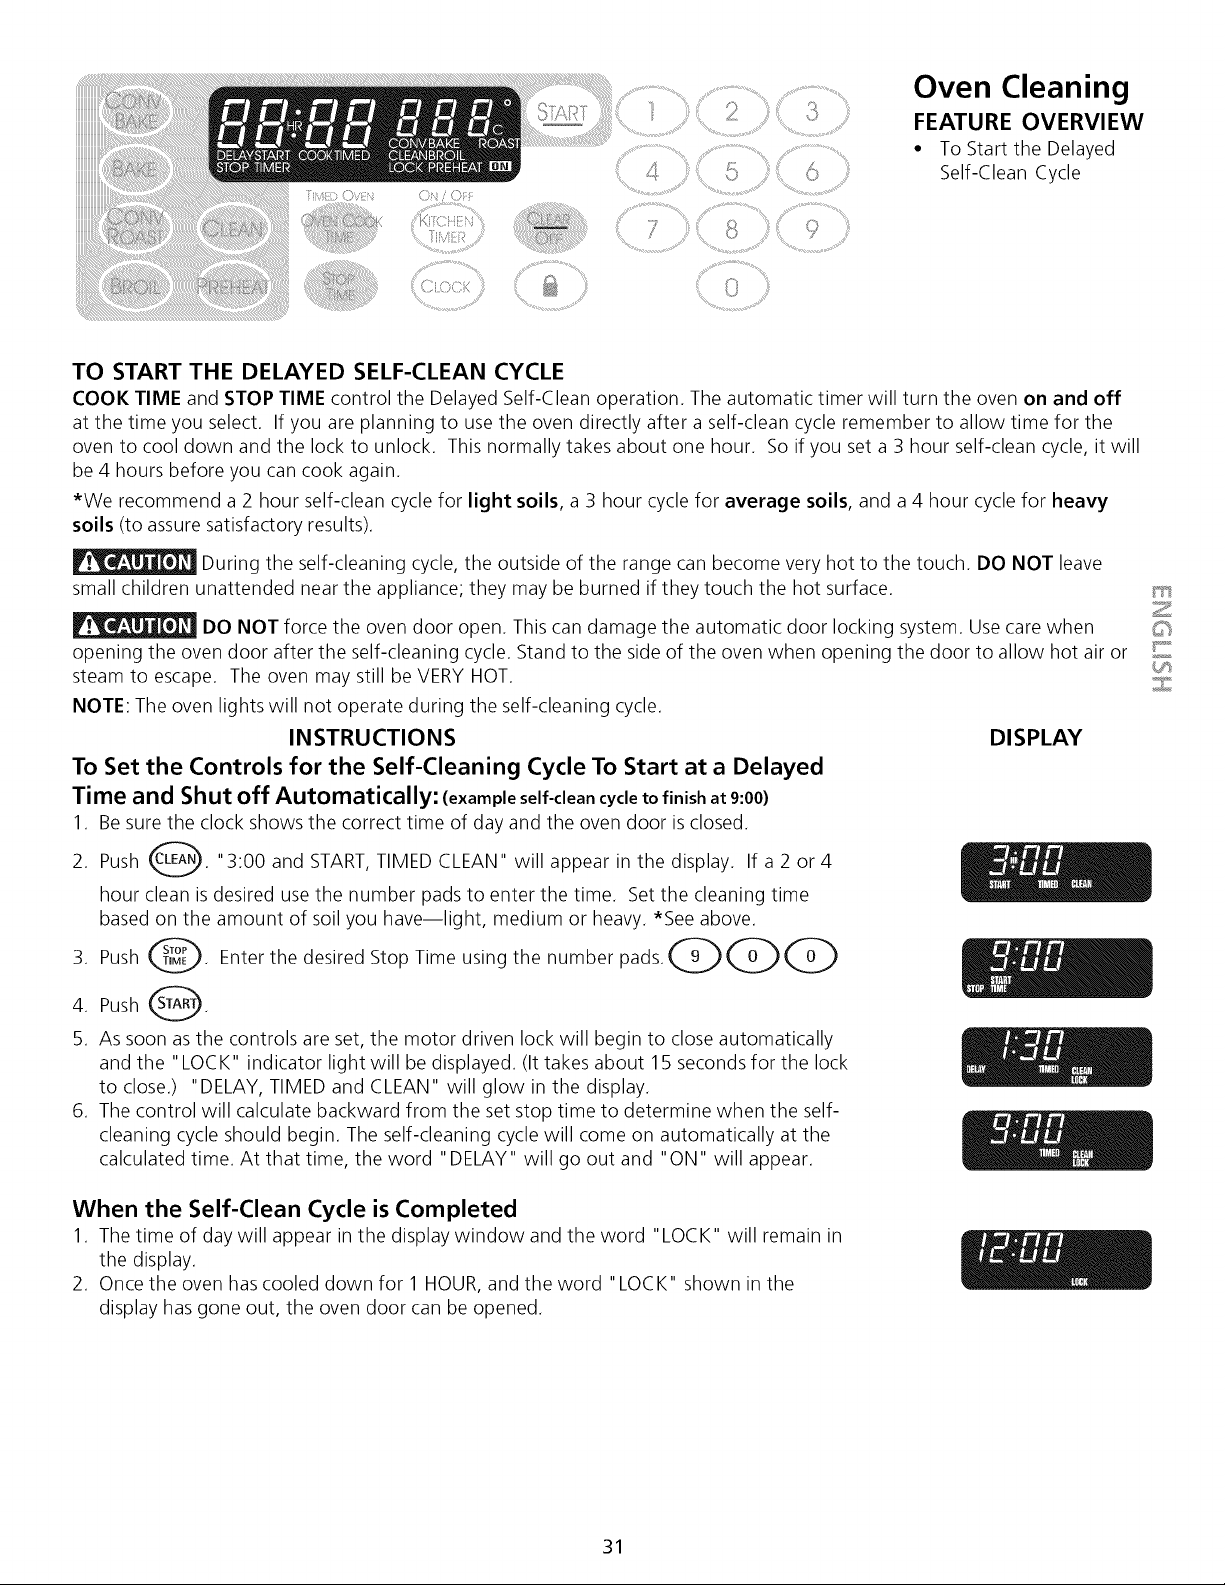
TO START THE DELAYED SELF-CLEAN CYCLE
COOK TIME and STOP TIME control the Delayed Self-Clean operation. The automatic timer will turn the oven on and off
at the time you select. If you are planning to use the oven directly after a self-clean cycle remember to allow time for the
oven to cool down and the lock to unlock. This normally takes about one hour. So if you set a 3 hour self-clean cycle, it will
be 4 hours before you can cook again.
*We recommend a 2 hour self-clean cycle for light soils, a 3 hour cycle for average soils, and a 4 hour cycle for heavy
soils (to assure satisfactory results).
During the self-cleaning cycle, the outside of the range can become very hot to the touch. DO NOT leave
small children unattended near the appliance; they may be burned if they touch the hot surface. _'_'t
DO NOT force the oven door open. This can damage the automatic door locking system. Use care when _"_
C
opening the oven door after the self-cleaning cycle. Stand to the side of the oven when opening the door to allow hot air or !_
steam to escape. The oven may still be VERY HOT. _3_
NOTE The oven lights will not operate during the self-cleaning cycle.
INSTRUCTIONS DISPLAY
To Set the Controls for the Self-Cleaning Cycle To Start at a Delayed
Time and Shut off Automatically: (exampleself-cleancycleto finishat 9:00)
1. Be sure the clock shows the correct time of day and the oven door is closed.
2. Push _. "3:00 and START,TIMED CLEAN" will appear in the display. If a 2 or 4
hour clean is desired use the number pads to enter the time. Set the cleaning time
based on the amount of soil you have--light, medium or heavy. *See above.
3. Push @. Enter the desired Stop Time using the number pads.@QQ
4. Push _.
5. As soon as the controls are set, the motor driven lock will begin to close automatically
and the "LOCK" indicator light will be displayed. (It takes about 15 seconds for the lock
to close.) "DELAY, TIMED and CLEAN" will glow in the display.
6. The control will calculate backward from the set stop time to determine when the self-
cleaning cycle should begin. The self-cleaning cycle will come on automatically at the
calculated time. At that time, the word "DELAY" will go out and "ON" will appear.
When the Self-Clean Cycle is Completed
1. The time of day will appear in the display window and the word "LOCK" will remain in
the display.
2. Once the oven has cooled down for 1 HOUR, and the word "LOCK" shown in the
display has gone out, the oven door can be opened.
31
General
Cleaning
FEATURE OVERVIEW
• Cooktop Cleaning
To Clean the Cooktop Glass
The cooktop is designed to make cleaning easier. Cleanups are easy when spillovers are
cleaned up immediately. To clean, wipe with a clean, damp cloth and wipe dry.
Correct and consistent leaning is essential to maintaining your heat-resistant glass top. Spills
and spatters should be wiped up using a clean paper towel and sudsy water. This should be
done either as soon as possible after the spill occurs, after cooking is completed, or at the
latest, before using the cooktop again. Use caution if the cooktop is hot. For heavy spills,
spatter or burned-on materials, use a razor blade scraper. Hold the razor blade scraper at a 30 °
angle and remove food spills or burned on food residue.
Finish the cleaning process by applying a recommended heat-resistant glass cooktop cleaning
cream. Apply cleaner with clean, damp paper towel. Rinse with a paper towel dampened with
clean water and wipe dry. Always wipe the cooktop thoroughly to avoid heating any cleaner
residue.
DO NOT us a cooktop cleaner on a hot cooktop. The fumes can be hazardous
to your health, and can chemically damage the ceramic- glass surface. Be sure the controls are
turned to OFF. Do not use commercial oven cleaners on any part of the cooktop. Damage to
the finish or parts could result.
Things to Remember
1. Avoid using bleach and do not use ammonia to clean the ceramic surface.
2. Do not put plastic items on warm cooking areas.
3. Never slide oven racks across cooktop surface. They may scratch or metalmark the cooktop.
4. If cooktop should break, do not use cooktop or attempt to clean it. Call your Sears Service
Center immediately.
5. Never use rivet or metal stand between the cooking utensil and the ceramic cooktop. The
ceramic surface may be scratched, metalmarked or etched by such items.
6. Sugary spills can cause pitting of your cooktop surface. Therefore, you must begin cleaning
the spills while the cooktop is still hot. Use caution when following the steps below.
a) Turn off all surface units and remove all pans immediately.
b) Wearing an oven mitt, use a razor to scrape the hot spill out of the cooking zone to
cooler area on the cooktop.
c) Allow the cooktop to cool.
Use and Care of Glass Surface
Problem Cause To Remove
Fine "Brown lines"
(tiny scratches or
abrasions which have
collected soil).
Metalmarking (mark
or black marks).
Brown streaks and
specks.
Coarse particles (salt, sand,
sugar or grit) between bottom
of cookware and cooktop that
are not removed before
cooking. Using incorrect
cleaning materials.
Sliding or scraping metal
utensils or oven shelves across
cooktop.
Cleaning with a sponge or
dishcloth that has been used
for other kitchen tasks.
To Prevent
Clean cooktop
after every use.
Use cleaner cream
daily.
Do not slide
cookware across
cooktop.
Use cleaner cream
with clean, damp
paper towel.
Tiny scratches are not
removable. They can be
minimized by continual
use of cleaner cream.
Such scratches do not
affect cooking.
Apply cleaner cream
with dampened paper
towel to cooled surface
Use a small amount of
cleaner cream with
clean, damp paper
towel.
32
Cleaning Materials for Ceramic-Glass Cooktop
Some cleaning materials may contain an ingredient which can damage the cooktop. Use
recommended cleaning products only (see below). Cleaner cream should be used regularly.
First use recommended products listed below, then use cleaner cream.
Use only recommended cleaning products and follow these basic cleaning suggestions.
1. Before the cooktop is used, thoroughly clean and saturate the cooktop with cleaner cream.
a) Dampen clean paper towel and clean unit.
b) Wipe off with another clean, damp paper towel; then wipe dry.
2. For normal daily cleaning, apply a dab of cleaner cream in the center of each unit-area to be
cleaned. Start with approximately 1/8 teaspoon (apply more if needed). Then, proceed as
stated above in a and b.
3. Make sure bottom of cookware and cooking area are clean and dry.
4. Select heat settings and cookware large enough for food and liquid.
5. Wipe up food spills and spatters before they burn into surface.
IMPORTANT : Regularly use cleaner cream. If you run out of cream, use one of the
cleaners listed. Be sure to get a new supply of cleaner cream.
Never mix cleaning products! Mixtures may interact, with damaging or
hazardous results.
Recommended cleaning products for ceramic-glass cooktop
1. Baking soda.
2. Non-impregnated plastic and nylon pads.
3. For burned on material, scrape with single-edged razor blade, held at a 30 ° angle.
4. Ceramic glass cleaning cream.
Do not use on ceramic-glass cooktop
1. Avoid pads, that can leave marks and scratches.
2. Avoid heavy-duty cleaning powders; these can scratch, depending on their abrasiveness and
cleaning pressure applied.
3. Avoid chemical oven cleaners. These can etch the cooktop surface and are caustic.
4. Avoid rust stain removers containing hydrofluoric acid.
5. Avoid using bleach and do not use ammonia.
Special Cleaning Instructions for Mineral Deposits and Discolorations
Problem: Condensation, when cooking, often collects and drips from cookware. The
minerals found in water may cause a gray or brown film to develop on
cooktop. This film is very thin and appears to be under cooktop.
Prevention: Daily and proper use of cleaner cream. Stain from mineral depostis must be
removed from the cooktop as soon as possible.
Removal:
• Wet surface with water and apply cleaner cream.
• Scrub with clean, damp paper towel until stain disappears.
• Clean remaining paste away with damp paper towel.
• Apply dab of cleaner cream and polish with clean paper towel.
General
Cleaning
FEATURE OVERVIEW
• Cooktop Cleaning
Do not
use cleaners on a heated
surface. Fumes could be
hazardous. Wait for
area to cool before
cleaning. Do not use
cleaner cream to clean
porcelain, paint or
aluminum because it can
damage the surface.
Z
©
33
General
Cleaning
Cleaning Various Parts of Your Range
Before cleaning any part of the range, be sure all controls are turned OFFand the range is cool.
Remove spillovers and heavy soiling as soon as possible. Regular cleanings will reduce the effort
required for major cleanings later.
Surfaces
Aluminum & Vinyl
Control Panel and Trim
Pieces
Glass, Painted and Plastic
Body Parts, Control Knobs
and Decorative Trim Pieces
Stainless Steel (some
models) Oven door & drawer
front panel
Oven Racks
Searing Grill
Porcelain Enamel
Broiler Pan and Insert, Door
Liner, Body Parts and Warmer
Drawer and Drawer Cavity.
How to Clean
Use hot, soapy water and a cloth. Dry with a clean cloth.
Before cleaning the control panel, turn all controls to OFFand remove the control knobs.
To remove, pull each knob straight off the shaft. Clean using hot, soapy water and a
dishcloth. Rinse with a clean water and a dishcloth. Be sure to squeeze excess water from
the cloth before wiping the panel; especially when wiping around the controls. Excess
water in or around the controls may cause damage to the appliance. Be sure to rinse the
cleaners as bluish stains may occur during heating and cannot de removed. To replace
knobs after cleaning, line up the flat sides of both the knob and the shaft; then push the
knob into place.
For genera/cleaning, use hot, soapy water and a cloth. For more difficu/t soils and built-up
grease, apply a liquid detergent directly onto the soil. Leave on soil for 30 to 60 minutes.
Rinse with a damp cloth and dry. DO NOT use abrasive cleaners on any of these materials;
they can scratch. To remove control knobs, turn to the OFFposition; grasp firmly and pull
straight off the shaft. To replace knobs after cleaning, line up the flat sides of both the
knob and the shaft; then push the knob into place.
Cleaners made especially for stainless steel as Stainless Steel Magic, or other similar
cleaners are recommended. Always follow the manufacturer's instructions. Be sure to rinse
the cleaners as bluish stains may occur during heating and cannot be removed.
Remove racks. See "Removing and Replacing Oven Racks" under Oven vent(s) and
racks. Use a mild, abrasive cleaner, following manufacturer's instructions. Rinse with clean
water and dry. After cleaning the racks, rub the sides of the racks with wax paper or a
cloth containing a small amount of baby oil or salad oil (this will make the racks glide
easier into the rack positions).
For general cleaning, put in hot soapy water for approximately 10 minutes. Use a soft cloth
to remove difficult soils. Rinsewith a damp cloth and dry. DO NOT use abrasive cleaners or
pads; they can scratch.
Gentle scouring with a soapy scouring pad will remove most spots. Rinsewith a 1:1
solution of clear water and ammonia. If necessary, cover difficult spots with an ammonia-
soaked paper towel for 30 to 40 minutes. Rinse with clean water and a damp cloth, and
then scrub with a soap-filled scouring pad. Rinseand wipe dry with a clean cloth. Remove
all cleaners or the porcelain may become damaged during future heating. DO NOT use
spray oven cleaners on the cooktop.
34
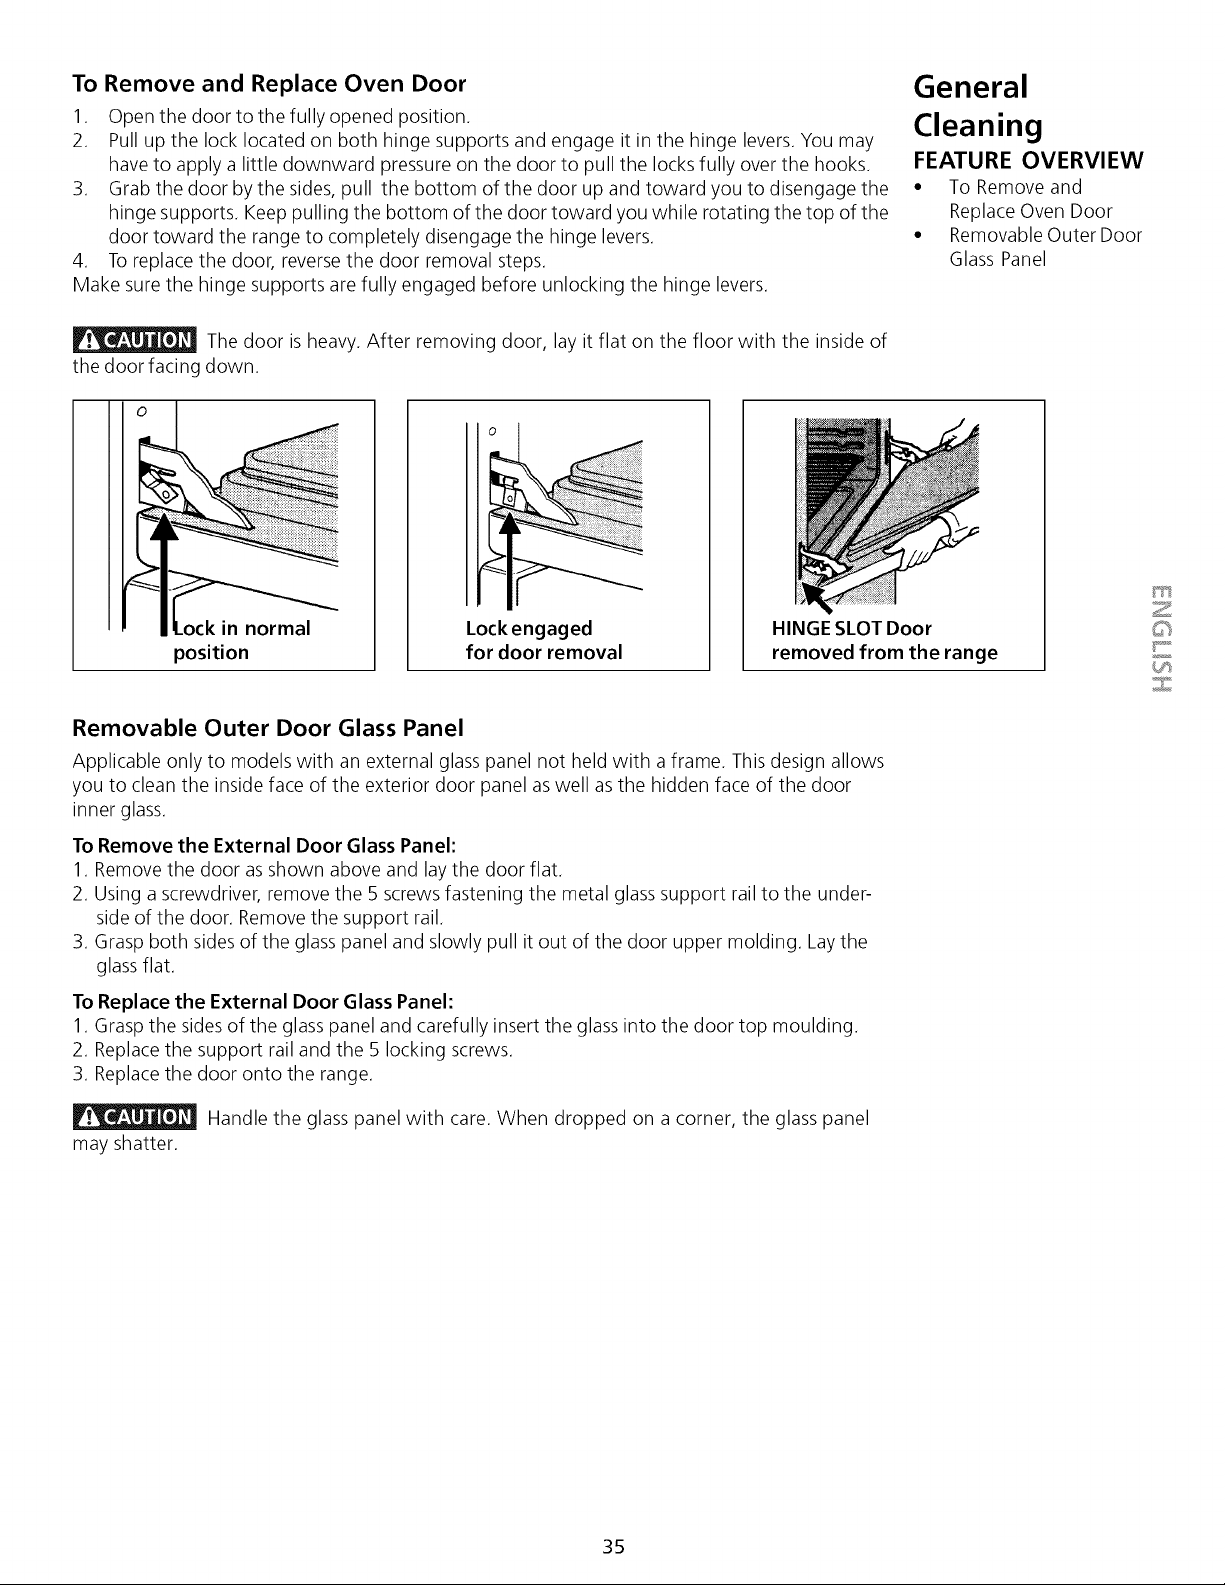
To Remove and Replace Oven Door
1. Open the door to the fully opened position.
2. Pull up the lock located on both hinge supports and engage it in the hinge levers. You may
have to apply a little downward pressure on the door to pull the locks fully over the hooks.
3. Grab the door by the sides, pull the bottom of the door up and toward you to disengage the
hinge supports. Keep pulling the bottom of the door toward you while rotating the top of the
door toward the range to completely disengage the hinge levers.
4. To replace the door, reverse the door removal steps.
Make sure the hinge supports are fully engaged before unlocking the hinge levers.
The door is heavy. After removing door, lay it flat on the floor with the inside of
the door facing down.
General
Cleaning
FEATURE OVERVIEW
• To Remove and
Replace Oven Door
• Removable Outer Door
Glass Panel
in normal
position
Lock engaged
for door removal
HINGE SLOT Door
removed from the range
Removable Outer Door Glass Panel
Applicable only to models with an external glass panel not held with a frame. This design allows
you to clean the inside face of the exterior door panel as well as the hidden face of the door
inner glass.
To Remove the External Door Glass Panel:
1. Remove the door as shown above and lay the door flat.
2. Using a screwdriver, remove the 5 screws fastening the metal glass support rail to the under-
side of the door. Remove the support rail.
3. Grasp both sides of the glass panel and slowly pull it out of the door upper molding. Lay the
glass flat.
To Replace the External Door Glass Panel:
1. Grasp the sides of the glass panel and carefully insert the glass into the door top moulding.
2. Replace the support rail and the 5 locking screws.
3. Replace the door onto the range.
Handle the glass panel with care. When dropped on a corner, the glass panel
may shatter.
Z
©
35
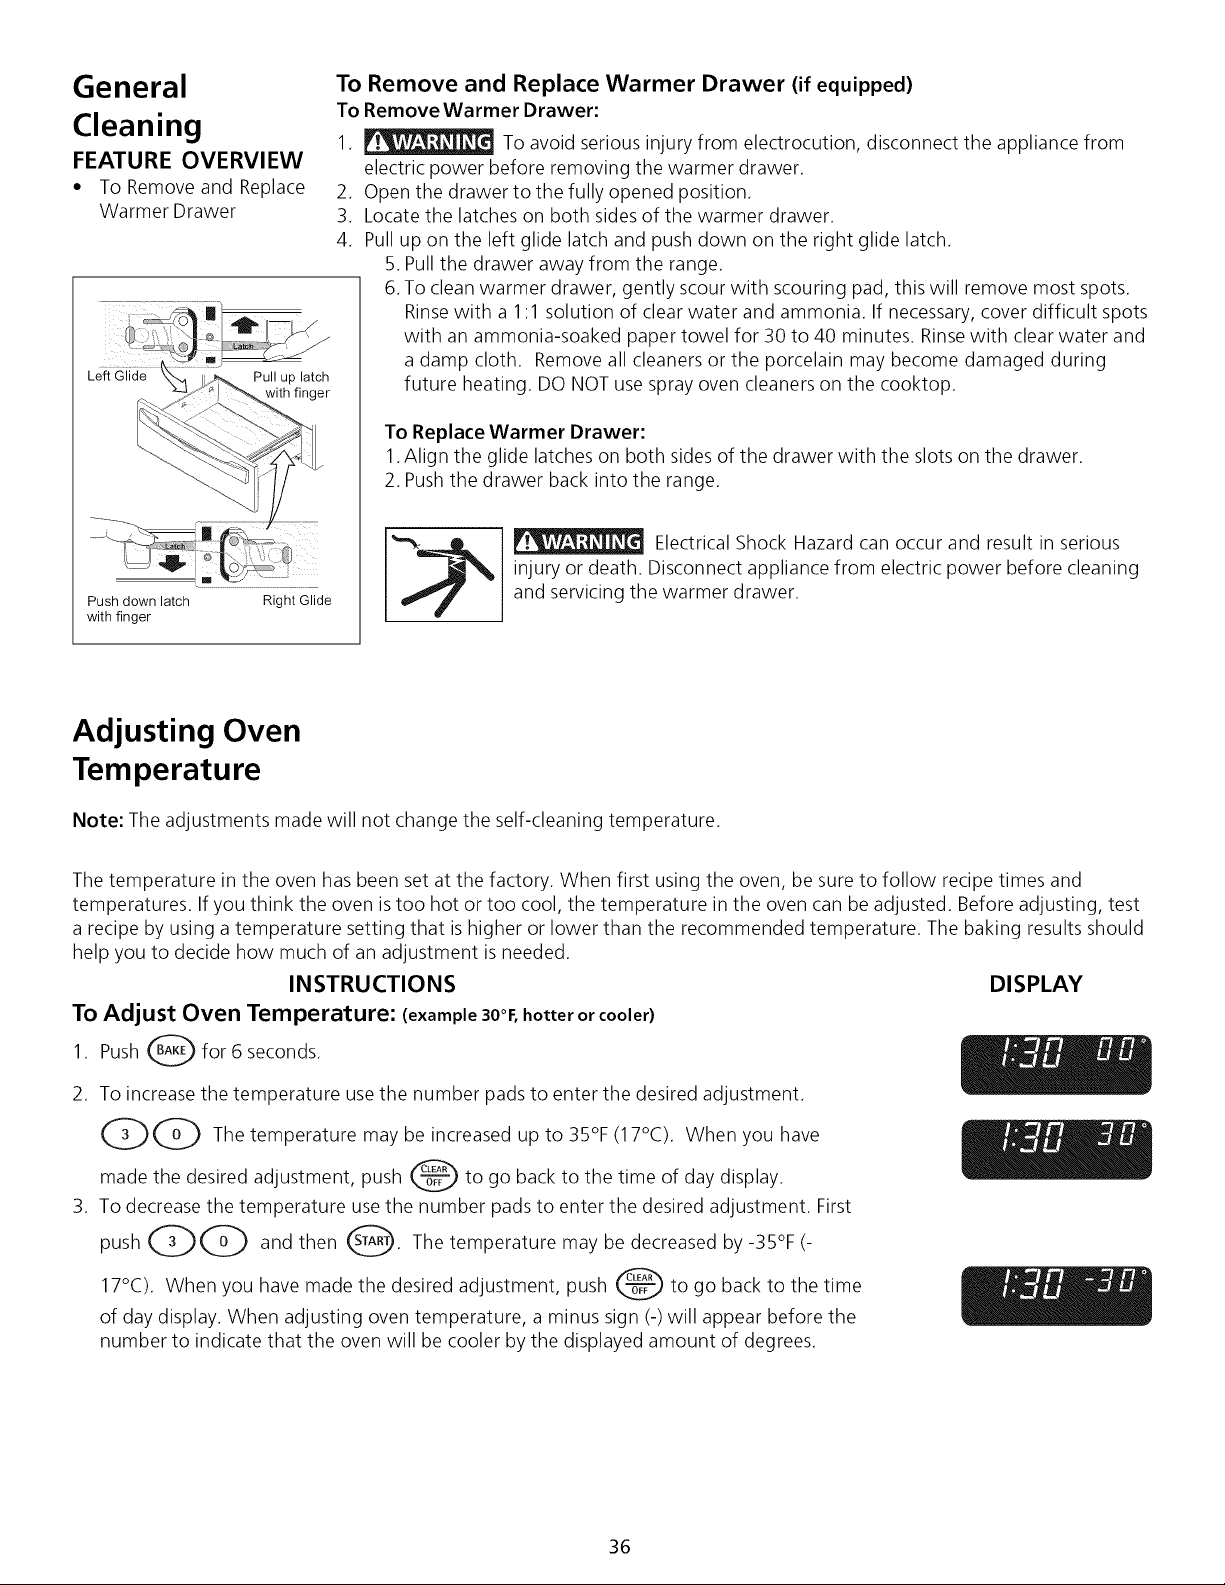
General
Cleaning
FEATURE OVERVIEW
• To Remove and Replace
Warmer Drawer
Left Glide Pull up latch
with finger
Push down latch Right Glide
with finger
To Remove and Replace Warmer Drawer (if equipped)
To Remove Warmer Drawer:
1. _ To avoid serious injury from electrocution, disconnect the appliance from
electric power before removing the warmer drawer.
2. Open the drawer to the fully opened position.
3. Locate the latches on both sides of the warmer drawer.
4. Pull up on the left glide latch and push down on the right glide latch.
5. Pull the drawer away from the range.
6. To clean warmer drawer, gently scour with scouring pad, this will remove most spots.
Rinse with a 1:1 solution of clear water and ammonia. If necessary, cover difficult spots
with an ammonia-soaked paper towel for 30 to 40 minutes. Rinse with clear water and
a damp cloth. Remove all cleaners or the porcelain may become damaged during
future heating. DO NOT use spray oven cleaners on the cooktop.
To Replace Warmer Drawer:
1. Align the glide latches on both sides of the drawer with the slots on the drawer.
2. Push the drawer back into the range.
Electrical Shock Hazard can occur and result in serious
injury or death. Disconnect appliance from electric power before cleaning
and servicing the warmer drawer.
Adjusting Oven
Temperature
Note: The adjustments made will not change the self-cleaning temperature.
The temperature in the oven has been set at the factory. When first using the oven, be sure to follow recipe times and
temperatures. If you think the oven is too hot or too cool, the temperature in the oven can be adjusted. Before adjusting, test
a recipe by using a temperature setting that is higher or lower than the recommended temperature. The baking results should
help you to decide how much of an adjustment is needed.
INSTRUCTIONS
To Adjust Oven Temperature: (example 30°1:, hotter or cooler)
Push _ for 6 seconds.
1.
2. To increase the temperature use the number pads to enter the desired adjustment.
QQ The temperature may be increased up to 35°F (17°C). When you
have
adjustment, push _ to go back to the time of day display.
made the desired
3. To decrease the temperature use the number pads to enter the desired adjustment. First
pushQQ and then _. The temperature may be decreased by-35%(-
17°C). When you have made the desired adjustment, push _ to go back to the time
of day display. When adjusting oven temperature, a minus sign (-) will appear before the
number to indicate that the oven will be cooler by the displayed amount of degrees.
DISPLAY
36
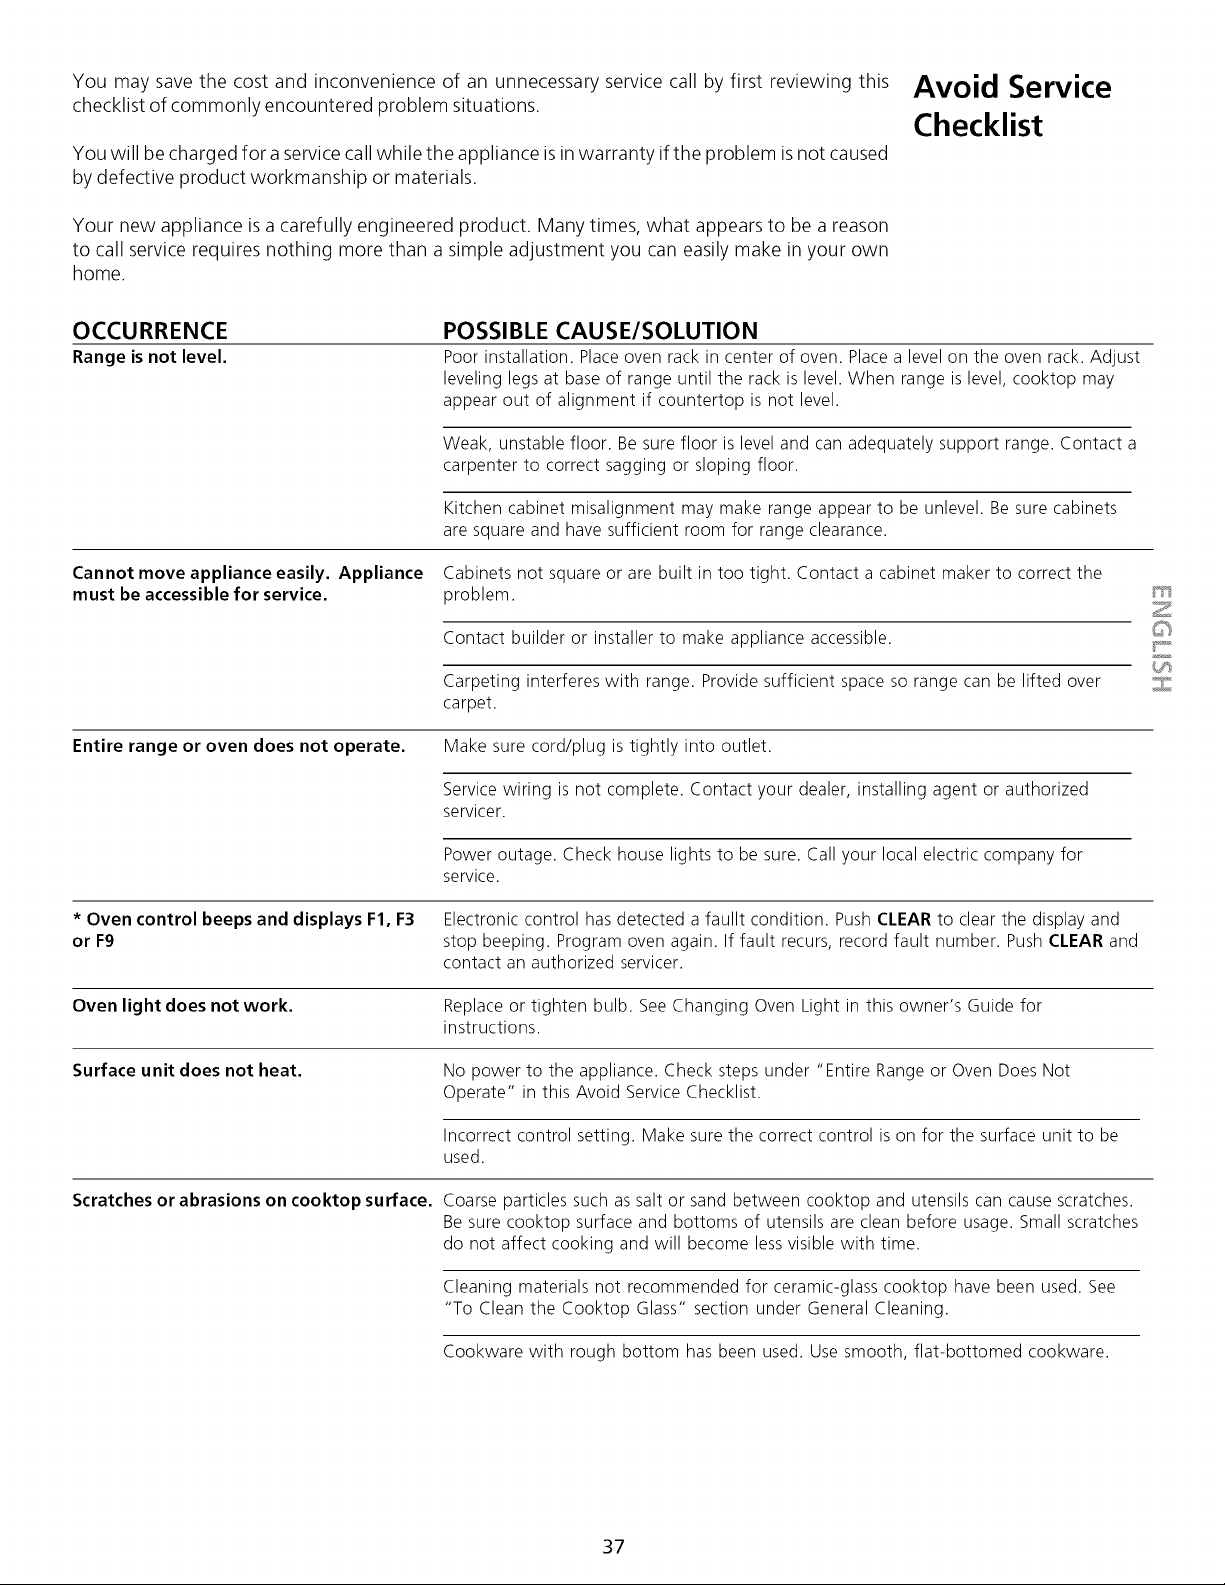
Youmaysavethecostandinconvenienceof anunnecessaryservicecallbyfirstreviewingthis
checklistofcommonlyencounteredproblemsituations.
Youwillbechargedforaservicecallwhiletheapplianceisinwarrantyiftheproblemisnotcaused
bydefectiveproductworkmanshipormaterials.
Yournewapplianceisacarefullyengineeredproduct.Manytimes,whatappearsto bea reason
to callservicerequiresnothingmorethana simpleadjustmentyoucaneasilymakeinyourown
home.
Avoid Service
Checklist
OCCURRENCE
Range is not level.
POSSIBLE CAUSE/SOLUTION
Poor installation. Place oven rack in center of oven. Place a level on the oven rack. Adjust
leveling legs at base of range until the rack is level. When range is level, cooktop may
appear out of alignment if countertop is not level.
Weak, unstable floor. Be sure floor is level and can adequately support range. Contact a
carpenter to correct sagging or sloping floor.
Kitchen cabinet misalignment may make range appear to be unlevel. Be sure cabinets
are square and have sufficient room for range clearance.
Cannot move appliance easily. Appliance Cabinets not square or are built in too tight. Contact a cabinet maker to correct the
must be accessible for service, problem.
Contact builder or installer to make appliance accessible.
Carpeting interferes with range. Provide sufficient space so range can be lifted over
carpet.
Entire range or oven does not operate. Make sure cord/plug is tightly into outlet.
Service wiring is not complete. Contact your dealer, installing agent or authorized
servicer.
Power outage. Check house lights to be sure. Call your local electric company for
service.
* Oven control beeps and displays F1, F3 Electronic control has detected a faullt condition. Push CLEAR to clear the display and
or F9 stop beeping. Program oven again. If fault recurs, record fault number. Push CLEAR and
contact an authorized servicer.
Oven light does not work. Replace or tighten bulb. See Changing Oven Light in this owner's Guide for
instructions.
Surface unit does not heat. No power to the appliance. Check steps under "Entire Range or Oven Does Not
Operate" in this Avoid Service Checklist.
Incorrect control setting. Make sure the correct control is on for the surface unit to be
used.
Scratches or abrasions on cooktop surface. Coarse particles such as salt or sand between cooktop and utensils can cause scratches.
Be sure cooktop surface and bottoms of utensils are clean before usage. Small scratches
do not affect cooking and will become less visible with time.
Cleaning materials not recommended for ceramic-glass cooktop have been used. See
"To Clean the Cooktop Glass" section under General Cleaning.
Cookware with rough bottom has been used. Use smooth, flat-bottomed cookware.
Z
©
37
Metalmarks.
Sliding or scraping of metal utensils on cooktop surface. Do not slide metal utensils on
cooktop surface. Use a ceramic-glass cooktop cleaning cream to remove the marks. See
"To Clean the Cooktop Glass" section under General Cleaning.
Brown streaks or specks. Boilovers are cooked onto surface. Use razor blade scraper to remove soil. See "To
Clean the Cooktop Glass" section under General Cleaning.
Areas of discoloration with metallic Mineral deposits from water and food. Remove using a ceramic-glass cooktop cleaning
sheen, cream. Use cookware with clean, dry bottoms.
Poor baking results. Many factors affect baking results. Make sure the proper rack position is used. Center
food in the oven and space pans to allow air to circulate. Allow the oven to preheat to
the set temperature before placing food in the oven. Try adjusting the recipe's
recommended temperature or baking time. If you feel the oven is too hot or cool, see
"Adjusting Oven Temperature" in this Owner's Guide.
Flames inside oven or smoking from vent. Excessive spillovers in oven. Set self-clean cycle for a longer cleaning time.
Excessive spillovers in oven. This is normal, especially for pie spillovers or large amounts
of grease on the oven bottom. Wipe up excessive spillovers before starting the self-
clean cycle. If flames or excessive smoke are present, stop the self-clean cycle and follow
the steps under "Stopping or Interrupting the Self-Cleaning Cycle" in the Electronic
Oven Control Guide.
Oven smokes excessively during broiling. Control(s) not set properly. Follow instructions under "Setting Oven Controls" in the
Electronic Oven Control Guide.
Make sure oven is opened to Broil Stop Position.
Meat too close to the element. Reposition the rack to provide proper clearance between
the meat and the element. Preheat broil element. Preheat broil element for searing.
Grid on broiler pan wrong side up and grease not draining. Always place grid on the
broiler pan with ribs up and slots down to allow grease to drip into pan.
Grease has built up on oven surfaces. Regular cleaning is necessary when broiling
frequently. Old grease or food spatters cause excessive smoking.
Self-cleaning cycle does not work. Control(s) not set properly. Follow instructions under "Oven Cleaning" in the Electronic
Oven Control Guide.
Self-cleaning cycle was interrupted. Stop time must be 3 to 4 hours past the start time.
Follow steps under "Stopping or Interrupting the Self-Cleaning Cycle" in the Electronic
Oven Control Guide.
Soil not completely removed after self-
cleaningcycle.
Failure to clean bottom, front top or oven, frame or door area outside oven seal. These
areas are not in the self-cleaning area, but get hot enough to burn on residue. Clean
these areas before the self-cleaning cycle is started. Burned-on residue can be cleaned
with a stiff nylon brush and water or nylon scrubber. Be careful not to damage the oven
seal.
38
Tabla de materias
Registro del producto .................................................... 39
Garantia de la estufa deslizable .................................... 39
IMPORTANTES INSTRUCCIONES DE SEGURIDAD ........ 40-42
Seleccion de los utensilios de cocina ............................ 43
Caseroles y soportes especiales ..................................... 43
Consejos e informaci6n para hacer conservas .............. 44
Caracteristicas de la estufa ............................................ 45
Funciones del panel de control ..................................... 46
Reglaj del reloj .......................................................... 47-48
• Reloj .......................................................................... 47
• Modo de ahorro de energia de doce horas .................. 47
• Recordatorio de la minutreria ...................................... 48
• Kitchen Timer (contador de tiempo) ............................ 48
Caracteristicas de control
definidas por el consumidor .......................................... 49
Coccion de superficie ................................................ 50-52
• Programacion de los controles de superficie ................. 50
• Vidrio cer_imico de la plancha de cocinar ............... 50-51
• Programando los controles para la zona de entibiado .. 52
Ajustado la temperatura de la gaveta de entibiar
(si equipada) ................................................................... 53
Ventilacion y rejillas de horno ....................................... 54
Cambiando la luz del horno .......................................... 54
Ajuste de los controles del homo ............................ 55-65
• Preheat (Precalentar) .................................................. 55
• Bake (Hornear) ...................................................... 56-59
• Broil (Asar a la parilla) ........................................... 60-62
• Horneado y rostizado de conveccion ...................... 63-65
I_impieza del homo ................................................... 66-70
I_impieza general ....................................................... 71-73
Regulacion de la temperatura del horno ...................... 73
Lista de verificacion para evitar Ilamadas ................ 74-75
Servicio Sears ........................................... Cubierta trasera
Registro del producto
En este espacio, inscriba la fecha de compra, modelo y n0mero de serie de su producto. Ud. encontrar_i el modelo y el
n0mero de serie en una placa de identificacion. La placa est,1Iocalisada al lado izquierdo de la estufa yes visible cuando la
puerta del homo esta abierta o en el interior de la gaveta en la parte lateral de la estufa.
Model No 790. Fecha de compra
No de serie Guarde estas instrucciones y su boleta de pago para consultacion futura.
Garantia de la estufa deslizable
UN ARIO COMPLETO DE GARANTiA SOBRETODOS LOS COMPONENTES.
Si, dentro del aho a partir de la fecha de instalacion, cualquier componente de este producto deja de funcionar debido a
alg0n defecto del material o de la fabricacion, Sears Io reparara o Io remplazara, seg0n su criterio, sin costo alguno.
LOS SERVICIOSDE GARANTiA SON DISPONIBLESCONTACTANDO AL CENTRO DE SERVICIOMAS CERCANO EN LOS
ESTADOS UNIDOS.
Esta garantia le otorga derechos legales especificos, y Ud puede tener otros derechos que puedan varias de un estado a
otro.
Sears Roebuck and Co. Dept. 817 WA Hoffman Estates, IL 601 79
Z_
Para aumentar el valor de su alcance, compre un Acuerdo de Mantenimiento SEARS.
"Mantenemos Io que vendemos" es nuestra garantia para que Ud. pueda depender del servicio Sears. Su
electrodomestico Kenmore ha aumentado de valor cuando Ud considera que Sears posee unidades de servicio a traves de
todo el pals con personal capacitado en la reparacion de todo electrodomesticos vendido por Sears. EIIosposeen el
conocimiento y las habilidades, las herramientas, componentes y el material para asegurar nuestra prenda: "Mantenemos
Io que vendemos".
Mantenga el valor de su compra con un Acuerdo de Mantenimiento Sears. Los aparatos Kenmore son disehados, fabricados
y verificados para obtener ahos de operaciones. ElAcuerdo de Mantenimiento Sears le ofrece un excelente programa de
servicio para su producto.
El Acuerdo de Mantenimiento SEARS:
• Es su manera de comprar los servicios del mahana a los precios de boy.
• Elimina las facturas por reparacion que resultan del uso normal.
• Permite las Ilamadas de servicio que necesite.
• Le ofrece una Verificacion Annual Preventiva cuando Io desee para mantener su aparato Kenmore en las mejores
condiciones.
Para mas informacion, Ilamar al 1-800-827-6655
39
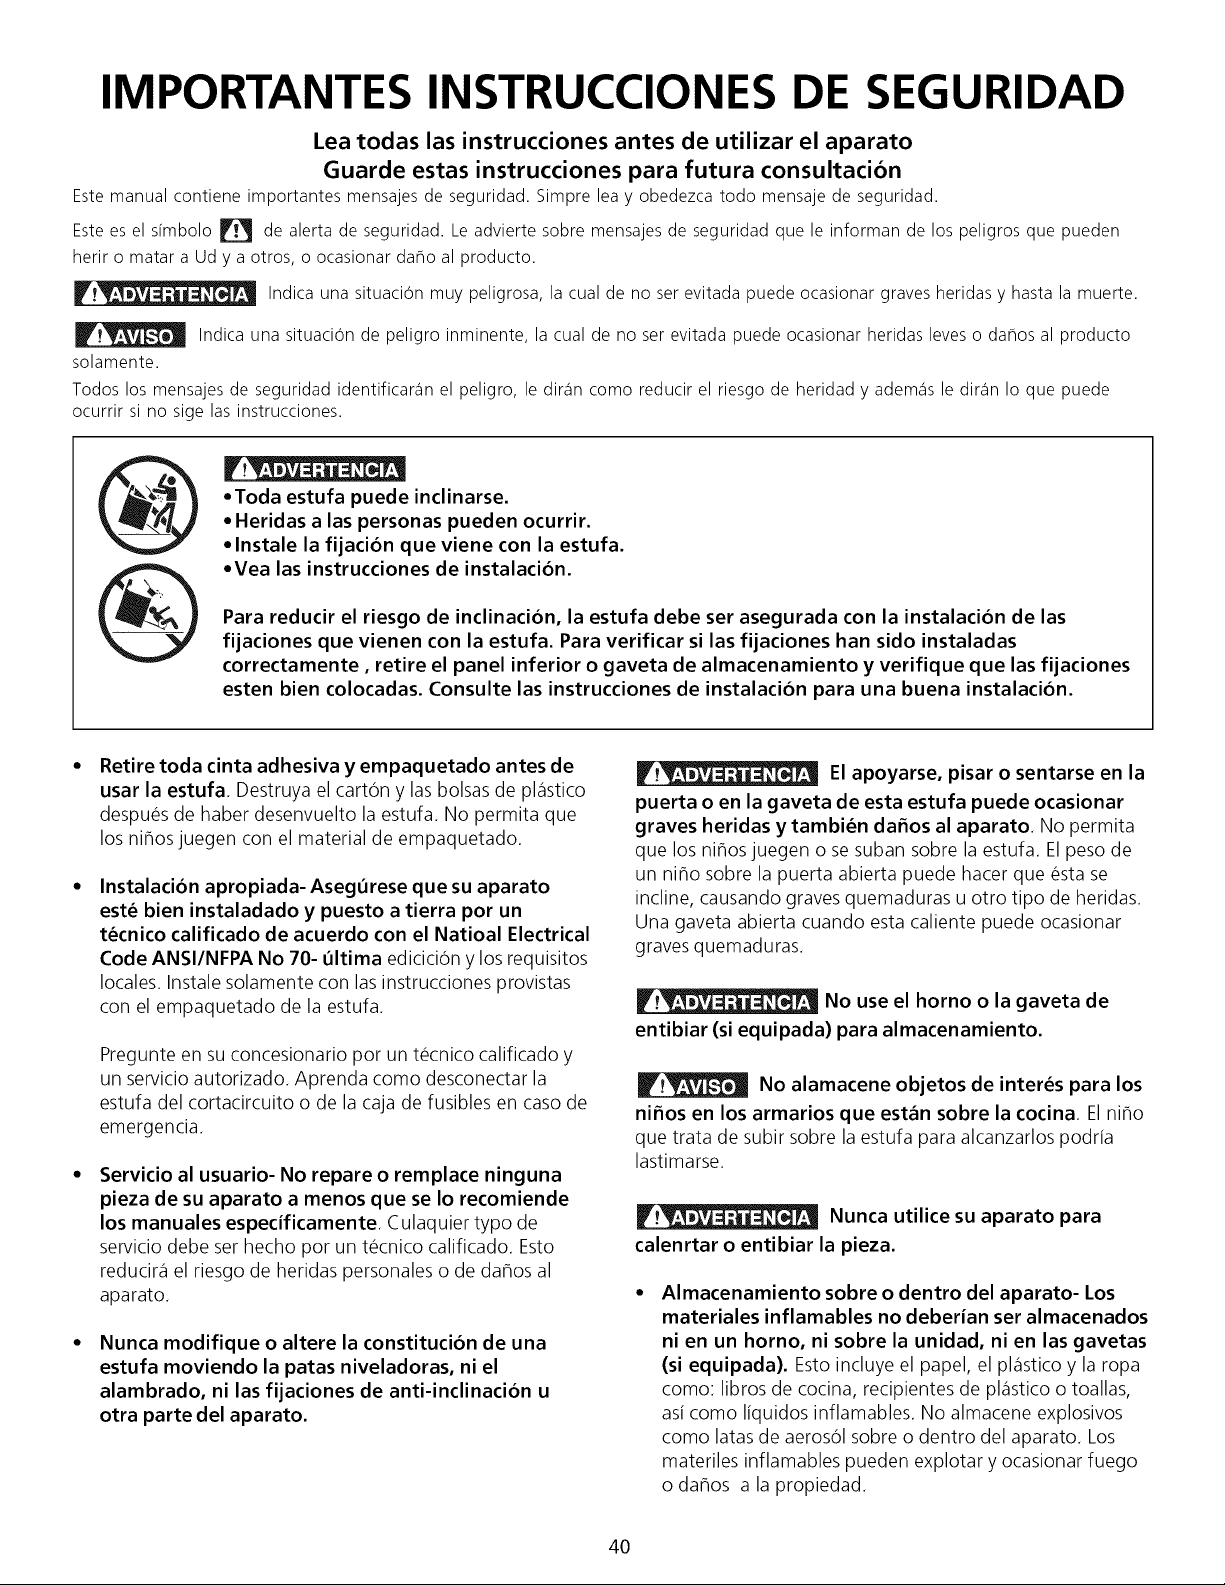
IMPORTANTES INSTRUCCIONES DE SEGURIDAD
Lea todas las instrucciones antes de utilizar el aparato
Guarde estas instrucciones para futura consultacion
Estemanual contiene importantes mensajesde seguridad. Simpre lea y obedezca todo mensajede seguridad.
Estees el simbolo _ de alerta de seguridad. Le advierte sobre mensajesde seguridad que le informan de los peligros que pueden
herir o matar a Ud y a otros, o ocasionar daflo al producto.
Indica una situacion muy peligrosa, la cual de no ser evitada puede ocasionargraves heridasy hasta la muerte.
Indica una situacion de peligro inminente, la cual de no ser evitada puede ocasionar heridas leves o daflos al producto
solamente.
Todos los mensajes de seguridad identificar_in el peligro, le dir_in como reducir el riesgo de heridad y adem_is le dir_in Io que puede
ocurrir si no sige las instrucciones.
@
• Toda estufa puede inclinarse.
• Heridas alas personas pueden ocurrir.
• Instale la fijacion que viene con la estufa.
• Vea las instrucciones de instalacion.
Para reducir el riesgo de inclinacion, la estufa debe ser asegurada con la instalacion de las
fijaciones que vienen con la estufa. Para verificar si las fijaciones han sido instaladas
correctamente, retire el panel inferior o gaveta de almacenamiento y verifique que las fijaciones
esten bien colocadas. Consulte las instrucciones de instalacion para una buena instalacion.
Retire toda cinta adhesiva y empaquetado antes de
usar la estufa Destruya el carton y las bolsas de pl_istico
despues de haber desenvuelto la estufa. No permita que
los niflos juegen con el material de empaquetado.
Instalacion apropiada- Asegurese que su aparato
est_ bien instaladado y puesto a tierra por un
t_cnico calificado de acuerdo con el Natioal Electrical
Code ANSI/NFPA No 70- ultima edicicion y los requisitos
locales. Instale solamente con las instrucciones provistas
con el empaquetado de la estufa.
Pregunte en su concesionario por un tecnico calificado y
un servicio autorizado. Aprenda como desconectar la
estufa del cortacircuito o de la caja de fusibles en caso de
emergencia.
Servicio al usuario- No repare o remplace ninguna
pieza de su aparato a menos que se Io recomiende
los manuales especificamente. Culaquier typo de
servicio debe ser hecho por un tecnico calificado. Esto
reducir_i el riesgo de heridas personales o de daflos al
aparato.
Nunca modifique o altere la constitucion de una
estufa moviendo la patas niveladoras, ni el
alambrado, ni las fijaciones de anti-inclinacion u
otra parte del aparato.
El apoyarse, pisar o sentarse en la
puerta o en la gaveta de esta estufa puede ocasionar
graves heridas y tambi_n da_os al aparato. No permita
que los niflos juegen o se suban sobre la estufa. El peso de
un niflo sobre la puerta abierta puede hacer que esta se
incline, causando graves quemaduras u otro tipo de heridas.
Una gaveta abierta cuando esta caliente puede ocasionar
graves quemaduras.
No use el horno o la gaveta de
entibiar (si equipada) para almacenamiento.
No alamacene objetos de interes para los
ni_os en los armarios que est_n sobre la cocina El niflo
que trata de subir sobre la estufa para alcanzarlos podria
lastimarse.
Nunca utilice su aparato para
calenrtar o entibiar la pieza.
Almacenamiento sobre o dentro del aparato- Los
materiales inflamables no deberian ser almacenados
ni en un horno, ni sobre la unidad, ni en las gavetas
(si equipada). Esto incluye el papel, el pl_istico y la ropa
como: libros de cocina, recipientes de pl_istico o toallas,
asi como liquidos inflamables. No almacene explosivos
como latas de aerosol sobre o dentro del aparato. Los
materiles inflamables pueden explotar y ocasionar fuego
o daflos a la propiedad.
4O
IMPORTANTES INSTRUCCIONES DE SEGURIDAD
No deje a los ni_os solos- Los ni_os no deben ser
dejados solos o sin atencion donde el aparato est_
funcionando. No les permita sentarse o pararse sobre
niguna parte del aparato.
NO TOQUE NINGUNA PARRTEDE LA SUPERFICIEDEL
APARATO, AREAS CERCA DE ESTASUNIDADES,
ELEMENTOS CALIENTES O LAS PARTESINTERNAS DEL
HORNO O DE LA GAVETA DE ENTIBIAR (SI EQUIPADA).
Lassuperficies o los elementos del homo pueden estar
calientes aOn que esten de color oscuro. Las areas cerca
de la superficie pueden estar Io suficientemente calientes
para causar quemaduras. Despues o antes del uso, no
permita que la ropa u otros materiales inflamables esten
en contacto con estas areas hasta que hallan enfriado.
Estasareas son: la plancha de cocinar, las areas frente a
la plancha de cocinar, las ranuras de ventilacion del
homo y las areas cercanas a elias, la puerta del homo y la
ventanilla.
Use una vestimenta apropiada- No use ropa que es
suelta u holgada cuando utilice el aparato. No ponga
la ropa u otros materiales inflamables en contacto con las
areas calientes.
No utilice agua o harina para apagar un fuego-
Apague el fuego con la tapa de una sart_n o use
soda c_ustica, un quimico seco o un extinguidor en
aerosol.
• Cuando caliente substancias grasosas, tenga
cuidado. Puede ocasionar un fuego si es calentado por
mucho tiempo.
Utilice unicamente los soportes para recipientes que
est_n secos- Los soportes que est_n humedos o
mojados puden ocasionar quemaduras a causa del
vapor. No permita que los soportes esten en contacto con
las superficies calientes. No utilice una toalla o un papel
para remplazar al soporte.
• No caliente recipientes de comida que est_n
cerrados- La presion al interior de estos puede
hacerlos explotar y ocasionar heridas.
• Retire la puerta del homo de toda estufa inutilizada
siesta va ser almacenada o destruida.
IMPORTANTE- No trate de utilizar el horno durante un
corte de electricidad. Si no hay electricidad, apaga su
estufa. Si no apaga el homo y que la electricidad es
restablecida, el homo puede seguir funcionando. La comida
que deja sin cuidado puede quemarse o deteriorarse.
Los controles el_ctricos pueden
ser da_ados con frias temperaturas. Cuando utilice su
estufa por la primera vez, o si no ha sido utilizada por
41
mucho tiempo asegurese que no haya sido expuestas a
temperaturas mas altas que 0°C/32°F por mas de 3
horas antes de conectar su estufa al suministro
el_ctrico.
INSTRUCCIONES IMPORTANTES PARA
UTILIZAR SU PLANCHA DE COClNAR.
• Saber que perillas controlan cada una de los
quemadores.
Utilice una sart_n de tama_o apropiado. Esteaparato
est,1equipado con quemadores de diferentes tamaAos.
Elija utensilios con las bases aplanadas y Io
suficientemente grandes para cubrir todo el area del
quemador. Utilizar utensilios m_is pequeAos puede
exponer parte del quemador y ocasionar quemaduras de
las prendas que Ileva puesta.
Los mangos de los utensilios deben ser colocados
hacia el interior y no sobre otras unidades de
superficie- Parareducir el riesgo de quemaduras, el
encendido de materiales inflamables y los derrames
ocasionados de casualidad. Elmango del utensilio debe
ser colocado hacia el interior y no sobre otras unidades de
superficie.
Nunca deje los quemadoreas con alta temperatura
sin cuidado- Los derrames ocasionan humo y derrames
grasosos que pueden encenderse, o una sarten que ha
calentado por mucho tiempo puede derretirse.
Delineadores protectores- No utilice pelicula de
aluminium a la base del homo u otra parte del aparato. _
Solo utilizela para cubrir la comida cuando este
cociendola. Cualquier otra utilizacion puede ocasionar un_.....
incendio, una electrocution o un cortocircuito.
Utensilios de cocina envidriados- Solo algunos tipos de
utensilios de vidrio, de vidrio/cer_imica, de cer_imica
pueden resistir la temperatura del quemador de su
plancha de cocinar. Verifique las recomendaciones del
fabricante sobre el uso con las planchas de cocinar.
No utilice cubiertas decorativas- Si un quemador es
encendido accidentalmente, la cubierta decorativa se
calentar_i y podria derretirse. Lascubiertas calientes
podr_in ocasionar quemaduras si las toca. La plancha de
cocinar tambien podria ser daAada.
PARA PLANCHAS DE COClNAR SOLAMENTE
• No limpie o utilice una plancha de cocinar que est_
rota- Si la plancha de cocinar se rompe, los productos de
limpieza o los derrames pueden penetrar en ella y
producir un riesgo de electrocucion. Llame a un tecnico
calificado inmediatamente.
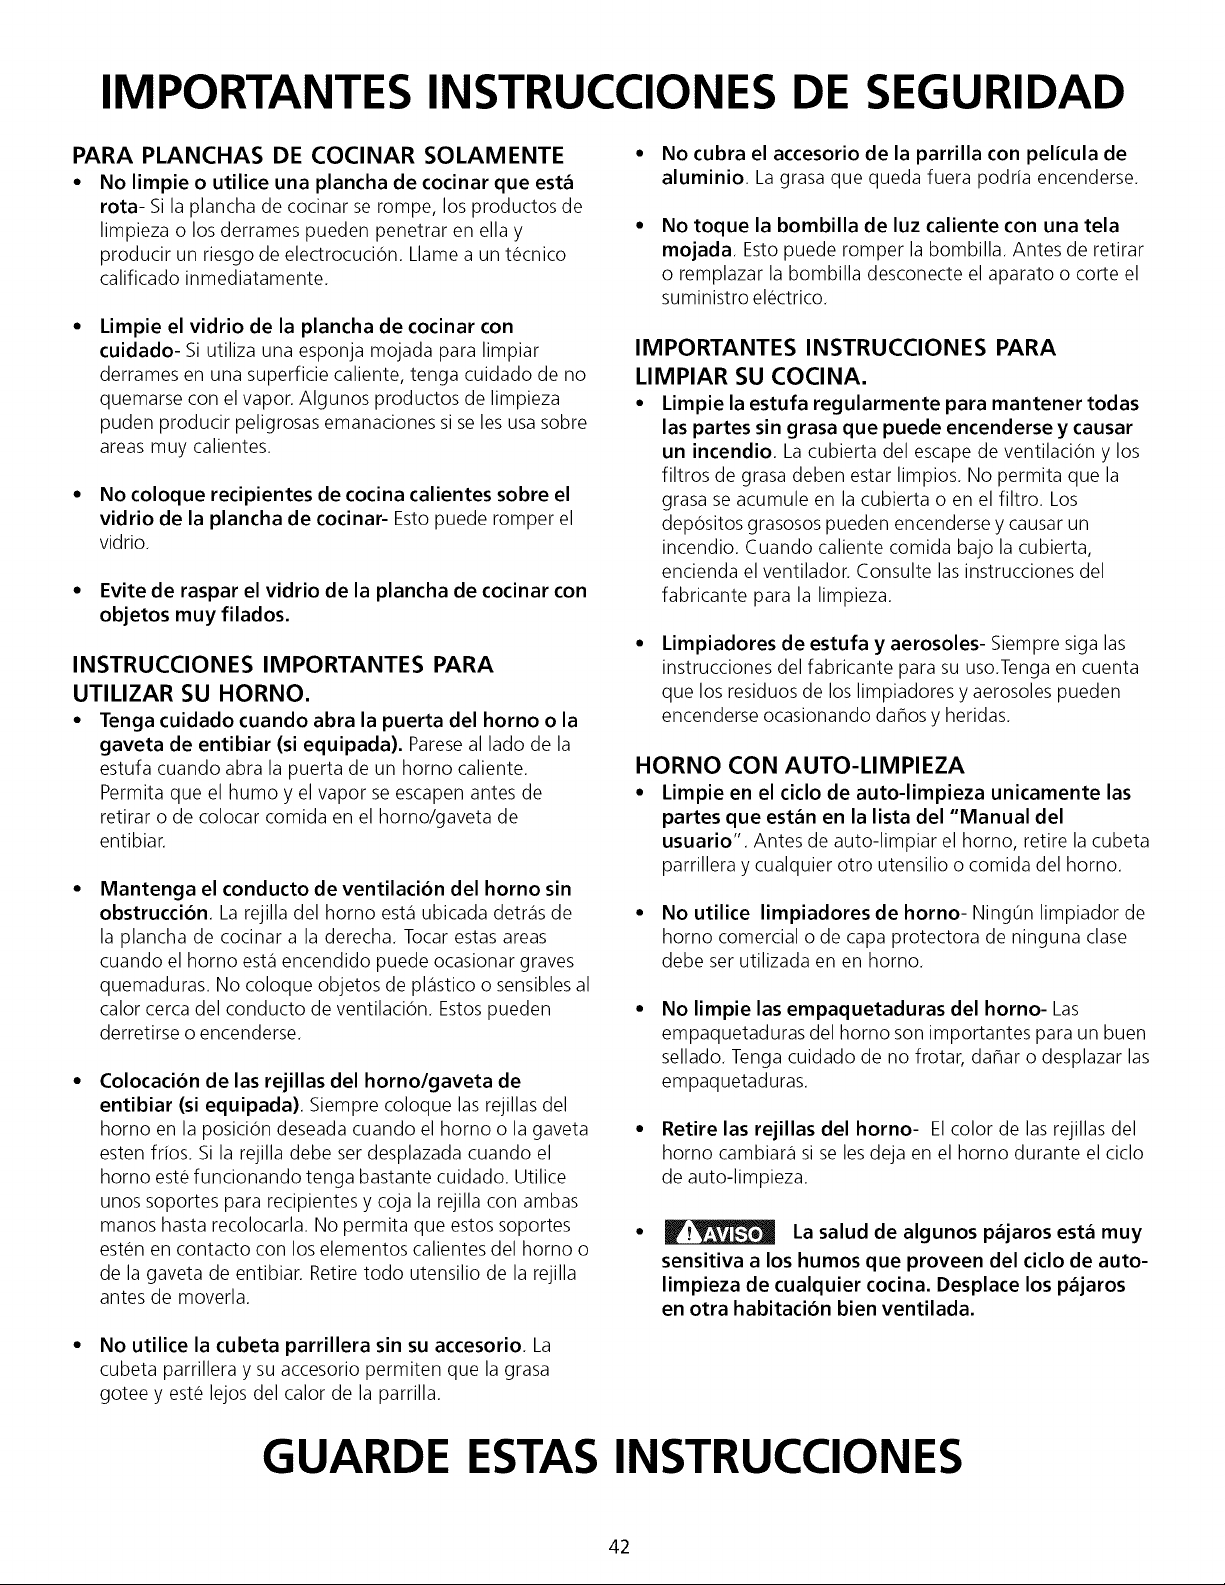
IMPORTANTES INSTRUCCIONES DE SEGURIDAD
PARA PLANCHAS DE COCINAR SOLAMENTE •
• No limpie o utilice una plancha de cocinar que est_
rota- Si la plancha de cocinar se rompe, los productos de
limpieza o los derrames pueden penetrar en ella y •
producir un riesgo de electrocuci6n. Llame a un tecnico
calificado inmediatamente.
Limpie el vidrio de la plancha de cocinar con
cuidado- Si utiliza una esponja mojada para limpiar
derrames en una superficie caliente, tenga cuidado de no
quemarse con el vapor. Algunos productos de limpieza
puden producir peligrosas emanaciones si se les usa sobre
areas muy calientes.
• No coloque recipientes de cocina calientes sobre el
vidrio de la plancha de cocinar- Esto puede romper el
vidrio.
• Evite de raspar el vidrio de la plancha de cocinar con
objetos muy filados.
INSTRUCCIONES IMPORTANTES PARA
UTILIZAR SU HORNO.
• Tenga cuidado cuando abra la puerta del horno o la
gaveta de entibiar (si equipada). Parese al lado de la
estufa cuando abra la puerta de un horno caliente.
Permita que el humo y el vapor se escapen antes de
retirar o de colocar comida en el horno/gaveta de
entibiar.
Mantenga el conducto de ventilacion del horno sin
obstruccion La rejilla del homo esta ubicada detras de
la plancha de cocinar a la derecha. Tocar estas areas
cuando el homo esta encendido puede ocasionar graves
quemaduras. No coloque objetos de plastico o sensibles al
calor cerca del conducto de ventilaci6n. Estos pueden
derretirse o encenderse.
Colocacion de las rejillas del horno/gaveta de
entibiar (si equipada). Siempre coloque las rejillas del
homo en la posicion deseada cuando el homo o la gaveta
esten frios. Si la rejilla debe ser desplazada cuando el
homo este funcionando tenga bastante cuidado. Utilice
unos soportes para recipientes y coja la rejilla con ambas
manos hasta recolocarla. No permita que estos soportes
esten en contacto con los elementos calientes del homo o
de la gaveta de entibiar. Retire todo utensilio de la rejilla
antes de moverla.
• No utilice la cubeta parrillera sin su accesorio. La
cubeta parrillera y su accesorio permiten que la grasa
gotee y este lejos del calor de la parrilla.
No cubra el accesorio de la parrilla con pelicula de
aluminio. La grasa que queda fuera podria encenderse.
No toque la bombilla de luz caliente con una tela
mojada Esto puede romper la bombilla. Antes de retirar
o remplazar la bombilla desconecte el aparato o corte el
suministro electrico.
IMPORTANTES INSTRUCCIONES PARA
LIMPIAR SU COCINA.
• Limpie la estufa regularmente para mantener todas
las partes sin grasa que puede encenderse y causar
un incendio. La cubierta del escape de ventilacion y los
filtros de grasa deben estar limpios. No permita que la
grasa se acumule en la cubierta o en el filtro. Los
dep6sitos grasosos pueden encenderse y causar un
incendio. Cuando caliente comida bajo la cubierta,
encienda el ventilador. Consulte las instrucciones del
fabricante para la limpieza.
Limpiadores de estufa y aerosoles- Siempre siga las
instrucciones del fabricante para su uso.Tenga en cuenta
que los residuos de los limpiadores y aerosoles pueden
encenderse ocasionando daflos y heridas.
HORNO CON AUTO-LIMPIEZA
• Limpie en el ciclo de auto-limpieza unicamente las
partes que est_n en la lista del "Manual del
usuario". Antes de auto-limpiar el homo, retire la cubeta
parrillera y cualquier otro utensilio o comida del horno.
• No utilice limpiadores de horno- Ningun limpiador de
homo comercial o de capa protectora de ninguna clase
debe ser utilizada en en horno.
No limpie las empaquetaduras del horno- Las
empaquetaduras del homo son importantes para un buen
sellado. Tenga cuidado de no frotar, daflar o desplazar las
empaquetaduras.
Retire las rejillas del horno- El color de las rejillas del
homo cambiara si se les deja en el homo durante el ciclo
de auto-limpieza.
La salud de algunos pajaros est_ muy
sensitiva a los humos que proveen del ciclo de auto-
limpieza de cualquier cocina. Desplace los pajaros
en otra habitacion bien ventilada.
GUARDE ESTAS INSTRUCCIONES
42
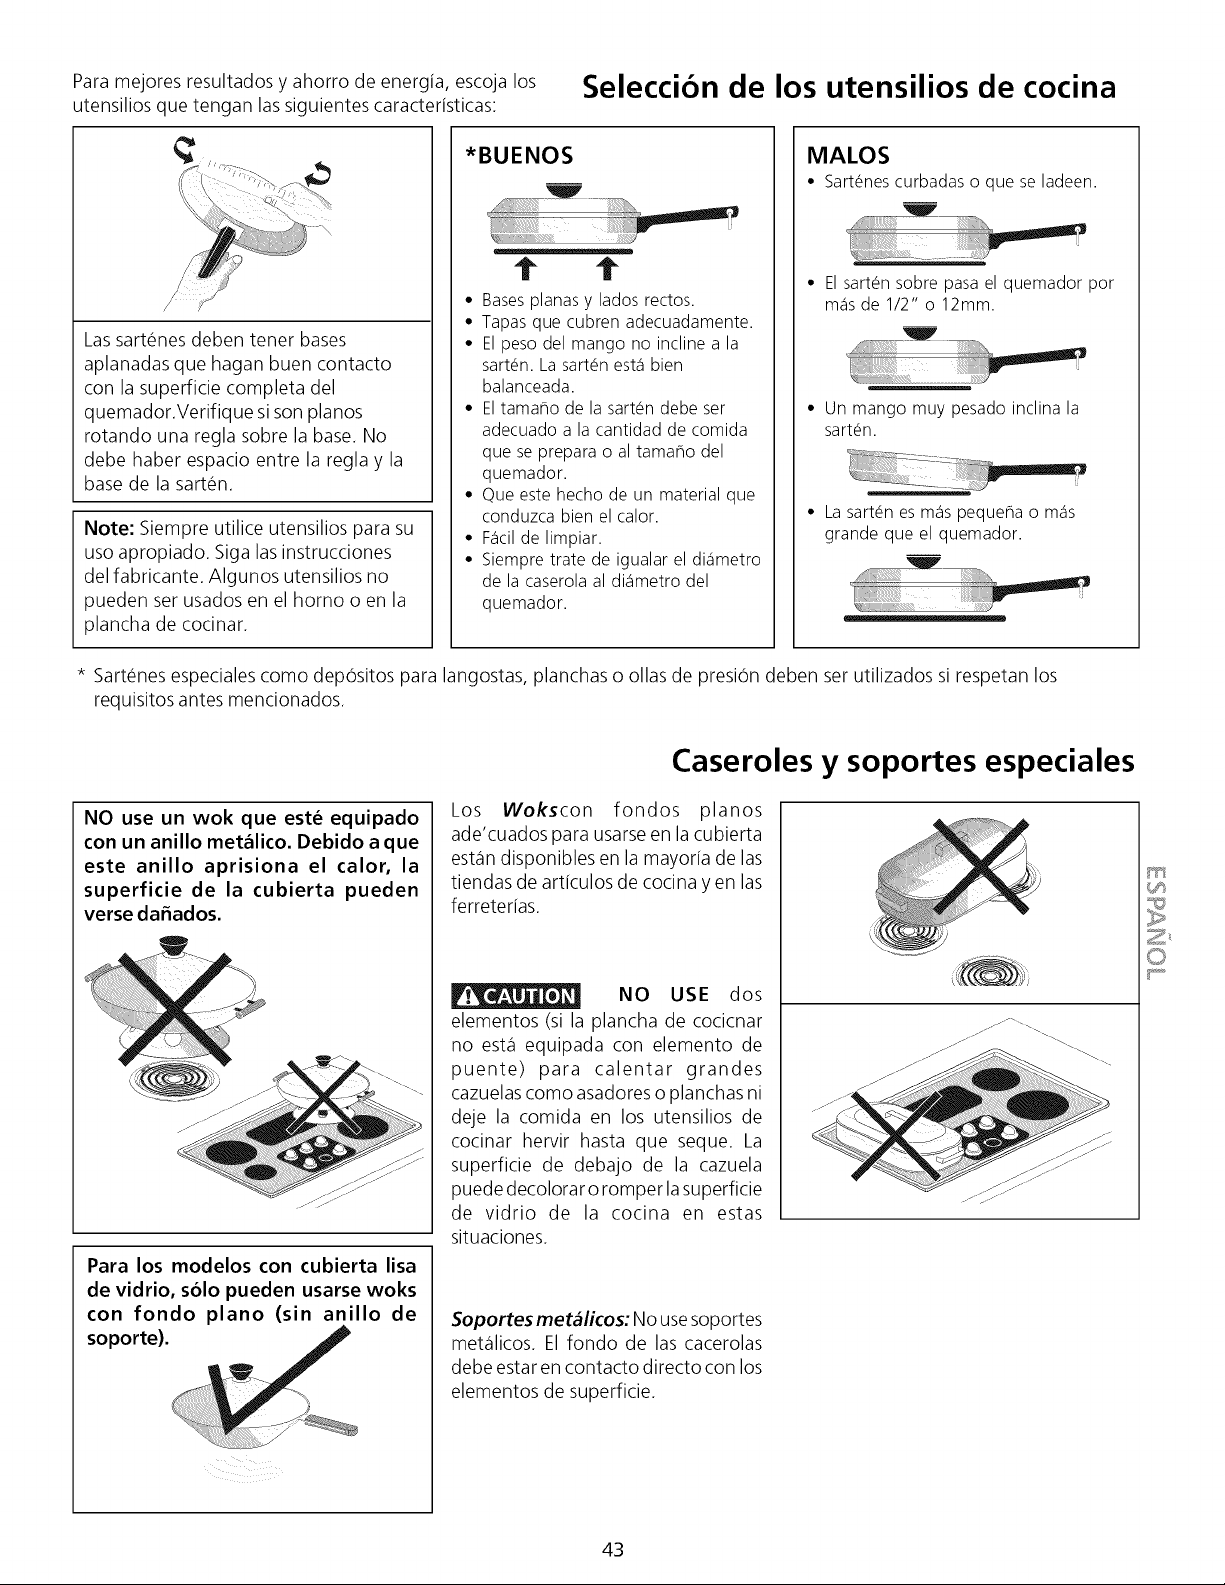
Paramejoresresultadosyahorrodeenergia,escojalos
utensiliosquetenganlassiguientescaracteristicas:
Seleccion de los utensilios de cocina
_X
..... -4
Las sartenes deben tener bases
aplanadas que hagan buen contacto
con la superficie completa del
quemador.Verifique si son pianos
rotando una regla sobre la base. No
debe haber espacio entre la regla y la
base de la sarten.
Note: Siempre utilice utensilios para su
uso apropiado. Siga las instrucciones
del fabricante. Algunos utensilios no
pueden ser usados en el homo o en la
plancha de cocinar.
*BUENOS
t t
• Basesplanasy lados rectos.
• Tapasque cubren adecuadamente.
• El peso del mango no incline a la
sart_n. Lasart_nesta bien
balanceada.
• El tamaho de la sart_n debeser
adecuadoa la cantidad de comida
que se preparao al tamaho del
quemador.
• Que este hecho de un material que
conduzcabien el calor.
• %cil de limpiar.
• Siempretrate de igualar el di_imetro
de la caserolaal di_imetrodel
quemador.
MALOS
• Sart_nescurbadaso que se ladeen.
• El sart_n sobre pasa el quemador por
m_is de 1/2" o 12mm.
• Un mango muy pesado inclina la
sart_n.
• La sart@nes m_is pequeha o m_is
grande que el quemador.
* Sartenes especiales como depositos para langostas, planchas o ollas de presion deben ser utilizados si respetan los
requisitos antes mencionados.
NO use un wok que est_ equipado
con un anillo met_lico. Debido a que
este anillo aprisiona el calor, la
superficie de la cubierta pueden
verse da_ados.
Para los modelos con cubierta lisa
de vidrio, solo pueden usarse woks
con fondo piano (sin anillo de
soporte).
Caseroles y soportes especiales
Los Wekscon fondos pianos
ade'cuados para usarse en la cubierta
est_indisponibles en la mayoria de las
tiendas de articulos de cocina yen las
ferreterias.
NO USE dos
elementos (si la plancha de cocicnar
no est.1 equipada con elemento de
puente) para calentar grandes
cazuelas como asadores o planchas ni
deje la comida en los utensilios de
cocinar hervir hasta que seque. La
superficie de debajo de la cazuela
puede decolorar oromper la superficie
de vidrio de la cocina en estas
situaciones.
Soportes met_licos: No usesoportes
met_ilicos. El fondo de las cacerolas
debe estar en contacto directo con los
elementos de superficie.
Z_
43
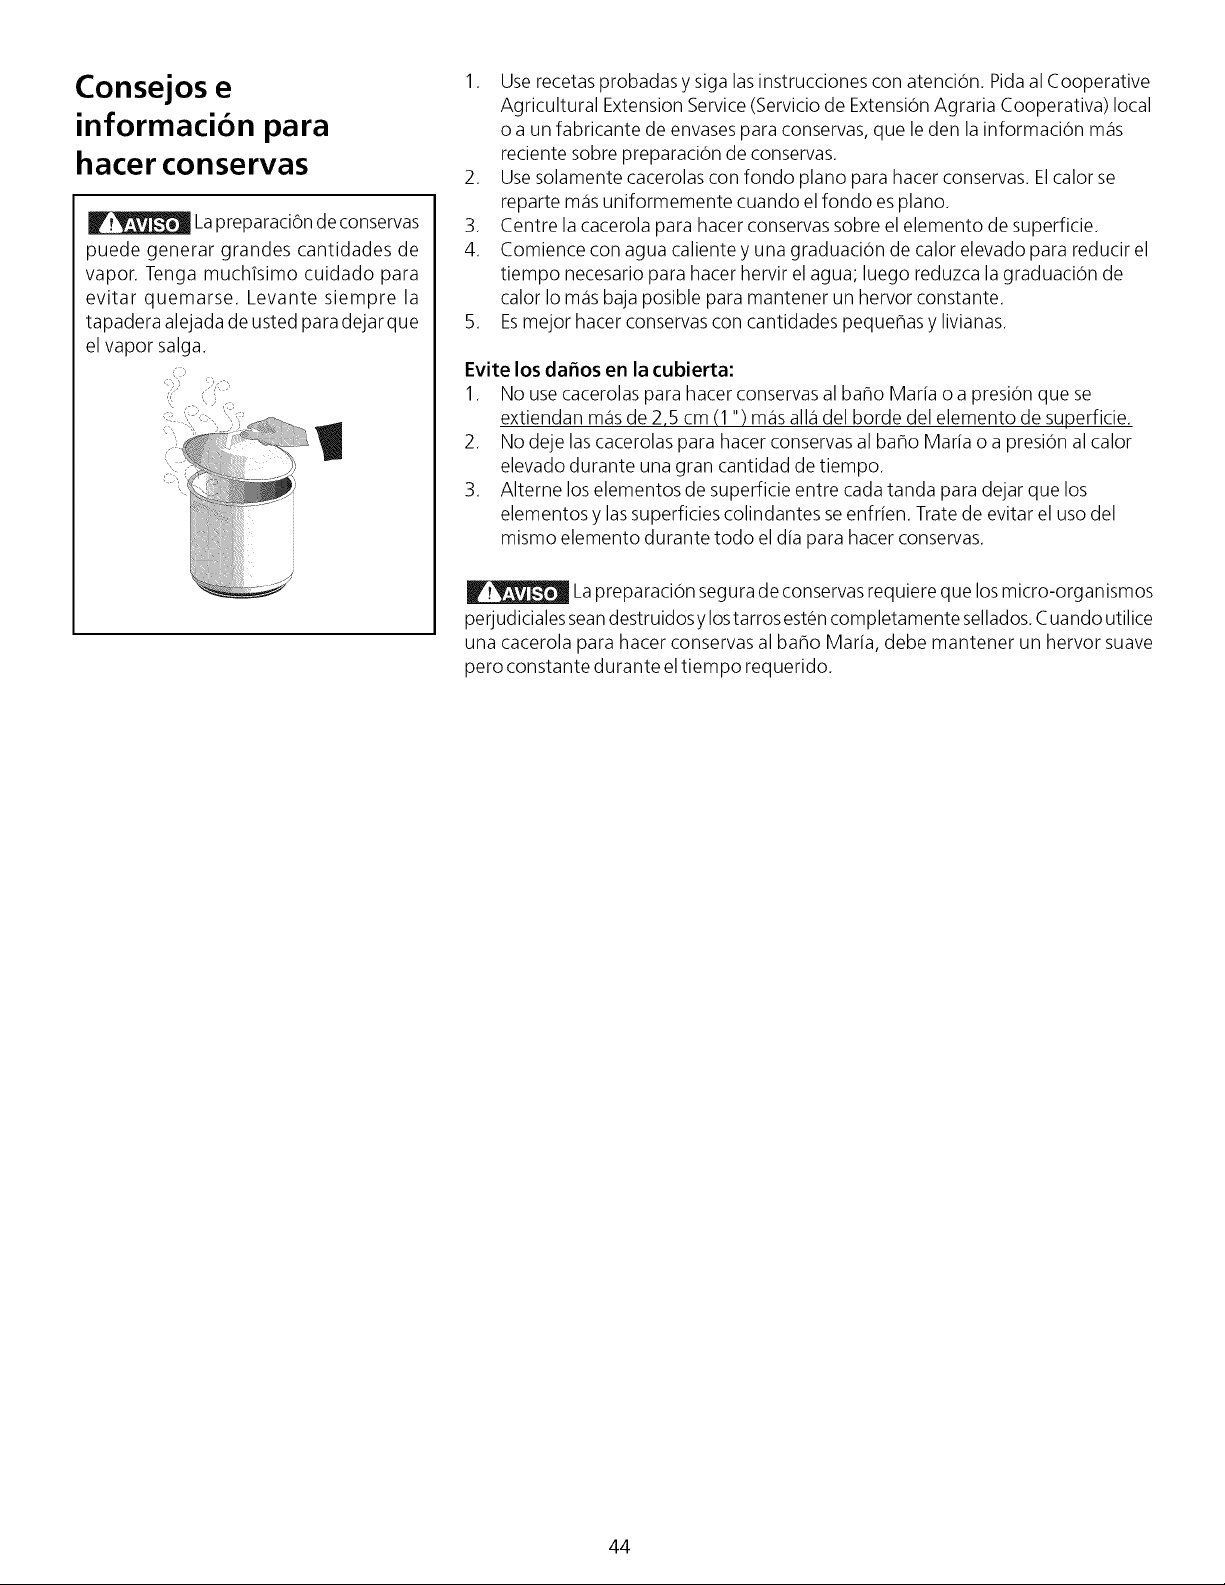
Consejos e
informacion para
hacer conservas
Lapreparaci6n de conservas
puede generar grandes cantidades de
vapor. Tenga muchTsimo cuidado para
evitar quemarse. Levante siempre la
tapadera alejada de usted para dejar que
el vapor salga.
1. Use recetas probadas y siga las instrucciones con atenci6n. Pida al Cooperative
Agricultural Extension Service (Servicio de Extensi6n Agraria Cooperativa)local
o a un fabricante de envases para conservas, que le den la informaci6n mas
reciente sobre preparaci6n de conservas.
2. Usesolamente cacerolas con fondo piano para hacer conservas. El calor se
reparte mas uniformemente cuando el fondo es piano.
3. Centre la cacerola para hacer conservas sobre el elemento de superficie.
4. Comience con agua caliente y una graduaci6n de calor elevado para reducir el
tiempo necesario para hacer hervir el agua; luego reduzca la graduaci6n de
calor Io mas baja posible para mantener un hervor constante.
5. Esmejor hacer conservas con cantidades pequeflas y livianas.
Evite los da_os en la cubierta:
1. No use cacerolas para hacer conservas al baho Maria o a presi6n que se
extiendan mas de 2 5 cm (1 ") mas alia del borde del elemento de superficie.
2. No deje las cacerolas para hacer conservas al baflo Maria o a presi6n al calor
elevado durante una gran cantidad de tiempo.
3. Alterne los elementos de superficie entre cada tanda para dejar que los
elementos y las superficies colindantes se enfrien. Trate de evitar el uso del
mismo elemento durante todo el dia para hacer conservas.
La preparaci6n segura de conservas requiere que los micro-organismos
perjudiciales sean destruidos y los tarros esten completamente sellados. C uando utilice
una cacerola para hacer conservas al baho Maria, debe mantener un hervor suave
pero constante durante el tiempo requerido.
44
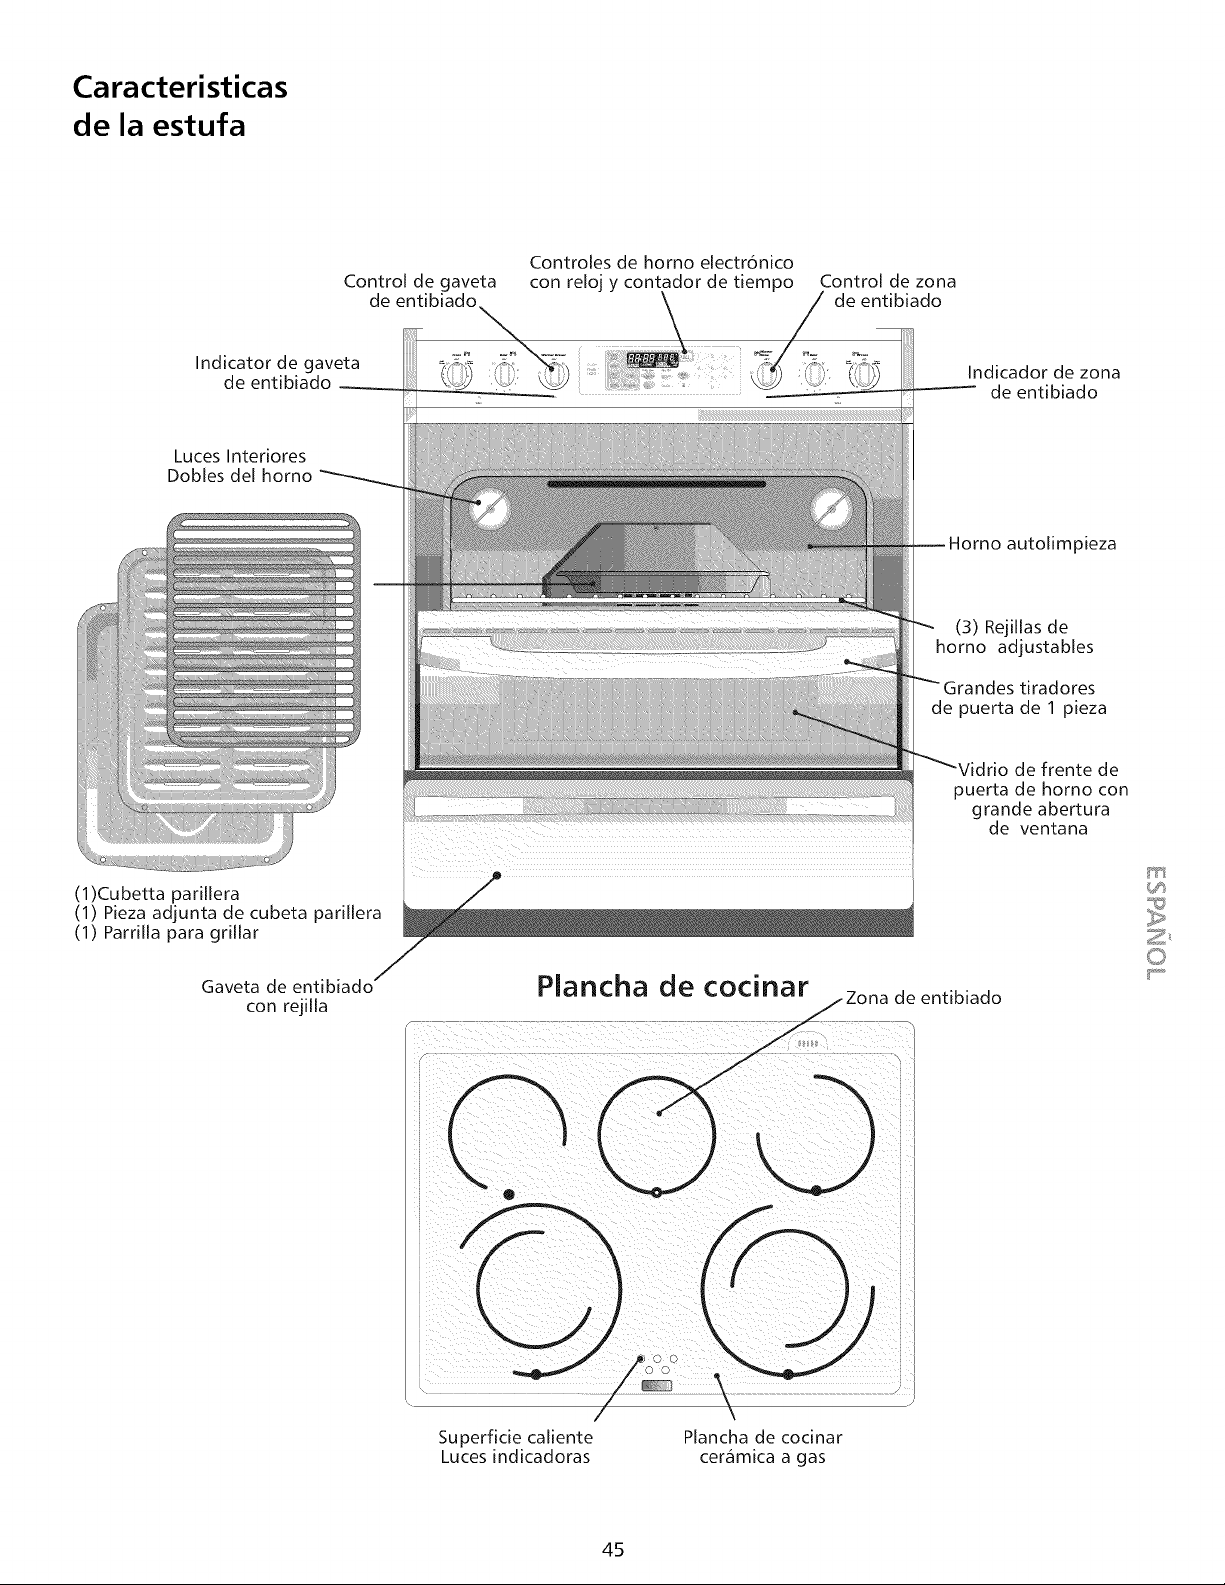
Caracteristicas
de la estufa
Control de gaveta
Indicator de gaveta
de entibiado
Luces Intedores
Dobles del homo
(1)Cubetta padllera
(1) Pieza adjunta de cubeta padllera
(1) Pardlla para gdllar
Controles de homo electronico
con reloj y contador de tiempo Control de zona
de entibiado% _ ___ di_intibiado
'_ . _ . _ Indicador de zona
de entibiado
Homo autolimpieza
(3) Rejillas de
homo adjustables
tiradores
de puerta de 1 pieza
de frente de
puerta de horno con
grande abertura
de ventana
Gaveta de entibiado
con rejilla
Plancha de cocillar jzon a de entibiado
Z_
)
/ E q
i \
/ \
Superficie caliente Plancha de cocinar
Luces indicadoras ceramica a gas
45
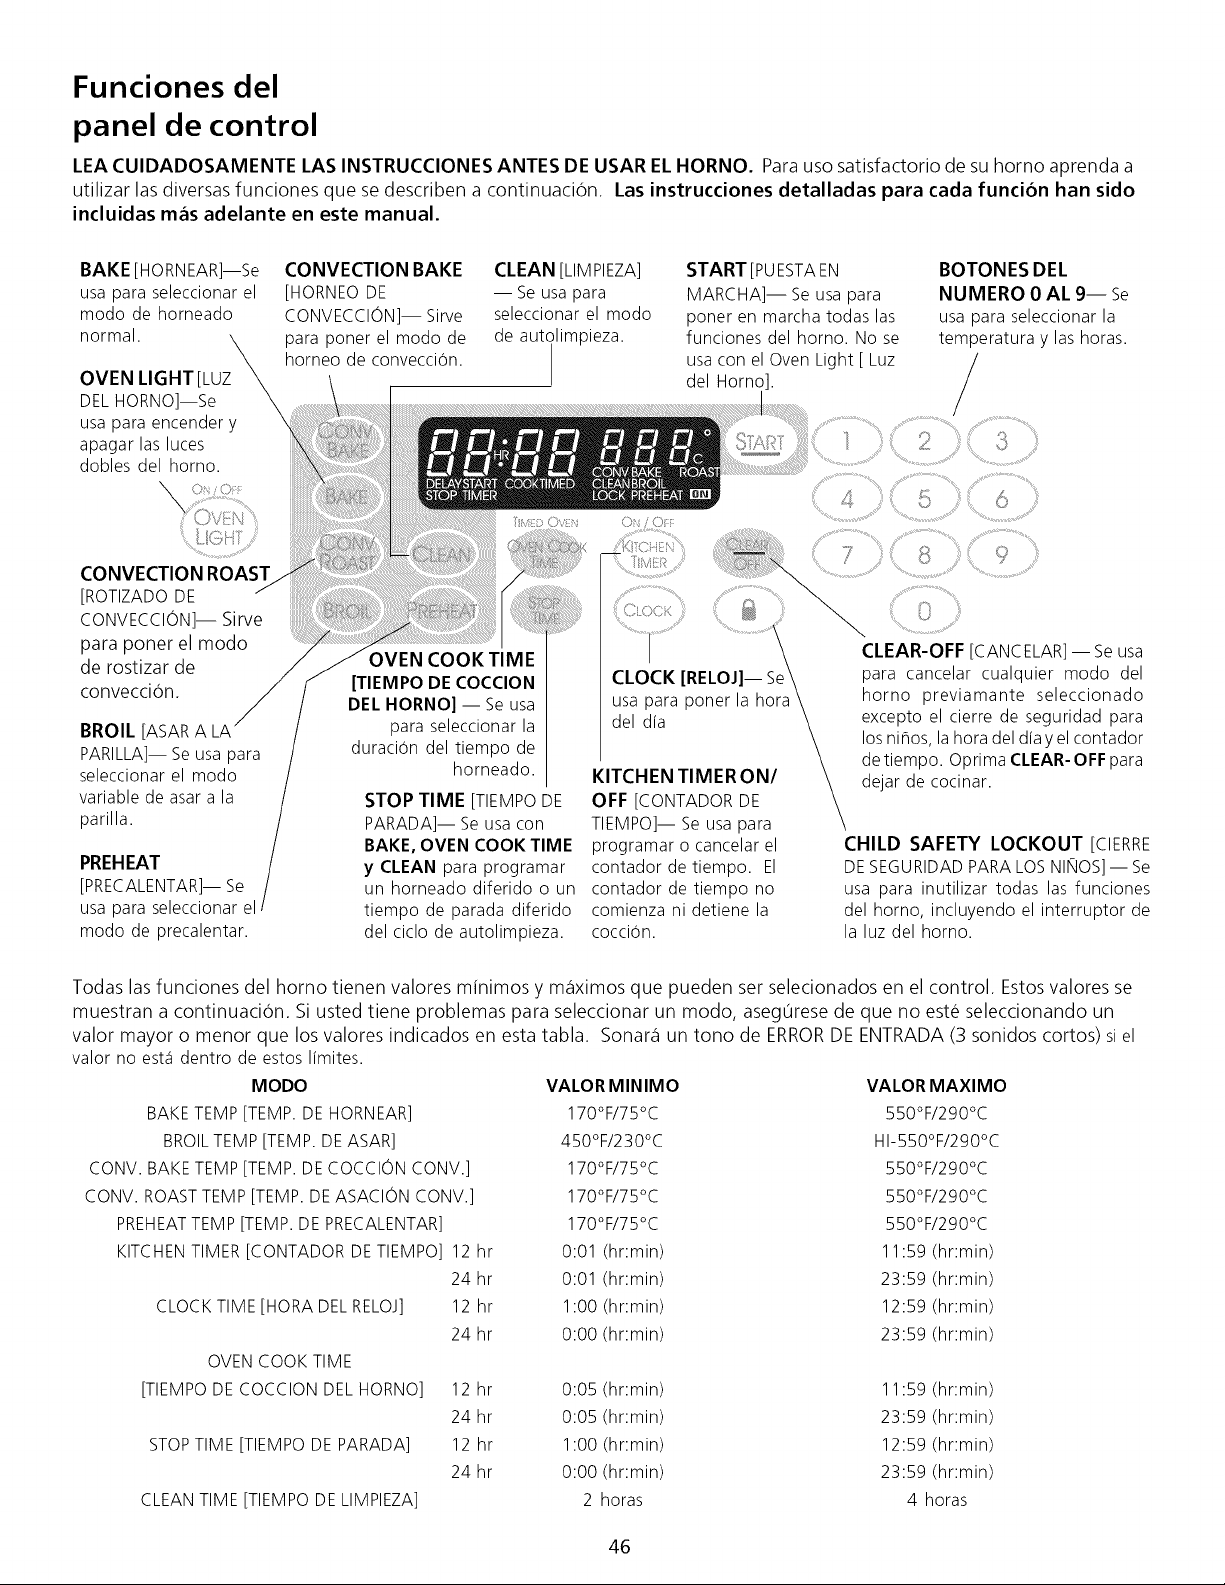
Funciones del
panel de control
LEA CUIDADOSAMENTE LAS INSTRUCCIONES ANTES DE USAR EL HORNO. Para uso satisfactorio de su homo aprenda a
utilizar las diversas funciones que se describen a continuacion. Las instrucciones detalladas para cada funci6n han sido
incluidas m_s adelante en este manual.
BAKE [HORNEAR]--Se
usa para seleccionar el
modo de horneado
normal.
OVEN LIGHT [LUZ
DEL HORNO]--Se
usa para encender y
apagar las luces
dobles del homo.
CONVECTION ROAST
[ROTIZADO DE
CONVECCION]-- Sirve
para poner el modo
de rostizar de
conveccion.
BROIL [ASAR A LA
PARILLA]-- Se usa para
seleccionar el modo
variable de asar a la
parilla.
PREHEAT
[PRECALENTAR]-- Se
usa para seleccionar el
modo de precalentar.
CONVECTION BAKE
[HORNEO DE
CONVECCION]-- Sirve
para poner el modo de
borneo de convecci6n.
CLEAN [LIMPIEZA]
-- Se usa para
seleccionar el modo
de autilimpieza.
START [PUESTAEN BOTONES DEL
MARCHA]-- Se usa para NUMERO 0 AL 9-- Se
poner en marcha todas las usa para seleccionar la
funciones del homo. No se temperatura y las horas.
usa con el Oven Light [ Luz /
del Homo].
/
OVEN COOK TIME
[TIEMPO DE COCCION
DEL HORNO]-- Se usa
para seleccionar la
duraci6n del tiempo de
horneado.
STOP TIME [TIEMPO DE
PARADA]-- Se usa con
BAKE, OVEN COOK TIME
y CLEAN para programar
un horneado diferido o un
tiempo de parada diferido
del ciclo de autolimpieza.
,:i_ i 0::
CLEAR-OFF [CANCELAR] -- Se usa
CLOCK [RELOJ]--Se\ para cancelar cualquier modo del
usa para ponerla hora\ homo previamante seleccionado
del cl[a - \ excepto el cierre de seguridad para
\ los niflos, la hora del d[a y el contador
, \ de tiempo. Oprima CLEAR- OFF para
KITCHEN TIMERON/ \ dejar de cocinar
OFF [CONTADOR DE _
TIEMPO]-- Se usa para_
programar o cancelar el CHILD SAFETY LOCKOUT [ClERRE
contadordetiempo. El DESEGURIDADPARALOSNINOS]--Se
contador de tiempo no usa para inutilizar todas las funciones
comienza ni detiene la del horno, incluyendo el interruptor de
cocci6n, la luz del homo.
Todas las funciones del homo tienen valores minimos y m_iximos que pueden ser selecionados en el control. Estos valores se
muestran a continuaci6n. Si usted tiene problemas para seleccionar un modo, asegOrese de que no este seleccionando un
valor mayor o menor que los valores indicados en esta tabla. SonaDi un tono de ERRORDE ENTRADA (3 sonidos cortos) si el
valor no est,1 dentro de estos I[mites.
MODO
BAKE TEMP [TEMP. DE HORNEAR]
BROILTEMP [TEMP. DEASAR]
CONV. BAKE TEMP [TEMP. DECOCCION CONV.]
CONV. ROASTTEMP [TEMP. DEASACION CONV.]
PREHEATTEMP [TEMP. DE PRECALENTAR]
KITCHEN TIMER [CONTADOR DE TIEMPO] 12 hr
24 hr
CLOCK TIME [HORA DEL RELOJ] 12 hr
24 hr
OVEN COOK TIME
[TIEMPO DE COCCION DEL HORNO] 12 hr
24 hr
STOP TIME [TIEMPO DE PARADA] 12 hr
24 hr
CLEAN TIME [TIEMPO DE LIMPIEZA]
VALOR MINIMO VALOR MAXIMO
170°F/75°C 550°F/290°C
450°F/230°C HI-550°F/290°C
170°F/75°C 550°F/290°C
170°F/75°C 550°F/290°C
170°F/75°C 550°F/290°C
0:01 (hr:min) 11:59 (hr:min)
0:01 (hr:min) 23:59 (hr:min)
1:00 (hr:min) 12:59 (hr:min)
0:00 (hr:min) 23:59 (hr:min)
0:05 (hr:min) 11:59 (hr:min)
0:05 (hr:min) 23:59 (hr:min)
1:00 (hr:min) 12:59 (hr:min)
0:00 (hr:min) 23:59 (hr:min)
2 horas 4 horas
46
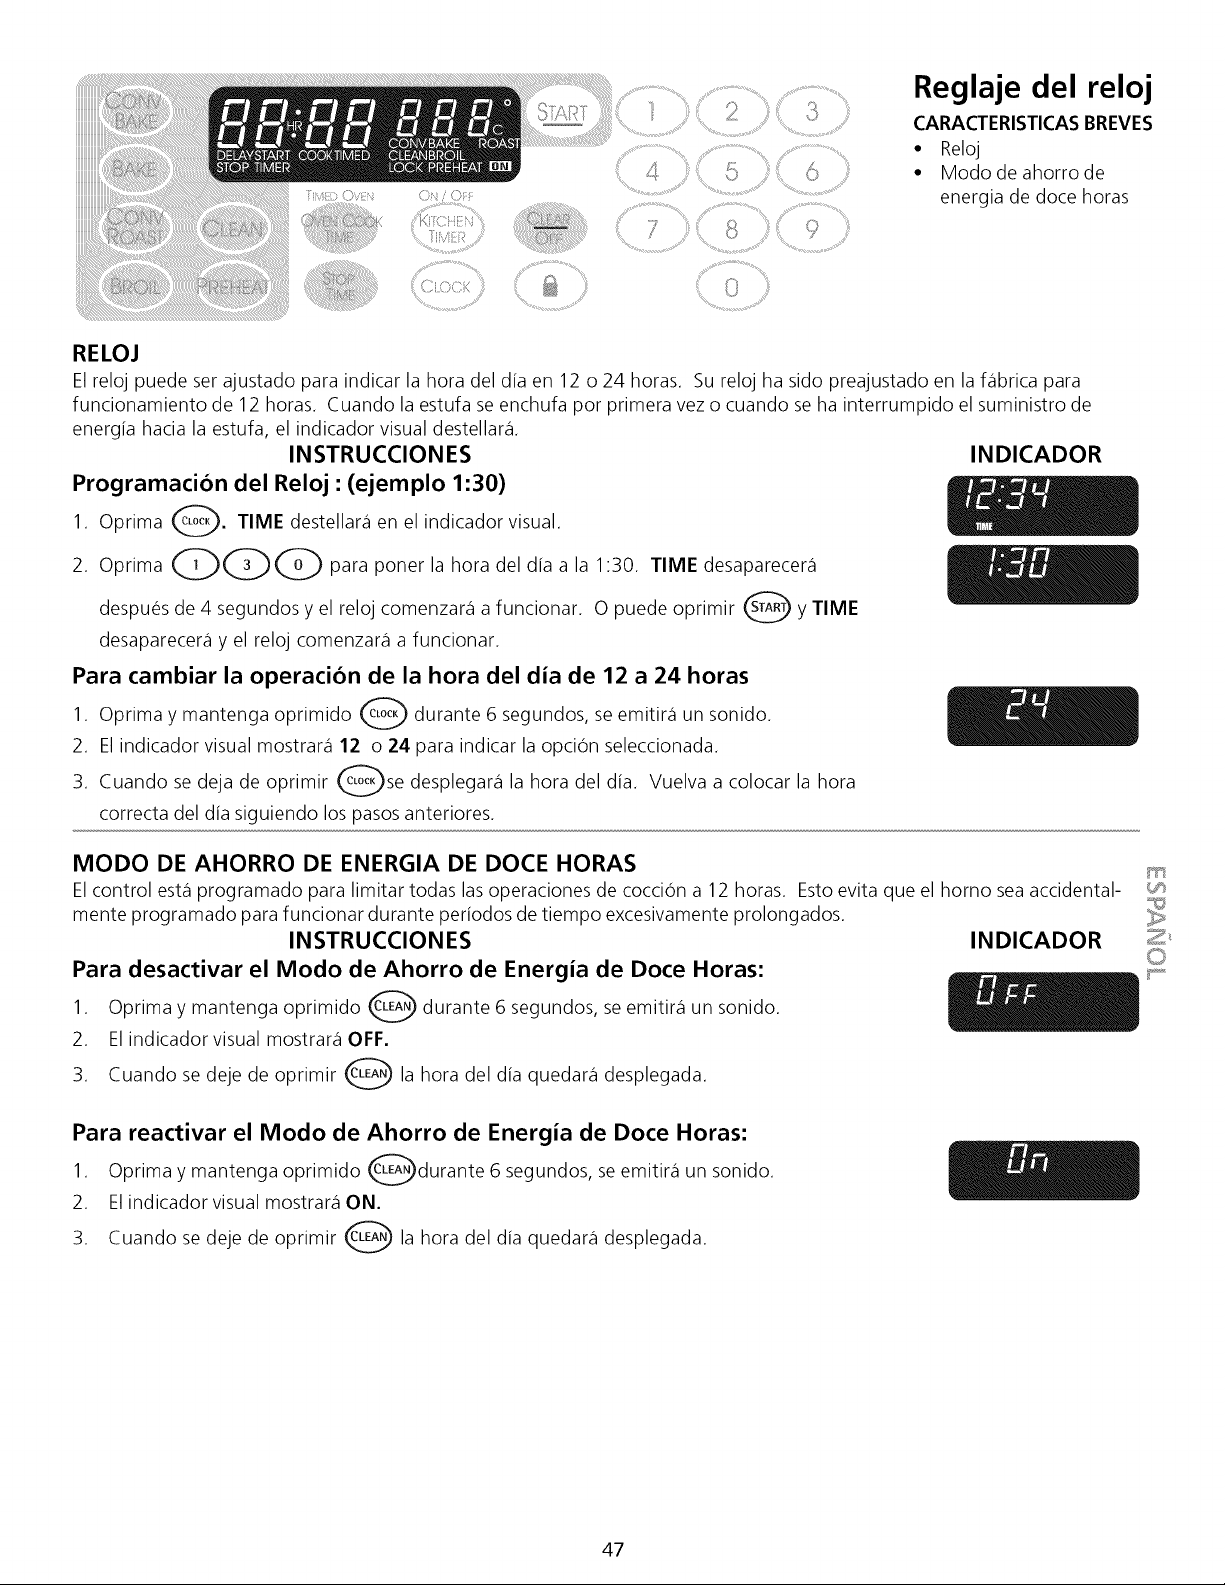
....................................>,.,, - ........... .,,,¸¸¸¸9
Reglaje del reloj
CARACTERISTICASBREVES
• Reloj
• Mododeahorrode
energia de dote horas
RELOJ
El reloj puede ser ajustado para indicar la hora del dia en 12 o 24 horas. Su reloj ha sido preajustado en la flibrica para
funcionamiento de 12 horas. Cuando la estufa se enchufa por primera vez o cuando se ha interrumpido el suministro de
energia hacia la estufa, el indicador visual destellar_i.
INSTRUCCIONES
Programacion del Reloj : (ejemplo 1:30)
1. Oprima Q. TIME destellar_i en
el indicador visual.
2. Oprima QQQ para poner la hora del dia a la 1:30. TIME desaparecera
despues de 4 segundos y el reloj comenzar_i a funcionar. 0 puede oprimir _ y TIME
desaparecer_i y el reloj comenzar_i a funcionar.
Para cambiar la operacion de la hora del dia de 12 a 24 horas
1. Oprima y mantenga oprimido Q durante 6 segundos, se emitir_i un
sonido.
2. El indicador visual mostrar_i 12 o 24 para indicar la opcion seleccionada.
Cuando se deja de oprimir Qse desplegar_i la hora del dia. Vuelva a colocar la hora
3.
correcta del dia siguiendo los pasos anteriores.
INDICADOR
MODO DE AHORRO DE ENERGIA DE DOCE HORAS _
El control est.1programado para limitar todas las operaciones de coccion a 12 horas. Esto evita que el homo sea accidental- v_
mente programado para funcionar durante periodos de tiempo excesivamente prolongados.
INSTRUCCIONES
Para desactivar el Modo de Ahorro de Energia de Doce Horas:
1. Oprima y mantenga oprimido Q durante 6 segundos, se emitir_i un
sonido.
2. El indicador visual mostrar_i OFF.
3. Cuando se deje de oprimir Q la hora del dia quedar_i desplegada.
INDICADOR _2_
Para reactivar el Modo de Ahorro de Energia de Doce Horas:
1. Oprima y mantenga oprimido Qdurante 6 segundos, se emitir_i un sonido.
2. El indicador visual mostrar_i ON.
3. Cuando se deje de oprimir Q la hora del dia quedar_i desplegada.
47
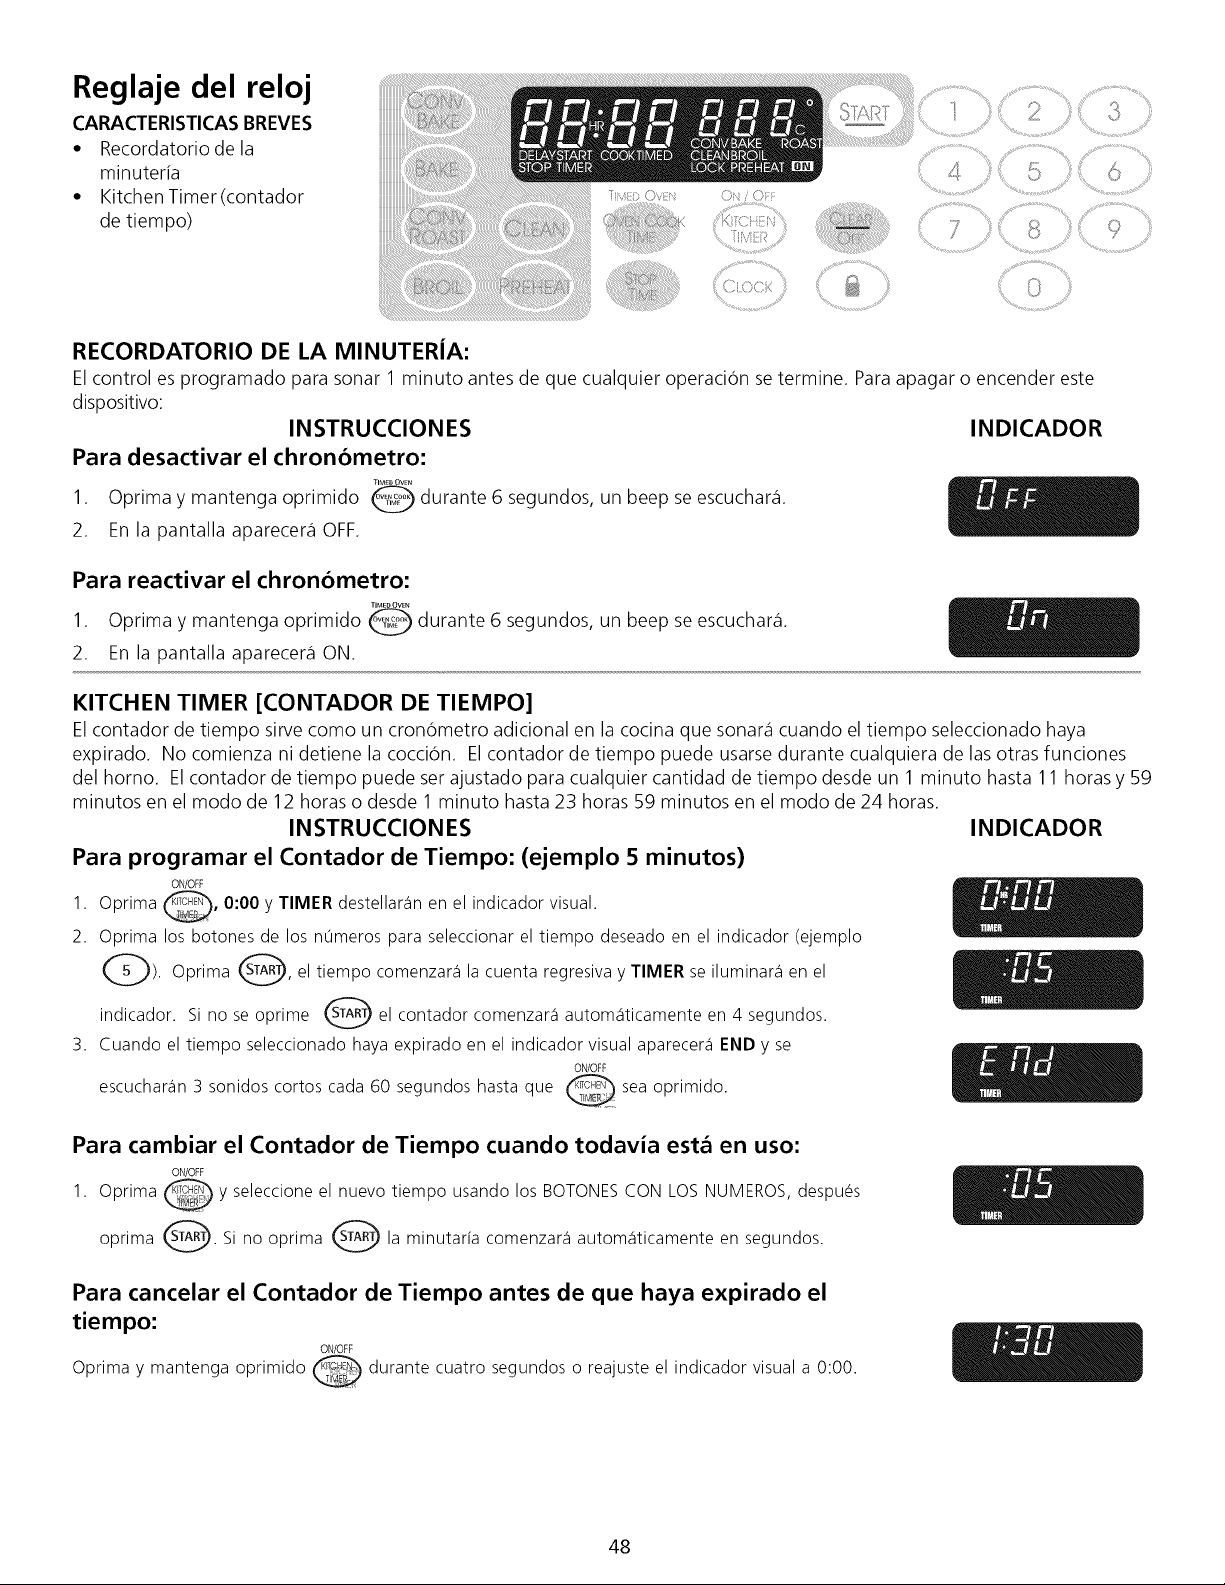
Reglaje del reloj
CARACTERISTICASBREVES
• Recordatoriodela
minuteria
• Kitchen Timer(contador
de tiempo)
RECORDATORIO DE LA MINUTERIA:
El control es programado para sonar 1 minuto antes de que cualquier operacion se termine. Para apagar o encender este
dispositivo:
INSTRUCCIONES
Para desactivar el chronometro:
TIM_DOWN
1. Oprima y mantenga oprimido _ durante 6 segundos, un beep se escuchar_i.
2. En la pantalla aparecer_i OFF.
INDICADOR
Para reactivar el chronometro:
TIMED OVEN
1. Oprima y mantenga oprimido _ durante 6 segundos, un beep se escuchar_i.
2. En la pantalla aparecer_i ON.
KITCHEN TIMER [CONTADOR DE TIEMPO]
El contador de tiempo sirve como un cronometro adicional en la cocina que sonars1cuando el tiempo seleccionado haya
expirado. No comienza ni detiene la coccion. El contador de tiempo puede usarse durante cualquiera de las otras funciones
del horno. Elcontador de tiempo puede ser ajustado para cualquier cantidad de tiempo desde un 1 minuto hasta 11 horas y 59
minutos en el modo de 12 horas o desde 1 minuto hasta 23 horas 59 minutos en el modo de 24 horas.
INSTRUCCIONES
Para programar el Contador de Tiempo: (ejemplo 5 minutos)
ON/OFF
1. Oprima _, 0:00 y TIMER destellar_inen el indicador visual.
2. Oprima los botones de los n0meros para seleccionarel tiempo deseadoen el indicador (ejemplo
Q). Oprima _, el tiempo comenzar_ila cuenta regresivay TIMER se iluminar_ien el
indicador. Si no se oprime O el contador comenzara autom_iticamenteen 4 segundos.
3. Cuando el tiempo seleccionadohaya expirado en el indicador visual aparecer_iENDy se
ON/OFF
escuchar_in3 sonidos cortos cada 60 segundoshasta que _ seaoprimido.
INDICADOR
Para cambiar el Contador de Tiempo cuando todavia esta en uso:
ON/OFF
1. Oprima @ y seleccioneel nuevo tiempo usando los BOTONESCON LOSNUMEROS,despu_s
oprima _. Si no oprima _ la minutar[a comenzar_i autom_iticamente en segundos.
Para cancelar el Contador de Tiempo antes de que haya expirado el
tiempo:
ON/OFF
Oprima y mantenga oprimido _ durante cuatro segundos o reajuste el indicador visual a 0:00.
48
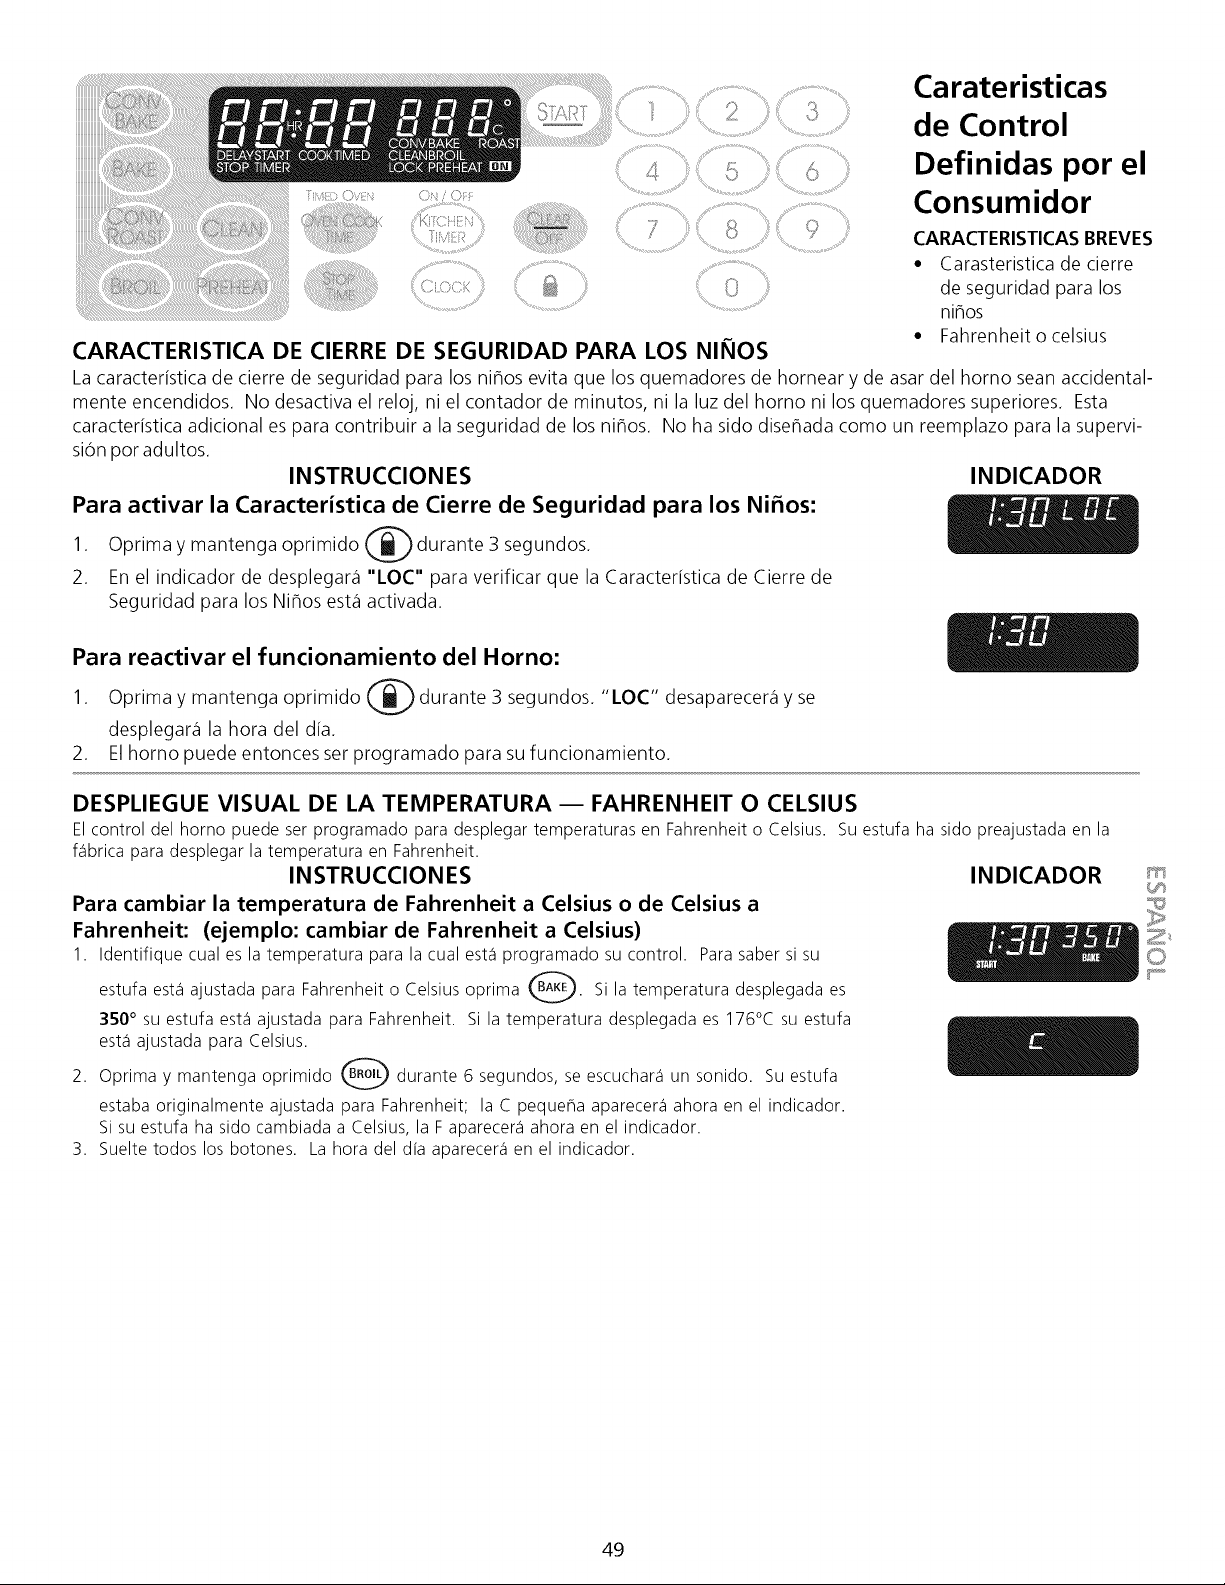
....................................>,.,, % ........... .,,,¸¸¸¸9
Carateristicas
de Control
Definidas por el
Consumidor
CARACTERISTICASBREVES
• Carasteristica de cierre
de seguridad para los
nihos
• Fahrenheit o celsius
CARACTERISTICA DE CIERRE DE SEGURIDAD PARA LOS NII_IOS
La caracteristica de cierre de seguridad para los nihos evita que los quemadores de hornear y de asar del homo sean accidental-
mente encendidos. No desactiva el reloj, ni el contador de minutos, ni la luz del homo ni los quemadores superiores. Esta
caracteristica adicional es para contribuir a la seguridad de los nihos. No ha sido disehada como un reemplazo para la supervi-
sion por adultos.
INSTRUCCIONES
Para activar la Caracteristica de Cierre de Seguridad para los Ni_os:
Oprima y mantenga oprimido @ durante 3 segundos.
1.
2. En el indicador de desplegar_i "[OC" para verificar que la Caracteristica de Cierre de
Seguridad para los Nihos esta activada.
Para reactivar el funcionamiento del Homo:
Oprima y mantenga oprimido @ durante 3 segundos. "LOC" desaparecer_i y se
1.
desplegar_i la hora del dia.
2. El homo puede entonces ser programado para su funcionamiento.
INDICADOR
DESPLIEGUE VISUAL DE LA TEMPERATURA i FAHRENHEIT O CELSIUS
Elcontrol del homo puedeser programado para desplegartemperaturas en Fahrenheito Celsius. Su estufa ha sido preajustadaen la
f_ibricaparadesplegar la temperatura en Fahrenheit.
INSTRUCCIONES
Para cambiar la temperatura de Fahrenheit a Celsius o de Celsius a
Fahrenheit: (ejemplo: cambiar de Fahrenheit a Celsius)
1. Identifiquecualeslatemperaturaparalacualest_iprogramadosucontrol. Parasabersisu
estufaest_iajustada para FahrenheitoCelsiusoprima _. Silatemperaturadesplegadaes
350° su estufa est,1ajustada para Fahrenheit. Si la temperatura desplegadaes 176°C su estufa
est,1ajustada para Celsius.
2. Oprimaymantengaoprimido _ durante6segundos, seescuchar_iunsonido. Suestufa
estabaoriginalmenteajustada para Fahrenheit; laC pequehaapareceraahoraenelindicador.
Si su estufa ha sido cambiadaa Celsius, la F aparecer_iahora en el indicador.
3. Suelte todos los botones. La hora del d[a aparecer_ien el indicador.
INDICADOR x_
49
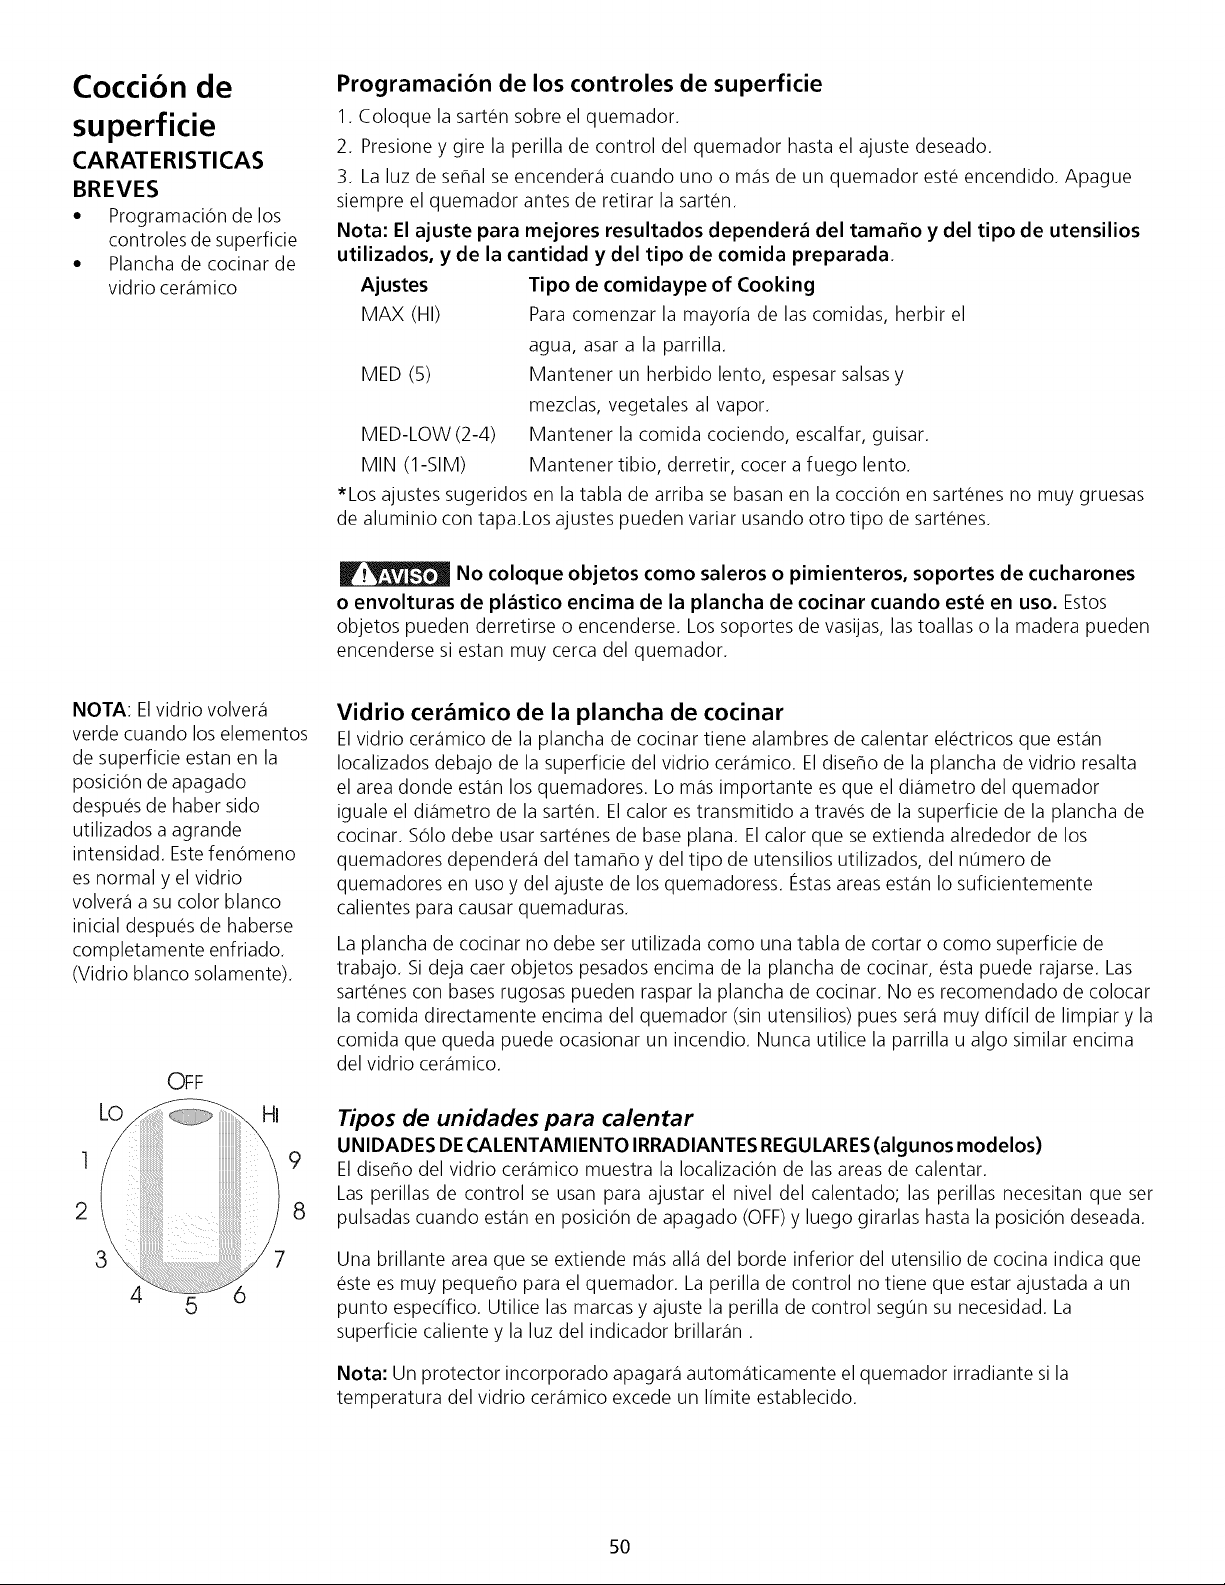
Coccion de
superficie
CARATERISTICAS
BREVES
• Programacion de los
controles de superficie
• Plancha de cocinar de
vidrio ceramico
Programaci6n de los controles de superficie
1. Coloque la sarten sobre el quemador.
2. Presione y gire la perilla de control del quemador hasta el ajuste deseado.
3. La luz de sehal se encendera cuando uno o m_isde un quemador este encendido. Apague
siempre el quemador antes de retirar la sarten.
Nota: El ajuste para rnejores resultados depender_ del tama_o y del tipo de utensilios
utilizados, y de la cantidad y del tipo de comida preparada.
Ajustes Tipo de comidaype of Cooking
MAX (HI) Para comenzar la mayoria de las comidas, herbir el
agua, asar a la parrilla.
MED (5) Mantener un herbido lento, espesar salsas y
mezclas, vegetales al vapor.
MED-LOW (2-4) Mantener la comida cociendo, escalfar, guisar.
MIN (1-SIM) Mantener tibio, derretir, cocer a fuego lento.
*Los ajustes sugeridos en la tabla de arriba se basan en la coccion en sartenes no muy gruesas
de aluminio con tapa.Los ajustes pueden variar usando otro tipo de sartenes.
No coloque objetos como saleros o pimienteros, soportes de cucharones
o envolturas de pl_stico encima de la plancha de cocinar cuando est@en uso. Estos
objetos pueden derretirse o encenderse. Los soportes de vasijas, las toallas o la madera _ueden
encenderse si estan muy cerca del quemador.
NOTA: El vidrio volvera
verde cuando los elementos
de superficie estan en la
posicion de apagado
despues de haber sido
utilizados a agrande
intensidad. Este fenomeno
es normal y el vidrio
volvera a su color blanco
inicial despues de haberse
completamente enfriado.
(Vidrio blanco solamente).
1
2
OFF
LO HI
3 7
4 5 6
Vidrio ceramico de la plancha de cocinar
El vidrio ceramico de la plancha de cocinar tiene alambres de calentar electricos que estan
Iocalizados debajo de la superficie del vidrio ceramico. El diseho de la plancha de vidrio resalta
el area donde estan los quemadores. Lo m_isimportante es que el diametro del quemador
iguale el diametro de la sarten. El calor es transmitido a traves de la superficie de la plancha de
cocinar. Solo debe usar sartenes de base plana. El calor que se extienda alrededor de los
quemadores dependera del tamaho y del tipo de utensilios utilizados, del numero de
quemadores en uso y del ajuste de los quemadoress. Estas areas estan Io suficientemente
calientes para causar quemaduras.
La plancha de cocinar no debe ser utilizada como una tabla de cortar o como superficie de
trabajo. Si deja caer objetos pesados encima de la plancha de cocinar, esta puede rajarse. Las
sartenes con bases rugosas pueden raspar la plancha de cocinar. No es recomendado de colocar
la comida directamente encima del quemador (sin utensilios) pues sera muy dificil de limpiar y la
comida que queda puede ocasionar un incendio. Nunca utilice la parrilla u algo similar encima
del vidrio ceramico.
Tipos de unidades para calentar
UNIDADES DE CALENTAMIENTO IRRADIANTES REGULARES(algunos modelos)
9 El diseflo del vidrio ceramico muestra la Iocalizacion de las areas de calentar.
Las perillas de control se usan para ajustar el nivel del calentado; las perillas necesitan que ser
8 pulsadas cuando estan en posicion de apagado (OFF)y luego girarlas hasta la posicion deseada.
Una brillante area que se extiende m_is aid del borde inferior del utensilio de cocina indica que
este es muy pequeho para el quemador. La perilla de control no tiene que estar ajustada a un
punto especifico. Utilice las marcas y ajuste la perilla de control segun su necesidad. La
superficie caliente y la luz del indicador brillaran.
Nota: Un protector incorporado apagara autom_iticamente el quemador irradiante si la
temperatura del vidrio ceramico excede un limite establecido.
5O
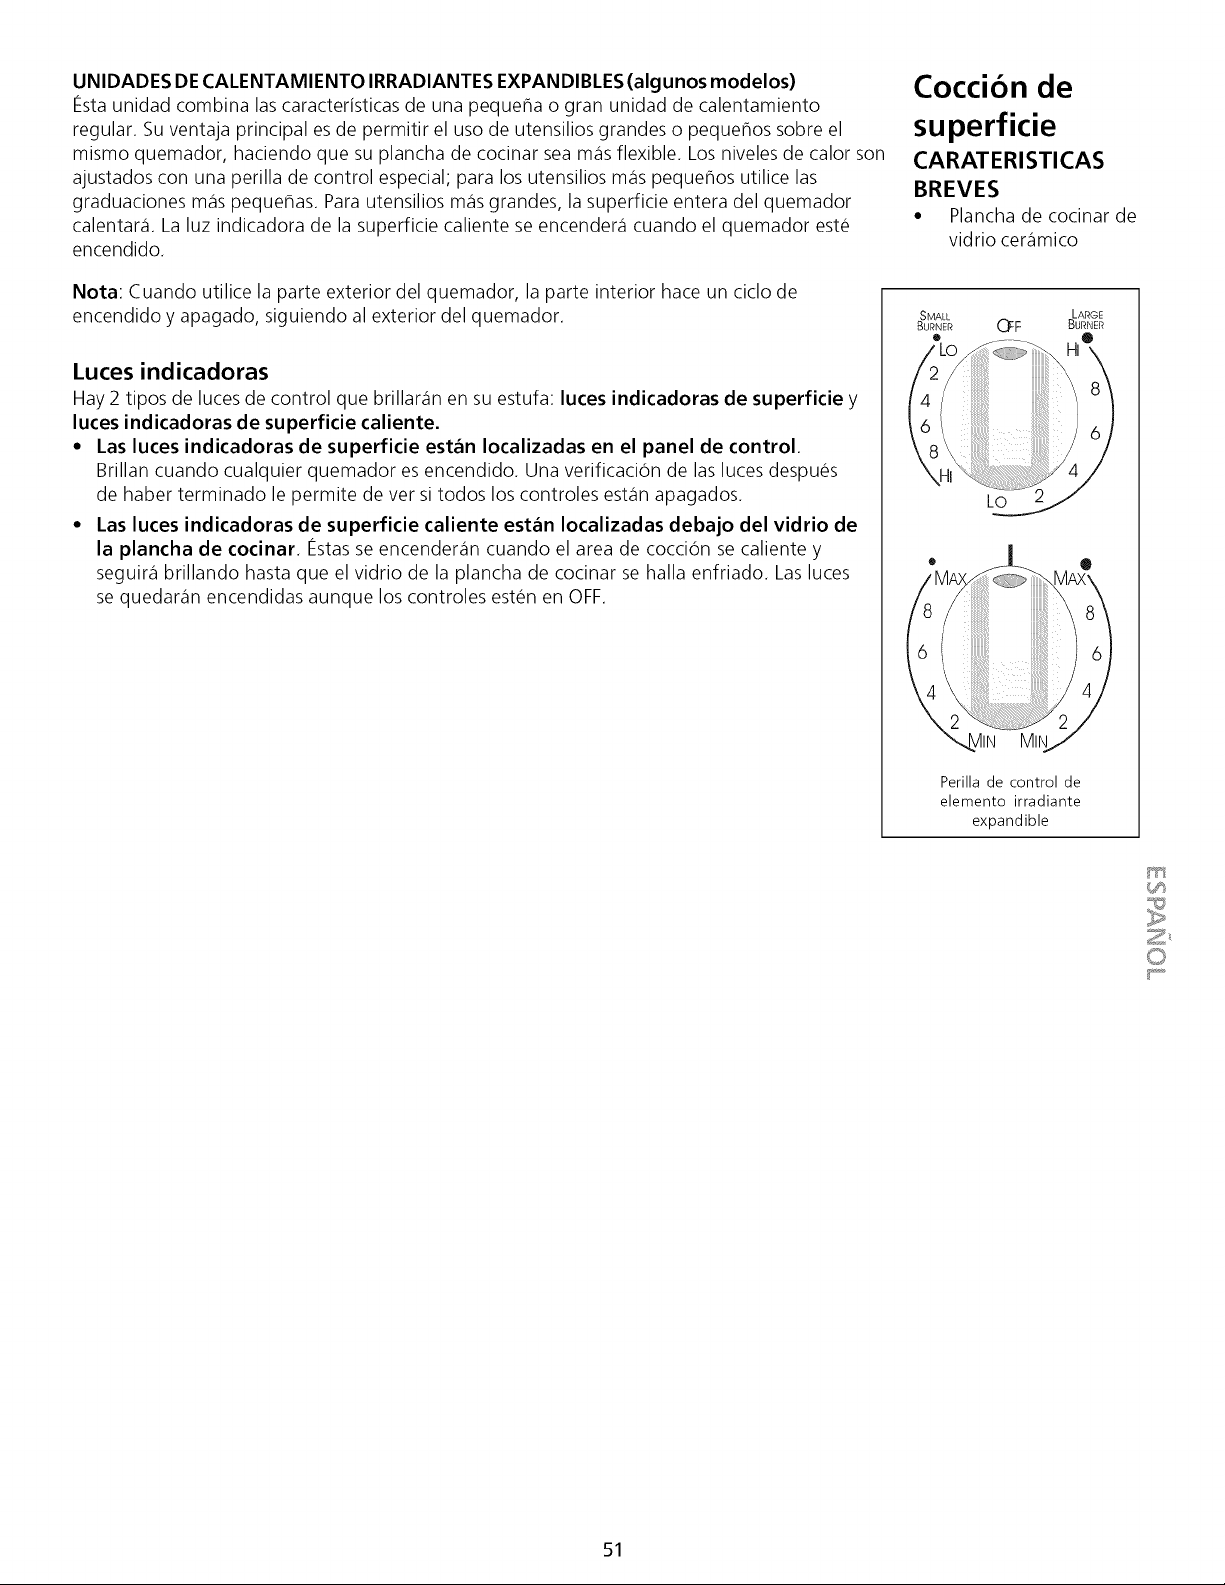
UNIDADESDE CALENTAMIENTO IRRADIANTES EXPANDIBLES (algunos modelos)
festaunidad combina las caracteristicas de una pequeha o gran unidad de calentamiento
regular. Su ventaja principal es de permitir el uso de utensilios grandes o pequehos sobre el
mismo quemador, haciendo que su plancha de cocinar sea mas flexible. Los niveles de calor son
ajustados con una perilla de control especial; para los utensilios mas pequehos utilice las
graduaciones mas pequehas. Para utensilios mas grandes, la superficie entera del quemador
calentara. La luz indicadora de la superficie caliente se encendera cuando el quemador este
encendido.
Nota: Cuando utilice la parte exterior del quemador, la parte interior hace un ciclo de
encendido y apagado, siguiendo al exterior del quemador.
Luces indicadoras
Hay 2 tipos de luces de control que brillaran en su estufa: luces indicadoras de superficie y
luces indicadoras de superficie caliente.
• Las luces indicadoras de superficie est_n Iocalizadas en el panel de control.
Brillan cuando cualquier quemador es encendido. Una verificacion de las luces despues
de haber terminado le permite de ver si todos los controles estan apagados.
• Las luces indicadoras de superficie caliente est_n Iocalizadas debajo del vidrio de
la plancha de cocinar, lestasse encenderan cuando el area de coccion se caliente y
seguira brillando hasta que el vidrio de la plancha de cocinar se halla enfriado. Las luces
se quedaran encendidas aunque los controles esten en OFF.
Coccion de
superficie
CARATERISTICAS
BREVES
• Plancha de cocinar de
vidrio cer_imico
BSMALL LARGE
URNER O_F BURNER
®
LO
Perilla de control de
elemento irradiante
expandible
Z_
51
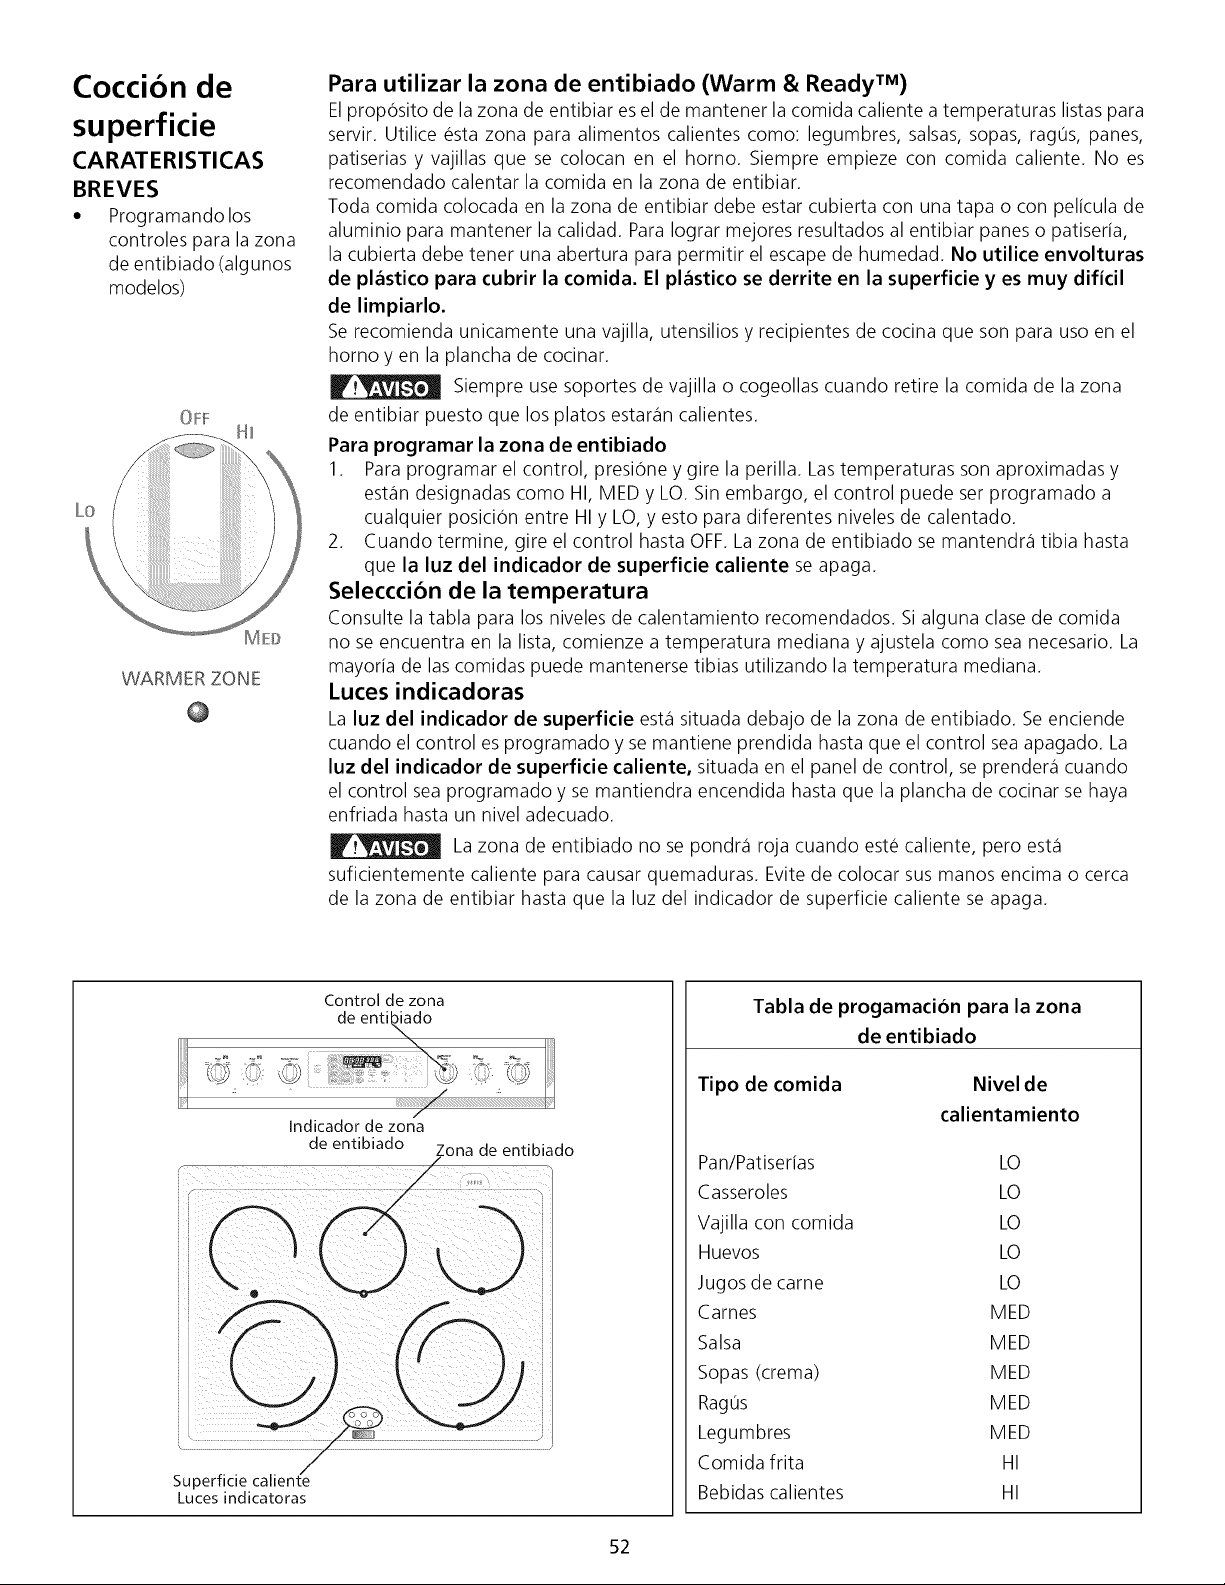
Coccion de
superficie
CARATERISTICAS
BREVES
• Programandolos
controles para la zona
de entibiado (algunos
modelos)
OFF
H_
Lo
\
IMP
WARMER ZONE
Para utilizar la zona de entibiado (Warm & Ready TM)
Elproposito de la zona de entibiar es el de mantener la comida caliente a temperaturas listas para
servir. Utilice esta zona para alimentos calientes como: legumbres, salsas, sopas, ragus, panes,
patiserias y vajillas que se colocan en el horno. Siempre empieze con comida caliente. No es
recomendado calentar la comida en la zona de entibiar.
Toda comida colocada en la zona de entibiar debe estar cubierta con una tapa o con pelicula de
aluminio para mantener la calidad. Para Iograr mejores resultados al entibiar panes o patiseria,
la cubierta debe tener una abertura para permitir el escape de humedad. No utilice envolturas
de pl_stico para cubrir la comida. El pl_stico se derrite en la superficie y es muy dificil
de limpiarlo.
Se recomienda unicamente una vajilla, utensilios y recipientes de cocina que son para uso en el
homo yen la plancha de cocinar.
Siempre use soportes de vajilla o cogeollas cuando retire la comida de la zona
de entibiar puesto que los platos estaran calientes.
Para programar la zona de entibiado
1. Para programar el control, presione y gire la perilla. Lastemperaturas son aproximadas y
estan designadas como HI, MED y LO. Sin embargo, el control puede ser programado a
cualquier posici6n entre HI y LO, y esto para diferentes niveles de calentado.
2. Cuando termine, gire el control hasta OFF.La zona de entibiado se mantendra tibia hasta
que la luz del indicador de superficie caliente se apaga.
Selecccion de la temperatura
Consulte la tabla para los niveles de calentamiento recomendados. Si alguna clase de comida
no se encuentra en la lista, comienze a temperatura mediana y ajustela como sea necesario. La
mayoria de las comidas puede mantenerse tibias utilizando la temperatura mediana.
Luces indicadoras
La luz del indicador de superficie est,1 situada debajo de la zona de entibiado. Se enciende
cuando el control es programado y se mantiene prendida hasta que el control sea apagado. La
luz del indicador de superficie caliente, situada en el panel de control, se prendera cuando
el control sea programado y se mantiendra encendida hasta que la plancha de cocinar se haya
enfriada hasta un nivel adecuado.
Lazona de entibiado no se pondra roja cuando este caliente, pero esta
suficientemente caliente para causar quemaduras. Evite de colocar sus manos encima o cerca
de la zona de entibiar hasta que la luz del indicador de superficie caliente se apaga.
Control de zona
de enti_o
/
Indicador de zona
de entibiado '.ona de entibiado
Superficie calienl[e
Luces indicatoras
Tabla de progamacion para la zona
de entibiado
Tipo de comida
Nivelde
calientamiento
Pan/Patiserias LO
Casseroles LO
Vajilla con comida LO
Huevos LO
Jugos de came LO
Carries MED
Salsa MED
Sopas (crema) MED
Ragus MED
Legumbres MED
Comida frita HI
Bebidas calientes HI
52
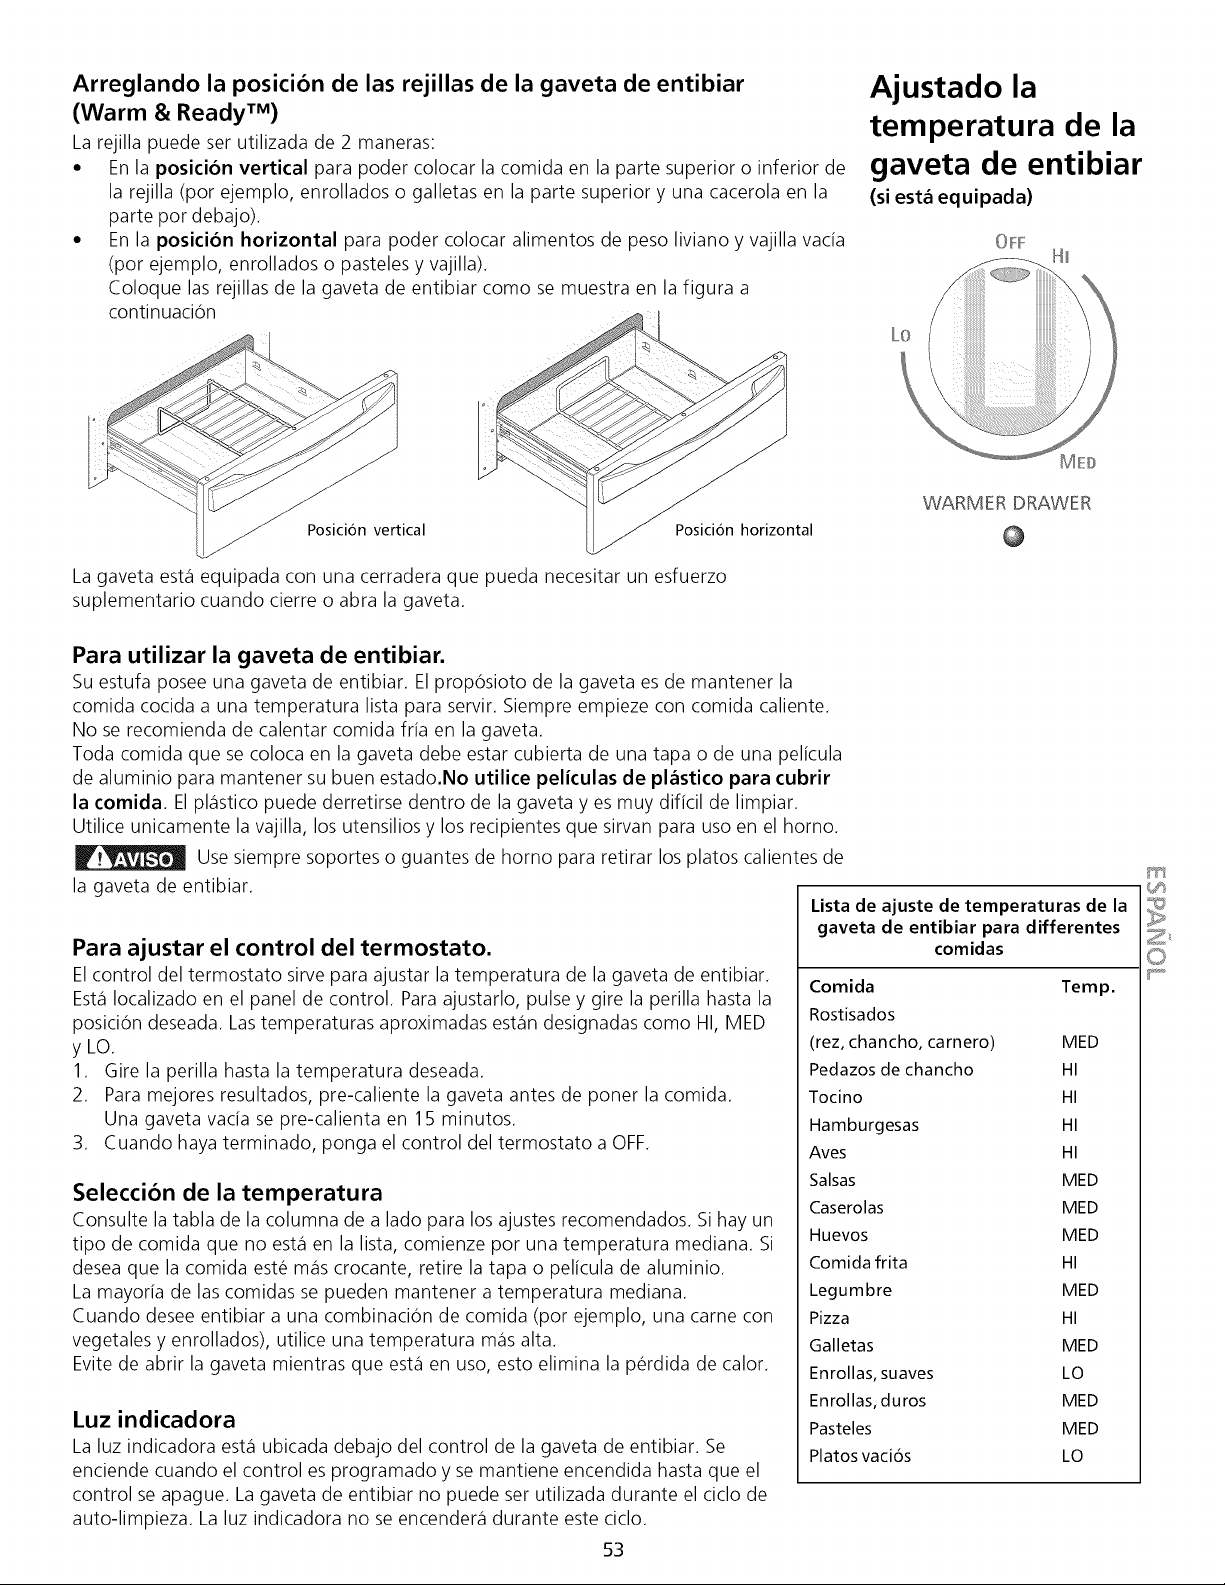
Arreglando la posicion de las rejillas de la gaveta de entibiar
(Warm & Ready TM)
La rejilla puede ser utilizada de 2 maneras:
• En la posicion vertical para poder colocar la comida en la parte superior o inferior de
la rejilla (por ejemplo, enrollados o galletas en la parte superior y una cacerola en la
parte por debajo).
• En la posicion horizontal para poder colocar alimentos de peso liviano y vajilla vacia
(por ejemplo, enrollados o pasteles y vajilla).
Coloque las rejillas de la gaveta de entibiar como se muestra en la figura a
continuacion
Posicion vertical
La gaveta est,1equipada con una cerradera que
suplementario cuando cierre o abra la gaveta.
Posicion horizontal
3ueda necesitar un esfuerzo
Ajustado la
temperatura de la
gaveta de entibiar
(si est& equipada)
WARMER DRAWER
Para utilizar la gaveta de entibiar.
Su estufa posee una gaveta de entibiar. El proposioto de la gaveta es de mantener la
comida cocida a una temperatura lista para servir. Siempre empieze con comida caliente.
No se recomienda de calentar comida fria en la gaveta.
Toda comida que se coloca en la gaveta debe estar cubierta de una tapa o de una pelicula
de aluminio para mantener su buen estado.No utilice peliculas de pl_stico para cubrir
la comida El plastico puede derretirse dentro de la gaveta y es muy dificil de limpiar.
Utilice unicamente la vajilla, los utensilios y los recipientes que sirvan para uso en el horno.
Use siempre soportes o guantes de homo para retirar los platos calientes de
la gaveta de entibiar.
Para ajustar el control del termostato.
El control del termostato sirve para ajustar la temperatura de la gaveta de entibiar.
Esta Iocalizado en el panel de control. Para ajustarlo, pulse y gire la perilla hasta la
posicion deseada. Las temperaturas aproximadas estan designadas como HI, MED
y LO.
1. Gire la perilla hasta la temperatura deseada.
2. Para mejores resultados, pre-caliente la gaveta antes de poner la comida.
Una gaveta vacia se pre-calienta en 15 minutos.
3. Cuando haya terminado, ponga el control del termostato a OFF.
Seleccion de la temperatura
Consulte la tabla de la columna de a lado para los ajustes recomendados. Si hay un
tipo de comida que no esta en la lista, comienze por una temperatura mediana. Si
desea que la comida este mas crocante, retire la tapa o pelicula de aluminio.
La mayoria de las comidas se pueden mantener a temperatura mediana.
Cuando desee entibiar a una combinacion de comida (por ejemplo, una came con
vegetales y enrollados), utilice una temperatura mas alta.
Evite de abrir la gaveta mientras que esta en uso, esto elimina la perdida de calor.
Luz indicadora
La luz indicadora est,1 ubicada debajo del control de la gaveta de entibiar. Se
enciende cuando el control es programado y se mantiene encendida hasta que el
control se apague. La gaveta de entibiar no puede ser utilizada durante el ciclo de
auto-limpieza. La luz indicadora no se encender_i durante este ciclo.
53
Lista de ajuste de temperaturas de la
gaveta de entibiar para differentes
comidas
Comida Temp.
Rostisados
(rez, chancho, carnero) MED
Pedazos de chancho HI
Tocino HI
Hamburgesas HI
Aves HI
Salsas MED
Caserolas MED
Huevos MED
Comida frita HI
Legumbre MED
Pizza HI
Galletas MED
Enrollas, suaves LO
Enrollas, duros MED
Pasteles MED
Platos vaci6s LO
Z_
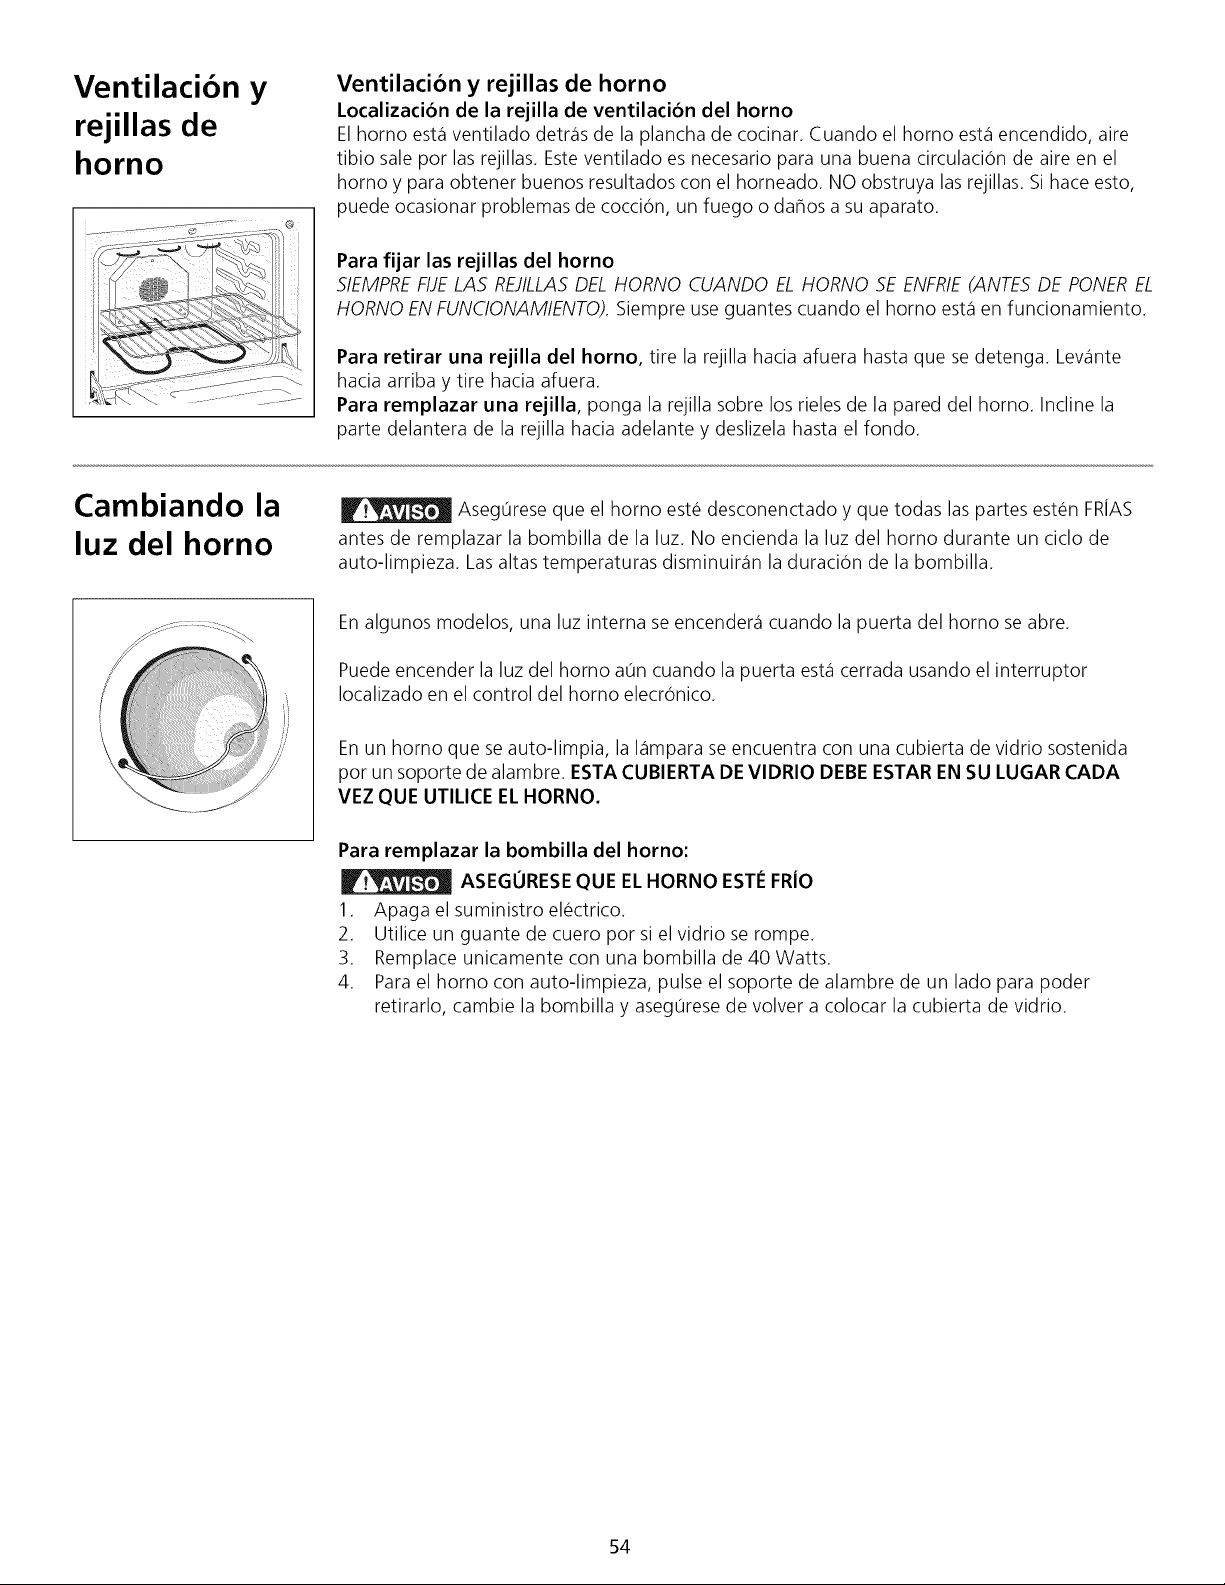
Ventilacion
rejillas de
horno
Y
Ventilacion y rejillas de homo
Localizacion de la rejilla de ventilacion del horno
El homo est,1ventilado detr_is de la plancha de cocinar. Cuando el homo est,1encendido, aire
tibio sale por las rejillas. Este ventilado es necesario para una buena circulacion de aire en el
homo y para obtener buenos resultados con el horneado. NO obstruya las rejillas. Si hace esto,
puede ocasionar problemas de coccion, un fuego o dahos a su aparato.
Para fijar las rejillas del homo
SIEMPREFIJELAS REJILLASDEL HORNO CUANDO EL HORNO SE ENFRIE(ANTES DE PONEREL
HORNO EN FUN¢IONAMIENTO). Siempre use guantes cuando el homo esta en funcionamiento.
Para retirar una rejilla del horno, tire la rejilla hacia afuera hasta que se detenga. Lewinte
hacia arriba y tire hacia afuera.
Para remplazar una rejilla, ponga la rejilla sobre los rieles de la pared del horno. Incline la
parte delantera de la rejilla hacia adelante y deslizela hasta el fondo.
Cambiando la
luz del horno
Asegurese que el homo este desconenctado y que todas las partes esten FRiAS
antes de remplazar la bombilla de la luz. No encienda la luz del homo durante un ciclo de
auto-limpieza. Las altas temperaturas disminuir_in la duracion de la bombilla.
En algunos modelos, una luz interna se encender_i cuando la puerta del homo se abre.
Puede encender la luz del homo aOn cuando la puerta est,1cerrada usando el interruptor
Iocalizado en el control del homo elecronico.
En un homo que se auto-limpia, la I_impara se encuentra con una cubierta de vidrio sostenida
por un soporte de alambre. ESTA CUBIERTA DE VIDRIO DEBE ESTAR EN SU LUGAR CADA
VEZ QUE UTILICE ELHORNO.
Para remplazar la bombilla del horno:
ASEGURESE QUE EL HORNO ESTleFRiO
1. Apaga el suministro electrico.
2. Utilice un guante de cuero por si el vidrio se rompe.
3. Remplace unicamente con una bombilla de 40 Watts.
4. Para el homo con auto-limpieza, pulse el soporte de alambre de un lado para poder
retirarlo, cambie la bombilla y asegurese de volver a colocar la cubierta de vidrio.
54
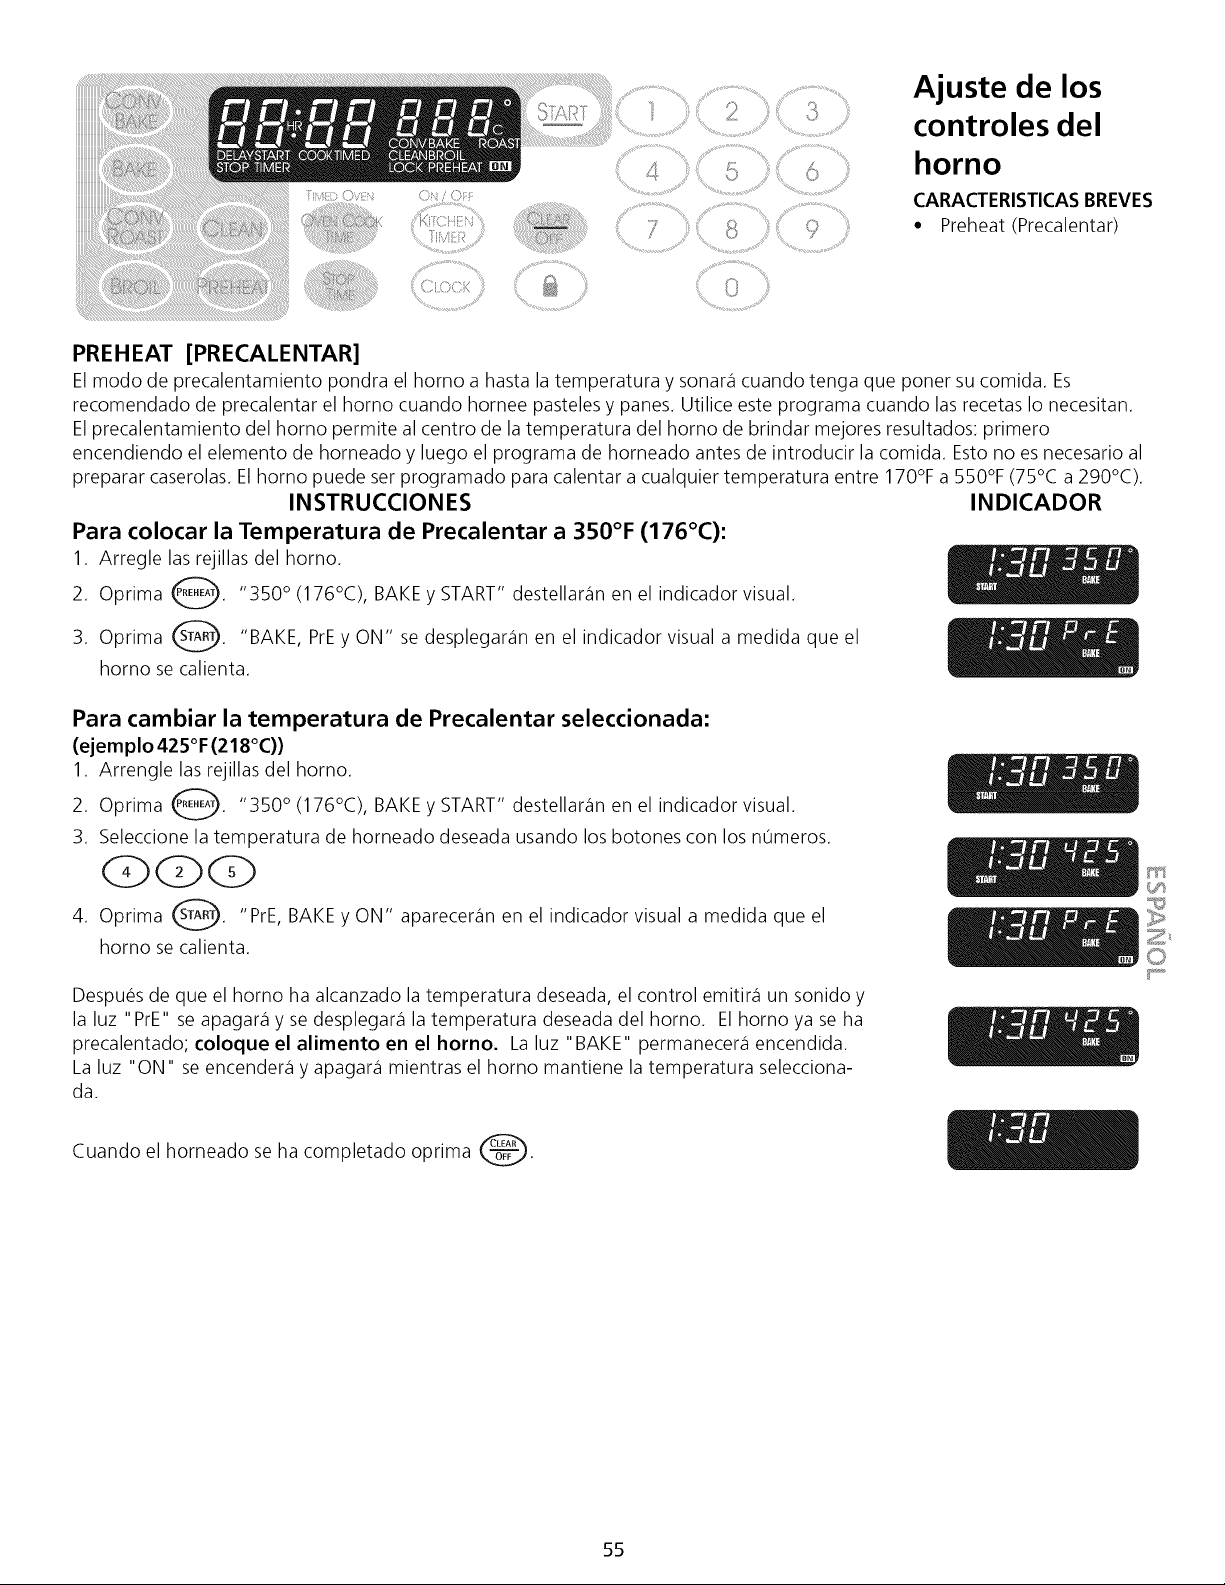
....................................>,.,, - ........... .,,,¸¸¸¸9
Ajuste de los
controles del
homo
CARACTERISTICASBREVES
• Preheat (Precalentar)
PREHEAT [PRECALENTAR]
El modo de precalentamiento pondra el homo a hasta la temperatura y sonara cuando tenga que poner su comida. Es
recomendado de precalentar el homo cuando hornee pasteles y panes. Utilice este programa cuando las recetas Io necesitan.
El precalentamiento del homo permite al centro de la temperatura del homo de brindar mejores resultados: primero
encendiendo el elemento de horneado y luego el programa de horneado antes de introducir la comida. Esto no es necesario al
preparar caserolas. Elhomo puede ser programado para calentar a cualquier temperatura entre 170°F a 550°F (75°C a 290°C).
INSTRUCCIONES INDICADOR
Para colocar la Temperatura de Precalentar a 350°F (176°C):
1. Arregle las rejillas del horno.
2. Oprima _. "350 ° (176°C), BAKE y START" destellaran en
el indicador visual.
3. Oprima _. "BAKE, PrEy ON" se desplegar_in en el indicador visual a medida que el
homo se calienta.
Para cambiar la temperatura de Precalentar seleccionada:
(ejem plo 425°F (218°C))
1. Arrengle las rejillas del horno.
2. Oprima _. "350 ° (176°C), BAKE y START" destellaran en
el indicador visual.
3. Seleccione la temperatura de horneado deseada usando los botones con los numeros.
(2 QQ
4. Oprima @. "PrE, BAKE y ON" apareceran en el indicador visual a medida que
el
homo se calienta.
Despues de que el homo ha alcanzado la temperatura deseada, el control emitir_i un sonido y
la luz "PrE" se apagar_i y se desplegar_i la temperatura deseada del horno. El homo ya se ha
precalentado; coloque el alimento en el homo. La luz "BAKE" permanecer_i encendida.
La luz "ON" se encender_i y apagar_i mientras el homo mantiene la temperatura selecciona-
da.
Cuando el horneado se ha completado opnma @.
55
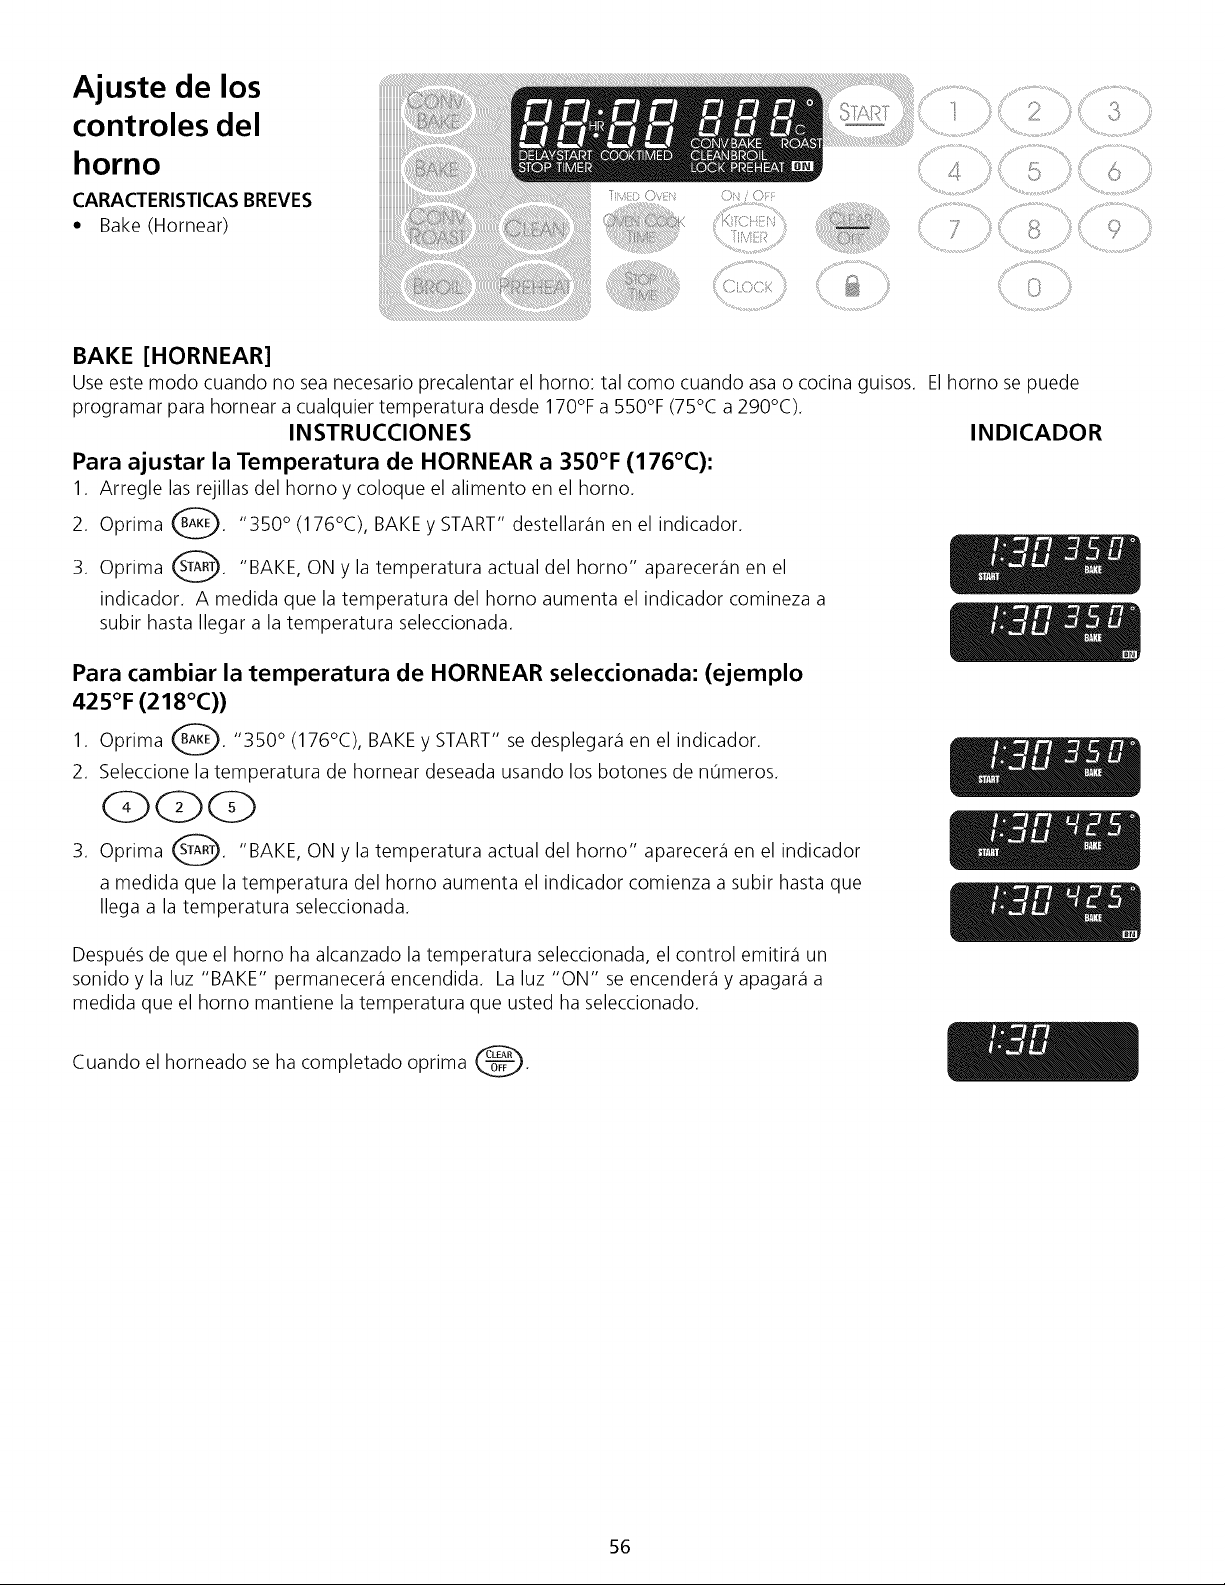
Ajuste de los
controles del
horno
CARACTERISTICASBREVES ::::"'
• Bake (Hornear)
BAKE [HORNEAR]
Use este modo cuando no sea necesario precalentar el homo: tal como cuando asa o cocina guisos. Elhomo se puede
programar para hornear a cualquier temperatura desde 170% a 550% (75°C a 290°C).
INSTRUCCIONES
Para ajustar la Temperatura de HORNEAR a 350°F (176°C):
1. Arregle las rejillas del homo y coloque el alimento en el horno.
2. Oprima _. "350 ° (176°C), BAKE y START" destellahin en
el indicador.
3. Oprima _. "BAKE, ON y la temperatura actual del homo" aparecehin en
el
indicador. A medida que la temperatura del homo aumenta el indicador comineza a
subir hasta Ilegar a la temperatura seleccionada.
Para cambiar la temperatura de HORNEAR seleccionada: (ejemplo
425°F (218°C))
1. Oprima _. "350 ° (176°C), BAKE y START" se desplegahi en
el indicador.
2. Seleccione la temperatura de hornear deseada usando los botones de numeros.
GQQ
3. Oprima @. "BAKE, ON y la temperatura actual del homo" aparecehi en
el indicador
a medida que la temperatura del homo aumenta el indicador comienza a subir hasta que
Ilega a la temperatura seleccionada.
Despues de que el homo ha alcanzado la temperatura seleccionada, el control emitihi un
sonido y la luz "BAKE" permanecer_i encendida. La luz "ON" se encendehi y apagahi a
medida que el homo mantiene la temperatura que usted ha seleccionado.
Cuando el horneado se ha completado oprima @.
INDICADOR
56
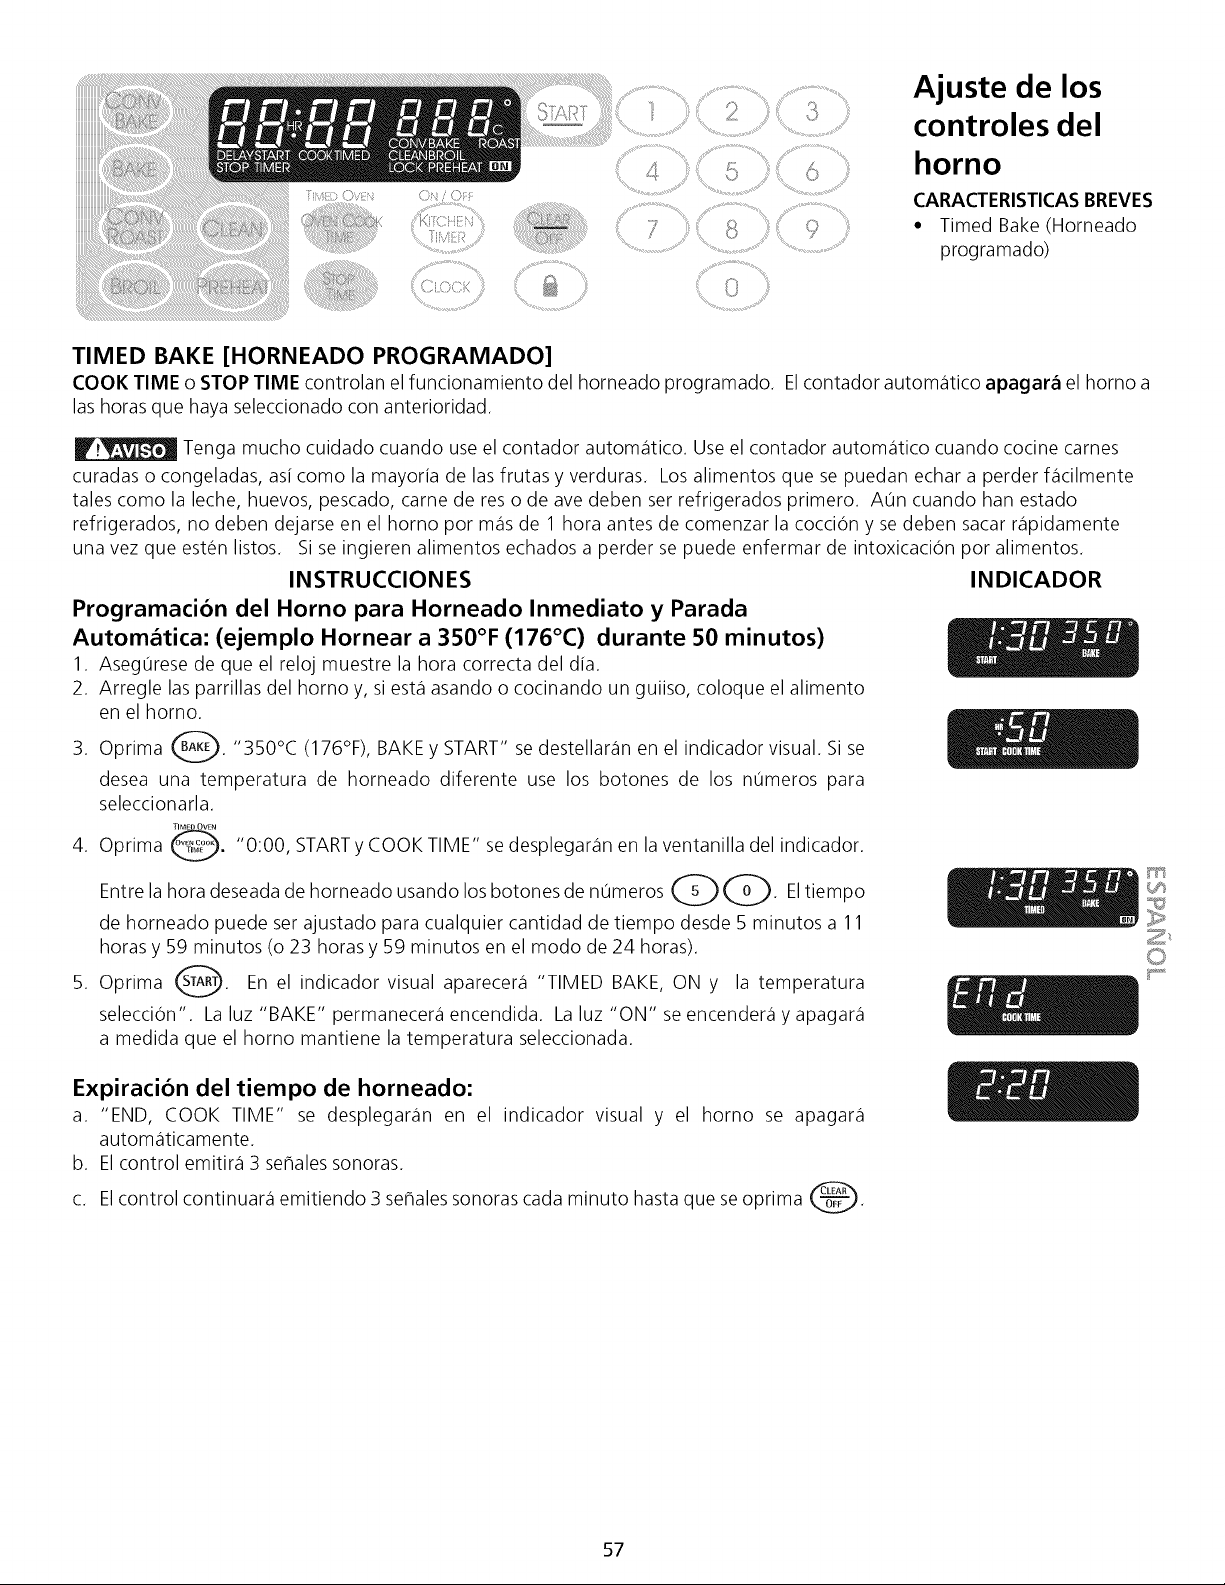
Ajuste de los
controles del
horno
CARACTERISTICASBREVES
• Timed Bake (Horneado
programado)
TIMED BAKE [HORNEADO PROGRAMADO]
COOK TIME o STOP TIME controlan el funcionamiento del horneado programado. Elcontador automatico apagar_ el homo a
las horas que haya seleccionado con anterioridad.
Tenga mucho cuidado cuando use el contador automatico. Use el contador automatico cuando cocine carnes
curadas o congeladas, asi como la mayoria de las frutas y verduras. Los alimentos que se puedan echar a perder facilmente
tales como la leche, huevos, pescado, came de res o de ave deben ser refrigerados primero. Aun cuando han estado
refrigerados, no deben dejarse en el homo por mas de 1 hora antes de comenzar la coccion y se deben sacar rapidamente
una vez que esten listos. Si se ingieren alimentos echados a perder se puede enfermar de intoxicacion por alimentos.
INSTRUCCIONES INDICADOR
Programacion del Homo para Horneado Inmediato y Parada
Automatica: (ejemplo Hornear a 350°F (176°C) durante 50 minutos)
1. Asegurese de que el reloj muestre la hora correcta del dia.
2. Arregle las parrillas del homo y, si est,1asando o cocinando un guiiso, coloque el alimento
en el horno.
3. Oprima _. "350°C (176°F), BAKE y START" se destellar_in en el indicador visual. Si se
desea una temperatura de horneado diferente use los botones de los numeros para
seleccionarla.
4. Oprima _. "0:00, STARTy COOK TIME" se desplegar_in en la ventanilla del indicador.
la hora deseada de horneado usando los botones de numeros QQ. El
Entre
tiempo
de horneado puede ser ajustado para cualquier cantidad de tiempo desde 5 minutos a 11
horas y 59 minutos (o 23 horasy 59 minutos en el modo de 24 horas).
5. Oprima _. En el indicador visual aparecer_i "TIMED BAKE, ON y la temperatura
seleccion". La luz "BAKE" permanecer_i encendida. La luz "ON" se encender_i y apagar_i
a medida que el homo mantiene la temperatura seleccionada.
Expiracion del tiempo de horneado:
a. "END, COOK TIME" se desplegar_in en el indicador visual y el homo se apagar_i
automaticamente.
b. Elcontrol emitir_i 3 sehales sonoras.
c. Elcontrol continuar_i emitiendo 3 sehales sonoras cada minuto hasta que se oprima _.
@
>
Z
57
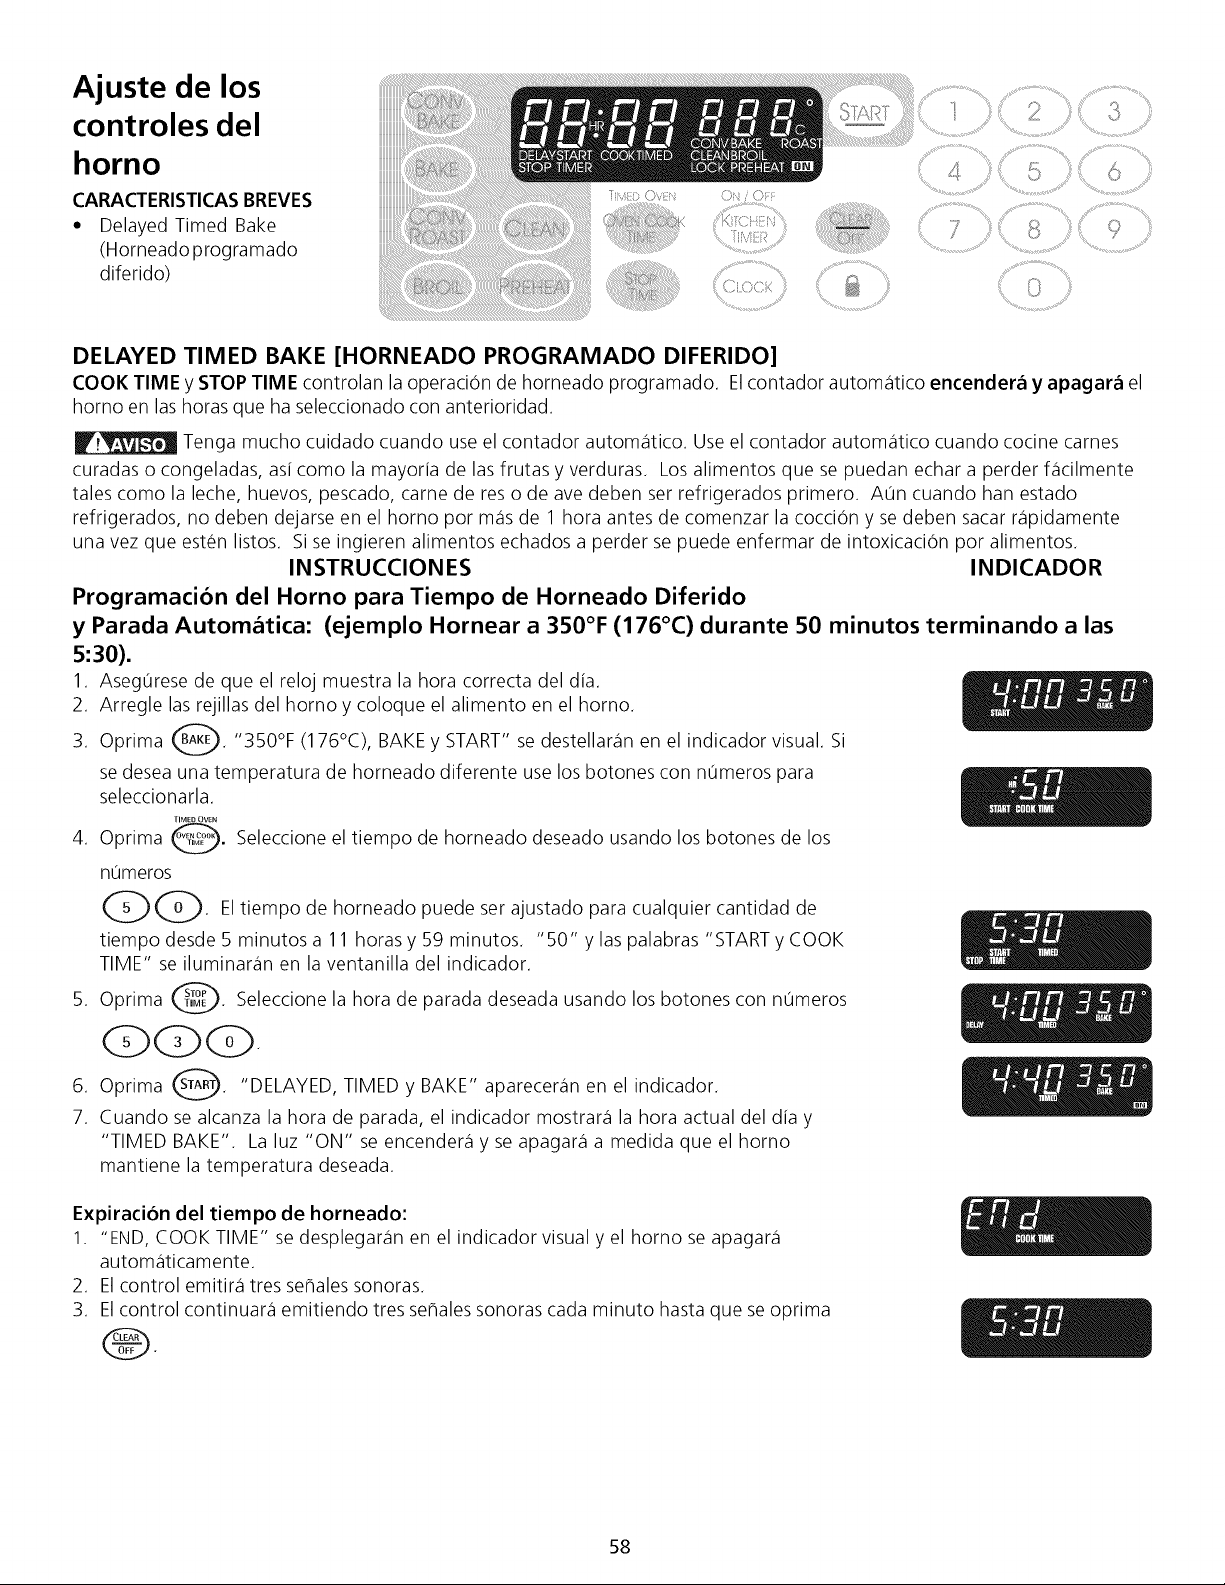
Ajuste de los
controles del
horno
CARACTERISTICASBREVES
• Delayed Timed Bake
(Horneado programado
diferido)
DELAYED TIMED BAKE [HORNEADO PROGRAMADO DIFERIDO]
COOK TIME y STOP TIME controlan la operacion de horneado programado. Elcontador automatico encender_ y apagar_ el
homo en las horas que ha seleccionado con anterioridad.
Tenga mucho cuidado cuando use el contador automatico. Use el contador automatico cuando cocine carnes
curadas o congeladas, asi como la mayoria de las frutas y verduras. Los alimentos que se puedan echar a perder facilmente
tales como la leche, huevos, pescado, came de res o de ave deben ser refrigerados primero. A0n cuando han estado
refrigerados, no deben dejarse en el homo por mas de 1 hora antes de comenzar la coccion y se deben sacar rapidamente
una vez que esten listos. Si se ingieren alimentos echados a perder se puede enfermar de intoxicacion por alimentos.
INSTRUCCIONES INDICADOR
Programacion del Homo para Tiempo de Horneado Diferido
y Parada Automatica: (ejemplo Hornear a 350°F (176°C) durante 50 minutos terminando a las
5:30).
1. Aseg0rese de que el reloj muestra la hora correcta del dia.
2. Arregle las rejillas del homo y coloque el alimento en el horno.
3. Oprima _. "350°F (176°C), BAKE y START" se destellaran en el indicador visual. Si
se desea una temperatura de horneado diferente use los botones con n0meros para
seleccionarla.
4. Oprima _. Seleccione el tiempo de horneado deseado usando los botones de los
n0meros
QQ. El tiempo de horneado puede ser ajustado para cualquier
cantidad de
tiempo desde 5 minutos a 11 horas y 59 minutos. "50" y las palabras "START y COOK
TIME" se iluminaran en la ventanilla del indicador.
_. Seleccione la hora de parada deseada usando los botones
5.
Oprima
con
n0meros
CDQ<
6. Oprima @. "DELAYED, TIMED y BAKE" apareceran en
el indicador.
7. Cuando se alcanza la hora de parada, el indicador mostrara la hora actual del dia y
"TIMED BAKE". La luz "ON" se encendera y se apagara a medida que el homo
mantiene la temperatura deseada.
Expiracion del tiempo de horneado:
1. "END, COOK TIME" se desplegaran en el indicador visual y el homo se apagara
automaticamente.
2. El control emitira tres seAales sonoras.
3. Elcontrol continuara emitiendo tres seAales sonoras cada minuto hasta que se oprima
58
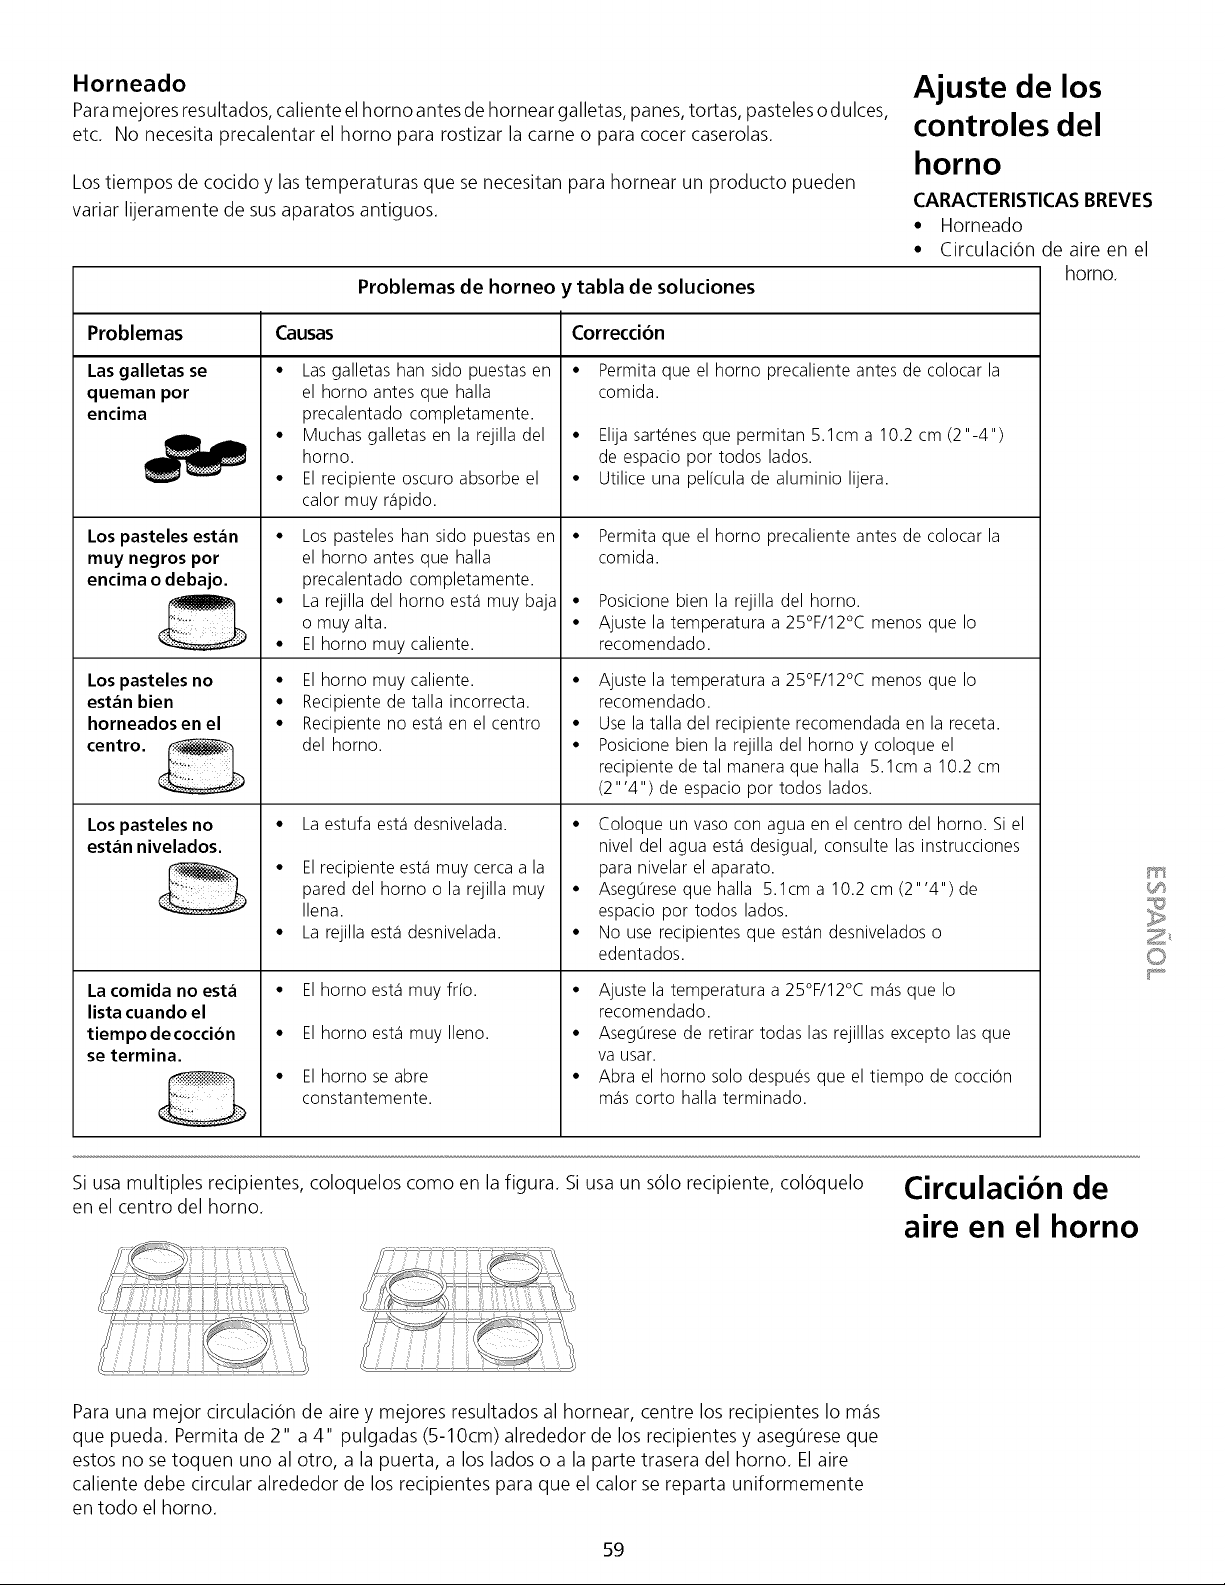
Horneado
Para mejores resultados, caliente el homo antes de hornear galletas, panes, tortas, pasteles o dulces,
etc. No necesita precalentar el homo para rostizar la came o para cocer caserolas.
Los tiempos de cocido y las temperaturas que se necesitan para hornear un producto pueden
variar lijeramente de susaparatos antiguos.
Problemas
Las galletas se
queman por
encima
Los pasteles estan
muy negros por
encima o debajo.
Los pasteles no
estan bien
horneados en el
centro.
Los pasteles no
estan nivelados.
La comida no esta
lista cuando el
tiempo de coccion
se termina.
Problemas de horneo y tabla de soluciones
Causas Correccion
Las galletas ban sido puestas en
el homo antes que halla
precalentado completamente.
Muchas galletas en la rejilla del
homo.
El recipiente oscuro absorbe el
calor muy r_ipido.
• Los pasteles ban sido puestas en
el homo antes que halla
precalentado completamente.
• La rejilla del homo est,1rnuy baja
o muy alta.
• El homo muy caliente.
• El homo muy caliente.
• Recipiente de talla incorrecta.
• Recipiente no est,1en el centro
del homo.
La estufa est,1desnivelada.
El recipiente est,1 muy cerca a la
pared del homo o la rejilla muy
Ilena.
La rejilla est,1 desnivelada.
• El homo est,1muy fifo.
• El homo est,1muy Ileno.
• El homo se abre
constantemente.
Ajuste de los
controles del
horno
CARACTERISTICASBREVES
• Horneado
• Circulacion de aire en el
horno.
• Permita que el homo precaliente antes de colocar la
comida.
• Elija sart_nes que permitan 5.1cm a 10.2 cm (2"-4")
de espacio por todos lados.
• Utilice una pel[cula de aluminio lijera.
Permita que el homo precaliente antes de colocar la
comida.
Posicione bien la rejilla del homo.
Ajuste la temperatura a 25°F/12°C menos que Io
recomendado.
• Ajuste la temperatura a 25°F/12°C menos que Io
recomendado.
• Use la talla del recipiente recomendada en la receta.
• Posicione bien la rejilla del homo y coloque el
recipientedetalmaneraquehalla 5.1cma10.2cm
(2"'4") de espacio por todos lados.
• Coloque un vaso con agua en el centro del homo. Si el
nivel del agua est,1 desigual, consulte las instrucciones
para nivelar el aparato.
• Aseg0rese que halla 5.1cm a 10.2 cm (2"'4") de
espacio por todos lados.
• No use recipientes que est_in desnivelados o
edentados.
• Ajuste la temperatura a 25°F/12°C m_is que Io
recomendado.
• Aseg0rese de retirar todas las rejilllas excepto las que
va usar.
• Abra el homo solo despu_s que el tiempo de coccion
m_is corto halla terminado.
Z_
Si usa multiples recipientes, coloquelos como en la figura. Si usa un solo recipiente, coloquelo
en el centro del horno.
Circulacion de
aire en el horno
Para una mejor circulacion de aire y mejores resultados al hornear, centre los recipientes Io mas
que pueda. Permita de 2" a 4" pulgadas (5-10cm) alrededor de los recipientes y asegurese que
estos no se toquen uno al otro, a la puerta, a los lados o a la parte trasera del horno. El aire
caliente debe circular alrededor de los recipientes para que el calor se reparta uniformemente
en todo el horno.
59
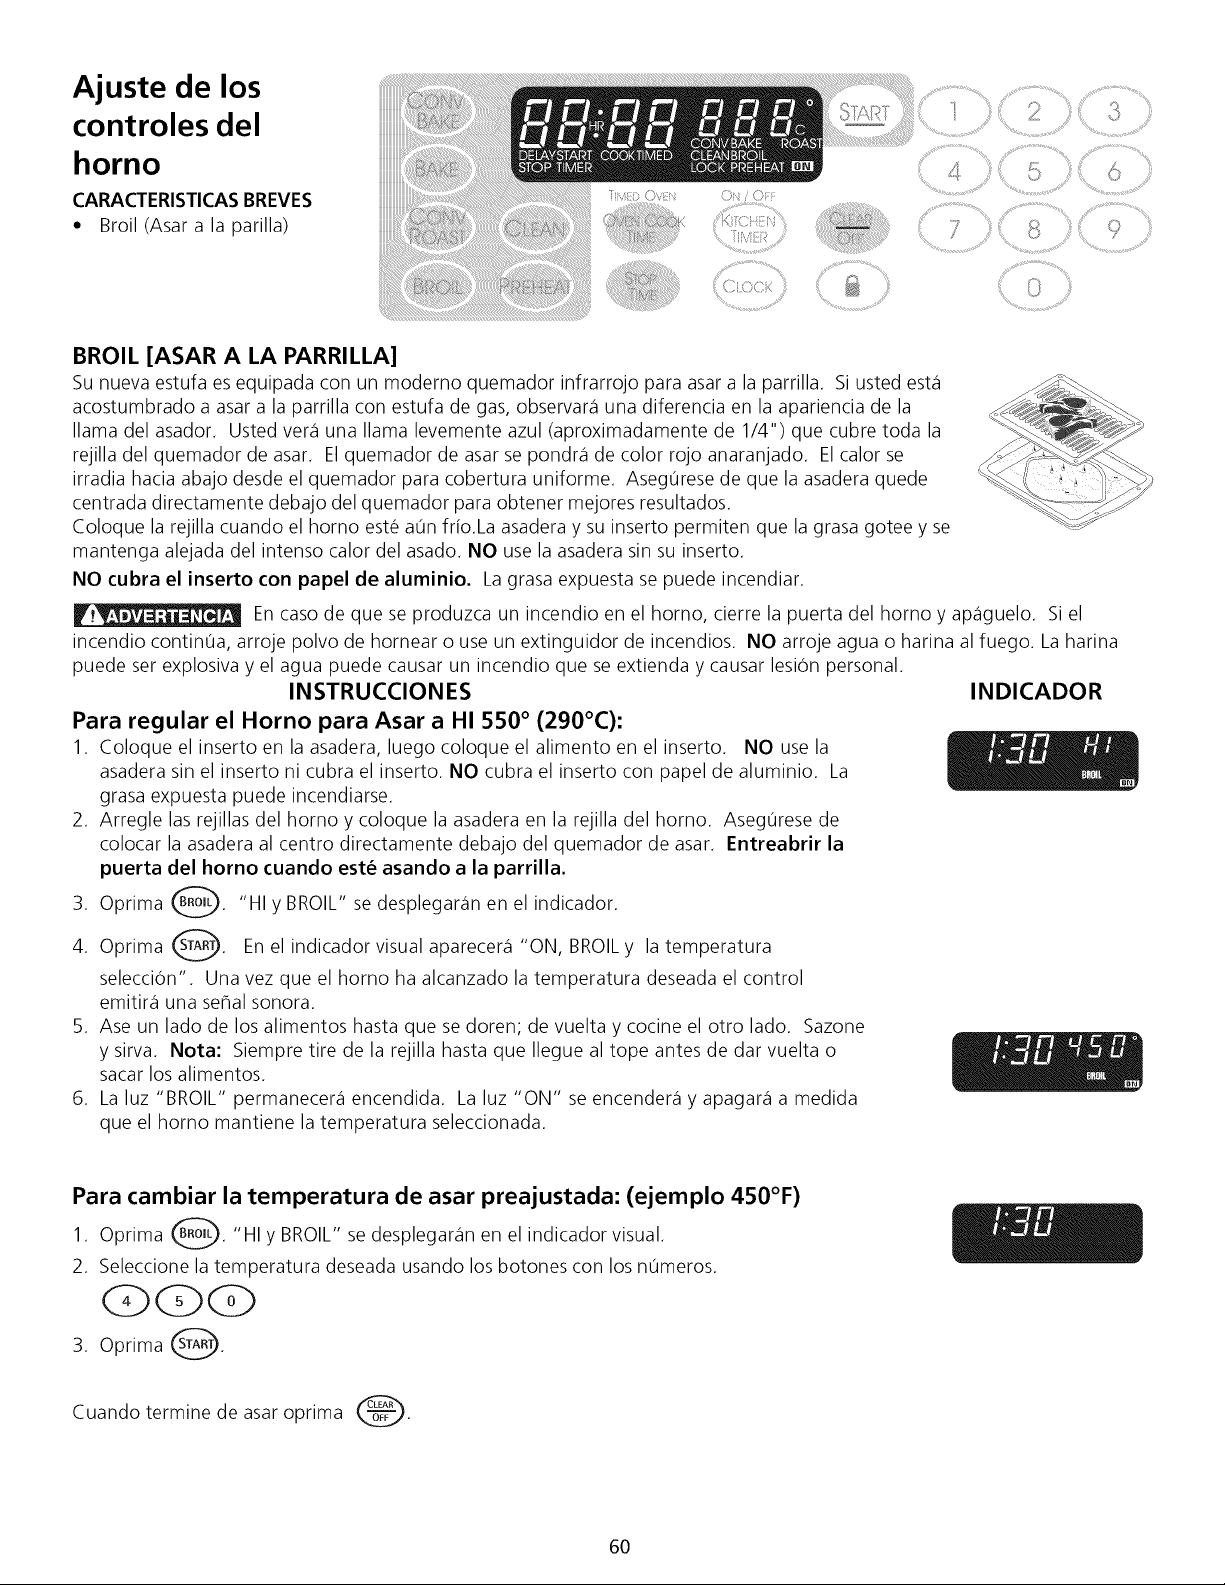
Ajuste de los
controles del
horno
CARACTERISTICASBREVES ::::"'
• Broil (Asar a la parilla)
BROIL [ASAR A LA PARRILLA]
Su nueva estufa es equipada con un moderno quemador infrarrojo para asar a la parrilla. Si usted est,1
acostumbrado a asar a la parrilla con estufa de gas, observar_i una diferencia en la apariencia de la
llama del asador. Usted ver_i una llama levemente azul (aproximadamente de 1/4") que cubre toda la
rejilla del quemador de asar. El quemador de asar se pondr_i de color rojo anaranjado. Elcalor se
irradia hacia abajo desde el quemador para cobertura uniforme. Aseg0rese de que la asadera quede
centrada directamente debajo del quemador para obtener mejores resultados.
Coloque la rejilla cuando el homo este a0n frio.La asadera y su inserto permiten que la grasa gotee y se
mantenga alejada del intenso calor del asado. NO use la asadera sin su inserto.
NO cubra el inserto con papel de aluminio. La grasa expuesta se puede incendiar.
En caso de que se produzca un incendio en el homo, cierre la puerta del homo y ap_iguelo. Si el
incendio continua, arroje polvo de hornear o use un extinguidor de incendios. NO arroje agua o harina al fuego. La harina
puede ser explosiva y el agua puede causar un incendio que se extienda y causar lesion personal.
INSTRUCCIONES
Para regular el Horno para Asar a HI 550 ° (290°C):
1. Coloque el inserto en la asadera, luego coloque el alimento en el inserto. NO use la
asadera sin el inserto ni cubra el inserto. NO cubra el inserto con papel de aluminio. La
grasa expuesta puede incendiarse.
2. Arregle las rejillas del homo y coloque la asadera en la rejilla del horno. Asegurese de
colocar la asadera al centro directamente debajo del quemador de asar. Entreabrir la
puerta del homo cuando est_ asando a la parrilla.
3. Oprima _. "HI y BROIL" se desplegar_in en
el indicador.
4. Oprima _. En el indicador visual aparecer_i "ON, BROIL y la temperatura
selecci6n". Una vez que el homo ha alcanzado la temperatura deseada el control
emitir_i una serial sonora.
5. Ase un lado de los alimentos hasta que se doren; de vuelta y cocine el otro lado. Sazone
y sirva. Nota: Siempre tire de la rejilla hasta que Ilegue al tope antes de dar vuelta o
sacar los alimentos.
6. La luz "BROIL" permanecer_i encendida. La luz "ON" se encender_i y apagar_i a medida
que el homo mantiene la temperatura seleccionada.
INDICADOR
Para cambiar la temperatura de asar preajustada: (ejemplo 450°F)
1. Oprima _. "HI y BROIL" se desplegar_in en el indicador visual.
2. Seleccione la temperatura deseada usando los botones con los n0meros.
GQd_P
3. Oprima _.
Cuando termine de asar oprima _.
6O
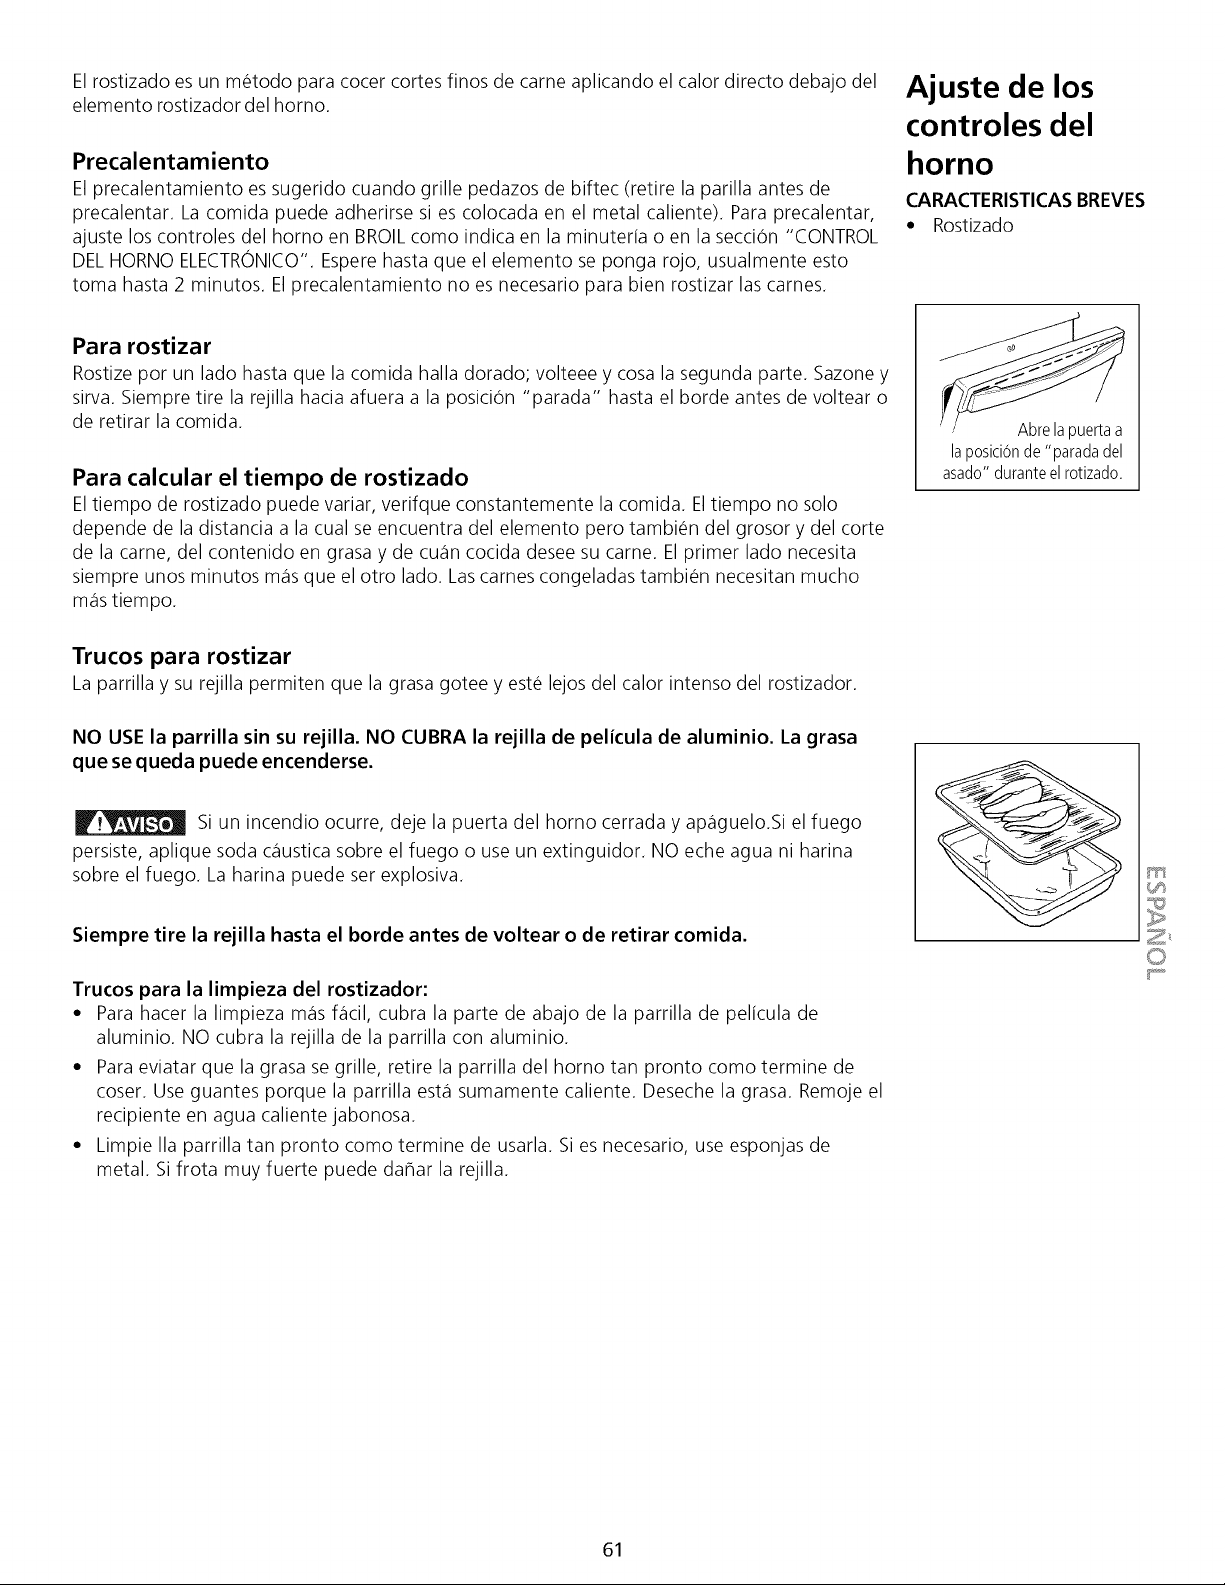
Elrostizadoesunmetodoparacocercortesfinosdecameaplicandoelcalordirectodebajodel
elementorostizadordelhorno.
Precalentamiento
Elprecalentamientoessugeridocuandogrillepedazosdebiftec(retirelaparillaantesde
precalentar.Lacomidapuedeadherirsesi escolocadaenel metalcaliente).Paraprecalentar,
ajusteloscontrolesdelhomoenBROILcomoindicaenlaminuteriao enlaseccion"CONTROL
DELHORNOELECTRONICO".Esperehastaqueel elementosepongarojo,usualmenteesto
tomahasta2 minutos.Elprecalentamientonoesnecesarioparabienrostizarlascarnes.
Ajuste de los
controles del
horno
CARACTERISTICASBREVES
• Rostizado
Para rostizar
Rostize por un lado hasta que la comida halla dorado; volteee y cosa la segunda parte. Sazone y
sirva. Siempre tire la rejilla hacia afuera a la posicion "parada" hasta el borde antes de voltear o
de retirar la comida.
Para calcular el tiempo de rostizado
El tiempo de rostizado puede variar, verifque constantemente la comida. Eltiempo no solo
depende de la distancia a la cual se encuentra del elemento pero tambien del grosor y del corte
de la came, del contenido en grasa y de cuan cocida desee su carne. El primer lado necesita
siempre unos minutos mas que el otro lado. Las carries congeladas tambien necesitan mucho
m_istiempo.
Trucos para rostizar
La parrilla y su rejilla permiten que la grasa gotee y este lejos del calor intenso del rostizador.
NO USE la parrilla sin su rejilla. NO CUBRA la rejilla de pelicula de alurninio. La grasa
que se queda puede encenderse.
Si un incendio ocurre, deje la puerta del homo cerrada y apaguelo.Si el fuego
persiste, aplique soda caustica sobre el fuego o use un extinguidor. NO eche agua ni harina
sobre el fuego. La harina puede ser explosiva.
Siempre tire la rejilla hasta el borde antes de voltear o de retirar comida.
Trucos para la limpieza del rostizador:
• Para hacer la limpieza m_isfacil, cubra la parte de abajo de la parrilla de pelicula de
aluminio. NO cubra la rejilla de la parrilla con aluminio.
• Para eviatar que la grasa se grille, retire la parrilla del homo tan pronto como termine de
coser. Use guantes porque la parrilla esta sumamente caliente. Deseche la grasa. Remoje el
recipiente en agua caliente jabonosa.
• Limpie Ila parrilla tan pronto como termine de usarla. Si es necesario, use esponjas de
metal. Si frota muy fuerte puede dahar la rejilla.
Abre la puertaa
laposicionde "parada del
asado" duranteel rotizado.
Z_
61
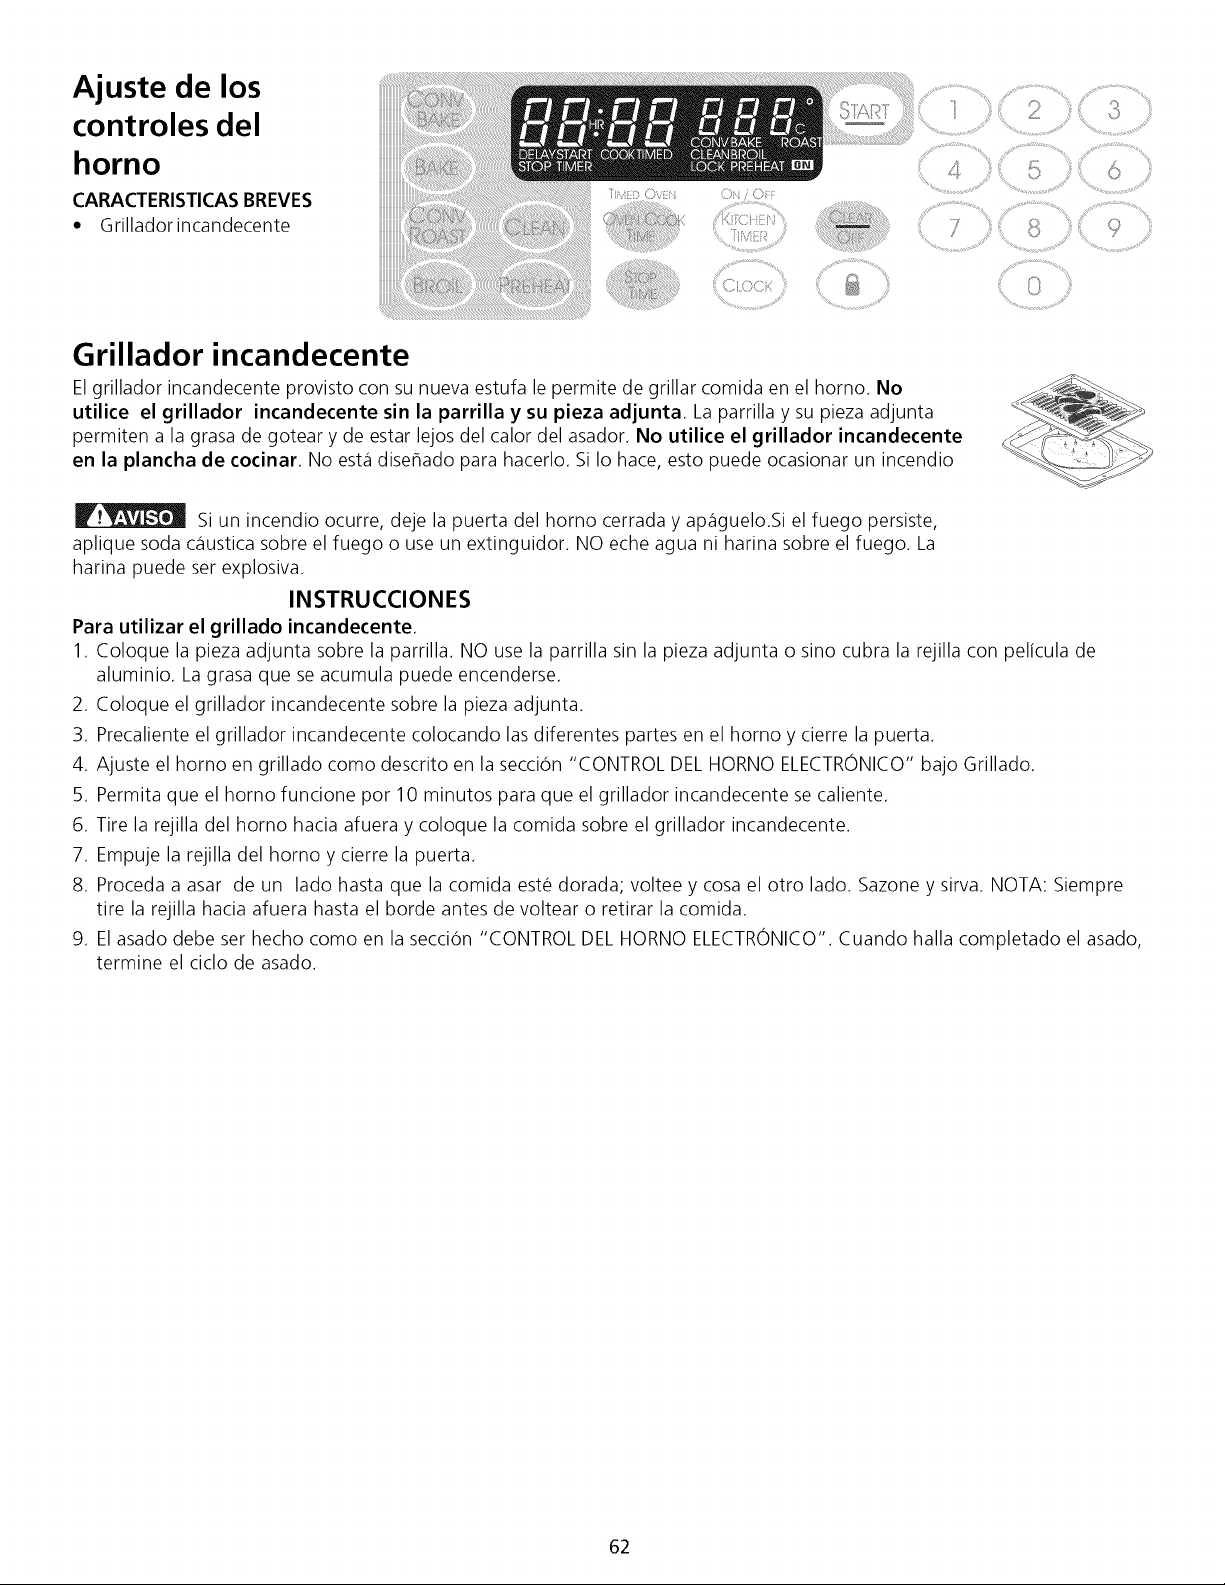
Ajuste de los
controles del
horno
CARACTERISTICASBREVES
• Grillador incandecente
i :i
%¸¸¸¸¸.¸¸..¸¸¸...¸¸.¸¸¸.¸¸:¸¸¸¸¸¸¸¸¸¸¸¸¸¸¸
Grillador incandecente
El grillador incandecente provisto con su nueva estufa le permite de grillar comida en el horno. No
utilice el grillador incandecente sin la parrilla y su pieza adjunta La parrilla y su pieza adjunta
permiten a la grasa de gotear y de estar lejos del calor del asador. No utilice el grillador incandecente
en la plancha de cocinar. No est,1disehado para hacerlo. Si Io hace, esto puede ocasionar un incendio
Si un incendio ocurre, deje la puerta del homo cerrada y ap_iguelo.Si el fuego persiste,
aplique soda c_iustica sobre el fuego o use un extinguidor. NO eche agua ni harina sobre el fuego. La
harina puede ser explosiva.
INSTRUCCIONES
Para utilizar el grillado incandecente,
1. Coloque la pieza adjunta sobre la parrilla. NO use la parrilla sin la pieza adjunta o sino cubra la rejilla con pelicula de
aluminio. La grasa que se acumula puede encenderse.
2. Coloque el grillador incandecente sobre la pieza adjunta.
3. Precaliente el grillador incandecente colocando las diferentes partes en el homo y cierre la puerta.
4. Ajuste el homo en grillado como descrito en la seccion "CONTROL DEL HORNO ELECTRONICO" bajo Grillado.
5. Permita que el homo funcione por 10 minutos para que el grillador incandecente se caliente.
6. Tire la rejilla del homo hacia afuera y coloque la comida sobre el grillador incandecente.
7. Empuje la rejilla del homo y cierre la puerta.
8. Proceda a asar de un lado hasta que la comida este dorada; voltee y cosa el otro lado. Sazone y sirva. NOTA: Siempre
tire la rejilla hacia afuera hasta el borde antes de voltear o retirar la comida.
9. El asado debe ser hecho como en la seccion "CONTROL DEL HORNO ELECTRONICO". Cuando halla completado el asado,
termine el ciclo de asado.
62
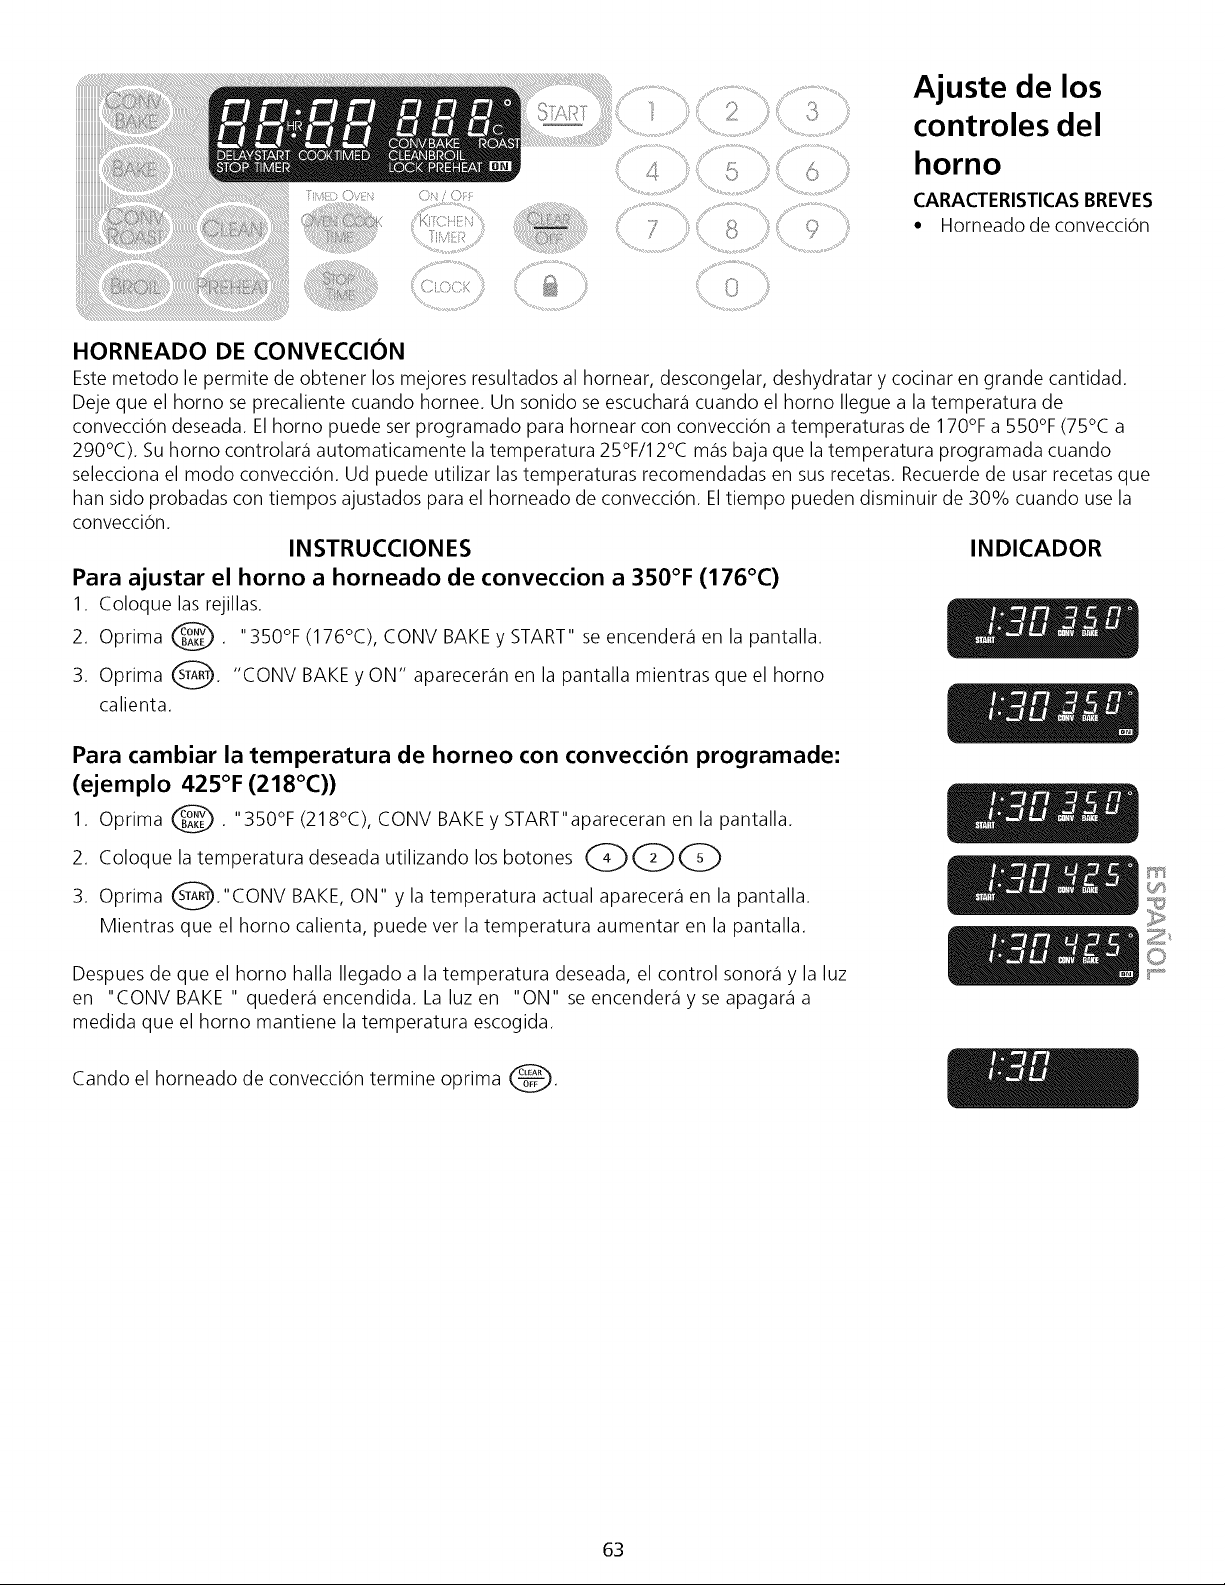
....................................>,.,, % ........... .,,,¸¸¸¸9
Ajuste de los
controles del
horno
CARACTERISTICASBREVES
• Horneadode conveccion
HORNEADO DE CONVECCION
Este metodo le permite de obtener los mejores resultados al hornear, descongelar, deshydratar y cocinar en grande cantidad.
Deje que el homo se precaliente cuando hornee. Un sonido se escuchara cuando el homo Ilegue a la temperatura de
conveccion deseada. El homo puede ser programado para hornear con conveccion a temperaturas de 170% a 550% (75°C a
290°C). Su homo controlara automaticamente la temperatura 25°F/12°C mas baja que la temperatura programada cuando
selecciona el modo conveccion. Ud puede utilizar las temperaturas recomendadas en sus recetas. Recuerde de usar recetas que
ban sido probadas con tiempos ajustados para el horneado de conveccion. El tiempo pueden disminuir de 30% cuando use la
conveccion.
INSTRUCCIONES INDICADOR
Para ajustar el homo a horneado de conveccion a 350°F (176°C)
1. Coloque las rejillas.
2. Oprima @. "350% (176°C), CONV BAKE y START" se encendera en la pantalla.
3. Oprima _. "CONV BAKE y ON" apareceran en la pantalla mientras que el homo
calienta.
Para cambiar la temperatura de horneo con conveccion programade:
(ejemplo 425°F (218°C))
1. Oprima _. "350°F (218°C), CONV BAKEy START"apareceran en la pantalla.
2. Coloque la temperatura deseada utilizando los botones (_)(_(_
3. Oprima 8"CONV BAKE, ON" y la temperatura actual aparecera en la pantalla.
Mientras que el homo calienta, puede ver la temperatura aumentar en la pantalla.
Despues de que el homo halla Ilegado a la temperatura deseada, el control sonora y la luz
en "CONV BAKE " quedera encendida. La luz en "ON" se encendera y se apagara a
medida que el homo mantiene la temperatura escogida.
Cando el horneado de convecci6n termine oprima @.
63
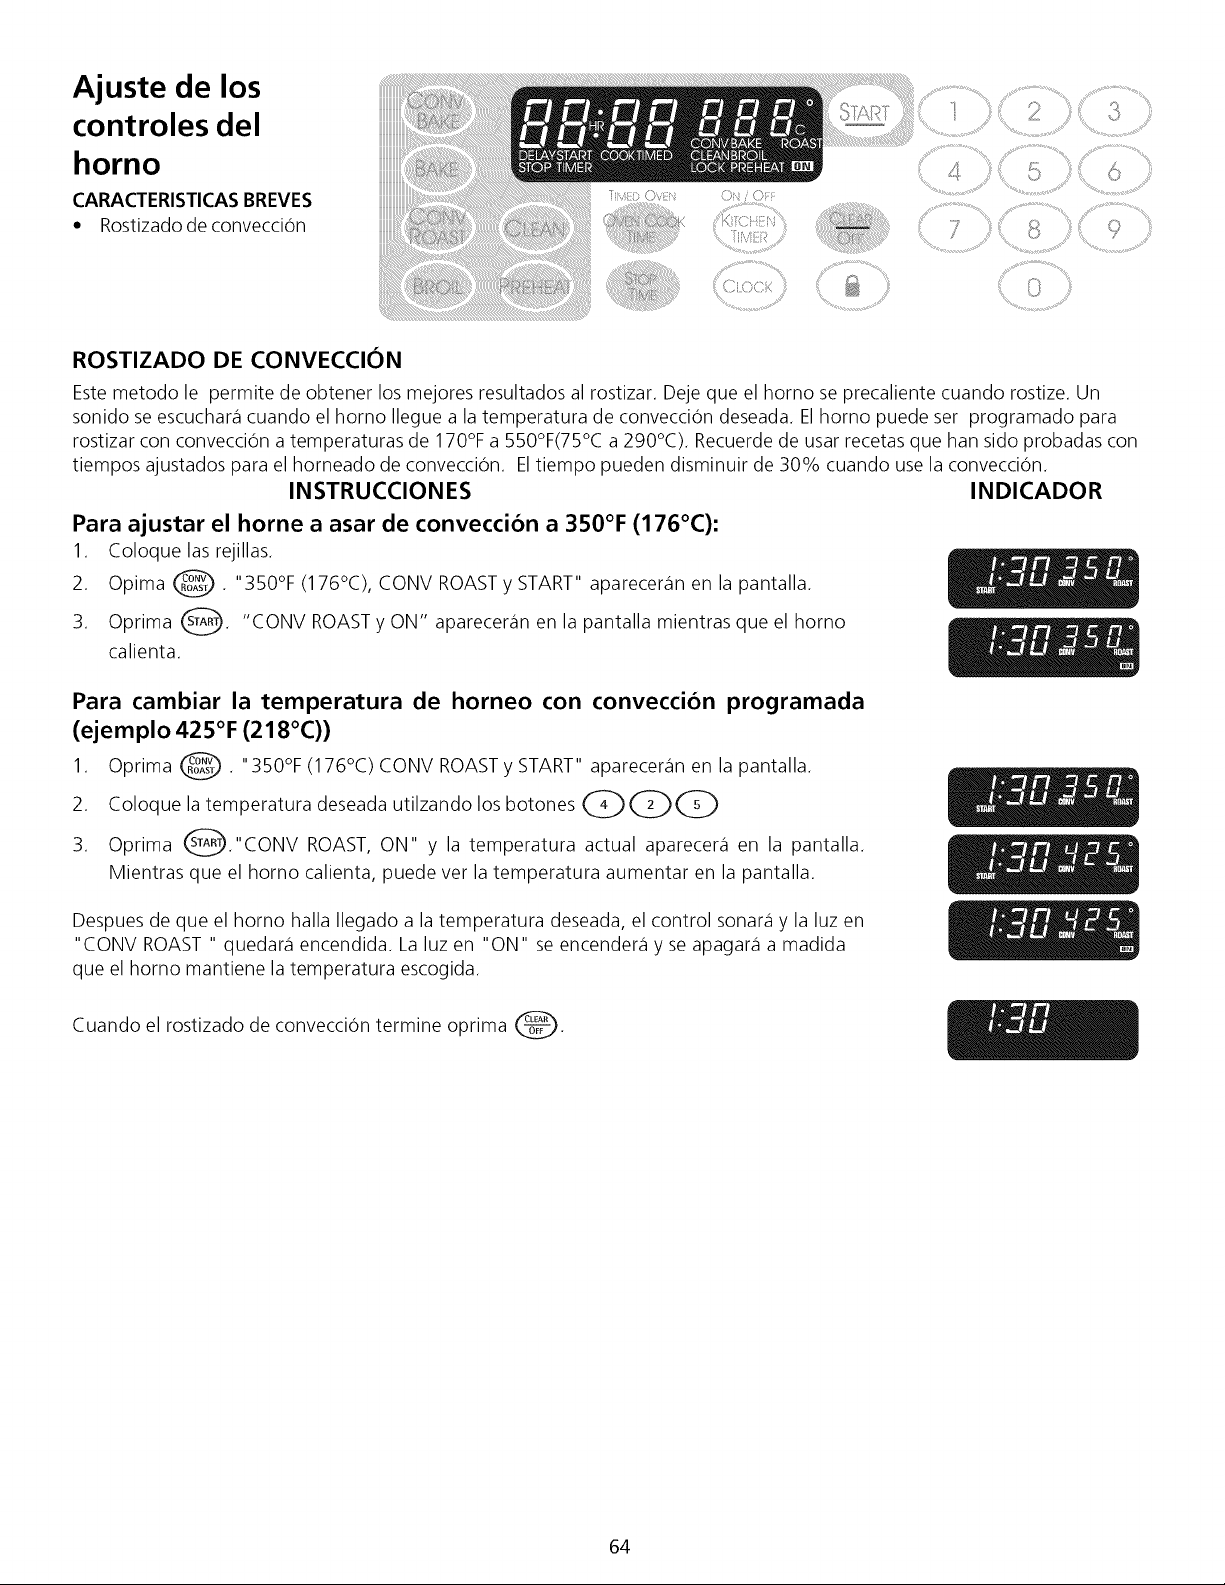
Ajuste de los
controles del
horno
CARACTERISTICASBREVES ::::""
• Rostizadodeconvecci6n
ROSTIZADO DE CONVECCION
Este metodo le permite de obtener los mejores resultados al rostizar. Deje que el homo se precaliente cuando rostize. Un
sonido se escuchara cuando el homo Ilegue a la temperatura de convecci6n deseada. El homo puede ser programado para
rostizar con convecci6n a temperaturas de 170°F a 550°F(75°C a 290°C). Recuerde de usar recetas que han sido probadas con
tiempos ajustados para el horneado de convecci6n. El tiempo pueden disminuir de 30% cuando use la convecci6n.
INSTRUCCIONES INDICADOR
Para ajustar el home a asar de conveccion a 350°F (176°C):
1. Coloque las rejillas.2. Opima @. "350°F (176°C), CONV ROASTy START" apareceran en la pantalla.
3. Optima s_. "CONV ROASTy ON" apareceran en la pantalla mientras que el homo
calienta.
Para cambiar la temperatura de horneo con conveccion programada
(ejemplo 425°F (218°C))
1. Oprima @. "350% (176°C) CONV ROASTy START" apareceran en la pantalla.
2. Coloque la temperatura deseada utilzando los botones Q_--_DQ
3. Oprima _."CONV ROAST, ON" y la temperatura actual aparecera en la pantalla.
Mientras que el homo calienta, puede ver la temperatura aumentar en la pantalla.
Despues de que el homo halla Ilegado a la temperatura deseada, el control sonara y la luz en
"CONV ROAST " quedara encendida. La luz en "ON" se encendera y se apagara a madida
que el homo mantiene la temperatura escogida.
Cuando el rostizado de convecci6n termine oprima _.
64
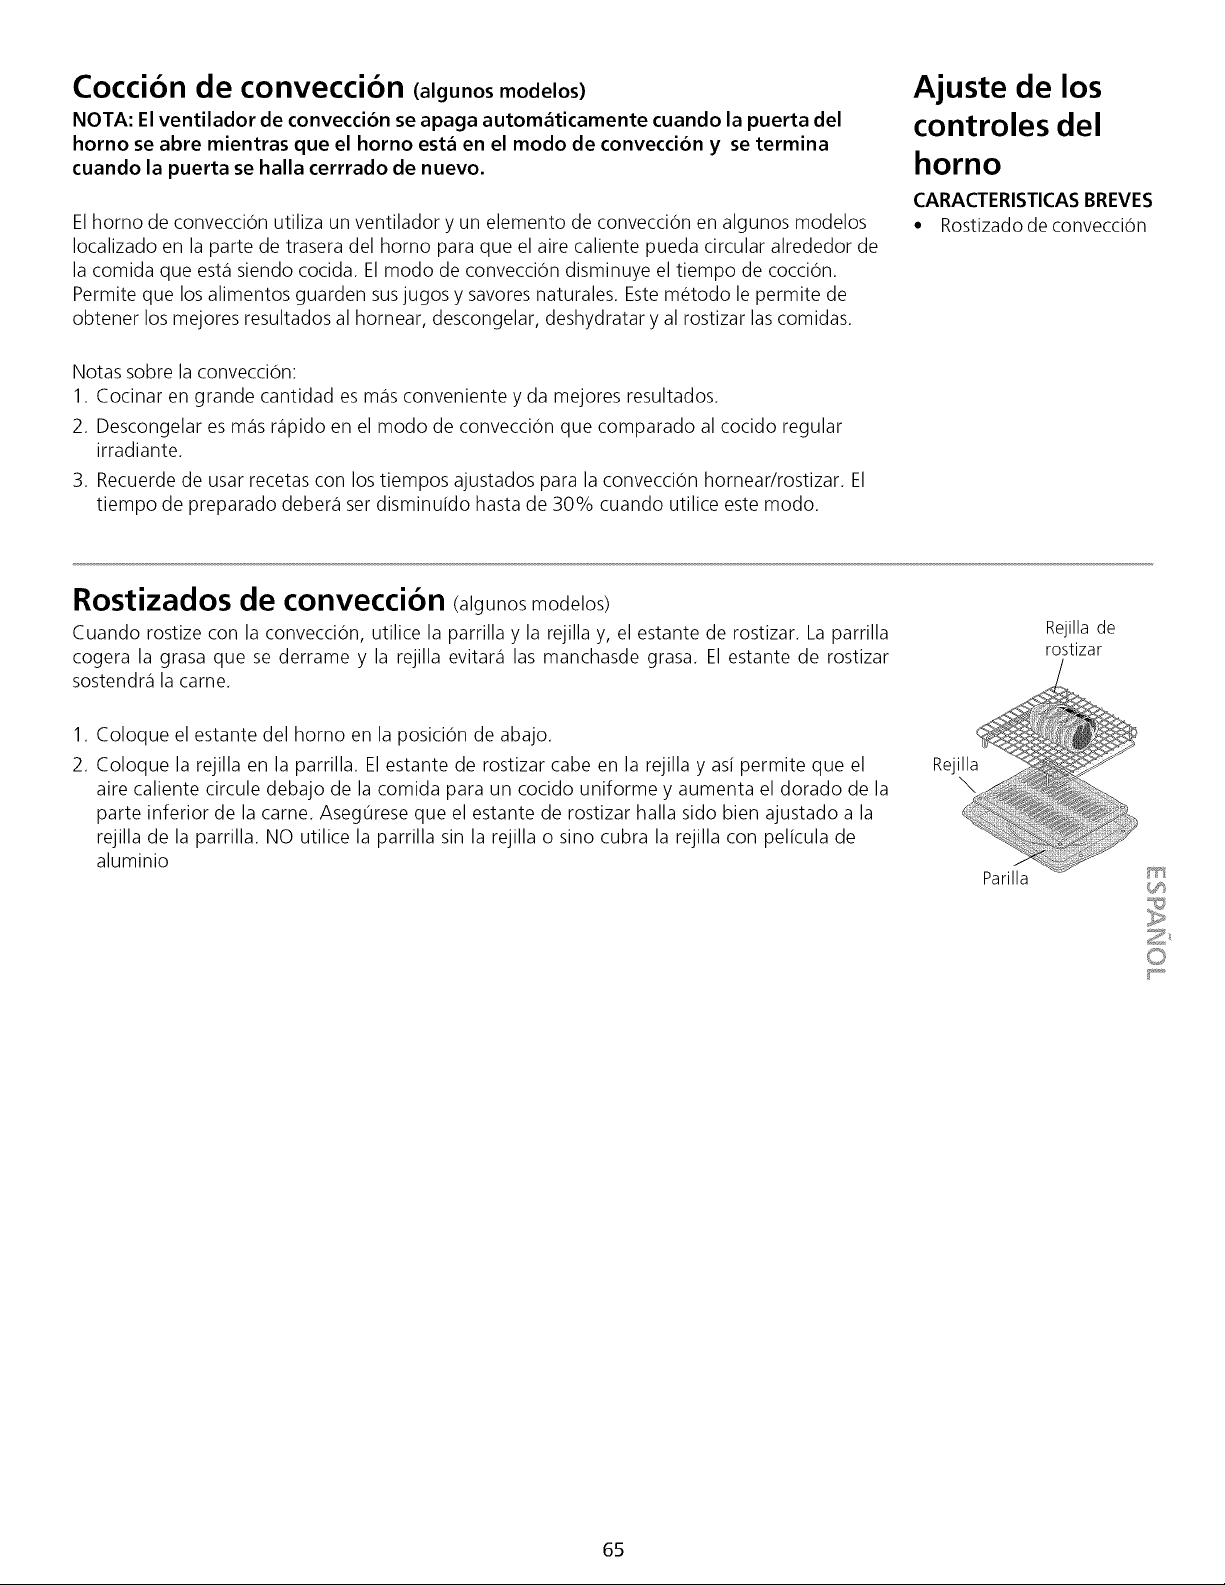
Coccion de conveccion (algunos modelos)
NOTA: El ventilador de convecci6n se apaga automaticamente cuando la puerta del
homo se abre mientras que el horno est_ en el modo de conveccion y se termina
cuando la puerta se halla cerrrado de nuevo.
El homo de convecci6n utiliza un ventilador y un elemento de convecci6n en algunos modelos
Iocalizado en la parte de trasera del homo para que el aire caliente pueda circular alrededor de
la comida que esta siendo cocida. El modo de convecci6n disminuye el tiempo de coccion.
Permite que los alimentos guarden susjugos y savores naturales. Este metodo le permite de
obtener los mejores resultados al hornear, descongelar, deshydratar y al rostizar las comidas.
Notas sobre la convecci6n:
1. Cocinar en grande cantidad es m_is conveniente y da mejores resultados.
2. Descongelar es m_israpido en el modo de convecci6n que comparado al cocido regular
irradiante.
3. Recuerde de usar recetas con los tiempos ajustados para la convecci6n hornear/rostizar. El
tiempo de preparado debera ser disminuido hasta de 30% cuando utilice este modo.
Ajuste de los
controles del
horno
CARACTERISTICASBREVES
• Rostizadodeconvecci6n
Rostizados de conveccion <a guno modelos)
Cuando rostize con la conveccion, utilice la parrilla y la rejilla y, el estante de rostizar. La parrilla
cogera la grasa que se derrame y la rejilla evitara las manchasde grasa. El estante de rostizar
sostendra la carne.
Rejilla de
rostizar
1. Coloque el estante del homo en la posicion de abajo.
2. Coloque la rejilla en la parrilla. El estante de rostizar cabe en la rejilla y asi permite que el
aire caliente circule debajo de la comida para un cocido uniforme y aumenta el dorado de la
parte inferior de la carne. Aseg0rese que el estante de rostizar halla sido bien ajustado a la
rejilla de la parrilla. NO utilice la parrilla sin la rejilla o sino cubra la rejilla con pelicula de
aluminio
Rejilla
Parilla
Z_
65
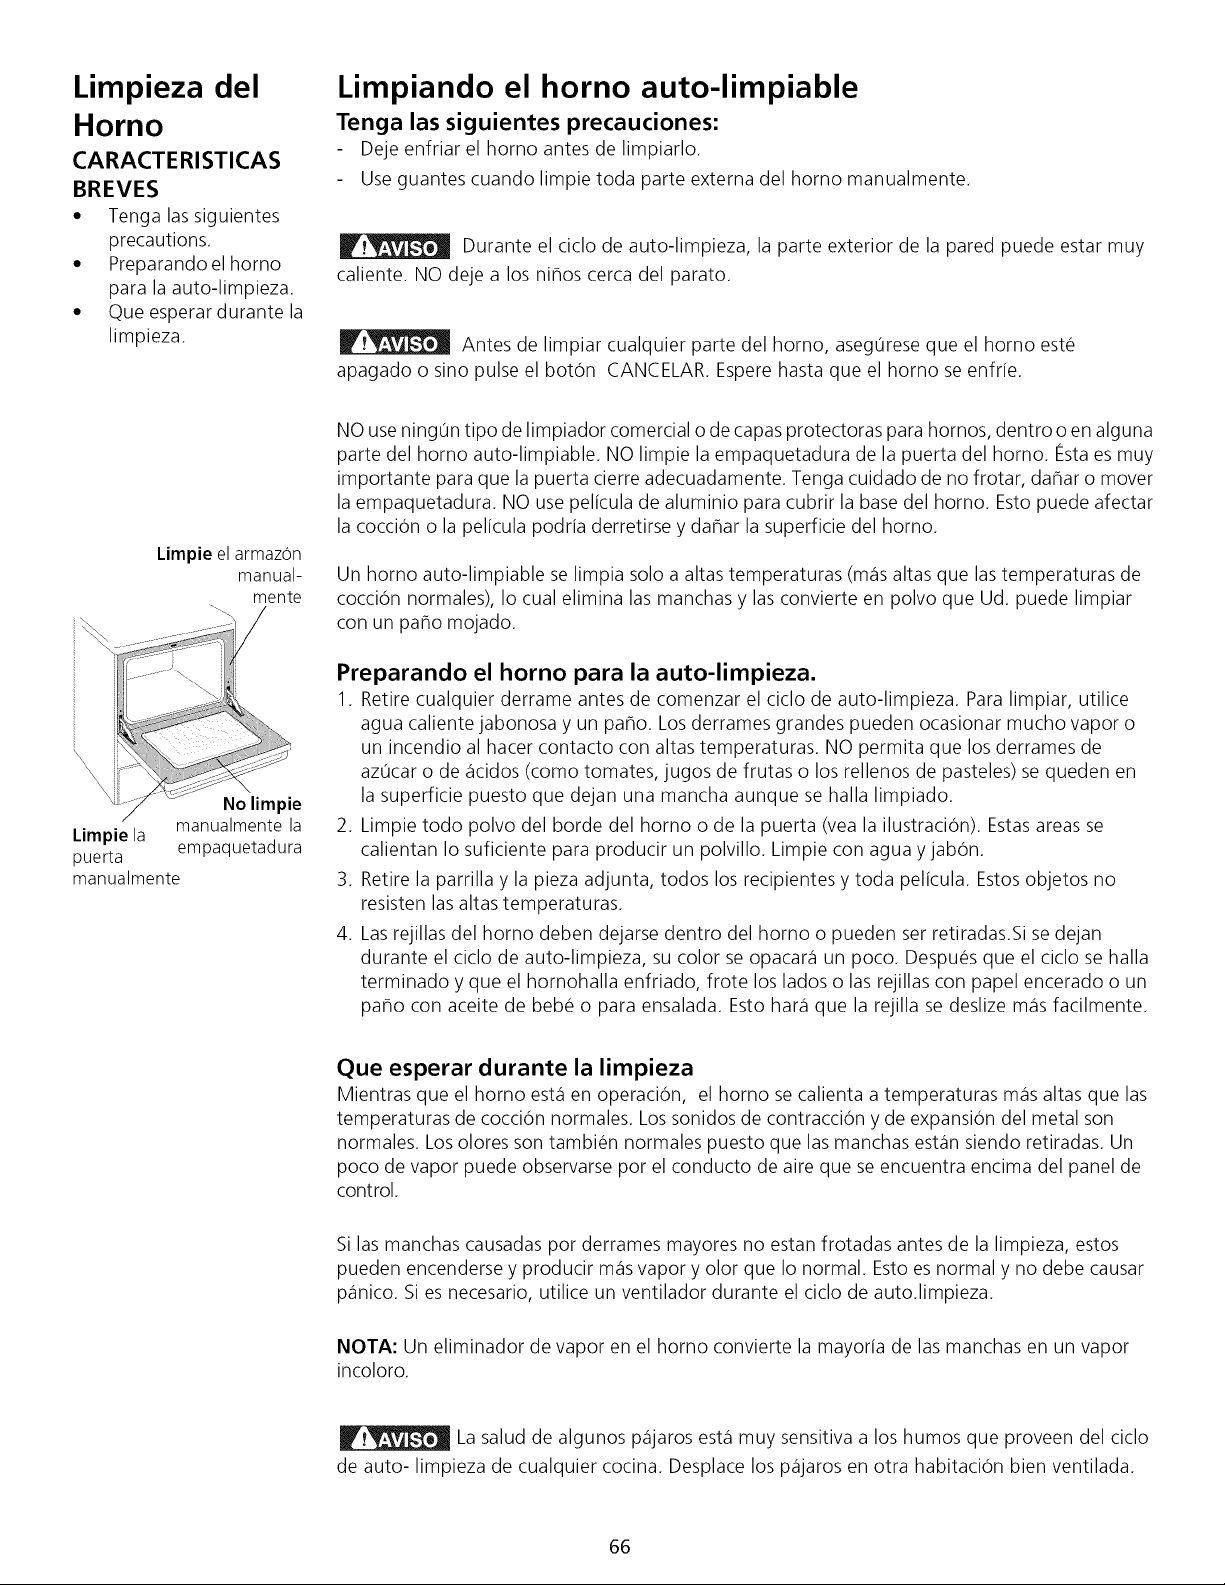
Limpieza del
Horno
CARACTERISTICAS
BREVES
• Tenga las siguientes
precautions.
• Preparando el homo
para la auto-limpieza.
• Que esperar durante la
limpieza.
Limpiando el horno auto-limpiable
Tenga las siguientes precauciones:
Deje enfriar el horno antes de limpiarlo.
Use guantes cuando limpie toda parte externa del homo manualmente.
Durante el ciclo de auto-limpieza, la parte exterior de la pared puede estar muy
caliente. NO deje a los nihos cerca del parato.
Antes de limpiar cualquier parte del horno, aseg0rese que el horno este
apagado o sino pulse el boton CANCELAR. Espere hasta que el homo se enfrie.
Limpie el armazon
manual-
mente
Limpie la manualmente la
puerta empaquetadura
manualmente
NO use ning0n tipo de limpiador comercial o de capas protectoras para hornos, dentro o en alguna
parte del homo auto-limpiable. NO limpie la empaquetadura de la puerta del horno, festaes muy
importante para que la puerta cierre adecuadamente. Tenga cuidado de no frotar, dahar o mover
la empaquetadura. NO use pelicula de aluminio para cubrir la base del horno. Esto puede afectar
la coccion o la pelicula podria derretirse y dahar la superficie del horno.
Un homo auto-limpiable se limpia solo a altas temperaturas (m_is altas que las temperaturas de
coccion normales), Io cual elimina las manchas y las convierte en polvo que Ud. puede limpiar
con un paho mojado.
Preparando el homo para la auto-limpieza.
1. Retire cualquier derrame antes de comenzar el ciclo de auto-limpieza. Para limpiar, utilice
agua caliente jabonosa y un paho. Los derrames grandes pueden ocasionar mucho vapor o
un incendio al hacer contacto con altas temperaturas. NO permita que los derrames de
az0car o de _icidos (como tomates, jugos de frutas o los rellenos de pasteles) se queden en
la superficie puesto que dejan una mancha aunque se halla limpiado.
2. Limpie todo polvo del borde del homo o de la puerta (vea la ilustracion). Estas areas se
calientan Io suficiente para producir un polvillo. Limpie con agua y jabon.
3. Retire la parrilla y la pieza adjunta, todos los recipientes y toda pelicula. Estos objetos no
resisten las altas temperaturas.
4. Las rejillas del homo deben dejarse dentro del homo o pueden ser retiradas.Si se dejan
durante el ciclo de auto-limpieza, su color se opacar_i un poco. Despues que el ciclo se halla
terminado y que el hornohalla enfriado, frote los lados o las rejillas con papel encerado o un
paho con aceite de bebe o para ensalada. Esto har_i que la rejilla se deslize m_is facilmente.
Que esperar durante la limpieza
Mientras que el homo esbi en operacion, el homo se calienta a temperaturas m_isaltas que las
temperaturas de coccion normales. Los sonidos de contraccion y de expansion del metal son
normales. Los olores son tambien normales puesto que las manchas esbin siendo retiradas. Un
poco de vapor puede observarse por el conducto de aire que se encuentra encima del panel de
control.
Si las manchas causadas por derrames mayores no estan frotadas antes de la limpieza, estos
pueden encenderse y producir m_isvapor y olor que Io normal. Esto es normal y no debe causar
p_inico. Si es necesario, utilice un ventilador durante el ciclo de auto.limpieza.
NOTA: Un eliminador de vapor en el horno convierte la mayoria de las manchas en un vapor
incoloro.
La salud de algunos p_ijaros esbi muy sensitiva a los humos que proveen del ciclo
de auto- limpieza de cualquier cocina. Desplace los p_ijaros en otra habitacion bien ventilada.
66
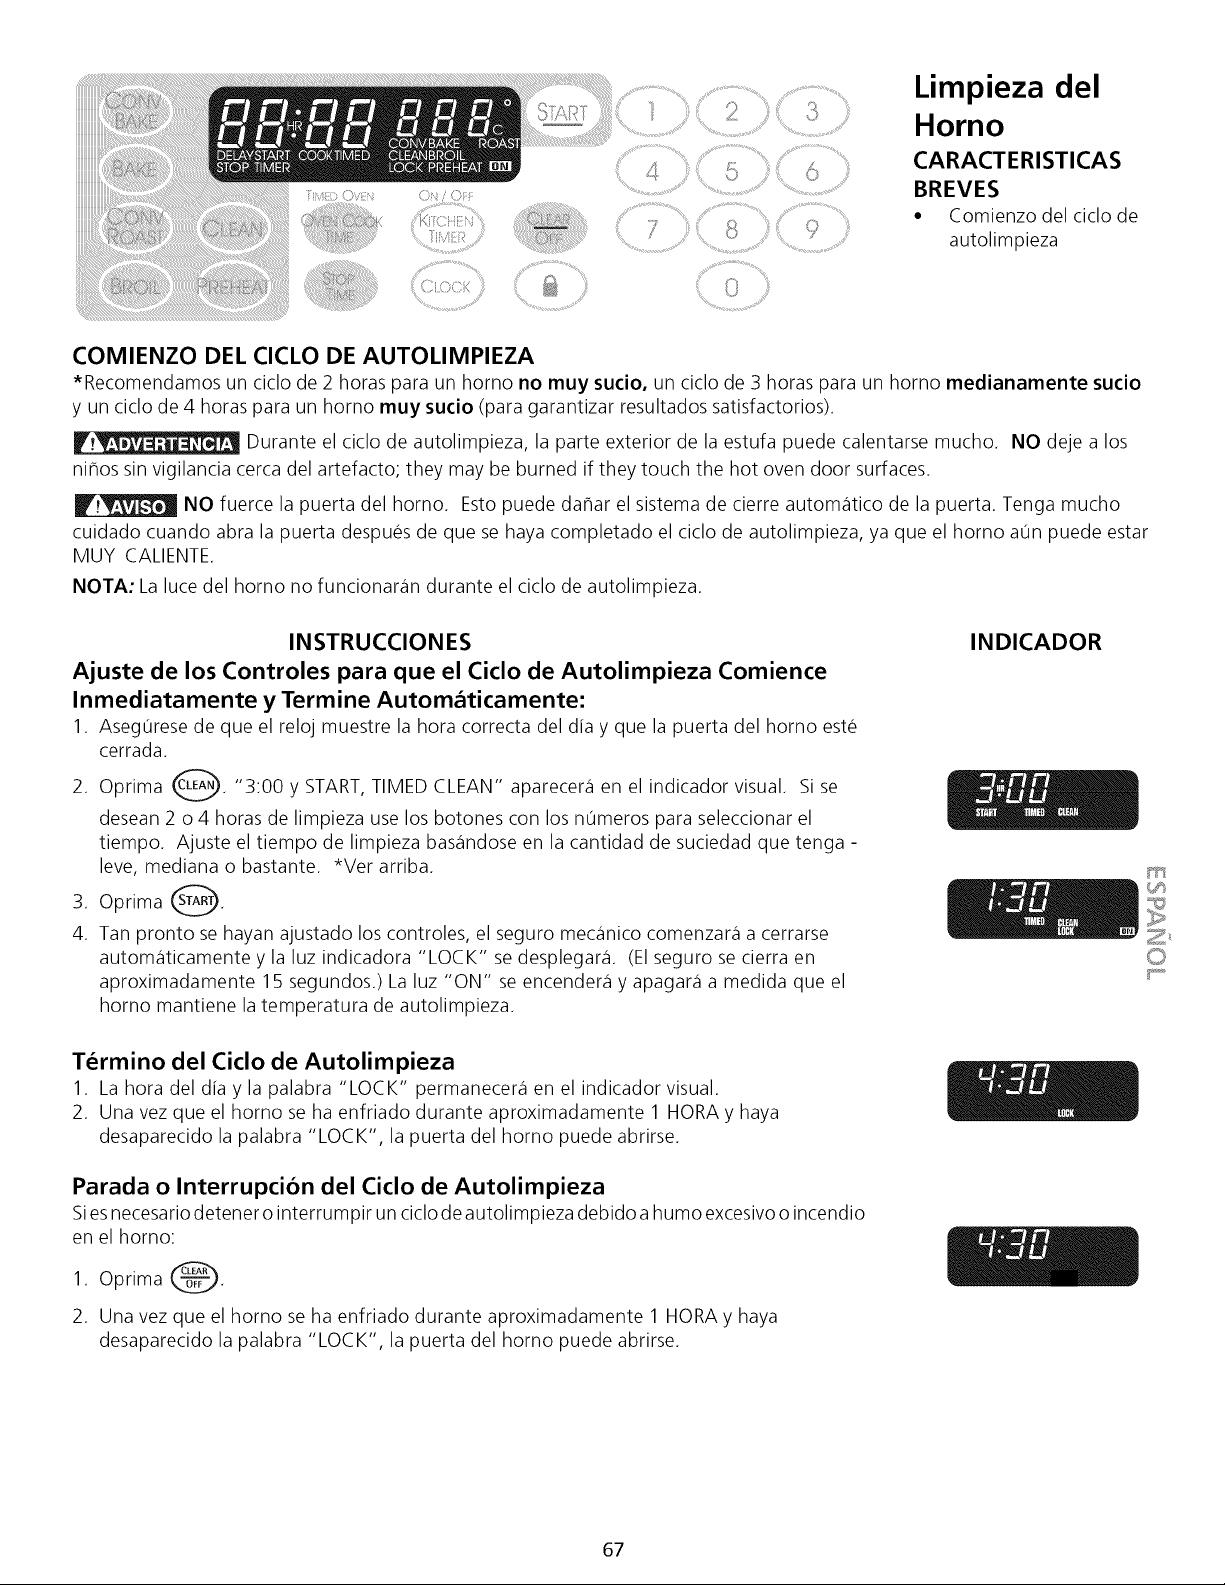
, .......................%¸.¸¸¸¸¸¸¸
....................................>,.,, % ........... .,,,¸¸¸¸9
Limpieza del
Horno
CARACTERISTICAS
BREVES
• Comienzodel ciclode
autolimpieza
COMIENZO DEL CICLO DE AUTOLIMPIEZA
*Recomendamos un ciclo de 2 horas para un homo no muy sudo, un ciclo de 3 horas para un homo medianamente sudo
y un ciclo de 4 horas para un homo muy sudo (para garantizar resultados satisfactorios).
Durante el ciclo de autolimpieza, la parte exterior de la estufa puede calentarse mucho. NO deje a los
nihos sin vigilancia cerca del artefacto; they may be burned if they touch the hot oven door surfaces.
NO fuerce la puerta del horno. Esto puede dahar el sistema de cierre automatico de la puerta. Tenga mucho
cuidado cuando abra la puerta despues de que se haya completado el ciclo de autolimpieza, ya que el homo a0n puede estar
MUY CALIENTE.
NOTA: La luce del homo no funcionaran durante el ciclo de autolimpieza.
INSTRUCCIONES
Ajuste de los Controles para que el Ciclo de Autolimpieza Comience
Inmediatamente y Termine Automaticamente:
1. Aseg0rese de que el reloj muestre la hora correcta del dia y que la puerta del homo este
cerrada.
2. Oprima Q. "3:00 y START,TIMED CLEAN" aparecera en el indicador visual. Si se
desean 2 o 4 horas de limpieza use los botones con los n0meros para seleccionar el
tiempo. Ajuste el tiempo de limpieza basandose en la cantidad de suciedad que tenga -
leve, mediana o bastante. *Ver arriba.
3. Oprima @.
4. Tan pronto se hayan ajustado los controles, el seguro mecanico comenzara a cerrarse
automaticamente y la luz indicadora "LOCK" se desplegara. (Elseguro se cierra en
aproximadamente 15 segundos.) La luz "ON" se encendera y apagara a medida que el
homo mantiene la temperatura de autolimpieza.
INDICADOR
Termino del Ciclo de Autolimpieza
1. La hora del dia y la palabra "LOCK" permanecera en el indicador visual.
2. Una vez que el homo se ha enfriado durante aproximadamente 1 HORA y haya
desaparecido la palabra "LOCK", la puerta del homo puede abrirse.
Parada o Interrupcion del Ciclo de Autolimpieza
Siesnecesario detener o interrumpir un ciclo de autoli mpieza debido a humo excesivo o incendio
en el homo:
1. Oprima _.
2. Una vez que el homo se ha enfriado durante aproximadamente 1 HORA y haya
desaparecido la palabra "LOCK", la puerta del homo puede abrirse.
PC'TI
_Js
67
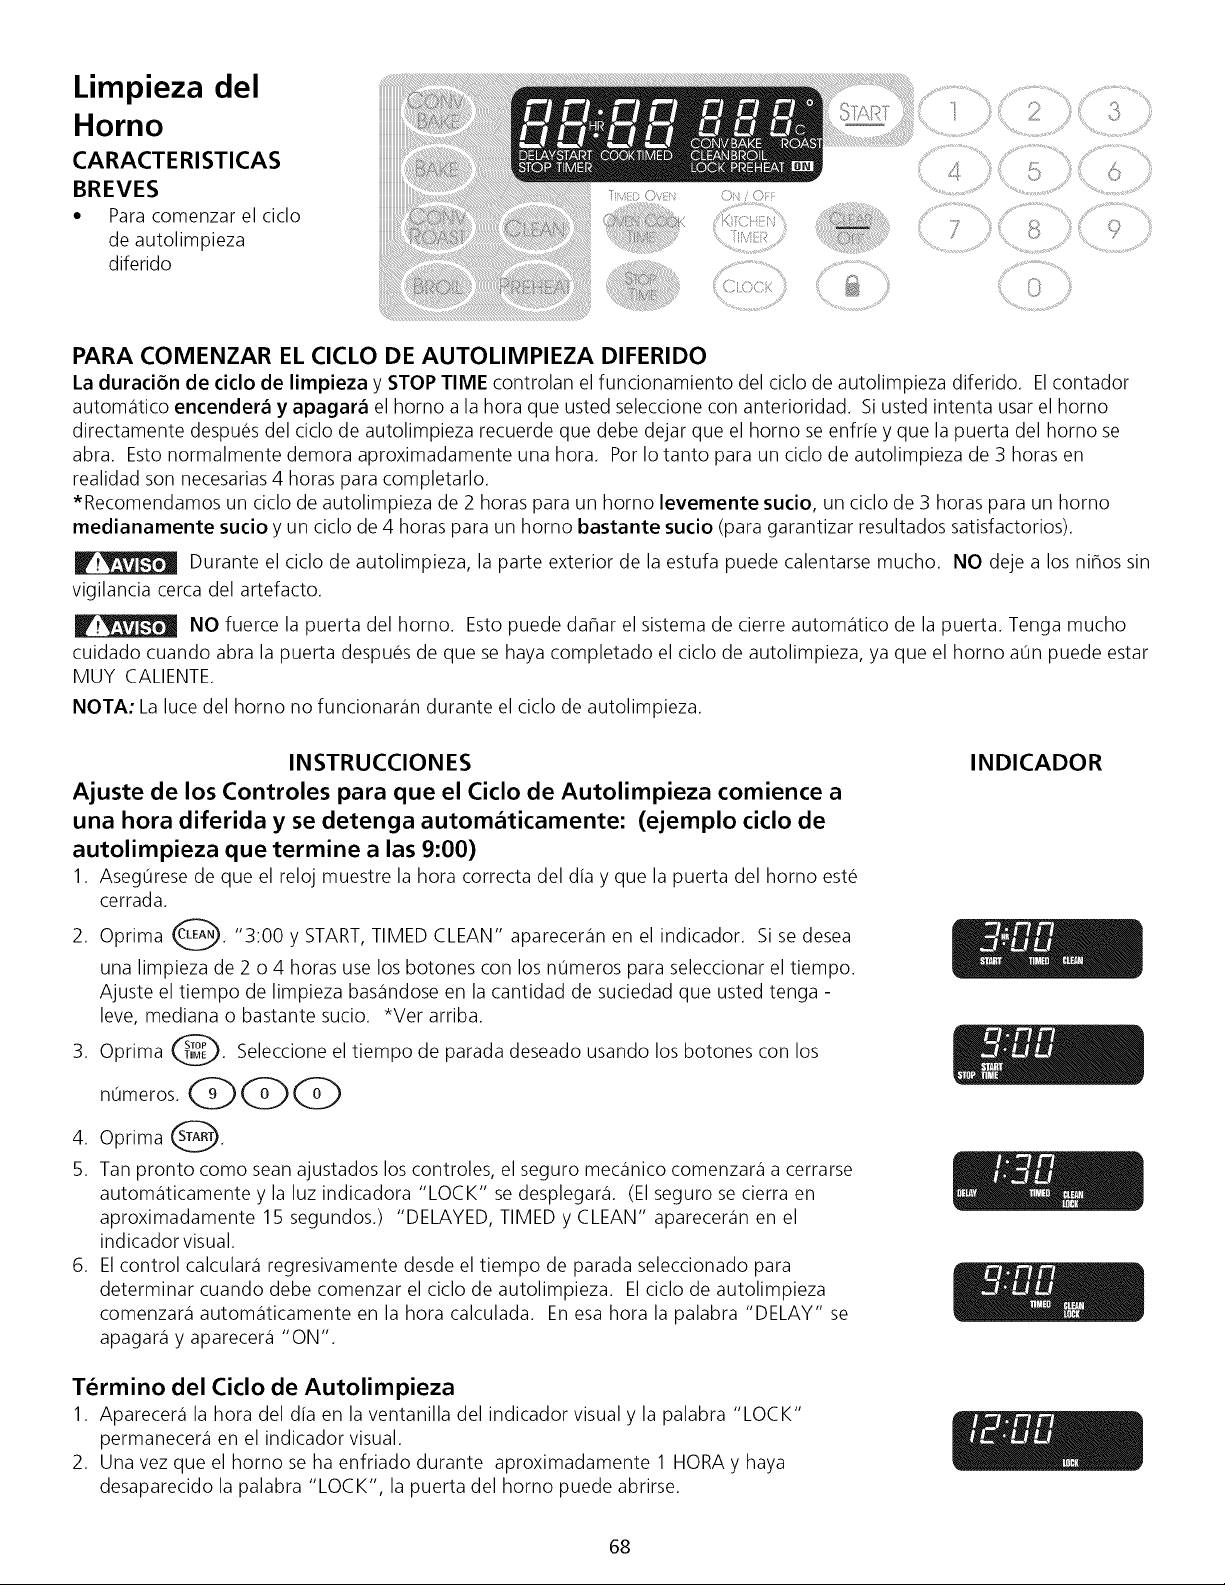
Limpieza del
Horno
CARACTERISTICAS
BREVES
• Para comenzar el ciclo
de autolimpieza
diferido
PARA COMENZAR EL CICLO DE AUTOLIMPIEZA DIFERIDO
La duraci6n de ciclo de limpieza y STOP TIME controlan el funcionamiento del ciclo de autolimpieza diferido. El contador
automatico encender_ y apagar_ el horno a la hora que usted seleccione con anterioridad. Si usted intenta usar el homo
directamente despues del ciclo de autolimpieza recuerde que debe dejar que el homo se enfrie y que la puerta del homo se
abra. Esto normalmente demora aproximadamente una hora. Por Io tanto para un ciclo de autolimpieza de 3 horas en
realidad son necesarias 4 horas para completarlo.
*Recomendamos un ciclo de autolimpieza de 2 horas para un homo levemente sucio, un ciclo de 3 horas para un homo
medianamente sucio y un ciclo de 4 horas para un homo bastante sucio (para garantizar resultados satisfactorios).
Durante el ciclo de autolimpieza, la parte exterior de la estufa puede calentarse mucho. NO deje a los niAos sin
vigilancia cerca del artefacto.
NO fuerce la puerta del horno. Esto puede daAar el sistema de cierre autom_itico de la puerta. Tenga mucho
cuidado cuando abra la puerta despues de que se haya completado el ciclo de autolimpieza, ya que el horno aOn puede estar
MUY CALIENTE.
NOTA: La luce del homo no funcionaran durante el ciclo de autolimpieza.
INSTRUCCIONES
Ajuste de los Controles para que el Ciclo de Autolimpieza comience a
una hora diferida y se detenga automaticamente: (ejemplo ciclo de
autolimpieza que termine a las 9:00)
1. Aseg0rese de que el reloj muestre la hora correcta del dia y que la puerta del homo este
cerrada.
2. Oprima Q. "3:00 y START,TIMED CLEAN" apareceran en el indicador. Si se
desea
una limpieza de 2 o 4 horas use los botones con los n0meros para seleccionar el tiempo.
Ajuste el tiempo de limpieza basandose en la cantidad de suciedad que usted tenga -
leve, mediana o bastante sucio. *Ver arriba.
@. Seleccione el tiempo de parada deseado usando los botones con los
3.
Oprima
4. Oprima _.
5. Tan pronto como sean ajustados los controles, el seguro mecanico comenzara a cerrarse
autom_iticamente y la luz indicadora "LOCK" se desplegara. (El seguro se cierra en
aproximadamente 15 segundos.) "DELAYED, TIMED y CLEAN" apareceran en el
indicador visual.
6. El control calculara regresivamente desde el tiempo de parada seleccionado para
determinar cuando debe comenzar el ciclo de autolimpieza. Elciclo de autolimpieza
comenzara autom_iticamente en la hora calculada. En esa hora la palabra "DELAY" se
apagara y aparecera "ON".
Termino del Ciclo de Autolimpieza
1. Aparecera la hora del dia en la ventanilla del indicador visual y la palabra "LOCK"
permanecera en el indicador visual.
2. Una vez que el homo se ha enfriado durante aproximadamente 1 HORA y haya
desaparecido la palabra "LOCK", la puerta del homo puede abrirse.
INDICADOR
68
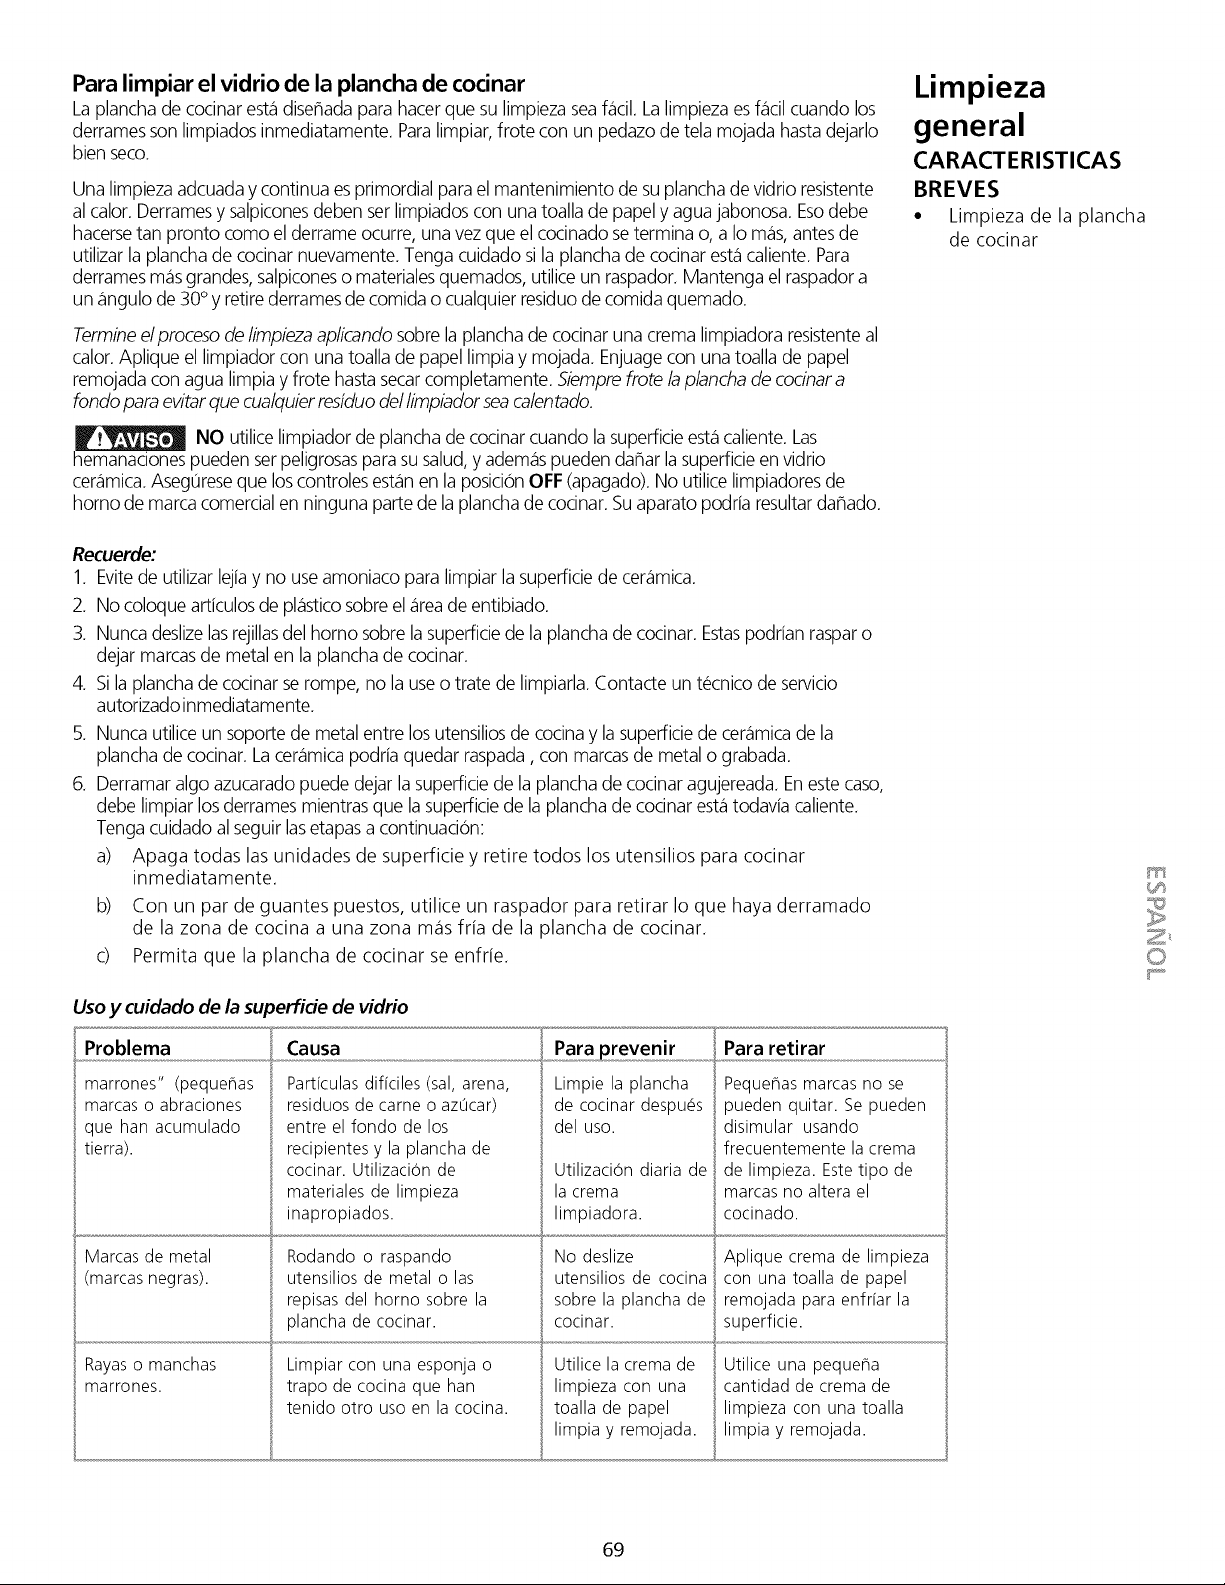
Para limpiar el vidrio de la plancha de cocinar
La planchade cocinarest,1disehada parahacer que su limpieza seaf_icil.La limpiezaes flicil cuando los
derramesson limpiados inmediatamente. Paralimpiar,frote con un pedazode tela mojada hastadejarlo
bien seco.
Una limpiezaadcuada y continua esprimordial parael mantenimiento de su planchade vidrio resistente
al calor.Derramesy salpiconesdeben ser limpiados con una toalla de papely agua jabonosa. Esodebe
hacersetan pronto como el derrame ocurre, una vez que el cocinado setermina o, a Io mas, antesde
utilizar la plancha de cocinar nuevamente.Tenga cuidado si la plancha de cocinar estacaliente. Para
derramesm_isgrandes,salpiconeso materialesquemados, utilice un raspador. Mantenga el raspadora
un angulo de 30° y retire derramesde comida o cualquier residuode comida quemado.
Termineelproceso de/impieza ap/icandosobre la plancha de cocinar una crema limpiadora resistenteal
calor.Aplique el limpiador con una toalla de papellimpia y mojada. Enjuagecon una toalla de papel
remojada con agua limpia y frote hasta secarcompletamente. Siemprefrote la plancha de cocinara
fondo para evitarque cualquierresiduo de/ limpiador seacalentado.
NO utilice limpiador de planchade cocinar cuando la superficieest,1caliente. Las
hemanacionespueden serpeligrosaspara su salud,y adem_ispueden dahar lasuperficieen vidrio
cer_imica.Asegureseque loscontroles est_inen la posicion OFF(apagado).No utilice limpiadoresde
homo de marca comercialen ninguna parte de la planchade cocinar. Su aparato podria resultardahado.
Limpieza
general
CARACTERISTICAS
BREVES
• Limpieza de la plancha
de cocinar
Recuerde:
1. Evitede utilizar lejia y no use amoniaco para limpiar la supefficiede cer_imica.
2. No coloque articulosde pl_isticosobre el_ireade entibiado.
3. Nunca deslizelasrejillasdel homo sobre lasupefficie de la plancha de cocinar. Estaspodrian rasparo
dejar marcasde metal en la plancha de cocinar.
4. Sila plancha de cocinar se rompe, no la useo trate de limpiarla. Contacte un tecnico de servicio
autorizadoinmediatamente.
5. Nunca utilice un soporte de metal entre los utensiliosde cocina y lasupefficie de cer_imicade la
plancha de cocinar. Lacer_imicapodria quedar raspada, con marcasde metal o grabada.
6. Derramaralgo azucaradopuede dejar la supefficiede la planchade cocinaragujereada. Eneste caso,
debe limpiar losderrames mientras que la supefficiede la planchade cocinar est,1todavia caliente.
Tengacuidado al seguir lasetapasa continuaci6n:
a) Apaga todas las unidades de superficie y retire todos los utensilios para cocinar
inmediatamente.
b) Con un par de guantes puestos, utilice un raspador para retirar Io que haya derramado
de la zona de cocina a una zona m_isfria de la plancha de cocinar.
c) Permita que la plancha de cocinar se enfrie.
Use y cuidado de la su
Problema
marrones" (pequehas
marcas o abraciones
que ban acumulado
tierra).
Marcas de metal
(marcas negras).
Rayas o manchas
marrones.
)erfide de vidrio
Causa
Part[culas dificiles (sal, arena,
residuos de came o azOcar)
entre el fondo de los
recipientes y la plancha de
cocinar. Utilizacion de
materiales de limpieza
inapropiados.
Rodando o raspando
utensilios de metal o las
repisas del homo sobre la
plancha de cocinar.
Limpiar con una esponja o
trapo de cocina que han
tenido otro uso en la cocina.
Limpie la plancha
de cocinar despu_s
del uso.
Utilizacion diaria de
la crema
limpiadora.
No deslize
utensilios de cocina
sobre la plancha de
cocinar.
Utilice la crema de
limpieza con una
toalla de papel
limpia y remojada.
Para retirar
Pequehas marcas no se
pueden quitar. Se pueden
disimular usando
frecuentemente la crema
de limpieza. Este tipo de
marcas no altera el
cocinado.
Aplique crema de limpieza
con una toalla de papel
remojada para enfrfar la
superficie.
Utilice una pequeha
cantidad de crema de
limpieza con una toalla
limpia y remojada.
Z_
69
Limpieza
general
CARACTERISTICAS
BREVES
• Limpieza de la plancha
de cocinar
No utilice
los limpiadores en una
superficie caliente. Las
hemanaciones pueden ser
peligrosas. Paciente hasta
que el _ireaeste m_is
aereada antes de limpiar.
No utilice la crema de
limpieza para limpiar
porcelana, pintura o
aluminium porque la
superficie podria quedar
dahada.
Material de limpieza para el vidrio cer_mico de la plancha de cocinar
AIgunos materiales de limpieza pueden estar compuestos de un ingrediente que puede dahar la
plancha cocinar. Utilice unicamente los materiales recomendados (vea aqui abajo). La crema de
limpieza debe ser utilizada regularmente. Primero, utilice los productos aqui recomendados, luego
use la crema de limpieza.
Utilice unicamente los productos de limpieza recomendados y siga estas simples sugerencias de
limpieza.
1. Antes que la plancha de cocinar sea utilizada, limpie y sature la plancha de cocinar a fondo
con la crema de limpieza.
a) Remoje la toalla de papel y limpie la unidad.
b) Frote con otra toalla de papel limpia y remojada, luego frote hasta secar.
2. Para la limpieza diaria, aplique un poco de crema de limpieza en el centro de cada unidad-
_irea. Comienze con 1/8 de cucharada aproximadamente (utilice m_is si es necesario).
Luego, proceda como en a y b.
3. Asegurese que debajo de la plancha de cocinar y las _ireasde coccion esten limpias y secas.
4. Seleccione los ajustes para calentar y los utensilios suficientemente grandes para la comida y
los liquidos
5. Limpie todo derrame de comida y todas manchas antes que se quemen en la superficie.
IMPORTANTE: Utilice regularmente la crema de limpieza. Si la crema se acaba, utilice uno de
los limpiadores en la lista. Aseg0rese de obtener una nueva crema de limpieza.
Nunca mezclar los productos de limpieza! Las mezclas pueden reaccionar con
resultados dahinos y peligrosos.
Limpiadores aprobados para plancha de cocinar en cer_mica
1. Soda caOstica.
2. Tampones de pl_istico y de nylon sin empapar.
3. Para el material quemado, raspe con una hoja de afeitar unilateral, sostengala a un
_ingulo de 30°.
4. Crema de limpieza para vidrio cer_imico.
No usar sobre el vidrio cer_mico de la plancha de cocinar
1. Evite los tampones que puedan dejar manchas o raspones.
2. Evite los polvos de limpieza extra fuertes, estos pueden raspar si son muy abrasivos o si la
presion aplicada al momento de la limpieza es muy fuerte.
3. Evite los limpiadores quimicos de horno. Estos pueden grabar la superficie de la plancha de
cocinar y son c_iusticos
4. Evite los limpiadores de manchas de oxidacion que contienen _icido hydrofluorico.
5. Evite de utilizar lejia o amoni_ico.
Instrucciones de limpieza especialemente para los depositos minerales y las
descoloraciones
Problema: Una mancha marr0n gris que no puede ser retirada.
Causa: La condensacion que se acumula y gotea de los utensilios de cocina. Los
minerales contenidos en el agua y las comidas pueden ocasionar la aparicion
de una pelicula gris o marron sobre la plancha de cocinar. Esta pelicula est,1
muy fina y parece como si fuera debajo de la plancha de cocinar.
Para prevenir: Uso diario y apropiado de la crema de limpieza.
Pararetirar: • Remoje la superficie con agua y aplique la crema de limpieza.
• Frote con una toalla de papel limpia y remojada hasta que la mancha
desaparezca.
• Limpie el resto de pasta con una toalla de papel remojada.
• Aplique un poco de crema de limpieza y lustre con una toalla de papel.
7O
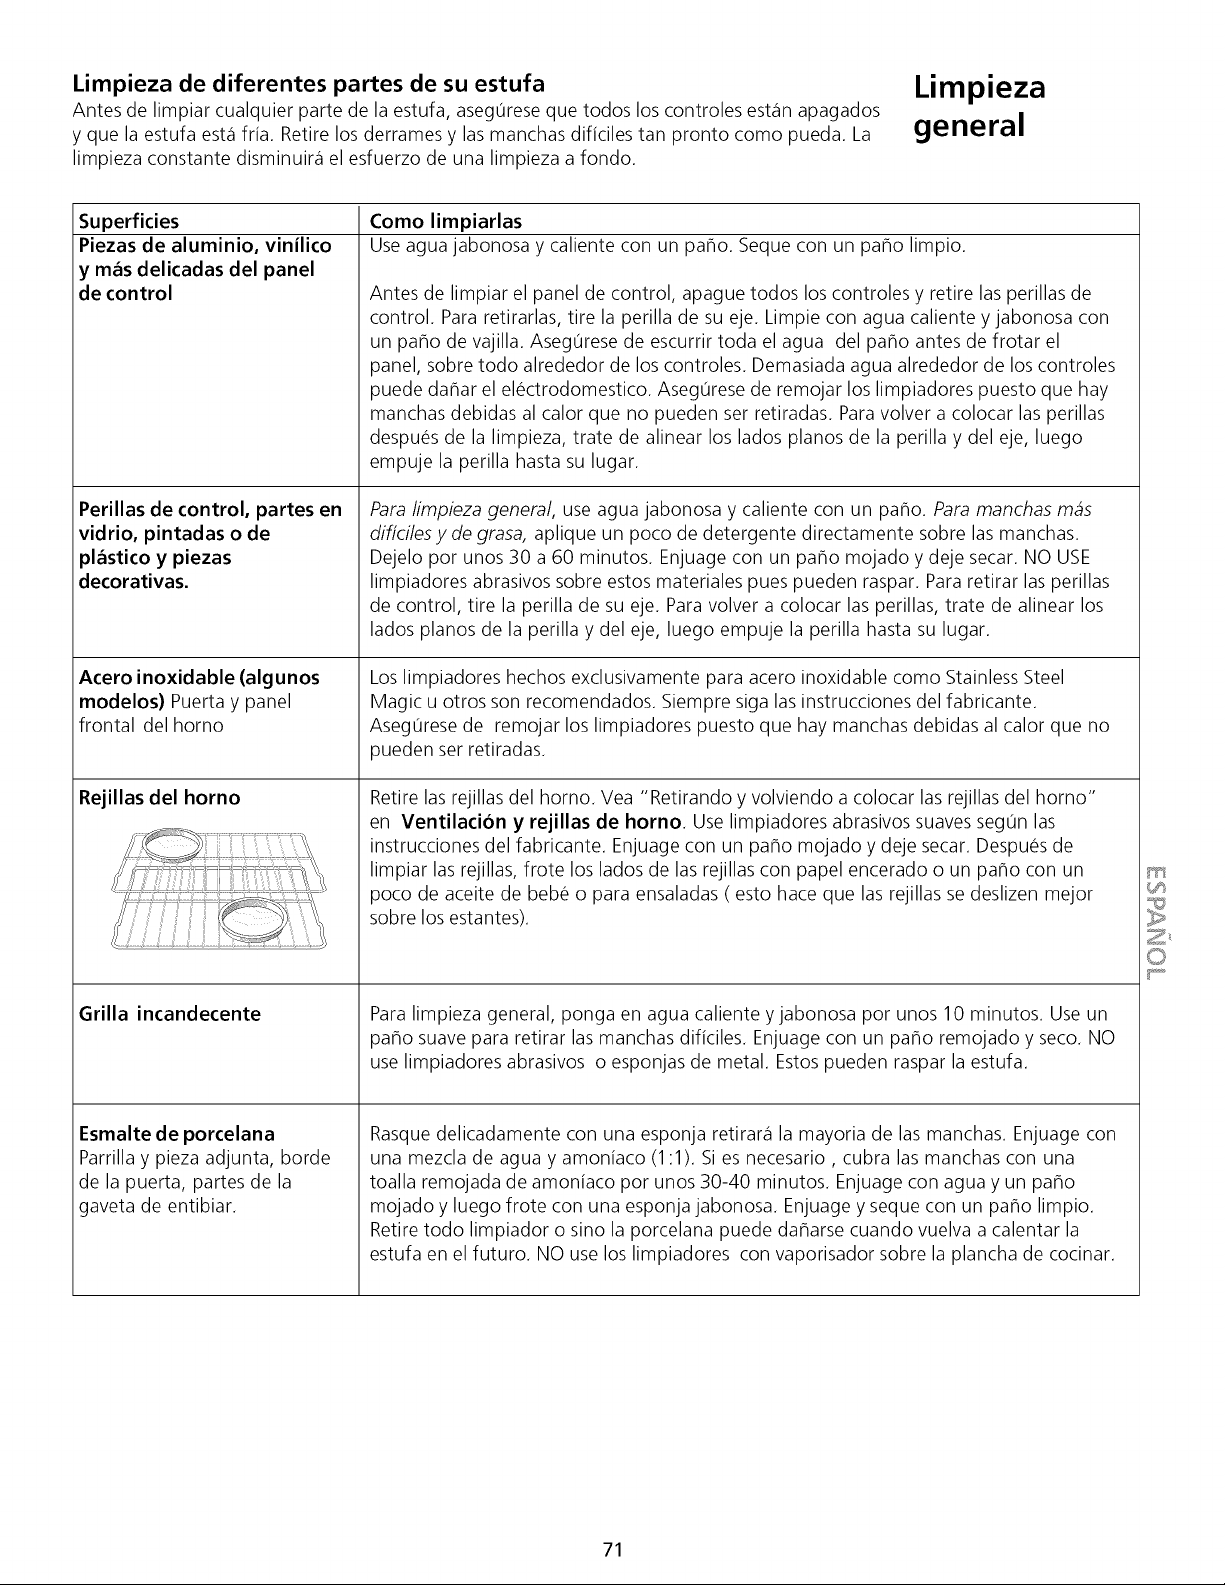
Limpieza de diferentes partes de su estufa
Antes de limpiar cualquier parte de la estufa, aseg0rese que todos los controles est_inapagados
y que la estufa est,1fria. Retire los derrames y las manchas dificiles tan pronto como pueda. La
limpieza constante disminuir_i el esfuerzo de una limpieza a fondo.
Limpieza
general
Superficies
Piezas de aluminio, vinilico
y mas delicadas del panel
de control
Perillas de control, partes en
vidrio, pintadas o de
pl_stico y piezas
decorativas.
Acero inoxidable (algunos
modelos) Puerta y panel
frontal del homo
Rejillas del horno
Grilla incandecente
Esmalte de porcelana
Parrilla y pieza adjunta, borde
de la puerta, partes de la
gaveta de entibiar.
Como limpiarlas
Use agua jabonosa y caliente con un patio. Seque con un patio limpio.
Antes de limpiar el panel de control, apague todos los controles y retire las perillas de
control. Pararetirarlas, tire la perilla de su eje. Limpie con agua caliente y jabonosa con
un patio de vajilla. Asegurese de escurrir toda el agua del patio antes de frotar el
panel, sobre todo alrededor de los controles. Demasiada agua alrededor de los controles
puede dahar el electrodomestico. Aseg0rese de remojar los limpiadores puesto que hay
manchas debidas al calor que no pueden ser retiradas. Para volver a colocar las perillas
despues de la limpieza, trate de alinear los lados pianos de la perilla y del eje, luego
empuje la perilla hasta su lugar.
Para/impieza genera/, use agua jabonosa y caliente con un paho. Para manchas mas
dificiles y de grasa, aplique un poco de detergente directamente sobre las manchas.
Dejelo por unos 30 a 60 minutos. Enjuage con un patio mojado y deje secar. NO USE
limpiadores abrasivos sobre estos materiales pues pueden raspar. Para retirar las perillas
de control, tire la perilla de su eje. Para volver a colocar las perillas, trate de alinear los
lados pianos de la perilla y del eje, luego empuje la perilla hasta su lugar.
Los limpiadores hechos exclusivamente para acero inoxidable como Stainless Steel
Magic u otros son recomendados. Siempre siga las instrucciones del fabricante.
Aseg0rese de remojar los limpiadores puesto que hay manchas debidas al calor que no
pueden ser retiradas.
Retire las rejillas del horno. Vea "Retirando y volviendo a colocar las rejillas del homo"
en Ventilacion y rejillas de horno. Use limpiadores abrasivos suaves seg0n las
instrucciones del fabricante. Enjuage con un paho mojado y deje secar. Despues de
limpiar las rejillas, frote los lados de las rejillas con papel encerado o un paho con un
poco de aceite de bebe o para ensaladas ( esto hace que las rejillas se deslizen mejor
sobre los estantes).
Para limpieza general, ponga en agua caliente yjabonosa por unos 10 minutos. Use un
patio suave para retirar las manchas dificiles. Enjuage con un paho remojado y seco. NO
use limpiadores abrasivos o esponjas de metal. Estos pueden raspar la estufa.
Rasque delicadamente con una esponja retirar_i la mayoria de las manchas. Enjuage con
una mezcla de agua y amoniaco (1:1). Si es necesario, cubra las manchas con una
toalla remojada de amoniaco por unos 30-40 minutos. Enjuage con agua y un paho
mojado y luego frote con una esponja jabonosa. Enjuage y seque con un paho limpio.
Retire todo limpiador o sino la porcelana puede daharse cuando vuelva a calentar la
estufa en el futuro. NO use los limpiadores con vaporisador sobre la plancha de cocinar.
Z_
71
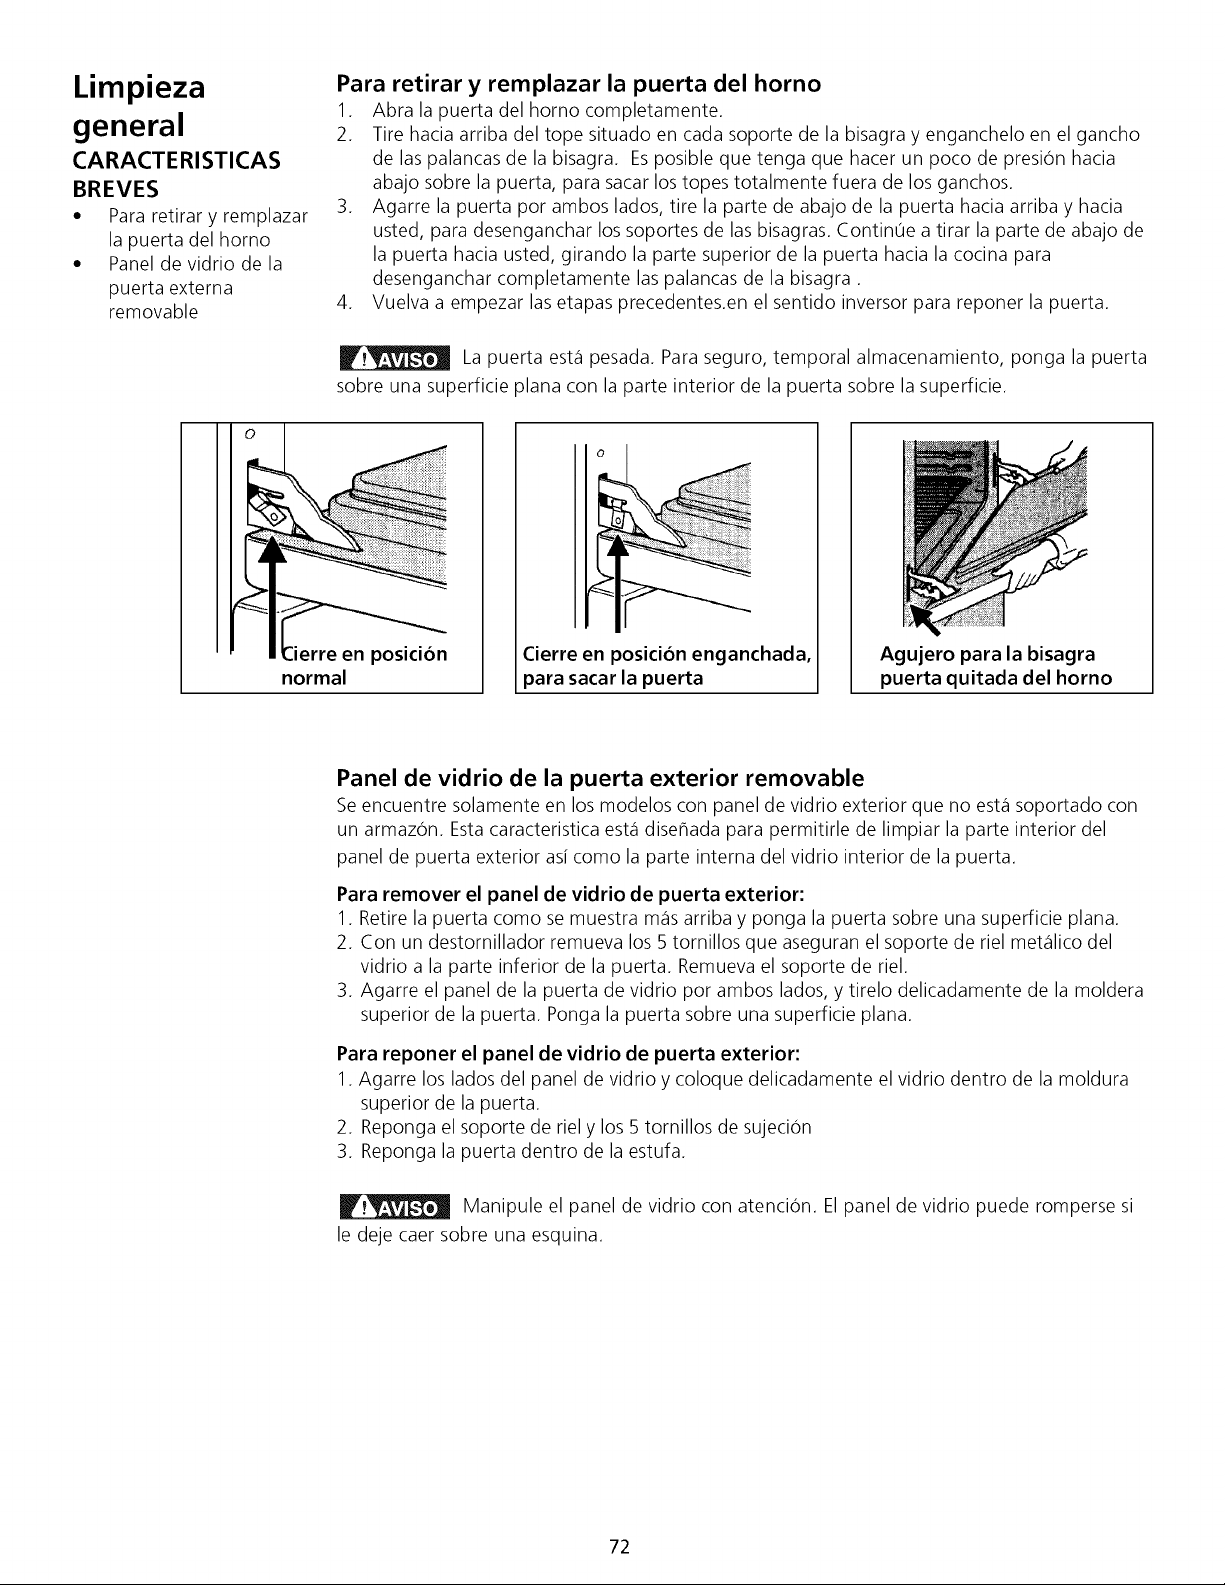
Limpieza
general
CARACTERISTICAS
BREVES
• Para retirar y remplazar
la puerta del homo
• Panel de vidrio de la
puerta externa
removable
Para retirar y remplazar la puerta del homo
1. Abra la puerta del homo completamente.
2. Tire hacia arriba del tope situado en cada soporte de la bisagra y enganchelo en el gancho
de las palancas de la bisagra. Es posible que tenga que hater un poco de presion hacia
abajo sobre la puerta, para sacar los topes totalmente fuera de los ganchos.
3. Agarre la puerta por ambos lados, tire la parte de abajo de la puerta hacia arriba y hacia
usted, para desenganchar los soportes de las bisagras. Continue a tirar la parte de abajo de
la puerta hacia usted, girando la parte superior de la puerta hacia la cocina para
desenganchar completamente las palancas de la bisagra.
4. Vuelva a empezar las etapas precedentes.en el sentido inversor para reponer la puerta.
La puerta esta pesada. Para seguro, temporal almacenamiento, ponga la puerta
sobre una superficie plana con la parte interior de la puerta sobre la superficie.
.lerre en posicion
normal
Cierre en posicion enganchada,
_ara sacar la puerta
Agujero para la bisagra
puerta quitada del horno
Panel de vidrio de la puerta exterior removable
Seencuentre solamente en los modelos con panel de vidrio exterior que no est,1soportado con
un armazon. Esta caracteristica esta diseflada para permitirle de limpiar la parte interior del
panel de puerta exterior asi como la parte interna del vidrio interior de la puerta.
Para remover el panel de vidrio de puerta exterior:
1. Retire la puerta como se muestra m_isarriba y ponga la puerta sobre una superficie plana.
2. Con un destornillador remueva los 5 tornillos que aseguran el soporte de riel metalico del
vidrio a la parte inferior de la puerta. Remueva el soporte de riel.
3. Agarre el panel de la puerta de vidrio por ambos lados, y tirelo delicadamente de la moldera
superior de la puerta. Ponga la puerta sobre una superficie plana.
Para reponer el panel de vidrio de puerta exterior:
1. Agarre los lados del panel de vidrio y coloque delicadamente el vidrio dentro de la moldura
superior de la puerta.
2. Reponga el soporte de riel y los 5 tornillos de sujecion
3. Reponga la puerta dentro de la estufa.
Manipule el panel de vidrio con atencion. El panel de vidrio puede romperse si
le deje caer sobre una esquina.
72
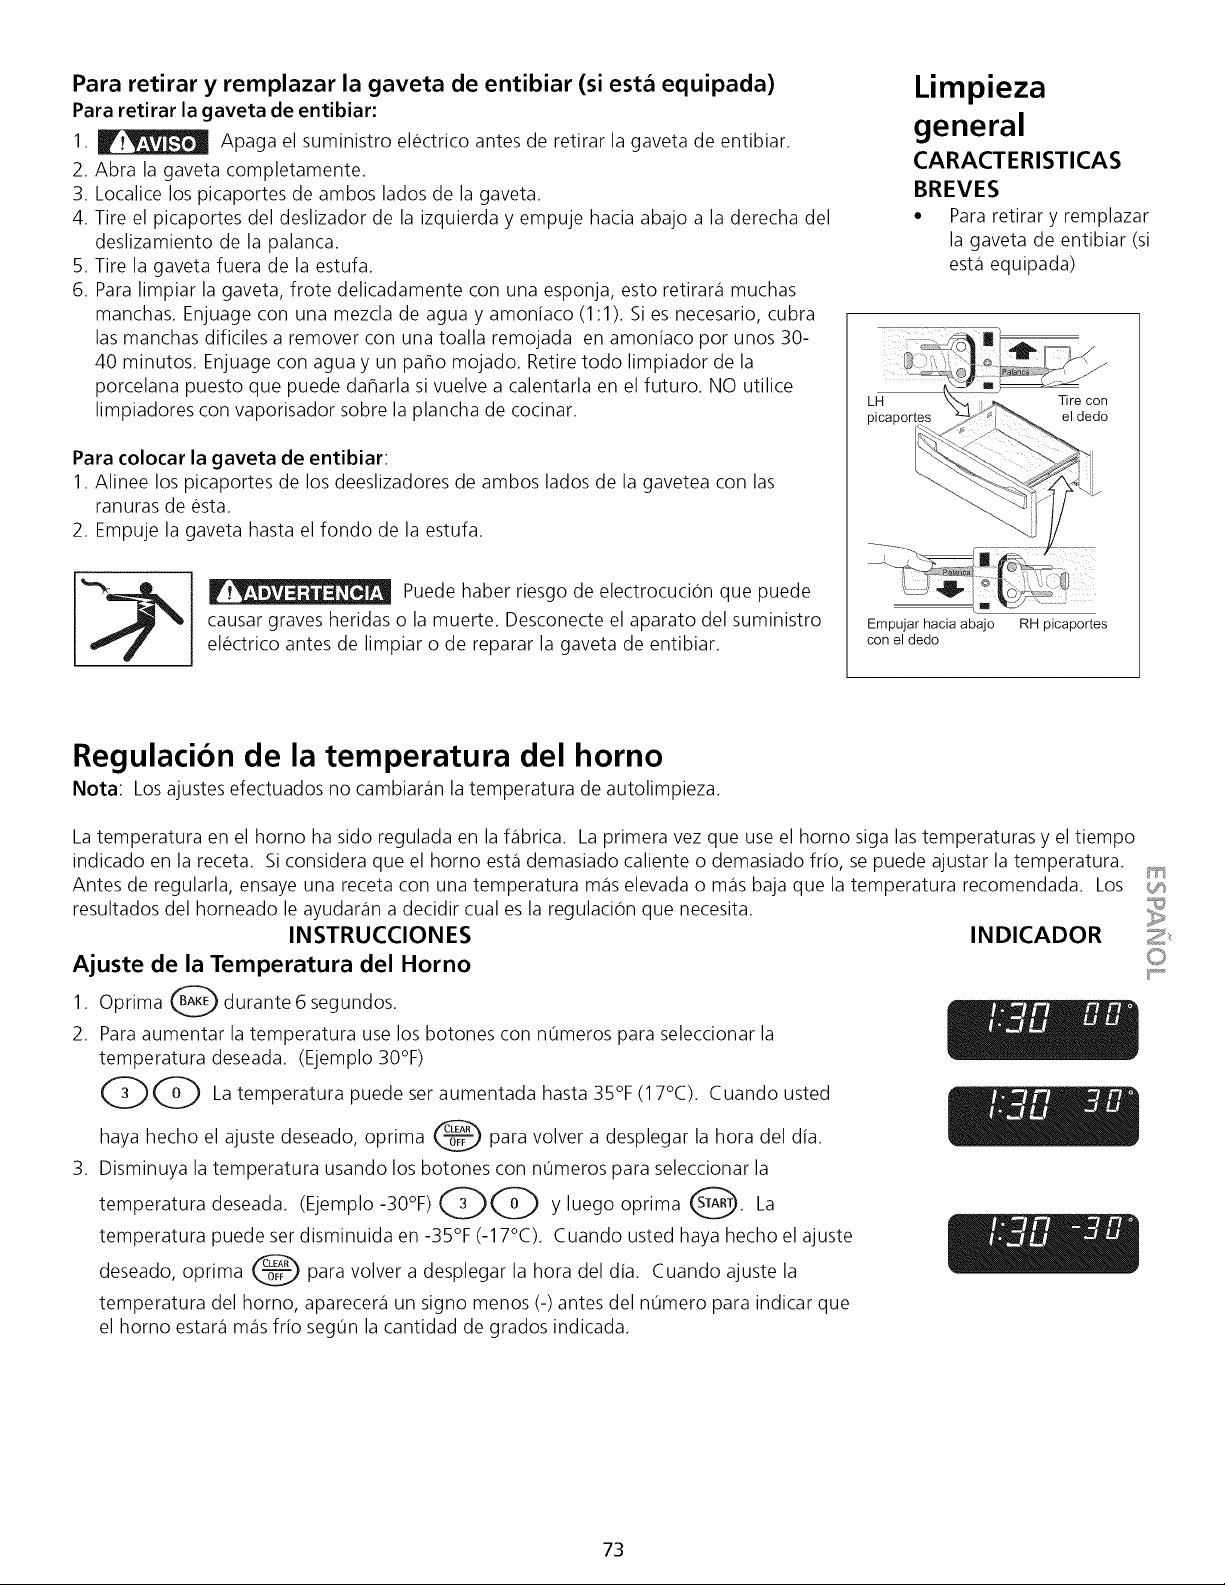
Para retirar y remplazar la gaveta de entibiar (si esta equipada)
Para retirar la gaveta de entibiar:
1. _ Apaga el suministro electrico antes de retirar la gaveta de entibiar.
2. Abra la gaveta completamente.
3. Localice los picaportes de ambos lados de la gaveta.
4. Tire el picaportes del deslizador de la izquierda y empuje hacia abajo a la derecha del
deslizamiento de la palanca.
5. Tire la gaveta fuera de la estufa.
6. Para limpiar la gaveta, frote delicadamente con una esponja, esto retirara muchas
manchas. Enjuage con una mezcla de agua y amoniaco (1:1). Si es necesario, cubra
las manchas dificiles a remover con una toalla remojada en amoniaco por unos 30-
40 minutos. Enjuage con agua y un paho mojado. Retire todo limpiador de la
porcelana puesto que puede daharla si vuelve a calentarla en el futuro. NO utilice
limpiadores con vaporisador sobre la plancha de cocinar.
Para colocar la gaveta de entibiar:
1. Alinee los picaportes de los deeslizadores de ambos lados de la gavetea con las
ranuras de esta.
2. Empuje la gaveta hasta el fondo de la estufa.
Puede haber riesgo de electrocucion que puede
causar graves heridas o la muerte. Desconecte el aparato del suministro
electrico antes de limpiar o de reparar la gaveta de entibiar.
Limpieza
general
CARACTERISTICAS
BREVES
• Para retirar y remplazar
la gaveta de entibiar (si
est,1equipada)
LH Tire con
picaporl el dedo
Empujar hacia abajo RH picaportes
con el dedo
Regulacion de la temperatura del horno
Nota: Los ajustes efectuados no cambiaran la temperatura de autolimpieza.
La temperatura en el homo ha sido regulada en la f_ibrica. La primera vez que use el homo siga las temperaturas y el tiempo
indicado en la receta. Si considera que el homo est,1demasiado caliente o demasiado frio, se puede ajustar la temperatura.
Antes de regularla, ensaye una receta con una temperatura m_is elevada o m_is baja que la temperatura recomendada. Los
resultados del horneado le ayudaran a decidir cual es la regulacion que necesita.
INSTRUCCIONES
Ajuste de la Temperatura del Horno
1. Oprima _ durante 6 segundos.
2. Para aumentar la temperatura use los botones con n0meros para seleccionar la
temperatura deseada. (Ejemplo 30%)
CDCD La temperatura puede ser aumentada hasta 35% (17°C).
Cuando usted
haya hecho el ajuste deseado, oprima _ para volver a desplegar
la hora del dia.
3. Disminuya la temperatura usando los botones con n0meros para seleccionar la
temperatura deseada. (Ejemplo-30°F)QQ y luegooprima 0 La
temperatura puede ser disminuida en -35% (-17°C). Cuando usted haya hecho el ajuste
para volver a desplegar la hora del dia. Cuando ajuste la
deseado,
oprima
temperatura del homo, aparecera un signo menos (-) antes del n0mero para indicar que
el homo estara m_isfrio segun la cantidad de grados indicada.
INDICADOR
73

Lista de
verificacion
para evitar
Ilamadas
Usted puede evitarse el incoveniente y los gastos de una Ilamada innecesaria al servicio
revisando esta lista de verficaci6n, festalista muestra los problemas m_isfrecuentes que no son la
causa de un fabricado defectuoso de las piezas.
Usted sera facturado por la Ilamada de servicio, durante el tiempo que cubre la garantia, si el
problema no es la causa del fabricado defectuoso de una pieza.
Su nuevo aparato ha sido disehdo cuidadosamente. Muchas veces, Io que parece necesitar una
Ilamada al Centro de servicio se puede arreglar con algunos ajustes que Ud.mismo puede hacer
en su domicilio o son caracteristicas normales de funcionamiento de su aparato en ciertas
condiciones.
SITUACION
La estufa esta desnivelada.
POSIBLE CAUSA/SOLUCION
Instalcion inadecuada. Coloque la rejilla en el centro del homo. Coloque un nivel sobre la
rejilla. Ajuste las patas niveladoras en la base de la estufa hasta que la rejilla se nivele.
Cuando la estufa est,1nivelada, la plancha de cocinar puede aparecer desnivelada si la
plancha de cocinar no est,1nivelada.
Piso no solido, inestable. Aseg0rese que el piso est,1 nivelado y que puede soportar la
cocina. Llame su carpintero para corregir un piso inclinado.
El desnivel del armario de la estufa puede hacer aparecer la estufa desnivelada. AsegOrese
que los armarios est_in cuadrados y tienen suficiente espacio para la cocina.
No puede mover el aparato facilmente.EI Los armarios no son cuadrados o son fabricados muy angostos. Consulte un carpintero
aparato no puede ser accesible facilmente, para corregir el problema.
Consulte un carpintero para hacer el aparato m_is accesible.
Las alfombras interfieren con la cocina. Deje suficentemente de espacio para que la estufa
pueda ser levantada sobre la alformbra.
La estufa completa o el homo no
funcionan.
Aseg0rese que el cable este bien ajustado en el enchufe.
El alambrado no ha sido terminado. Consulte con su agente de servicio, agente de
instalaci6n o servicio autorizado.
Corte de electricidad. Verifique las luces de la casa para asegurarse. Llame a su copaflia de
electricidad local para el servicio.
*El control del horno suena yen la pantalla El control electronico ha detectado una anomalia. Pulse CLEAR para borrar la pantalla y
aparece F1,F3 o F9 parar el sonido. Reprograme el horno. Si la anomalia se repite, tome nota del n0mero de
anomal[a. Pulse CLEARy consulte un servicio autorizado.
La luz del horno no funciona
Coloque o ajuste la bombilla. Yea "Cambio de la luz del homo" en el Manual del
usuario para las instrucciones.
La unidad de superficie no calienta No hay suministro el_ctrico al aparato. Verifique las etapas en "La estufa completa o el
homo no funcionan" que se encuentra en esta lista.
Programado de los controles inadecuado. Aseg0rese que el control adecuado este
encendido para que pueda usar la unidad de superficie.
Raspaduras o rasgu_os sobre la plancha de
cocinar.
Particulas dificiles como la sal o la arena entre la plancha de cocinar y los utensilios
pueden causar raspaduras. Aseg0rese que la superficie de la plancha de cocinar y la base
de los utensilios est_n limpias antes de usarla. Pequehas raspaduras no afectan la coccion
y desaparecer_in con el tiempo
74
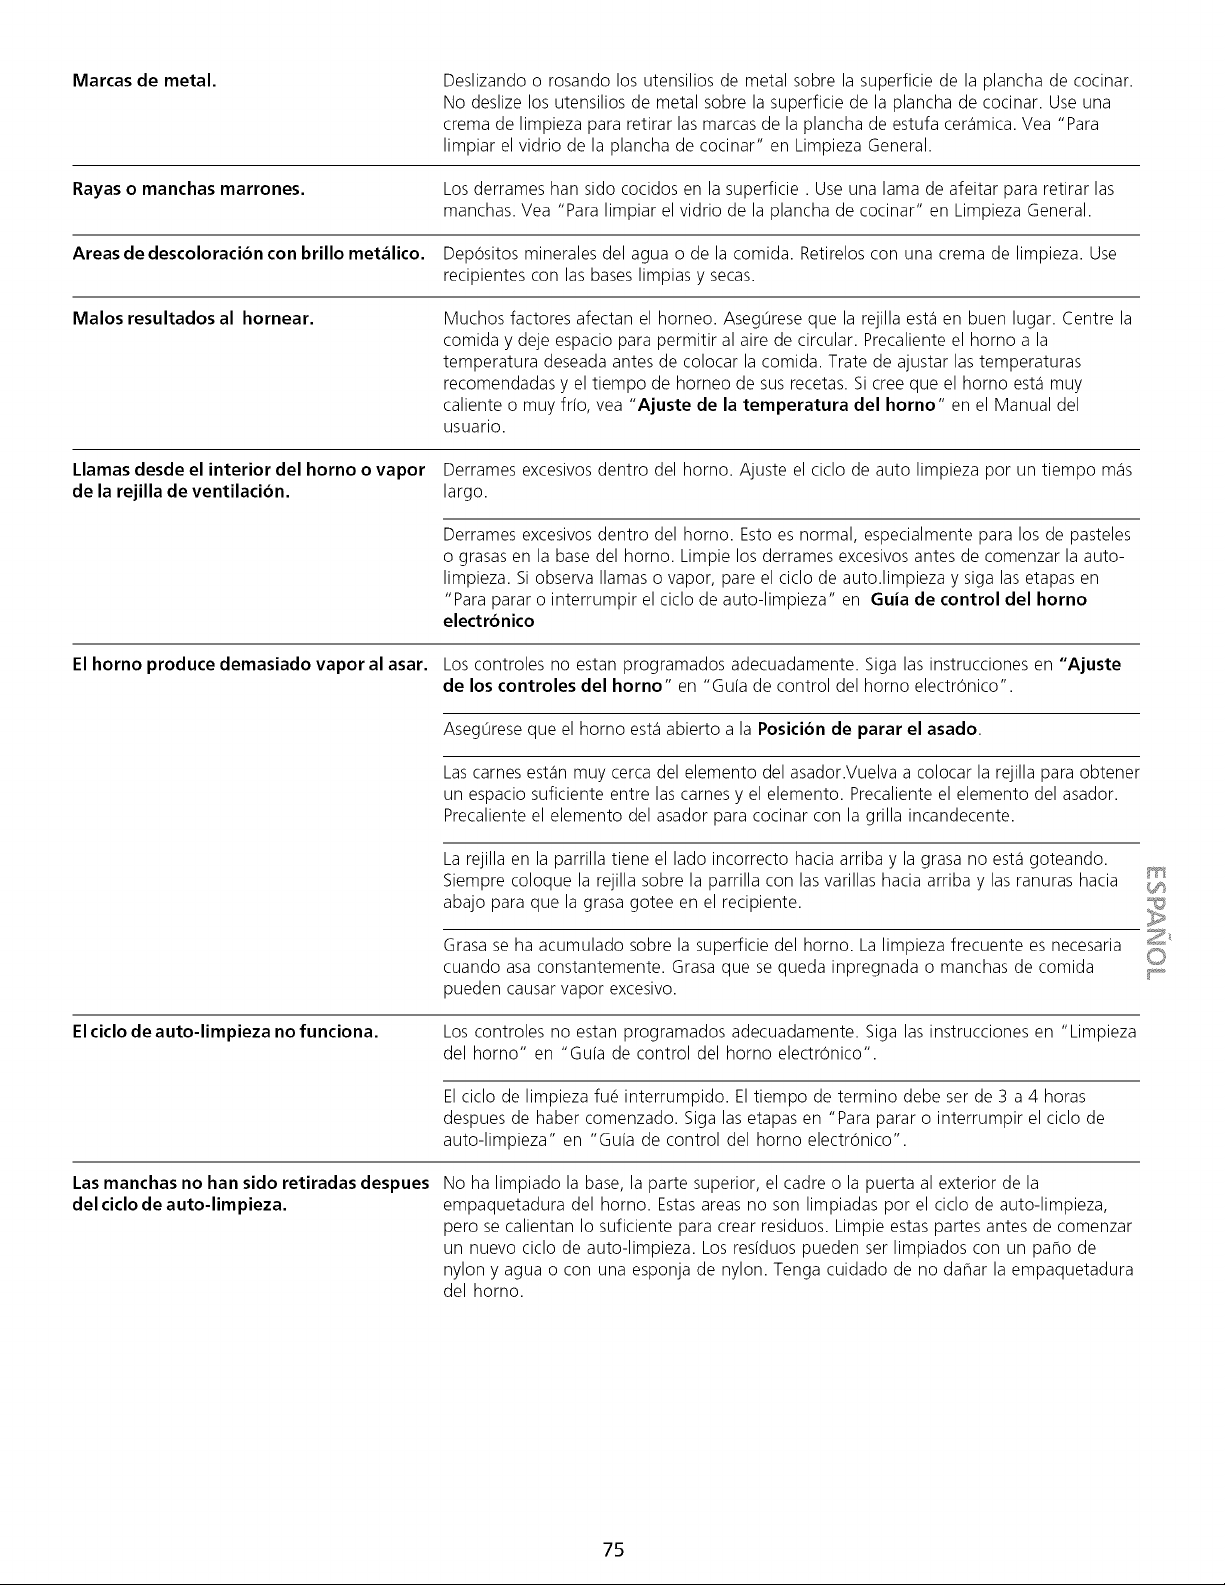
Marcas de metal.
Deslizando o rosando los utensilios de metal sobre la superficie de la plancha de cocinar.
No deslize los utensilios de metal sobre la superficie de la plancha de cocinar. Use una
crema de limpieza para retirar las marcas de la plancha de estufa cer_imica. Vea "Para
limpiar el vidrio de la plancha de cocinar" en Limpieza General.
Rayas o manchas marrones. Los derrames ban sido cocidos en la superficie. Use una lama de afeitar para retirar las
manchas. Vea "Para limpiar el vidrio de la plancha de cocinar" en Limpieza General.
Areas de descoloraci6n con brillo metalico. Depositos minerales del agua o de la comida. Retirelos con una crema de limpieza. Use
recipientes con las bases limpias y secas.
Malos resultados al hornear. Muchos factores afectan el borneo. AsegOrese que la rejilla est,1en buen lugar. Centre la
comida y deje espacio para permitir al aire de circular. Precaliente el homo a la
temperatura deseada antes de colocar la comida. Trate de ajustar las temperaturas
recomendadas y el tiempo de borneo de sus recetas. Si cree que el homo est,1muy
caliente o muy fr[o, vea "Ajuste de la temperatura del homo" en el Manual del
usuario.
Llamas desde el interior del horno o vapor Derrames excesivos dentro del homo. Ajuste el ciclo de auto limpieza por un tiempo m_is
de la rejilla de ventilacion, largo.
Derrames excesivos dentro del horno. Esto es normal, especialmente para los de pasteles
o grasas en la base del homo. Limpie los derrames excesivos antes de comenzar la auto-
limpieza. Si observa llamas o vapor, pare el ciclo de auto.limpieza y siga las etapas en
"Para parar o interrumpir el ciclo de auto-limpieza" en 6uia de control del horno
electronico
El horno produce demasiado vapor al asar. Los controles no estan programados adecuadamente. Siga las instrucciones en "Ajuste
de los controles del horno" en "Gu[a de control del homo electr6nico".
AsegOrese que el homo est,1abierto a la Position de parar el asado.
Las carnes est_in muy cerca del elemento del asador.Vuelva a colocar la rejilla para obtener
un espacio suficiente entre las carnes y el elemento. Precaliente el elemento del asador.
Precaliente el elemento del asador para cocinar con la grilla incandecente.
La rejilla en la parrilla tiene el lado incorrecto hacia arriba y la grasa no est,1goteando.
Siempre coloque la rejilla sobre la parrilla con las varillas hacia arriba y las ranuras hacia
abajo para que la grasa gotee en el recipiente.
El ciclo de auto-limpieza no funciona.
Grasa se ha acumulado sobre la superficie del horno. La limpieza frecuente es necesaria 2_
cuando asa constantemente. Grasa que se queda inpregnada o manchas de comida _.....
pueden causar vapor excesivo.
Los controles no estan programados adecuadamente. Siga las instrucciones en "Limpieza
del homo" en "Gu[a de control del homo electronico".
Las manchas no han sido retiradas despues
del ciclo de auto-limpieza.
Elciclo de limpieza fu_ interrumpido. El tiempo de termino debe ser de 3 a 4 horas
despues de haber comenzado. Siga las etapas en "Para parar o interrumpir el ciclo de
auto-limpieza" en "Gu[a de control del homo electronico".
No ha limpiado la base, la parte superior, el cadre o la puerta al exterior de la
empaquetadura del homo. Estas areas no son limpiadas por el ciclo de auto-limpieza,
pero se calientan Io suficiente para crear residuos. Limpie estas partes antes de comenzar
un nuevo ciclo de auto-limpieza. Los res[duos pueden ser limpiados con un paho de
nylon y agua o con una esponja de nylon. Tenga cuidado de no dahar la empaquetadura
del homo.
75
iiiiiiiiiiiiiiiiiiiiiiiiiiiiiiiiiiiiiiiiiiiiiiiiiiiiiiiiiii:ii:i!;i_i
iiiiiiiiiiiiiiiiiiiiiiiiiiiiiiiiiiiiiiiiiiiiiiiiiiiiiiiiiii:ii:i!;i_i
iiiiiiiiiiiiiiiiiiiiiiiiiiiiiiiiiiiiiiiiiiiiiiiiiiiiiiiiiii:ii:i!;i_i
iiiiiiiiiiiiiiiiiiiiiiiiiiiiiiiiiiiiiiiiiiiiiiiiiiiiiiiiiii:ii:i!;i_i
iiiiiiiiiiiiiiiiiiiiiiiiiiiiiiiiiiiiiiiiiiiiiiiiiiiiiiiiiii:ii:i!;i_i
For repair of major brand appliances in your own home...
no matter who made it, no matter who sold it!
1-800-4-MY-HOME ® Anytime, day or night
(1-800-4694663) (U.S.A. and Canada)
www, sears.com www, sears.ca
iiiiiiiiiiiiiiiiiiiiiiiiiiiiiiiiiiiiiiiiiiiiiiiiiiiiiiiiiiiiiiiiiiii!i....................................................................................................,,
iiiiiiiiiiiiiiiiiiiiiiiiiiiiiiiiiiiiiiiiiiiiiiiiiiiiiiiiiii:ii:i!;i_i
For repair of carry-in products like vacuums, lawn equipment,
and electronics, call for the location of your nearest
Sears Parts and Repair Center.
1-800-488-1222 Anytime, day or night (U.S.A. only)
iiiiiiiiiiiiiiiiiiiiiiiiiiiiiiiiiiiiii!!
iiiiiiiiiiiiiiiiiiiiiiiiiiiiiiiiiiiiii
1111111111111111111_1
iiiiiiii
iiiiiiii
iiiiiiii
iiiiiiii
iiiiiiii
iiiiiiii
iiiiiiii
iiiiiiii
iiiiiiii
iiiiiiii
iiiiiiii_
iiiiiiii
Para pedir servicio de reparaci6n a
domicilio, y para ordenar piezas:
l=888=SU=HOGAR _M
(1=888=784-6427)
Au Canada pour service en frangais:
1-877=LE=FOYER Mc
(1-877-533-6937)
www.sears.ca
HomeCentral
:i:i:i:i:i:i:i:i:i:i:i:i:i:i;i_
CCCC,,
CCCCII
CCCCII,,,
@Registered Trademark/TM Trademark/sM Service Mark of Sears, Roebuck and Co.
TM
®Marca Registrada / Marca de F&brica/SM Marca de Servicio de Sears, Roebuck and Co.
Mc Marque de commerce/MD Marque d_pos6e de Sears, Roebuck and Co. @Sears, Roebuck and Co.