Loading ...
Loading ...
Loading ...
16
SERVICE AND MAINTENANCE
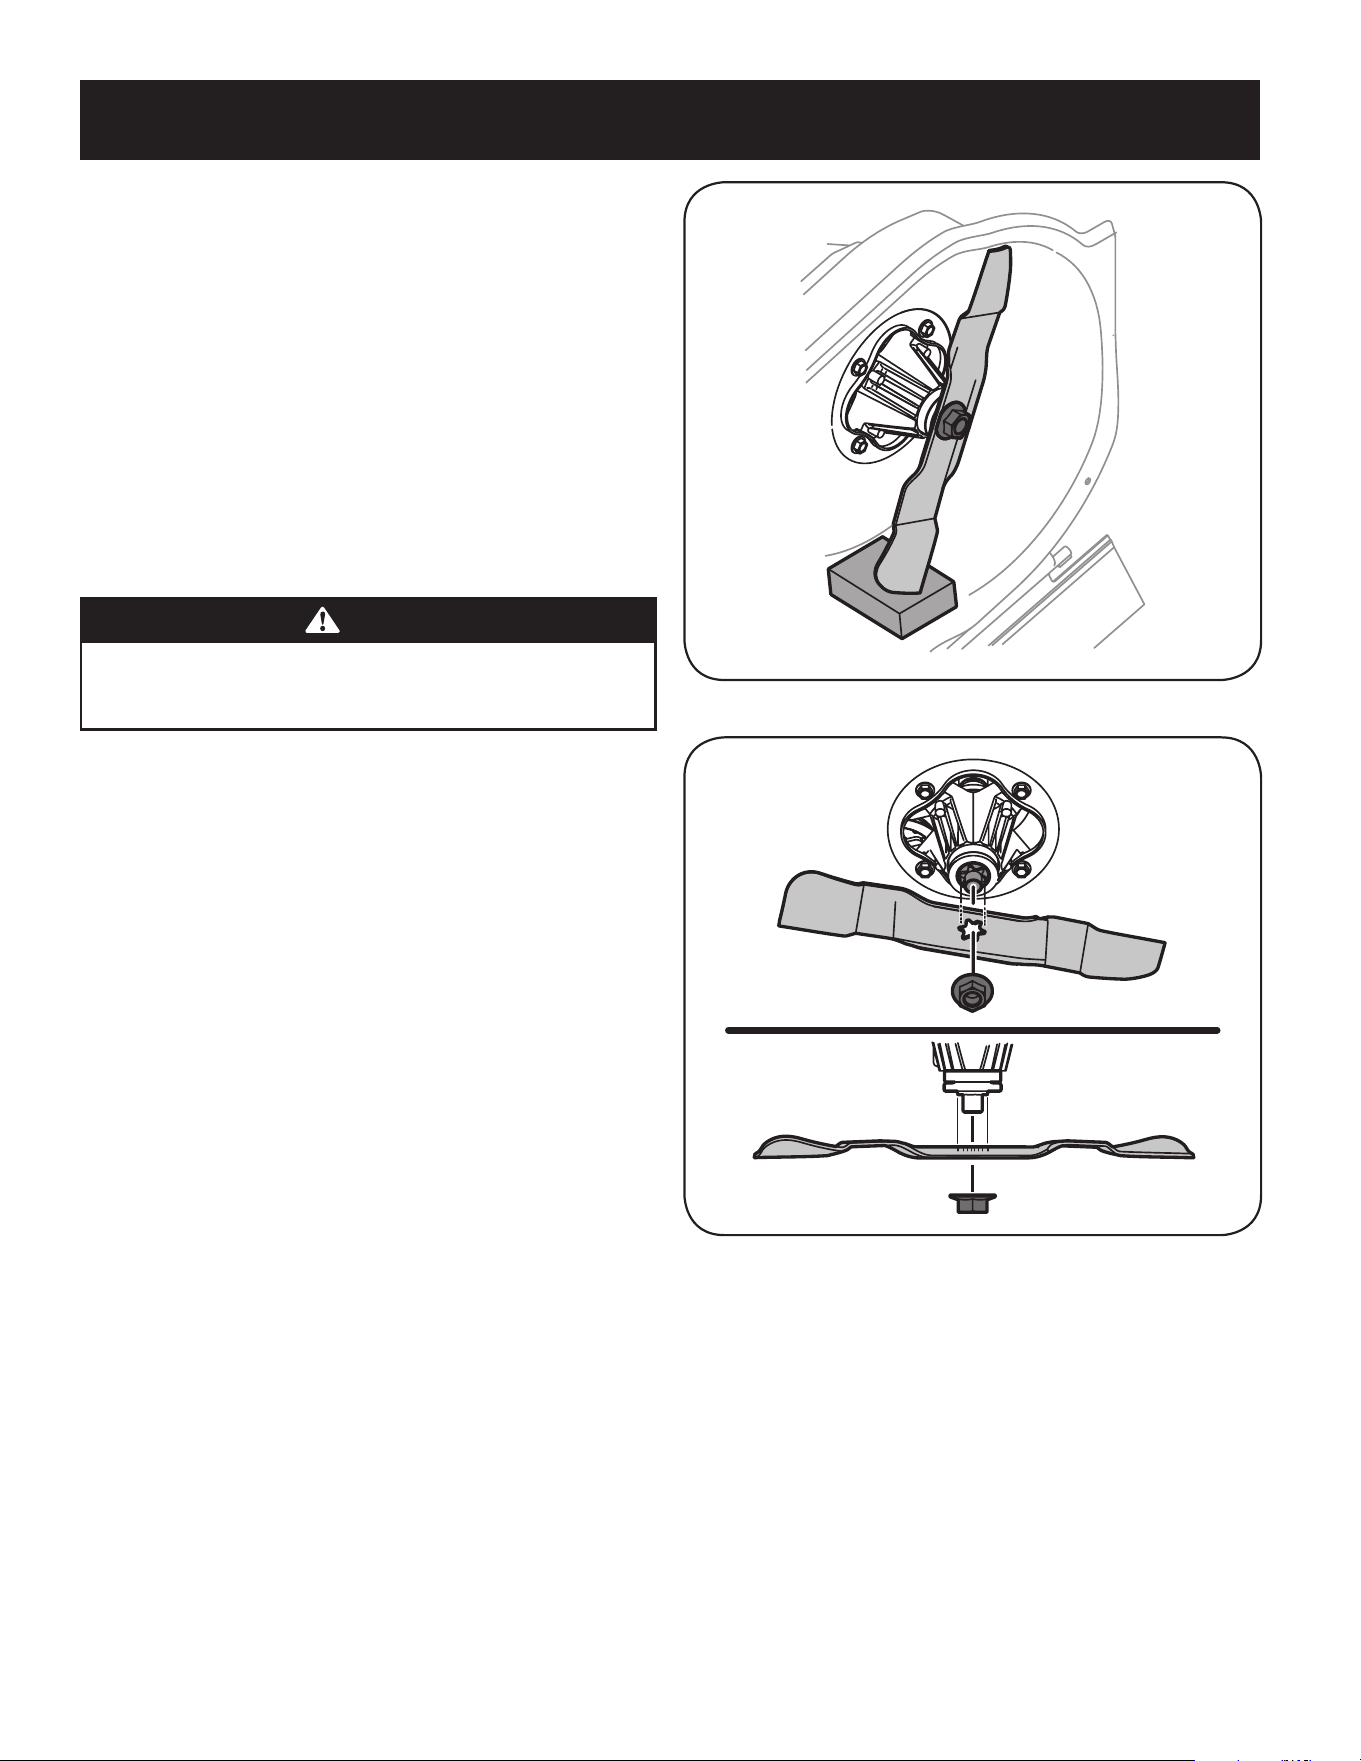
4. Remove the hex flange nuts that secures the blades to the spindle assembly.
See Figure 16.
Note: The hex flange nuts are secured using a standard thread pattern. Turn
counter-clockwise to loosen.
5. Remove the blades from the mowing deck.
6. Replace or sharpen the blades. To properly sharpen the cutting blades,
remove equal amounts of metal from both ends of the blades along the
cutting edges, parallel to the trailing edge, at a 25° to 30° angle. Always
grind each cutting blade edge equally to maintain proper blade balance.
7. Test the blades for balance by balancing the blade on a round shaft
screwdriver to check. If out of balance, when sharpening, remove metal from
the heavy side until it balances evenly. During sharpening the blade, follow
the original angle of grind. Grind each cutting edge equally to keep the blade
balanced.
WARNING
An unbalanced blade will cause excessive vibration when rotating at high
speeds. It may cause damage to mower and could break causing personal
injury.
8. Slide the blades onto the spindle shafts with the side marked “Grass Side”
(or with part number) facing the ground when the mower is in the operating
position.
9. Replace hex bolt and tighten hex bolt to torque:
70 ft-lb (min.), 90 ft-lb (max.).
To ensure safe operation of your mower, periodically check the blade bolt for correct
torque.
Figure 15
Figure 16
Belt Care
NOTE: Several components must be removed in order to change the mower’s
self-propulsion drive belt. See an authorized Sears Service Center to have your belt
replaced.
Loading ...
Loading ...
Loading ...