Loading ...
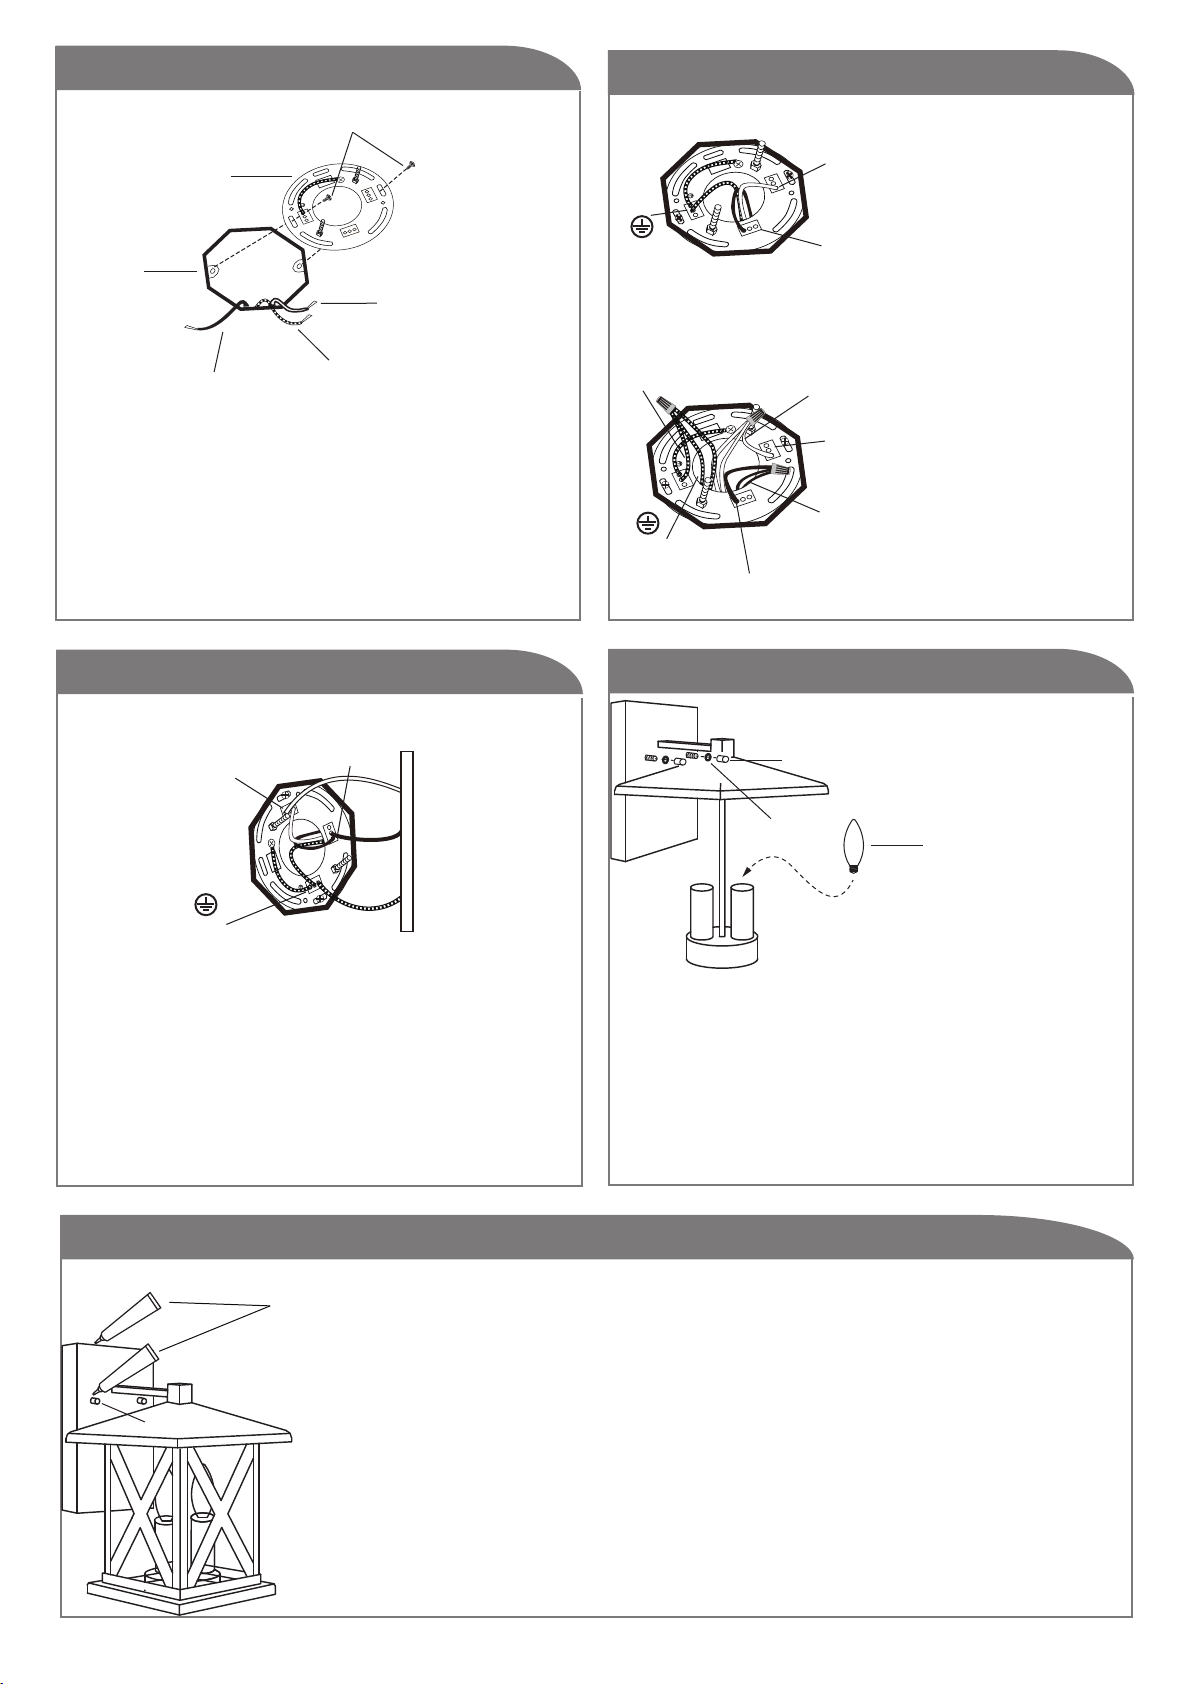
Step 5
Step 6
Step 7
Step 8
2
Tel: (613) 342-5424, Fax: (800) 263-4598
Option 1
Option 2
Option 1: Connect (push)
electrical wires from
electric box (house
wiring) into correct
inserts.
Option 2: For multiple
green (ground), black
(live) and white (neutral)
wires joined in the
electrical box (house
wiring), attach a single
“green”, “black” and
“white” jumper wire
before connecting. Strip
7mm from the 6” jumper
wires (AWG 12-24)
supplied. Then connect
(push) wires into the
correct inserts.
Connect (push) electrical wires from fixture into
correct inserts.
Tuck electrical wires into electrical box and
position fixture over studs on mounting bracket
assembly. Secure fixture in place with star washers
and cap nuts.
Install the proper bulb type and wattage (not included).
Reverse the process of step1 to install the fixture.
(L)
Black
(Live)
(N)
White
(Neutral)
Green
(Ground)
L
N
L
N
(L)
Black (Live)
(N)
White
(Neutral)
Green
(Ground)
Jumper Wire
Jumper
Wire
Jumper Wire
L
N
Fixture
(L)
Black (Live)
(N)
White
(Neutral)
Green
(Ground)
Step 4
Attach easy connect mounting bracket to electrical
box with electrical box screws (not included).
Black (Live)
White
(Neutral)
Green (Ground)
Easy Connect
mounting
bracket
Electrical
box screws
Electrical
Box
L
N
After Installation, seal around the top and side perimeter
between the fixture and the wall surface with weather
resistant caulking. The bottom should be left un-caulked
to prevent moisture build-up. Apply a small amount of
weather resistant caulking around the side perimeter
between the cap nut and mounting plate.
Star
Washer
Cap Nut
Bulb
Weather
Resistant
Caulking
(not included)
Cap Nut
Loading ...
Loading ...