Loading ...
Loading ...
Loading ...
Troubleshooting
& Service
TROUBLESHOOTING
Problem Possible Cause
Engine fails to start
Engine starts hard or runs poorly
Unit does not throw snow
1. Key is OFF
2. Failure to prime cold engine
3. Out of fuel
4. Choke OFF - cold engine
5. Engine flooded
6. Spark Plug not sparking
7. Water infuel, or old fuel
1. Fuel mixture too rich
2. Spark plug faulty, fouled,
or gapped incorrectly
3. Water infuel, or old fuel
Remedy
1. Turn Key to the ON position
2. Press primer button twice and restart.
3. Fill fuel tank
4. Turn Choke to ON.
5. Turn Choke to OFF; try starting
6. Check Gap. Gap plug, clean electrode,
or replace as necessary
7. Drain tank (Dispose of fuel at an authorized
waste facility). Fill with fresh fuel mixture.
1. Move choke to OFF position
2. Clean and gap, or replace
4. Gas cap vent hole plugged
1. Loose or broken drive belt
2. Incorrect control cable
adjustment
3. Discharge chute clogged,
foreign object lodged in auger
4. Broken control cable
1. Incorrect control cable
adjustment
1. Loose parts or damaged
auger
3. Drain tank (Dispose of fuel at an authorized
waste facility). Fill with fresh fuel mixture.
4. Clean vent hole or replace cap
1. Adjust or replace belt
2. Adjust Auger Control cable
3. Stop engine, remove key and
clean out discharge chute
4. Replace cable
1. Adjust Auger Control cableAuger does not stop turning
when control is released
Excessive vibration 1. STOP engine and REMOVE the key,
tighten all hardware. If vibration
continues, see your dealer.
Note: For repairs beyond the minor adjustments listed above, please contact your local authorized dealer.
REMOVING ENGINE COVER
Note: In many of the following adjustment and service
tasks, it will be necessary to remove and reinstall the
engine cover. To remove the cover, proceed as follows:
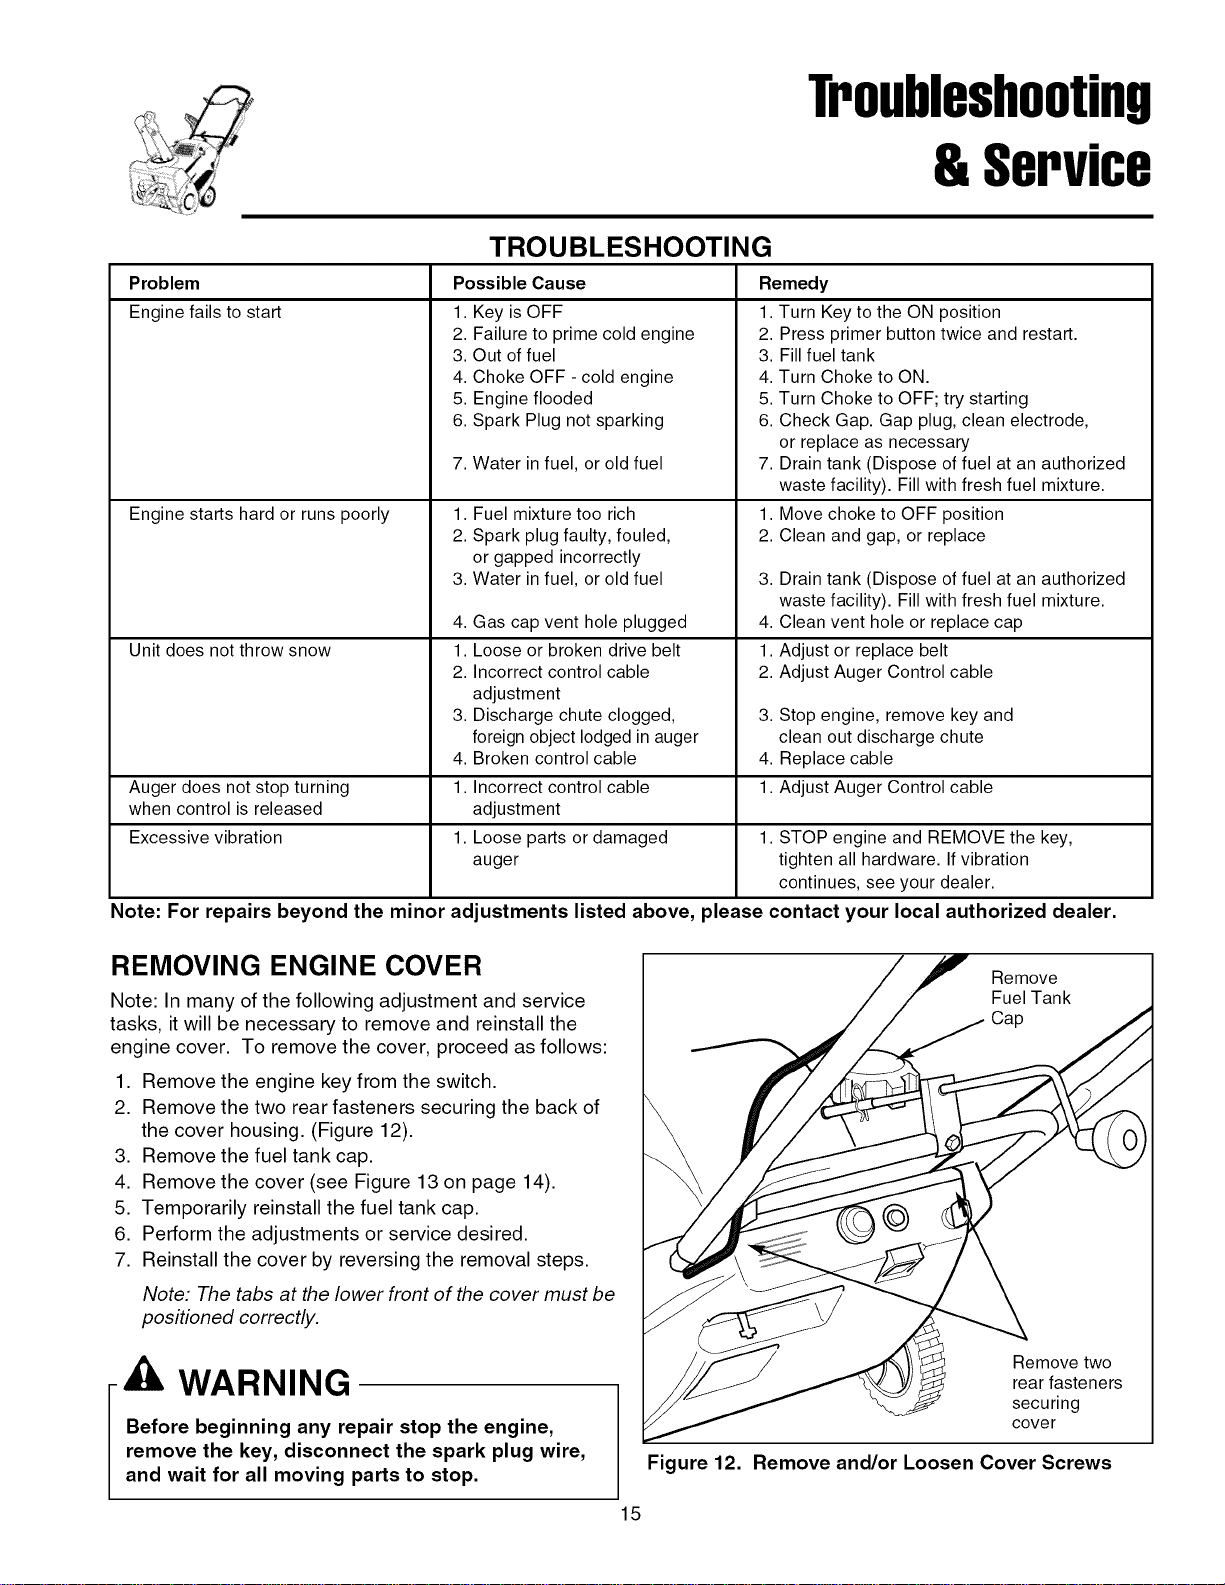
1. Remove the engine key from the switch.
2. Remove the two rear fasteners securing the back of
the cover housing. (Figure 12).
3. Remove the fuel tank cap.
4. Remove the cover (see Figure 13 on page 14).
5. Temporarily reinstall the fuel tank cap.
6. Perform the adjustments or service desired.
7. Reinstall the cover by reversing the removal steps.
Note: The tabs at the lower front of the cover must be
positioned correctly.
WARNING
Before beginning any repair stop the engine,
remove the key, disconnect the spark plug wire,
and wait for all moving parts to stop.
Figure 12.
5
Remove
Fuel Tank
Cap
Remove two
rearfasteners
securing
cover
Remove and/or Loosen Cover Screws
Loading ...
Loading ...
Loading ...