Simple version (Simple setup guide)
Here, we explain the entire setup procedure, from unboxing the unit to using it in a home theater. The “Simple version” section provides the speaker installation, connection, and setup methods for the 7.1-channel system with surround back speakers. For the installing, connecting, and setup methods of speakers other than the 7.1-channel system (with surround back speakers), see page 54.
- Before connecting the unit, turn off the power to all devices.
- For operation of the connected devices, refer to the user manuals for each device.

Set up speakers (Audyssey® Auto Setup)

 Install
This unit can perform 2.0 to 11.2-channel surround playback. This page provides the speaker installation procedure for the 7.1-channel playback using surround back speakers as an example.

FL Front speaker (L)
FR Front speaker (R)
C Center speaker
SW Subwoofer
SL Surround speaker (L)
SR Surround speaker (R)
SBL Surround back speaker (L)
SBR Surround back speaker (R)
• Install the surround speakers in a position 2 to 3 ft (60 to 90 cm) higher than ear level.

 Connect
Speakers
Carefully check the left (L) and right (R) channels and + (red) and – (black) polarities on the speakers being connected to the this unit, and be sure to interconnect the channels and polarities correctly.
Connecting the speaker cables
Peel off about 0.03 ft/10 mm of sheathing from the tip of the speaker cable, then either twist the core wire tightly or terminate it.

When using a banana plug
Tighten the speaker terminal firmly before inserting the banana plug.

NOTE
• Connect so that the speaker cable core wires do not protrude from the speaker terminal. The protection circuit may be activated if the core wires touch the rear panel or if the + and – sides touch each other (vpage 134 “Protection Circuit”).
• Never touch the speaker terminals while the power supply is connected. Doing so could result in electric shock.
• Use speakers with the speaker impedances shown below.

 Use speakers where one speaker has an impedance of 4 to 16 Ω. When using a speaker with impedance of 4 Ω or 6 Ω, make sure to set the “Speaker Impedance” in the menu (vpage 98) to “6 Ω/ohms” or “4 Ω/ ohms”.

Blu-ray Disc player and TV
Use only an HDMI (High Defi nition Multimedia Interface) cable that bears the HDMI logo (a genuine HDMI product). Using a cable without the HDMI logo (a non-genuine HDMI product) may result in abnormal playback. When outputting Deep Color or 1080p, etc., we recommend you use a “High Speed HDMI cable” or a “High Speed HDMI cable with Ethernet”for enhanced high-quality playback.

NOTE
• Do not plug in the power cord until all connections have been completed.
• Do not bundle power cords together with connection cables. Doing so can result in humming or noise.
 Turn on power
1 Turn on the TV and subwoofer power.

2 Change the TV input to the input of this unit.
3 Press POWER ON to turn on power to the this unit. The power indicator fl ashes green and the power turns on.

You can also switch the power to standby by pressing ON/STANDBY on the main unit.
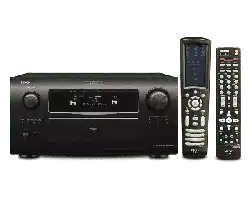
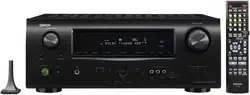
NOTE Before you use the remote control unit for the fi rst time, be sure to insert the batteries (vpage 124 “Inserting the batteries”).
 Set up speakers (Audyssey® Auto Setup)
The acoustic characteristics of the connected speakers and listening room are measured and the optimum settings are made automatically. This is called “Audyssey Auto Setup”. To perform measurement, place the setup microphone in multiple locations all around the listening area. For best results, we recommend you measure in six or more positions, as shown in the illustration (up to eight positions).
• When performing Audyssey Auto Setup, MultEQ® XT 32/Dynamic EQ®/Dynamic Volume® functions become active (vpage 89, 90).
• To set up the speakers manually, use “Speaker Setup” (vpage 93) on the menu.
NOTE
• Make the room as quiet as possible. Background noise can disrupt the room measurements. Close windows, silence cell phones, televisions, radios, air conditioners, fl uorescent lights, home appliances, light dimmers, or other devices as measurements may be affected by these sounds.
• Cell phones should be placed away from all audio electronics during the measurement process as Radio Frequency Interference (RFI) may cause measurement disruptions (even if the cell phone is not in use).
• Do not unplug the setup microphone from the main unit until Audyssey Auto Setup is completed.
• Do not stand between the speakers and setup microphone or allow obstacles in the path while the measurements are being made. This will cause inaccurate readings.
• Loud test sounds may be played during Audyssey Auto setup. This is part of normal operation. If there is background noise in room, these test signals will increase in volume
• Operating VOL during the measurements will cancel the measurements.
• Measurement cannot be performed when headphones are connected.
About setup microphone placement
• Measurements are performed by placing the setup microphone successively at multiple positions throughout the entire listening area, as shown in  For best results, we recommend you measure in six or more positions, as shown in the illustration (up to eight positions).
• Even if the listening environment is small as shown in  , measuring at multiple points throughout the listening environment results in more effective correction.

FL Front speaker (L)
FR Front speaker (R)
C Center speaker
SW Subwoofer

SL Surround speaker (L)
SR Surround speaker (R)
SBL Surround back speaker (L)
SBR Surround back speaker (R)
About the main listening position (*M)
The main listening position is the position where listeners would normally sit or where one would normally sit alone within the listening environment. Before starting Audyssey Auto Setup, place the setup microphone in the main listening position. Audyssey MultEQ® XT 32 uses the measurements from this position to calculate speaker distance, level, polarity, and the optimum crossover value for the subwoofer.
About multiple subwoofer calibration
Audyssey multiple subwoofer calibration optimizes the level, delay, and frequency response blending of two subwoofers. z To run Audyssey multiple subwoofer calibration you must select “Measure (2 spkrs)” in “Set up “Channel Select”” (vpage 64).
1 Prepare the setup microphone
Mount the setup microphone on a tripod or stand and place it in the main listening position. When placing the setup microphone, adjust the height of the sound receptor to the level of the listener’s ear.

NOTE
• Do not hold the setup microphone in your hand during measurements.
• Avoid placing the setup microphone close to a seat back or wall as sound refl ections may give inaccurate results.
2 Set up the subwoofer
If using a subwoofer capable of the following adjustments, set up the subwoofer as shown below.
When using a subwoofer with a direct mode
Set the direct mode to “On” and disable the volume adjustment and crossover frequency setting.
When using a subwoofer without a direct mode
Make the following settings:
• Volume : “12 o’clock position”
• Crossover frequency : “Maximum/Highest Frequency”
• Low pass filter : “Off”
• Standby mode : “Off”
3 Set up the remote control unit
Set up the zone mode
Press ZONE SELECT to switch the zone mode to  (MAIN ZONE). The indicator lights.

Set up the operation mode
Press AMP to set the remote control unit to AMPoperation mode.

STEP 1 Preparation
4 Connect the setup microphone to the SETUP MIC jack of this unit.

This screen provides the method for setting up 7.1-channel playback using surround back speakers. For the method of setting up speakers other than the 7.1-channel system, select “Amp Assign” and perform step 3 and 7 of “Set up “Amp Assign”” (vpage 63). If unused channels are set with “Channel Select”, measuring time can be shortened. Also, set “Channel Select” to measure two subwoofers. For setting, perform steps 9 to 14 of “Set up “Channel Select”” (vpage 64).
5 Use  to select “Auto Setup Start” and then press ENTER.
STEP 2 Detection & Measurement (Main listening position)
• In STEP 2, you will perform measurements at the main listening position.
• This step automatically checks the speaker confi guration and speaker size, and calculates the channel level, distance, and crossover frequency. It also corrects distortion in the listening area
6 Select “Measure” and then press ENTER.

1 Measure the subwoofer level
• To stop measuring, select “Cancel” and then press ENTER.
• When “Subwoofer” is set to “Skip” with “Channel Select”, this measurement is not taken, and the process proceeds to “w Measure each speaker”.
2 Measure each speaker
• Once the measurements in step 1 are complete, the measurements in step 2 start automatically.
• The measuring channel changes depending on the setting of “Set up “Amp Assign”” (vpage 63) and “Set up “Channel Select”” (vpage 64).
• Measurement requires several minutes.
7 The detected speakers are displayed.

NOTE If a connected speaker is not displayed, the speaker may not be connected correctly. Check the speaker connection.
8 Use to select “Next → Measurement” and then press ENTER.
NOTE If “Caution” is displayed: Go to “Error messages” (vpage 11), check any related items, and perform the necessary procedures.
When performing Audyssey Auto Setup over again
Press to select “Retry”, and then press ENTER.
When measuring has stopped
Press RETURN, to the “Cancel auto setup?” prompt is displayed. Press o to select “Yes”, then press ENTER.
Setting up the speakers again
Repeat the operation from step 4 of STEP1 Preparation .
STEP 3 Measurement (2nd – 8th listening position)
• In STEP 3, you will perform measurements at multiple positions (two to eight positions) other than the main listening position.
• You can achieve a more effective correction of distortion within the listening area by performing measurements at multiple positions.
9 Move the setup microphone to position 2, use to select “Measure”, and then press ENTER.
The measurement of the second position starts. Measurements can be made in up to eight positions.

If you want to omit measurements from the next position onward, select “Next → Calculation”. (Go to STEP4 Calculation )
10 Repeat step 9, measuring positions 3 to 8.
When measurement of position 8 is completed, a “Measurements fi nished.” message is displayed.

STEP 4 Calculation
11 On the STEP3 screen, use ui to select “Next → Calculation”, and then press ENTER.
Measuring results are analyzed, and the frequency response of each speaker in the listening room is determined.

• Analysis takes several minutes to complete. The time required for this analysis depends on the number of speakers connected. The more connected speakers there are, the longer it takes to perform analysis.
STEP 5 Check
12 Use to select the item you want to check, and then press ENTER.

• Subwoofers may measure a greater reported distance than the actual distance due to added electrical delay common in subwoofers.
• If you want to check another item, press RETURN.
13 Use to select “Next → Store” and then press ENTER.
NOTE
• If the result differs from the actual connection status, or if “Caution!” is displayed, see “Error messages” (vpage 11). Then carry out Audyssey Auto Setup again.
• If the result still differs from the actual connection status after remeasurement or the error message still appears, it is possible that the speakers are not connected properly. Turn this unit off, check the speaker connections and repeat the measurement process from the beginning.
• If you change speaker positions or orientation, perform Audyssey Auto Setup again to fi nd the optimal equalizer settings.
STEP 6 Store
14 Select “Store” and then press ENTER. Save the measurement results.

• Saving the results requires about 20 seconds.
• If the measuring results are not to be saved, press RETURN. A message “Cancel auto setup?” will be displayed. Press o then select “Yes”. All the measured Audyssey Auto Setup data will be erased.
NOTE During saving of measurement results, be sure not to turn off the power.
Finish
15 Unplug the setup microphone from the unit’s SETUP MIC jack.
16 Set Dynamic Volume®.

• For details of Dynamic Volume settings, see page 90.
When turning Dynamic Volume on
Use to select “Yes“, and then press ENTER.
• The  unit automatically enters “Evening” mode.
When turning Dynamic Volume off
Use to select “No“, and then press ENTER.
NOTE
• After performing Audyssey Auto Setup, do not change the speaker connections or subwoofer volume. In event of a change, perform Audyssey Auto Setup again.
• After performing Audyssey Auto Setup with two subwoofers, do not change the channel distances and levels of both subwoofers.
Error messages
An error message is displayed if Audyssey® Auto Setup could not be completed due to speaker placement, the measurement environment, etc. If this happens, check the relevant items, be sure to take the necessary measures, then perform Audyssey Auto Setup over again.
NOTE Be sure to turn off the power before checking speaker connections.
Examples

• Correct measurement is not possible due to inappropriate subwoofer volume.
Measures
• When using a subwoofer with built-in amplifi er (active type), use “SW Level Matching” to adjust the subwoofer volume (vpage 11 “Subwoofer level error message and how to adjust”).
• When using a subwoofer without a built-in amplifi er, select “Skip”, and then press ENTER.

• The connected setup microphone is broken, or a device other than the supplied setup microphone is connected.
• Not all speakers could be detected.
• The front L speaker was not properly detected.
Measures
• Connect the included setup microphone to the SETUP MIC jack of this unit.
• Check the speaker connections.

• There is too much noise in the room for accurate measurements to be made.
• Speaker or subwoofer sound is too low for accurate measurements to be made.
Measures
• Either turn off any device generating noise or move it away.
• Perform again when the surroundings are quieter.
• Check the speaker installation and the direction in which the speakers are facing.
• Adjust the subwoofer’s volume.

• The displayed speaker could not be detected.
Measures
• Check the connections of the displayed speaker.

• The displayed is connected with the polarities reversed.
Measures
• Check the polarities of the displayed speaker.
• For some speakers, this error message may be displayed even if the speaker is properly connected. If you are sure the connection is correct, press ui to select “Skip”, then press ENTER.
Remote control operation buttons
 Move the cursor (Up/Down/Left/Right)
 Confirm the setting
 Return to previous menu
Subwoofer level error message and how to adjust
The optimal level of each subwoofer channel for Audyssey Auto Setup measurement is 75 dB. During subwoofer level measurement (“Set up speakers (Audyssey® Auto Setup), STEP2 Detection & Measurement ” (vpage 9), 6 – 1), an error message is displayed when one level of subwoofers is outside the 72 – 78 dB range. When using a subwoofer with built-in amplifi er (active type), adjust the subwoofer volume so that the subwoofer level is within the 72 to 78 dB range.
1 Select “SW Level Matching” and then press ENTER.

2 Select “SW Test Start” and then press ENTER.
Subwoofer level measurement begins. During measuring, a “Testing …” message is displayed. The measured level appears on the level indicator after about 3 to 5 seconds.

• If the measured level is outside the 72 to 78 dB range, the level indicator is red.
• When measuring stops, press ENTER.
3 Adjust the volume control on your subwoofer so that the measured level is within the 72 to 78 dB range.

• If the measured level is within the 72 to 78 dB range, the level indicator is blue.
4 When the measured level is within the 72 to 78 dB range, press ENTER.
5 Select “Next” and then press ENTER. Proceed to “Set up speakers (Audyssey® Auto Setup), STEP2 Detection & Measurement ” (vpage 9), 6 – 2.

When you use two subwoofers, adjust each subwoofer so that the volume levels of Subwoofer 1 and Subwoofer 2 are appropriate for your needs.
When you use two subwoofers, adjust each subwoofer so that the volume levels of Subwoofer 1 and Subwoofer 2 are appropriate for your needs.
Parameter Check
This function enables you to check the measurement results and equalizer characteristics after Audyssey Auto Setup.
1 Use to select “Parameter Check” and then press ENTER or  .
.

2 Use to select the item you want to check, then press ENTER or .
Measurement results for each speaker are displayed.
Speaker Config Check. Check the speaker configuration.
Distance Check Check the distance.
Ch. Level Check Check the channel level.
Crossover Check. Check the crossover frequency.
EQ Check Check the equalizer.
• If “EQ Check” is selected, press to select equalizing curve (“Audyssey” or “Audyssey Flat”) to be checked, and then press ENTER or . Use ui to switch the display between the different speakers.
3 Press RETURN. The confirmation screen reappears. Repeat steps 2.
Retrieving Audyssey Auto Setup settings
If you set “Restore” to “Yes”, you can return to Audyssey Auto Setup measurement result (value calculated at the start by MultEQ® XT 32) even when you have changed each setting manually
 Play back disc
1 Press BD to switch an input source for a player used for playback.
2 Play the component connected to this unit.
Make the necessary settings on the player (language setting, subtitles setting, etc.) beforehand.
3 Adjust the sound volume.
VOL ........................................... Volume up
VOL ...................................... Volume down
MUTE .................................................. Muting

4 Set the listening mode.
Set the listening mode according to the playback contents (cinema, music, etc.) or according to your liking (vpage 50 “Selecting a listening mode (Surround Mode)”)
When power is switched to standby
Press POWER OFF. GPower indicator status in standby modeH
• Normal standby : Off
• When “HDMI Control” – “Control” is set to “ON” : Red
• When “Network Standby” is set to “ON” : Red

You can also switch the power to standby by pressing ON/STANDBY on the main unit.
NOTE During power standby, a minimal amount of power is consumed. To totally cut off the power, remove the power cord from the power outlet.
Basic version
Here, we explain the connections and basic operation methods for this unit.
Connections
Connecting an HDMI-compatible device
You can connect up to seven HDMI-compatible devices to the unit. HDMI function This unit supports the following HDMI functions:
• 3D
• Deep Color (vpage 132)
• Auto Lip Sync (vpage 98, 132)
• x.v.Color, sYCC601 color, Adobe RGB color, Adobe YCC601 color (vpage 132, 134)
• High defi nition digital audio format • ARC (Audio Return Channel)
• Content Type
• CEC (HDMI control)
About HDMI cables
• When a device supporting Deep Color signal transfer is connected, use a cable compatible “High Speed HDMI cable” or “High Speed HDMI cable with Ethernet”.
• When the ARC function is used, connect a device with a ”Standard HDMI cable with Ethernet” or “High Speed HDMI cable with Ethernet” for HDMI 1.4a.
HDMI control function (vpage 65)
This function allows you to operate external devices from the receiver and operate the receiver from external devices.
NOTE
• The HDMI control function may not work depending on the device it is connected to and its settings.
• You cannot operate a TV or Blu-ray Disc player/DVD player that is not compatible with the HDMI control function.
About 3D function
This unit supports input and output of 3D (3 dimensional) video signals of the HDMI 1.4a standards. To play back 3D video, you need a TV and player that provide support for HDMI1.4a standard 3D function and a pair of 3D glasses.
NOTE
• If you operate the menu while playing back 3D video content, the playback video is replaced by the menu screen. The playback video is not displayed behind the menu screen.
• This unit does not show the status display while playing back 3D video content.
About ARC (Audio Return Channel) function
The Audio Return Channel in HDMI 1.4a enables a TV, via a single HDMI cable, to send audio data “upstream” to this unit.
NOTE
• To enable the ARC function, set “HDMI Control” – “Control” to “ON” (vpage 99)
. • The ARC function cannot use the HDMI MONITOR 1 and HDMI MONITOR 2 terminals simultaneously. Perform the “HDMI Control” – “Control Monitor” setting in accordance with a TV that supports the ARC function and HDMI MONITOR terminal in this unit.
• When connecting a TV that does not support the ARC function, a separate connection using an audio cable is required. In this case, refer to “Connecting a TV” (vpage 18) for the connection method.
About Content Type
The HDMI specifi cation version 1.4a enables simple, automated picture setting selection with no user intervention. NOTE To enable the Content Type, set “Video Mode” to “Auto” (vpage 83).
Cables used for connections

• This interface allows transfer of digital video signals and digital audio signals over a single HDMI cable.

• When this unit is connected to other devices with HDMI cables, connect this unit and TV also with an HDMI cable.
• When connecting a device that supports Deep Color transmission, please use a “High Speed HDMI cable” or “High Speed HDMI cable with Ethernet”.
• Video signals are not output if the input video signals do not match the monitor’s resolution. In this case, switch the Blu-ray Disc/DVD player’s resolution to a resolution with which the monitor is compatible.
• When this unit and monitor are connected with an HDMI cable, if the monitor is not compatible with HDMI audio signal playback, only the video signals are output to the monitor.
NOTE
• When the “Monitor Out” menu is set to “Auto (Dual)”, video may not be displayed properly on some monitors connected to the unit. In such a case, set to either “Monitor 1” or “Monitor 2” by pressing the MONITOR SELECT button on the remote control unit.
• When you use the HDMI control function, set “HDMI Control” – “Control” to “ON” and set the HDMI MONITOR terminal that you want to operate by the HDMI control function in “Control Monitor”.
• The audio signal from the HDMI output connector (sampling frequency, number of channels, etc.) may be limited by the HDMI audio specifications of the connected device regarding permissible inputs.

Connecting to a device equipped with a DVI-D connector
When an HDMI/DVI conversion cable (sold separately) is used, the HDMI video signals are converted to DVI signals, allowing connection to a device equipped with a DVI-D connector.
NOTE
• No sound is output when connected to a device equipped with a DVI-D connector. Make separate audio connections.
• Signals cannot be output to DVI-D devices that do not support HDCP.
• Depending on the combination of devices, the video signals may not be output.
Settings related to HDMI connections
Set as necessary. For details, see the respective reference pages.
Input Assign (page 82)
Set this to change the HDMI input connector to which the input source is assigned.
HDMI Setup (page 98)
Make settings for HDMI video/audio output.
• RGB Range
• HDMI Audio Out
• Vertical Stretch
• Monitor Out
• Auto Lip Sync
• HDMI Control
NOTE The audio signals output from the HDMI connectors are only the HDMI input signals.
Connecting a TV
• Select the connector to use and connect the device.
• For video connections, see “Converting input video signals for output (Video conversion function)” (vpage 15).
• For instructions on HDMI connections, see “Connecting an HDMI-compatible device” (vpage 16).
To listen to TV audio through this device, use the optical digital connection
NOTE The optical connection is not required when a TV compatible with the ARC function (Audio Return Channel (HDMI 1.4a standard function) is connected to this unit via an HDMI connection. For details, see “About ARC (Audio Return Channel) function” (vpage 16) or refer to the instruction manual for your TV.
Cables used for connections


in Set as Necessary
Set this to change the digital input connector or component video input connector to which the input source is assigned. “Input Assign” (page 82)
Connecting a Blu-ray Disc player
• You can enjoy video and audio from a Blu-ray Disc.
• Select the connector to use and connect the device.
• For instructions on HDMI connections, see “Connecting an HDMI-compatible device” (page 16).
Cables used for connections


in Set as Necessary
Set this to change the digital input connector or component video input connector to which the input source is assigned. “Input Assign” (page 82)
For HD audio (Dolby TrueHD, DTS-HD, Dolby Digital Plus and DTS Express) playback, connect with HDMI (page 16 “Connecting an HDMI-compatible device”).
Troubleshooting
If a problem should arise, first check the following:
1. Are the connections correct?
2. Is the set being operated as described in the owner’s manual?
3. Are the other components operating properly?
If this unit does not operate properly, check the items listed in the table below. Should the problem persist, there may be a malfunction. In this case, disconnect the power immediately and contact your store of purchase.
[General]
Power does not turn on.
• Check whether the power plug is correctly inserted into the power outlet.
• The protection circuit is active. Disconnect the power plug from the electric outlet, wait 5 to 10 seconds and then insert it back into the outlet.
( Page 6 5, 134 )
Display is off.
• Set “Dimmer” on the menu to something other than “OFF”. ( Page 105 )
The power indicator is blinking red in intervals of approximately 2 seconds.
• The temperature inside the unit has risen. Please turn off power once, and re-apply the power after the temperature has fallen sufficiently.
• Please re-install this unit in a place having good ventilation.
The power indicator is blinking red in intervals of approximately 0.5 seconds.
• Please use speakers which have the specified impedance.
• The speaker cable has shorted (is touching). Firmly twist the core wire in the speaker cable, and then re-connect it to the speaker terminal.
After turning on the power, the power indicator is blinking red in intervals of approximately 0.5 seconds.
• This unit amplifier circuit has failed. Turn off the power and please contact the DENON service adviser.
Set does not operate properly.
• Reset the microprocessor.
[Video]
No picture appears.
• Check the TV connection.
• Set the TV input correctly.
[Audio]
Audio is not output.
• Check the connections for all devices.
• Check the speaker connections and configurations.
• Check whether the audio device power is turned on.
• Adjust the master volume.
• Cancel the mute mode.
• Select a suitable input source.
• Select a suitable input mode.
• Disconnect the headphones. No sound is output from the speakers or the PRE OUT connectors when headphones are connected.
No sound is produced from surround speaker.
• Check if the surround speakers are connected to the SURROUND terminals.
No sound is produced from surround back speaker.
• Check if “Amp Assign” is set appropriately in order to output audio from the surround back speakers.
• Set “Speaker Config.” – “Surround Back” on the menu to something other than “None”.
• Set “Surround Parameters” – “Surround Back” on the menu to something other than “OFF”.
• Set the surround mode to something other than “STEREO”.
No sound is produced from front height speaker.
• Set “Surround Parameters” – “PLgz Height” on the menu to “ON”.
• Check if “Amp Assign” is set appropriately in order to output audio from the front height speakers.
• Set “Speaker Config.” – “Front Height” on the menu to something other than “None”.
No sound is produced from subwoofer.
• Check the subwoofer connections.
• Turn on the subwoofer’s power. • Set “Speaker Config.” – “Subwoofer” on the menu to “1spkr” or “2spkrs”.
• If “Front” and “Center” for “Speaker Config.” are set to “Large”, and “Subwoofer Mode” is set to “LFE”, no sound may be output from the subwoofers, depending on the input signal or selected surround mode.
DTS sound is not output.
• Set “Decode Mode” on the menu to “Auto” or “DTS”.
Dolby TrueHD, DTSHD, Dolby Digital Plus audio is not output.
• Make HDMI connections.
Dolby PLg mode or DTS NEO:6 mode cannot be selected. Or “Not Available” is displayed when the STANDARD button is pressed.
• Check that “Speaker Config.” – “Center” or “Surround” is set to other than “None”. If the speaker system is 2.0/2.1ch, this surround mode cannot be selected.
• When headphones are used, STANDARD mode (Dolby PLg or DTS NEO:6) cannot be selected.
Audyssey DSX™ cannot be selected. Or “Not Available” is displayed when AUDYSSEY DSX button is pressed.
• Check that “Speaker Config.” – “Front Height” or “Front Wide” is set to other than “None”.
• Check that “Speaker Config.” – “Center” is set to other than “None”. • Switch the surround mode to STANDARD.
• Check that “Input Mode” is set to other than “EXT.IN”.
• When headphones are used, Audyssey DSX cannot be selected.
MultEQ® XT 32, Dynamic EQ® and Dynamic Volume® cannot be selected. Or “Not Available” is displayed when MULTEQ button or DYN EQ/VOL button is pressed.
• Switch the surround mode to other than “DIRECT”or“PURE DIRECT”.
• Check that “Input Mode” is set to other than “EXT.IN”.
• When headphones are used, MultEQ XT 32, Dynamic EQ and Dynamic Volume cannot be selected.
Dynamic EQ and Dynamic Volume cannot be selected. Or “Run Audyssey Auto Setup” is displayed when DYN EQ/VOL button is pressed.
• Make Audyssey Auto Setup.
RESTORER cannot be selected. Or “Not Available” is displayed when the RESTORER button is pressed.
• Check that an analog signal or PCM signal (fs=44.1/48kHz) is input. For playback of multichannel signals such as Dolby Digital or DTS surround, RESTORER cannot be used.
• Check that “Input Mode” is set to other than “EXT.IN”.
[HDMI]
No audio is output with HDMI connection.
• Check the connection of the HDMI connectors.
• When outputting HDMI audio from the speakers, set “HDMI Audio Out” on the menu to “AMP”.
• When outputting HDMI audio from a TV, set “HDMI Audio Out” on the menu to “TV”.
No video is output with HDMI connection.
• Check the connection of the HDMI connectors.
• Set the input source to match the connected HDMI connector.
• Check whether the TV is compatible with copyright protection (HDCP). If connected to a device not compatible with HDCP, video will not be output correctly.
When the following operations are performed on devices compatible with HDMI control, the same operations occur on this unit.
• Power ON/OFF
• Switching audio output devices
• Adjust volume
• Switch input source
Set “HDMI Control” on the menu to “OFF”. To operate power only for each device, set “Power Off Control” to “OFF”.
[SIRIUS Satellite Radio]
“CHECK SIRIUS TUNER” is displayed.
• The SiriusConnect Home Tuner unit is not connected. Check that the connections are correct
ANTENNA ERROR” is displayed.
• The antenna is not connected. Check that the connections are correct.
”NO SIGNAL” is displayed.
• The antenna is not connected. Check that the connections are correct.
”INVALID CHANNEL” is displayed.
• Channel is not present. Select another channel.
ACQUIRING SIGNAL” is displayed.
• The signal cannot be received. Reposition your SiriusConnect Home Tuner and Home Dock antenna.
• Displays while SiriusConnect Home Tuner is connected. Reposition your SiriusConnect Home Tuner and Home Dock antenna.
”Call SIRIUS”z is displayed.
• Channels are not subscribed to. If you subscribe to the channel, you can receive the channel.
”SUBSCRIPTION UPDATED” is displayed.
• While updating contract information.
”Enter Lock Code [ ]” is displayed.
• Selected channels are locked. Please insert pass word (4 digits) into “[ ]”
*After scroll displays “Call 888-539-....” twice, displays “Call SIRIUS”.
[HD Radio receiver]
Reception fails, or there is a lot of noise or distortion.
• Change the antenna orientation or position.
• Separate the AM loop antenna from the unit.
• Use an FM outdoor antenna.
• Separate the antenna from other connection cables.
[Control dock for iPod]
iPod cannot be played.
• Check the iPod connections.
• Insert the AC adaptor of the iPod control dock into the power outlet.
• Switch the input source to “DOCK”.
[ Internet radio / Media server / iPod / USB memory device / Flickr / Napster / Pandora / Rhapsody ]
When a USB memory device is connected, “USB” is not displayed on the menu.
• The set cannot recognize a USB memory device. Check the connection.
• A USB memory device not conforming to mass storage class or MTP standards is connected. Connect a USB memory device conforming to mass storage class or MTP standards.
• A USB memory device that the set cannot recognize is connected. This is not a malfunction. DENON does not guarantee that all USB memory devices will operate or receive power.
• USB memory device is connected via USB hub. Connect the USB memory device directly to the USB port.
Files on a USB memory device cannot be played.
• USB memory device is in format other than FAT16 or FAT32. Set the format to FAT16 or FAT32. For details, refer to the USB memory device’s operating instructions.
• USB memory device is divided into multiple partitions. When divided into multiple partitions, only files stored in the top partition can be played.
• Files are stored in a non-compatible format. Record the files in a compatible format.
• You are attempting to play a file that is copyright protected. Files that are copyright protected cannot be played on this unit.
The file names are not displayed properly (“...”, etc.).
• Characters that cannot be displayed are used. This is not a malfunction. On this unit, characters that cannot be displayed are replaced with a “.” (period).
Internet radio cannot be played.
• Ethernet cable is not properly connected or network is disconnected. Check the connection status.
• Program is being broadcast in non-compatible format. Only Internet radio programs in MP3 and WMA can be played on this unit.
• The computer’s or router’s firewall is activated. Check the computer’s or router’s firewall settings.
• Radio station is not currently broadcasting. Choose a radio station that is currently broadcasting. • IP address is wrong. Check the set’s IP address.
Files stored on a computer cannot be played.
• Files are stored in a non-compatible format. Record in a compatible format.
• You are attempting to play a file that is copyright protected. Files that are copyright protected cannot be played on this unit.
• Set and computer are connected by USB cable. The set’s USB port cannot be used for connection to a computer.
Server is not found, or it is not possible to connect to the server.
• The computer’s or router’s firewall is activated. Check the computer’s or router’s firewall settings.
• Computer’s power is not turned on. Turn on the power.
• Server is not running. Launch the server.
• Set’s IP address is wrong. Check the set’s IP address
iPod cannot be played.
• Some iPods do not support being used connected directly to the USB port. Cannot connect to preset or favorite radio stations.
• Radio station is not currently broadcasting.
Wait a while before trying again.
• Radio station is not currently in service. It is not possible to connect to radio stations that are no longer in service. For some radio stations, “Radio station server full” or “Connection Down” is displayed and station cannot be connected to.
• Station is congested or not currently broadcasting. Wait a while before trying again.
For some radio stations, “Radio station server full” or “Connection Down” is displayed and station cannot be connected to.
• Station is congested or not currently broadcasting. Wait a while before trying again.
Sound is broken during playback.
• Network’s signal transfer speed is slow or communications lines or radio station is congested. This is not a malfunction. When playing broadcast data with a high bit rate, the sound may be broken, depending on the communications conditions.
Sound quality is poor or played sound is noisy.
• File being played has a low bit rate. This is not a malfunction.
Cannot login to Rhapsody. (“Incorrect Username or Password” is displayed.)
• Login information is incorrect. Check if the Username for Rhapsody has been properly entered. Re-enter the Password. (Password is not displayed.)
Cannot compile Playlist.
• This unit does not respond to playlist compilation. When the playlist is compiled in PC Application, it is registered to “My Library”. In this way, the playlist can be played in this unit
Cannot delete Rhapsody Channel registered in “My Channels”
• Cannot be done with this unit. Delete from PC Application.
Cannot delete Tracks, Playlists, Channels registered in “My Library”
• Cannot be done with this unit. Delete from PC Application.
Cannot login to Napster. (“Incorrect Username or Password” is displayed.)
• Login information is incorrect. Check if the Username for Napster has been properly entered. Re-enter the Password. (Password is not displayed.)
Cannot login to Pandora. (“Email address” or “Password” is displayed.)
• Login information is incorrect. Check if the “Email address” for Pandora has been properly entered. Re-enter the “Password”. (Password is not displayed.)
[Remote Control Unit]
The set cannot be operated with the remote control unit.
• Batteries are worn out. Replace with new batteries.
• Operate the remote control unit within a distance of about 23 ft / 7 m from this unit and at an angle of within 30°.
• Remove any obstacle between this unit and the remote control unit.
• Insert the batteries in the proper direction, checking the + and - marks.
• The set’s remote control sensor is exposed to strong light (direct sunlight, inverter type fluorescent bulb light, etc.). Move the set to a place in which the remote control sensor will not be exposed to strong light.
• Make sure the remote control IDs of the main unit and remote control unit match. If the IDs do not match, “AVAMPz” (z is the main unit’s remote control ID) appears on the display of this unit when the remote control unit is operated.
• The ZONE SELECT setting is not correct. Press ZONE SELECT to select the zone to operate.
• The operation mode does not match the settings of the device to operate. Check the operation mode.
Resetting the microprocessor
Perform this procedure if the display is abnormal or if operations cannot be performed. When the microprocessor is reset, all the settings are reset to their default values.

1 Turn off the power using ON/STANDBY.
2 Press ON/STANDBY while simultaneously pressing STANDARD and DSP SIMULATION.
3 Once the display starts flashing at intervals of about 1 second, release the two buttons.
If in step 3 the display does not flash at intervals of about 1 second, start over from step 1.
If in step 3 the display does not flash at intervals of about 1 second, start over from step 1.