Loading ...

1. INTRODUCTION
1.1 SCOPE
Part of our Expert range, this product is intended for
trade use with the quality & features to meet and exceed
the expectations of the most demanding user. Any
application other than that it was intended for, is
considered misuse.
This product is not a toy and must not be used by
children or any person with reduced physical, sensory or
mental capabilities or lack of experience and knowledge,
or people unfamiliar with these instructions.
Local regulations may restrict the age of the operator.
1.2 UNDERSTANDING THIS MANUALS
SAFETY CONTENT:
IMPORTANT: For detailed and concise instructions on
the correct use of this kit, refer to the vehicle
manufacturer’s manual.
Warning! Do not over pressurize the system, as
excessive pressure may cause failure of the radiator,
hoses etc.
2. UNPACKING AND
CHECKING
2.1 PACKAGING
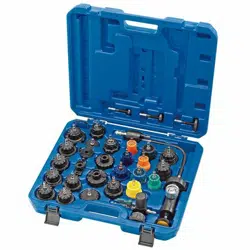
Carefully remove the product from the packaging and
examine it for any sign of damage. Check contents
against the parts shown in Fig A. If any part is damaged
or missing, please contact the Draper Help Line (see
warranty). Do not attempt to use the product!
The packaging material should be retained during the
warranty period, in case the product needs to be
returned for repair.
Warning!
• Some of the packaging materials may be harmful to
children. Do not leave any of these materials in
reach of children.
• If any of the packaging is to be thrown away, make
sure they are disposed of correctly, according to local
regulations.
3. TESTING
3.1 MANUAL PRESSURE TESTING
INSTRUCTIONS - FIG.1
1. Carefully undo and remove the radiator or expansion
tank pressure cap (use a cloth or gloves and arm
protection if the radiator cap is known to be hot).
2. Select the correct adaptor and configuration of the
stationary seat accessories and ensure it is securely
fitted to the filler neck of the radiator or expansion
tank.
3. Attach the quick-coupling connector (1) onto the
male tailpiece of the adaptor fitted to the radiator.
4. Depress the hand pump handle (2) and check the
reading indicated on the pressure gauge (3). Ideal
readings should range between 12-15PSI (always
check relevant manufacturer’s manual), if the
pressure level is below this range or the pressure
drops during testing, a leak in the coolant system
(radiator, hose, etc.) is the most likely source of the
problem.
5. Once the test is complete, release the air pressure
by depressing the quick release valve (4).
Disconnect the quick-coupling connector (1) and
adaptor assembly and replace the radiator filler cap
securely.
1
FIG.
3.2 USING KIT WITH COMPRESSED
AIR LINE
Warning!
Input air pressure must be set to below 25psi on
compressed air line BEFORE connecting to cooling
system. Failure to do so will cause damage to the
system and danger to the user.
- Proceed as in steps 1-4 of manual testing.
- Ensure air tap (5) is in closed position (right angle to
coupling).
- Connect compressed air line to air inlet (6).
- Connect to adaptor using quick-coupling (1).
- Slowly open air tap (5) until air pressure gauge (3)
shows the required test pressure (always check
relevant manufacturer’s manual).
- Once the test is complete, completely close air tap
(5), disconnect compressed air line (6) then
carefully re-open air tap (5) to release stored
pressure and remove from cooling system. Finally,
replace the cap securely.
–
2
–
Loading ...
Loading ...