Loading ...
Loading ...
Loading ...
ICE AND WATER INSTALLATION
IMPORTANT
• Always fit the filter as per manufacturer’s instructions.
• If you need to replace water tube, only use approved water quality piping that meets the pressure requirements.
• Make sure your refrigerator is level to avoid uneven ice cubes.
• Replace filter at suggested intervals to avoid water/ice reduction and irregularities in taste.
• Remove and clean ice bin once a month, discarding unused ice cubes. This will ensure fresh, clean ice and smooth operation of
your ice maker.
• Clean and empty the dispenser drip tray regularly to avoid overflow.
WARNING
Use the appliance with water filter supplied by Electrolux Home Products Pty Ltd or its authorized service agent only.
For correct operation of this appliance it is essential to observe the manufacturer’s instructions
Water filter
The water filter is located at the top left side of the fresh food compartment.
Replacing the water filter
You should change the water filter every six months to ensure the highest possible
water quality.
If your refrigerator has not been used for a period of time (during a house move for
example), change the filter before reinstalling the refrigerator.
It is not necessary to turn the water supply off to change the filter. Be ready to wipe up
any small amounts of water released during the filter replacement.
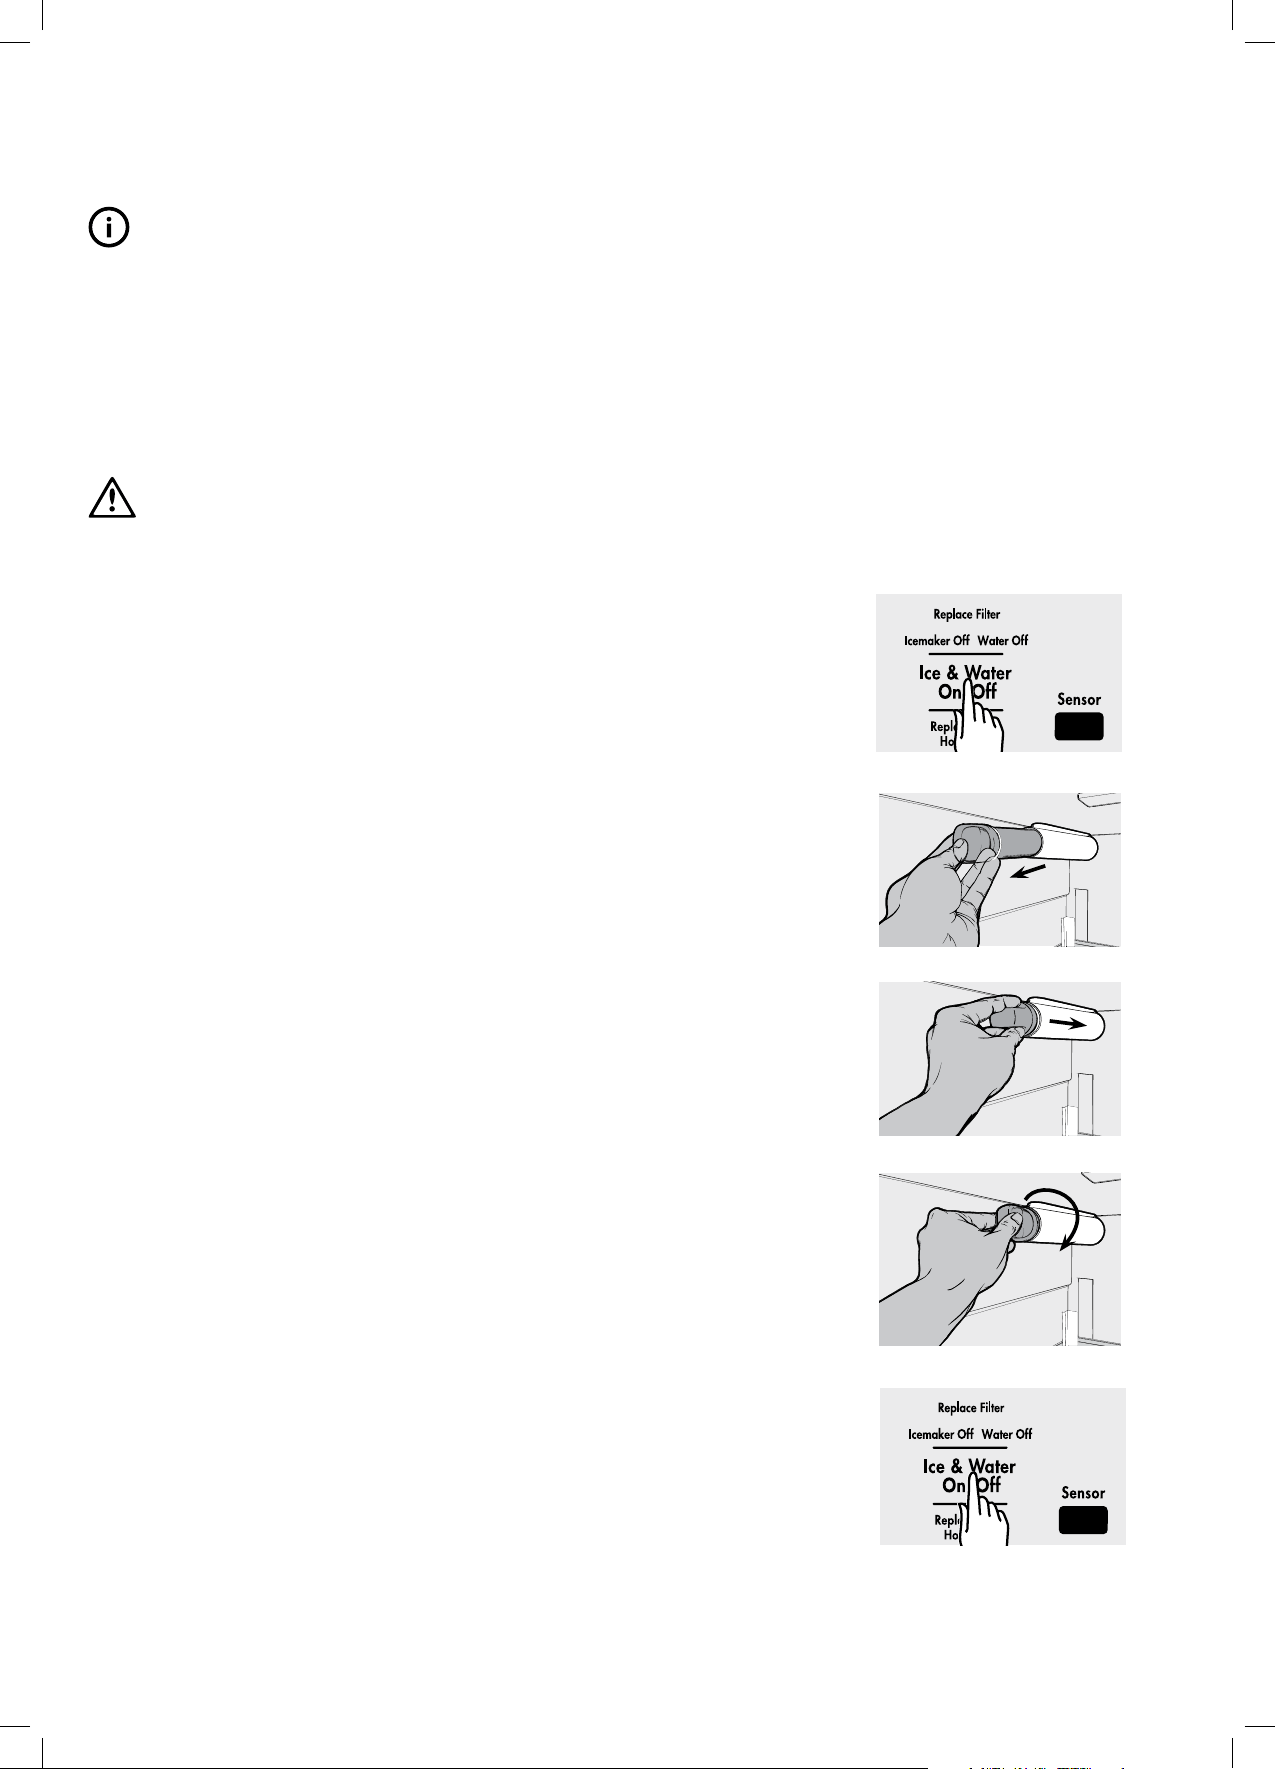
1
.Ensure that the ice maker is turned off (Diagram 1).
2
.Remove the filter by turning anti-clockwise 180˚.
3.Slide the old water filter cartridge straight out of the housing and discard it.
(Diagram 2).
4.Unwrap the new filter cartridge and using the alignment guide, slide it gently into
filter housing until it stops against the filter connection at the back of the housing.
(Diagram 3).
5.Engage the filter by firmly rotating clockwise until the filter snaps into position (once
engaged the filter cannot be rotated further). (Diagram 4).
6.Press a drinking glass against the water dispenser while checking for any leaks at the
filter housing. Any spurts and sputters that occur as the system purges air out of the
dispenser system are normal.
7.After filling one glass of water, continue flushing the system for about four minutes.
8.Turn on the ice maker. (Diagram 5).
9.When the filter has been replaced press and hold the ‘Ice and Water’ button for three
seconds to reset the filter replace timer.
16 INSTALLATION
Diagram 1
Diagram 2
Diagram 3
Diagraammm
4
Diagram 5
Loading ...
Loading ...
Loading ...