Loading ...
Loading ...
Loading ...
WARNINGS!:
The radio control is optional.
Follow the entire procedure described below if purchased.
Place the hood away from sources of electromagnetic waves (e.g. microwave ovens),
which could interfere with the radio control and with the hood electronics.
The maximum operating distance is 5 metres, that may vary according to the pres-
ence of electromagnetic interferences.
Radio control operated at 433.92MHz.
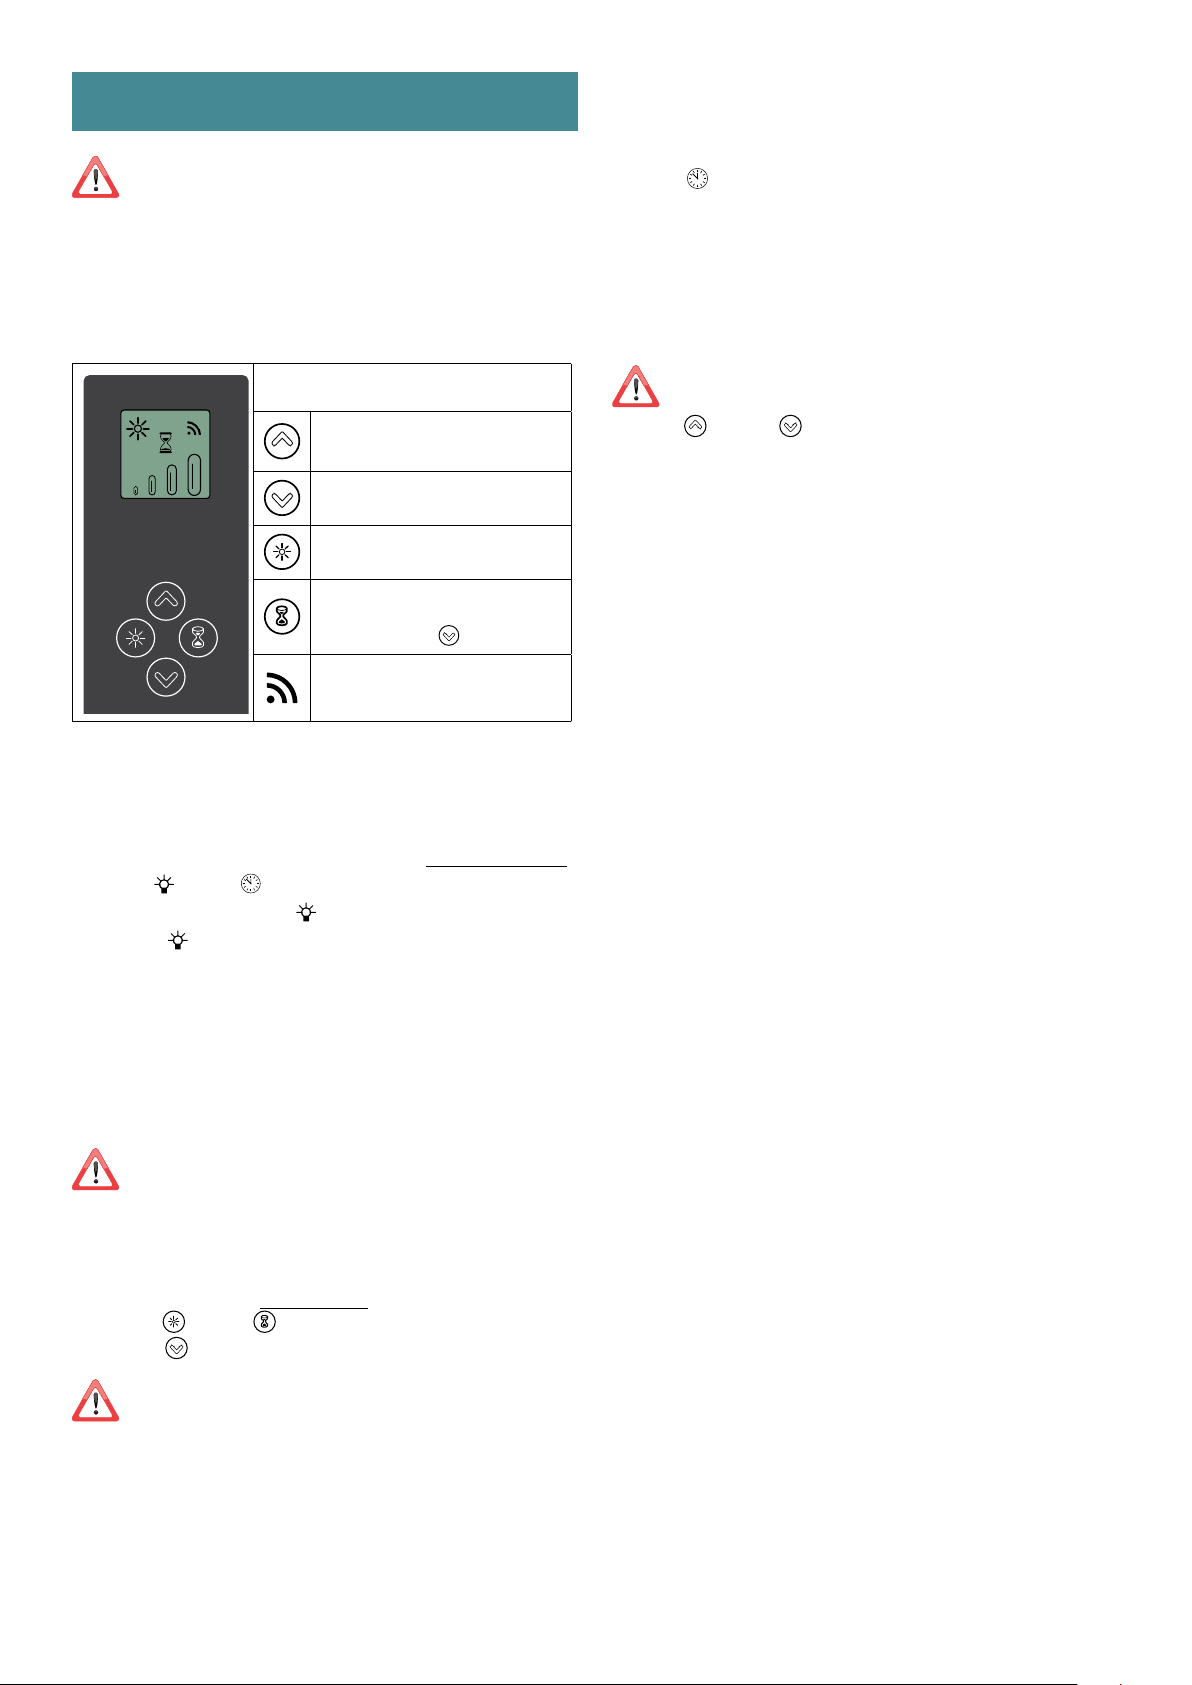
The radio control consists of two parts:
- the receiver built into the hood;
- the transmitter shown here in the figure.
DESCRIPTION OF TRANSMITTING COM-
MANDS
UP
Motor switch-on and speed increase from 1
to 4. Speed 4 is only active for a few minutes.
DOWN
Speed decrease and motor switch-o
Light ONOFF
TIMER ON: The motor automatically
switches o after 15 min.
The function is automatically disabled if the
motor is switched o (
key)
Command transmission active
ACTIVATION PROCEDURE
Before using the radio control, follow the procedure below on the hood pushbutton panel:
• Press LIGHT
and TIMER simultaneously until all LEDs start flashing.
• Release the two keys and press LIGHT again until all LEDs are lit up.
• Release LIGHT : now the receiver is active.
This procedure is also used to deactivate the receiver.
RADIO CONTROL CODE CHANGE
With only one radio control, go directly to point 2.
With several radio controls in the same room, a new code can be created by following the
procedure below.
Disconnect the power to the hood before starting the procedure.
CREATE A NEW CODE
The procedure is to be carried out on the radio control.
• Press LIGHT
and TIMER simultaneously until the display starts flashing.
• Press DOWN
on the radio control: saving is confirmed by three brief flashes of the dis-
play. The new code cancels and replaces the previous default code.
Reconnect the hood to the electrical power supply, making sure that the
lights and motor are o.
PAIRING THE RADIO CONTROL WITH THE HOOD
USING THE ELECTRONIC PUSHBUTTON PANEL
press TIMER
on the hood pushbutton panel for 2 seconds:
the red LED lights up.
press any key on the radio control within 10 seconds.
RESTORING DEFAULT CODE
the procedure is to be carried out if the hood is disposed of, sold or transferred.
Disconnect the power to the hood before starting the procedure.
• Press UP
and DOWN simultaneously on the radio control for more than 5 sec-
onds: reset is confirmed by three brief flashes of the display.
• Reconnect the hood to the electrical power supply.
• Proceed with associating the hood and the radio control, as described in point 2.
USIN THE RADIO CONTROL
Loading ...
Loading ...
Loading ...