Gas SJide-Jn Range - Easy Touch ConttoJ 800
iii¸
Form No. B/06/05
Pat_:No. 8113P521 60
Maintenance .................................................. 22-23
Oven Window & Light
Removal of Gas Appliance
Troubleshooting ............................................ 24-25
Warranty & Service .............................................. 22
Guide d'utiJisation et d'entretien ...................... 28
Gu_a de Use y Cuidado ....................................... 56
@2005 Maytag Appliances Sales Co. Litho U.S.A.
Consumer: Please read and keep th!s guide for future
of purchase,
Model Number
Serial Number
Date of Purchase
1-800-843-0304 USA
1_866-587-.2002canada
(Mon.Wr., 8 am_8 pm Eastern -rime]
!nternet: http:!iwww.aman&com
!n our continuklg effort to improvethe quaHtyand performance
of cuecooking PrOducts,it may benecessaryto make changes
tothe appliance w!thout rev!s!ngth!s guidel
Warning and Important Safety Instructions appearing in
this guide are not meant to cover all possible conditions
and situations that may occur. Common sense, caution,
and care must be exercised when installing, maintaining,
or operating the appliance.
Always contact the manufacturer about problems or
conditions you do not understand.
Recognize Safety Symbols, Words, LabeHs
replace any part of your appliance unless it is specifically
recommended in this guide. All other servicing should be
referred to a qualified servicer, Have the installer show
you the location of the gas shut off valve and how to
shut it off in an emergency,
Always disconnect power to appliance before servicing.
ff the information in this manual is not followed
exactly, a fire or e×plosion may result causing
property damage, personal injury or death.
- Do not store or use gasoline or other
flammabme vapors and liquids ill the vicinity
of this or any appliance°
- IF YOU SMELL GAS:
o Do not try to might any appliance°
- Do not touch any electrical switch.
o Do not use any phone in your building.
- immediately call your gas supplier from a
neighbor's phone. Follow the gas supplier's
instructions.
o If you cannot reach your gas supplier, call
the fire department.
- mnstallation and sewice must be performed by
a quamified installer, service agency or the gas
su pplier,
Gas leaks may occur in your system and resuJt in a
by Sin!!! alone. Gas suppJiers recommend you
install and use in accordance with the manufacturer's
instructions,
WARNnNG - Hazards or unsafe practices which
COULD result in severe personal injury ordeath,
CAUTION - Hazards or unsafe practices which
COULD result in minor personal injury.
Read and follow aH instructions before using this
appmiance to prevent the potential risk of fire, electric
shock, personal injury or damage to the appliance as a
result of improper usage of the appliance. Use appliance
only for its intended purpose as described in this guide.
To ensure proper and safe operation: Appliance
must be propedy installed and grounded by a qualified
technician. Do not attempt to adjust, repair, service, or
Genera instructions
To check if devbe b properly installed, look underneath
range with a flashlight to make sure one of the rear
bveling legs is properly engaged in the bracket slot. The
antPtip devbe secures the rear leveling leg to the floor
when properly engaged. You should check thb anytime
the range has been moved.
Do not use water on grease fires. Use baMng soda, a
dry chembal or foam-type exdngubher to smother fire
or flame.
Child Safety
To Prevent Fire or
Smoke Damage
Be sure all packing materials are removed from the
appliance before operating it.
Keep area around appliance clear and free from
combustibb materiab, gasoline, and other flammable
vapors and materiab.
If appliance is instalbd near a window, proper
precautions should be taken to prevent curtains from
blowing over burners.
NEVER leave any items on the cooktop. The hot air from
the vent may ignite flammabb items and may increase
pressure in dosed containers which may cause them to
burst.
Many aerosol-type spray cans are EXPLOSIVE when
exposed to heat and may be highly fiammabb. Avoid
their use or storage near an appliance.
Many plastics are vulnerabb to heat. Keep plastics away
from parts of the appliance that may become warm or
hot. Do not leave plastic items on the cooktop as they
may melt or soften if left too close to the vent or a
lighted surface burner.
To eliminate the hazard of reaching over hot surface
burners, cabinet storage should not be provided directly
above a unit. If storage is provided, it should be limited
to items which are used infrequently and which are
safely stored in an area subjected to heat from an
appliance. Temperatures may be unsafe for some items,
such as volatile liquids, cleaners or aerosol sprays.
In Case of Fire
Turn off appliance and ventilating hood to avoid
spreading the flame. Extinguish flame then turn on
hood to remove smoke and odor.
Cooktop: Smother fire or flame in a pan with a lid or
cookie sheet.
NEVER pick up or move a flaming pan.
Oven: Smother fire or flame by closing the oven door.
NEVER store items of interest to children in cabinets
above an appliance Or`on backguard 0f a range.
items could be seriously injured.
NEVER leave children alone or unsupervised near the
appliance when it is in use or is still hot.
NEVER allow children to sit or stand on any part of the
appliance as they could be injured or burned.
Children must be taught that the appliance and utensils
in it can be hot. Let hot utensils cool in a safe place, out
of reach of small children. Children should be taught
that an appliance is not a toy. Children should not be
allowed to play with controls or other parts of the unit.
About Your Appliance
2
NEVER use appliance door as a step stool or seat as this
may result in possibbtipping of the appliance and serious
injuries.
NEVER use this appliance as a space heater to heat
or warm a room. Doing so may result in carbon
monoxide poisoning and overheating of the oven.
NEVER cover any slots, holes or passages in the oven
bottom or cover the entire rack with materials such as
aluminum foil. Doing so blocks air flow through the
oven and may cause carbon monoxide poisoning.
Aluminum toil may also trap heat causing a tire
hazard.
NEVER obstruct the flow of combustion and ventilation
air by blocking the oven vent or' air intakes. Doing so
restricts air to the burners and may result in carbon
monoxide poisomng.
The oven vent is located at the rear of the cooking
surface.
Avoid touching oven vent area while oven is on and for
several minutes after oven is turned off. Some parts of
theventandsurroundingareabecomehotenoughto
causeburns.Afterovenisturnedoff,do nottouchthe
ovenventorsurroundingareasuntiltheyhavehad
sufficienttimeto cool.
Otherpotentiallyhotsurfacesincludecooktop,areas
facingthecooktop,ovenvent,surfacenearthevent
opening,ovendoor,areaaroundtheovendoorand
ovenwindow.
Do not touch a hot oven light bulb with a damp cloth as
the bulb could break. Should the bulb break, disconnect
power to the appliance before removing bulb to avoid
ebctrbal shock.
Do not use the cooktop or oven as a storage area for food
or cooking utensils.
Cooking Safety
Always place a pan on a surface burner before turning it
on. Be sure you know which knob controls which
surface burner. Make sure the correct burner is turned
on and that the burner has ignited. When cooking is
completed, turn burner off before removing pan to
prevent exposure to burner flame.
Always adjust surface burner flame so that it does
not extend beyond the bottom edge of the pan. An
excessive flame is hazardous, wastes energy and may
damage the appliance, pan or cabinets above the
appliance.
NEVER leave a surface cooking operation unattended
especially when using a high heat setting or when deep
fat frying. Boilovers cause smoking and greasy spillovers
may ignite. Clean up greasy spills as soon as possible.
Do not use high heat for extended cooking operations.
NEVER heat an unopened container on the surface
burner or in the oven. Pressure build-up may cause
container to burst resulting in serious personal injury or
damage to the appliance.
Use dry, sturdy potholders. Damp potholders may cause
burns from steam. Dish towels or other substitutes
should never be used as potholders because they can
trail across hot surface burners and ignite or get caught
on appliance parts.
Always let quantities of hot fat used for deep fat frying
coo[ before attempting to move or handle.
Do not let cooking grease or other flammable materials
accumulate in or near the appliance, hood or vent fan.
Clean hood frequently to prevent grease from accumulat-
ing on hood or filter. When flaming foods under the hood
turn the fan on.
NEVER wear garments made of fiammabb material or
loose fitting or Iong-sbeved apparel while cooking.
Clothing may ignite or catch utensil handles.
Always place oven racks in the desired positions while
oven is cool. Slide oven rack out to add or remove food,
using dry, sturdy potholders. Always avoid reaching into
the oven to add or remove food. If a rack must be moved
while hot, use a dry }otholder. Always turn the oven off at
the end of cooking.
Use care when opening the oven door. Let hot air or
steam escape before moving or replacing food.
PREPARED FOOD WARNUNG: Follow food
manufacturer's instructions. If a plastic frozen food
container and!or its cover distorts, warps, or is otherwise
damaged during cooking, immediately discard the food
and its container. The food could be contaminated.
NEVER use aluminum foil to cover oven racks or oven
bottom. This could result in risk of electric shock, fire, or
damage to the appliance. Use foil only as directed in this
guide.
3
Utensim Safety
Use pans with flat bottoms and handles that are easily
grasped and stay cool. Avoid using unstable, warped,
easily tipped or loose-handled pans. Also avoid using
pans, especially small pans, with heavy handles as they
could be unstable and easily tip. Pans that are heavy to
move when filled with food may also be hazardous.
Be sure utensil is large enough to properly contain food
and avoid boilovers. Pan size is particularly important in
deep fat frying. Be sure pan will accommodate the volume
of food that is to be added as well as the bubble action of
fat.
To minimize burns, ignition of fiammabb materials and
spillage due to unintentional contact with the utensil, do
not extend handles over adjacent surface burners. Always
turn pan handles toward the side or back of the appliance,
not out into the room where they are easily hit or reached
by small children.
Never let a pan boil dry as this could damage the utensil
and the appliance.
Follow the manufacturer's directions when using oven
cooking bags.
Onlycertaintypesof glass,glass/ceramic,ceramicor
glazedutensilsaresuitableforcooktoporovenusage
withoutbreakingdueto the suddenchangein
temperature.Followmanufacturer'sinstructionswhen
usingglass.
Thisappliancehasbeentestedforsafeperformance
usingconventionalcookware.Donot useanydevicesor
accessoriesthatarenotspecificallyrecommendedin
this guide.Donotuseeyelidcoversforthesurface
units,stovetopgrills,or add-onovenconvection
systems.Theuseof devicesor accessoriesthatarenot
expresslyrecommendedin thismanualcancreate
serioussafetyhazards,resultin performanceproblems,
andreducethelife ofthe componentsofthe appliance.
Cmeaning Safety
Turn off all controls and wait for appliance parts to cool
before touching or cleaning them. Do not touch the
burner grates or surrounding areas until they have had
sufficient time to cool.
Clean appliance with caution. Use care to avoid steam
burns if a wet sponge or cloth is used to wipe spills on a
hot surface. Some cleaners can produce noxious fumes
if applied to a hot surface.
Se f-C ean Oven
Do not leave food or Cooking utensils, etc. in the oven
It is normal for the cooktop of the range to become hot
during a self-clean cycle. Therefore, touching the
cooktop during a clean cycle should be avoided.
important Safety Notice
and Warning
The California Safe Drinking Water and Toxic
Enforcement Act of 1986 (Proposition 65} requires the
Governor of California to publish a list of substances
known to the State of California to cause cancer or
reproductive harm, and requires businesses to warn
customers of potential exposures to such substances.
Users of this appliance are hereby warned that the
burning of gas can result in low-level exposure to
some of the listed substances, including benzene,
formaldehyde and soot, due primarily to the incomplete
combustion of natural gas or liquid petroleum (LP} fuels.
Properly adjusted burners will minimize incomplete
combustion. Exposure to these substances can also be
minimized by properly venting the burners to the
outdoors.
Users of this appliance are hereby warned that when
the oven is engaged in the self-clean cycle, there may
be some low-level exposure to some of the listed
substances, including carbon monoxide. Exposure to
these substances can be minimized by properly venting
the oven to the outdoors by opening the windows and/
or door in the room where the appliance is located
during the self-clean cycle.
UMPORTANT NOTUCE REGARDUNG PET BURDS:
during the self-clean cycle. Never keep pet birds in the kitchen or in rooms where
the fumes from the kitchen could reach. Birds have a
Clean only parts listed in this guide. Do not clean door
gaskeL The door gasket is essential for a good seal
Care should be taken not to rub, damage, or move the
gaskeL Do not use oven cleaners of any kind in or
around any part of the self-clean oven.
Before self-cleaning the oven, remove broiler pan, oven
racks and other utensils and wipe up excessive
spillovers to prevent excessive smoke, flare-ups or
flaming.
very sensitive respiratory system. Fumes released during
an oven self-cleaning cycle may be harmful or fatal to
birds. Fumes released due to overheated cooking oil, fat,
margarine and overheated non-stick cookware may be
equally harmful.
Save These instructions for Future Reference
4
@
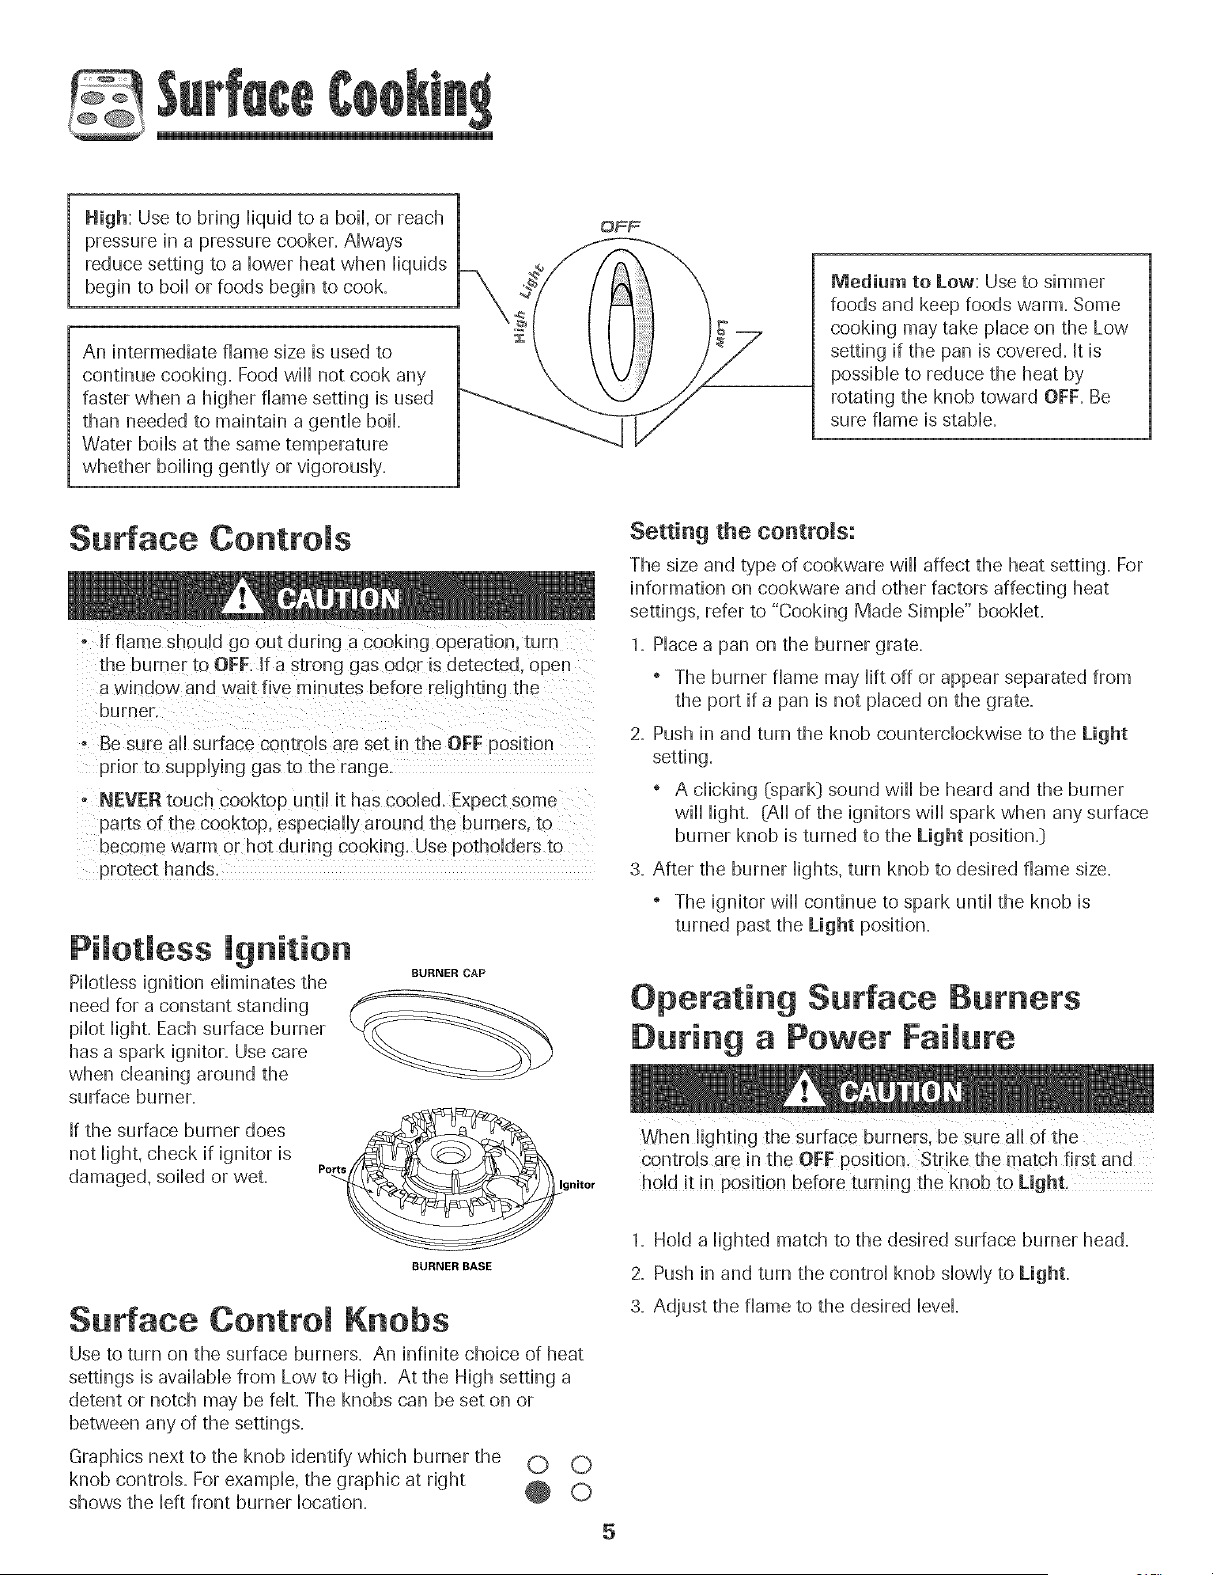
High: Use to bring liquid to a boil, or reach
pressure in a pressure cooker. Always
reduce setting to a lower heat when liquids
begin to boil or foods begin to cook.
An intermediate flame size is used to
continue cooking. Food will not cook any
faster when a higher flame setting is used
than needed to maintain a gentle boil.
Water boils at the same temperature
whether boiling gently or vigorously.
Medium to Low: Use to simmer
foods and keep foods warm. Some
cooking may take place on the Low
setting if the pan is covered. It is
possible to reduce the heat by
rotating the knob toward OFF. Be
sure flame is stable.
Surface Controls
° +fflame should go out during a cooking operation, turn
the burner to OFF, If a strong gas odor is detected, open
a window and wait five minutes before reiighting the
burner
o Be s_re all surface controls are set in the OFF position
prior to supplying gas to the range.
- NEVERtouch cooktop until it has cooled, Expect some
parts of the cooktop, especiaii} around the burners, to
become warm or hot during cooking. Use potholders to
Pilotless ignition
Pilotless ignition eliminates the
need for a constant standing
pilot light. Each surface burner
has a spark ignitor. Use care
when cleaning around the
surface burner.
If the surface burner does
not light, check if ignitor is
damaged, soiled or wet.
BURNER CAP
Ports
gnitor
BURNER BASE
Surface Control Knobs
Use to turn on the surface burners+ An infinite choice of heat
settings is available from Low to High+ At the High setting a
detent or notch may be felt+The knobs can be set on or
between any of the settings=
Graphics next to the knob identify which burner the
knob controls. For example, the graphic at right
shows the left front burner location. _ O
5
Setting the controls:
The size and type of cookware will affect the heat setting. For
information on cookware and other factors affecting heat
settings, refer to "Cooking Made Simple" booklet.
1. Place a pan on the burner grate.
o The burner flame may lift off or appear separated from
the port if a pan is not placed on the grate.
2. Push in and turn the knob counterclockwise to the Light
setting.
o A clicking (spark_)sound will be heard and tile burner
will light+ (All of the ignitors will spark when any surface
burner knob is turned to the Light positionY
3. After the burner lights, turn knob to desired flame size+
+ The ignitor will continue to spark until the knob is
turned past the Light position+
Operating Surface Burners
During a Power Failure
hold it in position before turning the knob to Light,
1. Hold a lighted match to the desired surface burner head.
2. Push in and turn the control knob slowly to Light.
3. Adjust the flame to the desired level.
@
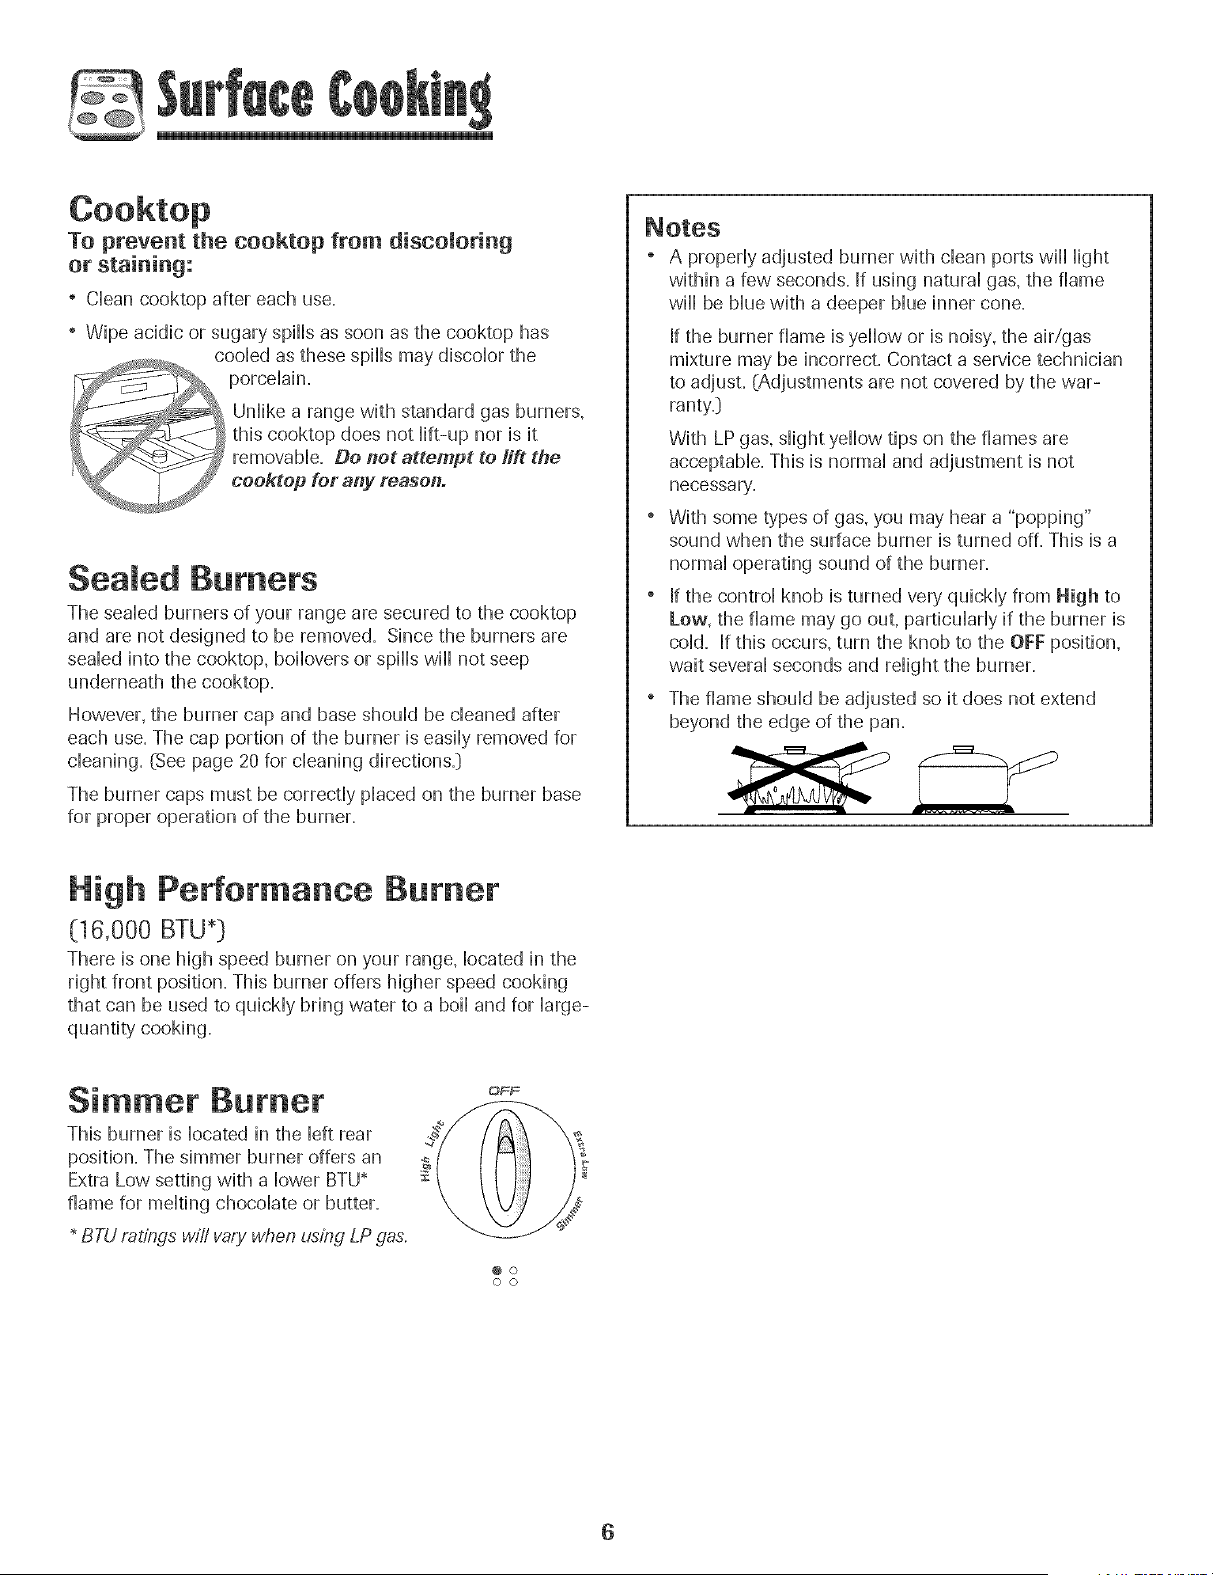
To prevent the cooktop from discoloring
or staining:
Cban cooktop after each use•
Wipe acidic or sugary spills as soon as the cooktop has
• coobd as these spills may discobr the
__ porcelain.
_ Unlike a range with standard gas burners,
this cooktop does not lift-up nor is it
removable. De net attempt te liff the
cooktop for any feasoi_.
Sea ed Burners
The sealed burners of your range are secured to the cooktop
and are not designed to be removed• Since the burners are
sealed into the cooktop, boilovers or spills will not seep
underneath the cooktop•
However, the burner cap and base should be cleaned after
each use• The cap portion of the burner is easily removed for
cleaning• (See page 20 for cleaning directions•}
The burner caps must be correctly placed on the burner base
for proper operation of the burner•
A properly adjusted burner with clean ports wiii light
within a few seconds. If using natural gas, the flame
wiii be blue with a deeper blue inner cone.
If the burner flame is yellow or is noisy, the air/gas
mixture may be incorrect. Contact a service technician
to adjust. (Adjustments are not covered by the war-
ranty.}
With LPgas, slight yellow tips on the flames are
acceptable• This is normal and adjustment is not
necessary.
" With some types of gas, you may hear a "popping"
sound when the surface burner is turned off• This is a
normal operating sound of the burner.
" If the control knob is turned very quickly from High to
Low, the flame may go out, particularly if the burner is
cold• If this occurs, turn the knob to the OFF position,
wait several seconds and relight the burner.
" The flame should be adjusted so it does not extend
beyond the edge of the pan•
High PeMormance Burner
(16,000 BTU
There is one high speed burner on your range, located in the
right front position• This burner offers higher speed cooking
that can be used to quickly bring water to a boil and for large-
quantity cooking•
Simmer Burner
This burner is located in the left rear
position• The simmer burner offers an
Extra Low setting with a lower BTU*
flame for melting chocolate or butter•
BTU ratings will vary when using LPgas.
OFF
@ o
o o
6
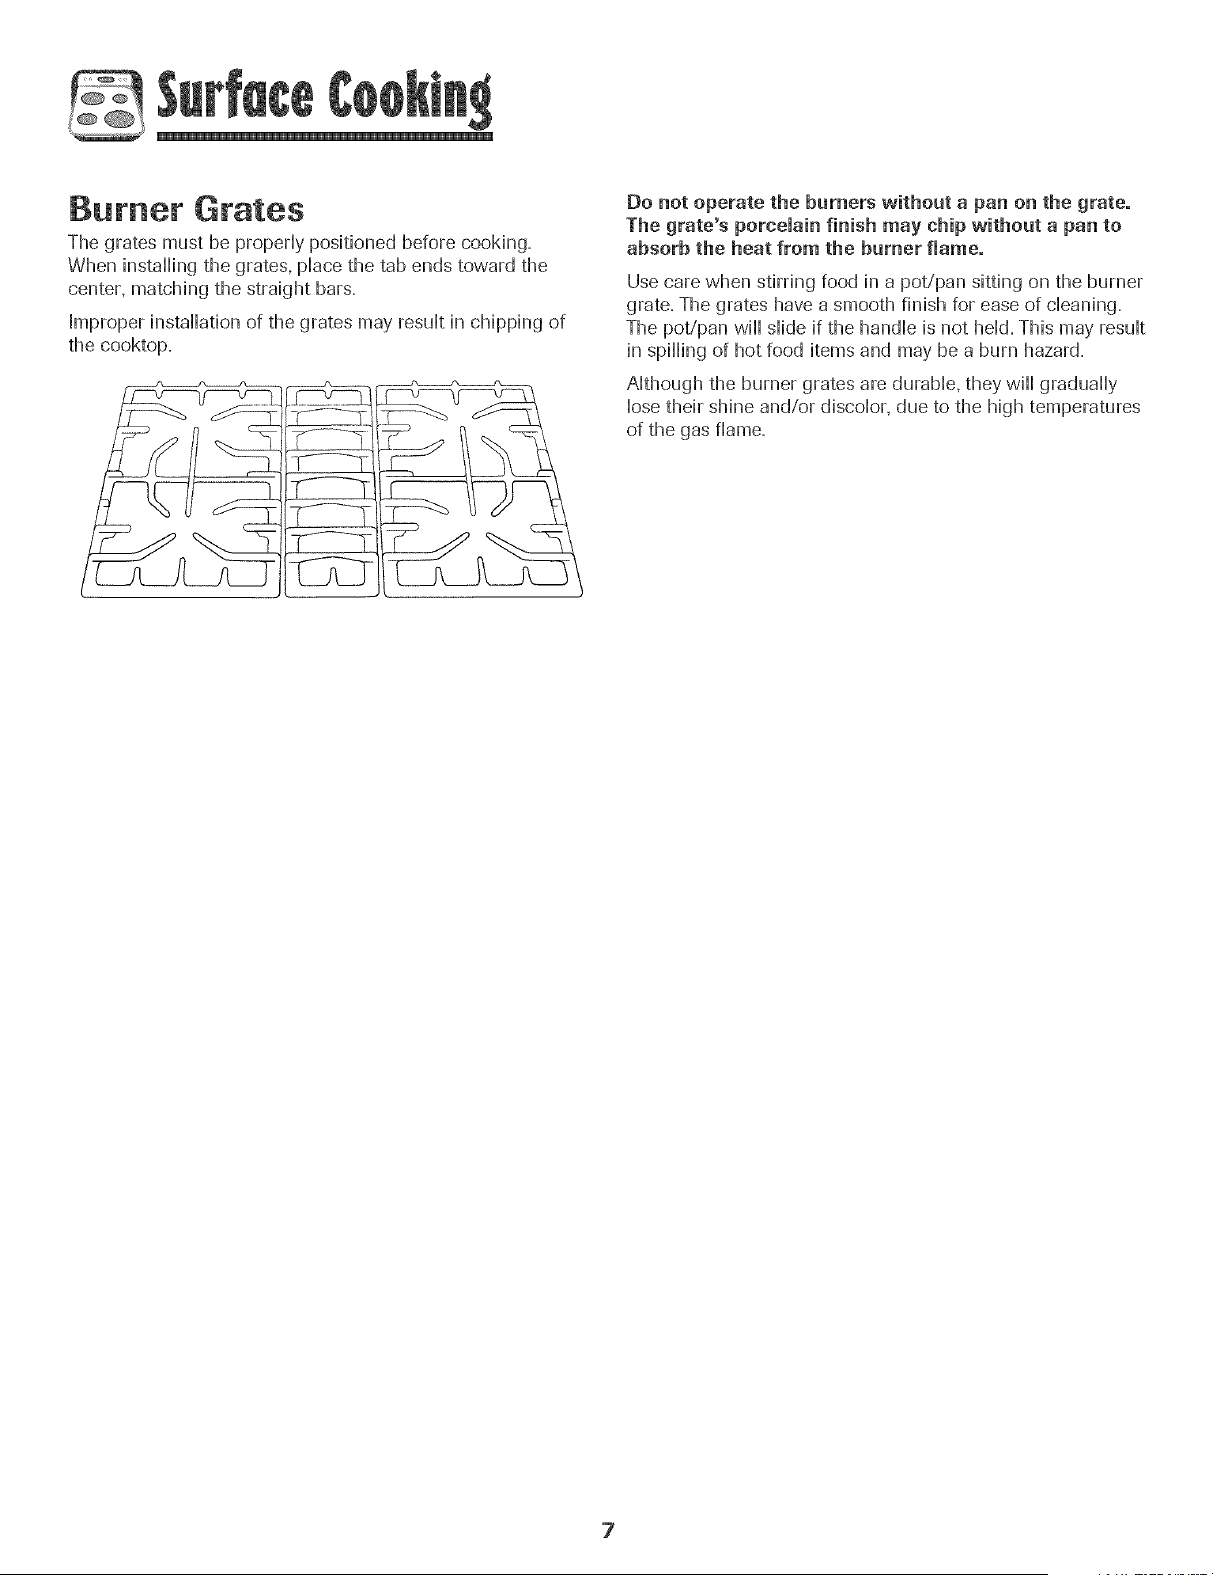
Burner Grates
The grates must be propedy positioned before cooking,
When installing the grates, pHacethe tab ends toward the
center, matching the straight bars,
Improper installation of the grates may resuHtin chipping of
the cooktop,
Do not operate the burners without a pan on the grate.
The grate's porcelain finish may chip without a pan to
absorb the heat from the burner flame.
Use care when stirring food in a pot/pan sitting on the burner
grate, The grates have a smooth finish for ease of cHeaning,
The pot/pan will sHideif the handHeis not heHd,This may resuHt
in spilling of hot food items and may be a burn hazard,
Although the burner grates are durable, they will gradually
lose their shine and/or discolor, due to the high temperatures
of the gas flame,
7
Control Panel
\
\
\
\
\
A
Cook& Keep
Hold Warm
\\\\\ ...........
E F G H
.........f....................
I 2 i ,4 55 _ Timer
6 :7 9 C} A._
r
K L M N
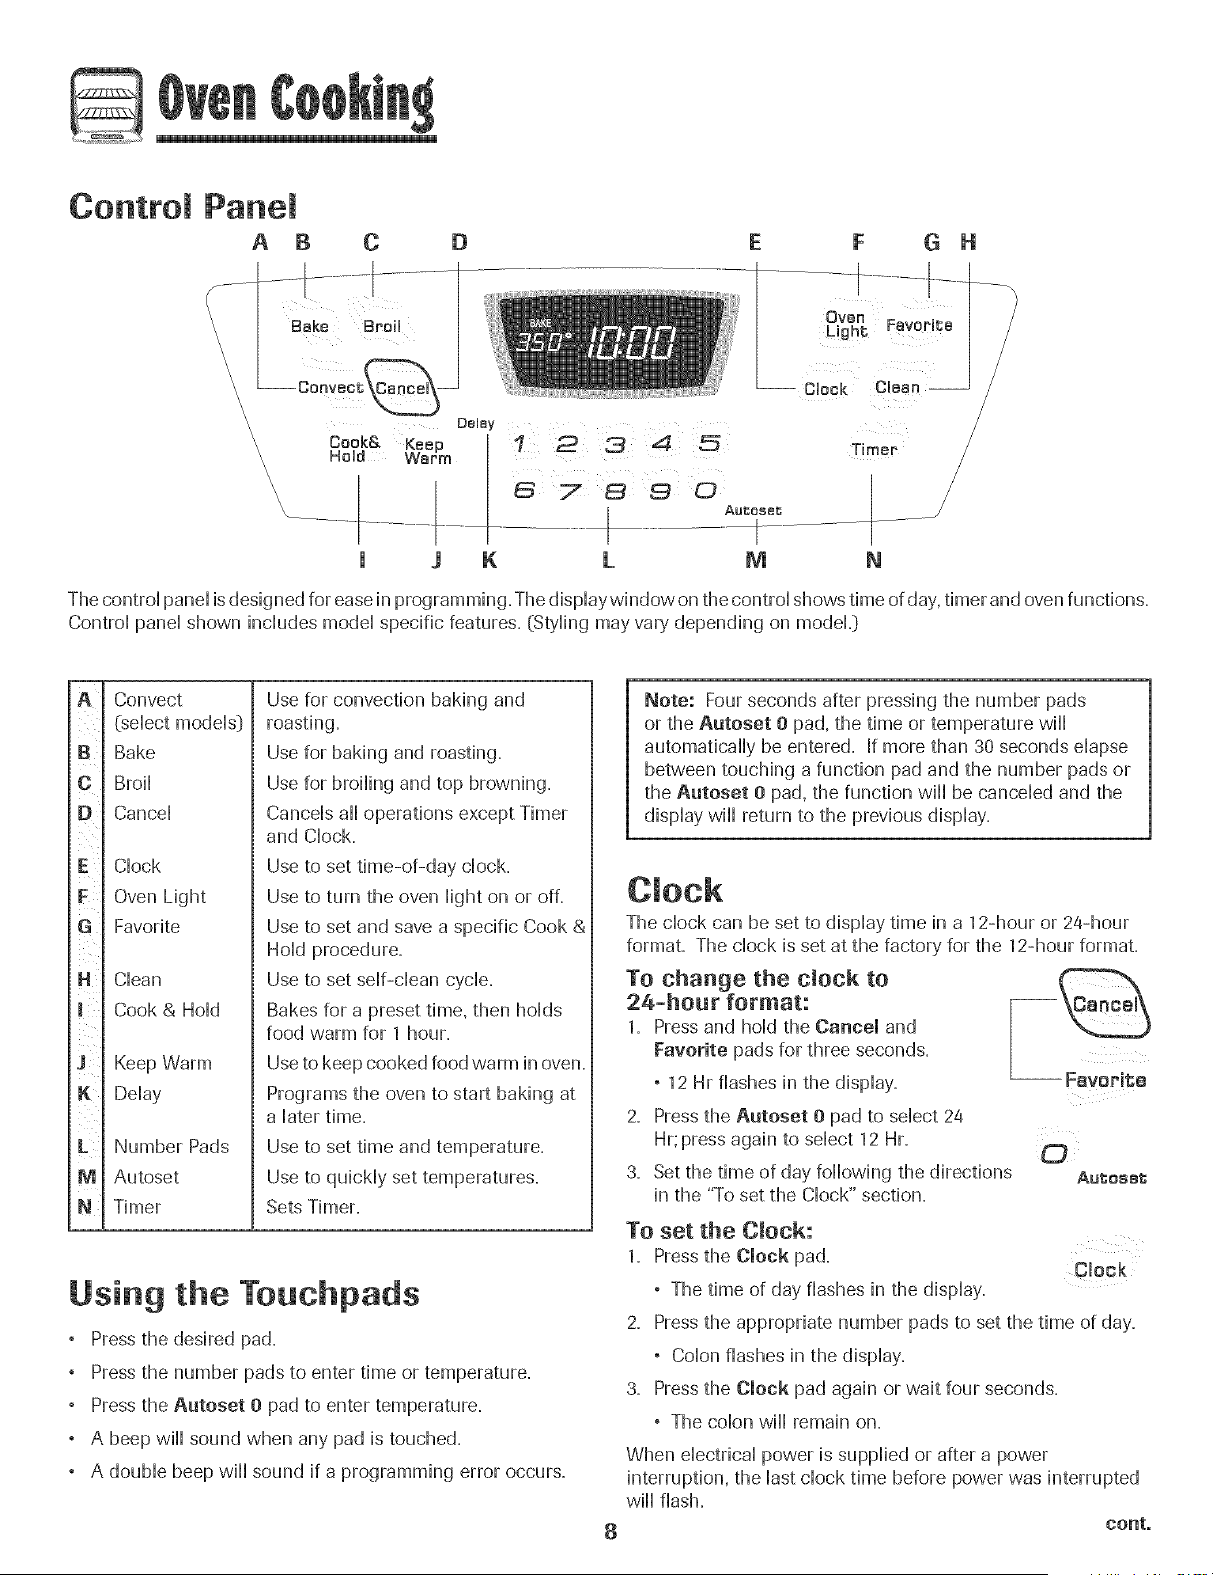
The controi pand is designed for ease in programming. The dispiaywindow on the controi shows time of day. timer and oven functions.
Controi pand shown inciudes modal specific features. (Styiing may vary depending on model{)
A
B
D
E
F
J
L
M
N
Convect
(select models}
Bake
Broil
Cancel
Clock
Oven Light
Favorite
Clean
Cook & Hold
Keep Warm
Delay
Number Pads
Autoset
Timer
Use for convection baking and
roasting.
Use for baking and roasting.
Use for broiling and top browning.
Cancels all operations except Timer
and Clock.
Use to set time-of-day clock.
Use to turn the oven light on or off.
Use to set and save a specific Cook &
Hold procedure.
Use to set self-dean cycle.
Bakes for a preset time. then holds
food warm for 1 hour.
Use to keep cooked food warm in oven.
Programs the oven to start baking at
a later time.
Use to set time and temperature.
Use to quickly set temperatures.
Sets Timer.
Using the Touchpads
Pressthe desired pad.
Pressthe number pads to enter time or temperature.
Pressthe Autoset 0 pad to enter temperature.
, A beep will sound when any pad is touched.
, A double beep will sound if a programming error occurs.
Note: Four seconds after pressing the number pads
or the Autoset Opad. the time or temperature will
automatically be entered. If more than 30 seconds elapse
between touching a function pad and the number pads or
the Autoset 0 pad. the function will be canceled and the
display will return to the previous display.
The clock can be set to display time in a 12-hour or 24-hour
format. The clock is set at the factory for the 12-hour format.
To change the clock to
24-hour format:
1. Pressand hold the Cancel and
Favorite pads for three seconds=
, 12 Hr flashes in the display= --FavoN1ce
2. Press the Autoset 0 pad to select 24
Hr;press again to select 12 Hr. (_
3. Set the time of day following the directions Au1:ossl;
in the "To set the Clock" section.
To set the Clock:
1. Pressthe Clock pad. Clock
, The time of day flashes in the display.
2. Press the appropriate number pads to set the time of day.
, Colon flashes in the display.
3. Press the Clock pad again or wait four seconds.
° The colon wiii remain on.
When electrical power is supplied or after a power
interruption, the last clock time before power was interrupted
wiii flash.
conto
©
To recaHHthe time of day when another time function is
showing, press the Clock pad.
CHocktime cannot be changed when the oven has been
programmed for DeHayCook or CHean,or Cook & HoHd.
To cancem the Clock dispmay:
If you do not want the time of day to dispHay:
Press and hoHdthe Cancel and Clock
pads for three seconds. The time of day
will disappear from the dispHay.
When the dock dispHayis cancded, press
the Clock pad to briefly display the time -- Clock
of day.
When the chock display is canceled, after 15 minutes, the oven
control wiil go into Standby Mode to saveenergy. The dispiaywiil
be blank and the oven Hightwiil not operate. To "wake up" the
control from Standby Mode, press any touchpad. A double beep
wiii sound.
To restore the Clock display:
Press and hoHdthe Cancel and Clock pads for three sec-
onds. The time of day will reappear in the dispHay.
The timer can be set from one minute (0:01:)up to 99 hours
and 59 minutes (99:59).
The timer can be used independentHy of any other oven
activity. It can aHsobe set whiHeanother oven function is
operating.
The timer does not control the oven. It only controls a beeper.
TO set the Timer:
1. Press the Timer pad. Timer
, 0:00 and TIMER flash in the display.
2. Press the appropriate number pads until the correct time
appears in the display.
, The colon and TIMER will continue to flash.
3. Press Timer pad again or wait four seconds.
° The colon stops flashing and the time begins counting
down.
° The last minute of the timer countdown will be displayed
in seconds.
4. At the end of the set time, one long beep will sound and
"End" will be displayed.
5. Press the Timer pad to clear the display.
To cancel the Timer:
1. Pressand hold the Timer pad for three
seconds. Timer
OR
2. Press the Timer pad and press '0' using the C_
number pads.
Locking the Control
and Oven Beer
The touchpad and oven door can be locked for safety,
cleaning, or to prevent unwanted use. The touchpads will not
function when locked.
If the oven is currently in use, the touchpads and door cannot
be locked.
The current time of day will remain in the display when the
touchpads and door are locked.
To mock:
Press and hold the Cancel and Cook &
Hold pads for three seconds. (Press the
Cancel pad first.)
, OFF appears in the display
, LOCK flashes while the door
is locking.
To unlock:
Press and hold the Cancel and Cook & Hold pads for three
seconds. (Press the Cancel pad first.) OFF disappears from
the display.
Cook&
Hold
Note: The touchpads and oven door cannot be locked if
the oven temperature is 400° F or above.
Faumt Codes
BAKE or LOCK may flash rapidly in the display to alert you if
there is an error or a problem. If BAKE or LOCK flash in the
display, press Cancel pad. If BAKE or LOCK continue to
flash, disconnect power to the appliance. Wait a few minutes,
and then reconnect power. If the flashing still continues,
disconnect power to the appliance and call an authorized
servicer.
9
G
To set Bake: Bak+
1+ Press the Bake pad+
, BAKE will flash+
° 000 will flash in the dispHay+
2+ SeHectthe oven temperature+ Press
3=
{::9¸
the Autoset 0 pad for 350° F or the
Autoset;
appropriate number pads.
° Each addWonaHpress of the Aatoset 0 pad will increase
the temperature by 25 degrees.
° The oven temperature can be set from 170° to 550°+
Press Bake pad again or wait four seconds.
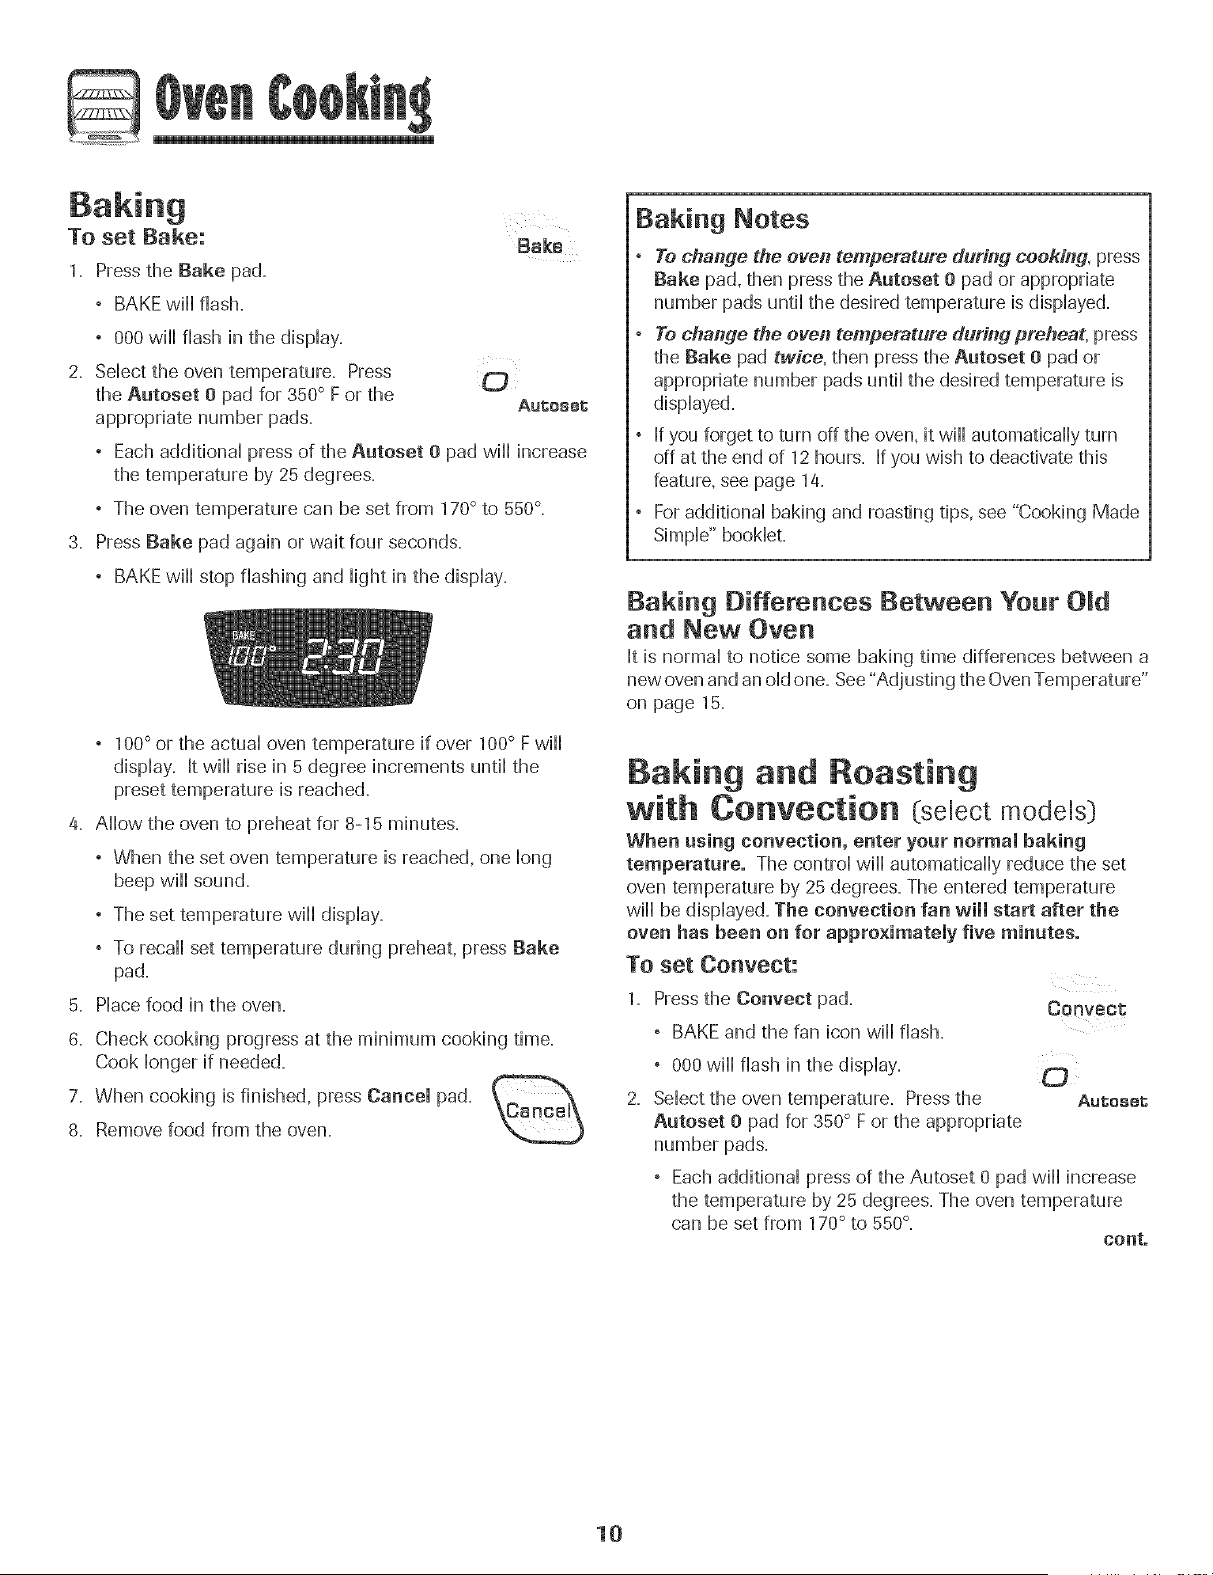
° BAKEwill stop flashing and Hightin the dispHay+
° 100° or the actuaHoven temperature if over 100° F will
dispHay. It will rise in 5 degree increments untiHthe
preset temperature is reached.
4. Allow the oven to preheat for 8-15 minutes.
° When the set oven temperature is reached, one long
beep will sound.
° The set temperature will display.
° To recall set temperature during preheat, press Bake
pad.
5. Place food in the oven.
G. Check cooking progress at the minimum cooking time.
Cook longer if needed.
7, When cooking is finished, press Cancel pad. tP.=n_._
:2L:D
8. Remove food from the oven.
Bak+ng Notes
, To change the even temperatnre dnfing cooking+ press
Bake pad, then press the Autoset 0 pad or appropriate
number pads until the desired temperature is displayed.
, To change the oven temperatnre during preheaL press
the Bake pad twice, then press the Autoset 0 pad or
appropriate number pads until the desired temperature is
displayed.
, If you forget to turn off the oven, it will automatically turn
off at the end of 12 hours. If you wish to deactivate this
feature, see page 14.
° For additional baking and roasting tips+see "Cooking Made
Simple" booklet.
Bak+ng Differences Between Your
and New Oven
It is normal to notice some baking time differences between a
new oven and an old one+See"Adjusting the OvenTemperature"
on page 15+
Baking and Roasting
with Convection (select models)
When using convection, enter your normal baking
temperature° The control will automatically reduce the set
oven temperature by 25 degrees. The entered temperature
will be displayed. The convection fan will start after the
oven has been on for approximately five minutes.
To set Conveet:
1, Pressthe Convect pad.
° BAKE and the fan icon will flash.
° 000 will flash in the display.
2. Select the oven temperature. Press the
Autoset 0 pad for 350° F or the appropriate
number pads.
+
Convect
Each additional press of the Autoset 0 pad wi[[ increase
the temperature by 25 degrees. The oven temperature
can be set from 170° to 550°.
conto
10
©
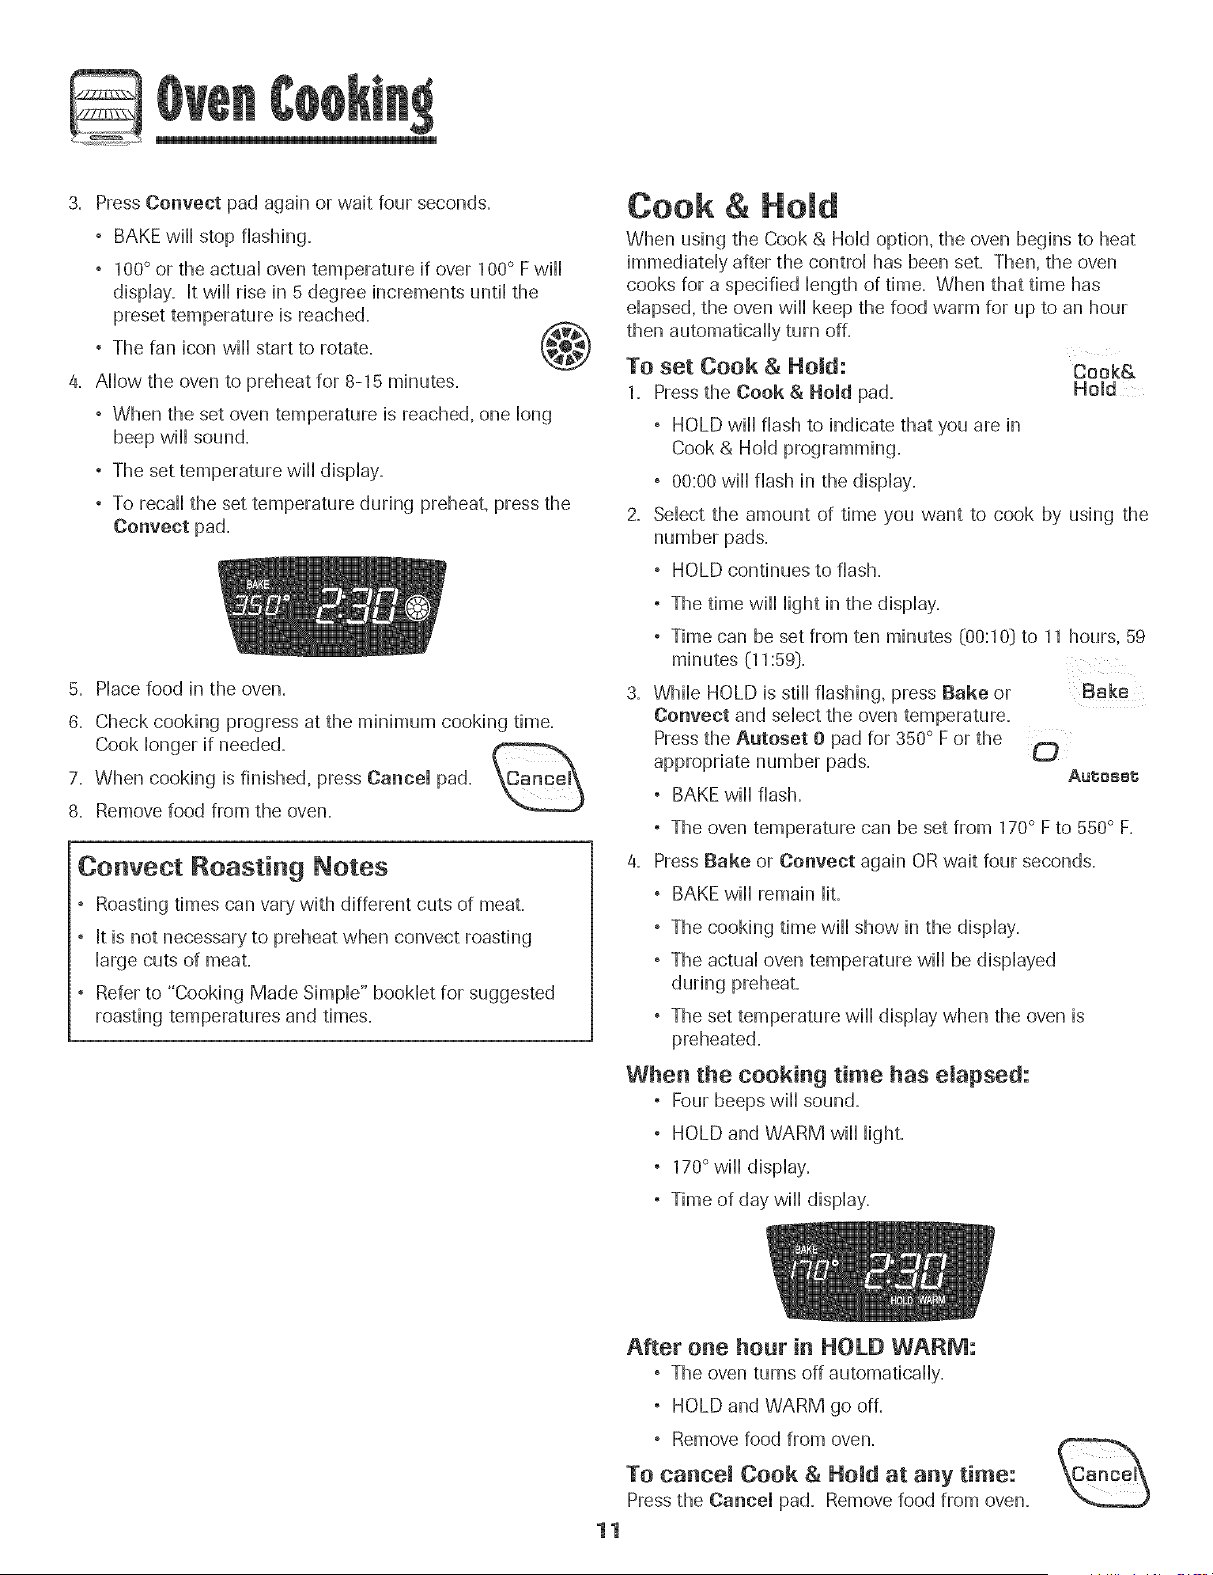
3. Press Convect pad again or wait four seconds.
° BAKEwill stop flashing.
, 100° or the actua] oven temperature if over 100° Fwill
dispHay. It will rise in 5 degree increments unti] the
preset temperature is reached.
, The fan icon will start to rotate. C_:_)
4. AHow the oven to preheat for 8-15 minutes.
, When the set oven temperature is reached, one ]ong
beep will sound.
, The set temperature will dispHay.
, To recall the set temperature during preheat, press the
Convect pad.
5. PHacefood in the oven.
6. Check cooking progress at the minimum cooking time.
Cook [onger if needed.
7. When cooking is finished, press Cancel pad.
8. Remove food from the oven.
Convect Roasting Notes
° Roasting times can vary with different cuts of meat.
, It is not necessary to preheat when convect roasting
large cuts of meat.
° Refer to "Cooking Made Simple" booklet for suggested
roasting temperatures and times.
Cook & Hold
When using the Cook & Hold option, the oven begins to heat
immediately after the control has been set. Then, the oven
cooks for a specified length of time. When that time has
elapsed, the oven will keep the food warm for up to an hour
then automatically turn off.
TO set Cook & Hold: Cook&
1. Pressthe Cook & Hold pad. Hold
° HOLD will flash to indicate that you are in
Cook & Hold programming.
° 00:00 will flash in the display.
Select the amount of time you want to cook by using the
number pads.
° HOLD continues to flash.
, The time wi[[ right in the display.
, Time can be set from ten minutes {00:10} to 11 hours, 59
minutes (11:59}.
While HOLD is still flashing, press Bake or Bake
Oonvect and select the oven temperature.
Press the Aatoset 0 pad for 350 ° F or the
appropriate number pads. f-_
Aulsosst;
° BAKE wiil flash.
° The oven temperature can be set from 170° F to 550° F.
4. Press Bake or Convect again OR wait four seconds.
° BAKE will remain lit.
, The cooking time wi[[ show in the disp[ay.
, The actua[ oven temperature wi[[ be disp[ayed
, The set temperature wi[[ disp[ay when the oven is
preheated.
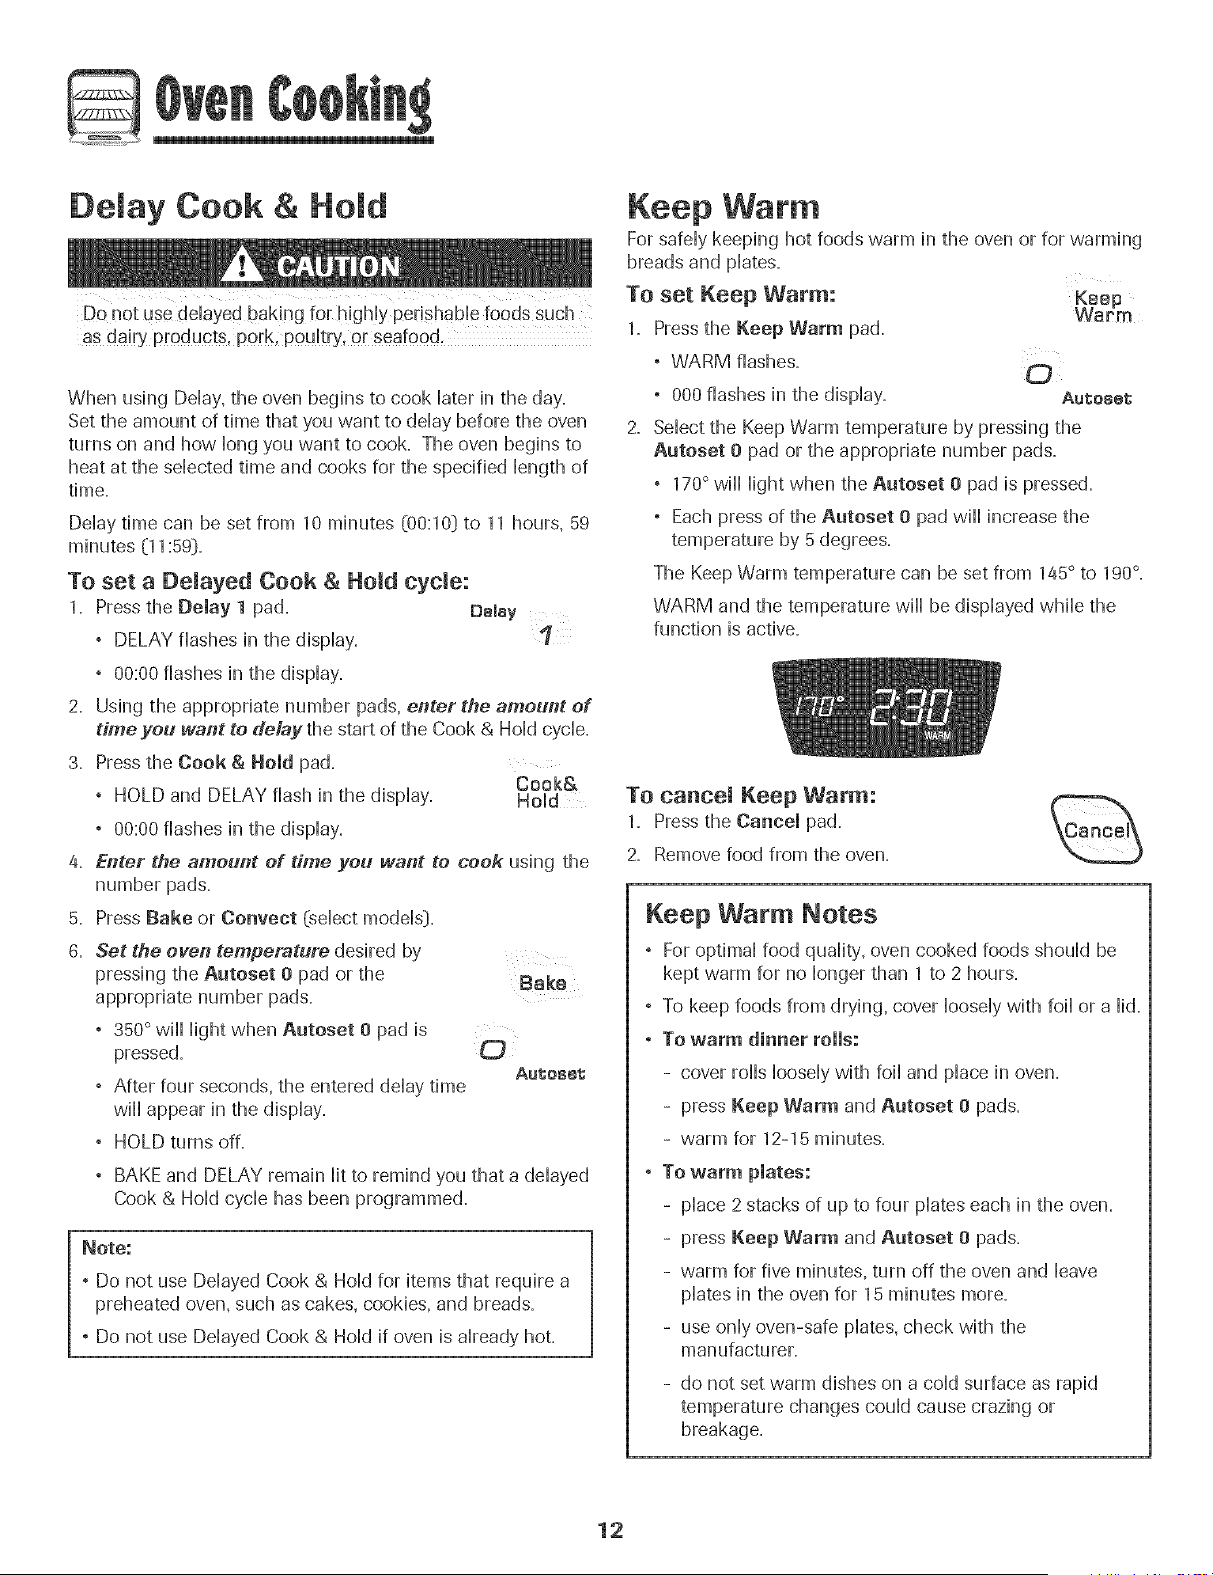
WheB the cooking time has elapsed:
° Four beeps will sound.
° HOLD and WARM will [ight.
, 170°wi[[ disp[ay.
° Time of day will display.
After one honr in HOLD WARM:
° The oven turns off automatically.
° HOLD and WARM go off.
° Remove food from oven.
To cancel Cook & Hold at any time:
Press the Cancel pad. Remove food from oven.
11
@
Delay Cook & Hold
Do not use delayed baking for highly perishable foods such
as dairy products, pork, poultry, or seafood,
When using Delay, the oven begins to cook later in the day.
Set the amount of time that you want to delay before the oven
turns on and how long you want to cook. The oven begins to
heat at the selected time and cooks for the specified length of
time,
Delay time can be set from 10 minutes (00:10) to 11 hours, 59
To set a Delayed Cook & Ho_d cycle:
1. Press the Delay 1 pad. Bemay
° DELAY flashes in the display. 1
° 00:00 flashes in the display.
2. Using the appropriate number pads, enter the amount of
dme you want to delay the start of the Cook & Hold cycle.
3. Press the Cook & Hold pad.
Cook&
° HOLD and DELAY flash in the display. Hold
° 00:00 flashes in the display.
4. Enter the amount of time you want to cook using the
number pads.
5. Press Bake or Conveet (select models:).
0. Set the oven temperature desired by
pressing the Aatoset 0 pad or the Bake
appropriate number pads.
° 350° will light when Aatoset 0 pad is
pressed. 0
Aul;oset
° After four seconds, the entered delay time
will appear in the display.
° HOLD turns off.
BAKE and DELAY remain lit to remind you that a delayed
Cook & Hold cycle has been programmed.
Note:
° Do not use Delayed Cook & Hold foritems that require a
preheated oven, such as cakes, cookies, and breads.
° Do not use Delayed Cook & Hold if oven is already hot.
To set Keep Warm:
1. Pressthe Keep Warm pad.
° WARM flashes.
Keep Warm
For safely keeping hot foods warm in the oven or for warming
breads and plates.
Keep
Warm
° 000 flashes in the display. Aute6et
Select the Keep Warm temperature by pressing the
Aatoset 0 pad or the appropriate number pads.
° 170° will light when the Aatoset 0 pad is pressed.
° Each press of the Aatoset 0 pad will increase the
temperature by 5 degrees.
The Keep Warm temperature can be set front 145° to 190°.
WARM and the temperature will be displayed while the
function is active.
To cancel Keep Warm:
1. Press the Cancel pad.
2. Remove food front the oven.
Keep Warm Notes
° For optimal food quality', oven cooked foods should be
kept warm for no longer than 1 to 2 hours.
° To keep foods from drying, cover loosely with foil or a lid.
, To warm dinner rolls:
- cover rolls loosely with foil and place in oven.
- press Keep Warm and Aatoset 0 pads.
- warm for 12-15 minutes.
, To warm plates:
- place 2 stacks of up to four plates each in the oven.
- press Keep Warm and Aatoset 0 pads.
- warm for five minutes, turn off the oven and leave
plates in the oven for 15 minutes more.
- use only oven-safe plates, check with the
manufacturer.
- do not set warm dishes on a cold surface as rapid
temperature changes could cause crazing or
breakage.
12
@
Broiling
Use CAUTION when cooking with the Bro!l feature. The
grease from fatty' foods may ignite. If a fire should occur;
close the oven door and turn the oven OFF. tf the fire does
To set Broil:
1. Press the Broil pad. BPoil
, BROIL and SET flash in the display.
2. Press the Aatoset 0 pad o#ce to set HI O
broil or twice to set LO broil Autoset
° HI or LO wiii be dispiayed.
, Seiect HJ broil (550° F} for normai broiiing.
Seiect LO broil (450° F} for How-temperature
broiiing of ionger cooking foods such as pouitry.
3. After four seconds, the oven wiii start.
, BROIL wiii remain Hit.
, HI or LO wiii remain Hit.
4, For optimum browning, preheat 2-3 minutes before adding
food.
5. Place food in the oven. Close the oven door.
6. Turn meat once about haifway through cooking.
7. When food is cooked, press the CANCEL pad.
Remove food and broiier pan from the oven.
° The time of day wiii reappear in the dispiay.
Broil Notes
, For best results when broiling, use a pan designed for
broiling.
, HI is used for most broiling. Use LO broil when broiling
longer cooking foods. The lower temperature allows
food to cook to the well done stage without excessive
browning.
, Te cha#ge the oven temperature during broiling,
press the Broil pad, then the Autoset 0 pad to switch
between LO and HI broil
° Broii times may be ionger when the iower broiiing
temperature is seiected.
° Most foods shouid be turned haifway through broiiing
time.
, For additional broiling tips and temperatures, refer to the
"Cooking Made Simple" bookleL
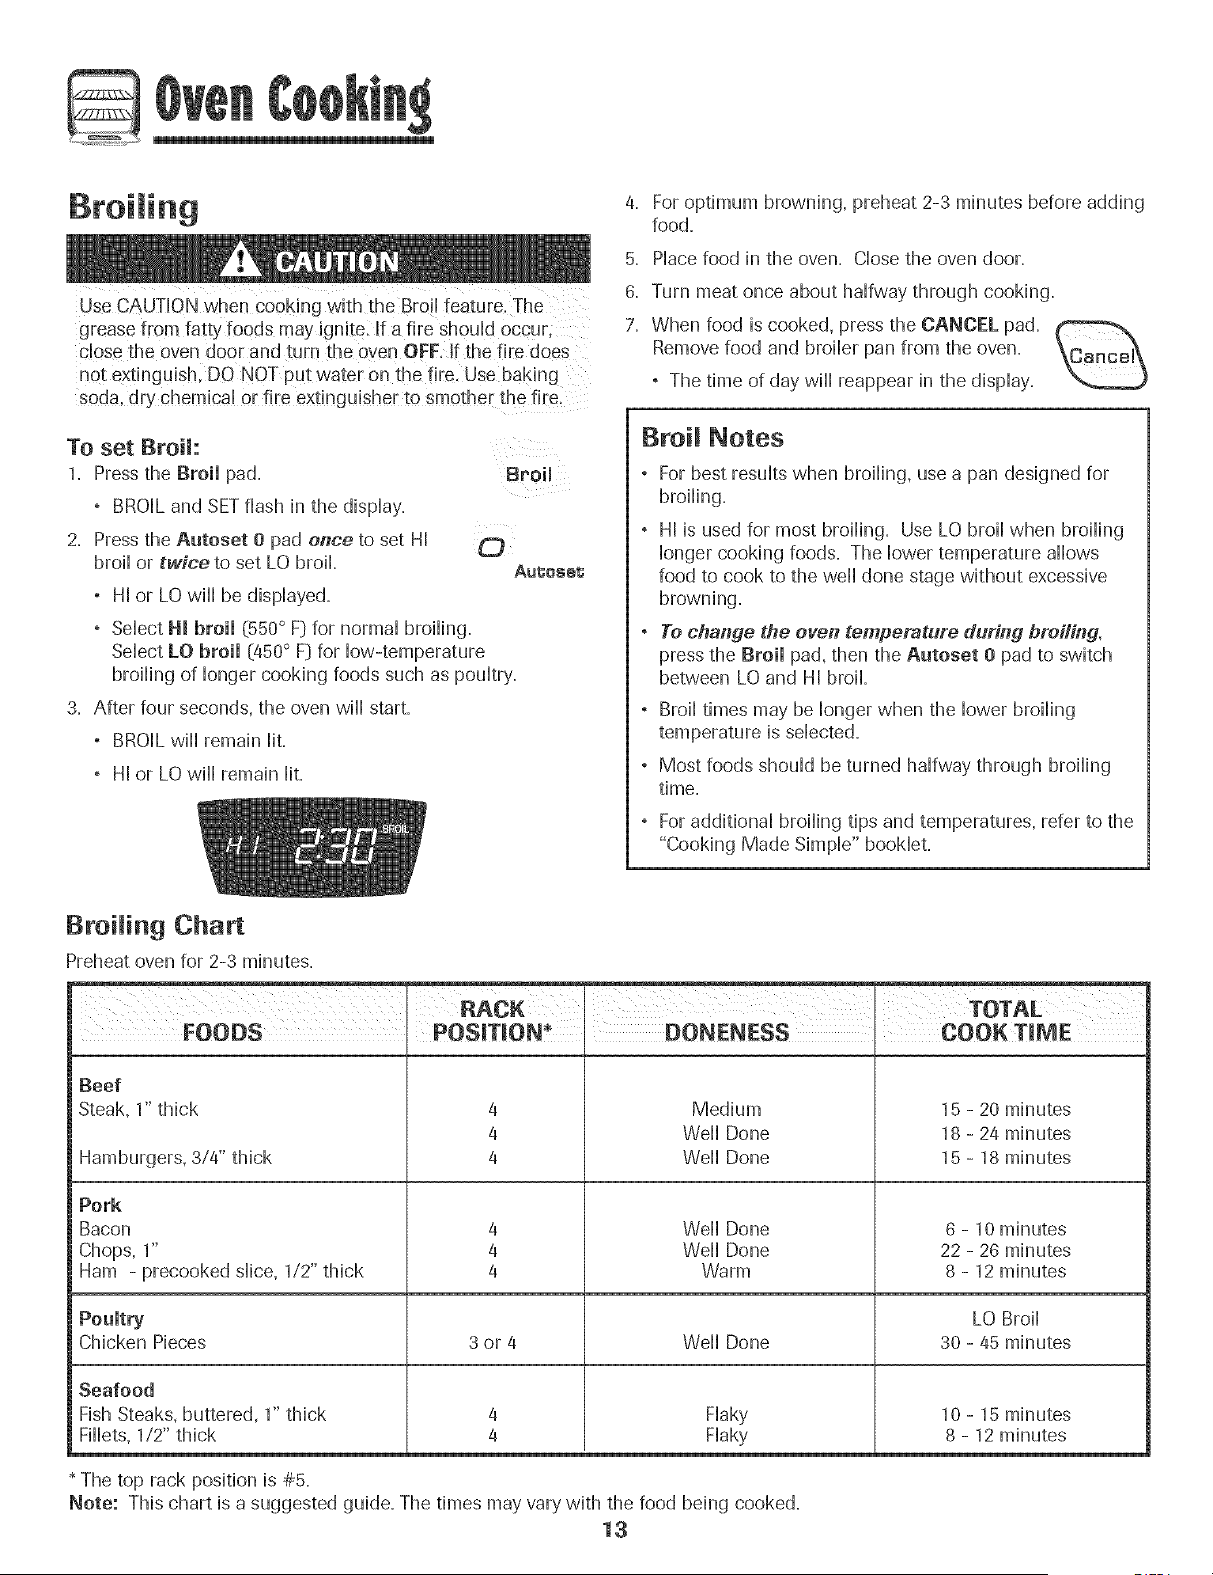
Broiling Chart
Preheat oven for 2-3 minutes.
I ,
P_CK I TOTAL
Beef
Steak, 1" thick
Hamburgers, 3/4" thick
Pork
Bacon
Chops, 1"
Ham - precooked slice, 1/2" thick
4
4
4
4
4
4
Medium
Weii Done
Weii Done
Weii Done
Weii Done
Warm
15 - 20 minutes
18 - 24 minutes
15 - 18 minutes
6 - 10 minutes
22 - 26 minutes
8 - 12 minutes
Poultry LO Broil
Chicken Pieces 3 or 4 Well Done 30 - 45 minutes
Flaky
Flaky
Seafood
Fish Steaks, buttered, 1" thick
Fillets, 1/2" thick
* The top rack position is #5.
10 - 15 minutes
8 - 12 minutes
Note: This chart is a suggested guide. The times may vary with the food being cooked.
13
@
Automatic Shut-Off/
Sabbath Mode
The oven will automatically turn off after 12 hours if you
acddentaHy Heaveit on. This safety' feature can be turned off.
TO cancem the 12-hour shut-off and run the
oven continuously for 72 hours:
1. Press and hoid the Clock pad for five CUock
seconds.
, SAb will be dispiayed and flash for five seconds.
° SAb will then be dispiayed condnuousiy until turned
off or until the 72-hour time limit is reached.
, BAKE will also be displayed if a bake cycle is in use
while the oven is in Sabbath Mode.
, BAKE is the only function that operates during the
Sabbath Mode. All other functions CTirner,Keep Warm,
Clean,etc.) are locked out during the Sabbath Mode.
, A Cook & Hold can be programmed during the Sabbath
Mode, however a Delay Cook & Hold is not allowed.
TO cancel the Sabbath &aerie:
1. Press the Clock pad for five seconds.
Clock
, SAb will flash for five seconds.
. The time of day wiii return to the display.
OR
2. After 72 hours, the Sabbath Mode wiii end.
, SAb wiii flash for five seconds.
. The time of day wiii return to the display.
Sabbath Mode Notes
, Sabbath Mode can be turned on at any time with or
without the oven on.
° Sabbath Mode cannot be turned on if the touchpads are
locked out or when the door is locked.
, Most prompts and messages and aii beeps are
deactivated when Sabbath Mode is active.
, If the oven is baking when Sabbath Mode is set, BAKE
will go out when bake is canceled. There will be no
audible beeps.
° The oven light will not automatically come on when the
oven door is opened while the oven is in Sabbath Mode.
If the oven light is desired while in Sabbath Mode, it
must be turned on before the Sabbath Mode is started.
, When the Sabbath Mode is started, the temperature
display will immediately show the set temperature, rather
than the actual oven cavity' temperature. No preheat
beep will sound.
, The self-clean cycle and automatic door lock do not
operate during the Sabbath Mode.
, Pressing Cancel pad will cancel a Bake cycle, however
the control will stay in the Sabbath Mode.
, If power fails, the oven will power up in Sabbath Mode
with 72 hours remaining and no cycle active.
14
Adjusting the Oven Temperature
Oven temperatures are carefully tested for accuracy at the
factory. [t is normal to notice some baking or browning
differences between a new oven and an old one= As ovens
get older, the oven temperature can shift.
You may adjust the oven temperature if you think the oven is
not baking or browning correctly. To decide how much to
change the temperature, set the temperature 25 degrees
higher or lower than your recipe recommends, then bake.
The results of the "test" should give you an idea of how much
To adjnst the oven temperatnre:
1.
2.
3.
Bake
Press the Bake pad=
Enter 550° by pressing the appropriate number pads.
Press and hold the Bake pad for several seconds or until
0° appears in the display.
If the oven temperature was previously adjusted, the
change will be displayed. For example, if the oven
temperature was reduced by 15 degrees the display will
show "- 15°"
4. Press the Autoset 0 pad to adjust the temperature.
Each time the Autoset 0 pad is pressed, the temperature
changes by 5 degrees. The oven temperature can be
increased or decreased by 5 to 35 degrees.
Pressing the Autoset 0 pad wiil first cycle through
increasing the oven temperature (5, 10.... 35}. Continuing
to press the Autoset 0 pad wiil then cycle through
decreasing the oven temperature (-35, -30.... -5}.
5. The time of day wiil automatically reappear in the display.
You do not need to readjust the oven temperature if there is a
power failure or interruption. Temperature adjustment applies
to Bake and Convect only. Broiling and cleaning temperatures
cannot be adjusted.
Changing Te p °F/°C
1. The factory default setting for temperature is Fahrenheit.
2. To change the setting, press and hold the Cancel and Bake
pads at the same time for three seconds.
3. A single beep will sound and the current setting will be
displayed (°F or °C)=(If no change is made, the range will
return to the existing setting after 30 seconds.[)
4. To change the setting, press the Autoset O pad. Pressagain
to return to existing setting. Wait five seconds and the setting
will be complete.
The Favorite pad allows you to save the time and temperature
from a Cook & Hold function.
To set a Favorite cycle, a Cook & Hold function must be either
active or just programmed=
To set a new Favorite cycme or to save a
cnrrently rnnning Cook & Hold as a Favorite:
1, Program a Cook & Hold cycle as described in the Cook &
Hold section on page 11=
2= Pressand hold the Favorite pad for three Favorit;e
seconds=
, The newly set or currently running Cook & Hold cycle
will be saved=
, A beep will sound to indicate that the control has
accepted the Favorite setting.
To start a cycle programmed into Favorite:
1= Press the Favorite pad.
, Time and temperature for the set Cook & Hold cycle
will be displayed. (If no Cook & Hold cycle has been
programmed, "nonE" is displayed.)
2. Press the Bake or Convect (select models] pad.
, The Favorite cycle will begin immediately.
, BAKE will light in the display.
, The cooking time will light in the display.
When the cooking time has elapsed:
, BAKE will turn off.
, HOLD and WARM will light.
, 170°will display.
To cancel a Favorite cycJe in progress:
1= Press the Cancel pad,
, The stored Favorite cycle will not
be affected.
2. Remove food from the oven.
15
@
Pilotless ignition
Your range is equipped with piHotHessignition. With this type of
ignition system, the gas automatically shuts off and the even
will not operate durii_g a power failure,
A lighted match will not light the oven burner. No attempt
should be made to operate the oven daring a power failareo
Oven Bottom
Protect oven bottom agahst spiHovers,especially acidic or
sugary spills, as they may discolor the porcelain enamel Use
the correct pan size to avoid spillovers and boilovers. Do not
place utensims or aluminum foil directmy oil the oven
bottom.
Oven Fans
A convection fan (select moddsD is used to circulate hot air
in the oven when the convection feature is selected, It
automatically turns on approximately five minutes after the
Convect pad is pressed and wi[[ turn off when Convect is
cancded.
A cooling fan wi[[ automatica[[y turn on during a[[ broi[ing
and some baking operations. It is used to keep interna[ parts
on the contro[ pane[ coo[. The fan wi[[ automatica[[y turn off
when parts have coo[ed. The fan may continue to operate
after the oven has been turned off. This is normal
Note: The convection fan will automatically stop when the
oven door is opened.
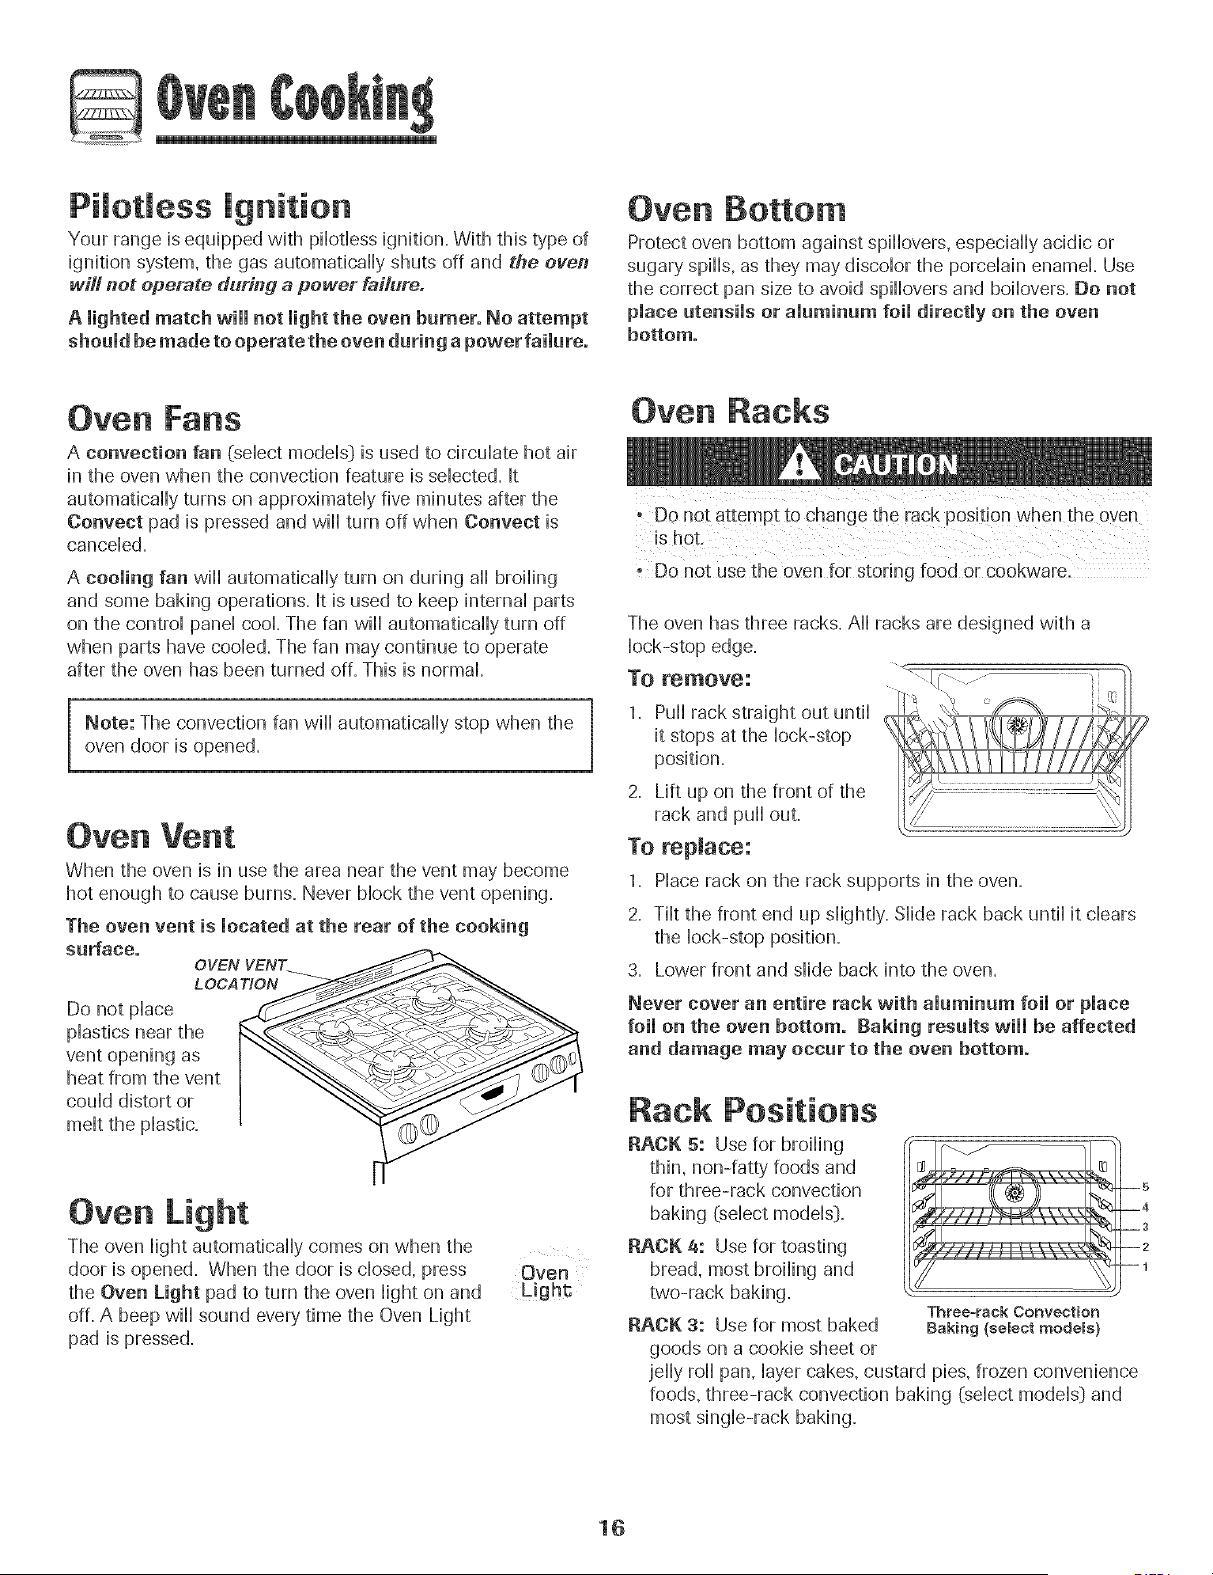
Oven Vent
When the oven is in use the area near the vent may become
hot enough to cause burns. Never block the vent opening.
The oven vent is located at the rear of the cooking
surface°
OVEN
L OCA TION
Do not place
plastics near the
vent opening as
heat from the vent
could distort or
Oven Light
The oven light automatically comes on when the
door is opened. When the door is closed, press Oven
the Oven Light pad to turn the oven light on and L!ght
off. A beep will sound every time the Oven Light
pad is pressed.
Oven Racks
° DOnot attempt to change the rack position when the oven
is h0t,
The oven has three racks. All racks are designed with a
lock-stop edge.
To remove:
1. Pull rack straight out until
it stops at the lock-stop
position.
2. Lift up on the front of the
rack and pull out.
To replace:
1. Place rack on the rack supports in the oven.
2. Tilt the front end up slightly. Slide rack back until it clears
the lock-stop position.
3. Lower front and slide back into the oven.
Never cover an entire rack with aluminum foil or place
foil on the oven bottom. Raking results wiii be affected
and damage may occur to the oven bottom.
Rack Positions
RACK 5: Use for broiling
thin, non-fatty foods and
for three-rack convection
baking (select modds_).
RACK 4: Use for toasting
bread, most broiling and
two-rack baking.
RACK 3: Use for most baked
goods on a cookie sheet or
Three=rack Convection
Baking (select models)
jelly roll pan, layer cakes, custard pies, frozen convenience
foods, three-rack convection baking (select models) and
most single-rack baking.
16
RACK 2: Use for fresh fruit pies, 9 x 13 cakes, roasting small
cuts of meat, casserobs, baking haves of bread, bundt
cakes and, and two-rack baking.
RACK 1: Use for roasting ]arge cuts of meat and pouitry,
frozen pies, dessert and savory souffles, ange] food cake
and three-rack convection baking _sebct modeb}.
MULTIPLE RACK COOKING:
Two rack: Use rack positions 2 and 4, or 1 and 4. Stagger
food to ensure proper air flow.
Three rack: (convection oniy, sebct modeb} Use rack
)osidons 1, 3 and 5.
Notes:
, Food shouM be checked for aloneness at minimum
suggested bake time.
, Never piace pans direcdy on the oven bottom.
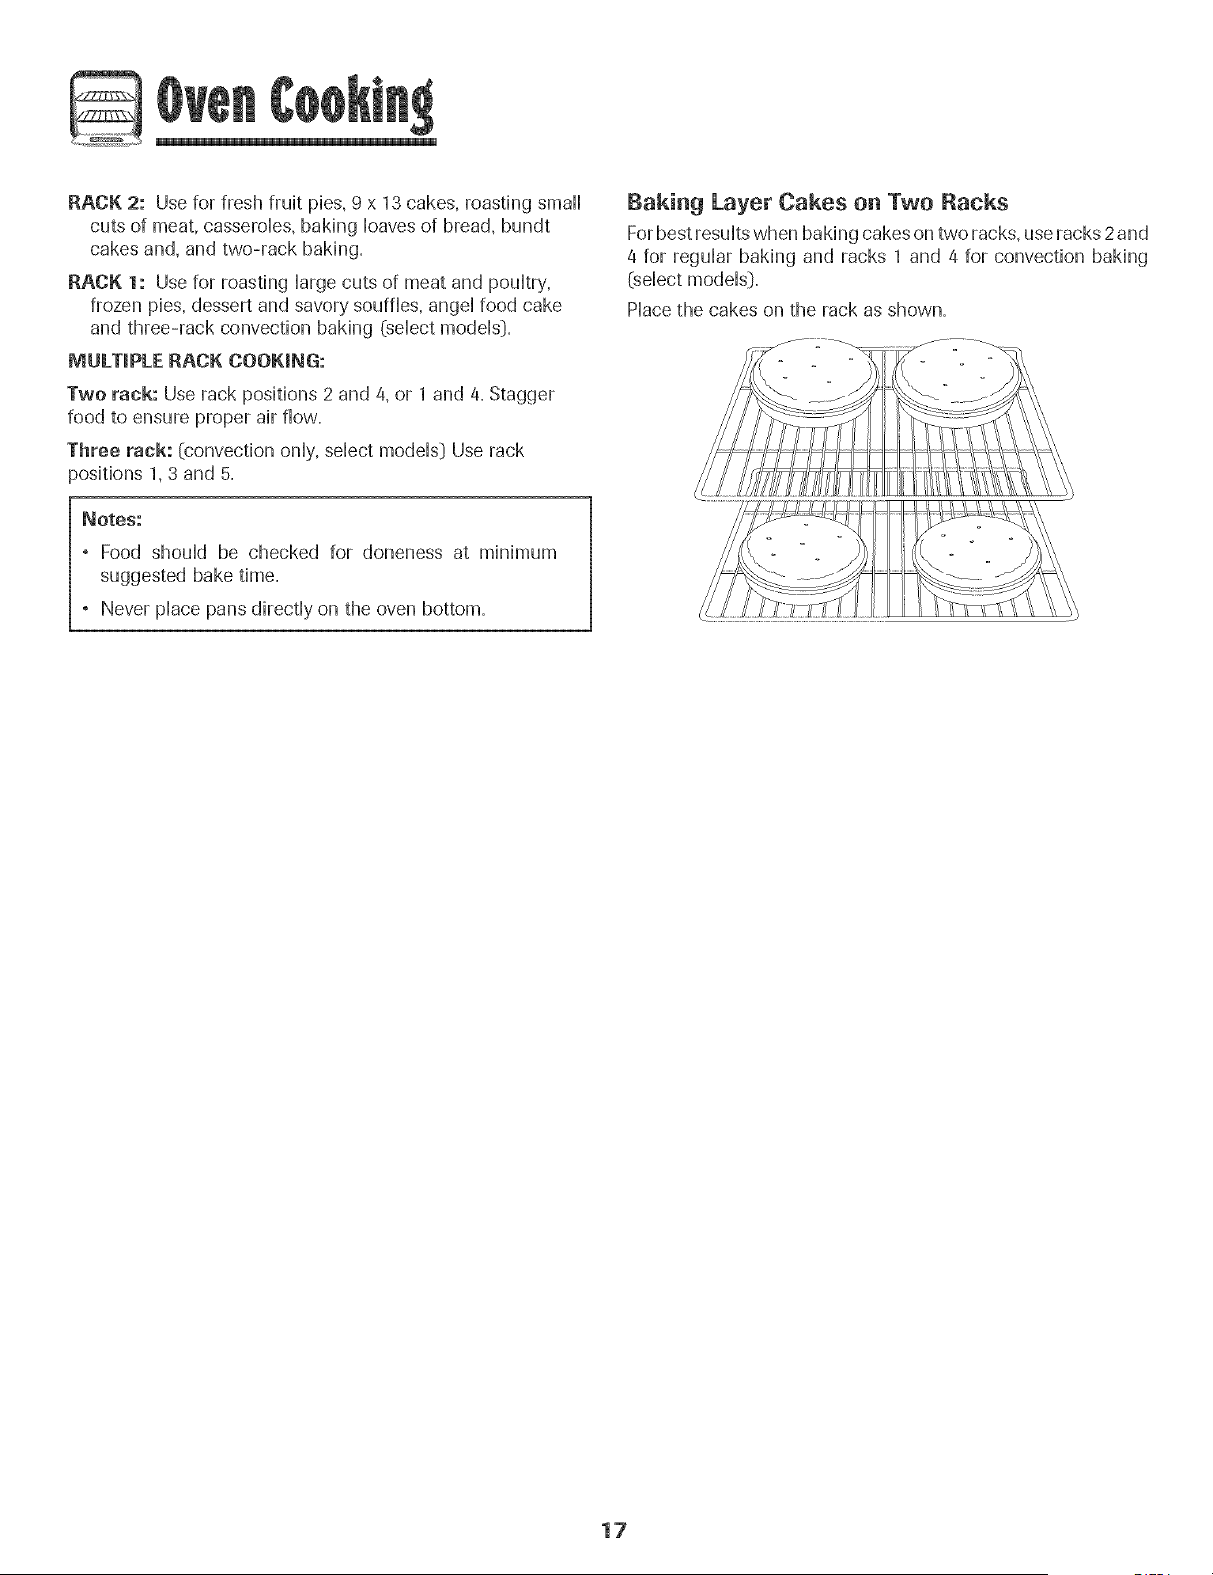
Baking Layer Cakes on Two Racks
For best resuits when baking cakes on two racks, use racks 2 and
4 for reguiar baking and racks 1 and 4 for convection baking
(select models}.
Place the cakes on the rack as shown.
17
Se f-C ean Oven
o It is normal foil parts of the range to become hot during a
To set Self-Clean:
Note: Oven temperature must be below 400° Fto program
a clean cycle.
° To prevent damage to oven door. do not attempt to open
the door when LOCK is displayed.
, Avoid touching cooktop door. window or oven vent area
during a Slean cycle.
• Do not use commercial oven cleaners on the oven finish
or around any part of the oven. The} will damage the
finish or parts,
The self-clean cycle uses above-normal cooking temperatures
to automatically clean the oven interior.
It is normal for flare-ups, smoking, or flaming to occur during
cleaning if the oven is heavily soiled. It is better to clean the
oven regularly rather than to wait until there is a heavy
build-up of soil in the oven.
During the cleaning process, the kitchen should be well
ventilated to get rid of normal odors associated with cleaning.
Before Self-Cmeaning
1. Turn off the oven light before charting. The light may burn
out during the clean cycle.
2. Remove all pans and oven racks from the oven. The oven
racks will discolor and may not slide easily after a self-
clean cycle if they are not removed.
3. Clean oven frame, door frame, area outside of gasket, and
around the opening in the door gasket with a nonabrasive
cleaner such as Ban Ami* or detergent and water. The
self-cleaning process does not clean these areas. They
should be cleaned to prevent soil from baking on during
the clean cycle. (The gasket is the
seal around the oven door and _ _
window,} ".
4. To prevent damage, do not clean or
rub the gasket around the oven
door. The gasket is designed to
seal in heat during the clean cycle.
5. Wipe up excess grease or spillovers from the oven bottom.
This prevents excessive smoking, flare-ups or flaming
during the clean cycle.
6. Wipe up sugary and acidic spillovers such as sweet
potatoes, tomato, or milk-based sauces. Porcelain enamel
is acid-resistant, not acid-proof. The porcelain finish may
discolor if acidic spills are not wiped up before a self-clean
cycle.
1. Close the oven door.
2. Press the Clean pad. Clean
, CLEAN flashes in the display.
, SET flashes in the display. O
3. Press the Aatoset 0 pad. Autuset
, "MEd" (Medium Soil, 3 hours} is displayed.
Pressthe Aatoset 0 pad to scroll through the self-cleaning
settings.
"HVy" (Heavy Soil, 4 hours}
"MEd" (Medium soil, 3 hours}
"LITE" (Light Soil, 2 hours}
Choosing the soil level of the oven automatically programs
the self-cleaning time.
After four seconds, the oven will start cleaning.
, If the door is not closed, beeps will sound and "door" will
display. If the door is not closed within 30 seconds, the
self-cleaning operation will be canceled and the display
will return to the time of day.
, CLEAN will appear in the display.
, LOCK will flash in the display. Once the door locks, the
word will remain steady.
, The cleaning time will start counting down in the display.
To Delay a Self-Clean Cycle:
1. Pressthe Delay 1 pad. Delay
° DELAY flashes. "I
, 00:00 will flash in the display.
Enter the amount of time you want to delay the cycle using
2.
the appropriate number pads.
3. Press the Clean pad. Clean
, SET flashes in the display.
4. Press the Aatoset 0 pad.
, "LITE" (Light soil level} is displayed. Autoset
eonto
* Brand names for cleaning products are registered trademarks of the respective manufacturers.
18
5. Press the Autoset 0 pad to scroll through
the sdf-cHeaning settings.
Autosat
"HVy" CHeavySoil 4 hours:)
"MEd" (MedhJm Soil 3 hours:)
"LITE" (Light Soil 2 hours:)
Choosing the soiHHeveHof the oven automatically programs
the sdf-cHeanhg time.
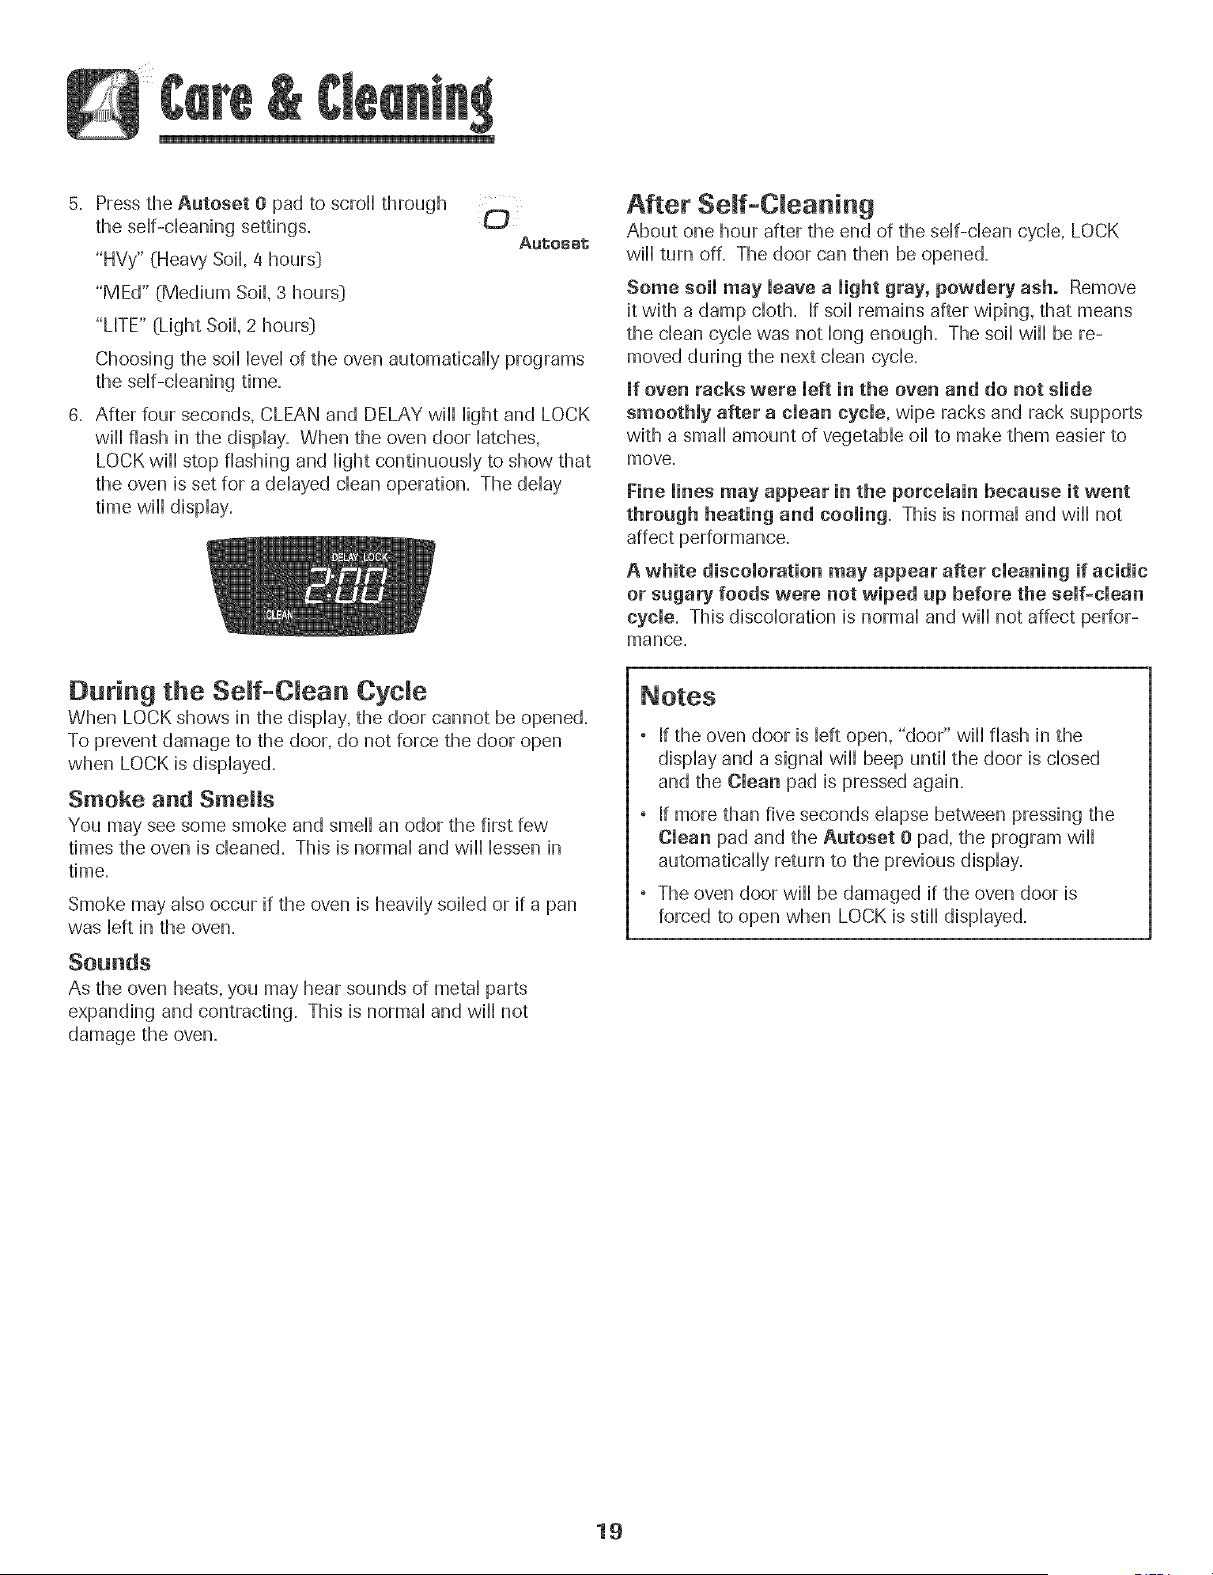
6. After four seconds, CLEAN and DELAY will Hightand LOCK
will flash in the dispHay. When the oven door Hatches,
LOCK will stop flashing and light continuously to show that
the oven is set for a delayed clean operation. The delay
time will display,
During the Serf-Clean Cycle
When LOCK shows in the display, the door cannot be opened.
To prevent damage to the door, do not force the door open
when LOCK is displayed.
Smoke and Smells
You may see some smoke and smell an odor the first few
times the oven is cleaned, This is normal and will lessen in
time,
Smoke may also occur if the oven is heavily soiled or if a pan
was left in the oven.
Sounds
As the oven heats, you may hear sounds of metal parts
expanding and contracting. This is normal and will not
damage the oven.
After Seff-Cmeaning
About one hour after the end of the self-clean cycle, LOCK
will turn off. The door can then be opened.
Some soil may leave a light gray, powdery ash. Remove
it with a damp cloth. If soil remains after wiping, that means
the clean cycle was not long enough. The soil will be re-
moved during the next clean cycle.
mfoven racks were left in the oven and do not slide
smoothly after a clean cycle, wipe racks and rack supports
with a small amount of vegetable oil to make them easier to
move.
Fine lines may appear in the porcelain becaase it went
through heating and cooling. This is normal and will not
affect performance.
A white discoloration may appear after cleaning if acidic
or sugary foods were not wiped ap before the self-clean
cycle. This discoloration is normal and will not affect perfor-
mance.
, If the oven door is left open, "door" will flash in the
display and a signal will beep until the door is closed
and the Clean pad is pressed again.
, If more than five seconds elapse between pressing the
Clean pad and the Autoset 0 pad, the program will
automatically return to the previous display.
, The oven door will be damaged if the oven door is
forced to open when LOCK is still displayed.
19
Cleaning Procedures
, Be sure appliance is eft and all parts ate bee! before handming
er cleaning. This is tO avoid damage and possib!e burn s,
, To Prevent staining or discol0rati0n, c!ean appliance after each use,
a part !s removed, be sure !t is correct!y top!abed_
Brand names are registered trademarks of the
respective manufacturers.
_* To order caii 1-877-232-6771 USA or
1-800-688-8408 Canada.
_J
PROCEDURE
Sealed Gas
Burners
Burner Grates -
Porcelain on
Cast iron
Clock and
Control Pad
Area
Control Knobs
Cooktop and
Control Panel -
Porcelain Enamel
Bemovabie Burner Cops
, Allow burner to cool Remove burner cap and wash in soapy water with a plastic scouring pad. For
stubborn soils, clean with a soap-filled, nonabrasive pad or Cooktop Cleaning Creme_
{Part #20000001} _* and a sponge.
, Do not clean in the dishwasher or self-cleaning oven.
Sealed Gas Burners
, Clean frequently. Allow burner to cool Clean with soap and plastic scouring pad. For stubborn soils,
clean with a soap-filled, nonabrasive pad. Do not enlarge or distort hobs.
, Be careful not to get water into burner ports.
, Use care when cleaning the ignitor. If the ignitor is wet or damaged the surface burner will not light.
, Wash with warm, soapy water and a nonabrasive, plastic, scrubbing pad For stubborn soils,
clean with a soap-filled, nonabrasive, plastic pad or Cooktop Cleaning Creme s (Part #20000001} #*
and a sponge. If soil remains, reapply Cooktop Cleaning Creme _, cover with a damp paper towel and
soak for 30 minutes. Scrub again, rinse and dry.
, Do not clean in the dishwasher or self-cleaning oven.
° To activate control lock for cleaning, see "Locking the Controls" page 9.
° Wipe with a damp cloth and dry. Do not use abrasive cleaning agents as they may scratch the finish.
, Glass cleaners may be used if sprayed on a cloth first. DO NOTspray direcdy on controlpad and
display area.
° Remove knobs in the OFFposition by pulling forward.
, Wash, rinse and dry'. Do not use abrasive cleaning agents as they may scratch the finish.
° Turn on each burner to be sure the knobs have been correctly replaced.
Porcelain enamel is glass fused on metal and may crack or chip with misuse. It is acid resistant, not acid proof.
All spillovers, especially acidic or sugary' spillovers, should be wiped up immediately with a dry cloth.
° When cool, wash with soapy water, rinse and dry.
, Never wipe off a warm or hot surface with a damp cloth. This may cause cracking or chipping.
, Never use oven cleaners, abrasive or caustic cleaning agents on exterior finish of range.
° When cool, wash with warm soapy water, rinse and dry. Never wipe a warm or hot surface with a damp
cloth as this may damage the surface and may cause a steam burn.
° Forstubborn soil, use mildly abrasive cleaning agents such as baking soda paste or Bon AmP. Do not use
abrasive cleaners such as steel wool pads or oven cleaners. These products will scratch or permanently
damage the surface.
Note: Use a dry towel or cJoth to wipe up spills, especially acidic or sugary spills. Surface may
discolor or dull if soil is not immediately removed. This is especially important for white surfaces.
Storage Drawer
and Door
Handles -
Painted Enamel
eonto
2O
Oven Window
and Door - Glass
, Avoid using excessive amounts of water which may seep under or behind gHasscausing staining.
, Wash with soap and water. Rinsewith dear water and dry. GHasscHeanercan be used if sprayed on a cHoth
first.
, DO NOT use abrasive materiaHssuch as scouring pads, steeHwooHor powdered cHeanersas they wiHH
scratch gHass.
Oven mnterior , FoHHowinstructions on pages 18-19 to set a seHf-cHeancycHe.
Oven Racks
Stainmess Steel
(seHect modems:)
®
®
®
CHeanwith soapy water.
Remove stubborn soiHwith cHeansingpowder or soap-fiHHedscouring pad. Rinse and dry.
Racks wiHHpermanentHydiscoHorand may not sHideout smoothHyif Heftin the oven during a seHf-cHean
operation. If this occurs, wipe the rack and embossed rack supports with a smaHHamount of vegetabHeoiH
to restore ease of movement, then wipe off excess oil
, DO NOT USE ANY CLEANING PRODUCT CONTAINiNO CHLORINE BLEACH.
, DO NOT USEABRAStVE OR ORANGE CLEANERS.
, ALWAYS WiPE WiTH THE GRAIN WHEN CLEANING.
, Daily Cleaning/Light Soil -- Wipe with one of the foHHowing- soapywater, white vinegar/water soHution,
FormuHa409 GHassand Surface CHeaner*or a simiHargHasscHeaner- using a sponge or soft cHoth.
Rinse and dry. To poHishand heHpprevent fingerprints, foHHowwith StainHessSteeHMagic Spray*
(Part No=20000008:)**=
Moderate/Heavy Soil -- Wipe with one of the foHHowing- Ben Ami*, Smart CHeanser,*or Soft Scrub* -
using a damp sponge or soft cHoth.Rinse and dry. Stubborn soiHsmay be removed with a damp muHti-
purpose Scotch-Brite * pad; rub evenHywith the grain. Rinse and dry.To restore Husterand remove streaks,
foHHowwith StainHessSteeHMagic Spray*.
Discoloration -- Using a damp sponge or soft cHoth,wipe with Cameo StainHessSteeHCHeaner*.Rinse
immediateHyand dry. To remove streaks and restore Huster,foHHowwith StainHessSteeHMagic Spray*.
* Brand names for cHeaning products are registered trademarks of the respective manufacturers.
_ To order direct, caHH1-877-232-8771 USA or 1-800-688-8408 Canada.
21
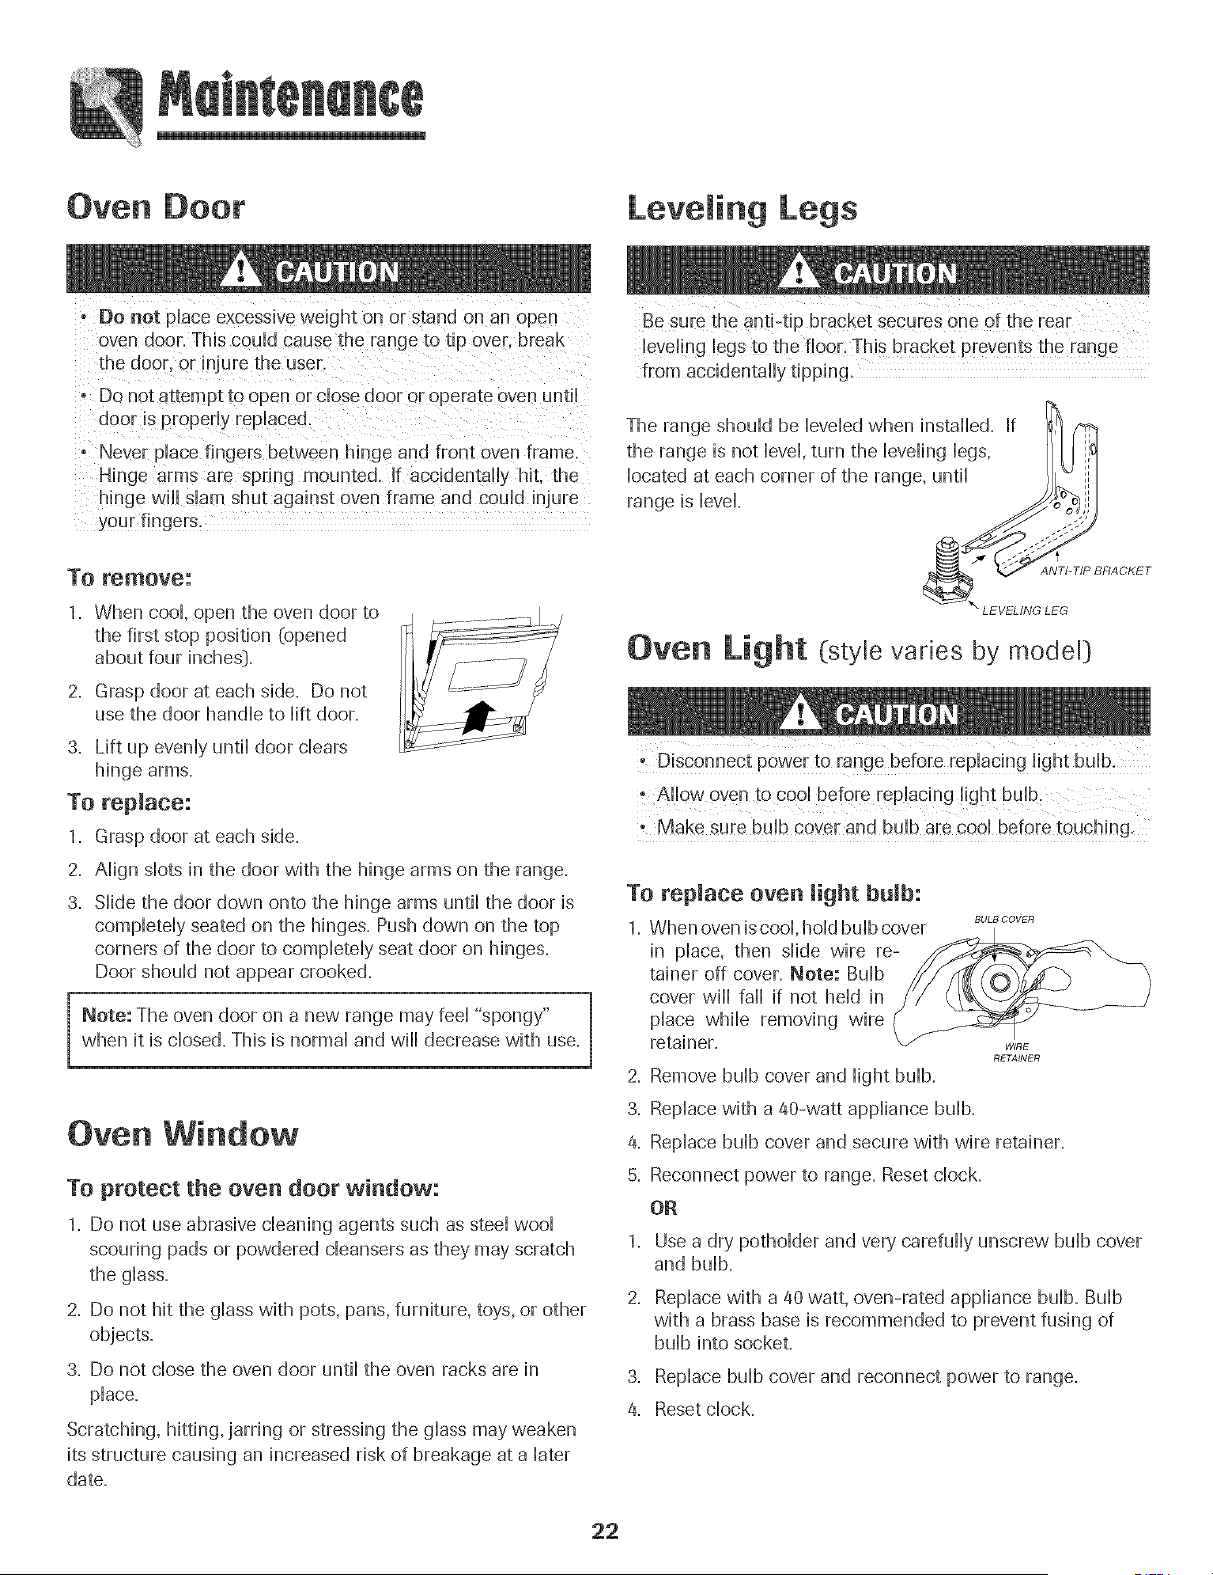
Oven Door
Leveling Legs
. De not place excessive weight on or stand on an open
oven door, This could cause the range to tip over. break
the door, or injure the user.
° Do not attempt to open or dose door or operate over until
door is properly replaced.
° Never place fingers between hinge and fron_ oven frame
Hinge arms are spring mounted, if accidentally hit. the
hinge wiii siam shut against oven frame and could injure
your fingers,
To remove:
1. When cool, open the oven door to
the first stop position {opened
about four inches}.
2. Grasp door at each side. Do not
use the door handle to lift door.
3. Lift up evenly until door clears
hinge arms.
To replace:
1. Grasp door at each side.
2. Align slots in the door with the hinge arms on the range.
3. Slide the door down onto the hinge arms until the door is
completely seated on the hinges. Push down on the top
corners of the door to completely seat door on hinges.
Door should not appear crooked.
Note: The oven door on a new range may feel "spongy"
when it is closed. This is normal and will decrease with use.
Oven Window
To protect the oven door window:
1. Do not use abrasive cleaning agents such as steel wool
scouring pads or powdered cleansers as they may scratch
the glass.
2. Do not hit the glass with pots, pans, furniture, toys, or other
objects.
3. Do not close the oven door until the oven racks are in
place.
Scratching, hitting, jarring or stressing the glass may weaken
its structure causing an increased risk of breakage at a later
date.
leveling !egs to the flOOr,This bracket Prevents the range
from accidentally tipping.
Oven Light (style varies by modeU}
Allow oven to COOlbefore replacing !ight bulb.
- Make sure bu!b cover and bulb are coo! before touching.
To replace oven light bulb:
1. When oven iscool, hold bulb cover
in place, then slide wire re-
tainer off cover. Note: Bulb
cover wiii fail if not held in
place while removing wire
retainer.
BULBCOVER
2. Remove bulb cover and light bulb.
3. Replace with a @-watt appliance bulb.
a.
RETAINER
Replace bulb cover and secure with wire retainer.
Reconnect power to range. Reset clock.
OR
1. Use a dry potholder and very carefully unscrew bulb cover
and bulb.
2. Replace with a ao watt, oven-rated appliance bulb. Bulb
with a brass base is recommended to prevent fusing of
bulb into socket.
3. Replace bulb cover and reconnect power to range.
4. Reset clock.
22
P,emova of Gas Appmiance
Gas appHiance connectors used to connect this appHianceto
the gas suppHyare not designed for continuous movement.
Once installed, DO NOT repeatedHymove this gas appHiance
for cHeaningor to reHocate=If this appHiancehas to be moved
and/or removed for servicing, follow the procedure described
in the installation instructions. For information, contact
Amana Customer Assistance at 1-800-843-0304 USA or
1-866-587-2002 Canada.
To prevent range from accidentally tipping, range must be
secured to the floor by sliding rear leveling leg into the anti-
tip bracket.
Storage Drawer
Do not store plastic, paper products, food or flammable
for these items when the oven is in use.
The storage drawer can be removed to allow you to clean
under the range.
To remove:
1. Empty'drawer and pull out to the first stop position.
2. Lift up the front of the drawer.
3. Pull out to the second stop position.
4. Grasp sides and lift drawer up and out.
To replace:
1. Fit the ends of the drawer glides into the rails in the range.
2. Lift up the front of the drawer and gently push in to the
first stop position.
3. Lift drawer up again and push until drawer is closed.
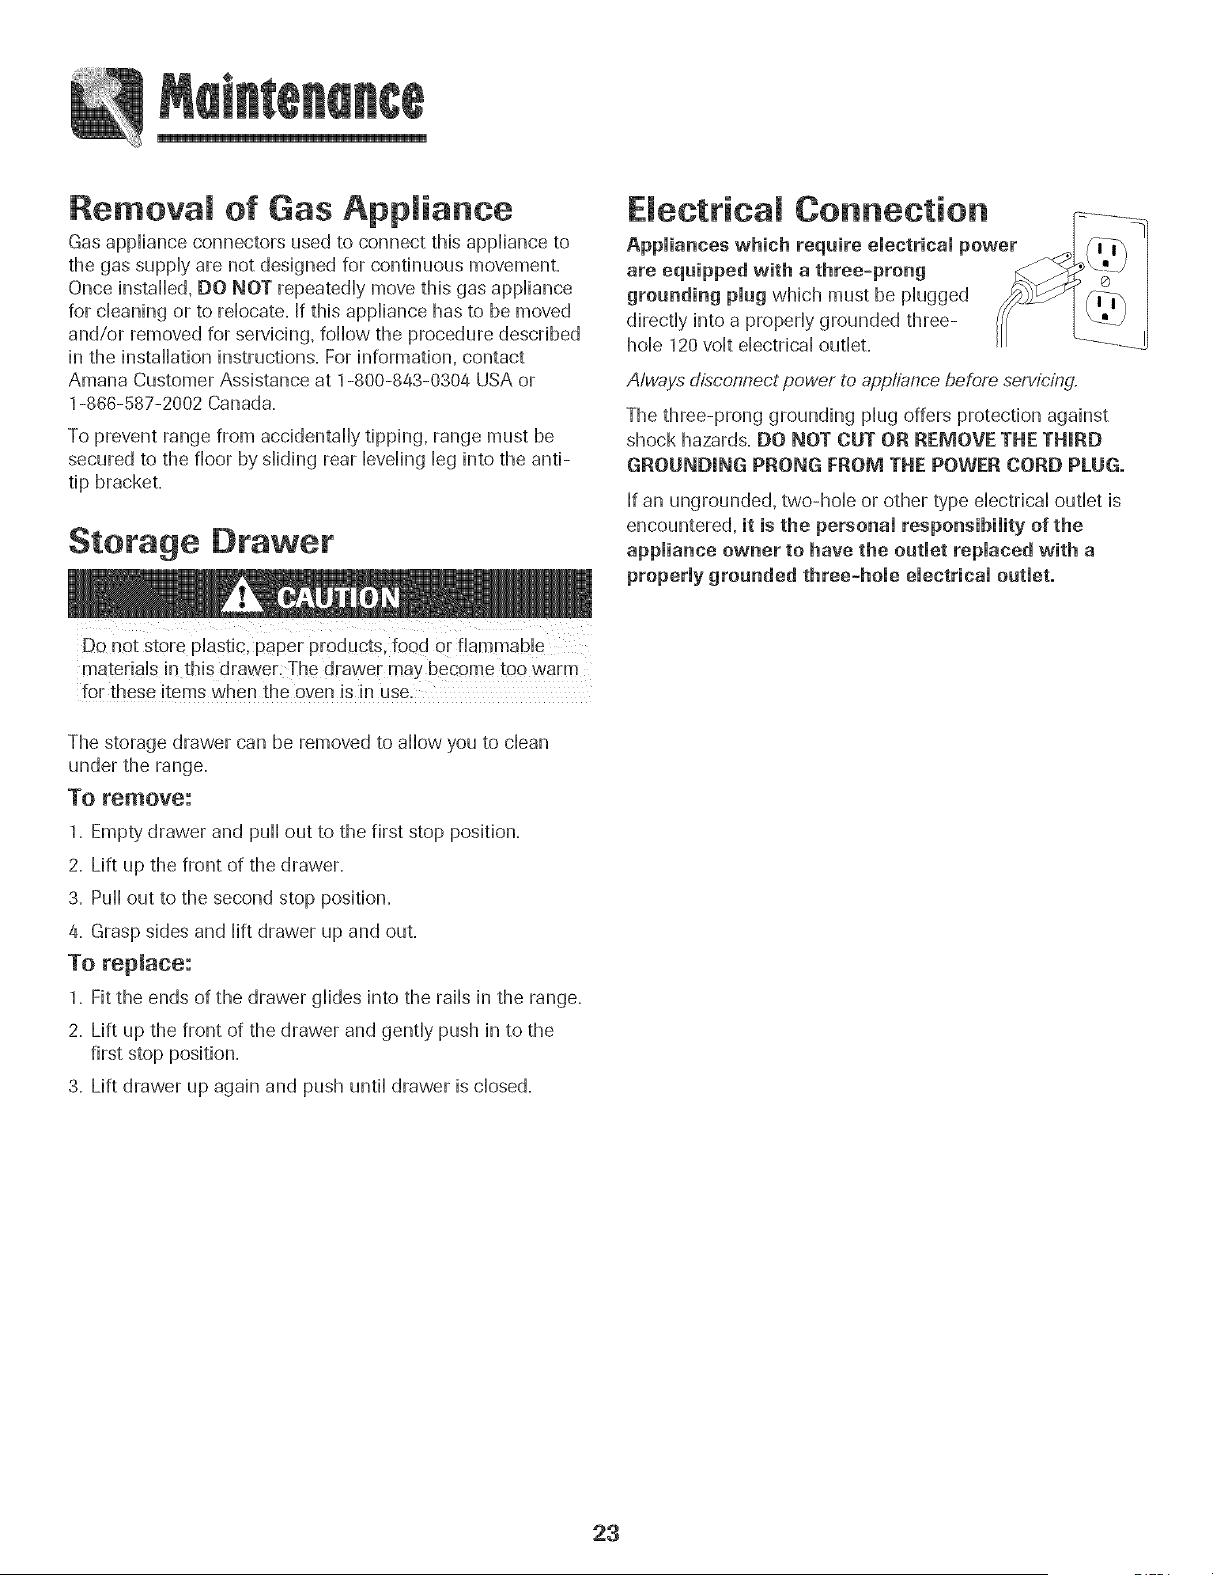
E ectticam Connection
Appmiances which require emectrical power
are equipped with a three-prong
grounding plug which must be plugged
directly into a properly grounded three-
hole 120 volt electrical outlet.
Always disconnect power to app!;iancebefore servicing,
The three-prong grounding plug offers protection against
shock hazards. DO NOT CUT OR REMOVE THE THIRD
GROUNDING PRONG FROM THE POWER CORD PLUG.
If an ungrounded, two-hole or other type electrical outlet is
encountered, it is the personal responsibility of the
appliance owner to have the outlet replaced with a
properly grounded three=hole electrical outlet.
23
PROBLEM SOLUTION
For most concerns, try these first.
Surface burner fails to light.
, Check if oven controHshave been propedy set.
, Check to be sure pHugis secureHyinserted into receptacle.
, Check or re-set circuit breaker. Check or repHacefuse.
, Check power suppHy.
, Check to be sure unit is propedy connected to power suppHy.
, Check for a Mown circuit fuse or a tripped main circuit breaker.
, Check to be sure ignitor is dry and cHicking.Burner will not Hightif ignitor is damaged,
soiHedor wet. If ignitor doesn't chick,turn controHknob to OFF.
The flame is uneven. , Burner ports may be dogged.
Surface burner flame lifts ° Check to be sure a pan is sitting on the grate above.
off ports.
Baking results are not as
expected or differ from
previous oven.
Food is net broiling properly or
smokes excessively.
Oven will not self-clean.
Check the oven temperature selected. Make sure oven is preheated when recipe
or directions recommend preheat.
° Make sure the oven vent has not been blocked. See page 16 for location.
° Check to make sure range is level.
, Temperatures often vary between a new oven and an old one. As ovens age, the oven
temperature often "drifts" and may become hotter or cooler. See page 15 for
instructions on adjusting the oven temperature. Note: It is not recommended to
adjust the temperature if only one or two recipes are in question.
° Use correct pan. Dark pans produce dark browning. Shiny pans produce light
browning. See "Cooking Made Simple" booklet for more information on bakeware.
° Check rack positions and pan placement. Stagger pans when using two racks. Allow
1-2 inches between pans and oven wall.
° Check the use of foil in the oven. Never use foil to cover an entire oven rack. Place
a small piece of foil on the rack below the pan to catch spillovers.
° Check oven rack positions. Food may be too close to flame.
° Aluminum foil was incorrectly used. Never line the broiler insert with foil.
° Trim excess fat from meat before broiling.
° A soiled broiler pan was used.
° Preheat oven for 2-3 minutes before placing food in the oven.
° Broil with the oven door closed.
, Check to make sure the cycle is not set for a delayed start. See pages 18-19.
° Check if door is closed.
° Check if control is in Sabbath Mode. See page 14.
° Oven may be over 400° F. Oven temperature must be below 400° F to program a
clean cycle.
24
PROBLEM $OLUTmON
Oven did not clean properly. ° Longer cHeaningtime may be needed.
° Excessive spiHovers, especially sugary and/or acidic foods, were not removed prior
to the stir-dean cycle.
Oven door will not unlock after
self=clean cycle.
Moisture collects on oven
window or steam comes from
oven vent.
There is a strong odor or might
smoke when oven is turned on.
Fault Codes
Noises may be heard.
There are no beeps and
no display.
SAb flashing and then
Oven interior is still hot. AHow about one hour for the oven to cool after the
completion of a self-clean cycle. The door can be opened when the LOCK indicator
word is not displayed.
The control and door may be locked. See page 9.
, This is normal when cooking foods high in moisture.
, Excessive moisture was used when cleaning the window.
, This is normal for a new range and wi[[ disappear after a few uses. Initiating a dean
cycle will "burn off" the odors more quickly.
, Turning on a ventilation fan will help remove the smoke and/or odor.
, Excessive food soils on the oven bottom. Use a self-clean cycle.
° BAKE or LOCK may flash rapidly in the display to alert you if there is an error
or a problem. If BAKEor LOCK appear in the display, press the Cancel pad.
If BAKE or LOCK continue to flash, disconnect power to the appliance.
Wait a few minutes, and then reconnect power. If the flashing still continues,
disconnect power to the appliance and call an authorized servicer.
° If the oven is heavily soiled, excessive flareups may result in a fault code during
cleaning. Press the Cancel pad and allow the oven to cool completely, wipe out
excess soil, then reset the clean cycle. If the fault code reappears, contact an
authorized servicer.
° The oven makes several low level noises. You may hear the oven relays as they go on
and off. This is normal.
° As the oven heats and cools, you may hear sounds of metal parts expanding and
contracting. This is normal and will not damage your appliance.
° A fan sound can be heard. This is the cooling fan and is normal. The fan will
continue to run after use until the oven cools.
° Oven may be in Sabbath Mode. See page 14.
° Oven is in Sabbath Mode. To cancel, press and hold the Clock pad for five
seconds.
25

26
Gas Range Warranty
Full One Year Warranty =
Parts and Labor
For one [1 } year from the original retail
purchase da_e,any part which fails in
normal home use will be repaired or
replaced free of charge.
Please Note: This full warranty applies
onlywhen the appliance is locatedin the
United Sta[es or Canada.Appliances
locate(] elsewhere are covered by the
limited warranties only, including parrs
which tail during the firs[ year.
Canadian Residents
-[hiswarranty' covers only those appliances
installed in Canada that have been listed
with Canadian Standards Association
unless the appliances are brought mo
Canada due [o transfer of residencefrom
the United States to Canada.
Thespedfic warrantiesexpressedabove
are the Only warrantiesprodded by the
manufacturer. Th_swarrantygivesyou
speeifleiega/ rights, andyou may also have
other rigi',,tsthat vat},from,state to state.
What is Not Covered By These Warranties:
1= Conditions and damages resulting from any of the following:
a= Improper instaiIation, deIivery,or maintenance.
b. Any repair, modification, aiteration, or adjustment not authorized by the
manufacturer or an authorized servicer.
c. Misuse, abuse, accidents, unreasonable use, or acts of God.
d. Incorrect eIectdc current, voItage, or supply.
e. Improper setting of any controI.
2. Warranties are void if the original serial numbers have been removed, altered, or
cannot be readily determined.
3= Light bulbs.
4. Products purchased for commercial or industrial use.
5. The cost of sewice or service call to:
a. Correct installation errors.
b. Instruct the user on the proper use of the product.
c. Transport the appliance to the sewicer and back.
6. Consequential or incidental damages sustained by any person as a result of any
breach of these warranties.
Some states do not allow the exclusion or limitation of consequential or incidental
damages,so the above exclusion may not apply.
If you Need Service
First see the Troubleshooting section in your Use and Care Guideor caII Maytag
ServicessM,Amana Customer Assistance at 1-800-843-0304 U.S.A.or
1-868-587-2002 Canada=
To Obtain Warranty Sewice
To locate an authorized service company in your area contact the dealer from
whom your appliance was purchased or call Maytag ServicessM,Amana
Customer Assistance. Should you not receive satisfactory warrant),,service,
call or write:
Maytag Servicess_J_
Attn: CAR Center
P.O. Box 2370, Cleveland, TN 37320-2370
NoSo1-800-843-0304 and Canada 1-866=587-2002
NoSoeasterners using TTY for deaf, hearing impaired or speech
impaired, call 1=800=688=2080o
Note: When contacting Maytag ServicesSM,Amana CustomerAssistance
about a service probIem, piease incIude the following:
a=Your name,address and teIephone number=
b=Model number and seriaI number of your appIiance=
c=Name and addressof your deaIer and date appliance was purchased=
d.A clear description of the problem you are having.
e=Proof of purchase=
SM
Use and Care guides, service manuals and parts information are available from Maytag Services' , Amana Customer Assistance.
22
Cuisini_re _ gaz encasttabie _ commandes Easy Touch 800
instructions de s6curit6
importantes ............................................................. 29-33
Cuisson sur masurface .......................................... 34-35
Commandes de Hasurface de cuisson
Br_JHeurssceH6s
Cuissen darts le four ............................................. 36-46
Cuisson courante
Cuisson et maintien
Cuisson et maintien diff6r6s
Maintien au chaud
Cuisson au gril
Grilles du four
Nettoyage ................................................................ 47-50
Four autonettoyant
M6thodes de nettoyage
Entretien ................................................................... 51-52
Hublot et lampe du four
D6placement d'un appareil 8 gaz
Recherche des pannes .........................................53-54
Garantie et service aprbs-vente .................................55
Guia de Use y Cuidade .................................................56
Censommatear : VeuilbZ [!re le guide et [e conserver pour
Numero des@ie
Dated'achat
1_866_587-2002Canada
Darts[e Cadrede nospratiques d'arn_ii0rationconstantede [a
qua[it6 et de ia performancede nos produ[tsde cuisson,des
modifications de I'appare[[qui ne sent pas mentionn@sdans ce
Repertez=veus _ la page 55 pe#r _l#s d'informado#s
Ce#cernant le setdce apr#s_ve#te.
Les instructions de secufite importantes et bs paragraphes
<<avertissement >>de ce guide ne sent pas destines a couvrir
toutes bs conditions et situations qui pourrabnt se presenter,
II faut faire preuve de ben sons, de prudence et de soin Iors de
Finstallation, de Fentretien ou du fonctionnement de Fappare&
Toujours prendre contact avec le fabricant darts b cas de
proNemes ou de conditions qui ne seraient pas comprises,
Reconna tre [es tiquettes, paragraphes et
symboUes sur [a securit6
Life toutes los instructions avant d'utiliser cot appareii;
observer toutes bs instructions pour eliminer bs risques
d'incendie, choc ebctrique, dommages materiels et corporeb
que pourrait susciter une utilisation incorrecte de Fappare&
Utiliser I'appareil uniquement pour bs fonctions prevues,
d@rites dans ce guide
Pour une utilisatien adequate et en securite, i[ faut que
I'appareil soit convenabbment installe pa un technicien
qualifie, et relic b la terre. Ne pas regbr, reparer n rempBcen
un composant, a morns que ceB ne soit s pecifiq uement
recommande darts ce guide, Toute autre reparation doit 6tre
effectuee pa un technicien qualifie Demander a Finstallateun
de montren ou se trouve b robinet d'arret de gaz et comment
b former en cas d'urgence,
Toujours ddbrancher [a ppareil avant d'y faire de [entretien,
Siles directives denn_es duns [e present guide ne
sent pas respect6es _ la [ettre, il y a risque d'incendie
ea d'expiesien peuvant causer des demmages, des
Messa reset memo [a merL
- Ne pas ranger ni atiliser d'essenee eu autre vapeur
eu liquide infiaramabie _ preximit_ de cot appareil
eu de teat autre appareiL
- QUE FAIRE S! L'ON SENT UNE ODEUR DE GAZ :
. Ne mettre aucun appareil en marche.
. Ne pas teacher _ un interruptear 6iectrique,
o N'atiliser aucun t_mephene de ['iraraeuble.
- Se rendre chez un veJsin et tel@honer
imra_diatement _ la cempagnie de gaz. Suivre los
directives denn_es par le pr@es_ de la
ee_pagnie de gaz.
* S'il est i_essible de jeindre [a ee_pagnie de
gaz, t_i@hener au service des incen_ies.
o L'installatien et los r_paratiens _eivent _tre
cenfi_es _ un installateur competent, _ ane
entreprise _e service eu & la ee_pagnie _e gaz.
AVERTiSSE_ENT _ Danger s 0U pratiques dangereuses qui
mort.
susdter une situation dangereuse: L'odorat pout nepas
POURRA[ENTresu[ter en des Nessures mineures.
(homobgatio n UL}_ hsta[ier et utiiiser le detecteur
confo_mement aux instructions du fabricant.
29
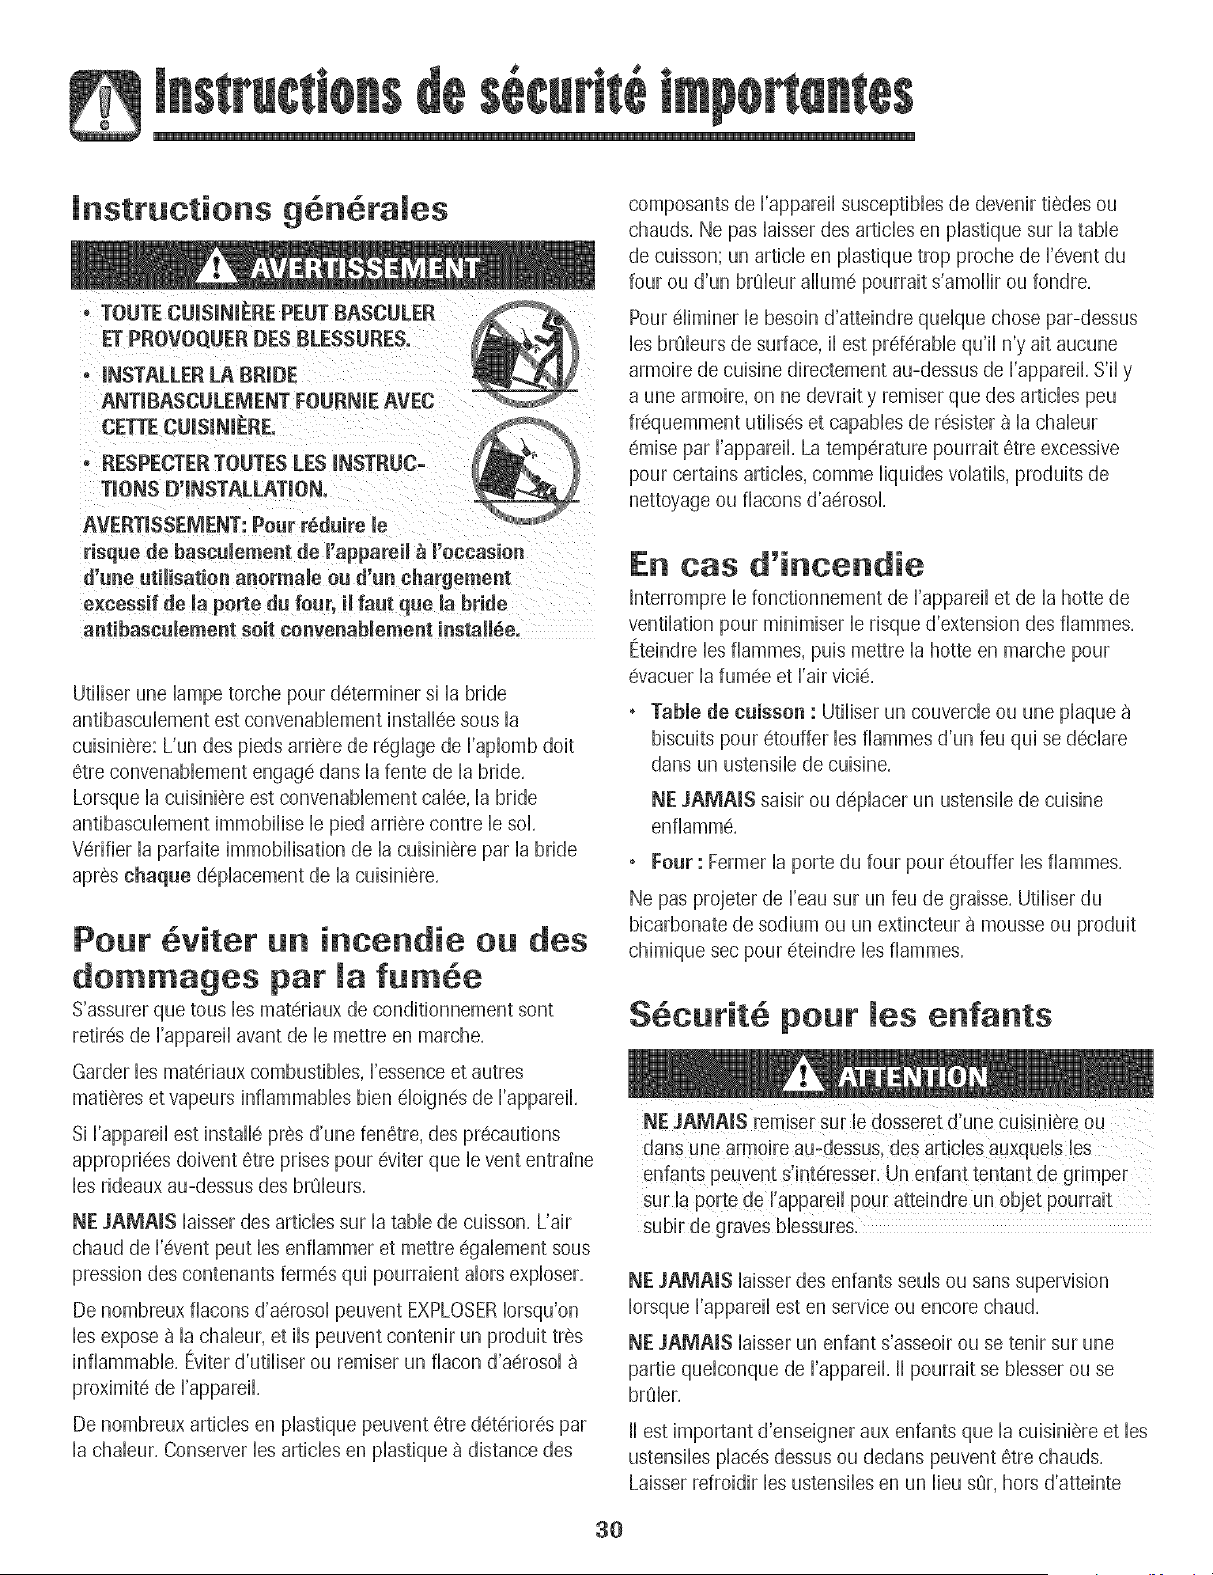
instructions g n raJes
* TOUTE CUmSINIEREPEUT BASCULER
ET PROVOQUER DES BLESSURES.
° iNSTALLER LA BRIDE
ANTIBASCULEMENT FOURNmE
CETTE CUmSINIERE.
, RESPECTERTOUTES LES iNSTRUC-
TiONS D'mNSTALLATmON.
AVERTmSSEMENT:Pour reduire b
risque de basculement de I'appareil _ re'occasion
d'une utilisatien anermaJe eu d'un chargement
e×cessif de la porte du four, il faut que la bride
antibaseulement seit eenvenabiement instail_e,
Utiliser une Bmpe torche pour determiner si la bride
antibascubment est convenabbment installee sous la
cuisiniere: L'un des pie@ arriere de reghge de I'aplomb doit
etre convenabbment engage darts la lento de la bride,
Lorsque la cuisiniere est convenabbment calee, la bride
antibascubment immoNise b pied arriere contre b sol,
Verifier la parfaite immoNisation de la cuisiniere par la bride
apres chaque @placement de la cuisiniere,
Pour 6viter un incendie ou des
dommages par fumee
S'assurer que tous bs materiaux de conditionnement sont
retires de I'appareil avant de b mettre en marche,
Garder bs materiaux combustibles, Fessence et autres
matieres et vapeurs inflammables bien eloignes de I'apparefl,
Si I'appareil est instafle pros d'une fenetre, des precautions
appropriees doivent 6tre prises pour @iter que b vent entrdne
bs rideaux au-dessus des brQburs,
NE JAMNS Bisser des articles sur la table de cuisson, L'air
chaud de F@ent pout bs enfiammer et mettre egabment sous
pression des contenants fermes qui pourraient dors exploser,
De nombreux flacons d'aerosol peuvent EXPLOSERIorsqu'on
bs expose a la chabur, et ils peuvent contenir un produit tres
inflammable, Eviter d'utiliser ou remiser un flacon d'aerosol
proximite de I'appareil,
De nombreux articles en pBstique peuvent etre @teriores par
la chabur, Conserver bs articles en plastique a distance des
composants de ['apparei[ susceptibies de devenir tiedes ou
chauds, Ne pas laisser des articles en plastique sur la table
de cuisson; un article en plastique trop proche de I'event du
four ou d'un brQleur allume pourrait s'amollir ou fondre,
Pour eliminer le besoin d'atteindre quelque chose par-dessus
les brQleurs de surface, il est preferable qu'il n'y ait aucune
armoire de cuisine directement au-dessus de I'appareil, S'il y
a une armoire, on ne @wait y remiser que des articles peu
frequemment utilises et capables de resister a la chaleur
emise par I'appareil, La temperature pourrait etre excessive
pour certains articles, comme liquides volatils, produits de
nettoyage ou flacons d'aerosol,
En cas d'incendie
[nterrompre [e fonctionnement de ['apparei[ et de [a hotte de
ventilation pour minimiser le risque d'extension des fiammes.
Eteindre les fiammes, pub mettre la hotte en marche pour
evacuer la fumee et [air vicie.
, Table de cuisson : Utiliser un couverde ou une plaque
biscuits pour etouffer bs fiammes d'un feu qui se declare
dans un ustensib de cuisine,
NE JAMAmS saisir ou d@Bcer un ustensib de cuisine
oriflamme,
. Four : Fermer la porte du four pour etouffer bs fiammes,
Ne pas projeter de I'eau sur un feu de graisse, Utiliser du
bicarbonate de sodium ou un extincteur a mousse ou produit
chimique sec pour eteindre bs fiammes,
S curit6 pour Jes enfants
enfants peuvent s'interesser. Un enfant tentant de gdmper
subir de graves bbssures.
NE JAMAIS iaisser des enfants seuis ou sans supervision
Iorsque I'appareil est en service ou encore chaud,
NE JAMAIS laisser un enfant s'asseoir ou se tenir sur une
partie quelconque de I'appareil, II pourrait se blesser ou se
brOler,
fl est important d'enseigner aux enfants que la cuisiniere et les
ustensiles places dessus ou dedans peuvent etre chauds,
Laisser refroidir les ustensiles en un lieu sSr, hors d'atteinte
3O
des enfants, II est important d'enseigner aux enfants qu'un
appareiI mdnager n'est pas un jouet, et qulb ne doivent
toucher aucune commande ou autre composant de I'appareiI,
Familiarisation avee l'appareil
NE JAMAmS utiliser la porte des fours comme tabouret/siege/
escabeau: ced pourrait faire bascubr I'appareil et entrainer
dommages corporels sedeux.
NE JAMAIS utHber la cubiniere comme source de chaleuH
pour le chauffage de la piece. Sinon. un empobonnement au
monoxyde de carbone pourrait s'ensuivre ainsi qu'une
surchauffe du four.
NE JAMAIS recouwer es fentes, ouvertures OLpassages
de la sob de four ni la gdlb toute entiere avec un matedau
comme du papler d'aluminium. Sinon. la circulation de I'air
dans b four sera entravee et donc entraher un
empolsonnement au monoxyde de carbone. Le papier
d'alumi nium peut aussi empnsonner de la chabur et
entrainer un risque d'incendie,
NE JAMAmS obstruer la circulation de I'air de combustion et
de _entilation au niveau de [event de four ou des entrees
d'air, Sinon, I'air ne parvient pas correctement aux brSleurs
et donc cela peut poser un risque d'empoisonnement au
monoxyde de carbone,
L'event de four est situe a I'arriere de la surface de cuisson.
Evitez de toucher ie voisinage de i'event de four iorsque ie four
est utiiise et pendant piusieurs minutes apres i'arret du four.
Certains composants de I'event et la zone voisine peuvent
devenir suffisamment chauds pour provoquer des brQiures.
Apres i'arret du four, ne touchez pas i'event de four ou ia zone
voisine avant que ces composants aient pu se refroidir
suffisamment.
Autres surfaces potentiellement chaudes table de cuisson,
zones faisant face a la table de cuisson, event de four, zones
voisines de i'event, porte de four et zones voisines de porte et
de hubiot.
Ne touchez pas I'ampoule chaude du four avec un linge
humidel le choc thermique pourrait la briser. Si tel est le cas,
debranchez I'appareil avant de retirer I'ampoule }our eviter
une decharge electrique.
Ne pas remiser des aliments ou ustensiles de cuisine sur la
table de cuisson ou dans le four.
Cuisson et s curit6
Placer toujours un ustensiie sur un brSieur de surface avant de
I'allumer. Veiller a bien connaitre la correspondance entre les
boutons de commande et les brQleurs.Veiller a allumer le
brOleur correct et verifier que le brQleur s'allume
effectivement. A la fin de la periode de cuisson, eteindre le
brQleur avant de retirer I'ustensile, pour eviter une exposition
aux flammes du brQleur.
Veiller a toujours ajuster correctement la taille des flammes
pour qu'elles ne depassent pas sur la peripherie de I'ustensile.
Des flammes de trop grande taille sur un brSleur sont
dangereuses, elles entrainent un gaspillage d'energie et elles
peuvent faire subir des dommages a I'ustensile, a I'appareil ou
I'armoire situee au-dessus.
NE JAMAIS iaisser un brQieur de surface aiiume sans
surveillance, particulierement avec une puissance de
chauffage elevee ou Iors d'une operation de friture. Un
debordement pourrait provoquer la formation de fumee et des
produits gras pourraient s'enfiammer. Eiiminer des que
possible les produits gras renverses. Ne pas utiliser une
puissance de chauffage elevee pendant une periode
proiongee.
NE JAMAIS faire chauffer un recipient non ouvert dans ie
four ou sur un brOleur de surface; I'accumulation de pression
dans le recipient pourrait provoquer son eclatement et de
graves dommages materiels ou corporels.
Utiliser des maniques robustes et seches. Des maniques
humides peuvent provoquer la formation de vapeur brQlante.
Ne jamais utiliser un torchon a vaisselle ou autre article textile
la place de maniques; un tel article pourrait trainer sur un
brQleur et s'enflammer, ou accrocher un ustensile ou un
composant de I'appareil.
Laisser toujours refroidir un recipient d'huile de friture chaude
avant de tenter de le deplacer et le manipuler.
Ne pas laisser la graisse de cuisson ou autre materiau inflam-
mable s'accumuler dans ou pres de I'appareil, de la hotte ou
du ventilateur de I'event. Nettoyer frequemment la hotte pour
empecher route accumulation sur la hotte elle-meme ou sur le
filtre. Lots du flambage d'aliments sous la hotte, mettre le
ventilateur en marche.
NE JAMAmS porter, Iors de I'utilisation de I'appareil, des
vetements fairs d'un materiau inflammable, ou amples, ou
Iongues manches. De tels vetements peuvent s'enflammer ou
accrocher la poignee d'un ustensile.
31
Placer toujours [es grilles a [a position appropriee darts [e four
Iorsque le four est froid. Faire coulisser la grille vers I'exterieur
avant d'ajouter ou enlever un plat; utiliser pour cela une
manique robuste et seche. Eviter d'introduire la main darts le
four pour y placer ou retirer un plat. S'il est necessaire de
deplacer une grille Iorsqu'elle est chaude, utiliser une manique
seche. Veiller a toujours arreter le four a la fin d'une periode
de cuisson.
Ouvrir toujours [a porte du four tres prudemment. Laisser ['air
chaud ou la vapeur s'echapper avant de retirer/introduire un
plat.
AVERTmSSEMENT : Mets prepares : Respecter les instruc-
tions du fabricant. Si le contenant ou le couvercle en plastique
d'un mets surgele se ddorme ou est endommage durant la
cuisson, jeter immediatement le recipient et son contenu. Les
aliments pourraient etre contamines.
NE JAMAIS garnir la sole ou une grille du four avec de la
feuille d'aluminium. Ceci pourrait susciter un risque de choc
electrique ou d'incendie, ou une autre deterioration de
I'appareil. Utiliser de la feuille d'aluminium uniquement selon
les instructions de ce guide.
Ustensimes et s curit
Utiliser des ustensiles a fond plat comportant une poignee
qu'on peut facilement saisir et qui reste froide. Eviter d'utiliser
un ustensile instable ou ddorme, qui pourrait facilement
basculer, ou dont la poignee est mal fixee. Eviter egalement
d'utiliser des ustensiles de petite taille comportant une
poignee Iourde; ces ustensiles sont generalement instables et
peuvent facilement basculer. Un ustensile Iourd Iorsqu'il est
rempli peut egalement etre dangereux Iors des manipulations.
Veiller a utiliser un ustensile de taille suffisante pour que le
contenu ne risque pas de deborder. Ceci est particulierement
important pour un ustensile rempli d'huile de friture. Verifier
que la taille de I'ustensile est suffisante pour qu'il puisse
recevoir les produits alimentaires a cuire, et absorber
I'augmentation de volume suscitee par I'ebullition de la
graisse.
Pour minimiser les risques de brOlure, d'infiammation de
matieres et de renversement par contact non intentionnel avec
un ustensile, ne pas orienter la poignee d'un ustensile vers un
brOleur adjacent; orienter toujours la poignee d'un ustensile
vers le cote ou I'arriere de I'appareil; ne pas laisser non plus la
poignee d'un ustensile deborder a I'avant de I'appareil, ou_un
jeune enfant pourrait facilement la saisir.
Veiller a ne jamais laisser le contenu liquide d'un ustensile
s'evaporer completement; I'ustensile et I'appareil pourraient
subir des dommages.
Appliquer les instructions du fabricant Iors de I'emploi d'un
sachet pour cuisson au four.
Seuls certains materiaux en verre, vitroceramique, ceramique,
ou certains ustensiles vitrifies/emailles peuvent etre utilises sur
la table de cuisson ou darts le four sans risque de bris sous
I'effet du choc thermique. Observer les instructions du
fabricant Iors de I'utilisation d'un ustensile en verre.
La secur[te de fonct[onnement de cet apparel[ a ete testee
I'aide d'ustensiles de cuisine conventionnels. Ne pas utiliser un
ustensile ou accessoire qui n'est pas specifiquement
recommande darts ce guide. Ne pas utiliser de couvre-brQleur,
gril place sur la table de cuisson ou systeme de convection
additionnel. L'utilisation d'un dispositif ou accessoire qui n'est
pas expressement recommande darts ce guide peut degrader
la securite de I'appareil ou sa performance, ou reduire la
Iongevite des composants.
Nettoyage et seeurit
Arreter toutes les commandes et attendre le refroidissement
de tousles composants avant de les toucher ou d'entre-
prendre le nettoyage. Ne pas toucher la grille d'un brQleur ou
la zone voisine avant que ces composants aient pu suffisam-
merit refroidir.
Exercer une grande prudence Iors du nettoyage de I'appareil.
Travailler prudemment pour eviter des brQlures par la vapeur
en cas d'utilisation d'un chiffon ou d'une eponge humide Iors
de I'elimination d'un produit renverse sur une surface chaude.
Certains produits de nettoyage peuvent generer des vapeurs
nocives Iorsqu'on les applique sur une surface chaude.
[:our autor|ettoyar|t
Ne [aisser aucune nourriture ni ustensile de cuisine, etc,
Nettoyer uniquement les pieces mentionnees darts ce guide.
Ne pas nettoyer le joint de porte; le joint joue un role essentiel
quanta I'etancheite. Ne pas frotter, endommager ou deplacer
le joint. Ne pas utiliser de produit de nettoyage du four darts
le four autonettoyant ou sur les zones voisines.
32

Avantd'executeruneoperationd'autonettoyage,retirerla
I@hefrite,lesgrillesdufouretlesautresustensiles,eteliminer
paressuyagetoutexcesderesidusrenversespour@iteria
formationdefumeeoui'infiammationdecesresidus,
li estnormalqueiasurfacedecuissondeviennechaude
durantuneoperationd'autonettoyage;parconsequent,eviter
detoucheriasurfacedecuissonduranti'autonettoyage,
Avertissement et avis
important pour s curit
La Ioi californienne {<Safe Drinking Water and Toxic Enforce-
ment Act >>de 1986 (proposition 65} stipule la publication par
ie gouverneur de ia Caiifornie d'une iiste de substances que
i'etat de Caiifornie considere comme cancerigenes ou
dangereuses pour ie systeme reproducteur, et impose aux
entreprises commerciaies i'obiigation de signaler a burs
clients ies risques d'exposition a de teiies substances,
Les utilisateurs de cet appareil peuvent etre exposes a une
faible concentration de certaines substances figurant darts la
liste mentionnee ci-dessus, dont benzene, formaldehyde et
sub, du fair de la combustion incomplete du gaz naturel ou du
gaz de petroie iiqudie, Pour minimiser ia combustion
incomplete, veiiier ace que ies bn3ieurs soient parfaitement
regies, Pour minimiser i'exposition aces substances, veiiier
bien @acuer ies gaz de combustion a i'exterieur,
Nous informons ies utiiisateurs de cet appareii que iors d'une
operation d'autonettoyage, ils peuvent etre exposes a une
faible concentration de certaines substances figurant darts la
iiste mentionnee ci-dessus, dont ie monoxyde de carbone,
Pour minimiser i'exposition, veiiier ace que ia piece ou se
trouve ie four soit convenabiement aeree durant une operation
d'autonettoyage par i'ouverture d'une fenetre ou d'une porte,
AViS iMPORTANT _ OISEAUX FAMILIERS : Les oiseaux ont
un systeme respiratoire tres sensible, Ne pas garder un oiseau
famiiier darts ia cuisine ou darts une piece oQii pourrait etre
expose aux fumees, Les fumees emises durant une operation
d'autonettoyage peuvent etre dangereuses ou morteiies pour
un oiseau, de meme que ies fumees emises iors du chauffage
excessif de graisse, huile, margarine, et du chauffage excessif
darts un ustensile a revetement antiadhesif,
Conserver ces instructions pout consultation ult tieute
33
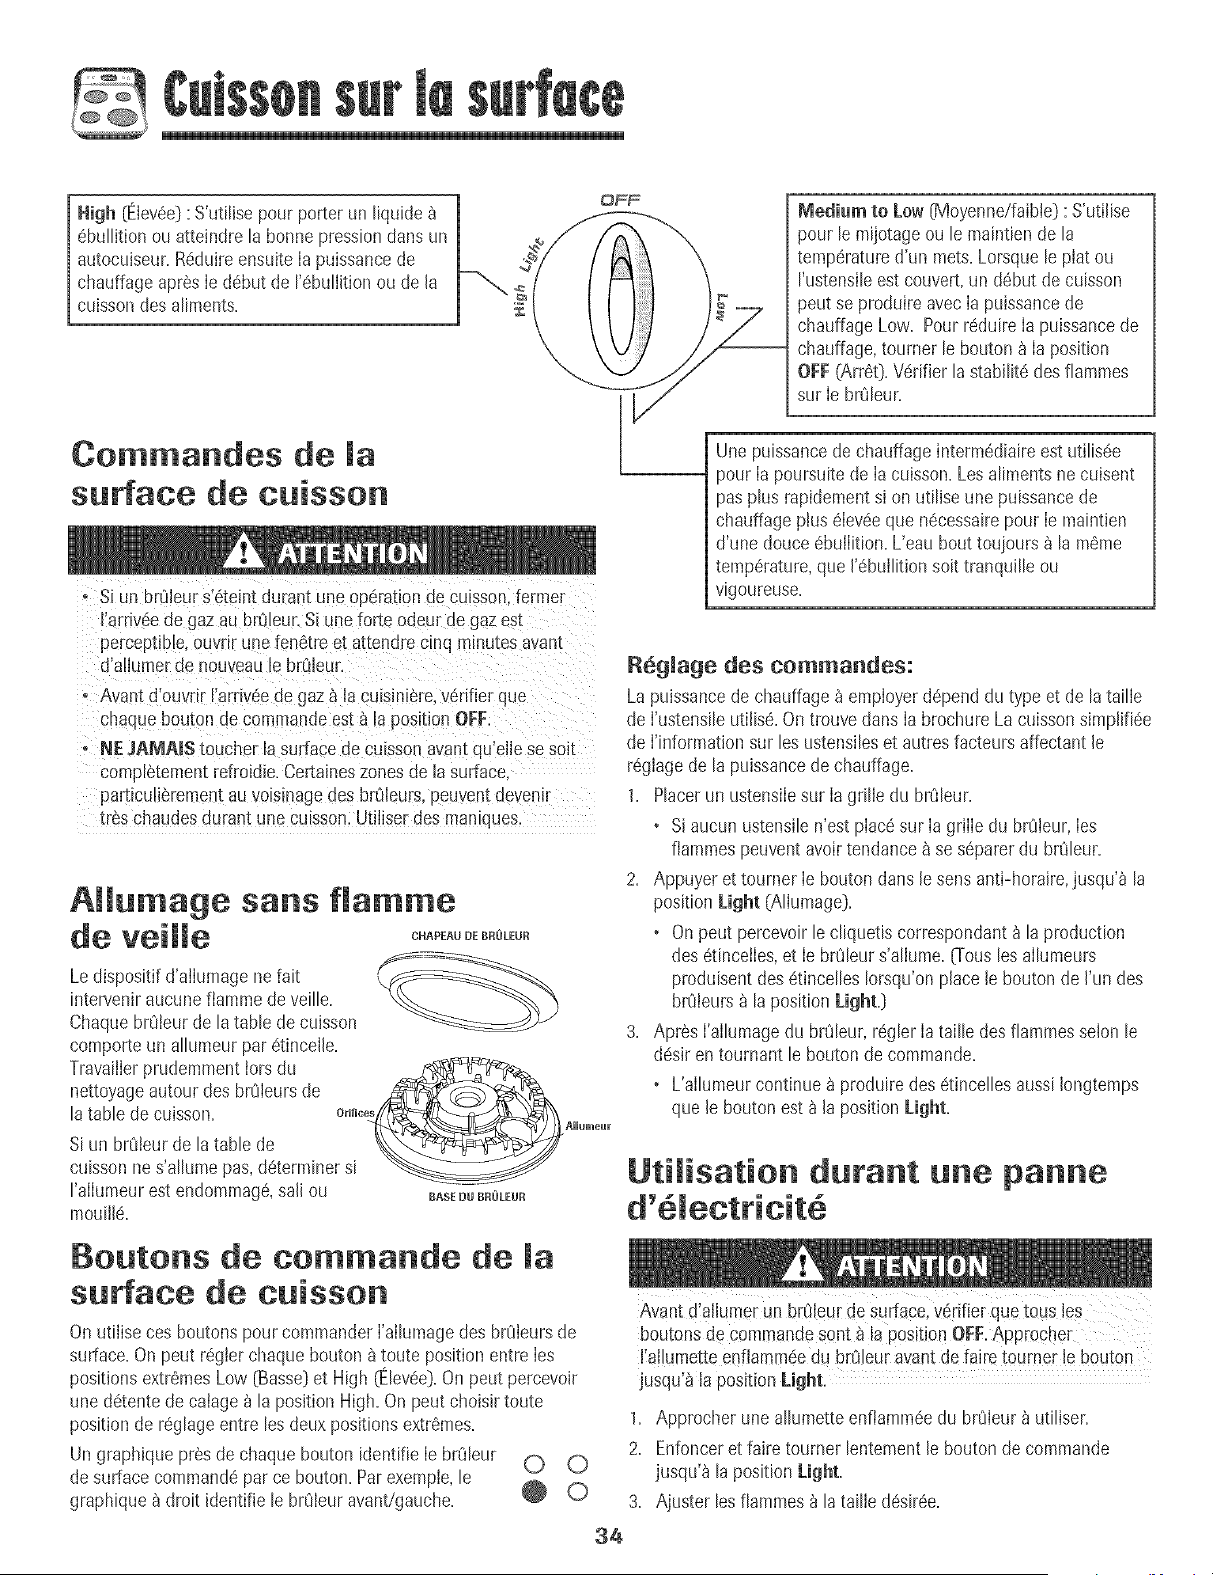
High (Elev6e}: S'utiHsepour porter un liquide
6bul%on ou atteindrela bonne pressiondans un
autocuiseur+R6duireensuite Ia puissancede
chauffage apr6sIe d6but de F6bul%onou de la
cuissondes aliments+
Comma°des de la
surface de cuisse°
+ Siun brOleurs'6teJntdurant uneop6ration de cusson, ferme+
I'arriv6edegaz au br01eur.Si une forte odeu+de gazem
Medium to Low[Moyenne/faible): S'utiJise
pour [emijotageou le maintiende [a
temp6ratured'un mets+Lorsquele plat ou
I'ustensileest couvert,un d6but de cuisson
peut se produire avec Ia puissancede
chauffage Low+PourreduireIa puissancede
chauffage,tourner le bouton_ Ia position
OFF(Arr6t}+Wrifier lastabilit6 des flammes
sur Ie bffJleur+
Une puissancede chauffage interm6diaireestutilis6e
pour Ia poursuitede Ia cuisson.Les alimentsne cuisent
pasplus rapidementsi on utilise une puissancede
chauffage plus 6Iev6eque n6cessairepour Ie maintien
d'une douce 6bulIition.L'eau bout toujours _ lam6me
temperature,que 1'6bullitionsoit tranquille ou
vigoureuse.
percept[bIe,ouvrir une fen6tre et attendre cmq minutes a_an[
d aIlumerde nouveau[e brOleur.
+ A_an[ d'ouvrir ['arriv_eaegaz _ Jacuis+ni_re,v6rifier que
cnaquebouton de commandeesta ta potationOFF
• NE JAMAIS toucher la surfacede cuissonavan[ qu'eHese so+t
compI_tementrefro+d+e.Certa+neszonesue la surface
particuli_remenlau volsmageaes br01eurspeuvemdeven++
[r_schaudesdurant une cu[sson.Ut+liserdes maniques.
Allumage sans flamme
de veiHe +++o,o.o+o
Ledispositifd'alIumage nefait k
interveniraucune flammede veille+
ChaquebrOleurde latable de cuisson
comporteun allumeur par 6tincelle+
Travaillerprudemmenttors du
nettoyageautour des brOleursde _(Z_z_L,,
latable decuisson, o,r+_+_//_,Pf_,g_/\\
Si un brOleurde la table de -u-._,__..__m,
cuissonne s'allumepas, d_terminersi
I'alIumetJrest endommag6,sali ou BASEnUBOOLEUR
mouille.
Boutons de comma°de de la
surface de cuisse°
OnutHisecesboutonspour commander['ai[umagedes brOleursde
surface.Onpeut r6glerchaquebouton a toute positionentre [es
positionsextremesLow [Basse}et High (Elevee}.On peut percevoJr
uned6tentede calage_ la position High.Onpeut choisir toute
positionde r6glage entre lesdeux positionsextremes.
Un graphJquepr6sde chaque bouton identifie [e brO[eur
desurface command_par ce bouton.Parexemple,le
graphique_droit [de°title [e brOleuravant!gauche.
34
R_glage des commaades:
La puissancede chauffage_ employerd6penddu type et de la taille
de ['ustensileuti[is6.On treuve dans [a brochure Lacuissons+mp[gi6e
de [information sur [esustensiIeset autresfacteursaffectant le
r6glagede la puissancede chauffage.
1. Placerun ustensilesur [agrille du brOleur.
• Si aucun ustens+len'est plac6sur [a grille du brOleur,[es
flammespeuventavoir tendance_ se s6parerdu brOleur.
2. Appuyer et tourner [e boutondarts [e sens anti-horaire,jusqu'_ la
position Light (AlJumage}.
+ On peut percevoir le cliquetiscorrespondant_ la production
des 6tincetles,et Ie br_Jleurs'alJume.[Tousles allumeurs
produisentdes @tincellesIorsqu'onplace [e bouton de ['un des
brOleurs_ la position Light.}
3. Apr@sI'allumagedu br_Jleur,r@glerIa taille des flammesselon le
d6sir en tournant le boutonde commande.
+ L'allumeurcontinue_ produiredes @tincellesaussiIongtemps
que [e bouton est _ [a positionLight.
UtiJisation d rant parme
Avant d:aiiumerun brOieurdeSurface,v6rifier quetous[es
boutons de comma°de sent_ la position OFF.Approcher
['ailurnette enflamm6edu br8ieur avant de faire tourner [e bouton
jusqu _ [a position Light.
1. Approcherune aJJumetteenflamm_edu brOIeur_ utiJiser.
2. Enfonceret faire toumer lentementle boutonde commande
jusqu'_ la positionLight.
3. Ajuster les fiammes_ la tailie d@sir@e.
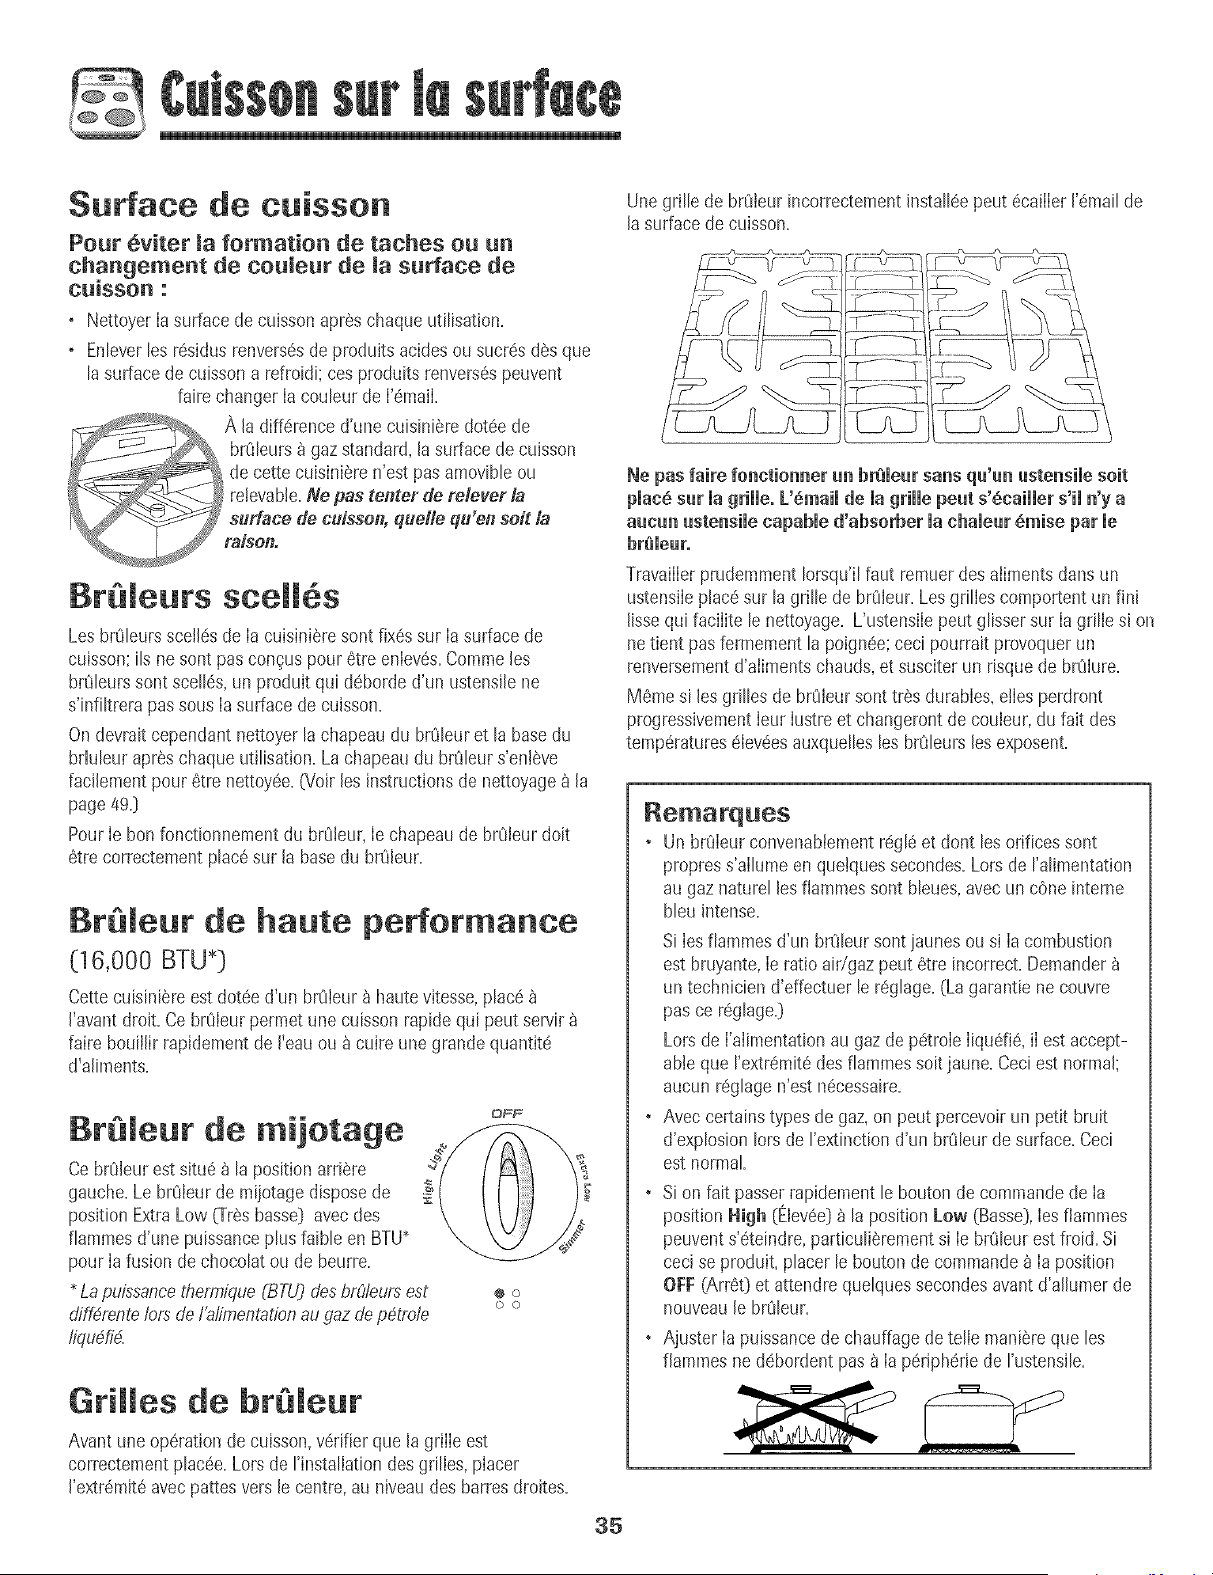
Surface de cuisson
Pour 6viter la formation de taches ou un
changement de couleur de la surface de
cu[sson :
o NettoyerIasurface de cuissonapreschaqueutilisation.
o Entevertesr6sidusrenvers6sde produitsacidesou sucr6sdes que
ta surfacede cuissona refroldi; cos produitsrenvers6speuvent
faire changer Ia couteur de I'6maiI.
A [a diff6rence d'une cuisini_re dot6ede
brOleurs_ gaz standard,[a surfacede cuisson
, de cette cuisinieren'est pas amovibleou
relevable.Ne pas tenter de relever la
_ surface de cuisson,quelfe qu'en soft la
raison.
Br@leurs scell s
Les brQleurssceil6sde Ia cuisini_resont fixessur Iasurface de
cuisson;ils nesont pas con_uspour 6tre enlev6s.Commelos
brQleurssont scell6s,un produit qui d6borded'un ustensflene
s'infiltrera passousIa surfacede culsson.
Ondewait cependant nettoyerla chapeaudu brOleuret la basedu
brhleur apreschaque utilisation.La chapeaudu brOleurs'enteve
facflementpour 6tre nettoy6e.(Voir los instructionsde nettoyage_ [a
page49,]
PourIe bon fonctlonnementdu brOleur,Ie chapeaude brOleurdoit
6tre correctementplac8sur [a basedu brOleur.
Br@leur de halite performance
(16,000 BTU*)
CettecuisiniSreest dot_e d'un brOleur_ hautevitesse,plac6
I'avantdroit. Ce brOIeurpermet unecuisson rapide qui peut servir
faire boufllir rapidementde I'eauou _ cuire une grande quantit6
d'aliments.
Br@Jeur de mijotage
Ce brOleurest situ6 _ la positionartiste
gauche.Le brOleurde mijotagedisposede
positionExtraLow 0-rSsbassel)avec des
fiammesd'une puissanceplus faible en BTU"
pour Ia fusionde chocolat ou de beurre.
Lapuisssncethe_ffque (BTU)desbrCt/eursest
diff4rentebrs de f'a_;Jmentsfionau.gazdep4.trote
fiqudi4.
@FF
0 0
0 0
Grilles de br@leur
Avantune op6rationde cuisson,vdrifier que la grille est
correctementplac6e.Lotsde I'instaliationdes grilles,placer
I'extr6mit6avecpattesversle centre,au niveaudes barresdroites.
35
Une grille de brOieurincorrectementJnstall_epout 6caiiier['6mailde
la surfacede cuisson.
Ne pas fsire fonctionner sn brelesr ss_s q_'_ _stensile soit
pisc_ s_r is grille, L'_msii de ia grille pest s'_csiiier s'ii _'y a
sscsn sstensile capable d'shserber mschsmear_mise par le
hr@me_r.
TravaiiierprudemmentIorsqu'ilfaut remuerdesaliments dansun
ustensfleplacesur la grille de brOleur.Lesgrilies comportent un fini
fissequi faciiite le nettoyage. Uustensflepout glissersur [a grilie s[on
netient pas refinementla poign_e;ceci pourrait provoquerun
renversementd'aiimentschauds,et susciter un risquede brOlure.
MSmesi los grilles de brOieursont tr_s durabies,elies perdront
progressivement[our [ustreet changerontde couleur,du fait des
temperatures_[ev_esauxquellesles bffJleurs[es exposent.
Remarques
• Un bKdeurconvenabiementr_gl6et dont losorifices sont
propress'aIlumeen quetquessecondes.Lorsde I'alimentation
au gaz naturel lesflammessont bIeues,avec un cone interne
b[euintense.
Si Iesfiammes d'un brQleursont jaunesou si Ia combustion
est bruyante,Ieratio aidgaz pout Qtreincorrect.Demander
un technicien d'effectuer le rQglage.(Lagarantie ne couvre
pas ce r_g[age.)
Lotsde I'aiimentat[onau gazde g_troIeIiqudiS, iI est accept-
able que I'extremit8desfiammessoit jaune. Ceciest normal;
aucun reglage n'est n_cessaire.
• Avec certainstypes de gaz,on pout percevoir un petit bruit
d'explosionIorsde I'extinct[ond'un brQleurde surface.Ceci
est normal
• Si on fait passerrapidementle bouton decommandode Ia
position Nigh (ElevSe)_ la position [_ew (Basso),Iesflammes
peuvents'Qteindre,particulierementsi Ie brQleurest froid. Si
ceci se produit,placer le bouton de commande_ Ia position
OFF[ArrQOet attendre quelquessecondesavantd'aflumer de
nouveau[e brO[eur.
• Ajuster [a puissancede chauffagedetelie mani6reque los
f[ammesne d_bordent pas8 [a p_riphQriede I'ustensfle.
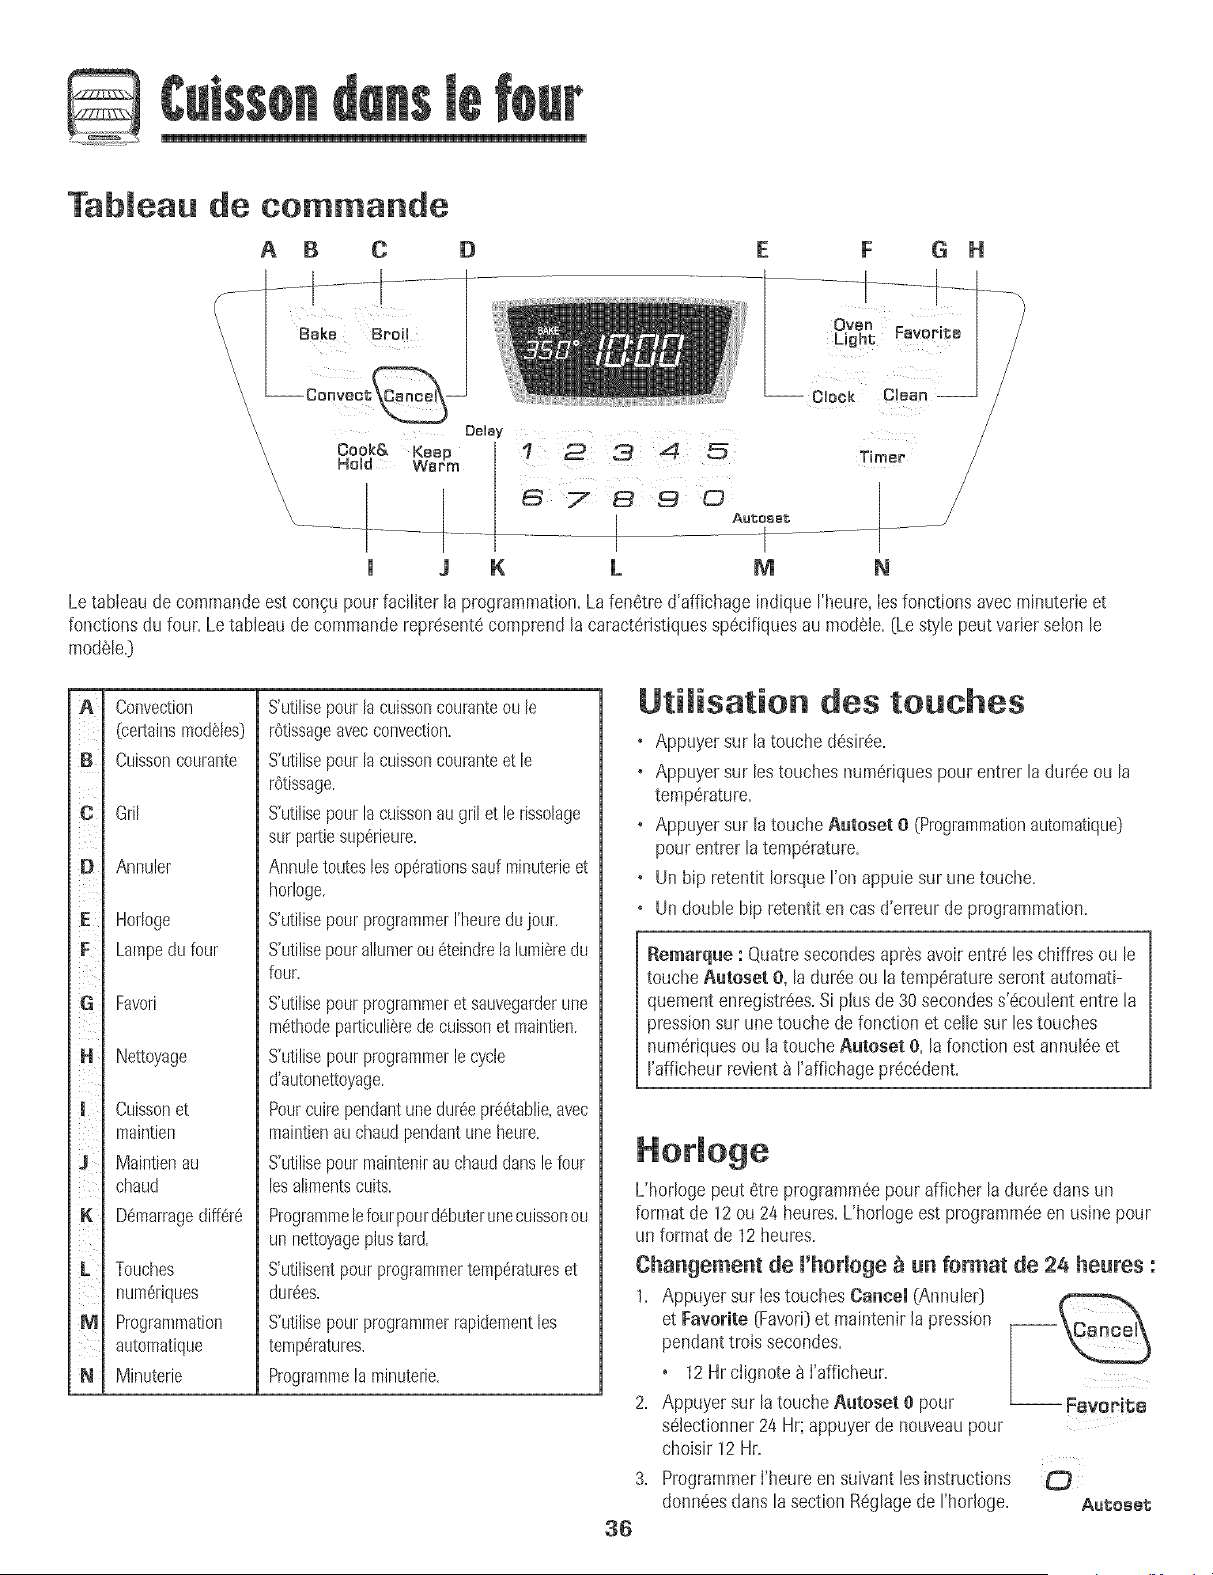
Tableau de commande
\
\
\
\
\
A B C D
DeUay
Cook& Keep I
HoUd WBrm I
\\\\\_ ........................ _ ...........l
J K
! 2 3 ,4 _5
6 789 0
Auteset
I
L M
F G H
ff...........t........
Timer
N
Letableau de commandeest con_upour faciliter la programmation,LafenStred'affichage indique I'heure,Ies fonctions avec minuterie et
fonctionsdu four, Letableau decommanderepresent6comprendla caracteristiquesspecifiquesau modele, [Le style poutvarier solon le
modele.]
[ :T
A
B
D
E
F
G
H
t
3
K
L
M
N
Convection
(certains modules]
Cuisson courante
Gill
Annuler
Horloge
Lampedu four
Favofi
Nettoyage
Cuissonet
maintien
Maintien au
chaud
De,,marragediffer6
Touches
num_riques
Programrnation
automatique
Minuterie
S'utilJsepourla cuissoncouranteou le
rOtissageavecconvection.
S'utilisepourla cuissoncouranteet le
rOtissage.
S'utilJsepourla cuissonaugrilet le rissolage
sur pmtiesuperieure.
Annuletouteslosoperationssaul minuterieet
hor!oge.
S'utilJsepour programmerI'heuredujour.
S'utilisepourallumerou 6teindrelalumbredu
four.
S'utilisepourprogrammeret sauvegarderLine
methodepmticuliarede cuissonet maintien.
S'utilisepourprogrammerlecycle
d'autonettoyage.
Pourcuirependantunedureepr6etablie,avec
maintienauchaudpendantuneheure.
S'utilisepourmaintenirauchauddanslefour
lesalimentscuits.
Programmeb fourpourdebuterunecuissonou
un nettoyageplustard.
S'utilisentpourprogrammertemperatureset
durees.
S'utilisepourprogrammerrapidementlos
temperatures.
Programmela minuterie.
UtiJisation des touches
• Appuyer sur la touchedesiree,
• Appuyer sur les touchesnumeriquespour entrer la dureeou la
temperature,
• Appuyer sur la toucheAutoset 0 (Programmationautomatique]
pourentrer la temperature,
• Un bip retentit IorsqueI'onappuie sur unetouche,
• Undouble bip retentit en cas d'erreur deprogrammation,
Remarque : Quatresecondesapresavoirentre leschiffres ou le
toucheAutoset O,la duree ou la temperatureseront automati-
quementenregistrees,Si plus de 30 secondess'#coubnt entre la
pressionsur unetouche de fonction et celle sur lestouches
numeriquesou la touche Autoset 0, la fonction est annuleeet
rafficheur revient _ raffichage precedent,
L'horloge pout etre programmeepour afficher la dureedans un
format de 12ou24 heures,L'horloge estprogrammeeen usinepour
un format de 12heures,
Changement de m'hodoge _ un format de 24 heures :
1, Appuyer sur los touches Cancel (Annulet]
et Favorite [Favod]et maintenirla pression
pendanttrois secondes,
12Hr ciignote 8 I'afficheur,
2, Appuyer sur la touche Autoset e pour -- Fmvorit;e
sebctionner 24 Hr; appuyerde nouveaupour
choisir 12 Hr,
Programmeri'heure en suivantlosinstructions
donneesdans la section Reglagede rhorloge, Aut;oset;
R6glage de l'horloge
1.
Appuyer sur la touche Clock [Hodoge]. Clock
o L'heureclignote _ i'afficheur.
2. Appuyer sur les touches num@iquesappropri6espour
programmer['heuredujour.
o Deuxpointsciignotent _ I'afficheur.
3. Appuyer a nouveausur la touche Clock ou attendre quatre
secondes.
o Lesdeux points restent.
LorsqueIe courant 61ectriquearrive ou apresune interruption de
courant, la derniare heure avant Finterruptiondecourantva cJignoter.
PourrappelerI'heuredu jour Iorsqu'uneautre fonction de dur6e
s'affiche,appuyersur la toucheClock.
L'heurede I'horlogene peut 6tre chang6eIorsqueIe four a 6t6
programm6pour une cuissonou un nettoyagediff6r6 ou pour la
fonction de cuissonet maintien.
Annulation de l'affichage de l'heure :
Si I'on ne desire pas I'affichagede I'heuredu jour:
Appuyersur Iestouches Cancel [Annuie0 et
Clock et les maintenirainsi pendanttrois
secondes.L'heure dujour disparak de
I'afficheur.
LorsqueI'affichagede I'heureest annul& Clock
appuyersur la touche Clock pour afficher
brievementI'heuredu jour.
Lorsquei'affichagede i'heure est annul& apres 15minutes,le four
passeen modeAttente pour 6conomiserde i'6nergie.L'afficheursera
viergeet 1'6clairagedu four ne fonctionnera pas.Pour _ r@eiiier>>ies
commandes_ partir du mode attente,appuyersur n'importe quelle
touche.Un double hip retentira.
R_affichage de l'heure :
Appuyersur Jestouches Cancel et Clock et Ies maintenirainsi
pendanttrois secondes.L'heuredu jour r6apparait8 I'afficheur.
Laminutedepeut 6tre progmmm6ede une minute (0:01}jusqu'_
99 heureset 59 minutes (99:59}.
Laminutedepeut 6tre utilis6eind@endammentdetoute autre
activit6du four. EIlepeut 6tre aussi programm6ealors qu'une autre
fonction du four est encours d'utilisation.
Laminuteriene commandepas le four. Ellene sert qu'_ 6mettredes
bips.
Programmation de la minuterie :
1. Appuyer sur la touche Timer (Minuterie].
Timer
o 0:00et Ie motTHMERclignotent
I'afficheur.
2. Appuyersur les touches num@riquesapproprJ6esjusqu'a ce que
J'heurejuste paraisse_ I'affJcheur.
o Lesdeux pointset le mot THMERcontinuent _ clignoter.
3. Appuyera nouveausur Jatouche Timer ou attendre quatre
secondes.
o Lesdeux pointss'arr6tentde clignoteret le d6comptede Ja
dur6e commence.
o Laderni6reminutedu d6comptesera affich6esousforme de
secondes.
4. #,la fin de la dur6e programm6e,un bip long retentit et le mot
End{Fin}sera affich6.
5. Appuyersur la toucheTimer poureffacer I'afficheur.
Annulation de la minuterie :
1. Appuyersur la toucheTimer et la maintenir Timer
ainsipendant trois secondes.
OU
2. Appuyersur la toucheTimer et sur la touche
num6rique_ e _.
Verro illage des commandos
et de la porte fo r
La porte du four et ies touches peuvent6tre verrouiii6espour des
raisonsdesecurJt&nettoyageou pour empachertoute utiiisation
non souhait6e.Lestouches ne fonctionneront pas si ellessont
verrouill_es.
Si le four est encours d'utilisation,los toucheset la porte ne peuvent
6tre verrouilIees.
L'heure actuelledujour resteraa J'afficheurJorsquelestouches et la
porte seront verrouill_es.
VerrouiJJage :
Appuyersur lostouches Cancel et Cook &
Hold et les maintenirainsi pendanttrois
secondes.(Appuyerd'abord sur Jatouche
o OFF(Arr60 parait _ I'afficheur.
o Le mot LOCK6/ermuiHage}clignote
Jorsquela porte est en cours de
verrouillage.
D_verro_iJJage :
Appuyersur lostouches Cancel et Cook & Holdet les maintenir
ainsi pendanttrois secondes.(Appuyerd'abord sur la touche
Cancel.} Lemot OFFdisparaitde I'afficheur.
_ Remarq_e : Laporte du four et lestouches ne peuvent6tre
verrouili@ssi la temp6raturedu four est de 205 °C{400°F}ou
plus.
__ Cook&
Hold
37
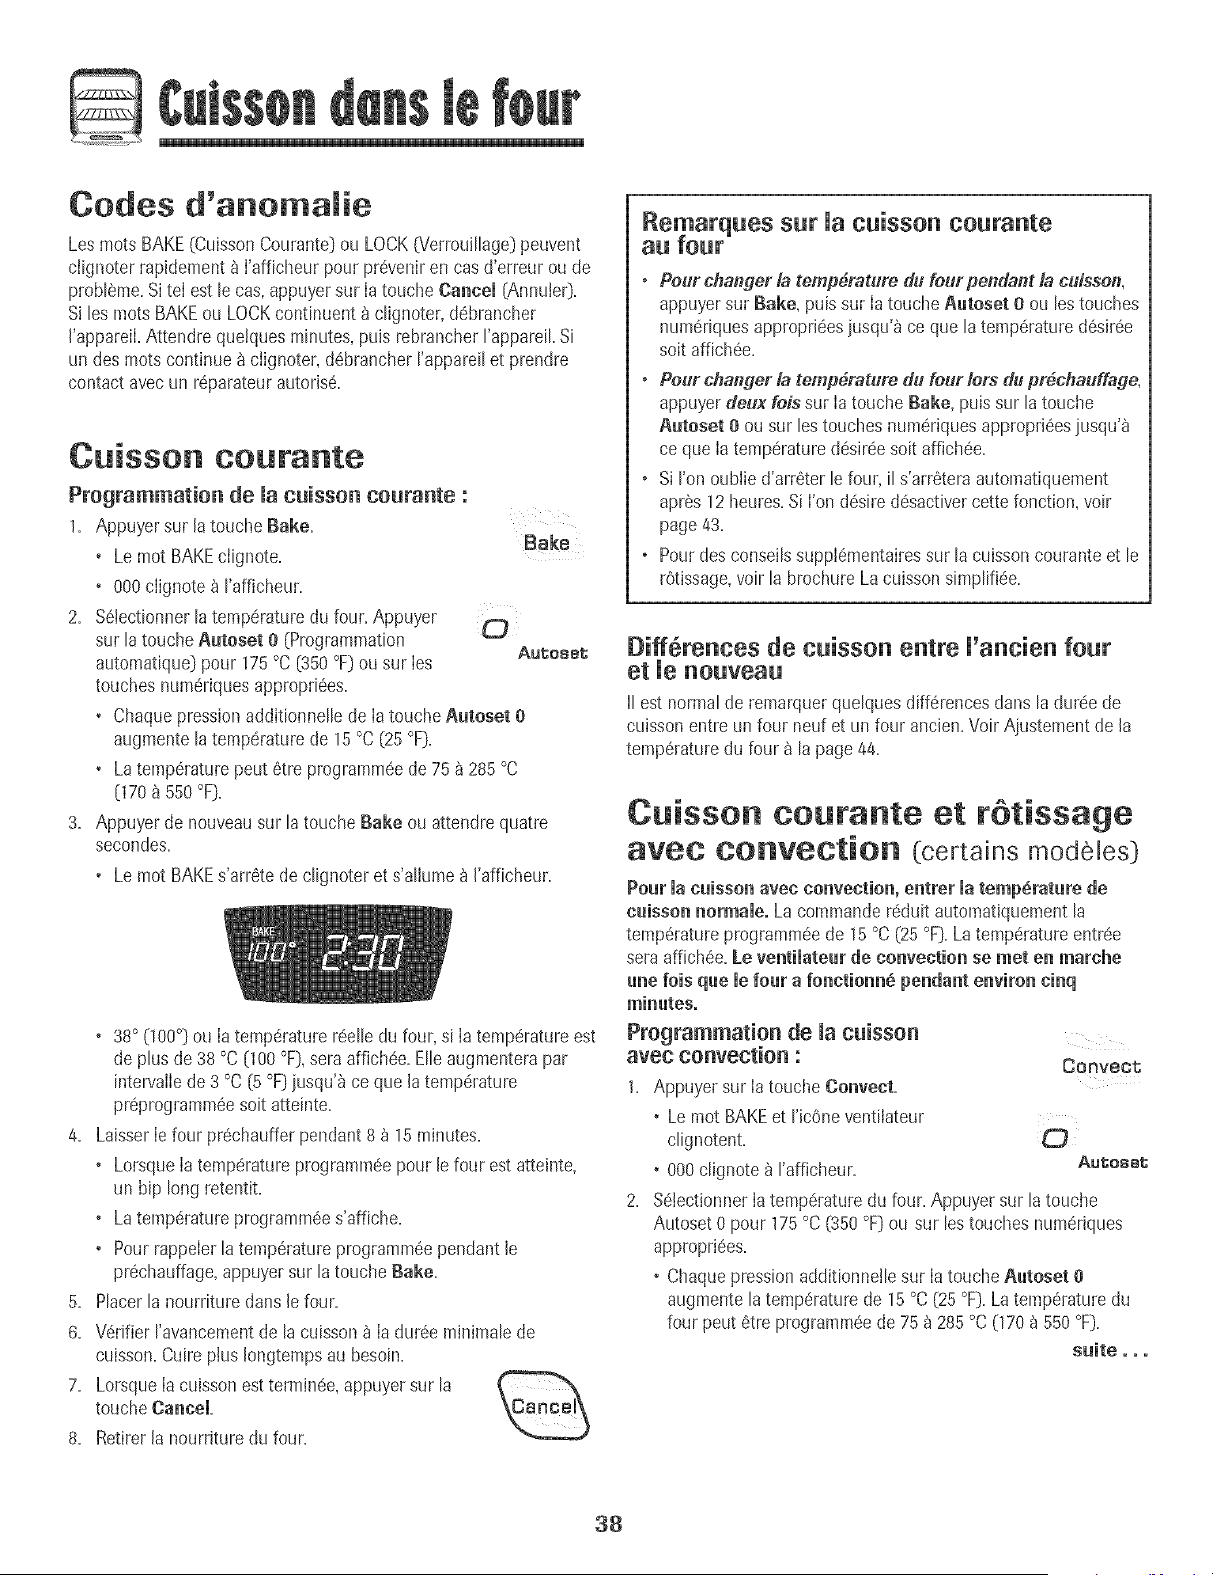
G
Codes d'anomalie
Les roots BAKE(CuissonCourante)ou LOCK07errouillage)peuvent
ciignoterrapidementb i'afficheur pour preveniren cas d'erreur oude
probleme.Sitei est le cas,appuyersur ia touche Cancel [AnnuIe0.
Si les rootsBAKEou LOCKcontinuent b c@noter,debrancher
I'appareiLAttendre queifluesminutes,puis rebrancherI'appareiLSi
un des rootscontinueb ciignoter,debrancherI'appareilet prendre
contactavecun reparateurautorise.
Cuisson courarite
Programmation de macuisson courante :
1. Appuyer sur la touche Bake+
• Le mot BAKEciignote.
• 000ciignote b I'afficheur.
2. Selectionnerlatemperaturedu four.Appuyer
sur latouche Aatoset 0 (Programmation
automatique)pour !75 °C (350OF)ou sur ies
touches numeriquesappropriees.
• Chaquepressionadditionnellede ia touche Aatoset e
augmentelatemperaturede 15°C(25 °F).
• La temperaturepeut etre programmeede75 _ 285°C
0 70 _ 550 °F).
Bake
3. Appuyer de nouveausur latouche Bake ou attendrequatre
secondes.
, Le mot BAKEs'arretede clignote+et s'allumeb J'afficheur.
• 38° (100°} ou Ia temperaturereelledu four,si Ia temperatureest
deplus de 38 °C (100°F),sera affichee.Elleaugmenterapar
intervallede 3 °C [5 °F]jusqu'_ ce que la temperature
preprogrammeesoit atteinte.
4. LaisserIefour prechauffer pendant8 b 15minutes.
• LorsqueIatemperatureprogrammeepour le four est atteinte,
un bip long retentit.
• La temperatureprogrammees'affiche.
• Pour rappelerla temperatureprogrammeependant le
prechauffage,appuyersur la touche Bake.
5. Placerlanourriture darts le four.
6. Verifier I'avancementde la cuissonb Ia dureeminimalede
cuisson.Cuireplus Iongtempsau besoin.
7. LorsqueIacuissonest terminee,appuyer sur la
touche Cancel.
8. Retirerla nourriture du four.
Remarques sur Uaeuissen eourante
aU fOUr
+ Pour chaitger la temperature du feurpendant & cuissetl,
appuyerstir Bake, puis sur Iatouche Ratoset 0 ou lestouches
numeriquesapproprieesjusqu'_ ce que la temperaturedesiree
soit affichee.
o Pout changer la temperature du four lots duprechauffage,
appuyerdeux lois sur Iatouche Bake, puis sur la touche
Autoset e ou sur les touchesnumeriquesapproprieesjusqu'b
ce que Ia temperaturedesireesoit affichee.
o Si I'on oublie d'arreter le four, il s'arreteraautomatiquement
apres 12 heures.Si I'ondesire desactivercette fonction, voir
page43.
o Pourdes conseilssupplementairessur la cuissoncouranteet le
rOtissage,voir la brochure La cuissonsimplifiee.
Differences de cuisso e tre 'a cie fo r
et
II est normalde remarquerquelques differencesclansladureede
cuissonentre un four neuf et un four ancien.VoirAjustement de la
temperaturedu four a lapage 44.
C isson tow'ante et r tissage
avec convection (certainsmodeles}
Poar macaisse_ avec ce_vectio_, e_trer matemp_ratare _e
euisso_ _ormaieo La commandereduit automatiquementla
temperatureprogrammeede 15°C(25 °F]. La temperatureentree
seraaffichee, ie ve_tiiateur _e co_vectio_ se met e_ marche
a_e lois qae mefo_r a fo_ction_ pendant e_viro_ ci_q
minutes.
Programmatio_ de la c_isso_
avec corivectiori : Convect;
1. Appuyer sur Ia touche Co,veer.
• Le mot BAKEet I'icOneventilateur
c@notent.
• 000 clignote _ I'afficheur. Au_omml;
2. SelectionnerIatemperaturedu four. Appuyersur la touche
Autoset 0 pour 175°C(350°F)ou sur lestouches numeriques
appropriees.
• Chaquepressionadditionne+lesur IatoucheR_teset e
augmentelatemperaturede 15°C(25 °F).Latemperaturedu
four peut etre programmeede 75 _ 285°C (170_ 550 °F).
s_ite...
38
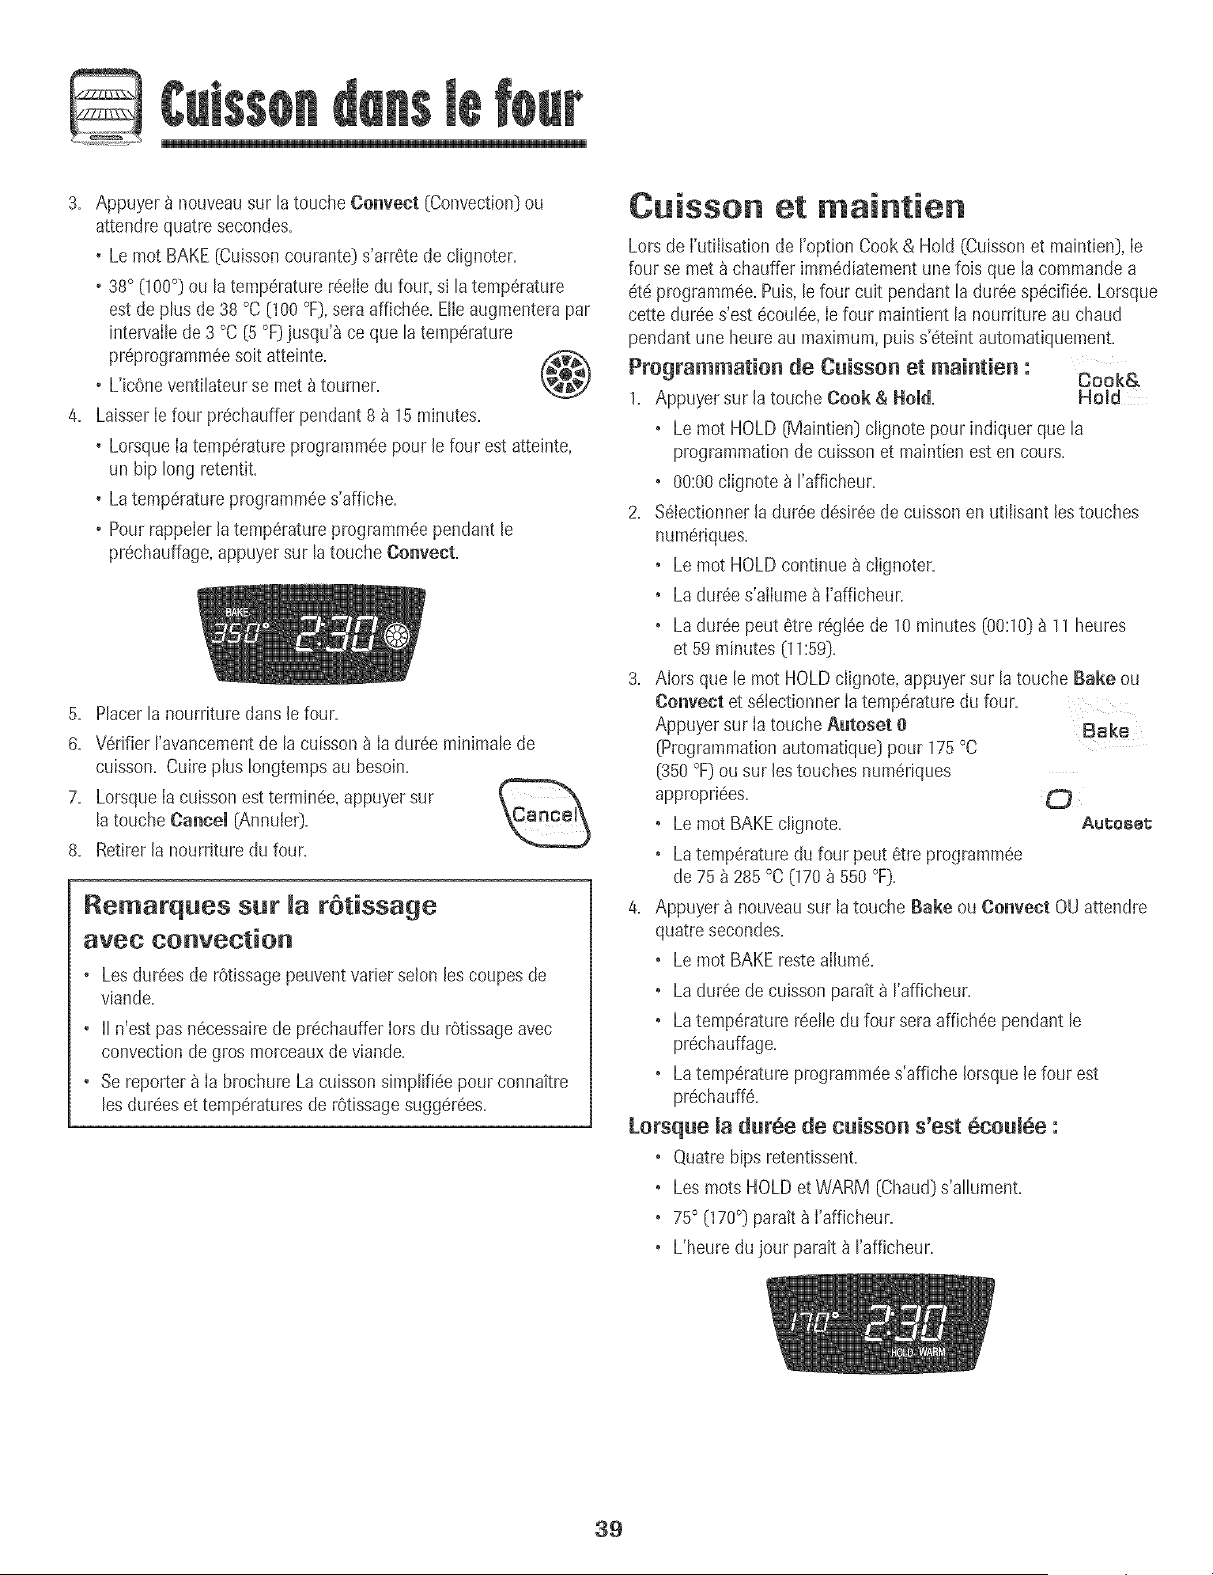
3+ Appuyer b nouveausur tatouche Conveet (Convection[ou
attendrequatre secondes+
• Le mot BAKE[Cuissoncourante)s'arretede ctignoter+
• 38° (100°) ou ta temperaturereeJiedu four,s+tatemperature
est de ptusde38 °C (100OF),seraaffichee+Bie augmenterapar
intervaltede3 °C(5 °F)jusqu'b ce qua ta temperature
preprogrammeesoit atteinte.
• L'icOneventihteur se met_ tourner.
4. LaisserIefour prechauffer pendant8 b 15minutes.
• Lorsquela temperatureprogrammeepour le four est atteinte,
un bip long retentiL
• Latemperatureprogrammees'affiche.
• Pourrappeler latemperatureprogrammeependant le
prechauffage,appuyersur la touche ConveeL
5. Placerlanourriture darts le four.
6. Verifier I'avancementde la cuisson_ Ia dureeminimalede
cuisson. Cuireplus Iongtempsau besoin.
7. LorsqueIacuissonest terminee,appuyer sur
latouche Cancel {Annule0.
8. Retirerla nourriture du four.
Remarques sur retissage
avec convection
• Lesdureesde rOtissagepeuventvarier selonJescoupesde
viande.
• II n'est pasnecessairede prechaufferIorsdu r0tissageavec
convectiondegros morceauxdeviande.
• Se reporter_ Ia brochure Lacuissonsimplifieepour connaitre
lesdureeset temperaturesde rBtissagesuggerees.
Cuisson et maintien
Lorsde I'utilisationde roption Cook& Hold (Cuissonet maintien),Ie
four se met _ chauffer immediatementune fois qua la commandea
eta programmee.Puis,le four cuit pendantla dureespecifiee.Lorsque
cette duree s'estecoulee,Ie four maintient la nourritureau chaud
pendantune heureau maximum,puis s'eteint automatiquement.
Programmation de Cuisson et maintien : Cook&
1. Appuyersur la touche Cook & Homd. Hold
+ Le mot HOLD[Maintien) clignote pourindiquer qua la
programmationde cuisson et maintien est en cours.
+ 00:00clignote_ I'afficheur.
2. S61ectionnerladuree desireedecuissonen utilisant lestouches
numeriques.
° Le mot HOLDcontinue_ clignoter+
° La duree s'allume_ I'afficheur+
• La dureepeut 6tre regleede 10minutes (00:10)_ 11heures
et 59minutes (11:59).
3. A+orsqua le mot HOLDclignote,appuyersur la touche Bake ou
Canveet et setectionnerIatemperaturedu four.
Appuyersur Ia toucheAutaset e Bake
(Programmationautomatique)pour 175°C
(350°F)ou sur lestouches numeriques
appropriees. O
• Le mot BAKEclignote. Au_e+e_
• La temperaturedu four peut etre programmee
de 75 _285 °C(170_ 550 °F).
4. Appuyer _ nouveausur latouche BaReou Conveet OU attendre
quatre secondes.
• Le mot BAKErestealhm6.
• La dureede cuissonparait _ I'afficheur.
• La temperature reelledu four seraaffichee pendant le
prechauffage.
• La temperature programmees'affiche Jorsquele four est
prechauff6.
Lorsque madur6e de cuisson s'est 6coum6e :
• Quatre hips retentissenL
• Les mats HOLDet WARM (Chaud)s'allument.
• 75° 070 °) parait _ I'afficheur.
• L'heure du jour parak _ rafficheur.
39

Apr@s une heure de _,_AINTIEN AU CHAUD :
• Le four s'Cteintautomatiquement.
• LosrootsHOLD(Maintien)et WARM (Chaud)s'Cteignent.
• Retirer[a nourriture du four.
Anuulation de Cook & Hold _ tout moment :
Appuyersur [atouche Cancel (Annub0. Retirerla
nourriture du four.
Cuisson et maintien diff r s
Ne pasutfiiser ]aCubsondiffCrCepour des denr_estr_s pCdsSabbS
comrnelos produits laitiers,le porc,la volaiile0u los fruits de met.
Avec[a fonction diffCrCe,ie four set met_ cuire plus tard dans [a
journCe.Programmer[a durCed'attentedCsirCeavant que [e four ne
se mette en marcheet [a durCede cuissondCsirCe.Le four com-
mence_ chauffer_ ['heuresClectionneeet cuit pour [a durCe
spCcifiee.
La durCed'attentepeut 6tre programmCede 10 minutes(00:10)
11heureset 59 minutes(11:59).
Programmatiou d'uu cycle de cuissou et maiutieu
differ6s :
1. Appuyer sur [a touche Delay1 (UneDifferes). Belay ............
:I
• Le mot Delay 1 cIignoteb ['afficheur.
• 00:00cIignote _ rafficheur.
2. A ['aidedestouches numCriquesappropriCes,entrer la durCe
d'attenteavant que _e d4bute le cyclede cuissonet maintien.
3. Appuyer sur la toucheCook & Hold.
Cook&
•Les rootsHOLDet DELAYciignotent _ Hold
I'afficheur.
• 00:00cIignote _ rafficheur.
4.
5.
6.
Entrer la dur_e dCsir_e de cuisson _ raide des touches
numCdques.
Appuyer sur [a touche Bake (Cuisson courante}
ou Convect (Convection, certains modules}. Bake
Programmer ta temp_.rature du fo_r d_sir_e
en appuyant sur [a touche g_toset O
(Programmation automatique) ou sur [es touches _
Aut;oget;
numeriques appmpd_es.
• 175° [350°} s'allume Iorsque I'on appuie sur la touche
A_toset O.
• AprOsquatre secondes,[a dur_e d'attenteentrOeparait
['afficheur.
• Le mot HOLDs'_teint.
• Losmots BAKEet DELAYrestentallum@spour rappeJerqu'un
cycle de cuissonet maintiendiff@r@sa @t4programm&
_emarq_es :
• Ne pasutHiserle cycle decuisson et maintien diffdrds pour des
articles qui n@cessitentque le four soit prOchauff&comme Jes
g_teaux,[es petJtsbiscuitset Jespains.
• Ne pasutiJJserle cycle decuJssonet maJntiendiff@r@ssJ[e four
est d_j8 chaud.
4O
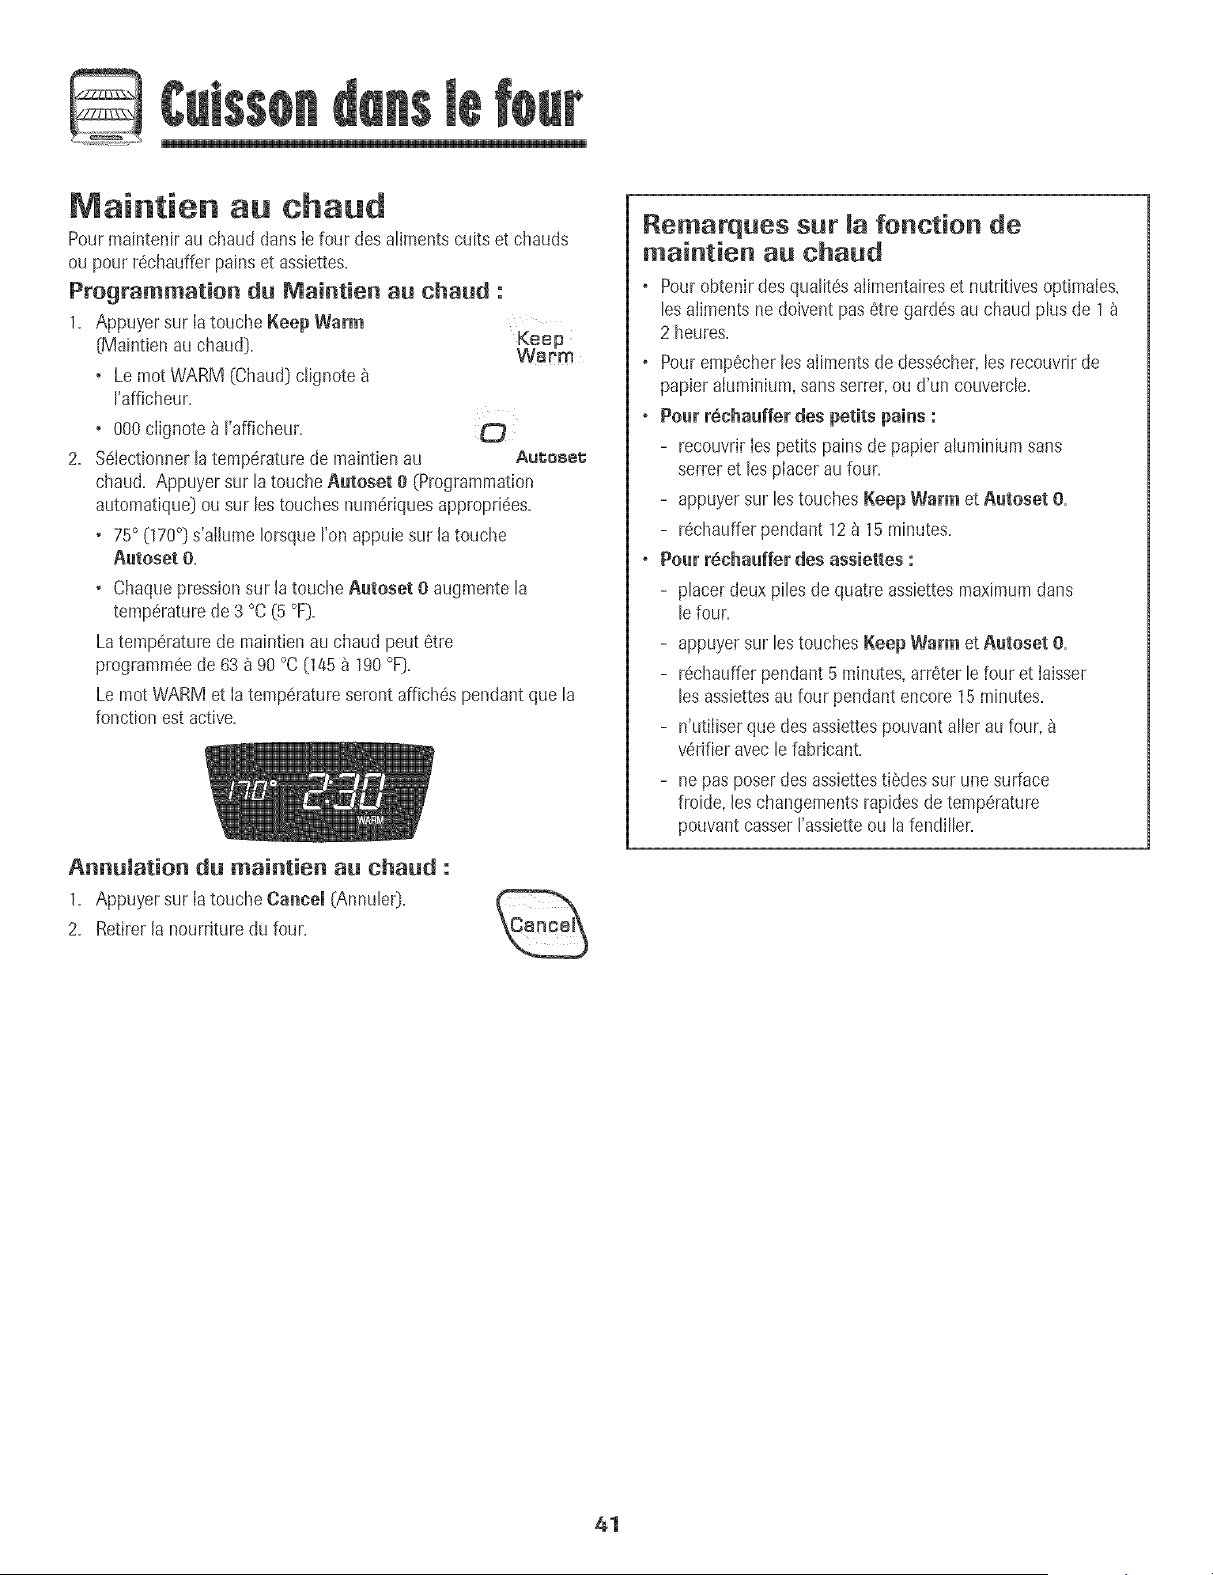
Maintien au chaud
Pourmaintenirau chaud dansIe four desatimentscuits et chauds
ou pour r6chaufferpains et assiettes,
Programmation du Maintien au chaud :
1. Appuyer sur Ia touche Keep Warm
(Maintienau chaud). Keep
Warm
• Le mot WARM (ChaudDclignote
I'afficheur.
• 000ciignote _ I'afficheur. O
2. %Iectionner latemp6raturede maintienau Aut;oset;
chaud, hppuyer sur la touche Autoset e [Programmation
automa%ue)ou sur lostouches numdriquesappropd6es.
• 75° (170°] s'alhme Iorsquerun appuiesur la touche
Autoset O,
• Chaquepressionsur la toucheAutoset 0 augmente la
temp6raturede 3 °C(5 °F].
Latemp6raturede maintienau chaud pout etre
programm6ede 63 _ 90 °C (145_ 190°F].
Lemot WARMet ia temp6ratureseront affich6spendant que la
fonction estactive.
Annulation du maintien au chaud :
1. Appuyer sur Ia touche Cancel (Annule0.
2. Retirerla nourriture du four.
Remarques sur fonction de
maintien au chaud
o Pourobtenir desqualitesaIimentaireset nutdtivesoptimaies.
los ailmentsne doivent pas6tre gard6s auchaud plus de 1
2 heures.
o Pouremp6cherlos aIimentsde dessecher,los recouvrirde
papieraIuminium,sanssorter, ou d'un couvercle.
o Pour r_chauffer des petits pains :
- recouvrirIespetits painsde papier aluminium sans
sorter et los piacerau four.
- appuyersur los touchesKeep Warm et Autoset O.
- rechaufferpendant 128 ]5 minutes.
o Pour rSehauffer des assiettes :
- placerdeux piles de quatre assiettesmaximumdarts
lefour.
- appuyersur los touchesKeep Warm et Autoset O.
- rechaufferpendant 5 minutes,arreter le four et laisser
los assiettesau four pendant encore ]5 minutes.
- n'utiIiserque des assiettespouvantallot aufour,
verifier avec le fabricant.
- ne pasposer des assiettestiSdessur une surface
froide, los changementsrapidesde temperature
pouvantcasserI'assietteou lafendiller.
41
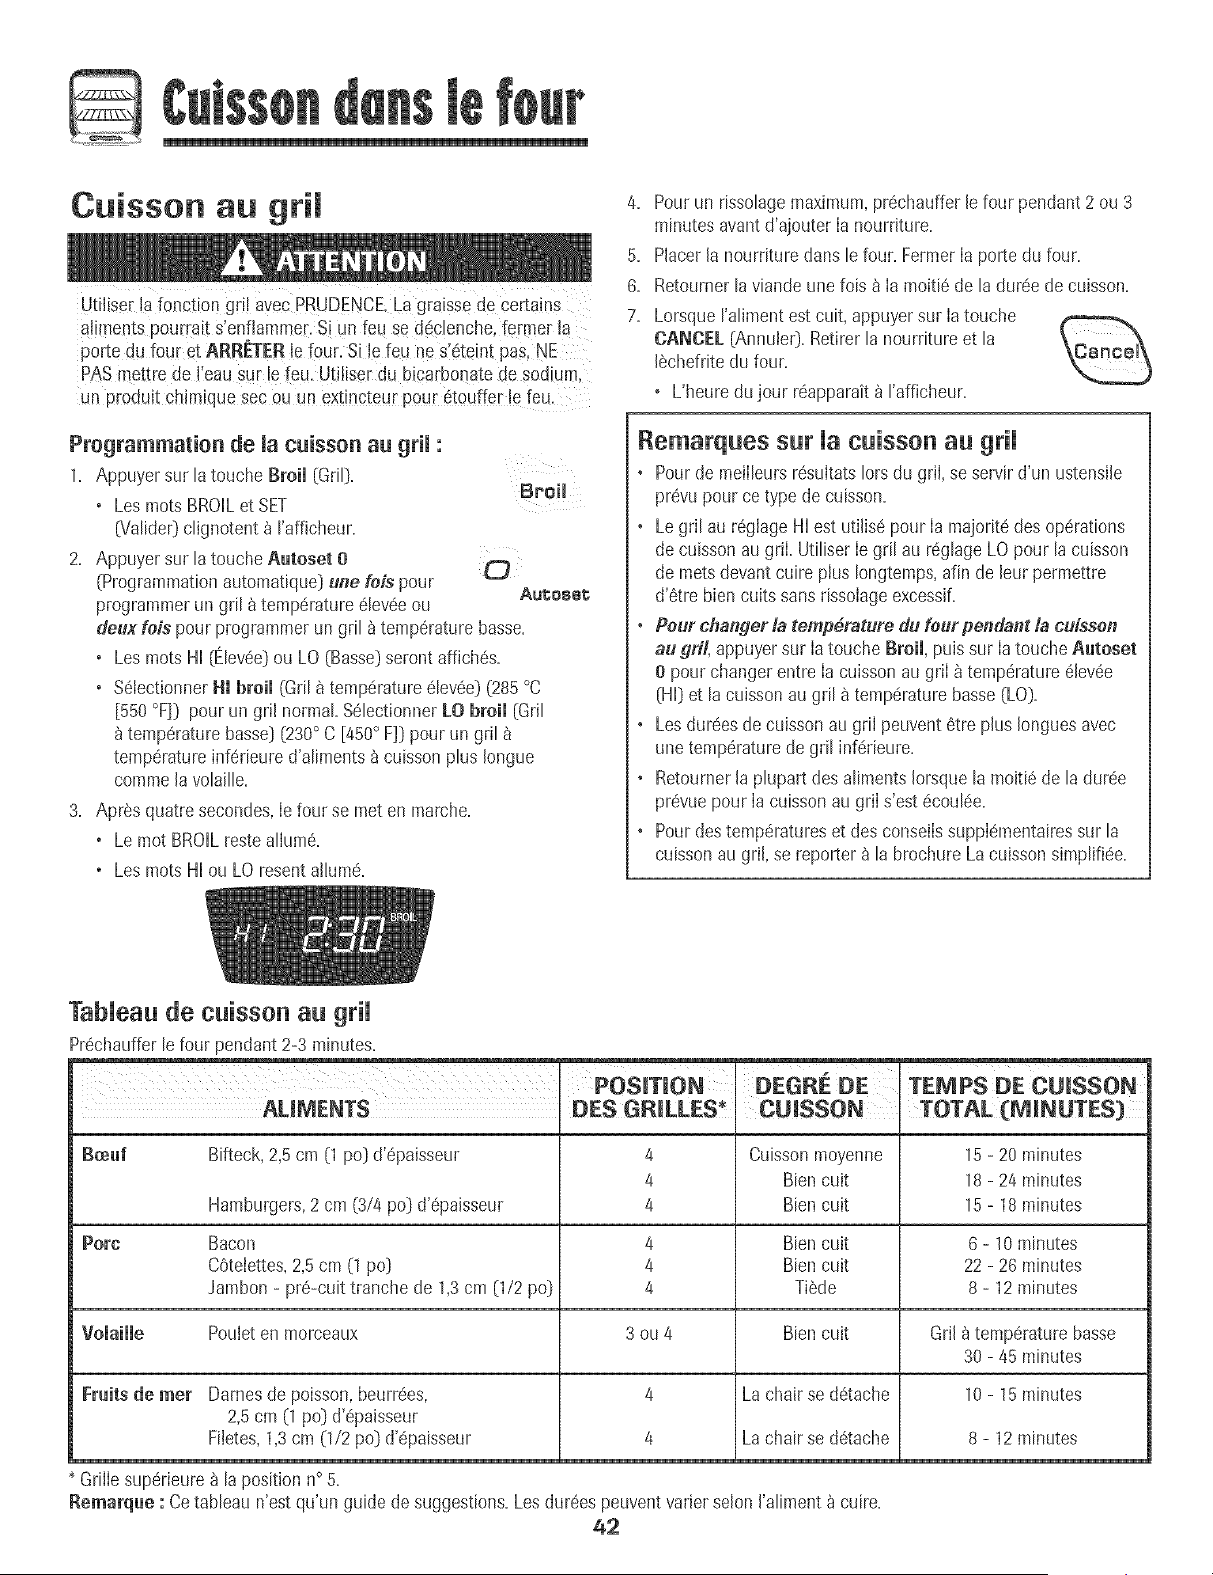
Cuisson au gril
Utiiiser !a fonction gri! avec PRUDENCELa graisse de certains
a!!mentspou_raits'enflammer.S! un feu se d_¢lenche,fermer la
porte du four et ARR_ER le Four.Si je feu ne s_eteintpas, NE
PASmettre de !'eausur !efeu. Utiliser du bicarbonatede sodium,
un produit chimique seeou un extincteur pour etouffer !e feu:
Programmation de la cuisson au grii :
1= Appuyersur h touche Broil [GriID=
Broil
o Les rootsBROILet SET
6/alider) clignotent _ rafficheur=
2= Appuyersur latouche Autoset O _}
(Programmationautomatique}line his pour Aul;o88I;
programmerun gril _ temperatureeleveeou
deux his pour programmer un gril _ temperaturebasse.
o Les rootsHi (Elevee}ou LO{Basse}seront affiches.
o SetectionnerHI broil (Grila temperatureelevee}{285°C
[550 °F]} pour un gril normal SelectionnerLO broil {Gril
temperaturebasse} {230° C [450° F]} pour un gril
temperatureinferieure d'aliments_ cuissonphs Iongue
commela volaille.
3. AprCsquatre secondes,Ie four se met en marche.
o Le mot BROILresteallume.
o Les rootsHi ou LOresentaihme.
4. Pour un rissolagemaximum,prechaufferle four pendant2 ou 3
minutesavant d'ajouter Ia nourriture.
5. Placerla nourrituredans le four. FermerIa portedu four.
6. Retournerla viande unelois a Ia moitie de laduree de cuisson.
7. Lorsqueraliment est cuit, appuyersur Iatouche
CANCEL{Annule0. Retirerla nourriture et la
lechefritedu four.
o L'heuredu jour reapparak_ rafficheur.
Remarques sur Uacuisson au grH
• Pourde meiIleursresuItatsIors du griN,se servir d'un ustensile
prevu pour ce type de cuisson.
• Le gril au regIageHi est utilise pour Ia majoritedes operations
de cuissonau griL UtiliserIe gril au reghge LOpour la cuisson
de mets devantcuire plus Iongtemps,afin de leur permettre
d'etre bien cults sans rissoiageexcessif=
• Peurchangerbtemp6raturedufeurperldadbcuissen
augril, appuyersur Iatouche Broil puis sur IatoucheAutoset
e pour changerentre Ia cuissonau griI _ temperatureelevee
{Hi} et la cuissonau gril a temperaturebasse(LO}=
• Lesdureesde cuissonau gril peuvent etre plus Ionguesavec
une temperaturede gril inferieure.
• Retournerla phpart des alimentsIorsque la moitiede la duree
prevuepour Ia cuissonau griI s'est ecoulee=
• Pourdestemperatureset des conseiIssupplementairessur la
cuissonau gril, se reporter_ la brochure Lacuissonsimplifiee=
TabUeau de cuisson au grH
Prechaufferlefour pendant 2-3 minutes=
POSITmON OEGNE OE
ALIMENTS DES GRmLLES" CU_SSON
TEMPS DE CU_SSON
TOTAL (M_NUTES)
Beauf Bifteck, 2,5 cm {1 pc} d'epaisseur 4 Cuisson moyenne 15 - 20 minutes
4 Bien cuit 18 - 24 minutes
Hamburgers, 2 cm (3/4 pc} d'epaisseur 4 Bien cuit 15 - 18 minutes
Pore Bacon 4 Bien cuit 6 - 10 minutes
COteiettes, 2,5 cm (1 pc} 4 Bien cuit 22 - 26 minutes
Jambon - pre-cuit tranche de 1,3 cm [1/2 pc] 4 Tilde 8 - 12 minutes
Volaille PouIet en morceaux 3 ou 4 Bien cuit Gril _ temperature basse
30 - 45 minutes
Fruits de mer 10 - 15 minutes4
4
Lachair se detache
Lachair se detache
Damesde poisson,beurrees,
2,5cm {1 pc} d'epaisseur
Filetes,1,3cm (1/2 pc} d'epaisseur
8 - 12 minutes
*GrilIe superieure_ la position n° 5.
Remurque : Ce tableau n'est qu'un guide de suggestions.Lesdureespeuventvarier selon I'aliment_ cuire.
_2
Arr t auto atique/
Mode sabbat
Lefour s'arr6teautomatiquementapr_s 12 heuress'il a 6t_
accidenteIIementIaiss_en marche.Cette caract6ristiquede s6curit6
peut 6tre arr6t6e.
Pour annuler l'arr_t 12 heures et faire fonctionuer me
four eu eoutiuu pendant 72 heures :
1. Appuyersur la touche Clock (Hodoge}et la Clock
maintenirainsi pendant cinq secondes.
o SAbsera affich6 et clignotera pendant cinq secondes.
o SAbsera ensuiteaffich6 en continu jusqu'a ce qu'on
I'arr6teoujusqu'a ceque la dur6e limitede 72 heuressoit
atteinte.
o Lemot BAKE(Cuissoncourante} seraaussiaffich6 si un
cycle de cuisson couranteesten cours alors que lefour est en
modesabbat.
o LaCU/SSONAUFOURest la seule fonetionquiest
op_mtionne/leen mode sabbat,Toutes/es autresfonctions
(Minuterie,Maintienauchaud,Nettoyage,etc,) sontverroui_;16,es
pendantb mode sabbat,
o LIncyclede cuissonet maintienpout 6tre programm6durant
le modesabbat.Cependant,un cycle de cuissonet maintien
diff6r6s n'est pas possible.
Auuulatiou du mode sabbat :
1. Appuyersur la touche Clock pendant cinq Clock
secondes.
o SAbcIignote pendant5 secondes.
o L'heuredu iour revient_ I'afficheur.
OU
2. Apr6s 72 heures, le modesabbat setermine.
o <_SAb >>clignote pendant5 secondes.
o L'heuredu iour revient_ I'afficheur.
Remarques sur Uemode sabbat
• Le modesabbatpeut 6tre mis en marche_tout moment,que
le four soit en marcheou non.
• Le modesabbatne pout pas 6tre mis en marchesiles touches
sontverrouilleesou Ia porte verrouill6e.
• La majorit6des messageset tous Iesbipssont d6sactiv6s
IorsqueIe modesabbatestactiE
• Si Iefour est en modecuissonIorsqueIe modesabbatest
programm6,Jemot BAKEs'6teintIorsquela cuissoncourante
est annuI6e.IJn'y auraaucun signal sonoreaudible.
• La Iampedu four ne s'aJlumepas automatiquement
I'ouverturede la porte IorsqueIe four est en modesabbat.Si
1'6clairagedu four estsouhait6 pendantle mode sabbat,Ia
lampedevra 6tre alIum6eavantque le modesabbat ne d6bute.
• LorsqueIe modesabbata d6marr6,I'afficheur indique
imm@diatementIa temperatureprogramm6eplutOtque la
temperaturer6elIede Ia cavit@du four.Aucun hip de
pr6chauffagene retentJt.
• Le cycled'autonettoyageet leverrouillageautomatiquede Ja
porte nefonctionnentpas pendant le modesabbat.
• Si I'onappuiesur latouche Cancel (Annulet}, un cyclede
cuissoncourante au four sera annul6.Cependant,le
programmateurresteraen modesabbat.
• Apr6s une panne de courant, lefour revienten modesabbat
avec72 heuresrestanteset aucun cycleactiE
43
Ajustement de temperature
du four
La precisiondes temperaturesdu four a 6t6 soigneusementverifiee
rusine+li est normalde remarquerquetquesdifferencesdens la
cuissonou ia couleur du rissohge obtenu entre un four neuf et un
four ancien+Au fur et _ mesureque le four est moins neuf, sa
temperature poutverier+
II est possibie d'ajusterla temperaturedu four si ton penseque ie
four necuit pasou ne rissolepas correctement+Pourdeciderde
%justement8 apporter, regier le four _ une temperaturede 15°C
(25°FDplus eieveeou pius bassoque ia temperatureindiquee dens
la recette, puisfaire cuire ia preparation+Los resuitatsde _i+essai>>de
cuissondoivent donner une [deedu hombrede degresduquel ia
temperaturedolt etre ajustee+
Ajustement de matemperature du four :
1+ Appuyer sur la toucheBake (CuissoncouranteD+
2+ Entrer285°C [550 °F] en appuyantsur les Bake
touches numeriquesappropriees+
3+ Appuyer sur ia touche Bake et la maintenirainsi pendant
plusieurssecondesoujusqu'_ ce que 0° paraisse_ i'afficheur+
Si ia temperaturedu four a ete precedemmentajustee,ie
changementsereaffiche+Parexemple,si latemperaturedu four
a ete reduitede 8 °C 05 °F], I'afficheurindiquera -8° (-15°]+
4+ Appuyer sur ia touche Aatoset e [Programmationautomatique]
pourajuster la temperature+
A chequefois que i'on appuiesur la touche Aatoset e, la
temperaturechange de3 °C [5 °F]+Latemperaturedu four peut
etre augmenteeou diminuee de3 _ 20 °C(5 _ 35°F]+
Appuyer sur ia touche Aatoset e pour augmenterla temperature
dufour (5, 10+++35]+Continuerd'appuyersur ia touche Autoset
e pour diminuer la temperaturedu four (-35,-30+++-5]+
5+ L'heuredu jour reapparattautomatiquement_ rafficheur+
II n'est pas necessairede reajusterlatemperaturedu four en casde
panneou d'interruption de courant+L'ajustementde latemperature
s'appliqueseulementaux fonctionsde cuissoncouranteet convec-
tion+Lostemperaturesde gril et de nettoyagene peuvent#tre
ajustees+
Changement de ma
temp6rature °F/°C
1+ Le reglage par ddaut de I'usine pour latemperatureest en
Fahrenheit.
2+ Pourmodifierce regiage,appuyersur los touchesCancel
[Annule0 et Bake simuitanementet maintener-lesenfoncees
pendanttrois secondes+
3+ Un hip retentit et ie regiagecourant (°Fou °C)parait _ i'afficheur+
(Sivous ne faites pas de changement,la cuisiniere retoume au
regiageexistentapres30 secondesy
4+ Pourmodifierie reglage,appuyersur la touche Aatoset e+
Appuyer _ nouveausur latouche pour retournerau reglage
existent.Attendercinq secondeset le reglagesereeffectue. 88
Latouche Favorite(favori] permetde sauvegarderla dureeet la
temperatured'une fonction de cuissonet maintien+
Pourprogrammerun cycle Favori,une fonction de cuissonet
maintiendolt 6tre activeou tout juste programmee+
Programmation d'un nouveau oycmefavori ou
sauvegarde d'un cycle en oours de ou[sson et
ma[nt[en oomme favori :
1+ Programmerun cyciede cuissonet maintien commeil est decrit
lasection Cuissonet maintien _ la page 40+
2. Appuyer sur la toucheFavorite et la maintenir Favorite
ainsi pendanttrois secondes+
+ Le cyclecuisson et maintiennouvellementprogramme ou en
cours de fonctionnementseresauvegarde.
+ Un hip sonoreretentit pourindiquer que loscommandesont
accepte Ie reglagefavori.
Demarrage d'un cycle programme dens favori :
1+ Appuyer sur ia toucheFavorite+
+ La dureeet latemperaturedu cycleprogrammede cuissonet
maintienserontaffichees (siaucun cycle decuisson et
maintienn'a ete programme,_ none >7sere afficheD+
2+ Appuyer sur la touche Bake ou Conveet [certains mod_les)+
+ Le cyciefavor[ commenceimmediatement+
+ Le mot BAKEs'allume _ rafficheur+
+ La dureede cuissons'alhme _ i'afficheur+
Lorsque madur6e de cuisson s'est 6coumee :
+ Le mot BAKEs'eteint.
+ LosrootsHOLD(Maintien)et WARM (Chaud)s'alhment.
+ 75° 070°) parait _ I'afficheur.
Annumation d'un cyde favor[ en tours :
1+ Appuyer sur la toucheCancel
+ Le cyciefavori sauvegardenesere pas affecte.
2. Retirerla nourriture du four.
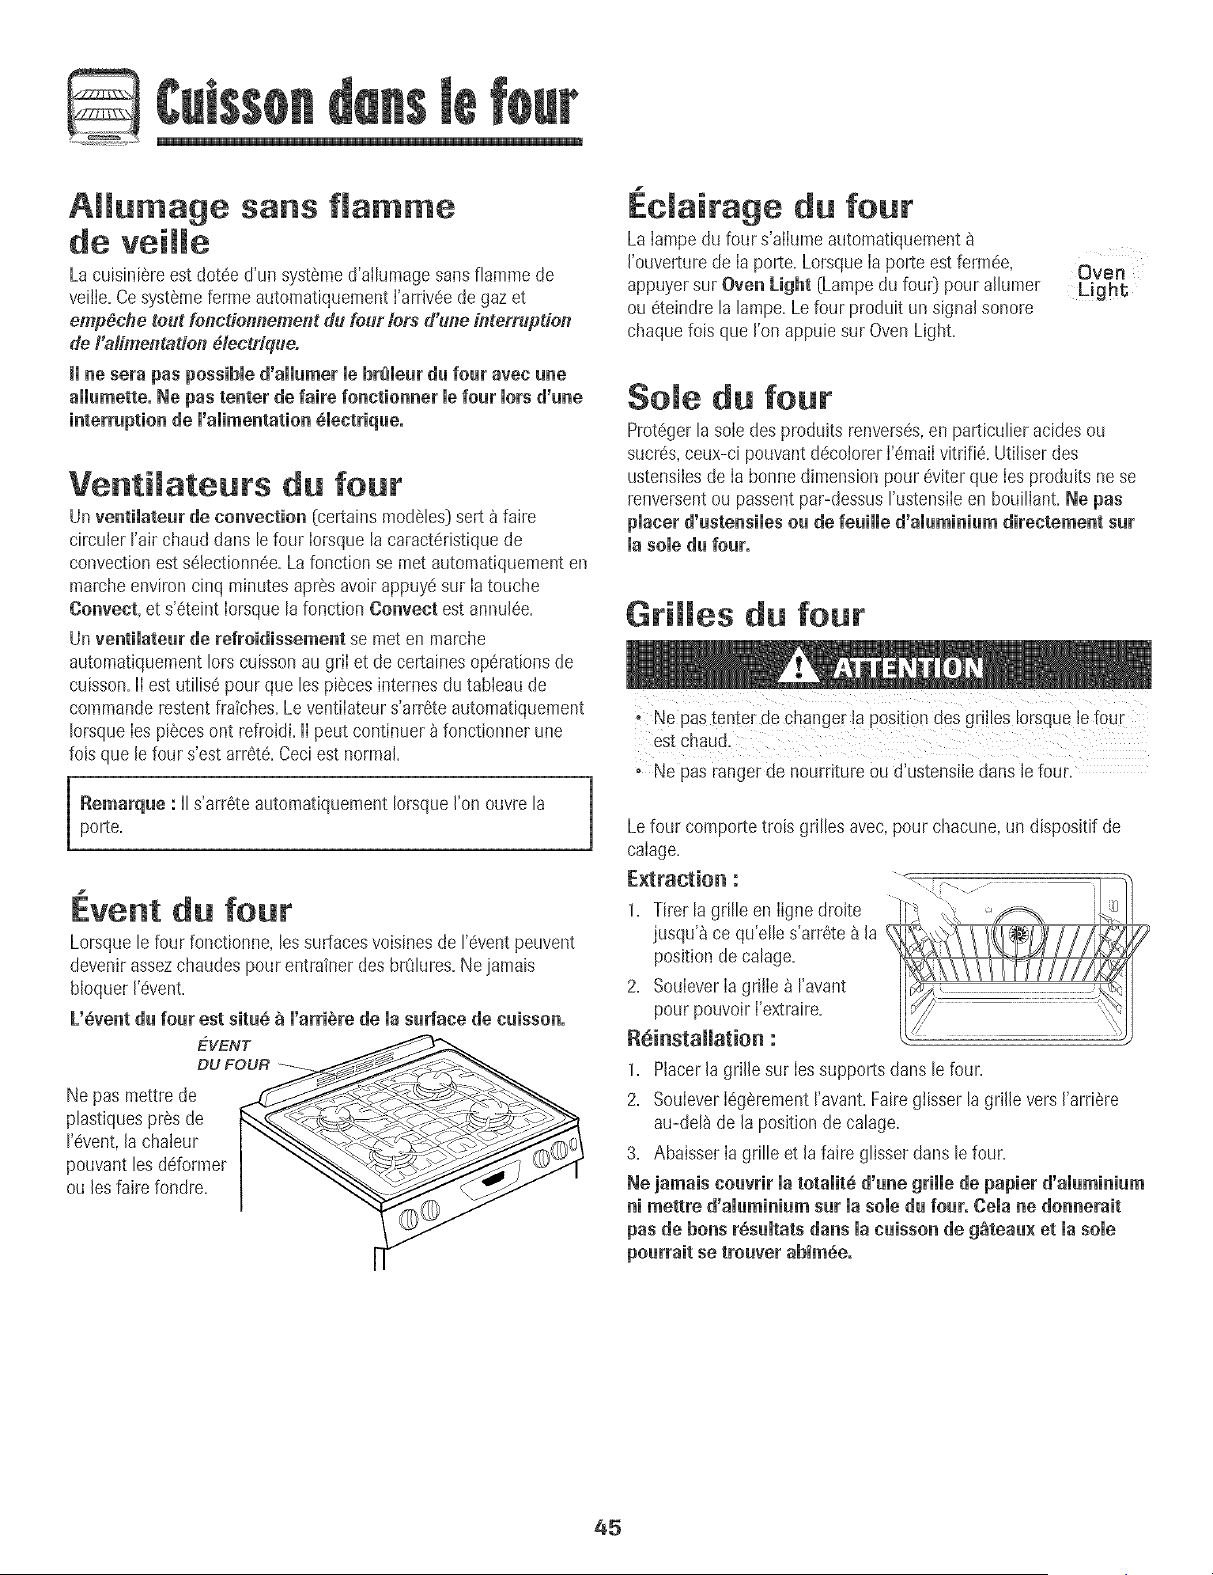
A umage sans f amme
de veiffe
Lacuisini_reest dot6e d'un syst_med'altumagesansfiammede
veille.CesystSmefermeautomatiquementI'arriv6ede gaz et
emp_che teut fei1cdem_ementdu feur lets d'une _l_terrupden
de/'alimentaden dlectHque.
imne sera pas possibmed'ammumermebr_meurdu four avec une
ammumette.Ne pas tenter de faire fonetionner mefour morsd'une
interruption de m'amimentation_meetrique,
VentiJateuts du four
Unventilateur de convection [certains modules)sert _ faire
circuler fair chaud dans lefour Iorsquelacaract6ristiquede
convectionests6tectionn_e=Lafonction se met automatiquementen
marcheenvironcinq minutesapres avoirappuy_sur Iatouche
Conveet, et s'6teint Iorsquela fonction Convect est annul6e.
Unve_timate_r_e refroidisseme_tse met en marche
automatiquementlots cuissonau griI et de ceRainesopSrationsde
cuisson=lI est utilis_pour que les piecesinternes du tabIeaude
commanderestentfraiches=Le ventiIateurs'arr_teautoma%uement
IorsqueIespiecesont refroidi=lI peut continuer _ fonctionner une
fois que le four s'est arret_=Ceci est normal
Remarq_e : II s'arr_teautomatiquementIorsqueI'on ouvre la J
porte,
J
1
Event fo t
Lorsquele four fonctionne, les surfacesvoisinesde I'_ventpeuvent
devenirassezchaudespour entra_nerdesbr_lures,Ne jamais
bloquerJ'_vent,
L'Svent_ four est sit_@_ l'arriSrede la s_dace de e_isson.
=EWNT
DU FOUR
Ne pas mettre de
plastiquespresde
revent, la chaieur
pouvantles ddormer
ou les faire fondre,
.cJairage fo t
La Iampedu four s'allumeautomatiquement
I'ouverturede Iaporte, LorsqueIaporte est ferrule,
appuyersur Ove_ Light (Lampedu fou0 pourailumer
ou _teindre la lampe,Le four produit un signalsonore
chaquefois que I'on appuiesur Oven Light,
Ovs[q
Ligh_
So e fo t
ProtSgerla soledes produits renverses,en particulier acides ou
sucres,ceux-ci pouvant d_colorerI'_maiIvitri%=Utiliserdes
ustensilesde Ia bonnedimensionpour_viterque Ies produits nese
renversentou passentpar-dessusrustensileen bouilIant=Ne pas
placer _'_ste_siies o_ de re,limed'ai_mi_i_m direeteme_t s_r
ia sole _ fo_r.
Griffes fo r
• Nepas tenter de changerla positiondes gri!!es 10rsque!efour
est Chaud.
, Ne pas ranger de nourritureou d'ustensiledans le four.
Lefour comportetrois gdlles avec,pour chacune,un disposkif de
calage,
Extractio_ : <
1. Tirer la grille en Iignedroite
jusqu'_ ce qu'elle s'arrSte_ la
positiondecalage,
2, SouleverIagriile _ ravant
pour pouvoirI'extraire,
R_i_sta_atio_ :
1, Racerla grille sur Iessupportsclansle four,
2, SouleverI_gerementravant,Fairegiisserla grille vers I'arriSre
au-del8 de la positionde calage,
3, AbaisserIagrille et la faire glisser clansle four,
Ne jamais co_vrir matotamitdd'_e grille de papierd'am_mi_i_m
_i mettre d'am_mi_i_ms_r la sole d_ four. Ceia _e do_erait
pas de bo_s rSs_mtats_a_s mae_isso_ _e g_tea_× et masome
45

Niveau× des grilles
N+VEAU5 : Pourpasserau gril
des alimentsnon graset peu
6pais,et pour Iacuissonavec
convection(certainsmodSles[}
sur 3 grilles=
N+VEAU4 : Pour faire griIler du
pain, pour la majorit6des
aliments8 passerau gril et pour
la cuissonsur 2 grilles.
N+VEAU3 : Pour la majorit6des
--4
--3
--2
--1
CuisGOn avec Convection
sur trois grilles
(certains modeles}
produitsde bouiangerieet p_tisseriessur une plaque _ g_teaux
ou darts un moule_ g_teau roule,pour les g_teaux_ etages,les
cremes,lesaIimentscuisines et surgeles,Ia cuissonavec
convection(certainsmodules[}sur 3 grilles et la majorite des
operationsde cuissonsur 1seuiegrilIe+
N+VEAU2 : Pour le rOtissagede petits morceauxde viande, les
plats mijotes,le pain,les savarins,Iestares auxfruits frais et
g_teauxde 9 x 13poet la cuissonsur deuxgrilles+
N+VEAU1 : PourIe rOtissagede gros morceauxde viande, la
volaille,lessouffles ou g_teauxdes angeset ta cuissonavec
convection(certainsmodeles}sur trois grilles.
CU_SSONSUR PLUSIEURSGRILLES:
Deux grilles : UtiIisezIespositions2 et 4, ou 1et 4. Disposezles
alimentsen quinconcepour que I'air circule bien.
Troisgrilles : [convectionseulement,certainsmodeles) utilisezles
positions 1,3 et 5.
_emarques :
o VerifiezIa cuissonapres Iadur6e minimalesuggeree.
o Nejamais placer lesustensilesdirectementsur la sole dufour.
Cuisson de g_teau× _ 6rages sur deu× grimmes
Pourde mei[ieursresultatspour [a cuissonde g_teauxsur deux
grilles,utiliser [espositions 2 et 4 pour une cuissontraditionneile et
[espositions 1 et 4 pour une cuissonavecconvection(certains
modeles}.
Placerles g_teauxsur lagrille, commeil est indique.
46
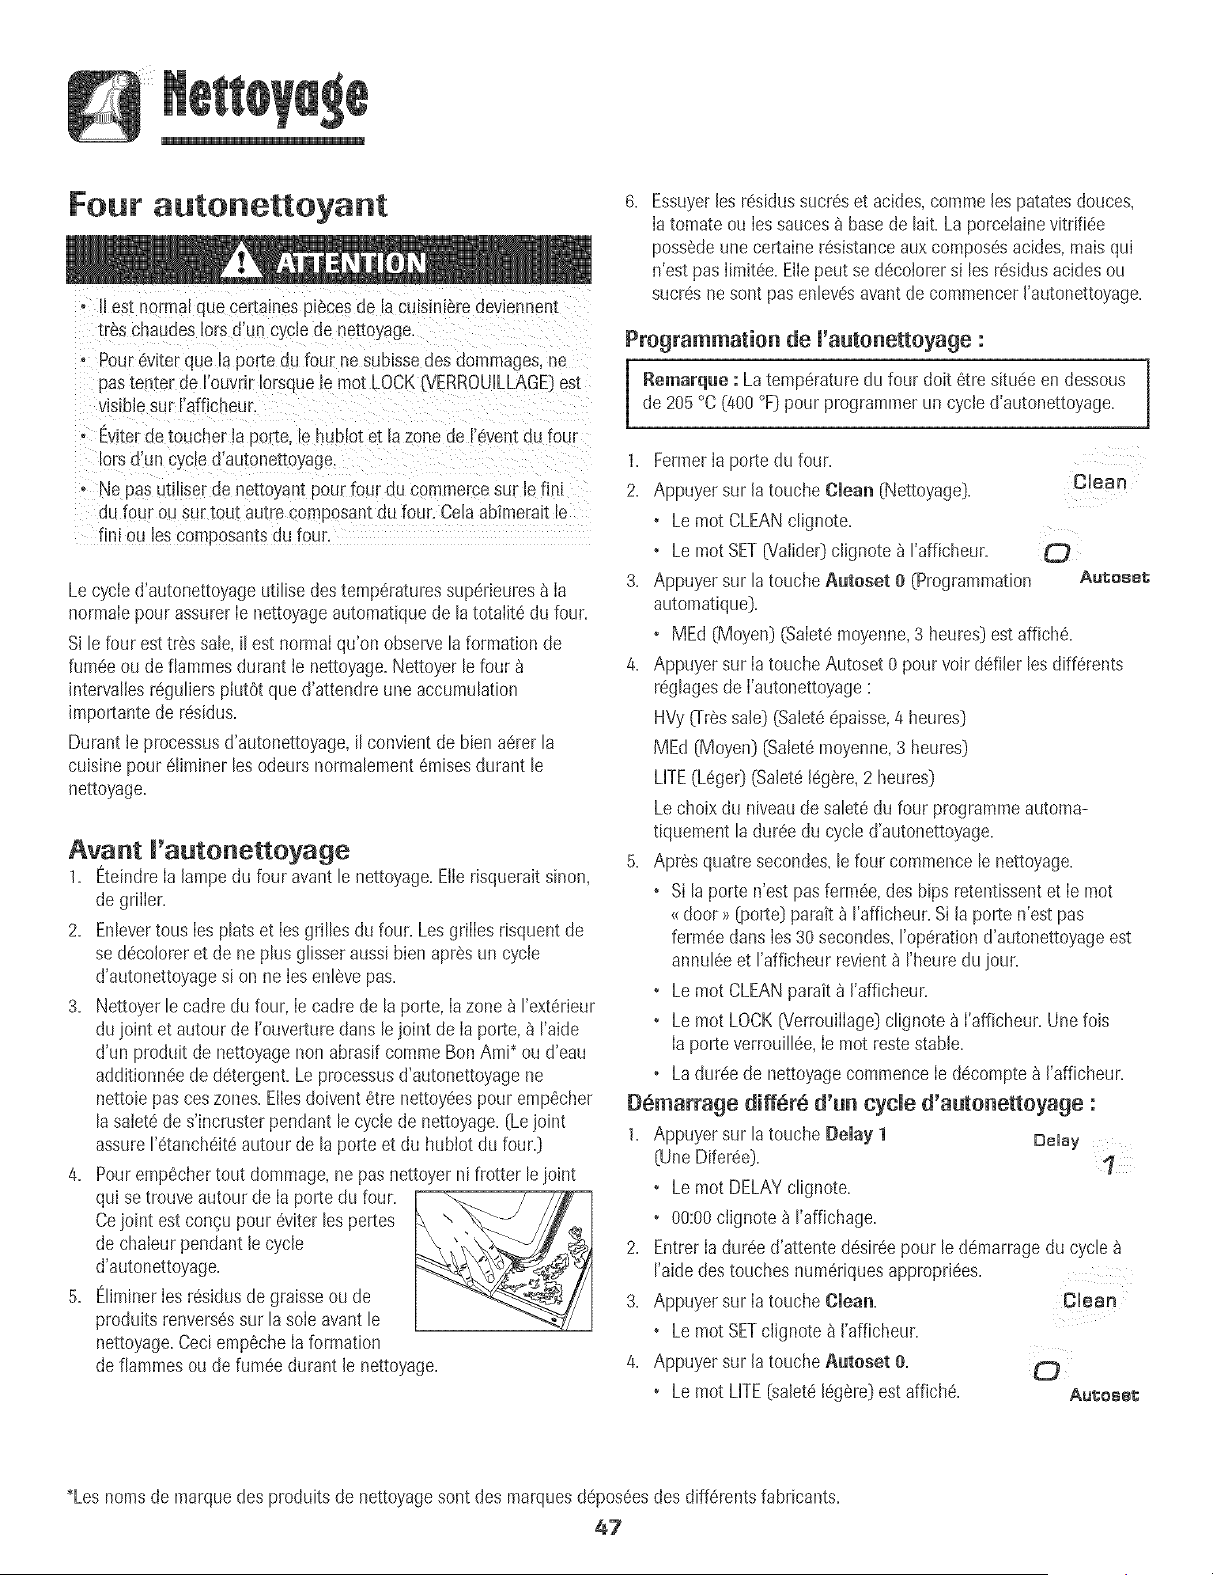
Four autonettoyant
o II eatnormal que certaines piecesue a cu_smieredeviennent
tres chaudes [ors d'un cyclede nettoyage.
o Pour6viterque la porte du four ne sublssedes dommages,ne
pastenter de rouvnr Iorsque le roD1LOCK(VERROUILLAGE}est
visiblesur rafficheur.
o Evlterde toucher laporte, le hub[ot et la zonede reventdu four
lotsd'un cycled'autonettoyage.
o Ne pas utiliserde nettoyantpour four du commercesur le fini
du four ou sur tout autre composantdu four. Celaabimera[tle
fini ou les composantsdu four.
Le cycled'autonettoyageutilise destemperaturessuperieuresa la
normaIepour assurerIe nettoyageautomatiquede latotaiit6 du four.
Si le faur est tres sale,11estnormal qu'on observelaformation de
fumeeou de flammesdurant ie nettoyage.Nettoyerlefaur
intervallesreguliersphtOt que d'attendre une accumulation
importantede residus.
Durant le processusd'autonettoyage,il convient de bienaerer la
cuisinepour eliminer les odeursnormalement6raisesdurant le
nettoyage.
Avant I'autonettoyage
1. EteindreIa lampe du four avant le nettoya% Eile risqueraitsinon,
degriller.
2. Enlevertous Ies plats et Ies grilles du four. Lesgrilles risquent de
se decoloreret de ne plus glisser aussibien aprSsun cycle
d'autonettoyagesi on ne Ies enlevepas.
3. Nettoyerle cadre du four, Ie cadrede la porte,Iazone _ I'exterieur
dujoint et autour de I'ouverturedans le joint de Ia porte,_ I'aide
d'un produit de nettoyagenon abrasif commeBanAmi* ou d'eau
additionneede detergent.Le pracessusd'autonettoyagene
nettoiepas ceszones.Ellesdoiventetre nettoy_espour empecher
lasaiet6de s'incmsterpendant le cycle de nettoyage.(Lejoint
assure1'etancheit6autour de laporte et du hubtot du four.)
4. Pourempechertout dommage,ne pasnettoyer ni frotter le joint
qui setrouve autour de Ia porte du four.
Cejoint estcongu pour 6viterles pertes
dechaleur pendant lecycle
d'autonettoyage.
5. EIiminerIes residus de graisseou de
produitsrenversessur la soleavant le
nettoyage.CeciempecheIa formation
defiammesoude fumee durant le nettoyage.
6. Essuyerles residussucreset acides,commeles patatesdouces,
Iatomate ou Ies sauces_}_basede lait. La porcelainevitrifi_e
possSdeunecertaineresistanceauxcomposesacides,maisqui
n'est pas Iimitee.Elle peut se decolorersi les residusacidesou
sucresne sont pas enlevesavant de commencerI'autonettoyage.
Programmation de l'autonettoyage :
Remarque : La temperaturedu four dolt 6tre situee en dessous
de 205 °C(400°F}pour programmerun cycled'autonettoyage.
1. FermerIa porte du four.
2. Appuyer sur la toucheClean (Nettoyage}. Clean
• Le mot CLEANclignote.
• Le mot SET[Valider}ciignote b I'afficheur.
3. Appuyer sur la toucheAatoset O(Programmation Au_ese_
automatique}.
•MEd (Moyen}(Salet6moyenne,3 heures}estaffiche.
4. Appuyer sur Ia toucheAutoset 0 pourvoir defiler les differents
reglagesde I'autonettoyage
HVy(Tressale} (Salet6epaisse,4 heures}
MEd (Moyen}(Salet6moyenne,3 heures}
LITE(Leger}(Salete16gere,2 heures}
Lechoixdu niveaudesalet6du four programmeautoma-
tlquement la dureedu cycle d'autonettoyage.
5. Apres quatre secondes,le four commencelenettoyage.
• Si la porte n'est pas fermee,des hips retentissentet Ie mot
<_door >>(porte} paratt_ I'afficheur.Si la porte n'est pas
fermeedartsIes30secondes,roperation d'autonettoyageest
annuleeet I'afficheur revient_ rheuredu jour.
• Le mot CLEANparait 8 I'afficheur.
• Le mot LOCK6/errouilIage}clignote _ I'afficheur.Une fois
Ia porteverrouillee,Ie mot restestable.
° Ladureede nettoyagecommenceIe decomptea I'afficheur.
De_a_age diffe_e d'_ cycle d'a_to_ettoyage :
1. Appuyer sur la touche Delay 1 Delay
(UneDifer_e}.
• Le mot DELAYclignote,
• 00:00ciignote_ I'affichage.
2. EntrerIaduree d'attentedesireepour le d_marragedu cycle
raide destouches num6riquesappropriees.
3. Appuyer sur Ia toucheClea_. Clean
• Le mot SETclignote a I'afficheur.
4. Appuyer sur la toucheAatoset O.
• Le mot LITE(saletelegere}estaffich_. Au_e_e_
*Lesnomsde marquedes produits de nettoyagesont des marquesdeposeesdes differents fabricants.
_7
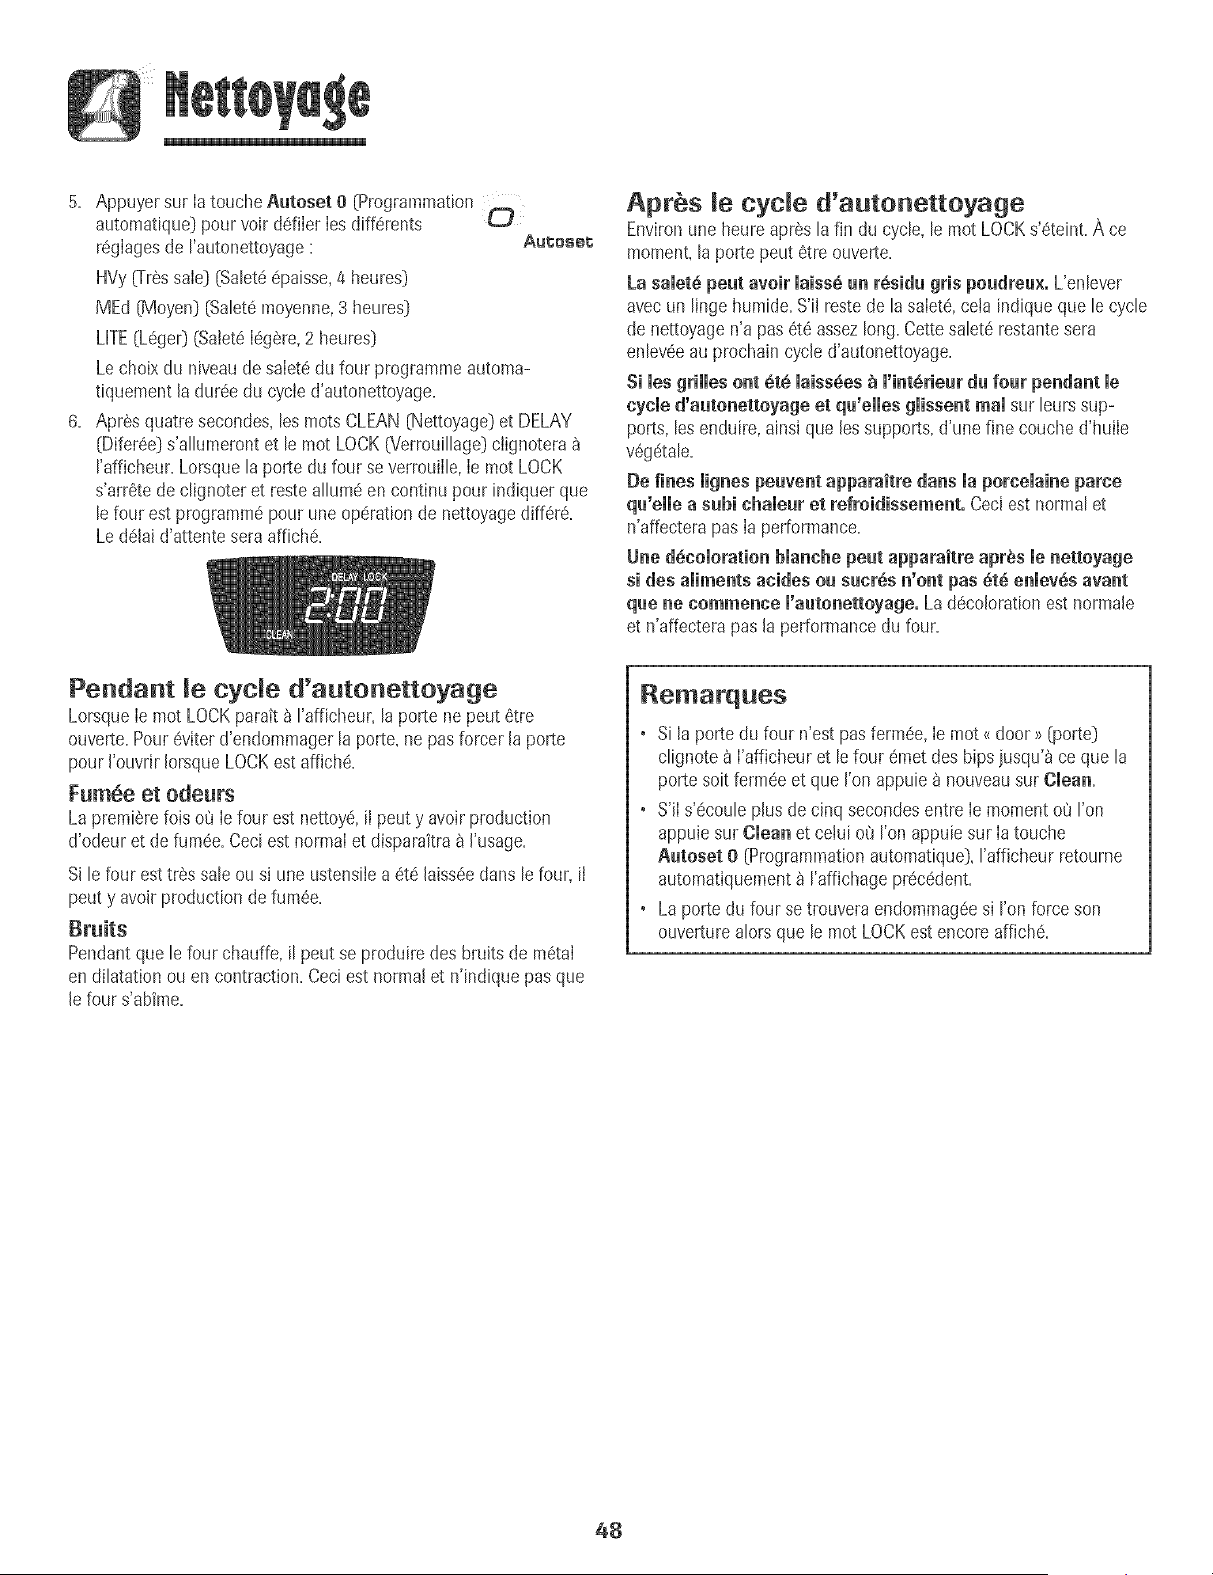
5+ Appuyer sur Ia touche Autoset O [Programmation
automatique}pour voir ddiler Iesdiff6rents O
r6glagesde I'autonettoyage Autoset
HVy[Tr6ssale} (Satet66paisse,4 heures}
MEd (Moyen} (Satet6moyenne,3 heures}
LITE(L6ge0 (Salet6I6g6re,2 heures}
Lechoixdu niveaude salet6du four programmeautoma-
tlquement la dur6edu cycle d'autonettoyage.
6. Apr6s quatre secondes,tes roots CLEAN(Nettoyage}et DELAY
(Difer6e}s'attumerontet le mot LOCK_errouillage} clignotera
I'afficheur.Lorsquela porte du four se verrauille,Ie mot LOCK
s'arr6te de clignoter et resteallure6en continu pour indiquer que
lefour est programm6pour uneop6ratlon de nettoyagediff6r&
Led61aid'attenteseraaffich&
Apr s le cycle d'autonettoyage
Environune heure apr_s [a fin du cycle,[e mot LOCKs'6teint+Ace
moment,laporte peut 6tre ouverte+
La samet6peut avoir maiss6un r6sidu gris peudreu×, L'enlever
avecun linge humide+S'iI reste de lasaIet& ceta indiqueque le cycle
de nettoyagen'a pas 6t6 assezlong+Cettesalet6restantesera
enlev6eau prachain cycled'autonettoyage+
Si les grilles ont _t_ maiss6es_ m'int_rieurdu four pendant le
cycle d'autenettoyuge et qu'elles gJissent real sur leurs sup-
ports, lesenduire,ainsJque lessupports, d'une fine couched'huile
v6g6tale.
De fines lignespeuventapparaitre darts la porcelaineparce
qu'elle a aubi chaleur et refroidissement. Ceciest normal et
n'affecterapas Ia performance.
Une d_comorationblanche peut apparaitre apr_s le netteyage
si des aliments acides ou sucrSs n'ont pas _t_ enlev_s avant
que ne commence l'autenettoyage. Lad6colorationestnormale
et n'affecterapas la performancedu four.
Pendant le cycle d'autonettoyage
LorsqueIe mot LOCKparatt_ I'afficheur,la porte ne peut 6tre
ouverte+Pour6viter d'endommagerla porte,nepas forcer la porte
pour I'ouvrJrIorsqueLOCKest affich_+
Fum_e et odeurs
La premiSrefois o_ Iefour est nettoyc!,il peut y avoir production
d'odeur et defum6e+Ceciest normalet disparaitra_ I'usage+
Si le faur est tr6s saleou si une ustensilea 6t_ laiss6eclansle four, il
peut y avoirproduction de fum6e+
Pendantque le four chauffe, il peut se produire des bruits de m6tai
en dilatation ou en contraction+Ceci est normal et n'indique pasque
le four s'abime+
Remarques
+ si la porte du four n'est pas ferm6e,Ie mot <<door >>(porte}
clignote8 I'afficheur et lefour 6metdes hips jusqu'_ ce que la
porte soit fermee et que I'on appuie_ nouveausur Clean+
• S'iI s'ecouleplus de cinq secondesentre Ie momento_'JI'on
appuiesur Clean et cetui ot'JI'onappuiesur Iatouche
Autoset O (Programmationautomatique},I'afficheur retourne
automatiquement_ I'affJchagepr6c_dent+
• La porte du four se trouveraendommag_esi I'on force son
ouverturealors que le mot LOCKestencore affJch&
48
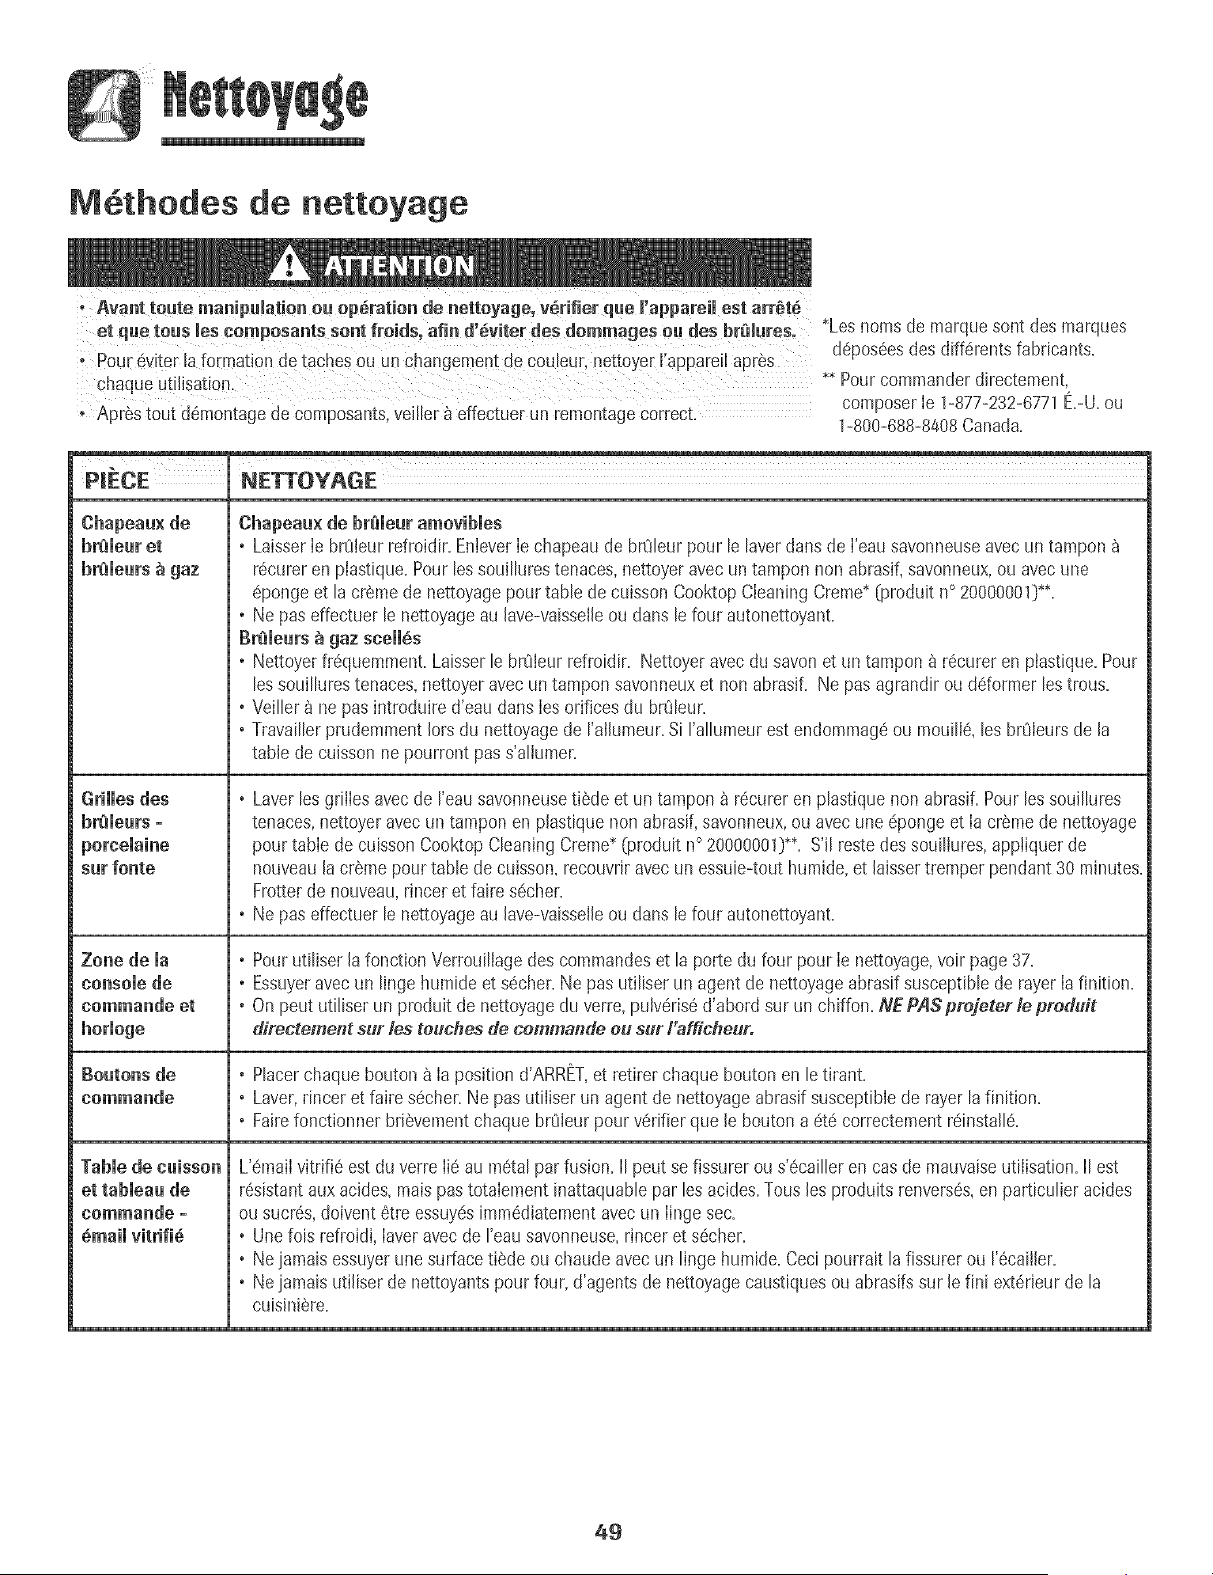
M6thodes de nettoyage
et qae teas les cem_esantSsent froids, afin d'dv!tet des dommages eu des br_lureS, *Lesnomsde marquesentdes marques
i Pour _vter laformationde taches 0u un cl_angementde C0Ueur, nettoyer Iapparei ap[_s depos6esdes differents fabricants=
chaque utilisation. *_Pour commanderdirectement,
o Apr_s tout d6montagede composants,veiller _ effectuerun remontagecorrect, composerIe !-877-232-6771E=-U=ou
1-800-688-8408Canada=
NETTOYAGE
surfonte
Zone de ia
console de
eemmande et
Table de caisson
et tabmeaa de
cemmande -
dmaii vitrifi6
Chapeau× de br_ieur amovibies
o LaisserIe brOieurrefmidir=EnteverIechapeau de br_fleurpour le laverdans de I'eausavonneuseavec un tampon
r6cureren plastique=Pourles souillurestenaces,nettoyeravecuntampon non abrasif,savonneux,ou avec une
6pongeetla cr_me de nettoyagepour table de cuissonCooktopCleaningCreme_[produit n° 20000OOlD_=
o Ne pas effectuer le nettoyageau lave-vaisselleou dans le four autonettoyant=
Breiears _ gaz sceii_s
o Nettoyer%quemment=Laisserle brOieurrefroidir= Nettoyeravec du savonet un tampon_ r6cureren piastique=Pour
les souillurestenaces,nettoyeravecuntampon savonneuxet nonabrasif=Ne pasagrandir ou ddormer les tmus=
o Veiller _ ne pasintroduire d'eau dans Ies orificesdu br_Jleur=
o TravaillerprudemmentIorsdu nettoyagede ralhmeur=Si rallumeur est endommageou mouilie,les brOieursde la
table de cuissonne pourront pass'aliumer=
o Laver[esgrilles avecde I'eausavonneusetiSde et un tampon _ recureren plastique non abrasif=Pourlessouillures
tenaces,nettoyeravecun tampon en plastiquenon abrasif,savonneux,ou avec une epongeetla cr6me de nettoyage
pour table de cuissonCooktopCleaningCreme*(produit n° 20000001)**=S'il restedes souillures,apptiquerde
nouveau[acrSmepourtable de cuisson,recouvriravecun essuie-tout humide,et laissertremperpendant30 minutes=
Frotterde nouveau,rincer et faire secher=
o Ne pas effectuer le nettoyageau [ave-vaisseileou dans le four autonettoyant=
o Pour utiliser la fonction Verrotfillagedes commandeset la porte du four pour Ie nettoyage,voir page 37=
o Essuyeravecun linge humide et sdcher=Ne pas utiliser un agent de nettoyageabrasifsusceptiblede rayerIa finition=
o On peut utiliser un produit de nettoyagedu verre,pulveris6d'abord surun chiffon=NEPASprejeter/epreduit
directement slut"les touches de cemmande eu sur Fafficfleuro
o Placerchaquebouton _ Ia position d'ARRCT,et retirer chaque boutonen le tirant=
o Laver,rincer et faire secher=Ne pasutiliser un agent de nettoyageabrasifsusceptiblede rayer la finition=
o Fairefonctionner briSvementchaquebrOleurpourverifier que le bouton a ete correctementreinstalle=
L'emaiIvitrifie estdu verre Iid au metalparfusion=II peut se fissurerou s'ecailler en casde mauvaiseutilisation=II est
resistantauxacides,maispastotalement inattaquablepar lesacides=Tousles produits renverses,en particulieracides
ou sucrds,doivent etre essuyesimmediatementavecun Iinge sec=
o Line lois refroidi, laveravecde reau savonneuse,rincer et secher=
o Ne iamaisessuyerune surfacetiede ou chaudeavec un linge humide=Ceci pourrait lafissurer ou I'ecailler=
o Ne iamaisutiliserde nettoyantspourfour, d'agents de nettoyagecaustiquesou abrasifssur le fini exterieurde la
cuisini_re.
49
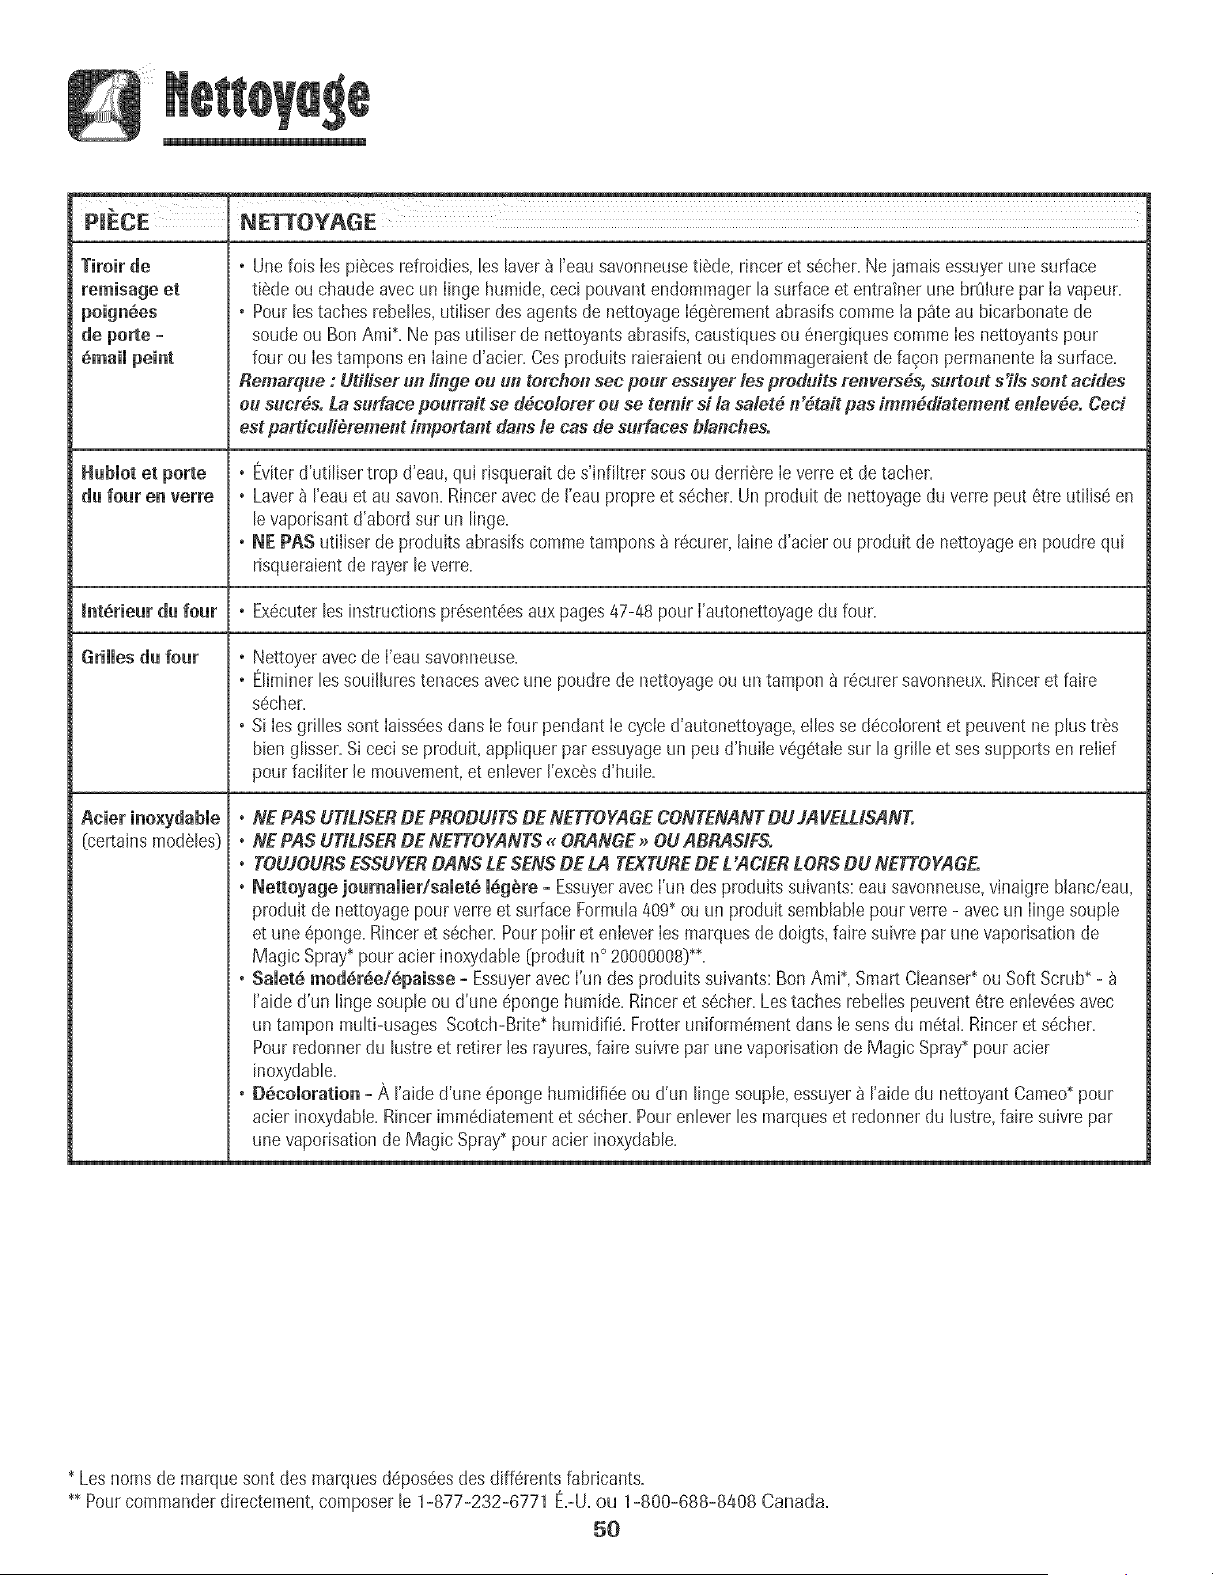
Tiroir de
de porte -
du four en verre
. Une fob Iespiecesrefmidies,les laver_ I'eausavonneusetie@+rincer et s@her.Ne jamais essuyerune surface
tie@ ou chaudeavec un Iinge humide, ceci pouvant endommagertasurface et entrainer une br0Iurepar Ia vapeur.
. Pour restaches rebetbs, utiliserdes agents de nettoyageIegerementabrasifscommela p_te au bicarbonatede
sou@ ou Bon ArnR Ne pasutil+serde nettoyantsabrasifs,caustiquesou @ergiquescomme Iesnettoyantspour
four ou Iestamponsen Iaine d'acier.Cesproduitsrabraient ou endommageraientde fagon perrnanentelasurface+
Remarque : Udliser un Hnge eu ull terchensec pour essuyer les preduits re_vers6s, surtout s'ils sent addes
eu sucr_soia surface _ourrait se d6celerer eu se temir si la salet611'6fair pas imm6diatement ettlev6e. Ceei
est pardcuii_rement important darts/e cas de surfaces blanches.
. t_viterd'utilber trop d'eau,qui risqueraitde s'infiltrer sousou derriere Ie verreet detacher.
. Laver_ I'eauet ausavon.Rinceravec de I'eaupropre et s@her.Un produit de nettoyageduverre peut 6tre utiliseen
le vaponsantd'abord sur un linge.
. NE PAS utiliserde produitsabrasifscommetampons _ recurer,lained'acier ou produit de nettoyageen poudrequi
risqueraientde rayer leverre.
IntSrieur du four + Ex@uter les instructions pr6sent6es aux pages 47-48 pour I'autonettoyage du four+
Grilles du four
[certainsmodeles}
* Nettoyeravecde I'eausavonneuse.
* t_liminerlessouillurestenacesavec une poudre de nettoyageou un tampon _ r6curer savonneux.Rinceret faire
secher.
. Si Ies grilles sont Iaiss@sdartsIe four pendantIe cycle d'autonettoyage,ellesse d@olorent et peuvent ne plus tres
bien glisser.Si cecise produit, appliquerparessuyageun peu d'huile veg6talesur la grille et sessupportsen relief
pour faciliter le mouvement,et enleverI'exc6sd'huile.
. NE PAS UTIUSERDE PRODUffS DE NETTOYAGECONTENANTDU JAVELLISANT.
" NEPAS UTIUSERDE NETTOYANTS, ORANGE_ OU ABRASIFSo
. TOUJOURSESSUYERDANS LESENSDE LA TEXTUREDE L'ACtERLORSDU NETTOYAGE.
. Nettoyage joamamier/samet8i_g_re - EssuyeravecI'un desproduitssuivants:eau savonneuse,vinaigre blanc/eau,
produit de nettoyagepour verre et surface Formula409+ou un produit semblablepour verre - avecun Iingesouple
et une @onge. Rinceret s@her.PourpoIir et enbver Iesmarquesde doigts,faire suivre par unevaporbation de
Magic Spray+pour acier inoxydabb {produit n° 20000008}++.
. Saiet_ mod_r_e/Spaisse - Essuyeravec I'un des produits suivants:BonAmi+,SmartCbanser+ouSoft Scrub+-
I'aided'un linge soupb ou d'une @onge humide.Rincer et s@her.Lestaches rebeIIespeuvent_tre eniev@savec
un tampon multi-usages Scotch-Brite+humidifie.Frotteruniform@nentdansle sens du m6taLRinceret s@her.
Pourredonnerdu lustre et retirer les rayures,faire suivre par unevaporisationde Magic Spray+pour acier
inoxydabb.
. DSeeJoratio_ - A raide d'une @ongehumidifi_e ou d'un lingesouple,essuyer_ I'aidedu nettoyant Cameo+pour
acier inoxydable.Rincerimm_diatementet s@her.Pourenleverles marqueset redonner du lustre,faire suivre par
unevaporisationde MagicSpray+pour acier inoxydable.
+Lesnomsde marquesontdes marquesd@os@sdes cliff, rents fabricants.
++Pourcommanderdirectement,composerle 1-877-232-6771 t_.-U,ou 1-800-688-8408 Canada.
50
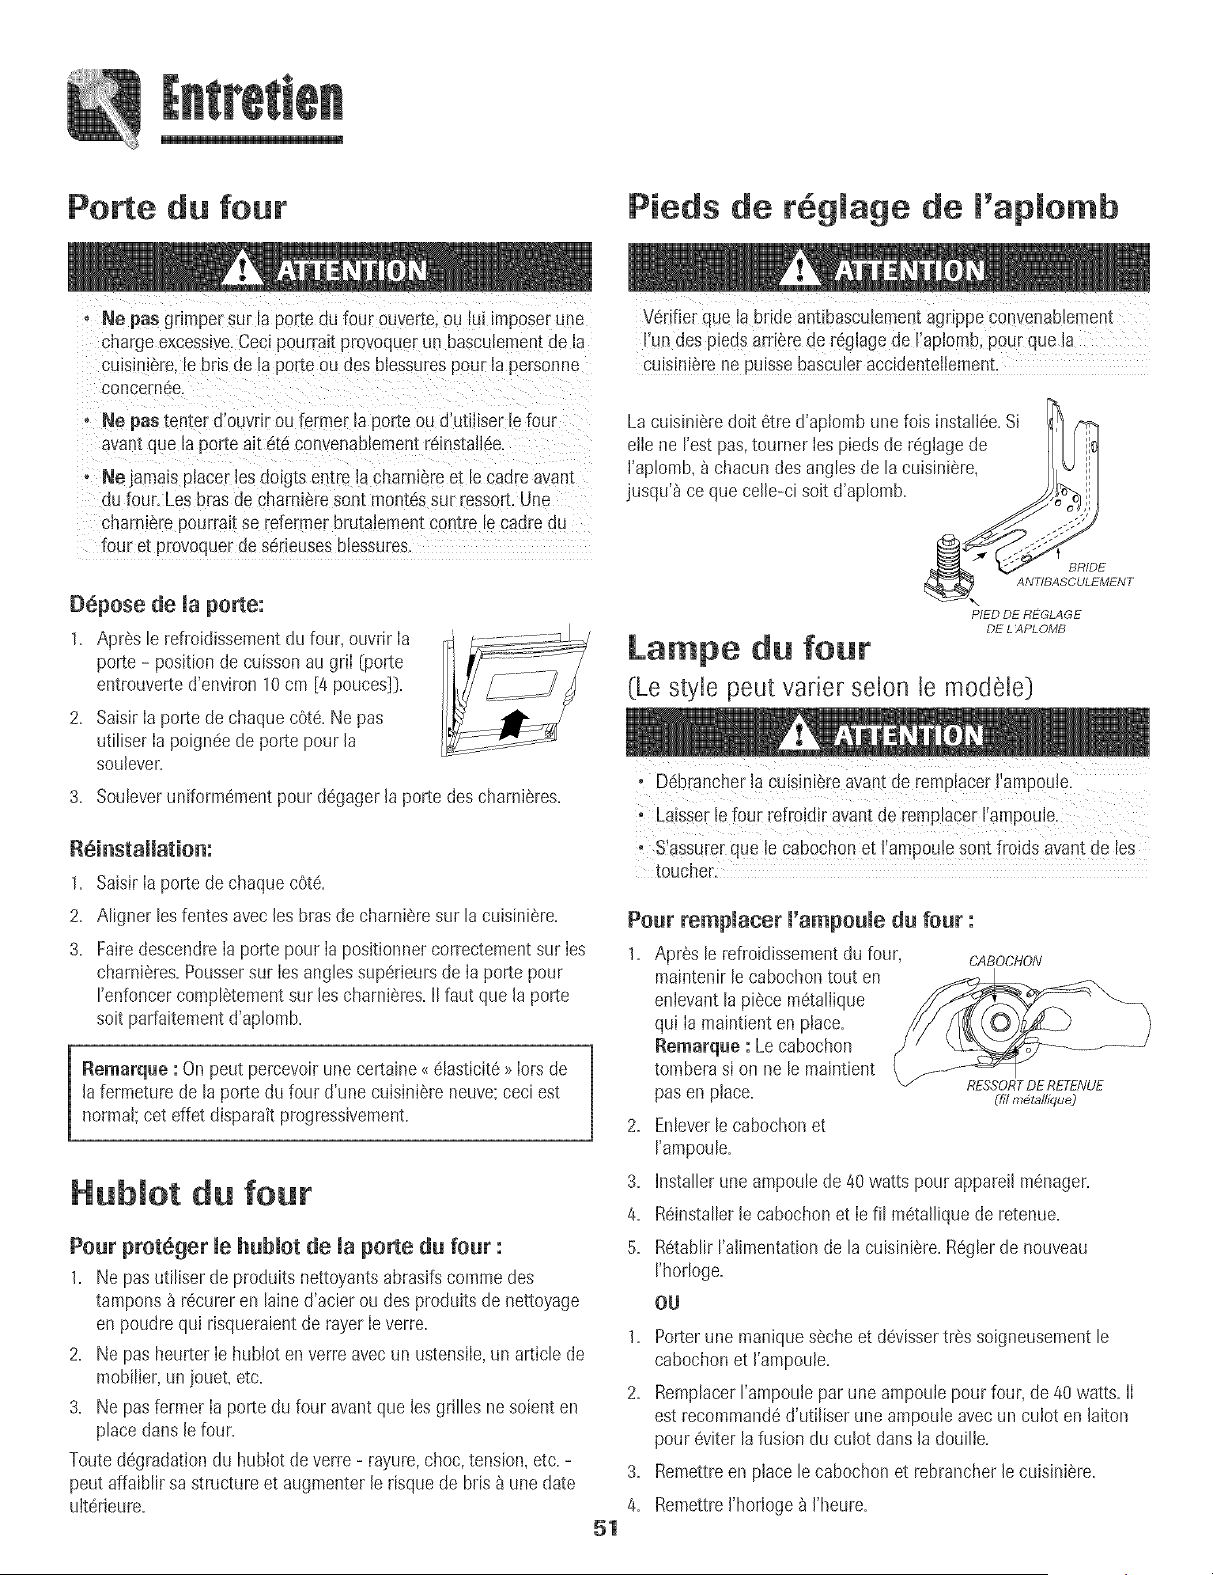
Porte du four
Pieds de r6glage de l'aplo b
o Ne pas crimper sur la _ortedu four ouverte,ou lUl_mposerune
charge excessive.Ceci pourrait provoquerun bascubment de B
culsmtere ie bris de la porteou des blessurespour la personne
concernee.
o Ne pastenter d'ouvnr ou fermer la porteou d'utiliser lefour
avant que laporte ait 6tOconvenablementreinstall@
o Ne }areas placer bs doigts entre la charnJereet le cadreavan[
du four. Les brasde charmeresent montessur ressort.Une
charniere pourraJtse refermer brutabment centre le cadredu
four et provoquerde sdrieusesbbssures.
Depose de la porte:
1. Apres b refroidissementdu four, ouvrir Ia
porte - position decuissonau griI {porte
entrouverted'environ10cm [4 pouces]}.
2. SaisirIa porte de chaquecote. Ne pas
utiliser Ia poign@de porte pourla
soulever.
3. Soubver uniform@_entpour dOgagerJaporte des charnieres.
1, SabJrIa porte de chaquecOtO.
2. Aligner bs fentesavec les brasde charnieresur la cuisiniere.
3. FairedescendreIa porte pour Ia positionnercorrectementsur Ies
charniOres.Poussersur Iesangbs superieursde Ia porte pour
I'enfoncercomplOtementsur los charnieres.II faut que la porte
soit parfaitementd'aplomb.
Remarque : On pout percevoirune certaine_elasticit6 >_Iorsde
la fermeturede la porte du four d'une cuisiniOreneuve:ceci est
normal;ceteffet disparaitprogressivement.
Nublot du four
Pour protOger le hublot de la porte du four :
1. Ne pas utiliser de produits nettoyantsabrasifscommedes
tampons_ r@ureren lained'acierou des produits de nettoyage
en poudre qui rbquerabnt de rayerIeverre.
2. Ne pas heurter Ie hubiot en verreavec un ustensib, un articb de
mobilier,unjouet, etc.
3. Ne pas former Ia porte du four avant que les grilles nesobnt en
place dartsle four.
Toutedegradationdu hubIotde verre - rayure,choc,tension,etc. -
peut affaiblir sa structureet augmenterle risquede bris b une date
ulterieure.
Vedfier que la bride antibasculeme_tagrippe CO!!venablement
'l n des peds art ere de r@ agede 'ap crab pour que a
cuis[r@rene Puissebasculer accidentellemenL
La cuisiniOredolt 6tre d'aptomb une fois install@.Si p_
etle ne I'estpas,tourner Iespiedsde r_glagede
I'aplomb,_ chacundesangles de la cuisiniere,
jusqu'_ ce que celle-ci soit d'aplomb, h,,J
&_TTBASI_ENT
PIED DE REGLAGE
DE L 7_PLOMB
La pe du four
(Le style pout varier selon le modeb}
51
o D@rancherla cuisiniOreavantde rempBcer I'ampoule.
Sassurerque le Cabochonet j arnpou!es0nt fro!ds avantde les
touche_.
Pour remplacer l'aapoule du four :
1. Apr@ le refroklissementdu four, CABOCHON
maintenirle cabochontout en
enlevantlapiece mOtallique
qui Ia maintient en place.
Remarque : Le cabochon
tomberasi on ne le maintient
pas en place.
2. Enleverle cabochonet
['ampoule.
3. Installerune ampoulede 40 watts pourappareil menager.
4. Reinstallerle cabochonet Ie fil metallique de retenue.
5. Retablir I'alimentationde la cuisiniere.Reglerde nouveau
I'horloge.
OU
1. Porterune maniquesOcheet dOvissertres soigneusementb
cabochonet I'ampoule.
2. RemplacerI'ampoulepar une ampoulepour four,de 40watts. II
estrecommand6d'utiliser uneampouleavecun culot en laiton
pour 6viter la fusiondu culot dartsla douille.
3. Remettreen placele cabochonet rebrancherle cuisiniere.
4. RemettreI'horloge_ I'heure.
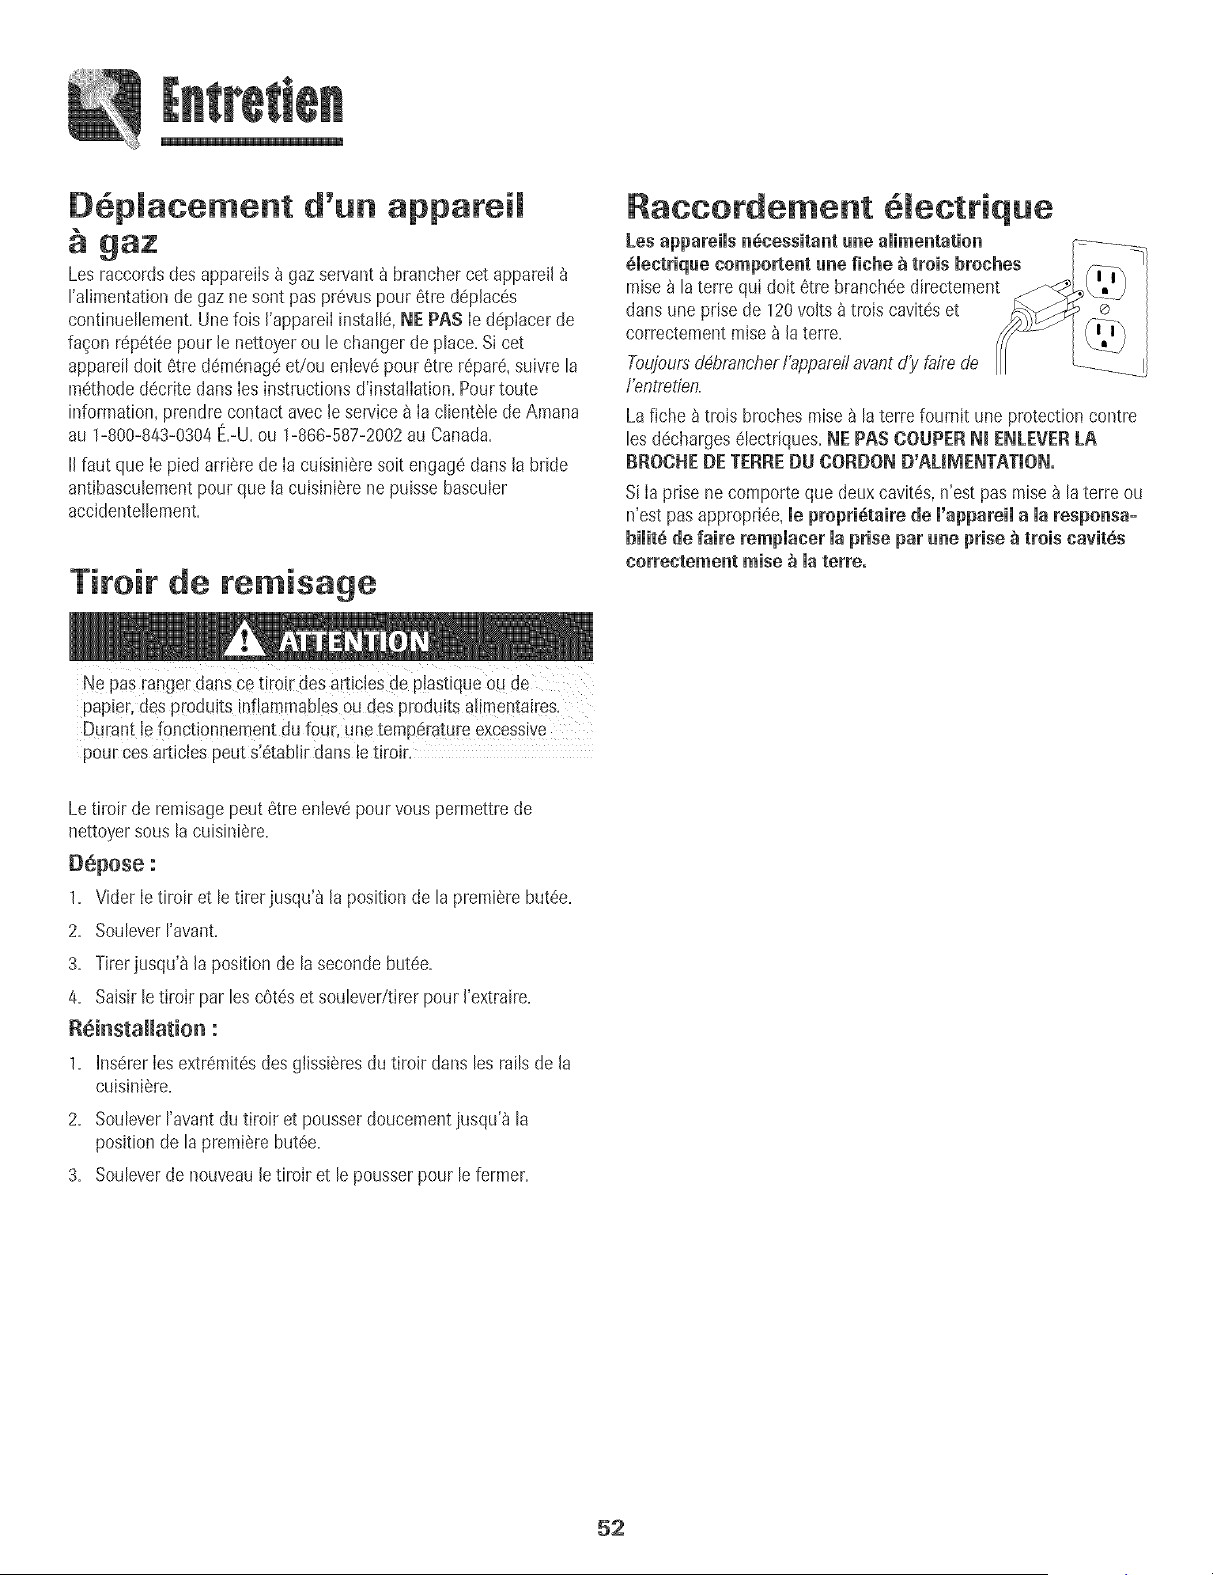
D place ent d'un appareil
gaz
Les raccordsdes appareils_ gazservant_ branchercet appareil
FaIimentationde gaz ne sontpas pr6vus pour 6tre d@lac6s
continueIIement.Unefois ['apparei[install& NE PAS Ie d@iacerde
fa_on r@6t6e pour le nettoyerou le changer deplace.Sicet
appareildoit 6tre d6mQnag6et!ou eniev6pour 6tre r@ar& suivre la
mQthoded6crite dans[esinstructionsd'instaliatJon.Pourtoute
information,prendrecontact avecle service_ [a cIient61edeAmana
au 1-800-843-0304E,-U,ou 1-886-587-2002au Canada.
IIfaut que [e pied arri_re de [a cuisini8resoit engagedartslabride
antibascuIementpourque la cuisinierene puisse basculer
accidenteIIement.
Tiroir de remisage
Raccordement lectrique
Los appareils n_cessitant une alimentation
6mectriquecomportent une fiche _ trois hroches
raise_ laterre qui doit 6tre branch_edirectement
dansune prise de 120volts _ trois cavit6set
correctementmise_ la terre.
Toujoulsd4brancherf'appardlavantd'y faire de
f'entretien.
Lafiche _ trois broches mise_ laterre fournit uneprotection contre
les d6charges6Iectriques.NE PASCOUPERN_ENLEVERLA
BROCNEDE TERREDU CORDOND'ALIMENTATION,
Si [a prise ne comporteque deuxcavit6s,n'est pas raise_ laterre ou
n'est pas appropri6e,le propri_taire de l'appareil a la responsao
bimit6de faire remplaeer la prise par une prise_ trois eavitSs
eorrecteme_t raise _ la torte.
Ne Pasrangerdans ce tiroir des articlesde piastiqueou de
papier, des produits inflammables0u des produitsalimentaires.
Durant Jefoncti0nnementdu four, unetempdratureexcessive
pour cos articles pout s'_taNir dans letiroJr.
Letiroir de remisagepout @treenJev@pour vous permettrede
nettoyersous Jacuisini6re.
D_pose :
1. Vider [et[roir et [e tirer jusqu'_ [a positionde [apremierebutte.
2. SouJeverJ'avant.
3. Tirerjusqu'a [aposition de Jaseconde butee.
4. Saisir Jetiroir par JescOt6set souJever/tirerpour ['extraire.
R_i_sta[[atio_ :
1. Ins6rer[esextr6mit6sdes glissi6resdu tiroir dans [esrails de [a
cuisJni6re.
2. SouIever['avantdu tiroir et pousserdoucementjusqu'_ [a
positionde [a premi6rebutte.
3. SouIeverde nouveau[etimir et [epousser pour [efermer.
52
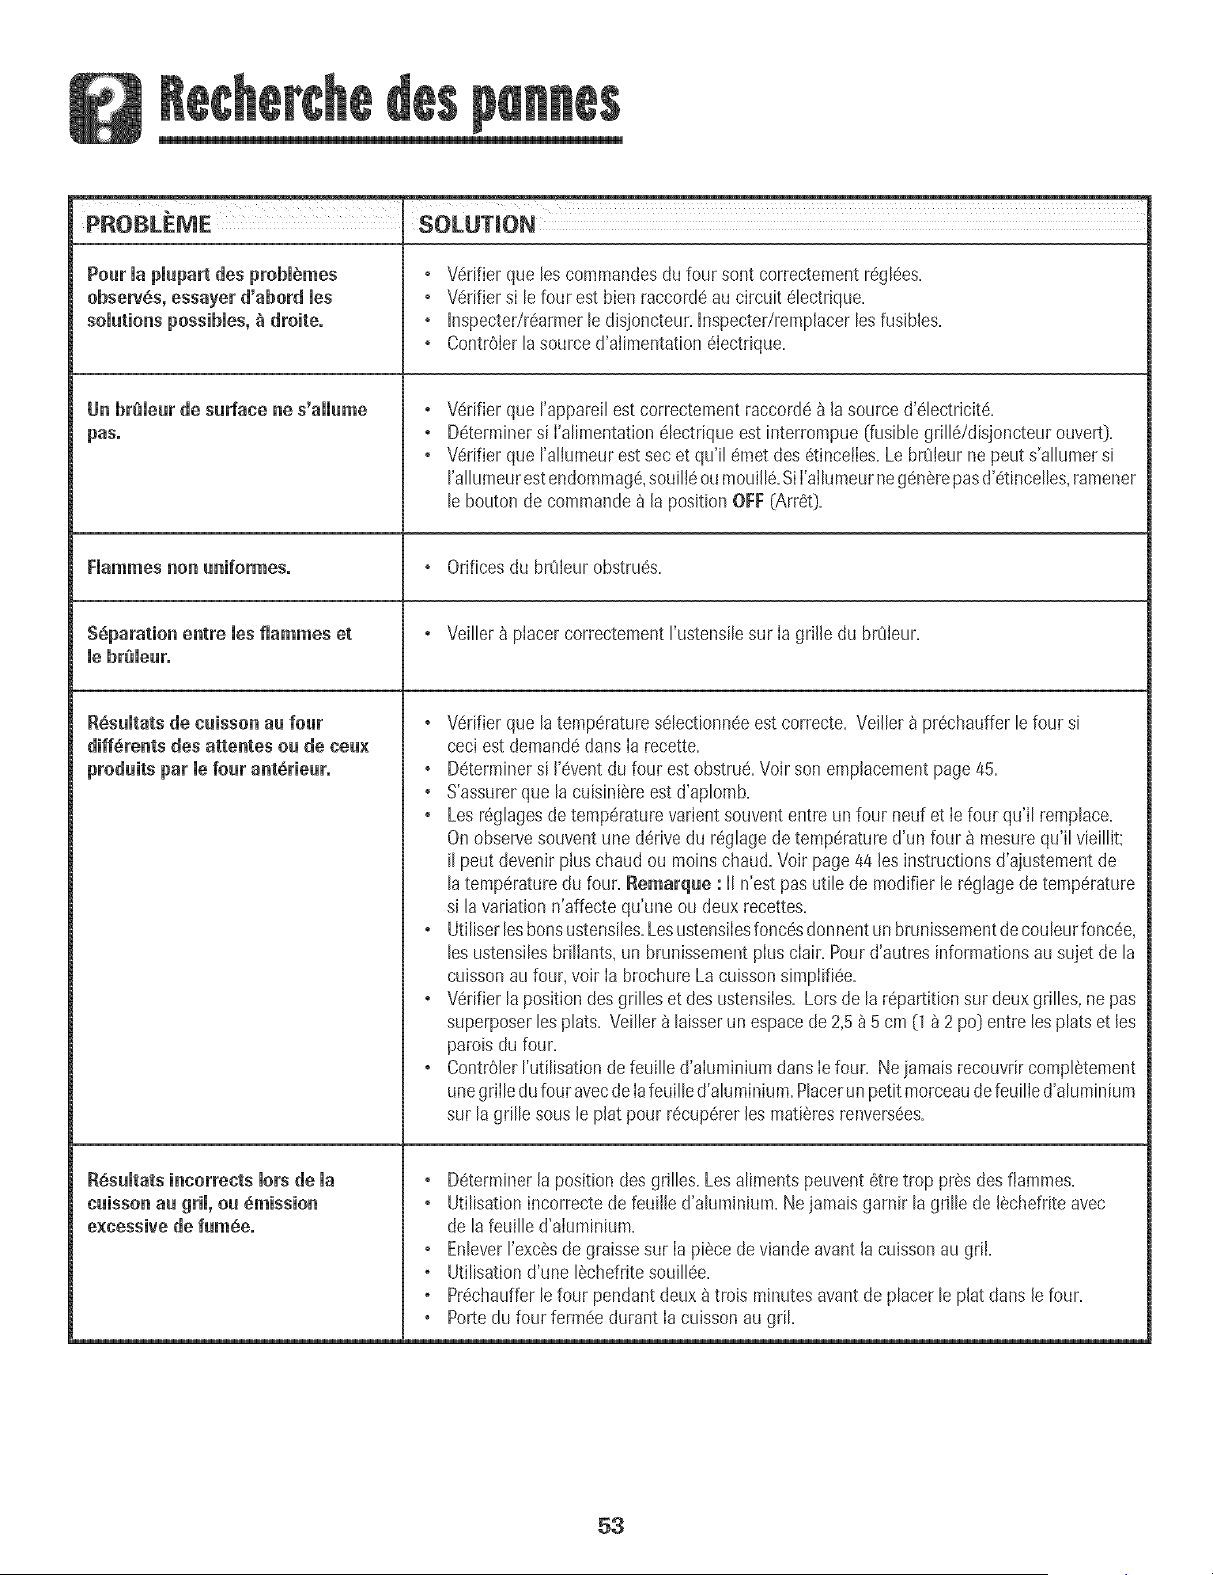
PROBLEME SOLUTION
Pour mapmupartdes probm_mes
obse_s, essayer d'abord rues
somutionspossibmes,_ droite,
Un hr_meurde sudace ne s'ammame
pas,
° V6rifier que lescommandesdu four sont correctementr6gl6es.
° Verifiersi le four est bien raccord6au circuit 61ectrique.
° hspecter/r6armer le disjoncteur. InspecteUremplacerles fusibles.
° ContrOIerlasourced'aiimentationeIectdque.
Verifier qua rappareilestcorrectementraccord6 _ lasource d'61ectricit6.
Determinersi I'alimentation61ectriqaeest interrompue{fusiblegrillUdisjoncteur ouvert}.
Verifier qua I'allumeurest sac et qu'il 6metdes 6tincetIes.Le br0Ieurne peut s'allumersi
I'allumeurestendommag6,soui116ou moui116.Si I'aIlumeurneg6nerepasd'6tincelles,ramener
lebouton de commande_ la position OFF (Arre0.
Fmammesnon aniformes. , Orificesdu br0Ieurobstru6s.
S6paration entre les flammes et , Veiller_ piacer correctementI'ustensilesur Ia grille du br01eur.
mebremear,
R_sumtats de caisson aa loaf
diff_rents des attentes ou de eea×
produits par mefour antSriear,
R_sumtatsineorreets morsde ma
caisson au grim,ou _mission
excessive de fum6e,
Verifier que latemperatures61ectionn6eestcorrecte. Veiller _ pr6chaufferle four si
ceci est demand6clansIa recette.
, Determinersi 1'6ventdu four est obstru6.Voir son emplacementpage45=
° S'assurerqua [a cuisiniereest d'ap[omb.
° Lesreghges de temperaturevariant souvententre un four neuf et ie four qu'il remplace.
On observesouventune derive du r6glagede temperatured'un four _ mesurequ'il vieillit:
il peut devenirplus chaud ou mainschaud.Voir page44lesinstructionsd'ajustementde
latemperaturedu four=Remarque : II n'est pas utile de modifier le r6glagedetemperature
si lavariationn'affecte qu'une ou deuxrecettes.
° Utiliserlesbonsustensiles.LesustensiIesfonc6sdonnentunbrunissementdecouleurfoncee,
lesustensilesbrilIants,un brunissementpIuscIair. Pourd'autres informationsau sujet de la
caissonau four,voir Ia brochureLa cuissonsimpIifi6e.
° Verifier la positiondes grilleset desustensiIes.Lots de la repartitionsur deux grilles, nepas
superposerlesplats. Veiller _ laisserun espacede 2,5_ 5 cm (1_ 2 podentre lesplats etles
patois du four=
° ContrOlerI'utilisationde feuille d'aIuminiumdansIe four= Nejamais recouvrir completement
unegriIledu faur avecde Iafeuilled'aluminium.PlacerunpetitmorceaudefeuilIed'aluminium
sur lagrille sous leplat pour r6cup6rerlesmatieresrenvers6es.
° Determinerla position des grilles.Lesaliments peuventetre trop pres desflammes.
° Utilisationincorrectede feuille d'aluminium.Ne jamais garnir la grille de lechefriteavec
de la feuille d'aluminium.
° EnleverI'excesdegraissesur Ia piece de viande avant lacuisson au gril.
o Utilisationd'une lechefritesouill6e.
o Prechaufferlefour pendant deux_ trois minutesavant de placer le plat clansle faur.
• Portedu four fermeedurant Ia cuissonau gril.
53
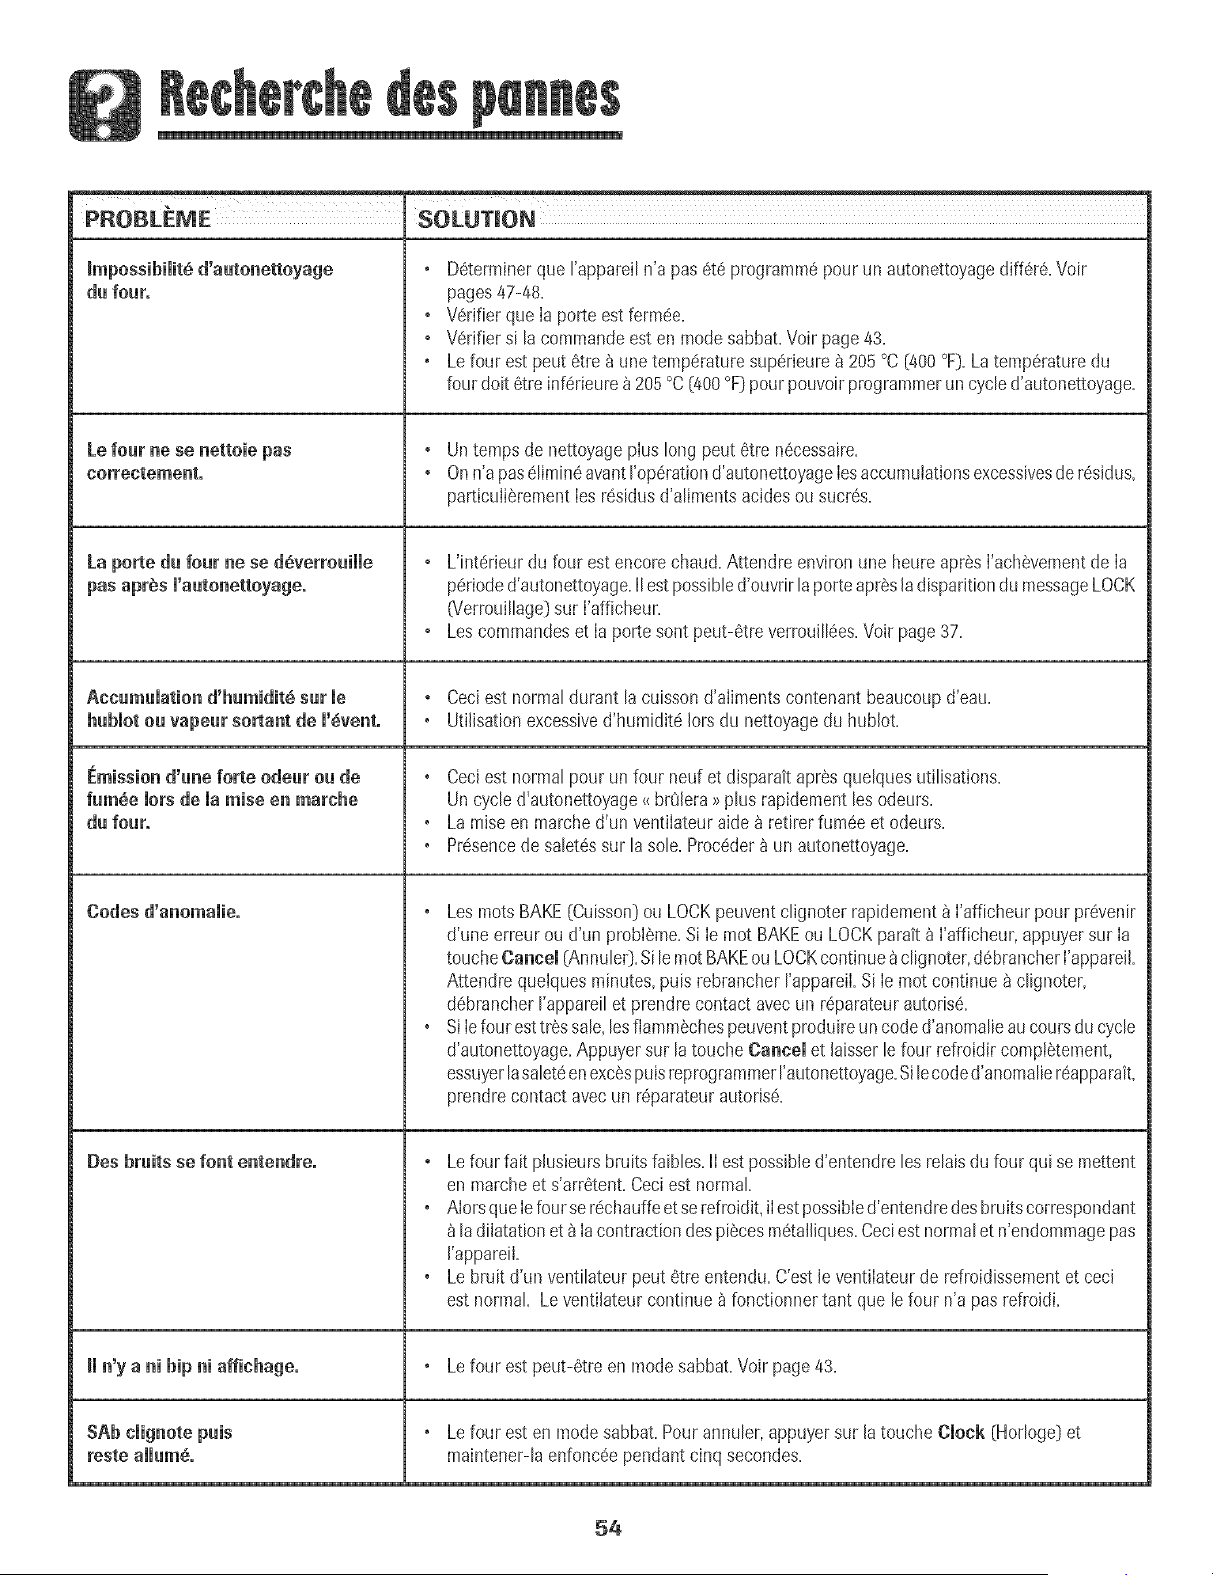
PROBLEME SOLUTION
_mpossibiiit_ d'autonettoyage
du four.
Le four ne se nettoie pas
correctement,
La porte du four ne se d6verrouiHe
pas apr_s m'autonettoyage.
Accumumationd'humidit_ sur me
hubmotouvapeurso,ant dem'6vent.
Emission d'one forte odeor co de
forage iors de ia raise en marche
do foot.
Codes d'onomaiie,
Des broits se font entendre.
_mn'yo ni hip ni affinhage.
SAb cmignotepuis
reste ommom_.
Determinerque rappareiln'a pas ete programmepour un autonettoyagediffere=Voir
pages47-48=
° Verifierque Ia porte est fermee=
° Verifiersi la commandeest en modesabbat=Voirpage43=
Le four est peut etre _ one temperaturesuperieore_ 205°C [400°F)=La temperaturedu
four doit etre inferieore_205°C[/*00°FDpour pouvoir programmerun cycled'autonettoya%
° Un temps de nettoyagepIos long peot etre necessaire=
° On n'a paselimineavantI'operationd'autonettoyageIesaccomulationsexcessivesderesidus,
particolierementIesresidusd'alimentsacidesco sucres,
° L'interieur du four est encorechaod=Attendreenviron une heure apresI'achevementde Ia
perioded'autonettoya% IIestpossibled'ouvrirla porteapresla disparitiondu messageLOCK
07errooilhge_sur I'afficheur=
° Les commandeset Ia porte sont peut-etre verrouillees=Voir page37=
° Ceci est normaldurant la cuissond'aIimentscontenant beaucoupd'eau=
Utilisationexcessived'humidite Iors du nettoyagedu hoblot=
Ceciest normalpour un four neuf et disparaitapresquelquesutilisations=
Un cycle d'aotonettoyage_<brOlera_>plus rapidement lesodeors=
La raiseen marched'un ventiIateuraide_ retirerfumee et odeurs=
Presencede saletessur la sole=Proceder_ on aotonettoya%
Les rootsBAKE[Cuisson_ou LOCKpeuventclignoterrapidement_ I'afficheur pour prevenir
d'une erreurou d'un probleme=Si Ie mot BAKEou LOCKparait _ I'afficheor,appuyersur Ia
toucheCancel [AnnuleO=Si le mot BAKEou LOCKcontinue_clignoter,debrancheri'appareil=
Attendreqoelques minutes,puis rebrancherI'appareiI=Si Ie mot continue _ clignoter,
debrancherI'appareilet prendre contact avecun reparateuraotorise=
SiIefour esttr_s sale,lesflammechespeoventproduireuncoded'anomalieaocours do cycle
d'autonettoyage=Appuyersor la touche Cannel et laisserle four refroidir compt_tement,
essuyerlasaleteenexcespoisreprogrammerrautonettoyage=Silecoded'anomaliereapparait,
prendrecontactavecon reparateurautorise,
° Le four fait phsieurs bruits faibles=lI estpossibled'entendreles relaisdu four qui se mettent
en marche et s'arretent,Ceciest normal
Aiorsque Iefourserechauffeet serefroidit,iIest possibied'entendre desbruitscorrespondant
ladiIatationet 8 Iacontractiondespiecesmetailiques,Ceciest normalet n'endommagepas
['appareil=
Le bruit d'un venti[ateurpeut 6tre entendu,C'est[e ventiiateurde refroidissementet ceci
est normal Le venti[ateurcontinue _ fonctionnertant que [efour n'a pas refroidi,
Le four est peut-etre en modesabbat,Voir page 43,
Le four est en modesabbat,Pourannulet,appoyersur [a touche Clock (Hodoge)et
maintener-[aenfonceependant cinq secondes,
54
Gatantie de la cuisini_te _ gaz
Gatantie cemplbte d'une annee -
Pibces et mai n-d'_uvre
Duramune p_rioded'un (1} an _ cornpterde la cta_e
de Fachati fitial au detail, toute piScequi se r@eieraJt
detectueusedonsues conditionsnormabs d'usage
menagerserarepareeou rempJaceegratultement.
Veuiliezrioter: Cegarantlecompletene
s'appliq_)entquesi b appareiisetrouw au Canada
ou auxEtats-Unis.LesappareJissJtu@ailleursne
sontcouvertsque par bs garandeslimit@s.}
comprisde pieces(_Jise r_vdleraientddec_ueusesia
premiereannee.
P,esidents canadiens
Legarsntieci-dessuscouvreJesappareilsJnstaJlesau
Canada.seubments'JJsont 6t6 agr@sparJa0S£
saul si cesapparellsollt ete introduJtsau Canaaaa
Foccas_ond'un changementde residencedes Etat.s-
Unisversle Canada.
Lesgarantiessp@ifiquestbrmu/@sci-dessussonz/es
SEULE$que/e fabricantaccorde Ce_Taranr/evous
cont_rentdesdreitsf_fdiques sp4cifiquesezvous
pouvez4gatementjouir d'autresdrotrs,vaflab/esd'un
_tat_/'autre d'uneprovincea uneautre
Ne sent pas couverts par ces garanties :
1= Lesdommagesou @rangementsdus _:
a=Mise en service,Iivraisonou entretieneffectu@incorrectement=
b=Touter@aratJon,modification,alterationet tout regIagenonautoris@par
Iefabricantou par un prestatairede serviceapr_s-venteagree=
c=MauvaisempIoi,emploiabusJf,accidents,usagenon raisonnable,ou
catastrophenaturelJe=
d=AIJmentationebctrique (tension,intensite]incorrecte=
e=RegIageincorrectd'unecommande=
2= Lesgarantbsne peuvent6tre honor@ssi bs numdmsdeserb d'origine ont 6t6
enbv@,modifiesou ne sont pasfacibment lisJbles=
3. Ampoules.
4. Appareilsachet@aux fins d'usagecommercialou industrieI.
5. Lesfraisdevisited'un prestatairede serviceou de serviceapres-venteencourus
pourIesraisonssuJvantes:
a. Correctiond'erreursde raiseenservice.
b. Initiationde I'utJlisateur_ I'emploide I'appareiL
c.Transportde I'appareiIiusqu'_ I'entreprisede serviceapres-venteet son retour.
6. Dommagessecondairesou indirectssubis par toute personnesuite au non-respect
decesgarantJes.Certainsetatsou provincesne permettentpas I'exclusionou la
limitationdes dommagessecondairesou indirects;par consequentlesJimJtatJonsou
exclusionsci-dessuspeuventne pass'appliquer_ votrecas.
Si un service apr_s-ve_te est _cessaire
IJfaut d'abordconsulterlasectionsur led@annagedu manueld'utilisationet
d'entretbn ou appeterMaytagServicesS_/service_ laclientebde Amanaau
1-800-843-0304E=-U=ou 1-866-587-2002au Canada=
Po_r obte_it les prestatio_s de gara_tie
PourIocaIiseruneagenceagreeedeserviceaprSs-ventedonsvotreregion,prenez
contactavecIedetaillanto_ vousavezacheteFappareil;ou appebz Ma_tagServicesS_/
servicea la cJient_bde Amana.Si vousn'obtenezpasun servicesatisfaisantenvertu
de la garantb, veuillezecrireou tel@honer_ :
MaytagServicessM
A I'attentiondu CAIR_Center
RO.Box2370,Cleveland,TN37320-2370
F:o-Uo1-800-8_3-e30_ et Ca_a_a 1-866-587-2002
Remarq_e : Lorsde tout contactaupresdeMa}_agServicesSM,Service_ la
clientebAmanaet concernantun problSme,veuillezfournir I'informatJonsuivante:
a. Vosnora,adresseet num@odetdI@hone;
b. Numerode mo@b et numerode sdriedeI'appareiI:
c. Noraet adressedu detaiIlantavecla date I'appareiiachete;
d. Descriptionciairedu probl_meobserve;
e. Preuved'achat.
SM
Lesguidesd'utilisation,bs manuelsde serviceet bs renseignementssur lespi@essontdisponibbsaupresde Ma}¢agServices', service_ JacJientele.
55
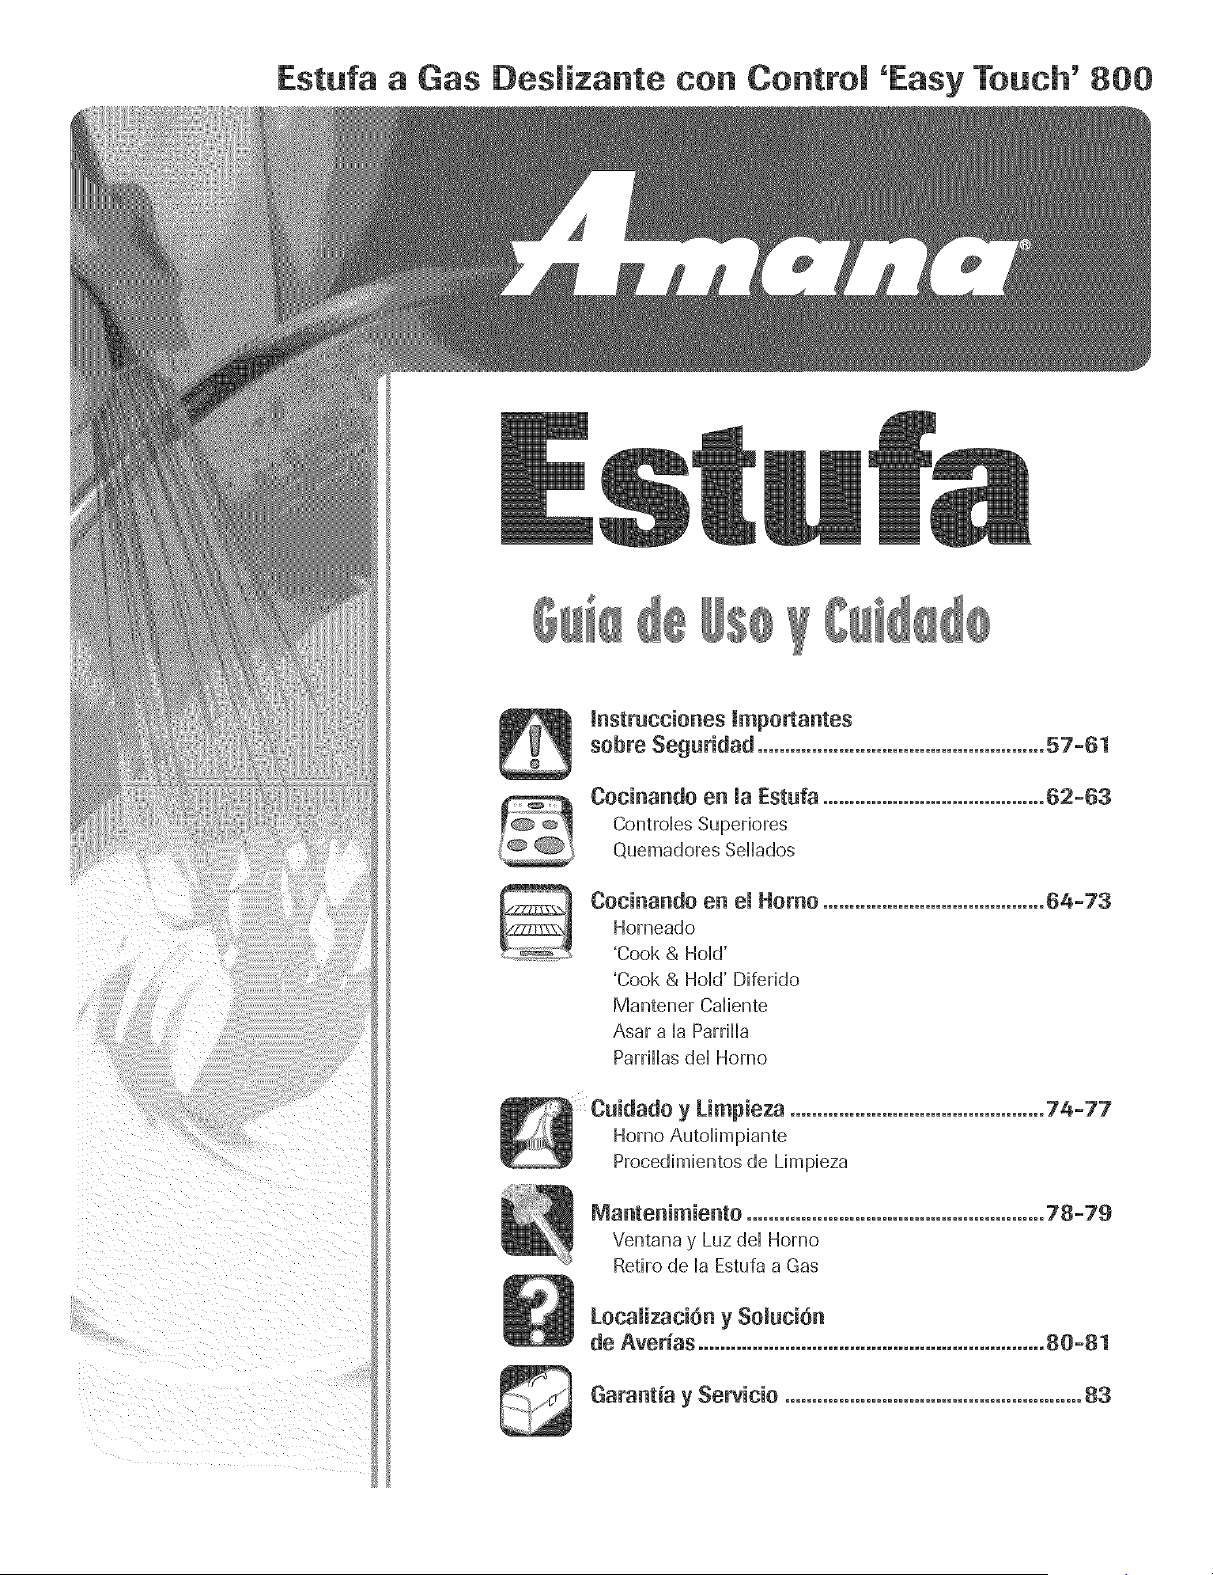
Estufa a Gas Desmizante con Controm 'Easy Touch' 800
mnstrucciones Jmportantes
sobre Seguridad .....................................................57-61
Cocinando en maEstufa ......................................... 62-63
ControHesSuperiores
Quemadores Seflados
Cocinando en el Homo ......................................... 64-73
Homeado
'Cook & HoHd'
'Cook & Hold' Diferido
Mantener Cdiente
Asar a HaParrflHa
ParrflHasdd Homo
y Limpieza ...............................................74-77
Homo AutoHhnpiante
Procedimientos de Limpieza
IViantenimiento ....................................................... 28-79
Ventana y Luz dd Homo
Retiro de la Estufa a Gas
Locaiizaci6n y Soluci6n
de Averias ................................................................80-81
Garantia y Servicio .......................................................83
Censumider: Pot favor lea y conserve esta gu[a para referencia
NOmerodeSerie
Fechade C0mpra
Sitiene pregur_taS}I!amea:
Amahs CustoroerAssistance
i_soo:sas_oso4EEUU.
1_866-587-2002
{Lunes a Vbmes, 8:80a,m.a 8;00p.m. Horadel Este}
En nuestrocontinuoafdn de rnejorar!a calidady rendimbnto de
para m&rmad6n SObreServJdo, ver p@&a 83.
Lea y siga todas las instmcciones antes de usar este
electrodom_stico para evitar el riesgo potencial de incendio,
choque ei@trico, iesi6n personal o da_io ai eiectrodom6stico
como resultado de su uso inapropiado, Utilice este
eiectrodomestico soiamente para ei prop6sito que ha sido
destinado segSn se describe en esta guia,
Para asegurar funcionamiento correeto y segure: El
eiectrodom6stico debe ser instaiado debidamente y puesto a
tierra por un t@nico caiificado, No intente ajustar, reparar,
prestar servicio o reempiazar ninguna pieza de este eiectrodo-
mestico a menos que sea espedficamente recomendado en
esta guia, Todas ias reparaciones deben ser reaiizadas por un
tecnico caiificado, Pida ai instaiador que ie indique ia
ubicaci6n de ia v_ivuia de cierre dei gas y como cerraria en
caso de una emergencia,
Siempre desenchufe ei eiectrodomestico antes de efectuar
alguna reparaci6n,
preper_ienada en esta gu_a, se puede predueir un
incendie e una e×PleSi6n, eausande da_es matedales,
NO a!maeene ni use gasolina n! otros vaperes y
liquidos iuflamab!es en la vecindad de este
Las advertencias e instrucciones importantes sobre seguridad
que aparecen en esta guia no est_in destinadas a cubrir todas
las posibles circunstancias y situaciones que puedan ocurrir,
Se debe ejercer sentido comSn, precauci6n y cuidado cuando
instale, realice mantenimiento o haga funcionar el artefacto,
Siempre p6ngase en contacto con el fabricante si surgen
problemas o situaciones que usted no comprenda,
Reconozca simbo os, advertencias,
etiquetas de seguridad
o NO trate de encender ningen artefacte ,
, No use ning_n tel_fene en Su edifleieo
Llame inmediatamente a su preveeder de gas
instrueeienes prepereienadas perel preveeder
gas.
Si ne puede leealiza r a su preveeder de gas,
La instalaci6n y reparaeienes deben set efeetuadas
per un t_cnice ealifieade, un a agencia de
reparacienes e el preveeder de gas.
PODRIAN Causar bsi6n personal grove o mortal,
P_ECAUCION _ Pe!igr0s0 pr_cticas no seguras que
PODRIAN causar lesi6n personal menos gravel
detectad0s P0re! o!0r s0!amente_LOSproveedores de gas
recomiendan que compre e instale un detector de gas
acuerdo Con las instmcciones del fabricante,
57
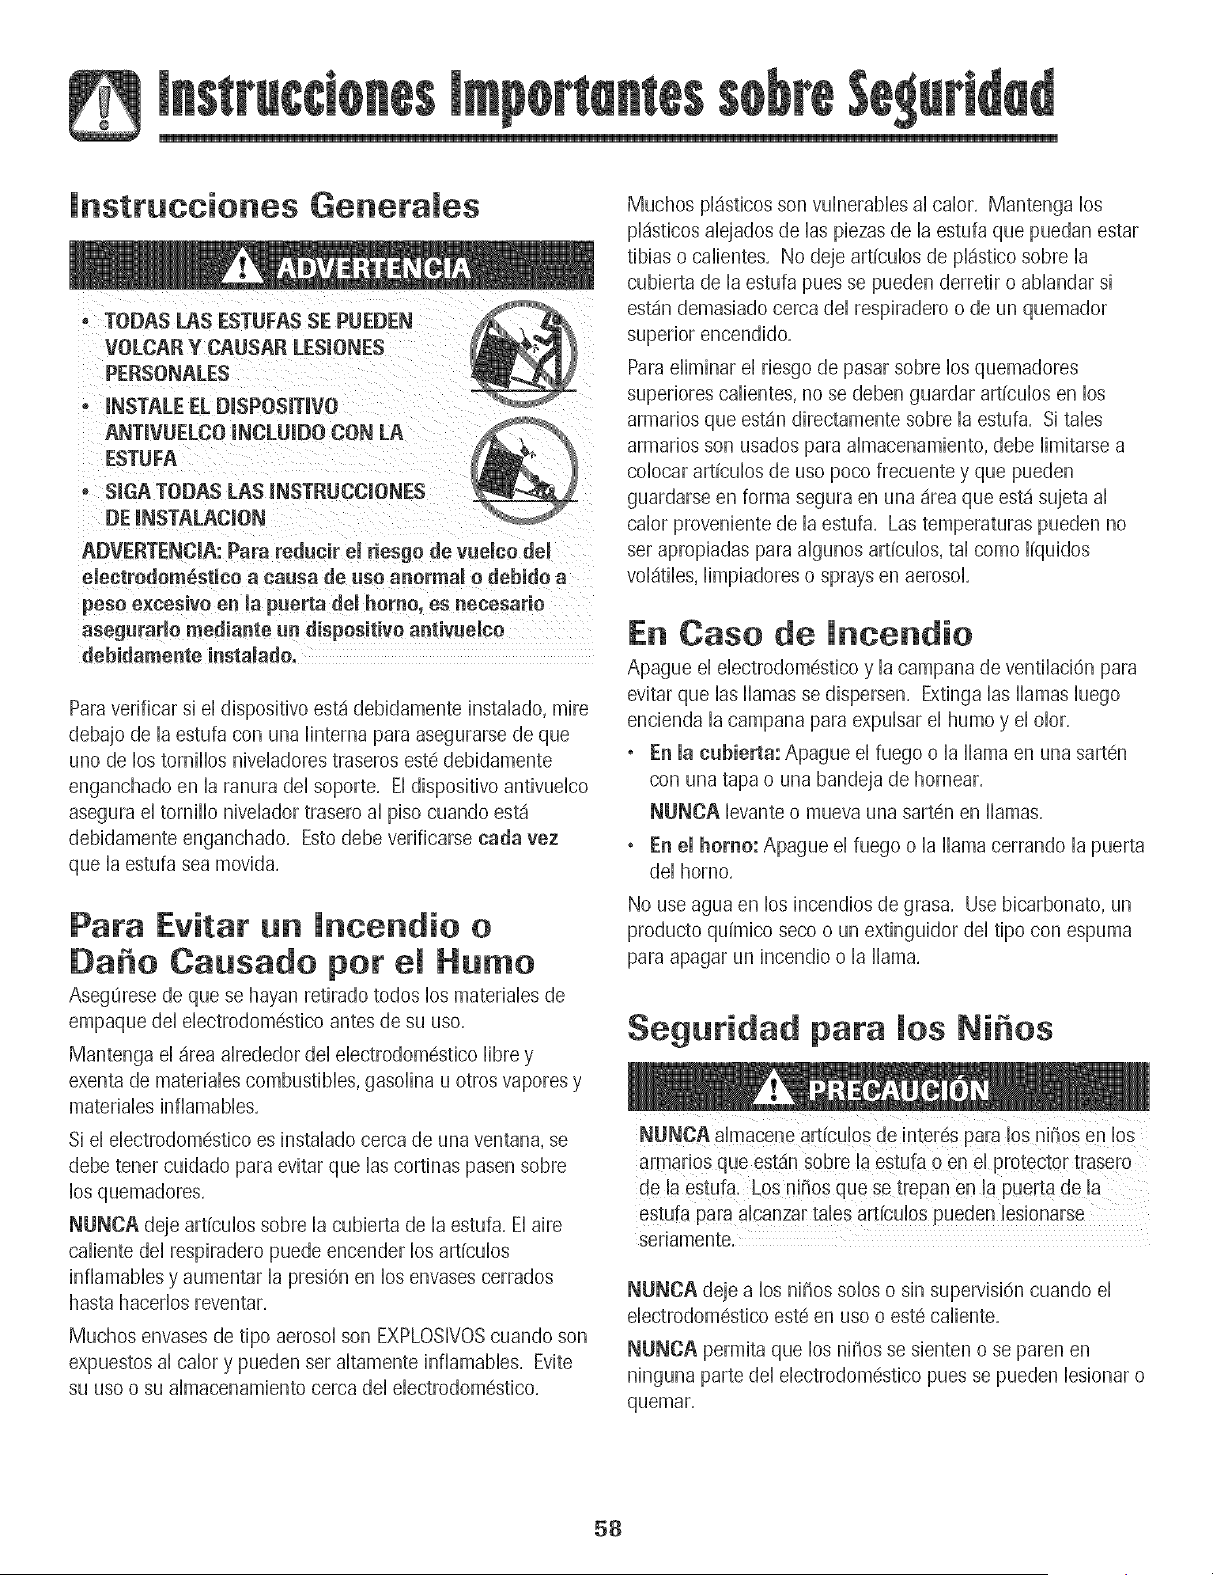
lnstruccienes Generates
o TODAS LAS ESTUFAS SE PUEDEN
VOLCAR Y CAUSAR LESJONES
PERSONALES
° mNSTALEEL DmSPOSffW(}
ANTiVUELCO INCLUIDO CON LA
ESTUFA
o SIGA TODAS LAS mNSTRUCCiONES
DE mNSTALACmON
ADVERTENCIA: Para redueir el desgo de vuelco deU
ebctrodom6stico a eausa de use anormal o debido a
peso e×eesivo en Japuerta deJ homo, es neoesario
asegurarJo mediante un dispositivo antivueleo
debidamente instalado=
Paraverificar si eI disposidvo est,1debidamente instaBdo, mire
debajo de la estufa con una linterna para asegurarse de que
uno de los tornillos niveladores traseros estd debidamente
enganchado en la ranura del soporte, El dispositivo antivuebo
asegura el tornillo niveBdor trasero al piso cuando estd
debidamente enganchado, Esto debe verificarse carla vez
que la estufa sea movida,
Pata Evitar un it|cot|die e
Da e Causado pet eJ Hume
Asegurese de que se hayan retirado redes los materiabs de
empaque del ebctrodomdstico antes de su use,
Mantenga el drea alrededor del ebctrodomdstico libre y
exenta de materiabs combustibles, gasolina u otros vapores y
materiabs infiamabbs,
Si el ebctrodomestico es instalado cerca de una ventana, se
debe tener cuidado para evitar que Bs cortinas pasen sobre
los quemadores,
NUNCA deje articulos sobre la cubierta de la estufa, El aire
caliente del respiradero puede encender los articulos
infiamabbs y aumentar la presi6n en los envases cerrados
hasta hacerlos reventar,
Muchos envases de %0 aerosol son EXPLOSIVOScuando son
expuestos al crier y pueden ser altamente infiamabbs, Evite
su use o su almacenamiento cerca del ebctrodom6stico,
Muchos pl_sticos son vulnerables al calor, Mantenga los
pl_sticos alejados de las piezas de la estufa que puedan estar
tibias o calientes, No deje art{culos de pl_stico sobre la
cubierta de la estufa pues se pueden derretir o ablandar si
est_indemasiado cerca del respiradero o de un quemador
superior encendido,
Paraeiiminar ei riesgo de pasar sobre los quemadores
superiores calientes, no se deben guardar art{culos en los
armarios que estSn directamente sobre la estufa, Si tabs
armarios son usados para almacenamiento, debe limitarse a
colocar articulos de use poco frecuente y que pueden
guardarse en forma segura en una _rea que est_ sujeta ai
calor proveniente de la estufa, Las temperaturas pueden no
set apropiadas para algunos articulos, tal come liquidos
vol_itiles,limpiadores o sprays en aerosol,
En Case de lncendie
Apague ei eiectrodomestico y ia campana de ventiiaci6n para
evitar que las llamas se dispersen, Extinga las llamas luego
encienda ia campana para expuisar ei humo y ei oior,
• En la eubierta: Apague ei fuego o ia llama en una sart_n
con una tapa o una bandeja de hornear,
NUNCA levante o mueva una sartdn en llamas,
• En el homo: Apague el fuego o la llama cerrando la puerta
dei homo,
No use agua en los incendios de grasa, Use bicarbonate, un
producto quimico seco o un extinguidor dei tipo con espuma
para apagar un incendio o la llama,
Seguridad para Jes Ni es
NUNCA almacene art[cuios de inter6s para !os nih0S en !0S
armar!os que est_n sobre la estufa o en el protecto[ t[asero
de la estufa, LOSn!SoSque se trepan en la puerta de la
sedamente,
NUNCA deje a los niSos solos o sin supervisi6n cuando el
electrodomestico est6 en use o este caliente,
NUNCA permita que los niSos se sienten o se paren en
ninguna parte del electrodom6stico pues se pueden lesionar o
quemar,
58
Se bs debe ensdiar a los ni_iosque eI ebctrodomestbo y
los utensiiios que est_n en _I o sobre 61pueden estar
cdientes, Deje enfriar los utensiiios caiientes en un lugar
seguro, fuera deI abance de los ni_ios pequdios, Se bs
debe ensdiar a los ni_ios que un ebctrodomOstbo no es un
juguete, No se debe permitir que los ni_iosjueguen con los
controbs u otras pbzas de la estufa,
NUNCA use la puerta de esteelectrodomOstico como peldaHio
o asbnto ya que el electrodomOstico se puede volcar, y causar
lesiones graves,
NUNCA use este electrodomOstico como calefactor de area
o para elevar la temperatura de la habitaciOn. Esto puede
causar envenenaml ento por monOxido de carbono y el
sobrecalentamiento del homo
NUNCA cubra ninguna rendija, agu)ero o canal en la parte
inferior del homo o cubra la rejilla completa con materiaies
tales como el papel de aluminio. Esto evita que el aire fluya
a travOsdel homo y puede causar envenenamiento pol
mon5xido de carbono. Ei papel de aiuminio tambiOn puede
contener el calory producir un nesgo de incendio.
NUNOA obstruya el flujo dei aire de combustion y de
ventilaciOn cubriendo las entradas o sal das de aire del homo.
Estopuede restringir ei acceso del aire a os quemadores y
causar envenenamlento pot monoxido de carbono.
El respiradero del homo se encuentra en la parte trasera de la
superficie de cocciOn,
Evite tocar el _rea del respiradero mientras el homo este
encendido y durante varios minutos despues de haberlo
apagado, Aigunas partes dei respiradero y dei _ireaque io
rodea se calientan Io suficiente como para causar
quemaduras, Despues de apagar ei homo, no toque ei
respiradero o el _rea que Io rodea hasta que haya tenido
suficiente tiempo para enfriarse,
Qtras superficies que pueden estar calientes incluyen la
cubierta, las superficies que est_in dirigidas hacia la cubierta,
el respiradero del homo, las superficies cercanas a la abertura
dei respiradero, ia puerta dei homo y ia _rea que ia rodea, y ia
ventanilla del homo,
No toque un foco de homo caliente con un paso humedo ya
que se puede romper, Si ei foco se rompe, desconecte ei
suministro elOctrico al electrodom6stico antes de retirar el foco
para evitar un choque elOctrico,
No use la cubierta o el homo como una area para almacenar
alimentos o utensilios de cocina,
Seguridad Para Cocinar
Siempre coioque un utensiiio en un quemador superior antes
de encenderio, Asegurese de usar ia periiia correcta que
controia cada quemador superior, Asegurese de encender ei
quemador correcto y comprobar de queen efecto ei
quemador haya sido encendido, Cuando haya terminado de
cocinar, apague ei quemador antes de retirar ei utensiiio para
evitar exposiciOn a ia llama dei quemador,
Siempre ajuste ia llama dei quemador superior de modo que
no se extienda mas all_ del borde inferior del utensilio, Una
llama excesiva es peiigrosa, desperdicia energia y puede
da_ar la estufa, el utensilio o los armarios que est_n sobre la
estufa,
NUNCA deje sin supervision ia cubierta de ia estufa cuando
est6 cocinando, especialmente cuando usa un ajuste de calor
alto o cuando est6 usando una freidora, Los reboses pueden
producir humo y los derrames de grasa pueden infiamarse,
Limpie los derrames grasosos tan pronto como sea posible,
No use caior alto durante periodos de cocciOn proiongados,
NUNCA caiiente un envase cerrado en ei quemador superior
o en el homo, La acumulaciOn de presiOn puede hacer
explotar el envase causando una lesiOn personal grave o da_o
a la estufa,
Use tomaollas secos y gruesos, Los tomaollas hOmedos
pueden causar quemaduras a causa dei vapor, Las toaiias u
otros sustitutos no deben ser usados como tomaollas porque
eiios pueden quedar coigando a travOs de los quemadores
superiores y encenderse o enredarse en ias piezas de ia
estufa,
Siempre deje enfriar ia grasa caiiente que se ha usado en ia
freidora antes de intentar mover o manipuiaria,
No permita que se acumule grasa u otros materiales
inflamables en la estufa o cerca de ella, en la campana o en el
ventiiador aspirador, Limpie ia campana extractora con
frecuencia para evitar que ia grasa u otros materiaies
inflamables se acumulen en la campana o en el filtro,
Encienda el ventilador cuando cocine alimentos flameados
debajo la campana,
NUNCA use vestimentas de materiales inflamables, ropa
suelta o de mangas largas cuando est6 cocinando, La
vestimenta se puede encender o enganchar en los mangos de
los utensilios,
59
Sbmpre coIoque las parriihs deI homo en la posbi6n deseada
cuando eI homo est6 frio, Desibe la parriih deI homo hacia
afuera para agregar o retirar aiimento, usando tomaoiias secos
y resbtentes, Siempre evite abanzar dentro deI homo para
agregar o retirar aiimentos, Si una parriiia debe ser sacada
cuando est,1todavia caiiente, use un tomaoiias seco, Siempre
@ague eI homo @spuds de haber terminado de cocinar,
Tenga cuidado cuando abra la puerta dei homo, Deje que
escape eI aire o eI vapor caibnte antes de sacar o voiver
coIocar eI aiimento,
ADVERTENCIA SOBRE LOS ALIMENTOS PREPARADOS:
Siga Bs instrucciones del fabricante de los aBnentos, Si un
envase de pldstico de alimento congeBdo y/o su tapa se
deforma, se comba o se da_iade alguna otra manera durante
la cocci6n, descarte inmediatamente el alimento y su envase,
Elalimento puede estar contaminado,
NUNCA use papel de duminio para cubrir una parrilh del
homo o la parte inferior del homo, El uso incorrecto puede
resultar en un riesgo de choque el6ctrico, incendio o daho al
ebctrodomestico, Use papel de duminio soBmente como se
indica en esta guia,
Utensilios Apropiados
Use sartenes con rondos pBnos y mangos que sean f_cibs de
tomar y que permanezcan frios, Evite usar sartenes u ollas
inestabbs, combadas que se pueden vobar fdcilmente u olhs
cuyos mangos est6n sueltos, Ademds evite usar utensilios
especidmente peque_ios o sartenes con mangos pesados
pues ellos pueden ser inestabbs y vobarse fdcilmente, Los
utensilios que son pesados de mover cuando est_in Ibnos con
alimento pueden tambi_n ser un peligro,
Asegurese de que el utensilio sea Io suficientemente grande
como para contener en forma debida los alimentos y evitar
derrames, El tama_ioes particularmente importante cuando
se utilizan freidoras, Asegu]rese de que el utensilio tiene
capacidad para el volumen de dimentos que se va a agregar
al iguai que para la formaci6n de burbujas de la grasa,
Para reducir a un minimo Bs quemaduras y que los materiabs
infiamabbs y los derrames se enciendan debidos a contacto
no intencional con el utensilio, los mangos no deben
extenderse sobre el quemador superior adyacente, Siempre
gire los mangos de los utensilios hacia el lado o hacia la parte
trasera de la estufa, no hacia la habitaci6n donde puede ser
facilmente golpeados o dcanzados por los ni_ios pequehos,
Nunca deje que un utensilio hierva hasta quedar seco pues
esto puede da_iar el utensilio y la estufa,
Siga las instrucciones del fabricante cuando use bolsas para
cocinar en el homo,
Solamente ciertos tipos de utensilios de vidrio cer_imico, de
ceramica o glaseados son convenientes para uso en la
cubierta de la estufa o en el homo sin quebrarse debido al
cambio repentino de temperatura, Siga las instrucciones del
fabricante cuando use utensilios de vidrio,
Esteelectrodomestico ha sido probado respecto a su
rendimiento seguro usando utensilios de cocina
convencionales, No use ningun dispositivo o accesorio que no
haya sido espedficamente recomendado en esta guia, No use
tapas para cubrir los quemadores superiores, rejiiias para ia
cubierta de la estufa ni agregue sistemas de convecci6n para
hornos, El uso de dispositivos o accesorios que no son
expresamente recomendados en esta guia, puede crear serios
peligros de seguridad, resultar en problemas de rendimiento y
reducir la vida utii de los componentes de la estufa,
Seguridad de la Limpieza
Apague todos los controies y espere que se enfrien ias piezas
de la estufa antes de tocarlas o limpiarlas, No toque las
rejiiias de los quemadores o ias _reas circundantes hasta que
elias no hayan tenido tiempo suficiente de enfriarse,
Limpie la estufa con cuidado, Tenga cuidado para evitar
quemaduras de vapor si se usa una esponja o un paho mojado
para iimpiar los derrames en una superficie caiiente, Aigunos
iimpiadores pueden producir vapores nocivos cuando se
aplican a una superficie caliente,
Homo Auto impiante
No deje a!imento ni utensilios de cocina, etc, en e! homo
durante el cicio de autolimpieza_
Limpie solamente las piezas que se indican en esta guia, No
iimpie ia junta de ia puerta, La junta es esenciai para un
sellado herm6tico, No restriegue, ddie, ni mueva la junta de
la puerta, No use limpiadores de homo de ninguna clase en el
homo ni alrededor de cualquier parte del homo autolimpiante,
6O
Antes de [a autoiimpbza de[ homo, saque [a asadera, [as
parriiias de[ homo y otros utensiiios y [impie los derrames
excesivos para evitar que se produzca demasiado humo,
[[amaradas o [lamas,
Es normal que [a cubierta de [a estufa se caiiente durante e[
cic[o de autoiimpieza, Por 1otanto, se debe evitar tocar [a
cubierta durante un cic[o de autoiimpieza,
Aviso y Adverteneia
lmportante Sobre Seguridad
La Propuesta 65 de la Ley de 1986 deI Estado de California
Sobre Seguridad y Contaminad6n deI Agua Potabb (California
Safe Drinking Water and Toxic Enforcement Act of 1986) exige
que el Gobemador de California publique una lista de las
sustancias que segLin el estado de California causan c_incer o
ddio al sistema reproductivo y exige que las empresas
adviertan a sus dientes sobre la exposici6n potencid a tales
sustancias,
Se advierte a los usuarios de esta estufa que la combusti6n
dei gas puede resuitar en exposici6n de bajo nivei a aigunas
de las sustancias publicadas en la lista, incluyendo benceno,
formaidehido y hoiiin, debido principaimente a ia combusti6n
incompieta dei gas natural o de los combustibles de petr6ieo
licuado, Los quemadores ajustados en forma debida
reducir_n la combusti6n incompleta, La exposici6n a estas
sustancias puede tambi6n ser reducida a un minimo
ventilando los quemadores al exterior en forma adecuada,
Se advierte a los usuarios de este electrodomdstico que
cuando el homo est,1funcionando en el cicio de autolimpieza,
puede haber exposici6n de bajo nivei a aigunas de ias
sustancias indicadas en la lista, incluyendo mon6xido de
carbono, La exposici6n a estas sustancias puede set reducida
a un minimo ventilando el homo al exterior en forma
adecuada, abriendo las ventanas y/o la puerta en la habitaci6n
en donde est,1ubicado el electrodomdstico durante el cicio de
autolimpieza,
AVISO mMPORTANTERESPECTO A LOS PAJAROS
DOMESTICOS:
Nunca mantenga los p_jaros en ia cocina o en ias
habitaciones donde puedan llegar los humos de la cocina, Los
p_jaros tienen un sistema respiratorio muy sensitivo, Los
humos producidos durante el cicio de autolimpieza del homo
pueden ser perjudiciaies o mortaies para los p_jaros, Los
humos que despide el aceite de cocina recalentado, la grasa,
margarina y los utensilios antiadherentes recalentados pueden
tambi6n ser perjudiciales,
Conserve estas lnstrucciones para Referencia Futura
61
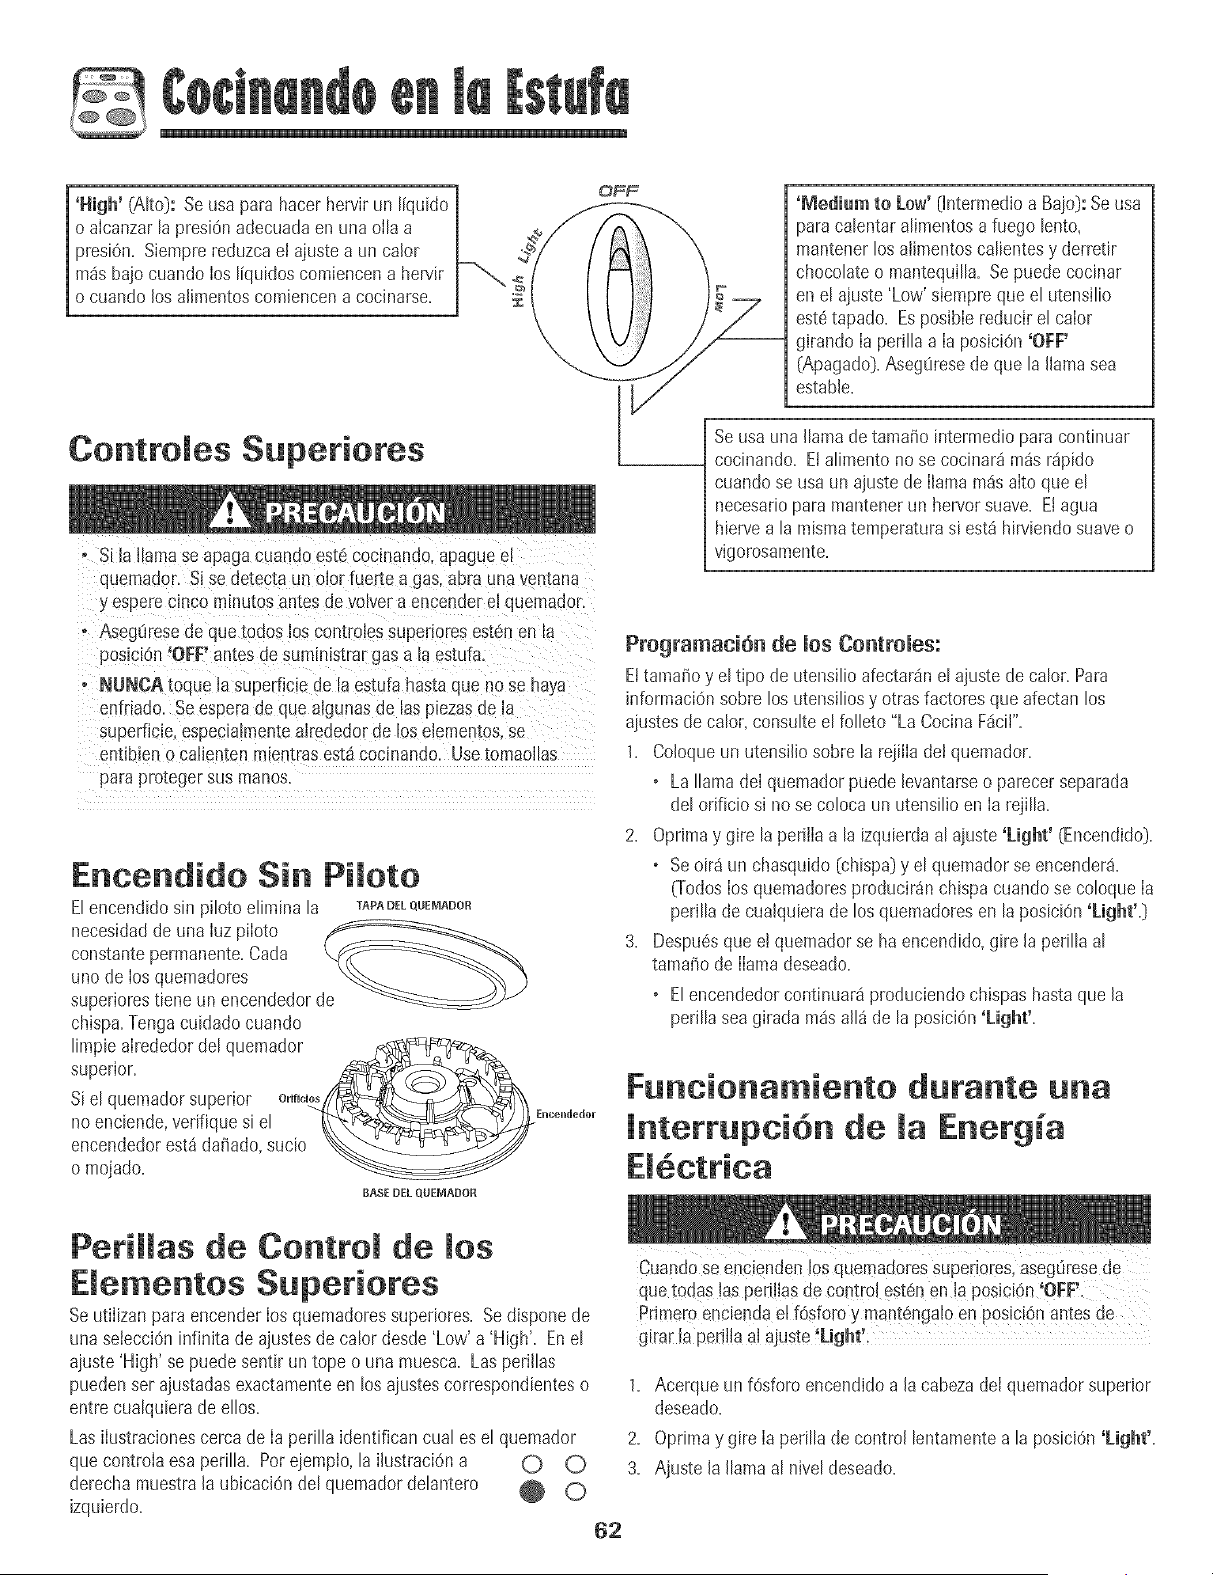
'High' (Alto}: Seusa para hacer hervirun [iquido] OFF
o aicanzar [apresiOnadecuadaen una oitaa [ _f //A\ "_
presiOn.Siemprereduzcael ajustea un calor h. ,5
m_sbajocuando los ffquidoscomiencena hervir [ _ g
o cuando los a[imentoscombncen a cocinarse, j '_
'JVJediumto Low' gntermedioa Bajo}: Se usa
paracatentaratimentosa fuego [ento,
mantenerlos a[imentoscaIientesy derretir
chocolateo mantequiIIa.Se puede cocinar
ene[ ajuste'Low'siemprequee[ utensiIio
est6tapado. Esposibiereducir e[ caior
girando[a per[Haa [a posiciOn'OFF+
(Apagado}.AsegOresede que [a llamasea
estab[e.
Controies Superiores
- S[ [a [lamase apaga cuando est6 cocinando,apagueel
qqemador. S+se @tecta un obr fuerre a gas, aDraunaventana
y esperecinco mmutosanEesde volver a encendere[ quemador.
- Aseg0resedeque todos los controbs supenoresestenen [a
posiciSn'OFF' antes de surninis_rargasa [aestufa.
+ NUNOA toque [a supedicie de [a estufa hastaque no se haya
enfriado. Se esperade que aigunasde [aspiezasde [a
suped[c+e,especmimenteairededor de [oseiementos+se
entib+eno caiienten mientrasest4 cocinando. Usetomao[ias
parapro-[egersus manos.
Encendide Sin Pi[ote
E[encendidosin pibto eHmina[a
necesidadde una [uzpiioto
constantepermanente.Cada
uno de los quemadores
superiorestiene un encendedorde
chispa.Tengacuidadocuando
TAPA DEL QUEiV1ADOR
limpb alrededordelquemador
superior. ,_
Siel quemadorsuperior O,B_+_
noencbnde, vedfique si e[ _'_ E._.,l_d_,
encendedorest_ daffado,sucio_
o mojado. "<
BASE DEL QUEMADOR
Seusa una llama detamaffo [ntermediopara continuar
cocinando. ElaIimentono se cocinar_ m_s r@ido
cuandose usa un ajustede llama m_s aito que e[
necesarioparamantenerun hervorsuave. Elagua
hiervea [a mismatemperaturasi est_ hirviendosuaveo
vigorosamente.
Programaci6n de los Contro[es:
E[tamaffoy e[%0 de utens[[ioafectar_ine[ ajustede ca[or.Para
[nformaci6nsobrelos utensi[iosy otras factores que afectan los
ajustesde caIor,consuItee[ foIbto "La CocinaF_ci[".
1. Coloqueun utensi[b sobre [a reji[iadet quemador.
. La llamadel quemadorpuede bvantarse o parecerseparada
de[ orificio si no se co[ocaun utensiI[oen [a rejiIIa.
2. Oprimay gire [aperiiia a [a izquierdaa[ ajuste 'Light' (Encendido}.
. Se oir8 un chasquido {chispa}y e[ quemadorse encendera.
(Todoslos quemadoresproducir_n chispacuandose co[oque [a
periIIade cualquierade los quemadoresen [aposiciOn'Light'.}
3. Despu6sque e[ quemadorse ha encendido,gire [a periIIa a[
tamaffode [[amadeseado.
. E[encendedorcontinuar_produciendochispas hastaque la
peri[[asea girada m_s a[[_ de [a posici6n'Light'.
Funcionamiento durante una
[nterrupci6n de [a Energia
Periiias de Centre[ de los
Eiementos Superiores
Seutiiizan para encender[osquemadoressupedores=Sedisponede
unaselecciOninfinita de ajustesdecaIordes@ 'Low'a 'High'+En e[
ajuste'High' se puede sentir un tope o una muesca. Las peri[Ias
puedenset ajustadasexactamenteen los ajustescorrespondienteso
entre cuaIquierade eIIos.
Lasiiustracionescerca de [a periIIaidentifican cua[es e[ quemador
que controia esa periIIa. Potejempb, [a i[ustraci6na
derecha muestra[a ubicaciOnde[ quemadordeIantero _ O
izqulerdo.
Cuandose encbnden los quernadoressuper[ores,aseg0resede
que todas [asper[Hasde control est6nen[a posiciOn,OFF+.
Primero enciendae[ f6sforo y mant@ga[0en P0SiCi6n antes de
girar [a peri[[aal ajuste'Light+;
1. Acerque un f6sforo encendidoa [a cabezade[ quemadorsuperior
deseado.
2. Oprimay gire [aperiJJade contro[ bntamente a Japosici6n'Eight+.
3. Ajuste la [JamaaJniveJdeseado.
62
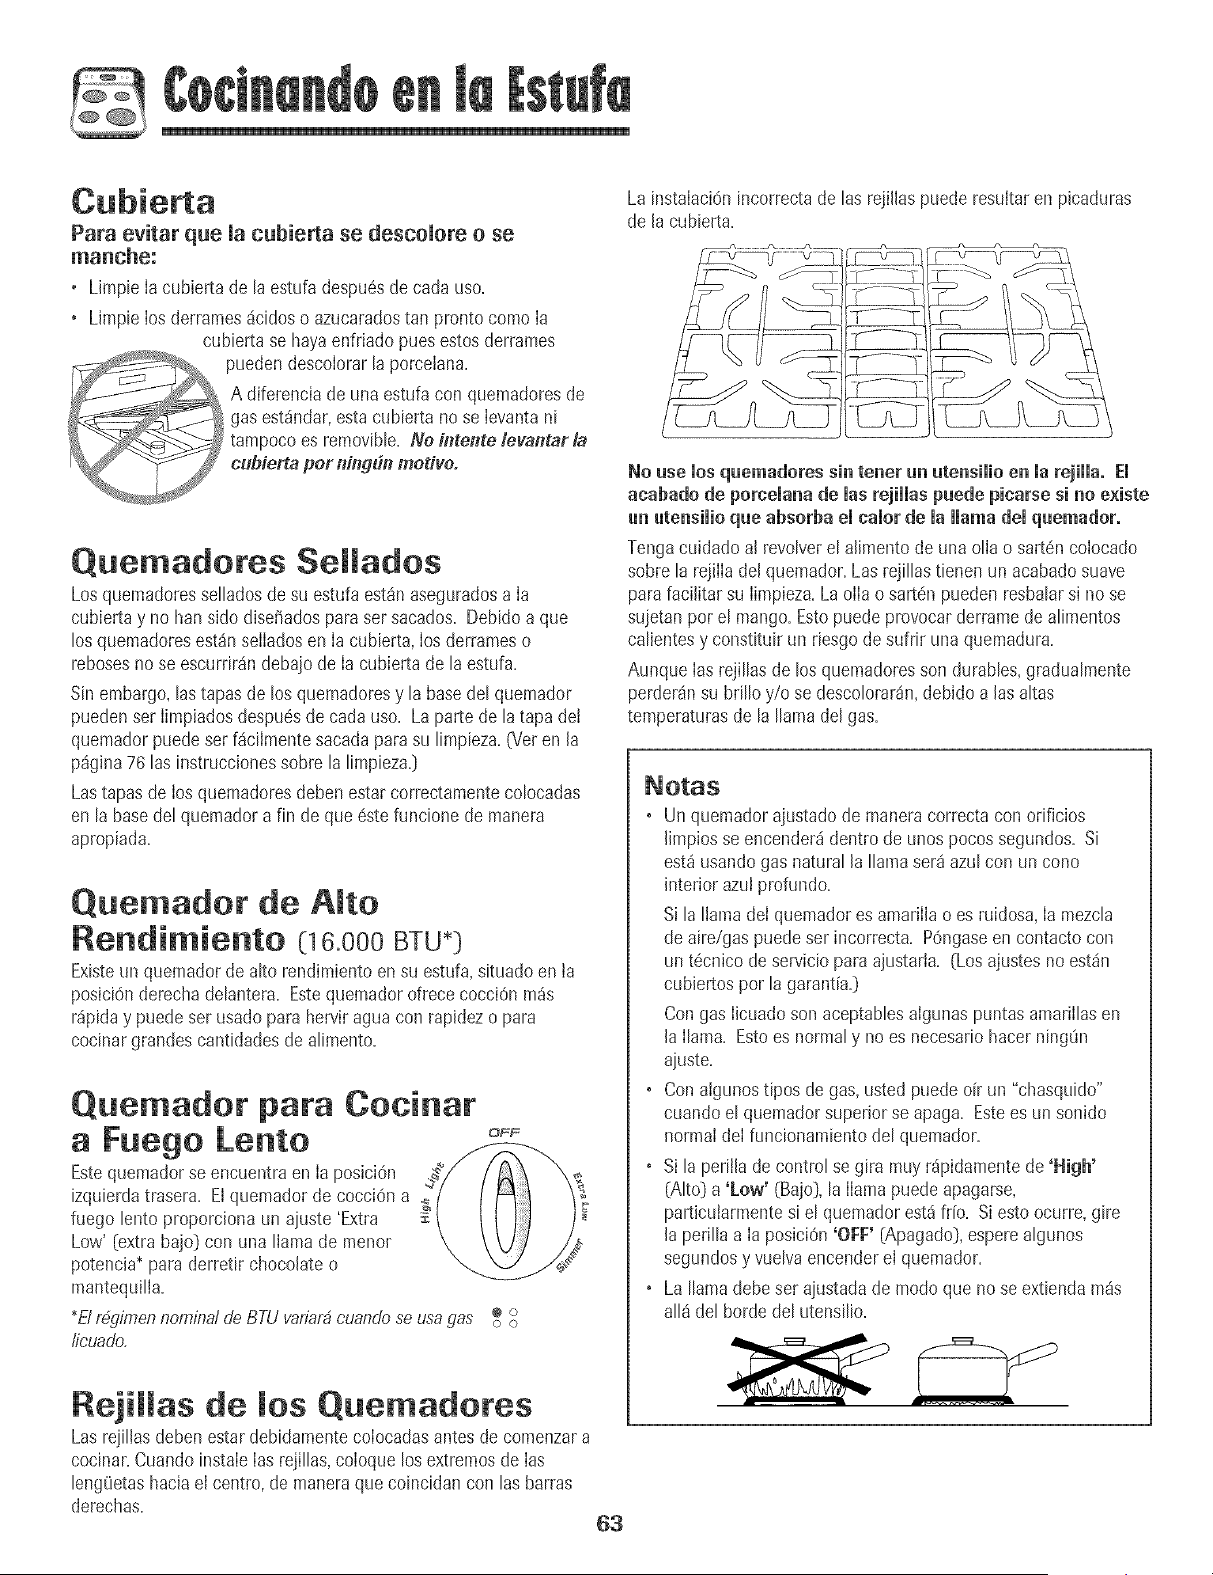
Paraevitar que macubierta se descomore o se
+ Limpie Ia cubierta de la estufadespu6sde cada uso+
+ Limpie Ios derrames_cidos o azucaradostan pranto cornoIa
cubiertase hayaenfriado pues estosderrames
puedendescoIorarlaporcelana+
A diferencia de unaestufa con quemadoresde
gas est_ndar,esta cubierta no se Ievantani
tampocoes removib[e. No fl_tente/evantar/a
cubierta per ningdn motive.
Quemadores SeJJados
Losquemadoresselladosde su estufa est_naseguradosa Ia
cubiertay no hartsido disei_adospara set sacados+Debidoa que
losquemadoresest_n seIIadosen Ia cubierta,Iosderrameso
rebosesno se escurrir_ndebajode Ia cubierta de la estufa+
Sinembargo,lastapas de los quemadoresy la basedel quemador
puedenser Iimpiadosdespuesde cada uso. La parte de latapa det
quemadorpuede ser f_cilmentesacadaparasu limpieza.[Ver en la
p_gina76 las instruccionessobre la limpieza.}
Lastapas de Iosquemadoresdebenestarcorrectamentecolocadas
en la basedel quemadora fin de que6stefuncione de manera
apropiada.
Quemador de AJto
Rendimiento (16.000BTU*)
Existeun quemadorde alto rendimientoen su estufa, situadoen ta
posici6nderechadelantera+Estequemadorofrece cocci6n m_s
r_piday puedeset usadopara herviraguacon rapidezo para
cocinargrandescantidadesde alimento+
O.uemador para Cocinar
a Fuego Lento
Estequemadorse encuentraen Ia posiciOn
izquierdatrasera+EIquemador de cocciOna
fuego lento proporciona un ajuste'Extra
Low' [extra bajo_con una Ilama de menor
potencia* para derretir chocolate o
mantequi[ia,
0
*F/r_9,imennominalde BTUvariarbcuandose usagas _ c_
/icuado.
RejiJJas de Jos Quemadores
LasrejillasdebenestardebidamentecoIocadasantesde cornenzara
cocinar+CuandoinstaIeIas rejillas,coIoquelos extremosde Ias
leng0etashaciael centro,de maneraque coincidan con las barras
derechas+
63
La instaIaci6nincorrectade las rejillas puede resultaren picaduras
de la cubierta+
Z _Lt _<
No use los quemadores sin tenet un uten+ilio en marejiiia+Em
acabado de porcemanade ias rejiiias puede picarse si no e×iste
an atensilio que absorba el caior de ia llamadei quemador°
Tengacuidado al revolverel alimentode una olla o sart6n colocado
sobre la re]ilIadel quemador+Las rejillastienen un acabadosuave
parafacilitar su Iimpieza+LaolIa o sart6npuedenresbalarsi no se
sujetanpot el mango+Estopuede provocar derramedealimentos
calientesy constituir un riesgode sufrir unaquemadura+
Aunque Ias rejillasde losquemadoresson durables,gradualmente
perderainsu brilloy/o se descolorar_n,debidoalas altas
temperaturasde la llama del gas+
• Un quemadorajustadode maneracorrecta con odficios
limpiosse encenderddentro de unos pocos segundos. Si
est_usandogas natural la llamaset8 azul con un cono
interior azuI profundo.
Sila Ilama dei quemadores amarilla o es ruidosa,Ia mezcla
deaire/gaspuedeser incorrecta. P0ngaseen contactocon
un t6cnico deservicio para ajustarta. (Losajustes no estdn
cubiertospor la garantia._
Congas Iicuadoson aceptablesalgunaspuntas amarillasen
la Ilama. Estoes normaly no es necesariohacer ning0n
ajuste.
• Conaigunostipos de gas,ustedpuedeoir un "chasquido"
cuandoel quemadorsuperiorse apaga. Estees unsonido
normaldeI funcionamientodel quemador.
+ Sila periila decontral se gira rnuyrdpidamentede 'Nigh'
(Alto] a 'Low' (Bajo], la llamapuede apagarse,
particularmentesi el quemadorest_fr[o. Si esto ocurre, gire
la perilla a Ia posiciOn'OFF' [Apagado),esperealgunos
segundosy vuelvaencenderei quemador.
+ La llamadebeser ajustadade modo que nose extienda m_s
all_del borde del utensilio.

Panel de Control
A B C D G H
\
\
\
\
\
Cook& KaBp
Hdd Warm
\\\\\__..........................
DeUay
1 2 3 4 5
67890
Autoset
1
J K L N
Timer
/
N
Elpaneldecontrol ha side diseffadoparasu fCcilprogramaciOn.El indicadorvisualen e! panel de corrtrolmuestrala herade[ dia, el
tempodzadory [asfunciones del homo. Elpanel de corrtro[mostradoarriba inchye [ascaracter[stlcasespecificasdel mode[o.
(Elestito de[ panelde corrtro[var[aseg0nel mode[o.)
B
C
D
E i
F
H
t
J
K
L
M
N
'Conved (Convecci6n)
(modelosselectos)
'Bake'(Hornea0
'Broil'(Asara
la Parrilla)
'Cancel'(Cancela0
'Clock'(Reloj)
'OvenLight'
(LuzdelHorned
'Favorite'(Favorite)
'Clearf(Limpieza)
'Cook& Hold'[Cocci6n
y MantenerCal[ente)
'KeepWarm'
(MantenerCaliente)
'Delay_(D[ferido:)
Teclas Num_ricas
'Autoset' [ProgramaciOr!
Automdtica)
'Timer' CFemporizado0
Se usa paFa hornear 0 asarper
convecciOn.
Seusaparahorneary asar.
Seusaparaasaralaparrillay dorarlos
alimentos.
Cancelartodaslosfuncionesa excepciOn
dottemporizadory el reloj.
Seusaparaprogramarla heradeldia.
Seusaparaencendero apagarlaluzdel
homo.
Seusaparaprogramary guardarun
procedimientoespecificode 'Cook& Hold'.
Seusaparaprogramarun ciclode
autolimpieza.
Seusaparahornearduranteun tiempo
seteccionado,kJegomantieneel alimento
calienteduranteunahera.
Seusapararnantenercalienteen e!
homoelalimentococinado.
Programael homoparacomenzara
hornearo limpiarsea una heraposterior.
Seusaparaprogramarlostiemposy
ternperaturas.
Seusaparaprogramartemperaturas
conrapidez.
Programaa!temporizador.
Use de masTeclas
o Optima[a tec[a deseada=
o Oprima[as tec[as num6ricaspara programarel tiempo o la
temperatura=
o Opdmala tecla 'Autoset O' (Pragramaci6nAutom4tica}para
programar[a temperatura=
o Seescuchar_una seffalsonoracoda vezque optima unatecla=
o Seescuchar_ndos seffalessonoras si ocurre un error en la
programaciOn.
Nora: Cuatrosegundosdespu6sde haberoprimido las teclas
nurn6ricaso [atecia 'gutoset 0', se programar_autom_ticamente
eltiempo o [a temperatura=Si transcurrenmCsde 30 segundos
despu6sde haber oprirnido una tecla defunci6n y antesde
oprimir [as tecias num6ricaso [a tecla 'gutoset 0', la funciOnser_
cance[aday el indicadorvisual volver_ a[ despliegueanterior=
'Cmock' (Re[oj)
Elre[oi puede ser ajustadopara desplegar[a hera ya sea en formate
de 12heros o 24 heros=Elreloj ha side programadoen la f_brica
parael formate de 12 heros=
Para cambiar el reloj a formate de 24 heros:
1= Optima y mantengaoprimidas [asteclas
'Cancel' y 'Favorite' durantetres segundos=
• '12 Hr' destellaen la pantalla=
2= Optima latecla 'Aatoset O' para seieccionar
24 heros;opr[ma[anuevamentepara -- FavoPite
seleccionar'12 Hr'=
3= Programela herade[ d[asiguiendo los
instruccionesindicadasen la secckin
Programaci6nde[ reloj. Autoset_
64
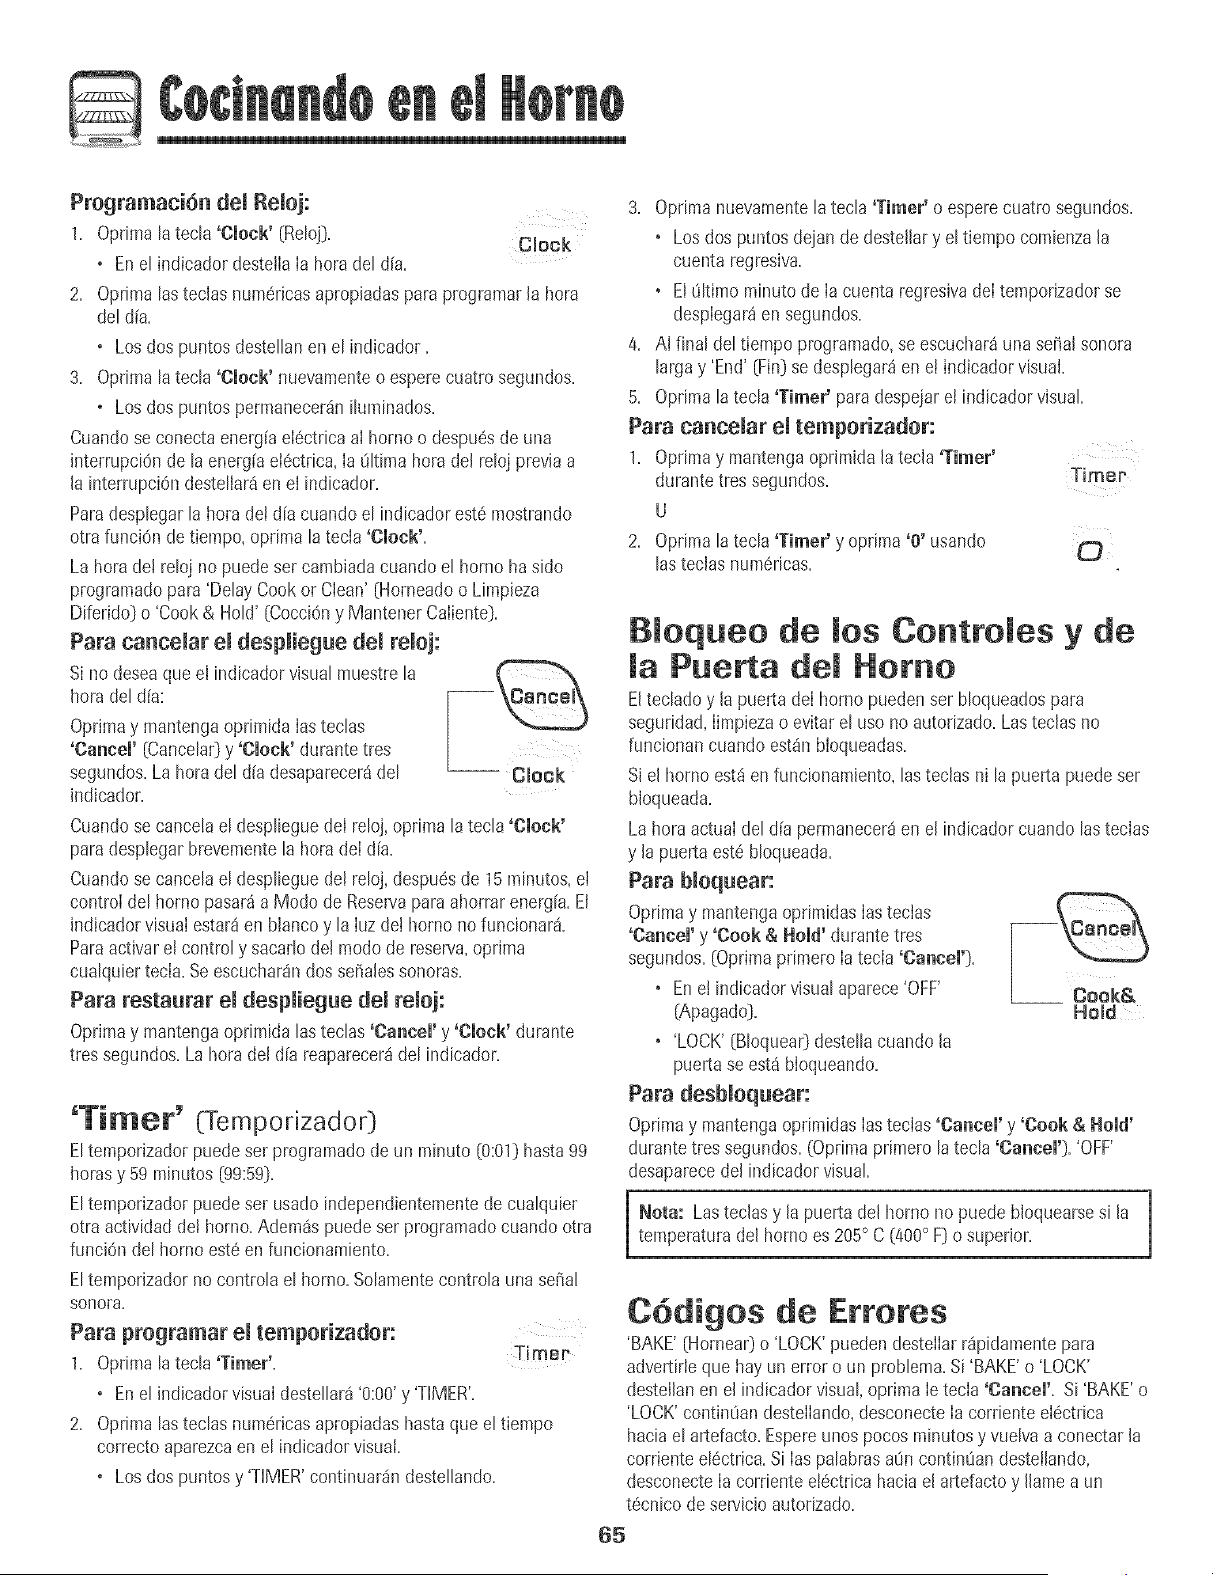
Q
Programaci6n dei Remoj:
1. Oprima [ateda 'Clock' (Reloj).
Clock
o Ene[ indicador destella[a hora de[ dia.
2. Oprima [astec[as numericasapropiadasparaprogramar[a hora
de[ d[a.
o Los dos puntosdestelhn enel indicador.
3. ODima [ateda 'Clock' nuevamenteoesperecuatro segundos.
o Los dos puntospermanecer_niluminados.
Cuandose conectaenelg[a ei6ctricaa[ horno o despu#sde una
interrupci6nde [a energ{ael6ctrica,[a LiItimahora del reIoj previaa
la interrupciOndestellar_en el indicador.
Paradesplegarla horadet dFacuandoel indicadorest6 mostrando
otra funci6n detiempo, oprima latecla 'Clock'.
La hora de! reloj no puedeser cambiada cuandoel horno ha sido
programaticpara 'DelayCook or Clean' (Horneadoo Limpieza
DiferidoDo 'Cook& Hold' (CocciOny MantenerCaliente).
Para cancelar el despliegue del reloj:
Sino deseaqueel indicadorvisualmuestrela
horadel d[a:
Oprimay mantengaoprimida [astecias
'Cancel' (CancelarDy 'Clock' durantetres
segundos.La hora del dia desaparecer_del -- Clock
indicador.
Cuandose canceIael despIieguede[ reIoj,optima latecIa 'Clock'
paradespIegarbrevementela hora de[ d[a.
Cuandose canceIael desplieguede[ reIoj,despu6sde 15minutos,ei
contro[del homo pasar_a Modo de Reservaparaahorrarenerg[& El
indicadorvisuai estar_ en Nancoy la [uz de[ homo no funcionar&
Paraactivarel controly sacarlo de[ modode reserva,oprima
cuaIquiertecia. Seescucharandos se5alessonoras.
Para restaurar e[ despmiegue de[ remoj:
Oprimay mante[_gaoprimida lastecIas'Cancem'y 'cmock' durante
tres segundos.Lahoradel d[a reaparecer_del indicador.
'Timer' dremporizador)
EItemporizadorpuede sel programadodeun minuto (0:01)hasta99
horasy 59 minutos (99:59).
EItemporizadorpuede sel usado independientementede cuaIquier
otra actividadde[ homo. Adem_s puede ser programadocuando otra
funciOndel horno est6 en funcionamiento.
EItemporizadorno controIael homo. SoIamentecontroIauna seSa[
SO[_ora,
Para programar e[ temporizador:
Timer
1. Oprima la tecIa 'Timer'.
o Enel indicador visualdesteIIar_'0:00'y 'THMER'.
2. Oprima lastecIasnumericasapropiadashastaque el tiempo
correcto aparezcaen el indicadorvisual.
o Los dos puntosy 'THMER'continuar_ndesteIIando.
3. Optima nuevamentela tecia 'Timer' o esperecuatrosegundos.
• Los dos puntos deian de destellary el tiempo comienzala
cuenta regresiva.
• El _ltimo minutode [a cuenta regresivade[temporizadorse
despiegar_en segundos.
4. A[ final del tiempoprogramado,se escuchar_unase£_alsonora
largay 'End' (Fin}se despiegar_en el indicadorvisual.
5. Optima la tecia 'Timer' paradespejarel indicadorvisual
Para cancelar el temporizador:
1. Oprimay mantengaoprimida la tecla 'Timer'
durante tres segundos. T[ me r
U
2. Optima [atecIa 'Timer' y oprima '0' usando
lasteclas num6ricas.
Bmoqueo de ruesContro[es y de
[a Puerta de[ Homo
EltecIadoy la puerta de[ horno puedenser bIoqueadospara
seguridad,[impiezao evitar el uso no autorizado.Lasteclas no
funcionancuando est_n bloqueadas.
S[el homo est_enfuncionamiento,lasteclas n[ la puerta puedeser
bloqueada.
La hora actual de[ dia permanecer_en el indicador cuando lasteclas
y la puerta est6bIoqueada.
Para bmoquear:
Oprimay mantengaoprimidas[as tecias
'Cancel' y 'Cook & Hold' durantetres
segundos.(Oprimaprimero [atecla 'Cancel'}.
• En el indicador visualaparece'OFF' __ Oook&
(Apagado). Hold
• 'LOCK' (B[oquear)deste[[acuando [a
puerta se estabioqueando.
Para desb[oquear:
Oprimay mantengaoprimidas[as tecias'Cancel' y 'Cook & Homd'
durantetres segundos.(Optimaprimero la tecia 'Cancel'). 'OFF'
desaparecede[ indicadorvisual
Nora: Lastecias y [a puertade[ horno no puedebioquearsesi [atemperaturade[ homo es 205° C (400° F) o superior.
C6digos de Errores
'BAKE'(HorneaOo 'LOCK'puedendesteiiarr4pidamentepara
advertirleque hay un error o un probJema.Si 'BAKE'o 'LOCK'
destellanen e[ indicador vJsuaJ,oprima[e tecia 'Cancel'. Si 'BAKE'o
'LOCK'continOandesteiiando,desconecte[a corriente ei6ctrica
hacia eJartefacto.Espereunos pocosminutosy vuelvaa conectar [a
corrienteeJ6ctrica.Si [aspaJabrasaOncontinOandesteJJando,
desconecte[a cordente eJ6ctricahacia e[ artefactoy [lamea un
t_cnico de servJcioautorizado.
65
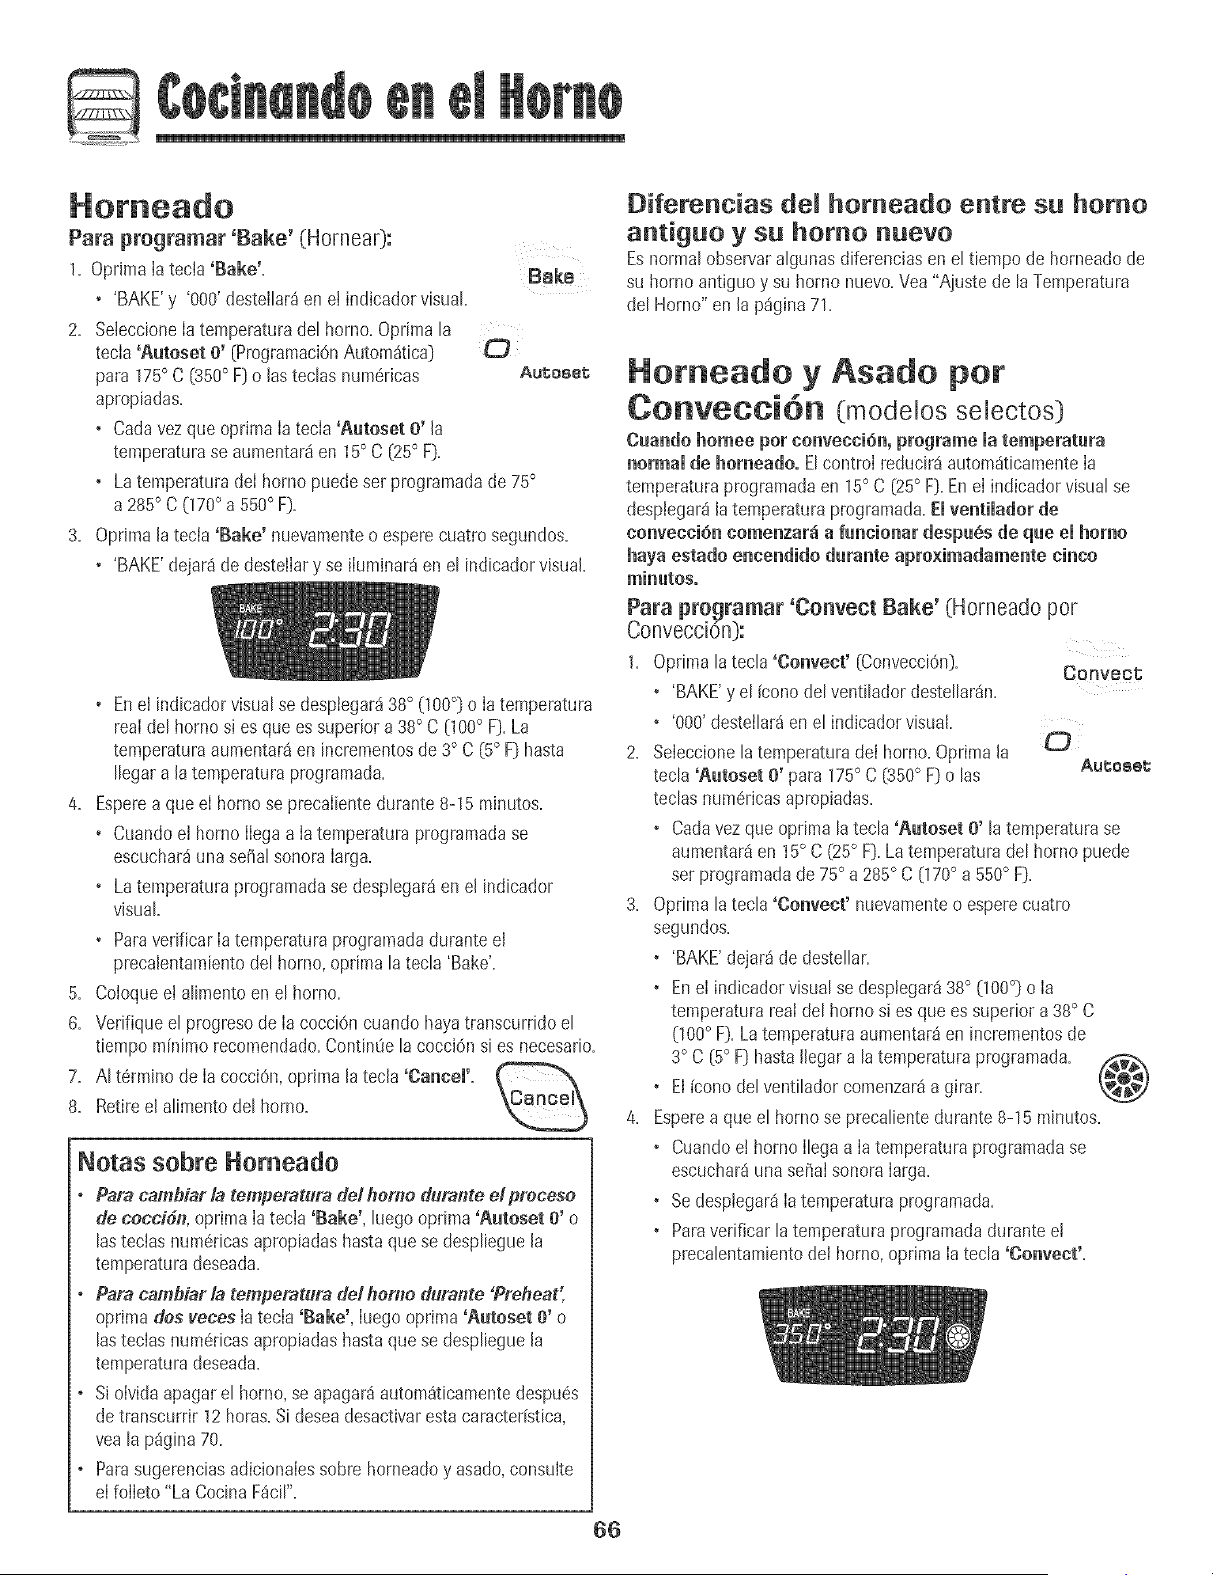
Paraprogramar+Bake'(Hornear):
1. Optima la tecla 'Bake'. Bske
• 'BAKE'y '000'desteihr_ en et indicadorvisual
2. SeleccioneIatemperaturadet homo. Oprimata
tecla 'Aateset 0' (ProgramaciOnAutom_tica} O
para175° C (350° F]o las tectas num#ricas Autoset
apropiadas.
• Cadavez que optima iatecia 'Amtoset O' la
temperaturase aumentar_en 15° C [25° F].
• La temperaturadei homo puedeser programadade 75°
a285° C (170° a 550° F].
3. Optima [atecla 'Bake' nuevamenteo esperecuatro segundos.
+ 'BAKE'dejar8 de destelIary se iluminar_en et indicadorvisual
, EneI indicadorvisualse despiegar_38° 000°] o Iatemperatura
reaIdel hornosi es que essuperior a 38° C [100° F].La
temperaturaaumentar_en incrementosde3° C (5° F] hasta
Ilegara latemperatura programada.
4. Esperea que eI homo se precaIientedurante 8-15 minutes.
+ CuandoeI borne IIegaa Iatemperaturaprogramadase
escuchar_unase_al sonoraIarga.
+ Latemperaturaprogramadase desplegar_en eI indicador
visual.
• ParaverificarIa temperaturaprogramadadurante el
precaientamientodel homo, optima latecla 'Bake'.
5. Coloquee! alimento en el horno.
6. Venfique el progresode Ia cocciOncuando hayatranscurridoel
tiempo m[nimorecomendado.Contin0ela cocciGnsi es necesario.
7. AI termino de Ia cocciOn,oprimala tecia 'Cancel'.
8. RetireeI alimentodel homo.
Notas sebre Herneado
+ Para cambJar/a tempemtura de/berne dumate etprecese
de ceccidn, oprima Iatecia 'Bake', luegoopdma'Aatoset O' o
lasteclas num6ricasapropiadashastaquese desplieguela
temperaturadeseada.
+ Para cambiar/a tempet_tura de/home duraate 'Preheat;
optimados veces Iatecla 'Bake', Iuego oprima'Aatoset O' o
lasteclas num6ricasapropiadashastaquese desplieguela
temperaturadeseada.
o Si oividaapagar el horno, seapagar_autom_ticamentedespu6s
detranscurrir 12horas.Si deseadesactivarestacaracter[stica,
yea la p_gina70.
o Parasugerenciasadicionalessobre horneadoy asado,consu+te
elfolIeto "La Cocina F_cir'.
Diferencias del homeado entre su homo
antiguo y su homo nuevo
Esnormal observaralgunas diferenciasen el tiempode horneadode
su horno antiguoy su homo nuevo.Vea"Ajustede laTemperatura
del Horno" en la p_gina71.
Homeado y Asado per
Convecci6n (modelos selectos)
Caando homee per cenve¢ci6n, programe la temperatara
normal de homeado. Elcontroi reduciraautom_ticamenteia
temperaturaprogramadaen 15° C (25° F]. Enei indicadorvisualse
desplegar8la temperaturaprogramada.Elventilador de
nonvecci6n cemenzar_ a fancionar despa6s de qae el home
haya estade encendido darante apre×imadamente ninne
minates,
Para programar 'Cenvect Bake' (Horneado per
ConvecciOn):
1. Optima latecla 'Convect' (ConvecciOn). Cenvect
• 'BAKE'y el (conedel ventiladordestellar_n.
+ '808'desteilar_en el indicadorvisual+
2. SeleccionelatemperaturadeI homo+Optima la
tecla 'Auteset O' para 175° C (350° F)o las Aut;e+et;
teclas num6ricasapropiadas.
+ Carlavez que optima latecla 'Auteset O' latemperaturase
aurnentar_en 15° C (25° F].Latemperaturadel borne puede
set programadade75° a 285° C 070° a 550° F].
3. Optima la tecla 'Convent' nuevamenteo esperecuatro
segundos.
• 'BAKE'dejar_de destellar.
• Enel indicadorvisual se desplegar_38° 000°] o Ia
temperaturareai del bornes+es que es superiora 38° C
(100° F]. Laternperaturaaumentar_en incrementosde
3° C (5° F] hasta Ilegara la temperaturaprogramada.
+ El [cone del ventiladorcomenzar_a girar.
4. Esperea que el homo se precalientedurante8-15 minutes.
• Cuandoe! homo ilega a ia temperaturaprogramadase
escuchar_una seSaisonora iarga.
+ Sedesptegar_ia temperaturaprogramada.
+ Paraverificar la temperaturaprogramadadurante el
precalentamientodei homo, optima iatecla 'Convent'+
66
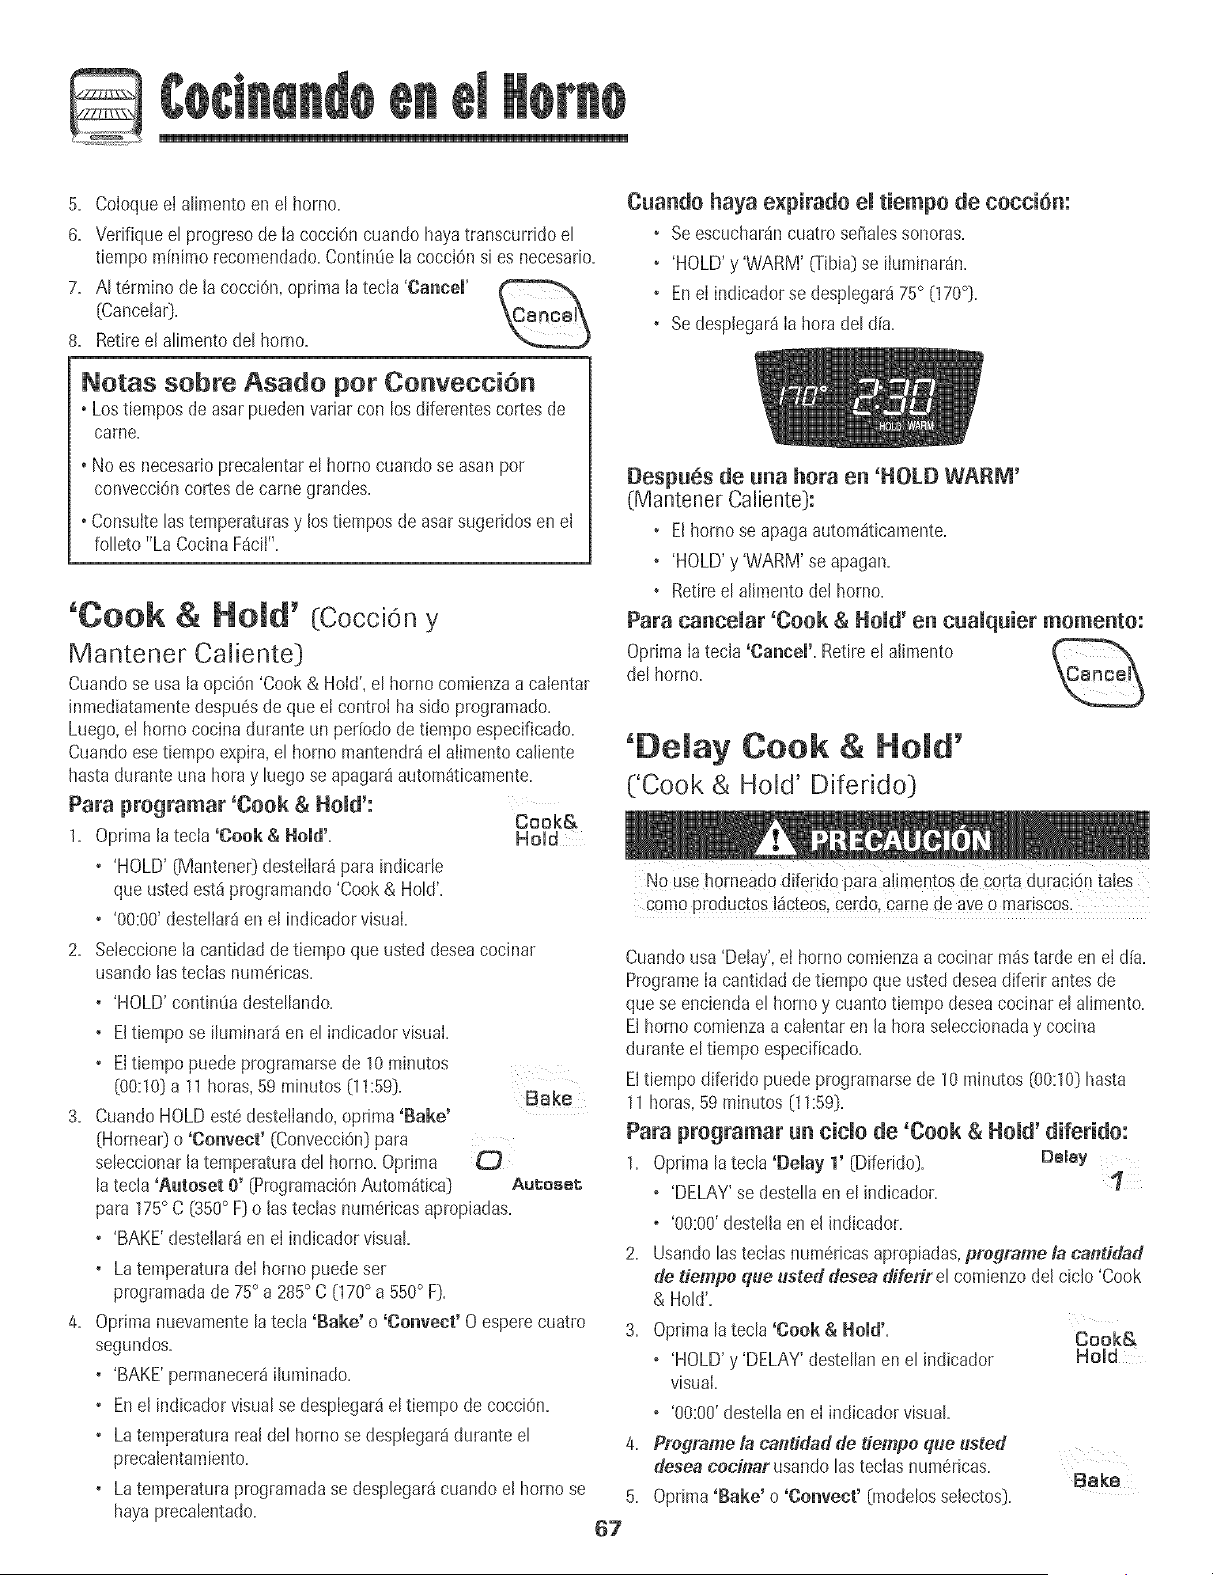
5. Co[oquee[ a[imentoen el homo.
6. Vedfique el progresode [a cocciOncuando hayatranscurddoel
tiempo minimo recomendado.Contint_e[a cocciOnsi es necesario.
7. A[ t6rmino de [a cocciOn,optima[a tech 'Cancel'
{Canceh0.
8. Retireel atimentode[ homo.
Notas sobre Asado per Conveeei6n
oLostiempos de asar puedenvariar con losdiferentescortes de
came.
oNo es necesarioprecalentarel homo cuandose asanpot
convecciOncortesde came grandes.
oConsuitelastemperaturasy los tiempos deasarsugeridosenel
foIIeto"La CocinaF_cii'.
'Cook & Hold' (Cocc+ony
Mantener Caliente}
Cuandose usa la opci6n 'Cook &Hoid', el homo comienzaa caientar
hlmediatamentedespu6sde que ei contro[ ha sido programatic.
Luego,e[ hornococinadurante un peffododetiempo especificado.
Cuandoesetiempo expira,el homo mantendr_iel aiimento caliente
hastaduranteuna horay luegose apagar8 autom_ticamente.
Para programar 'Cook & Hold':
Cook&
1, Oprimala tecia 'Cook & Hold', Held
, 'HOLD'(Mantene0 destellar_para indicade
queustedest_programando'Cook & HoW.
• '00:00'desteliar_en el indicadorvisual
2. Seleccionela cantidad de tiempo que usted deseacocinar
usandolastecias num6ricas.
+ 'HOLD'contintia destellando.
+ Eltiempo se iluminar_en el indicador visual
• Eltiempo puedeprogramarsede 10minutos
{00:10}a 11horas, 59 mhlutos (11:59}. Bake
3. CuandoHOLDest6desteliando,oprima'Bake'
{Hornear}o 'Convect' (ConvecciOn}para
seleccionarla temperaturadel homo. Oprima O
latecia 'Aatoset 0' (ProgramaciOnAutom_tica} Au_aset
para175° C (350° F} o las tecIas num6ricasapropiadas.
• 'BAKE'destelIar_en el indicadorvisual
+ Latemperaturade[ hornopuedeset
programadade 75° a 285° C 070° a 550° F}.
4. OprimanuevamentelatecIa 'Bake' o 'Convect' O esperecuatro
segundos.
+ 'BAKE'permanecer_iIumhlado.
• Enel indicadorvisualse despiegar_el tiempo de cocciOn.
• La temperaturarealdel horno se desplegar_durante el
precalentamiento.
+ Latemperaturaprogramadase despIegar_cuando el homo se
hayaprecaIentado.
Cuando haya expirado e[ tiempo de cocci6n:
• Se escuchar_ncuatro se_aIessonora&
, 'HOLD'y'WARM' (Tibia)se iluminar_n,
• Ene[ indicadorse despIegar_75° [170°].
+ Sedesplegar_[a hora del d[a.
DespuOs de una hora en 'HOLD WARM'
(Mantener Caliente}:
• El homo se apagaautomOticamente.
+ 'HOLD'y 'WARM' se apagan.
+ Retireel alimento del homo.
Para cancemar 'Cook & Hemal'en cuamquier memento:
Oprima[a tecla 'Cannel'+Retireel alimento
del homo+
'[}emay Cook & Hemal'
('Cook & Hold' Diferido)
NOusehorneado diferidQpara aHmentosde Cortadumc+6ntaies
comoproductosiacteos,cerdo, came de aveo mariscos.
Cuandousa'Delay',et homo comienzaa cocinar m_starde en el d[a.
Programe[a cantidadde tiempo que usteddeseadiferir antes de
quese enciendael homo y cuantotiempo deseacocinar elaIimento.
Elhomo comienzaacaIentaren la hora seleccionaday cocina
duranteel tiempo especificado.
Eltiempo diferido puedeprogramarsede 10 minutos (00:10)hasta
11horas,59 minutos (11:59).
Para programar un cido de 'Cook & Hold' diferido:
1. Optima [atec[a 'Delay 1' (Diferido). Da[ay
o 'DELAY'se deste[[aen e[ indicador. '1
o '00:00'destellaen el indicador.
2. Usandolastecias num6ricasapropiadas,pregrame la canddad
de dempe q#e #sted desea dffeflr el comienzodel ciclo 'Cook
& HoW,
3. Optima [atec[a 'Cook & Hold'.
Cook&
o 'HOLD'y 'DELAY'desteIIanen el indicador Bold
visual.
o '00:00'desteliaen e[ indicadorvisual
4. Pre_rame la cantidad de tiempe q_e listed
desea cec#_arusando [asteclas num_ricas.
Bake
5. Oplima 'Bake' o 'Convent+[modeIosselectos).
67
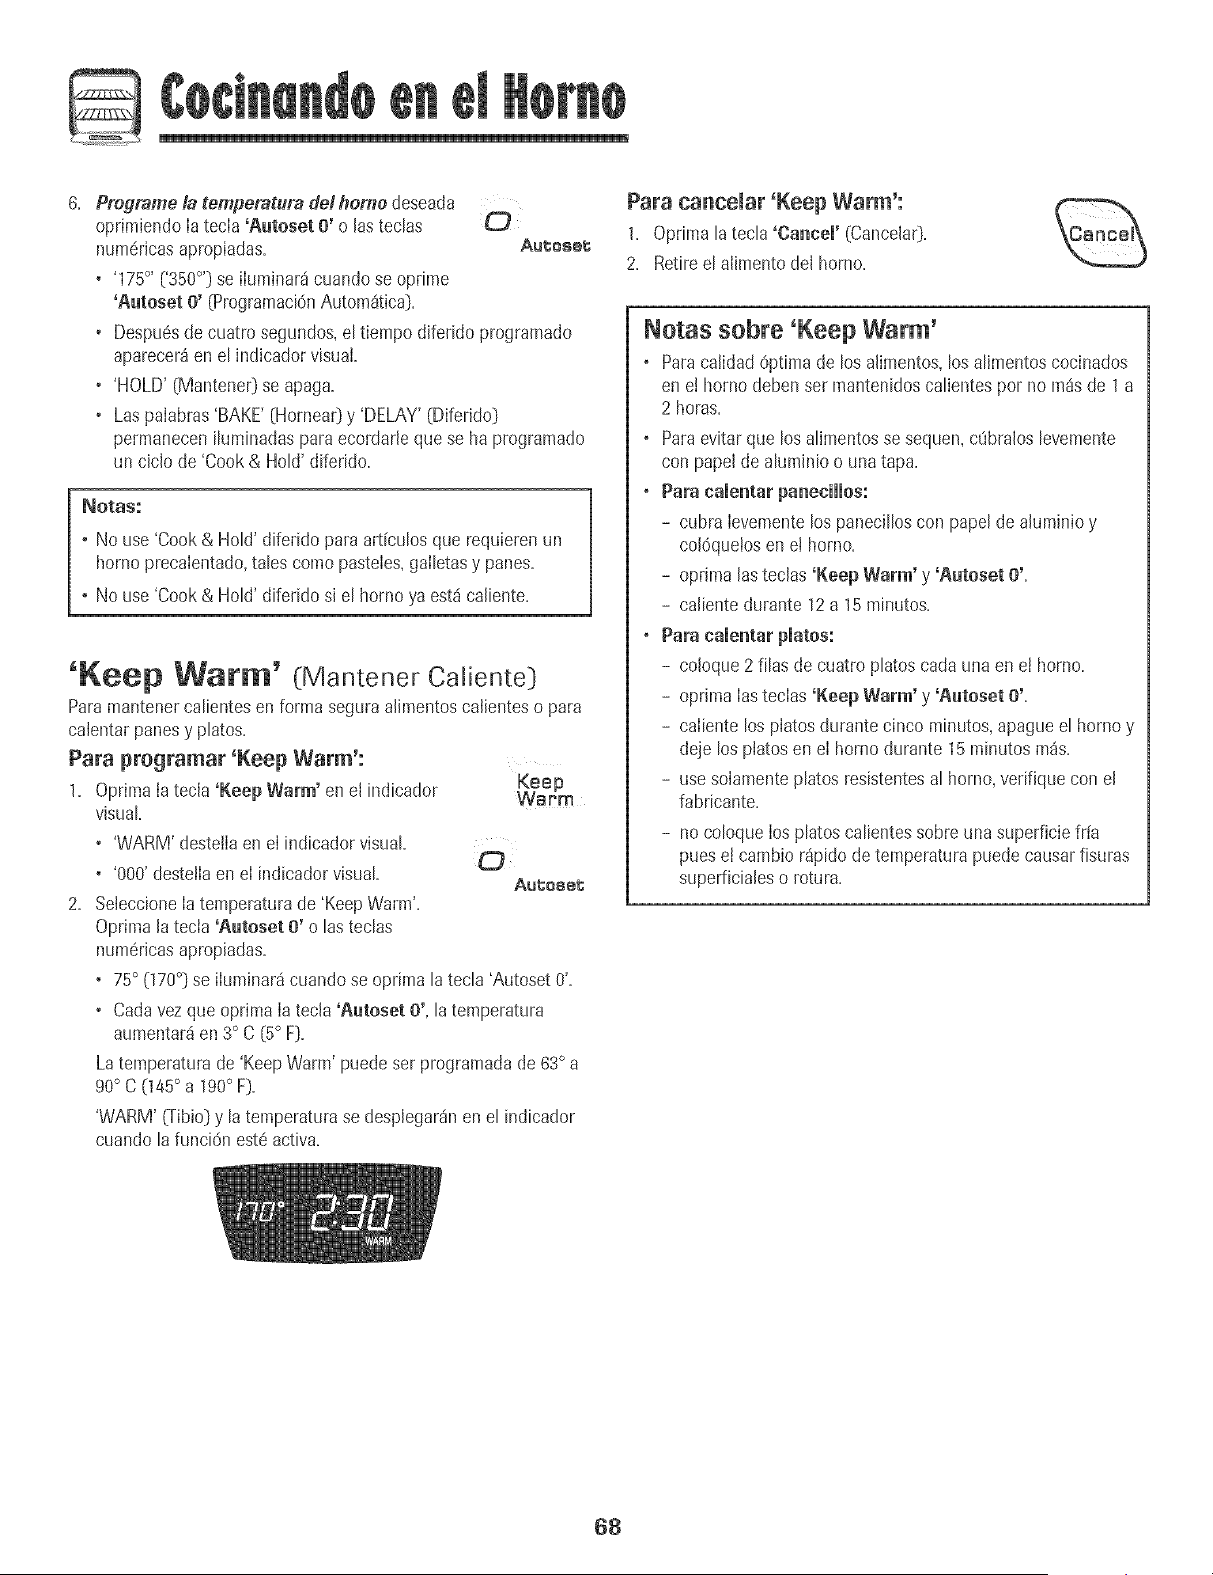
D
& Progcame/atempe_turade/hor#edeseada
oprimiendola tecla 'gutoset O' o las tedas
num_rJcasapropiadas. Aut;aset
+ '175°, ('350°'} se iIuminar4cuando se oprime
'Aatoset O' (Programaci6nAutom4tica}.
+ Despu6sde cuatro segundos,el tiempodiferido programado
aparecer_enel indicadorvisual
+ 'HOLD'(Mantene0 se apaga.
+ Laspalabras'BAKE'(Hornea0y 'DELAY'(Diferido}
permaneceniluminadasparaecordarleque se ha programado
un ciclo de 'Cook& HoWdiferido.
NOtaS:
+ No use 'Cook& HoW difeddo paraart[culosque requierenun
homo precaIentado,tales comopasteIes+gailetasy panes.
+ No use 'Cook& HoW diferido sJel homo ya est_ caliente.
'Keep Warm' (Mantener Caliente}
ParamantenercaIientesen forma seguraalimentoscaiienteso para
calentarpanesy platos.
Para pregramar 'Keep Warm':
1 Oprima[atecla 'Keep Warm' en el indicador Keep
+ WaPm
visual
• 'WARM'deste!Iaen el indicadorvisual
• '000'destetlaen el indicadorvisual O
Aut;oset;
2+ SeleccioneIatemperaturade 'KeepWarm'+
Oprimala tecla 'Aatoset O' o las tecIas
numerJcasapropiadas+
+ 75° (170°] se iIuminar4cuando se oprima la tecla 'Autoset0'+
+ Cadavez que oprima Iatecla 'Aatoset 0', la temperatura
aumentar_en 3° C (5° F].
Latemperaturade 'KeepWarm' puede set programadade 63° a
90° C (145° a 190° F).
'WARM'(Tibio]y latemperaturase desplegar4nen el indicador
cuandola funciOnest6activa.
Para canceJar 'Keep Warm':
1+ Optima [ateda 'Cancel' (Cancela0+
2+ Retireel alimento de[ homo+
Notas sobre +Keep Warm'
, ParacalidadOptimade los alimentos,losalimentoscocinados
en e! homo debenser mantenidoscalientespor no m4sde 1 a
2 horas+
, Paraevitarque losalimentosse sequen,cObraloslevemente
con papelde aluminioo una tap&
, Para eaientar paneciiios:
- cubra [evementelos panecilloscon papelde alumJn[oy
co[6quetosenei homo+
- oprima [as tee[as'Keep Warm' y 'Autoset 0'+
- ca[ientedurante 12a 15minutos+
+ Para caientar piatos:
- co[oque2 filas de cuatro platoscarlauna en e[ homo+
- opdma [as tecias 'Keep Warm' y 'Autoset 0'+
- caiiente los p[atosdurante cinco minutos,apagueel homo y
deje los p[atosen e[ horno durante 15 minutosm4s+
- use solamenteplatos resistentesal horno,verifique con e[
fabricante+
- nocoloque Ios platos calientessobreuna superficiefr[a
pues et cambior4pidode temperaturapuedecausarfisuras
superficialeso rotura+
68
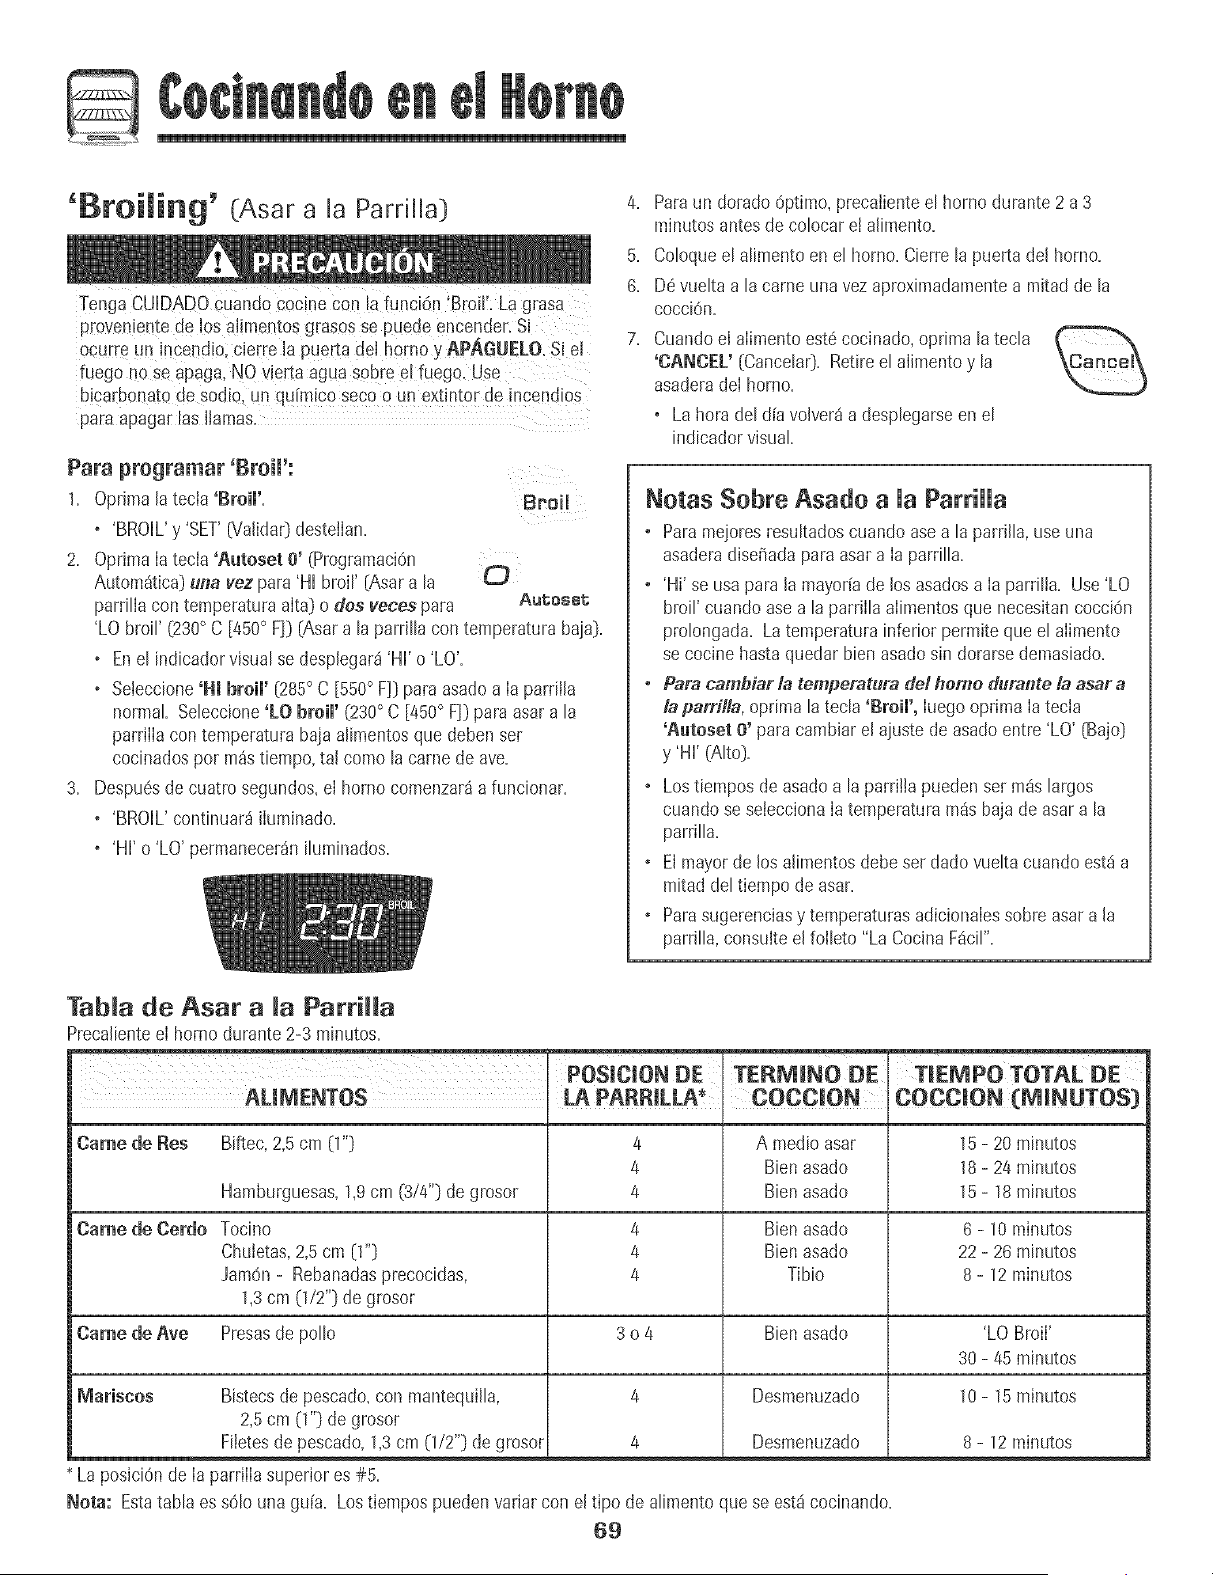
'BroiJing' (Asar a la Pardlla)
Tenga CUDADO Uuandococine Con!afunci6n 'Broil!: La grasa
provenientede los a!imentosgrasos se puede encender.Si
ocurre un !ncendiolcierre la puerta del homo y APAGUELO.Si el
fuego rio se apaga, NO Vie[taagua Sobre_r fuege. Use
b!oa_bo_atode sod[o,un qu[[_ic0 sec0 o Un extint0r de!r!cendi0s
Para programar 'BroiV:
1. Oprimala tecia 'Broil'.
o 'BROIL'y 'SET'6/alida0 desteilan.
2. OprimaIa tecla 'Autoset 0' (Programaci6n
Autom_tica}u/la vez para'Hi broir {Asara la
parriIiacon temperaturaaIta}o des veces para Aut;oset;
'LO broil' {230° C [450° F]} {Asara la parriIIacon temperaturabaia}.
o Enel indicadorvisualse desplegar_'Hl'o 'LO'.
o Seteccione'HI broim'(285°c [550° F]}para asadoa Ia parrilla
normal Seleccione'EO broil' (230° C [450° F]} para asara la
parrilIacon temperatura baja alimentosquedebenser
cocinadospot m_stiempo,tal como la camede ave.
3. Despu6sde cuatrosegundos,el homo comenzar_a funcionar.
o 'BROIL'continuar_iluminado.
o 'Hi' o 'LO' permanecer_niluminados.
4. Paraun dorado6ptimo, precaJienteeJhomo durante 2 a 3
minutosantes de coJocareJaJimento.
5. CoJoqueeJaJimentoen eJhomo. CierreJapuertade[ homo.
6. DewJeJtaa Jacame una vezaproximadamentea mJtadde Ja
cocci6n.
7. Cuandoel alimentoest6cocinado,optima JatecJa
'OANOEU [CanceIa0. Retireel alJmentoy la
asaderadeI homo.
• La hora deJd[avolver_a despJegarseen eJ
indicadorvisual
Notas Sebre Asado a Ja ParriHa
• Para me]oresresuJtadoscuando asea la parrJlJa,use una
asaderadiseiiada para asar a Ia parriJJa.
• 'Hi' se usa paraJamayoffade [os asadosa Ia parriJia. Use 'LO
bloiJ'cuando asea JaparrJlJaalimentosque necesitancocci6n
proJongada.Latemperaturainferior permiteque eJalimento
se cocine hasta quedar bien asadosin dorarsedemasiado.
• Para cambiar la temperatura de! homo durante la asar a
/aparrilla, optima [a tecIa'Broil', [uegooptima [a tecla
'Autoset O' paracambiarel aiuste de asadoentre 'LO' {Bajo}
y 'Hi' (Alto).
, Los tiemposde asadoa la parri!tapueden set m_slargos
cuando seseteccionaIatemperaturam_s baja de asar a la
parri[[a,
• E[mayorde los aJ[mentosdebe ser dado vueJtacuando est4 a
re[tadde[tiempo de asar,
• Parasugerenciasy temperaturasadiciona[essobreasar a [a
parrJJJa,consuitee[foiJeto"La CocinaFac[[".
Tab[a de Asar a [a Parri[[a
Preca[[entee[ horno durante 2-3 m[nutos.
POSICION DE TERNINO DE
AUNENTOS , LA PAP,RILL_. COCC[ON . COCClON (N[NUTOS)
Came de Res Biftec, 2,5cm (1"} 4 A medio asar 15- 20 minutos
4 Bien asado 18- 24 minutos
Hamburguesas,1,9cm (3/4"} de grosor 4 Bienasado 15 - 18 minutos
Came de Cerdo Tocino 4 Bien asado 6 - 10minutos
Chuletas,2,5cm [1"} 4 Bien asado 22- 26 minutos
Jam6n- Rebanadasprecocidas, 4 Tibio 8 - 12 minutos
1,3cm {1/2"} de grosor
Came de ,_ve Presasde polio 3 o 4 Bien asado 'LO BroiI'
30- 45 minutos
Mariseos 10- 15m[nutos
Bistecsde pescado,con mantequi%,
2,5cm (1")de grosor
Fiietesde pescado,1,3cm (1/2"} degrosor
La pos[ci6nde Ia parrilIasuperior es#5.
4
4
Desmenuzado
Desmenuzado
Nora: Estatab[aes s6[o una gu[a. Lostiempos pueden var[arcon e[tipo de a[imentoque se est_cocinando.
69
8 - 12 minutos
Cietre Auto tico/
Modo Sab tico
Elhomo se apagar_autom_ticamentedespu_sde 12horassi _Jsted
Iodeiaaccidentaimenteencendido=Estacaracter[sticade seguridad
puedeset desactivada=
Para canceiar el cierre autom_tieo de 12 horas y
dejar que el homo funcione continuamente durante
72 horas:
1= Oprimay mantengaoprimida ia tecla 'Clock' Clock
[Reloi)durantecinco segundos=
• 'SAb'se desplegar_y destellara durantecinco segundos=
• 'SAb'se desptegar_continuamentehasta que se desactiveo
hastaque transcurraei I[mite de 72horas=
• 'BAKE'(Hornea()tambiense desplegar_si se est_usando un
ciclode horneado cuandoel homo estuien modosab_tico=
• Lafuncidn 'BAKE'esla (mieaquesepuede utitizar
con e/modo sabbtieo.Lasdemdsfunciones(temporizador,
mantenereafiente,auto/impieza,ete,)sebloquearbndurantee/
modosab4dco.
• Se puede programar'Cook& HoW [CocciOny Mantener)
durantee] Modo Sab_tico,sin embargono se puede
programar'Delay(Diferido) Cook& HoW.
Para cancelar el Mode Sab_tico: Clock
1= OprimaIatecla 'Clock' durantecinco segundos=
• 'SAb'destellar_durante cinco segundos=
• La hora deldia reaparecer_en el indicadorvisual
O
2= Despu6sde 72horas,el modosab_ticoterminar&
• 'SAb'destellar_durante cinco segundos=
• La hora de[dia reaparecer_en el indicadorvisual
Notas Sebre eUMode Sab tico
• El Modo Sab_ticopuedeset activadoen cualquier momento,
est@o no el homo encendido=
• El Modo Sab_ticono se puedeactivar si lasteciasest4n
bloqueadaso cuando la puertaest4 bloqueada=
• La mayor[ade [asadvertenciasy mensajesy todas lassetiales
sonorasest4ndesactivadascuandoel Modo Sab_ticoest4
active.
• Si el hornoest4 horneandocuando el Modo Sab4ticoes
programado,'BAKE'se apagar4cuandose cancele el
horneado=No se emJtir_nso,ales sonoras=
• Mientras el horno est@en Modo Sab4tico la [uzde[ homo se
encender_autom_ticamentecuandose abra la puerta=Si se
deseala [uzde[ homo durante el Modo Sab4tico,6sta debe ser
encendidaantes de que comienceel Modo Sab4tico=
• Cuandocomienzael Modo Sab_tico,la temperaturaquese
despiiegaser_ la temperaturaprogramadaen vez de la
temperaturareaIde la cavidadde[ homo. No se emitir_ la
sepalsonorade precalentamiento=
• El cic[o de autolimpiezay bJoqueoautom4ticode la puertano
funcionar4durante el Modo Sab4tico=
• Si oprime [atecia 'Cancel' (Cancela0se cancelar4un cic[o
'bake',sin embargoe[ contro[permanecer4en Modo Sab4tico=
• Si faiia la corriente elSctrica,cuandovuelvalaenergiaet homo
se activar4en Mode Sab4ticocon 72 horasrestantesy ningt_n
cic[o activo=
7O
@
Ajuste de [a temperatura
de[ homo
La exactitudde [astemperaturasdot bornees cuidadosamente
probadaen [af_brica+Es normalnotar alguna diferencia entre [a
temperaturade horneadoo en et dorado,entre un homo nuevoy un
homo antiguo+A medidaque el homo se usa,[a temperaturadel
homo puedecambiar+
Usted puedeajustar [atemperaturadot homo, si consideraquesu
homo noest_ horneandoo dorandoen forma correcta+Paradecid+r
cuantodebecambiar[a temperatura,prog+ame[atemperaturadel
homo a 15° C (25° F) m_salta o m_isbaja que latemperatura
indicadaen sus recetas,luego borneo. Los resultadosde la
"prueba" puedendarleuna idea decuanto debeajustarla
temperatura.
Para ajustar la temperatura del homo:
1+ Optima [atecla 'Bake' (Hornea0+ Bake
2+ Programe285° C (550° F) oprimiendolasteclas num6ricas
apropiadas+
3+ Oprimay mantengaoprimida la tecla 'Bake' durantevaries
segundoso hastaque O° aparezcaenel indicadorvisual
Si [atemperaturadel homo ha side previamenteajustada,e[
cambioaparecer_enel indicadorvisual+Perejemp[o,s[ la
temperaturadel homo fue reducidaen 8° C 05 ° F) el ind+cador
mostrar_"- 8°" C-15°")+
4+ OprimaIatecia 'Aatoset e' (PrograpaaciOnAutom_tica)para
ajustarlatemperatura+
Cadavezque se optima [atecIa 'Aatoset O',[atemperatura
cambiaen 3° C [5° F)+Latemperaturadel bornepuede ser
aumentadao disminuida en 3° a 20° C (5° a35° F)+
Si oprime latecIa 'Aatoset O',latemperaturadel borne pasar_
per un cicIo de aumento de temperatura(5, 10 +++35)+Si
cont[n0aoprimiendo[a tecIa'Aatoset O',[a temperaturadeI
bornepasar8per un ciclo de descensodetemperatura (-35,-30 +
++-5)+
5+ Lahera del dfa reaparecer8autom_t[camenteen el ind+cador
visual
No necesitareajustar[atemperaturade[ homo si hayuna fa[[ao
interrupci6ndeenerg[ael6ctdca+El ajustede la temperaturaes
vSIidopara'Bake','Convect Bake'y 'ConvectRoast'(modelos
seIectos)soiamente.Lastemperaturasde asara la parrilla y de
limpiezano pueden ser ajustadas.
Cambio de [a temperatura
de °F/°O
1. Elajustedef_br[ca de [a medidadeternperaturaes Fahrenheit.
2. Paracambiar el ajuste,optima y mantengaoprim[das[astec[as
'Cancel' (Anula0 y 'Bake' a[ mismotiempo durantetres
segundos.
3. Escuchar_unasofia(sonoray el ajusteactual (°Fo °C)se
despiegar_en [apantalIa.(Sino se realizaning0neatable,[a
estufa regresar8a[ ajuste actualdespuesde 30 segundos).
4. Paracambiar el ajuste,oprima [a tec[a 'Aateset O'.Opr[maIa
nuevarnentepara regresara[ ajusteanterior.Esperecinco
segundosy el ajuste se guardar_.
'Favorite' (Favorite)
Latecia 'Favorite'[e permite guardar en memoriae[ tiempoy [a
temperaturade un cicio 'Cook& HoW (CocciOny Mantene0+
Paraprogramarun cic[o favorite, debe estar activao recientemente
prograpaadaunafunciOnde 'Cook& HoW+
Para programar un nuevo title Favorite o para
guardar come Favorite un title 'Cook & Hold' que
est+ en progreso:
1+ Programeun dclo de'Cook & HoW come se describeen [a
secci6n'Cook &Hoid' en [apdgina 67+
2. Optimay mantengaopdmida [a tec[a'Favorite' Favorite
durante tres segundos+
+ El cic[o'Cook & Hold' recientementeprogramatico en
progresoser_ guardadoen memoria.
+ Seoir_ una seffa[sonorapara indicarque el control ha
aceptadoel ajuste 'Favorite'.
Para comenzar un eie[oprogramatic come Favorite:
1+ Optima [atec[a 'Favorite'+
+ Sedesp[egar8e[ tiempo y [a temperaturaparael cicio 'Cook&
Hold'programatic (si nohay cic[o 'Cook & Hold' programado,
en e[ indicadorvisual se despIegar_'nonE'.)
2+ Optima [atec[a 'Bake' o 'Convect' (ConvecciOn,mode[os
se[ectos).
+ El cic[o Favoritecomenzar_inmediatamente.
+ 'BAKE'se iIuminar_en el indicador visual
+ Eltiempo de cocciOnse i[uminar_ien el indicadorvisual
Cuando ha expirado e[ tiempo de eoeei6m
+ El nombrede[ cic[o se[eccionadose apagar&
• Se i[uminarSn'HOLD'(Mantene0 y 'WARM' [Tibio).
• Enel indicadorse despIegar_'75°' ('170°').
Para canee[ar un cic[o favorite en progreso:
1= Optima [atec[a 'Cancel'+
• El cicio favorite guardado en memoriano
ser_ afectado+
2+ Retiree[ aiimento de[ homo+
71
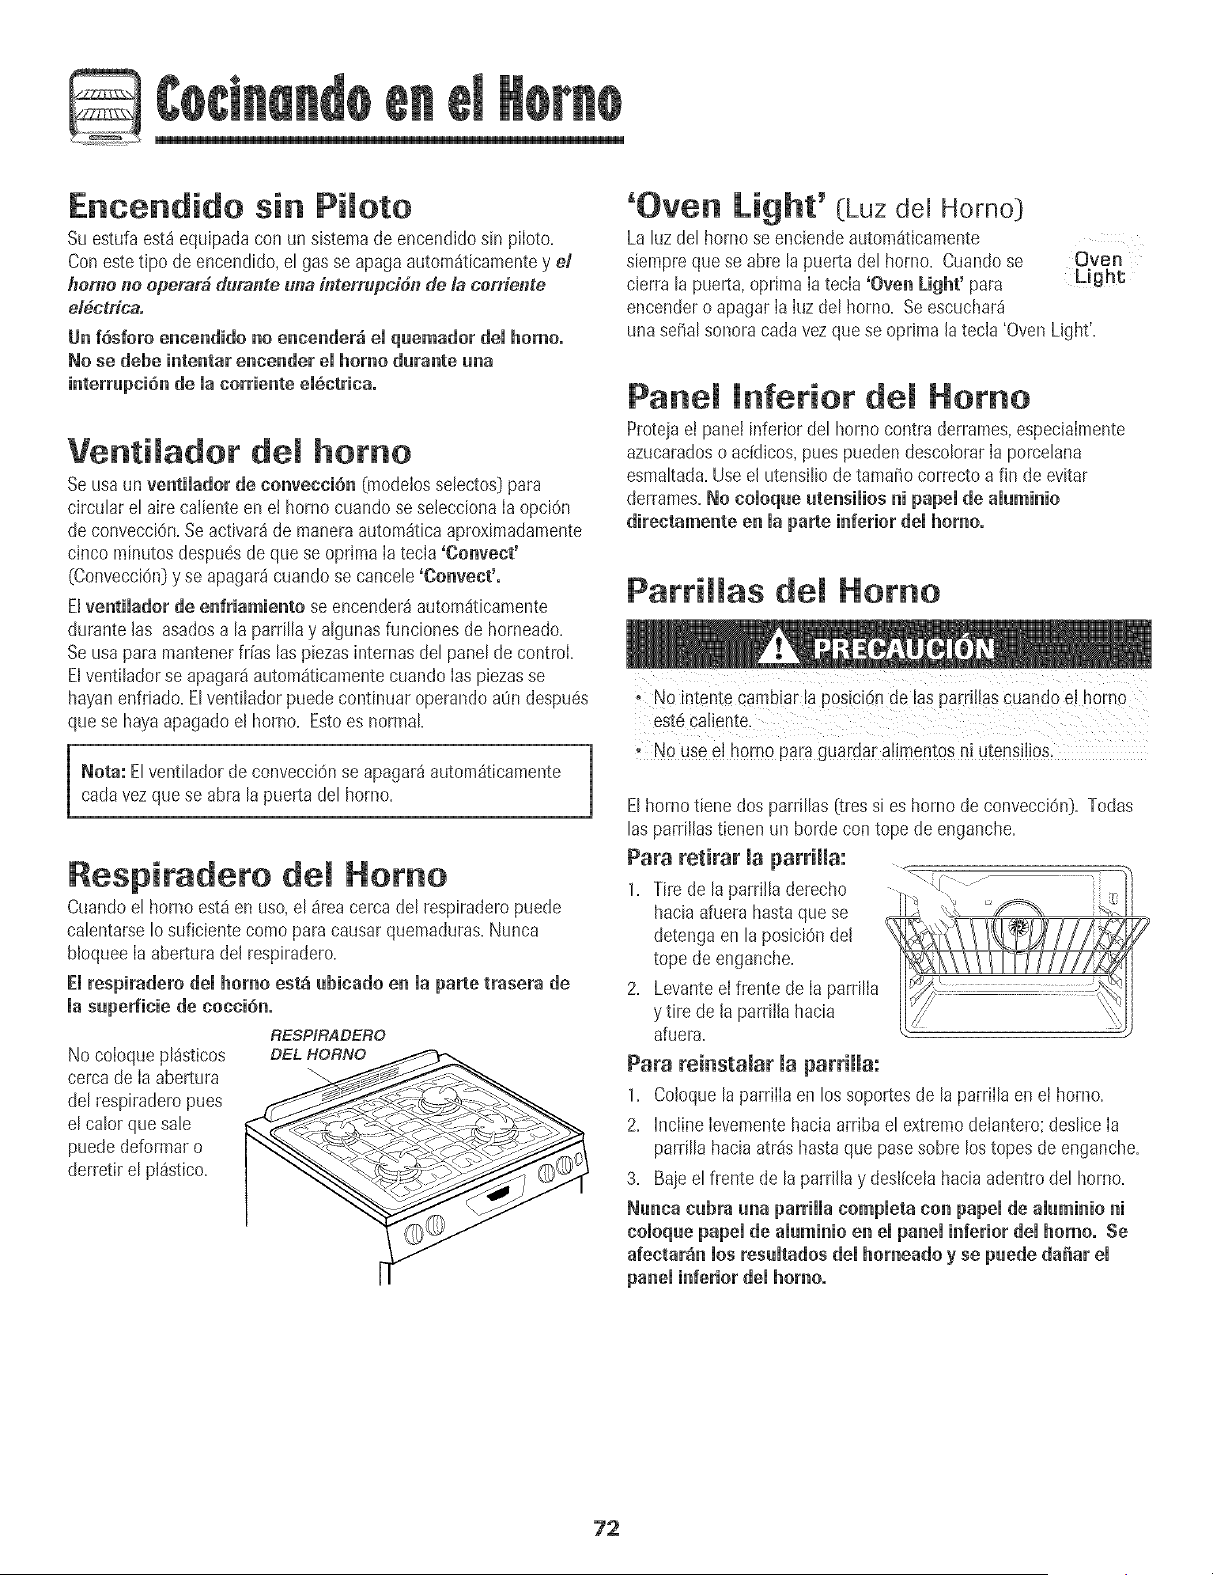
5
Encendido sin Piloto
Su estufaest_equipadacon un sistemade encendidosin plloto.
Coneste tipo de encendido,et gasse apagaautom_ticamentey e/
home no eperar_ dumnte una il_terrupcidnde la cerriente
e/#ctrica.
Un f6sforo encendido no eneender_ el qaemador dei home.
No se dehe intentar eneender el homo durante una
interrupei6nde la eorriente emSetrieu,
VentiJador deJ homo
Se usaun ventilader de eonveeei6n (modelossebctos) para
circular el aire calienteen ei homo cuandose sebcciona Ia opciOn
de convecciOn=Se activar_de maneraautom_ticaaproximadamente
cinco minutesdespu6sde que se optima Ia tecla'Convect'
(ConvecciOn}y se apagar_cuando se cancele'Conveet'°
Elventimaderde enfriamiente se encender_autom_ticamente
durante Ins asadosa la parrillay algunasfunciones de homeado=
Se usapara mantenerif[as Inspiezas internasdel panel de control
Elventiladorse apagar_autom_ticamentecuando Inspiezasse
hayanenfriado=El ventilador puedecontinuaroperandoa0ndespu6s
que se hayaapagado el homo= Estoes normal
Nora: El ventilador de conveoci0nse apagar_autom_ticamente J
cada vez que se ab_alapuerta del homo=
J
Respiradeto dem Homo
Cuandoel homo est_en use,el _rea cerca del respiraderopuede
calentarseIo suficientecome para causar quemaduras=Nunca
bloqueeIa abertura del respiradero=
El respirudere dei home est_ uhieado en la pure trasera de
masupeffieie de eoeei6n.
RESPIRADERO
No coIoque pl_sticos DELHORNO
cerca de Ia abertura
del respiraderopues
el calor que sale
puededeformaro
derretir el pl_stico=
'Oven Light' (Luz del Homo)
La luz del horno se enciendeautom_tbamente
siempreque se abre la puerta del homo= Cuandose
cierra la puerta,oprima ia tecia 'Oven Light' para
encendero apagaria iuz del homo=Se escuchar_
una sehalsonoracadavezque se optima la tecla 'OvenLight'=
Oven
Light
Panel inferior del Homo
Proteinet panelinferior del homo contra derrames,especiaImente
azucaradoso ac[dicos,puespuedendescolorarIa porcelana
esmaltada=Useel utensiliodetamahocorrecto a fin de evitar
derrames=No eeioque utensiiies ni pupei de aiuminio
directamente en la pare inferiordei homo,
PartiSans dem Homo
No intentecambiar b posici6n de InspardJJascuand0 e! homo
est6Caliente.
oNO USee! homo para guardar a!imentos n! utensil!0S,
E[homo tiene dos pardi[as [tres si es homo de convecci6n)=Todas
Insparrii[astienen un bordecon tope de enganche=
Para retirar [a parrilla: <
1= Tire de la parrilh derecho
haciaafuera hastaque se
detenga en la posiciOndel
tope deenganche=
2= Levanteeifrente de Ia parrilla
y tire de laparrilla hacia
afuera=
Para reiastamar maparrimma:
1= ColoquelaparriIIaen los soportesde laparriIla en eI homo=
2= InclineIevementehacia arriba el extremedelantero:deslice Ia
parrillahacia atr_s hastaque pasesobre los topes de enganche=
3= Baieel frente de la parrillay desl(celahacia adentrodel homo=
Nunea cubra una parriiia cempieta con pupeide aluminie ni
eeieque pupemde aluminie en el paneminferior dei homo. Se
afeetar_n ruesresumtadosdemherneado y se puede da_ar el
panel inferiordei home°
72
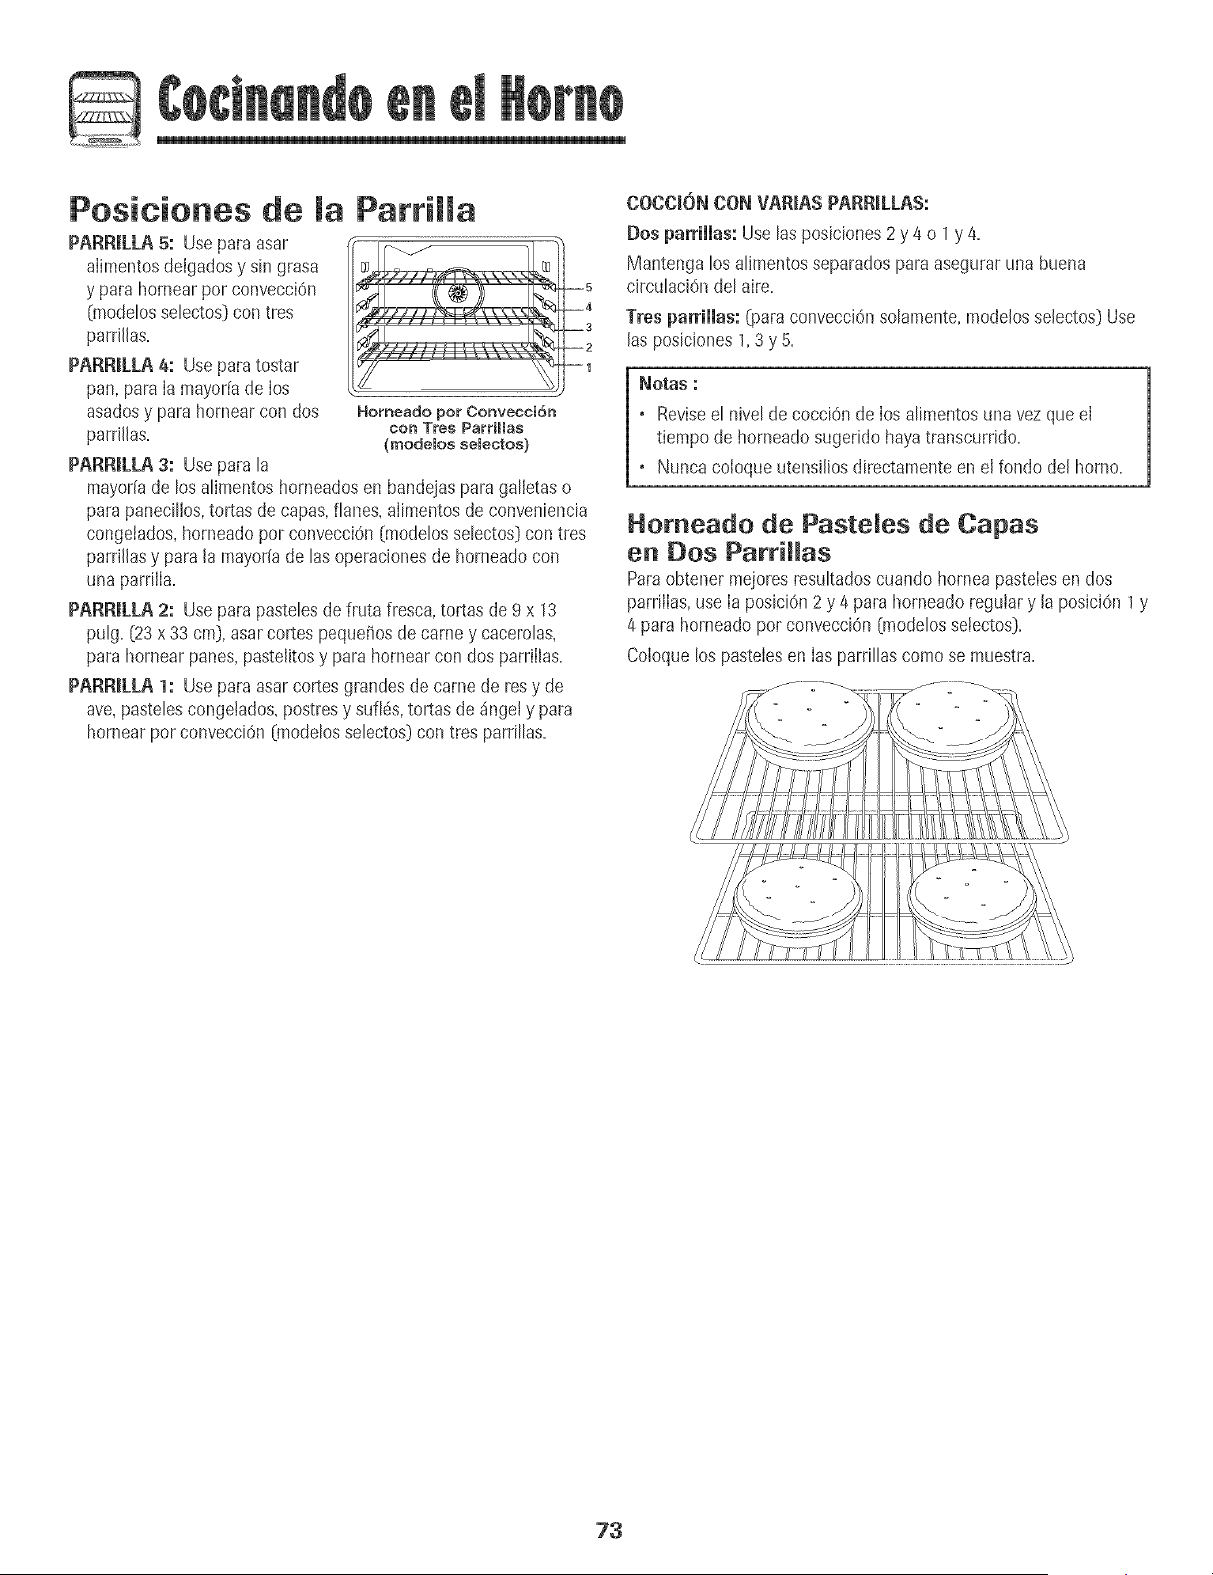
Posieiones de [a Parriiia
PARRtLLA5: Usepara asar
aiimentosdeigadosy sin grasa
y para hornearpot convecci6n
[modetossetectos_con tres
parrillas,
PARR[tLLA& Useparatostar
pan, para [a mayoffade [os
asadosy para hornearcon dos
parrillas.
PARR[LLA3: Usepara [a
Horneado pot ConvecciSn
con Tres Parrii[as
(modeIos seIectos)
mayoriade los a[imentoshorneadosen bandejasparaga[letaso
parapanecitlos,tortas de capas,fianes+aiimentosde conveniencia
congelados,horneadopor convecci6n {modeIosse[ectos}con tres
parri[lasy para[a mayoriade [asoperadonesde horneadocon
una parriiia.
PARRILLA 2: Usepara pastelesde fruta fresca,tortas de 9x 13
puIg. [23x 33 cm), asarcortes pequeffosde came y caceroIas,
para hornearpanes,pastelitosy para hornear con dos parriHas.
PARR[L[LA1: Usepara asarcortesgrandes de came de resy de
ave,pasteIescongelados+postresy sufI6s,tortas de _nge[y para
hornearpor convecci6n[modeIosseIectos)con tres parriIIas.
COCC+ONCON VAR[AS PARRILLAS:
Dos parriiias: Use [asposiciones2 y 4 o +y 4.
Mantengalos aIimentosseparadospara aseguraruna buena
circuIaci6nde[ aire+
Tres parrillas: (para convecci6nsoIamente,mode[osselectos)Use
[asposiciones1,3 y 5+
Notas :
• Revisee[ hive[decocci6n de [osaIimentosuna vez que e[
tiempode homeado sugeridohayatranscurrido+
• Nunca coloque utensi[iosdirectamenteen e[ fondo de[ homo+
Homeado de Paste[es de Capas
en Dos ParriHas
Paraobtener mejoresresuItadoscuandohorneapasteiesen dos
parriiias,use [a posiciOn2 y 4 para horneadoregulary [a posiciOn1 y
4 para homeadopot convecci6n[modeIosselectos)+
Coloquelos pasteiesen [asparriIIascomese muestra+
73
Homo Autoli piante
. Esnormal que las p_ezasdel homo se calientenduranteel chic
de autolimp_eza,
o Paraevitarda[Io a la puerta,no intenteabrirlacuando la palabra
'LOCK'(BIoquea0est6 oesp_egadaen el indicadorvisual.
. Evite[ocar la pueRa,la ventanao el areadel l espJraderodel
homo duran[eun ciclo de Iimpieza
° No use limpiadoresde hornos comerclabsen _, acabadodel
homo r' a[rededorde Emguna plezade[ homo pues pue_e
daF_arel acabadoo las p_ezas,
Elciclo de autolimpiezausatemperaturasde cocci6n superioresalas
normalespara Iimpiar autom_ticamentetodo et interior del horno.
Esnormal que ocurran Ilamaradas,humoo llamasdurante la limpbza
si et horno esta demasiadosucio. Esmejor limpiar el horno
regularmenteenvezde esperarhastaquese hayaacumuIado
demasiadasuciedad.
DuranteeI proceso de limpbza, Iacocina debeestarbienventilada
paraeliminar los olores normalesasociadoscon la limpbza.
Antes de AutoRimpieza
1. Apague Ia hz det horno antes de B Iimpieza.La luz del horno
puedefundirse duranteel cicio de Iimpieza.
2. Retiretodos IosutensiIiosy IasparrilBs dei homo. LasparrilIas
del homo se descolorar_ny nose deslizarSnfScilmentedespu6s
de un ciclo de autolimpbza si no son retiradasdel homo.
3. LimpieeI marcodel homo, eI marco de Ia puerta,el _rea fuera de
laiunta de la puertay alrededorde laaberturaen lajunta de la
puerta,con un agentede IimpiezanoabrasivotaI como'Bon
Ami'_o con detergentey agua.El procesode autolimpiezano
limpia estas_reas. Eliasdeben ser Iimpiadaspara evitar que la
suciedadse hornee duranteeI ciclo de autolimpieza. (La iunta es
el sello aIrededorde la puertay ventana del homo.)
4. Paraevitarda_o noIimpie ni froteIa -_ _
junta situadaalrededorde la puerta del _\
homo.Lajunta est8dise_adapara
sellar herm6ticamenteel calor durante ' "
el ciclo de Iimpieza.
5. Limpieel excesodegrasa o derrames
de Iaparte inferiordel homo. Esto
evita humo excesivoo Ilamaradasdurante el ciclo de Iimpieza.
6. Limpie losderramesazucaradoso _cidostales como papa dulce
(camote},tomateso salsasa basede Ieche.La porcelana
esmaltadaes resistenteal 8cido pero no a prueba de acidos=El
acabadode porcelanapuede descolorarsesi los derrames_cidos
o azucaradosno son Iimpiadosantesde un ciclo deautolimpieza.
Para programar 'Sdf-Cmean' (Autolimpieza):
Nota: Latemperaturadel horno debe ser inferior a205° C
(@0° F} paraprogramarun cicio de limpieza.
1, Cierre la puertadel homo.
2. Optima la tecla 'Cieaa' (Limpieza}, Clean
• 'CLEAN'desteliaenel indicadorvisual
• 'SET'destella en eJJndicadorvisuak O
3. Optima latecla 'Aatoset O' (Programaci6n Autoset;
Autom_tba}.
• 'MEd' (Suciedadmediana,3 horas}se despliegaen el
indicador.
4. Optima la tecla 'Aatoset e' para despbgar los ajustesde
autolimpieza.
'HVy' (Suciedadintensa,4 horas}
'MEd' (Suciedadmediana,3 horas}
'MTE'(Suciedadbye, 2 horas}
AI seleccionarel nivet de suciedad del hornose programa
automSticamentee! tiempo de Iimpbza.
5. Despu@de cuatro segundos,el homo comenzar8a Iimpiar.
• Si lapuerta no se cierra,se oir_ una se_alsonoray la palab_a
'door' se desplegar_en el indicadorvisual. Si Ia puerta no es
cerradadentro de 30 segundos,laoperaci6nde autolimpieza
ser_canceladay el indicadorvolver_a desplegarla hora del
d[a.
• 'CLEAN'aparecer8en el indicadorvisual.
• 'LOCK'destellar8en el indicadorvisual Unavez que Ia puerta
se bloquea,la palabra'LOCK' permanecer_ihminada sin
destelIar.
• El tiempo de limpbza comenzar_la cuenta regresivaen el
indicador.
Para diferir ua cido de autoiimpieza:
1, Optima la tecla 'Delay 1' (Diferk%. Delay
• 'DELAY'destella.
• '00:00'desteJlar_en eI indicadorvisual
2. ProgrameIa cantidad de tiempo que usted
deseadiferir el ciclo usandoJasteclas
num6ricasapropiadas.
Clean
3. Optima latecla 'Cleaa'.
• 'SET' desteIla en el indicador visual
Optima la tecla 'Aatoset O'.
Autosefc
• Se desplbga 'LITE' (nivel de suciedad leve},
coat,,
*Loshombresde los productosson marcasregistradasde sus respectivosfabricantes,
24
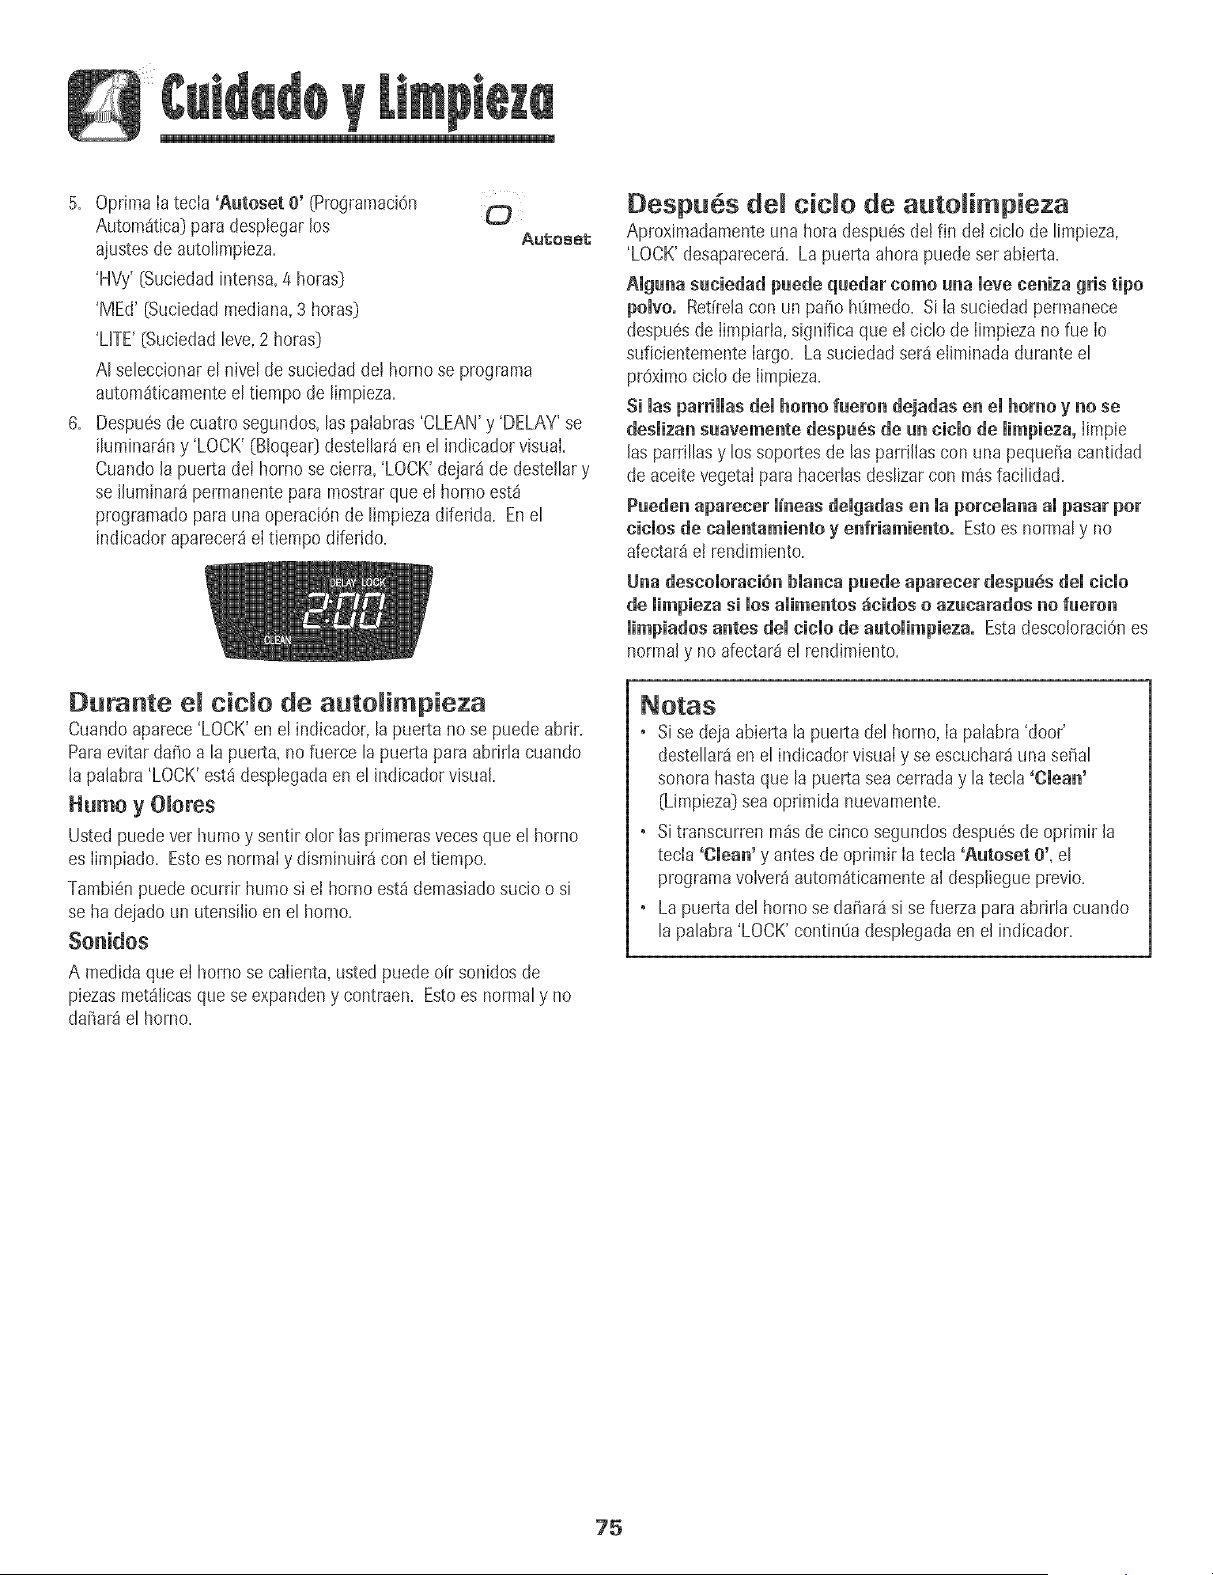
5. Oprima[atecia 'Autoset e' (Prograpaaci6n
Autom_tica)paradesplegarlos 0
ajustesde autolimpieza. Automet
'HVy'[Suciedadintensa,4 horas)
'MEd' [Suciedadmediana,3 horas_
'LifE' [Suciedadleve,2 horas)
AI seleccionarel nivel de suciedadde! homo se programa
autom_ticamenteel tiempo de limpieza.
6. Despu6sde cuatrosegundos,las paiabras'CLEAN'y 'DELAY'se
i[uminar_ny 'LOCK' (B[oqeaOdeste[[ar_en e[ indicadorvisual.
Cuandola puerta de! horno se cierra,'LOCK'dejar_ de desteliary
se ihminar_ permanenteparamostrarque el homo est_
programaticpara unaoperaci6nde limpiezadiferida. Enel
indicadoraparecerdel t[empo diferido.
Durante el c+c[o de auto[impieza
Cuandoaparece'LOCK'enel indicador,la puerta no se puedeabrir.
Paraevitardaffo a la puerta,nofuerce la puertapara abririacuando
[a palabra 'LOCK'estd despiegadaen el indicadorvisual+
Humo y Oiores
Usted puedever humoy sentirolor [as pdmerasvecesque el homo
es [imp[ado. Estoes norma[y disminuir_ con e[ tiempo.
Tambi6npuedeocurrir humo si e[ horno estd demasiadosucio o si
se ha dejadoun utensiiioen el homo+
Sonidos
A med[da queet homo se calienta,usted puede oir sonidosde
piezasmet_iicasque se expandeny contraen. Estoes normaly no
dariar_el horno.
Despues de[ cic[o de auto[imp+eza
Aproximadame_teunahora despu6sde[fin de[ cic[o de [impieza,
'LOCK'desaparecer& La puerta ahorapuedeser abierta.
Algeria suciedad puede quedar como una ieve ceniza gris tipo
poivo. Retirelacon un patio hOmedo+Si [a suciedadpermanece
despuesde [impiaria,significa que e[ cic[ode [impiezano rue1o
suficientementelargo. La suciedadser_eiiminada durantee[
proximocic[o de [[mpieza.
Si las parrillas del homo fueron dejadas en el homo y no se
desiizan suavemente despu6s de un ciclo de limpieza, [impie
[asparrillasy los soportesde lasparrilias con una pequeriacantidad
de aceitevegeta[para hacedasdesiizarcon m_s facilidad.
Pueden aparecer iineas deigadas en ia porceianaai pasarper
cieios de eaientamiento y enfriamiento. Estoes normaly no
afectar_e! rendimiento.
Una descoiorani6n bianca puede aparecer despu6s dei cicio
de mimpiezasi mosamimentosde[dos o azucaradosno fueron
mimpiadosantes demcicmode automimpieza. EstadescoloraciOnes
normaly no afectar8el rendimiento.
Notas
• Si se deja abierta la puertadel horno,[a palabra 'door'
destellar_enel indicadorvisua[y se escucharauna seiial
sonora hasta que la puertasea cerraday la tecia'Cmean'
[Limpieza]sea oprimida nuevamente.
• Si transcurrenrodsde cinco segundos despu6sde oprimir [a
tecia 'Clean' y antes de oprimir [atecla 'Autoset e', el
programavoiver_autom_ticamenteal despiiegueprevio.
• La puerta del homo se daffar_ si se fuerzaparaabriria cuando
la palabra'LOCK' continOadesplegadaen el indicador.
75
Procedi ientos de Li pieza
fr_asantes de tecarie e iimpiarlo, De este mode se evitar_ dam_oy
posiblesquemaduras _ _Loshombresde Ios productosson marcasregistradas
; para evitar marlchas0 decoloraci6[!limpie el homo despu6sde carla uSO. de susrespectivosfabricantes.
_ Parahacerpedidos, Ilameal 1-877-232-6771EE UU.o
Sise retira algunapieza,aseg[iresede qua Seareinstaladaen farina correcta. 1-800-688-8408Canadi
P_EZA PROCEDIMIENTO DE LIMPIEZA
Tapas de Tapas de Qaemadores Removibies
Quemadoresy o Dejeenfdarel quemador=RetirelatapayI_vetaenaguajabonosaconuna esponjade restregarde pl_stico=Parasuciedad
Quemadoresde dificil, timpie conunaesponjano abrasivarellenaconjabOno concremaparalimpiezadecubiertas'CooktopCleaning
Gas Seiiados Creme'_ (Pieza#20000001)_y unaesponja=
. No las laveenel lavavajillasni en un horno autolimpiante=
Qaemadores de Gas Seiiados
o L[mpieloscon frecuencia=Deieenfriar el quemador=Limpie conjab0n y una esponjade restregarde pl_stico=Para
suciedaddificil, limpie con una esponjano abrasivarellenacon jab0n=No agrande ni modifiquelos agujeros=
o Tengacuidado de qua no entreagua en ios orificios de ios q[lemadores=
o Tengacuidado cuando limpie el encendedor=Si elencendedorest_ hOmedoo da_ado,el quemadorsuperior no
encender&
Rejiiias de los o L_vetascon aguatibiajabonosay una esponjade pI_stico noabrasiva=Paramanchasrebeldes,limpie conunaesponja
Quemadores_ de pJ_sticorellena conjabOn,noabrasivao con 'CooktopCleaningCreme'*(CremaparaLimpiezadeCubiertas)(Pieza
poreeiana sabre 20000001)**y una esponja.Si [asuciedadpersiste,vueivaa apiicar'CooktopCleaningCreme',cubracon unatoa[[ade
papa!hOmeday deieremojardurante 30 minutos.Restrieguenuevamente,enjuaguey seque.
o No las laveenel lavavajillasni en un hornoautolimpiante.
Area del Reloj y o Parabloquearde los controlespara Ia Iimpieza,vet 'Btoqueode IosControles'en p_gina 65.
de las Teclas o Limpiecon un pat_oh_imedoy seque=No use agentesde limpieza abrasivospuespuedenrayarel acabado=
de Control o Sepuedeusar limpiavidriossi se rocianen el pa_o primero=NO recie directamente en elpanel.
Perimmasde o RetireIasperilhs cuandoest_n en Ia posiciOn'OFF'tir_ndolas haciaadehnte.
Control o Lave,enjuaguey seque. No useagentesde Jimpiezaabrasivospuespueden rayarel acabado=
o Enciendacada quemadorparaasegurarsede que lasperillas ban sido correctamentereinstaladas=
Cubierta y Panel La porcelanaesmaItadaesvidrio fundido en metaly puedeagrietarseo picarsesi no se usacorrectamente=Esresistente
de Control = a Jos_cidos,no a pruebade4cidos.Todos Ios derrames,especiaJmentelos derramesazucaradoso acidicos debenset
Esmaite de [[mpiadosinmediatamentecon un pat_oseco=
Poreelana o Cuandose enfr[e,lavecon aguajabonosa,enjuaguey seque=
o Nunca Iimpie unasuperficietibia o calientecon un pa_oht_medo.Estopuedecausaragrietamientoo picaduras.
o Nunca use limpiadoresde homo, agentes de limpiezaabrasivoso c_usticosenel acabadoexteriorde la estufa.
, Asegerese de qae el homo est_ apagado y qae tadas las plazasest6n
76
PROCEDIMIENTO DE UMP_EZA
Gaveta de
Ammacenamiento
y Manijas de mas
Puertas+ Esmamte
Pintado
Ventana y Puerta
demHomo +Vidrio
+ Cuandoest6fr[a, iave con agua tibia jabonosa,enjuaguey seque+Nunca iimpie una superficietibia o caliente
con un patio hMmedopues esto puededaMarla superficiey causaruna quemaduraa causadei vapor.
+ Paramanchasrebeides,use agentesde iimpiezaievementeabrasivostal como pasta de bicarbonatoo 'BonAmi'++
No useiimpiadoresabrasivos,cMusticoso _sperostal comoesponjasde lanadeacero o limpiadoresde homos+Estos
productospueden rayaro daMarpermanentementeia superficie+
Neta: Use uI_atoalla e u# pai_esece para Iimpiar los derrames, especialmente lus derramesac[dices e
azucaradusoLa superficie se puede descelurar u perder el bri#e si el derrame no se #mpia i#mediatamente.
Este es espedalmeute impurtante en las superficies btancas.
+ Eviteusar cantidadesexcesivasde aguapues puedeescurrirsedebajo o detrMsdei vidrio causando manchas+
+ Lavecon agua yjabOn+ Enjuaguecon agualimpiay seque+El limpiador deviddo puede usarsesi se roda en un
patio primero+
+ NO USE materialesabrasivostales comoesponjasde restregar,limpiadoresen polw+o esponjasde lana de acero
pues pueden rayarelvidrio+
+nteHor demHomo + Siga las instrucciones en las p%inas 74-75 para programar un ciclo de autolimpieza+
Acero lno×idabme
(modelosselectos_)
+ Limpiarcon aguacon jab6n.
+ Sacarlas manchasdificiles con polvo de limpiezao una esponjaIlenacon jab6n. Enjuaguey seque.
+ Lasparrillassedescolorar4npermanentementey puedennodesJizarseconsuavidadsisondejadaseneJhornodurante
unciclo de autolimpieza.Si estosucede,limpie la parri!lay lossoportesenrelievecon una pequetiacantidaddeaceite
vegetalpara restaurarJafaciJidadde movimiento,Juegolimpie el excesode aceite.
+ NO USENINGUN PBODUCTODE LIMPIEZA QUECONTENGABLANQUEADOBA BASE DE CLOBO.
• NO USELIMPtADOBES "ORANGE" M LIMPIADOBES ABBASIVOS.
+ SIEMPRELIMPIE LAS SUPERFICIESDE ACEBOA FAVORDEL GRANO,
+ Limpieza Diaria/Suciedad Leve+ Limpie con uno de los siguientes- agua conjabOn+una soluciOnde vinagre
blancocon agua,limpiador para superficiesy vidrio 'Forpaula409'*o un limpiavidriossimiJar- usandounaesponja
o un patio suave. Enjuaguey seque. Parapulir y evitar marcasde Josdedos,use el producto 'StainlessSteel
Magic Spray'*(PiezaNo. 20000008)**.
+ Suciedad Mederada/lntensa + Limpiecon uno de lossiguientes- 'Bon Ami'*, 'SmartCleanser'*o 'Soft Scrub'* -
usandouna esponja hOmedao un patio suave. Enjuaguey seque. Lasmanchasdificiles puedenset quitadas con
una esponjaparausosmOltiples'Scotch-Bdte'* hOmeda;frote a favor del grano. Enjuaguey seque. Pararestaurar
el lustre y sacarJasvetas,aplique'StainlessSteelMagic Spray'*.
+ Descoioraci6n = Useuna esponjamojadao un pa_osuave,limpie con limpiador de acero'CameoStainlessSteel
Cleaner'*.Enjuagueinmediatamentey seque.Paraeliminar lasestriasy restaurareJlustre,use despu+srociador
paraacero inoxidable'StainlessSteelMagic Spray'*.
*Losnombresde Ios productosson marcasregistradasde sus respectivosfabricantes.
** Parahacer pedidos,[[apaea[ 1-877-232-6771EE.UU.o 1-800-688-8408Canad&
77
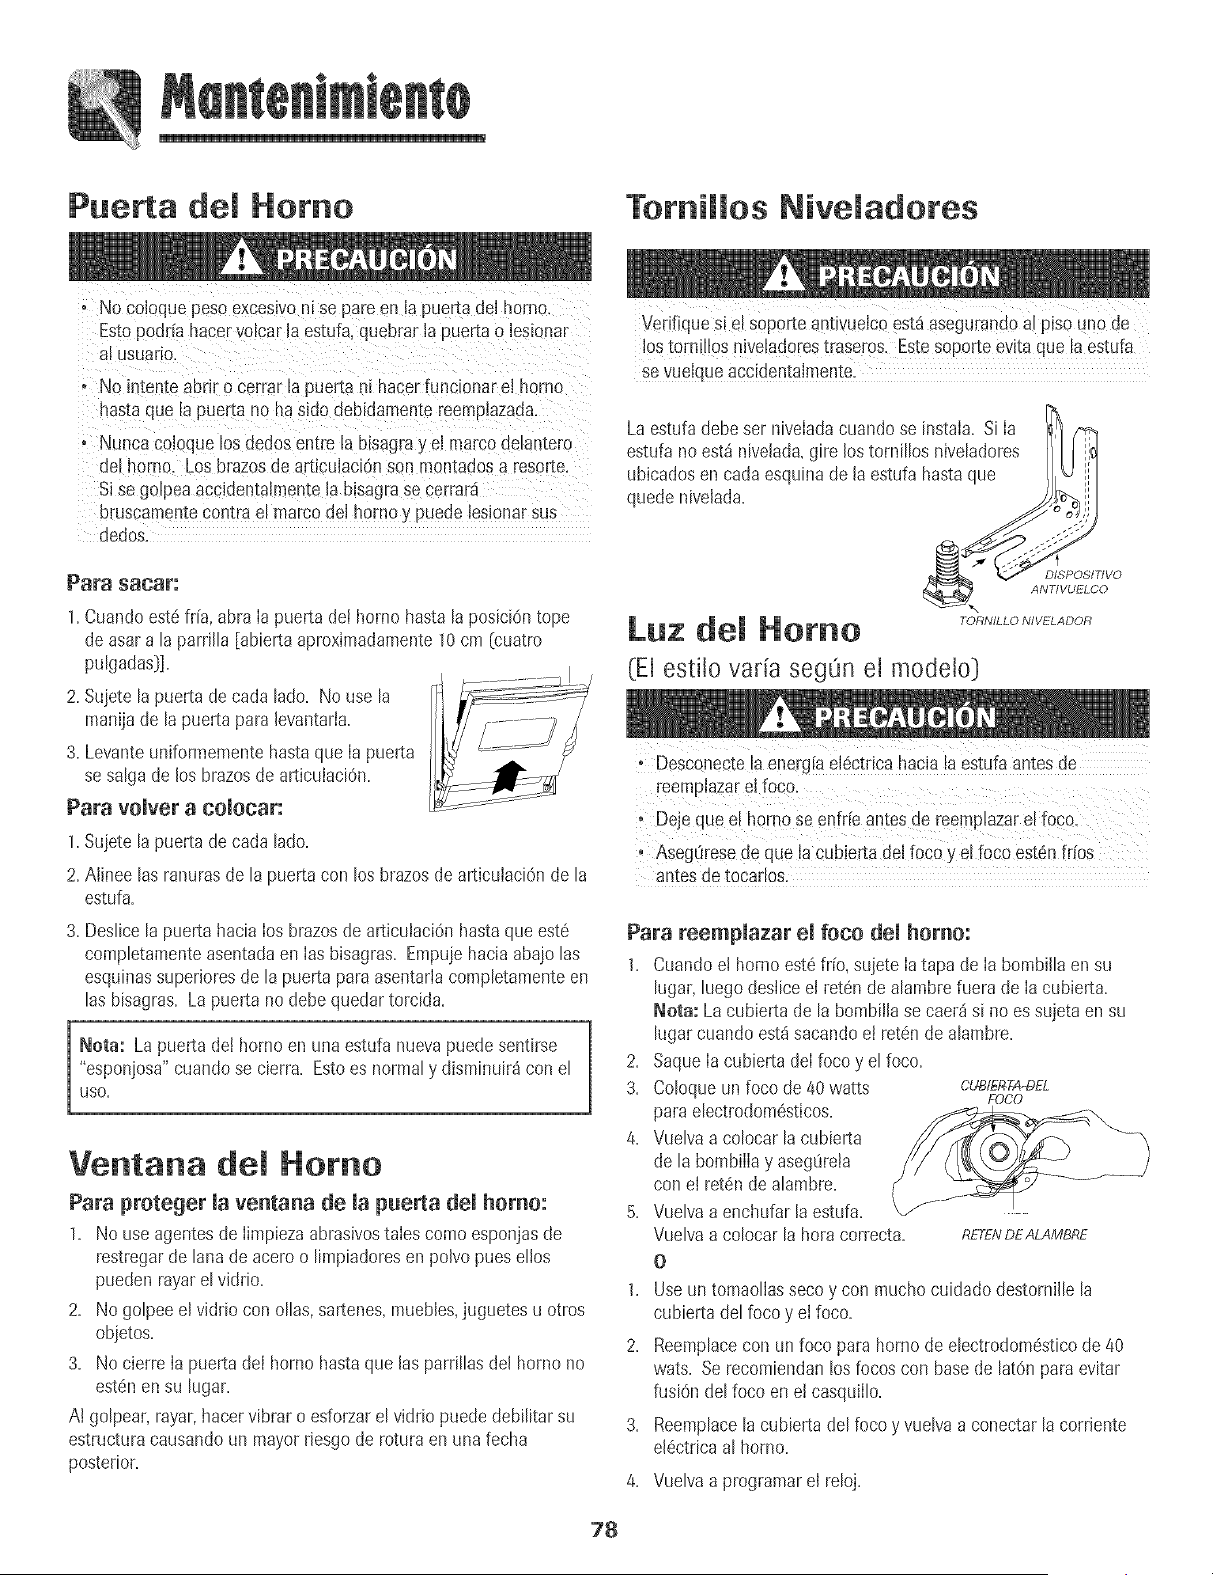
Puerta del Homo Tornillos Niveladores
o No coloquepeso exceslvonl se pareen la puer[adel horno
Estopodrfa hacervolcarla estufa,quebrar la puerta o lesienar
at usuario,
+ No intenteaDr+ro cerrar la puerta ni hacerruecionarel homo
has[aque la puerta no ha sido debidamen[e reemplazada.
o Nuncacoloquelos dedos entre la btsagray el marcoaetamero
de, qorno. Losbrazosde articulaci6nson montadosa resor[e,
Si segofpeaaccidentalmentelablsagrase cerrara
Lruscamentecontrae! marcodel homo y puede lesionarsus
dedos.
Psra $8c8r:
1.Cuandoest6frfa,abra Ia puerta dot hoino hastala posici6n tope
de asara la parrllla [abiertaaproximadamente10cm [cuatro
pulgadas]].
2. Sujetela puerta de cada lado. No use la
manljade la puertapara levantaria.
3. Levanteunlformementehasta que Ia pue_a
se salgade los brazosde articulaciOn.
Para volver a colocar:
1.Sujetela puerta de cada lado.
2. Alinee las ranurasde la puerta con los btazosdearticulaciOnde la
estufa.
3. Deslicela puerta hacia los brazosde articulaci6nhasta queest6
completamenteasentadaen Ias bisagras. Empujehaciaabajo las
esquinassuperloresde la puerta paraasentarlacompletamenteen
las bisagras. La pue_a no debequedartorcida.
Nora: Lapueita del horno en unaestufa nuevapuedesentlrse
"esponjosa"cuandose cierra. Estoes normaly disminuir_ con el
USO.
Ventana del Homo
Para proteger la ventana de la puemla del homo:
1. No use agentesde Iimpiezaabrasivostalescomoesponjasde
restregarde lana de aceroo Iimpiadoresenpolvo pues ellos
puedenrayarel vldrio.
2. No golpeeel vldrio con ollas,sartenes,muebles,juguetes u otros
objetos.
3. No cierre Ia puertadel horno hasta que las parrillasdel homo no
est6nen su lugar.
A! golpear, rayar,hacervibrar o esforzarel vidrio puededebi!itar su
estructuracausandoun mayor rlesgode rotura en una fecha
posterior.
Verifique Siel SOP0r_eantivueicoest,1asegurandQal piso [!no de
los tomlllos niveladorestraseros. Estesoporteevita quela estufa
Sevuelque accldentalmente_
La estufadebeser niveiadacuandose instala. Si [a 1_1
estufa no est_ nivelada,gire los tornillos niveladores I1[ I ._
ubicadosen cada esquinade la estufa hastaque I _::
quedenivelada: S_> ,:
_,_ .sos s'" f
A_POS/ TIVO
_\ ANTIVUELCO
Luz del Homo
(El estilo varia seg0n el modelo)
_eSCanecte !a energia el6ctrica hacJa h estda antes de
reernp+azard foco.
° AsegOrese de que Jacubierta delfoco y elfoco estOnfr[os
antesde tocarlos.
Para reemplazar el foco del homo:
1. Cuandoe! hornoest_fr[o,sujete Iatapa de Ia bombilla ensu
lugar,luego deslice el ret6n de alambrefuera de Iacubierta.
Nora: La cubiertade la bombillase caer_si no es sujeta en su
lugarcuando est_sacando et ret6n de alambte.
2. SaqueIa cubierta deIfoco y el foco.
3. Coloqueun foco de 40watts CL_fE_T:A-DEL
FOCO
para electrodomesticos.
4. Vuelvaa colocarla cubierta
de la bombilIay asegOreta
con el ret6n dealambre.
5. Vuelvaa enchufarla estufa.
Vuelvaa colocarla hora correcta. RETENDEALAMBRE
O
1. Useun tomaoliassecoy con mucho cuidadodestornille la
cubierta del foco y el foco.
2. Reemplacecon un foco para hornode electrodom6sticode 40
wats. Se recomiendanlosfocos con basede lat6n para evitar
fusion del foco ene! casquilIo.
3. Reemplacela cubierta del focoy vuelva a conectarla corrJente
eJ6ctricaal homo.
4. Vueiva a programar el reloj.
78
Retiro de maEstufa a Gas
Los conectoresde laestufa a gas usadospara conectar este
artefactoat suministrode gas no est_n dise_adospara movimiento
continue+Unavez instalados,NO muevarepetidamenteeste
artefactoa gas parasu Iimpiezao para ubicarto en otto Iugar+Si
esteartefactotlene que set movidoy/o retiradopara reparaci6n+
siga eI procedimientodescritoen Ias instruccionesde instalaci6n.
Parainformaci6n+p6ngaseen contactocon el Servicioa los Clientes
AmanaIlamandoal 1-800-843-0304EE+UU+o al 1-866-587-2002
Canadd.
Paraevitarque la estufase vuelque accidentalmente,se debe
aseguraral piso colocandoel tornillo niveladortraserodentro del
soporteantivuelco.
Gaveta de Almacenamiento
No guarde p[oductos de PaPe+o de ptdstico,al+mentosni
materiaiesinflarnabiesenestagaveta.Lagaveta PUede
calentarsedemasiadopara estosarticu!os cuandose est,1usando
el homo.
Cone×i6n El6etriea
LoselectrodomSsticos que requieren energia
el_ctrica est_n equipados con un enchufe de
ires cmavijascon cone×i6n a tierra, e! cual
debeset enchufado directamenteen un
tomacorrienteeiectricode tres agujeros,para
120voltiosdebidamenteconectadoa tierra+
Siempmdesenchubel e/ectrodom_sticoantesde efectuar
reparacione&
Elenchufede tres clavijascon conexidna tierra ofreceprotecciOn
contra peligrosde chequeselSctdcos+NO CORTI:NI FUMINF LA
TERCERACLAVUA DE CONEXIONA TtERRADEL ENCHUFE
DEL CORDON ELECTRICO.
Sisolamentesedispone de un tomacorrientesin conexiOna tierra,
de dos agujerosu otto tipo de tomacorrienteel6ctrico,el
propietariodemeiectrodom6stico es personammente
responsable de reemplazar el tomacorriente con un
tomacorriente el_ctrico de ires agujeros debidamente puesto
a tierra.
Lagavetade almacenamientopuede ser retirada para que usted
puedaIimpiardebajode la estufa.
Para sacar :
1. Vade la gavetay deslicelahaciaafuera hastalaprimera posiciOn
tope.
2. Levantelaparte delanterade la gaveta.
3. Tirelahasta lasegundaposicidn de tope.
4. SujeteIos ladesy levanteIa gavetapara retirarla.
Para volver a colocar:
1. Inserte Ios extremesde las correderasde la gavetaen los rieles
de la estufa.
2. Levantelaparte delanterade la gavetay suavementeempOjelaa
la primera posiciOndetope.
3. Levantelagavetanuevamentey empt_jelahasta que quede
completamentecerrada.
79
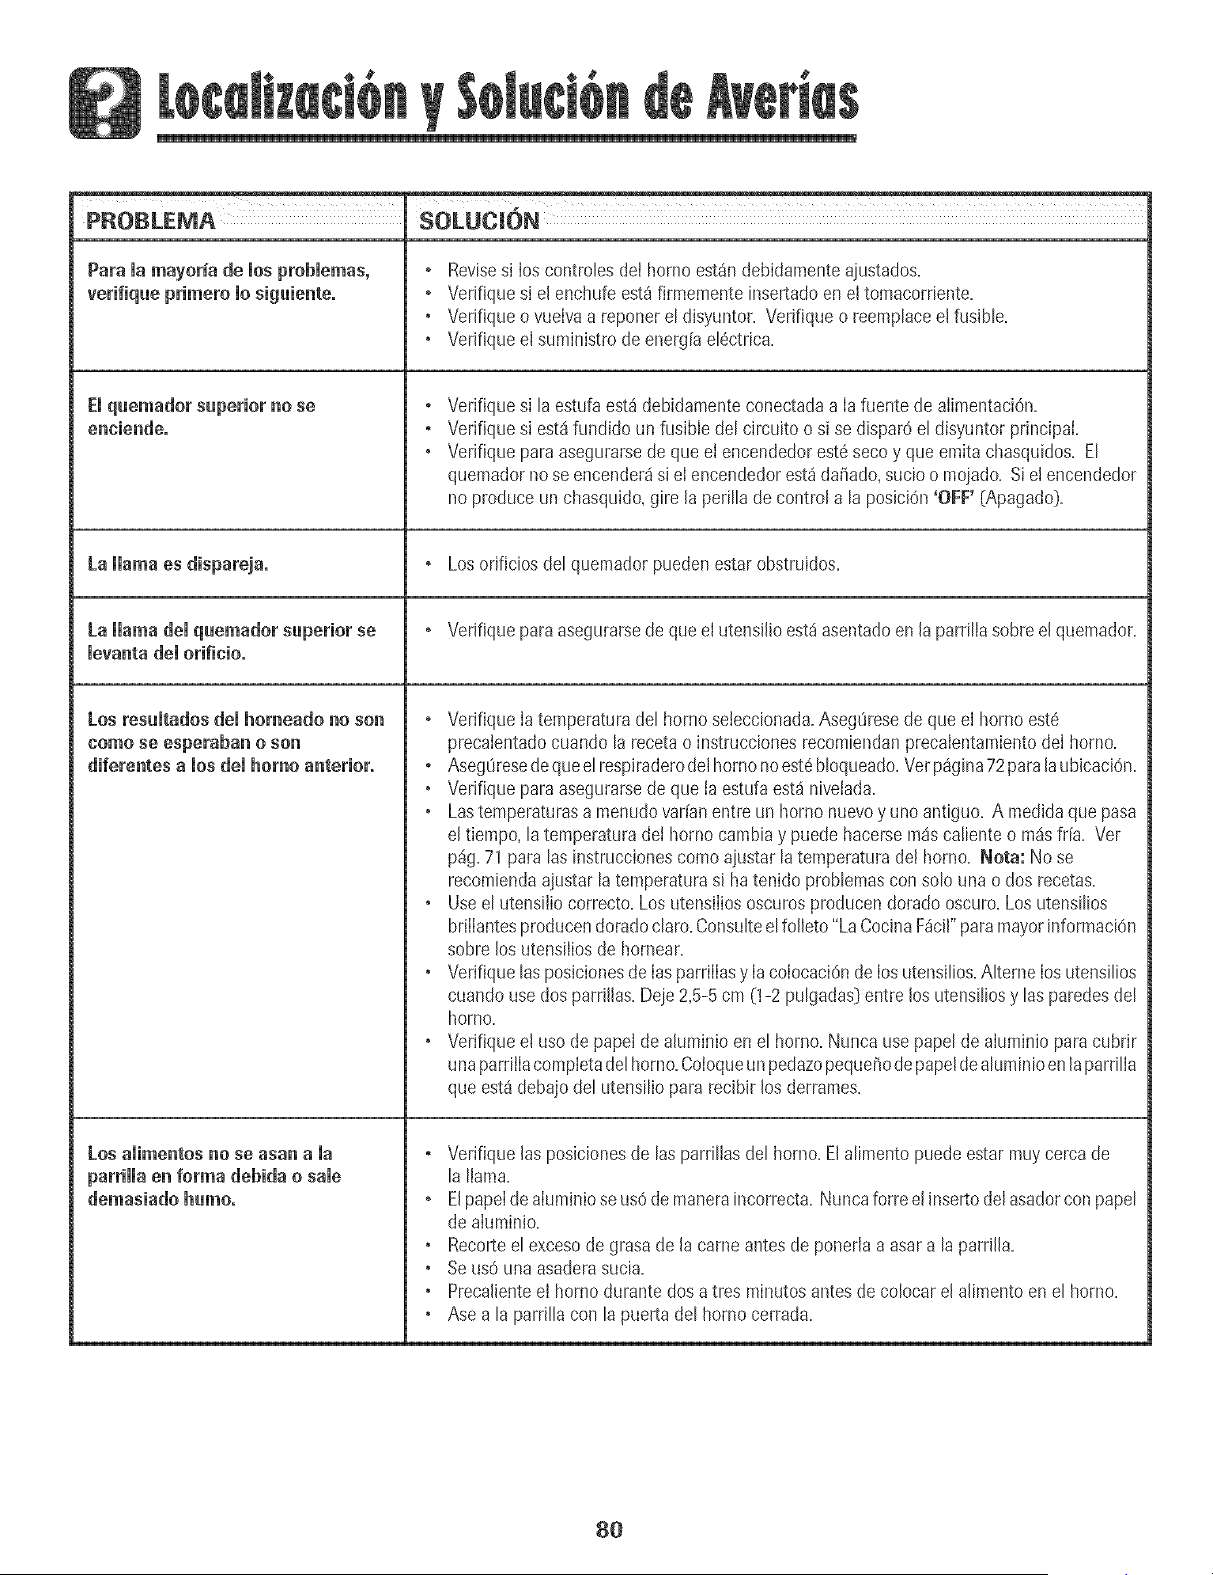
PROBLEMA SOLUCION
Para la mayor_ade los preblemas, , Revisesi Ios controbs deI hornoest4ndebidamenteajustados.
verifique primero io sigaiente. ° VerJfiquesi el enchufe est4 firmemente insertadoen eltomacorrbnte.
• VerJfiqueovueIvaa reponerel disyuntor. VerJfiqueo reempBceeJfusible=
• VerJfiqueeJsuministro de energ[ael@trba.
EJquemador superior no se , Verifique si la estufaest_ debidamenteconectadaa Ia fuente de alimentaciOn.
eneiendeo , Verifique si est4 fundido un fusibledel circuito o si se dispar6el disyuntor principal.
• Verifique para asegurarsede queel encendedorest6 seco y que emita chasquidos. El
quemadorno seencender4si el encendedorest4da_ado,sucioo mojado. Sie! encendedor
no produceun chasquido,gire la perillade control a la posici6n'OFF' (Apagado).
La llama es dispareja. ° Losorificios del quemadorpueden estar obstruidos.
La llama del quemador saperior se , VerJfiqueparaasegurarsede queel utensil[oest4asentadoen [aparrilla sobre el quemador.
levanta del orifieio,
Los resultados del homeado no son , Verifique Iatemperaturadel homo seleccionada.Aseg0resede que el horno est6
come se esperaban o son precalentadocuando la recetao instruccionesrecombndan precalentamientodeI horno.
diferentes a los del homo anterior. , Aseg0resedequeelrespiraderodel homo noest6bloqueado.Vet pagina72para laubbacidn.
• Verifique para asegularsede que ta estufaest4nivetada.
• Lastemperaturasa menudovar[anentre un horno nuevoy uno antiguo. A medidaque pasa
eJtiempo, latemperaturadei horno cambiay puede hacersem4s caliente o rn4sfr[a. Ver
p4g.71 paralas instruccionescomo ajustarlatemperaturade! homo. Nora: No se
recombnda ajustar la ternperaturasi ha tenido problemascon solo una o dos recetas.
• Useel utensiliocorrecto.Los utensiIiososcurosproducendorado oscuro.Los utensilios
briIIantesproducendoradoclaro.Consulteel foJbto "LaCocinaF_cil"paramayorinformaciOn
sobre Josutensiliosde hornear.
• Verifique lasposbionesdeIasparriIIasy IacoIocaciOndeIosutensilios.AIterneIosutensilios
cuandouse dosparrJlJas.Deie2,5-5cm (1-2 pulgadas}entre los utensiliosy las paredesdel
homo.
• Verifique el uso de papeI de ahminio en el homo. Nuncause papel de aluminio paracubrir
unaparriJlacompIetadel homo.Coloqueun pedazopequeBodepapeldealuminioenlaparrilIa
queest4debajodel utensilio para recibir los derrames.
Los alimentos no se asan a la , Verifique [asposicionesde las parrillasdel homo. Elalimento puede estar muy cerca de
parrillaen forma debida o sale la llama.
demasiado humo. , ElpapeIde aluminiose us0demaneraincorrecta. Nuncaforreel hlsertodeJasadorcon papel
deahminio.
• Recorteel excesode grasade la came antes de ponerlaa asar a la parrJlla.
• Seus0 una asaderasucia.
• Precalienteel hornodurante dos atres minutosantesde colocar el alimentoenel horno.
• Ase a la parrJllacon la puerta del hornocerrada.
80
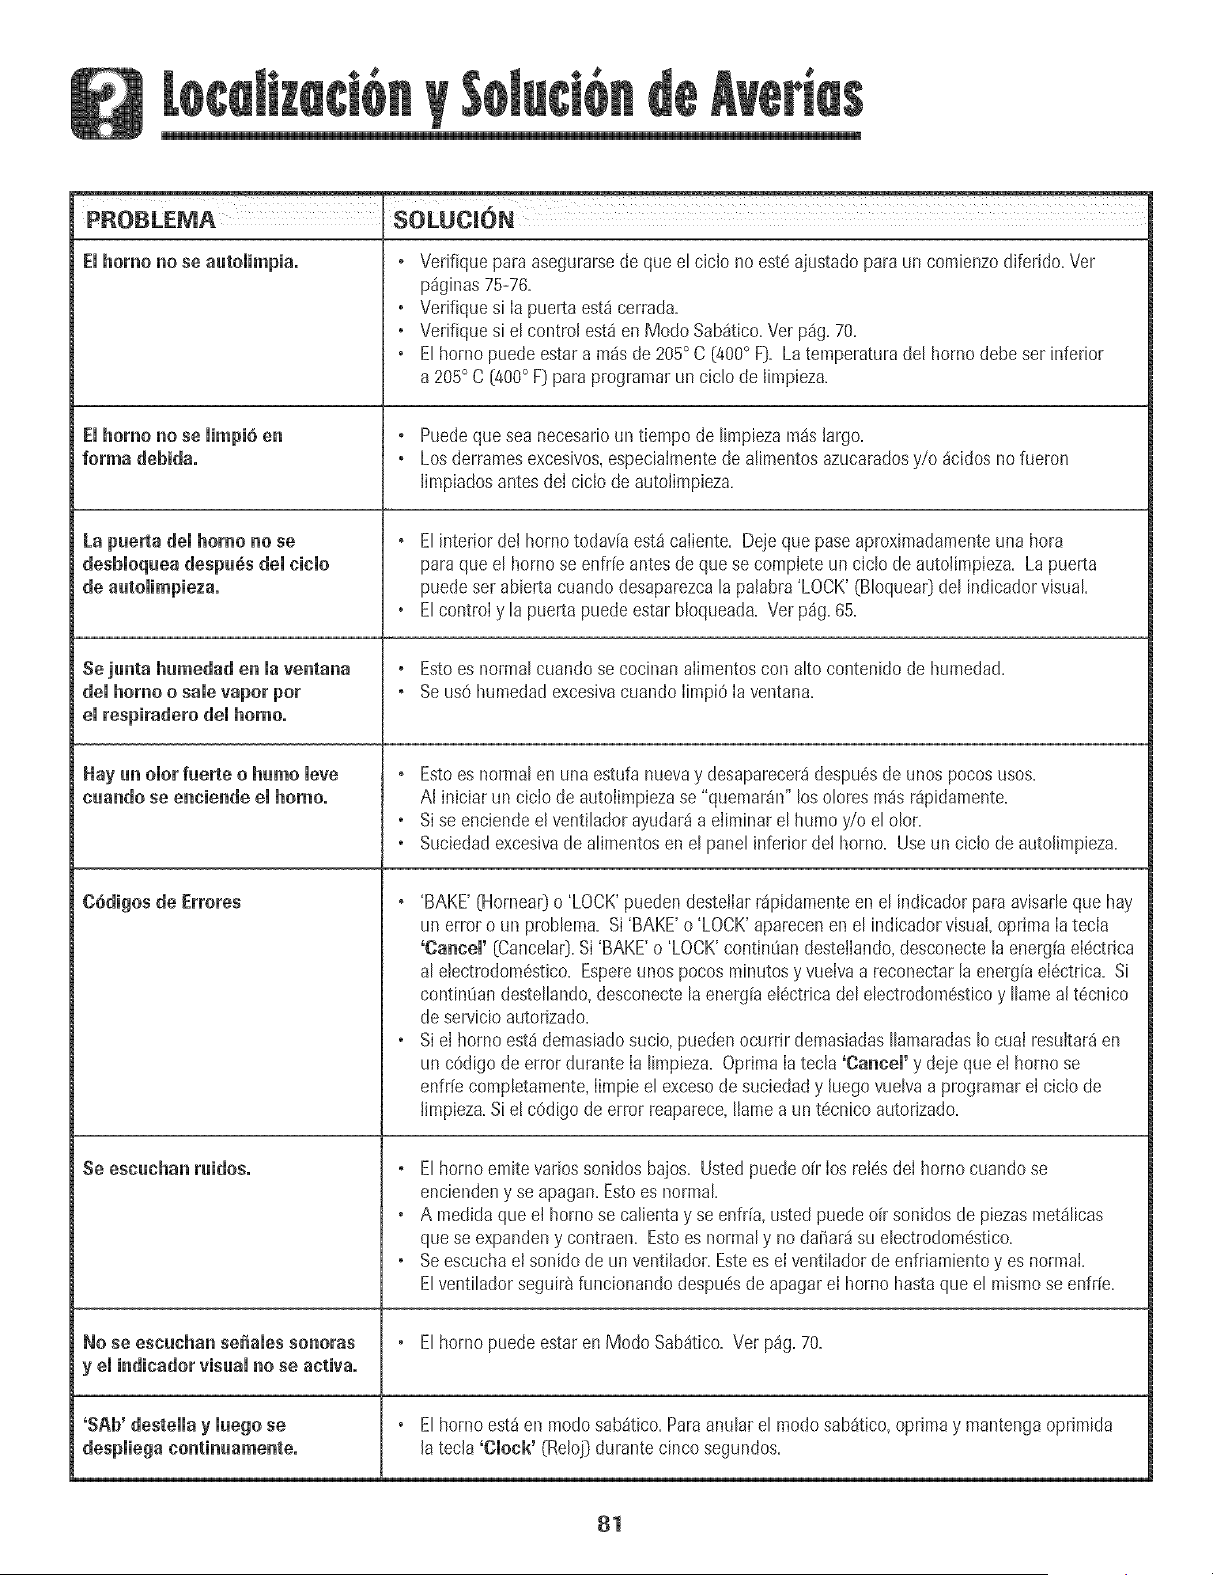
PROBLEMA SOLUC_6N
Emhomo no se automimpiao o Verifique para asegurarsede que el ciclo no est6 ajustadopara un comienzodiferido. Ver
p%inas 75-76.
* Vedfique si Ia puertaest_cerrada.
* Verifique si el control esta en Mode Sabaitico.Ver p%. 70.
o Elborne puede estar a m_sde 205° C [400° F[}.La temperaturadel homo debeser inferior
a 205° C (400° F_paraprogramarun ciclo de limpJeza.
El homo no se limp]6 en ° Puedeque sea necesarioun tiempo de limpiezam_slargo.
forma debida. * Los derramesexcesivos,especiaimentede a!imentosazucaradosy/o _cidosno fueron
JimpiadosantesdeI cicJode autoJimpieza.
La paerta del homo no se , Elinterior de! homo todav[aest_caliente. Dejeque paseaproximadamenteuna hera
desbloqaea despa@sdel eielo para que el homo se enfr[e antes de que secomplete un cido de autolimpieza. La puerta
puedeset abiertacuando desaparezcala palabra'LOCK' (BIoquea0del indicadorvisual
, Elcontrol y la puerta puede estar bloqueada. Ver p%. 65.
Sejanta hamedad en la ventana • Estoes normal cuandose cocinan alimentoscon alto contenido de humedad.
del homo o sale vapor per , Seus6 humedadexcesivacuandoIimpi6 Iaventana.
emrespiradero demborne,
Flay an olor faerie o hamo leve , Estoes normal en unaestufa nuevay desaparecer_despu6sde unos pocosuses.
caando se eneiende el homo, AI iniciar un ciclode autolimpiezase "quemar_n" los oloresm4s r4pidamente.
o Sise enciendeel ventihdor ayudar_a eiiminar el humo y/o el olor.
o Suciedadexcesivade alimentosen el panelinferior del homo. Use un ciclo de autofimpieza.
, 'BAKE'(Hornea0o 'LOCK'pueden destetlarr_pidamenteen el indicador paraavisarleque hay
un enor o un problema. Si 'BAKE'o 'LOCK'aparecenen el indicadorvisual,oprima Iatecla
'Cancel' [Cancela0.Si 'BAKE'o 'LOCK'continOandestetlando,desconectela energ[aeI6ctrica
al etectrodom6stico.Espereunos pocosminutesy vuelva a reconectarla energ[aeI6ctrica. Si
continOandestellando,desconectelaenerg[ael6ctricadel electrodom6sticoy Ilameal t6cnico
de servicioautorizado.
o Siel homo est_ demasiadosucio,puedenocurrir demasiadasIlamaradasIo cuaIresultar_en
un cOdigode errordurante Ia limpieza. OprimaIa tecla 'Cancel' y dejeque e! homo se
enfr[ecompletamente,Iimpieel excesode suciedad y hego vuelvaa programarel ciclo de
timpieza.Siel cOdigodeerror reaparece,Ilame a un t_cnico autorizado.
Se eseaehan fairies. , El horno emite varies son]dosbajos. Ustedpuedeo[r los ret6sdeI homo cuando se
enciendeny se apagan.Estoes normal
o A medidaque el hornose calientay se enfr[a,usted puede oir sonidosde piezasmet_licas
quese expandeny contraen. Estoes normaly no da_ar_su electrodomestico.
o Seescuchael sonido de un ventilador.Estees el ventilador de enfriamientoyes normal
Elventiladorseguirb funcionandodespu6sde apagar el borne hastaque el mismose enfr[e.
Noseeseuehansesamessonoras
y el indieadorvisaal no se activao
'SAb' destella y laego se
• Elhomo puedeestarenMode SabOt]co.Ver p%. 70.
o Elhomo estd en modesab_tico.Paraanular el modesab4tico,optima y mantengaoprimida
[a tecla 'Clock' (Reloj)durante cinco segundos.
81

82
Garantia de la Estufa a Gas
Garantia Cempleta de Un A_e _ Piezas
y Mane de Obra
Duranteun (1) a_o desdelafechaodginalde
corapraal pot menor se repararao reernplazara
gratu_tamentecualqoterplezaque falie durantesu
uso normalen el hogar.
Note Io sigoiente: Estasgarant[ascompfetasse
ap[ican@icamente cuando el elecrrouomestlcose
encoentraen los EstadosUn[dosoCanada.Los
elec[rodom6sticosquese encoentrenen o[ros
paisesestar_ncubiertos omcamentepot las
garant[aslimitadas,inciuyendo la garant[a ![mltada
paralasplezasqoe fallen oaran[ee_prmlera[_o.
Residentes Canadienses
Lasgarant[asanteriorescubrenso_ameroeaquellos
electrodomesticosinsta[adosen CaNad_que hayan
sido certif[cadoso aprouadospcr lasagenciasde
pruebascorrespond_entesparacumpi[mientocon la
Norma'Jac[ona[de Canad_a menosquee[
electmdom_sticohayas[do[raloo a Canadadesde
los EEUU.debidoa uo camblode residencia.
Losgarant/asespedficase_oresada,,amenormome
_onlasUMCAS galantiasprows_aspot d fabrican[e.
Es[asgaranL/osle otoldanderechoslegales
espodficosy ustedpuedetenorodemfiso[rus
detechosque vaffandeunestadoaotto.
Lo que No Cubren Estas Garantias:
1= Sitoacionesy daSosres_Jltantesdecoalqoierade lassigoienteseoentoalidades:
a= hstalaci6n,entregao mantenimientoinapropiados=
b=Cuaiqoierreparaci6n,modificaciOn,alteraci6no aiostenoautorizadoporel
fabncanteo por un centrode servicioautodzado=
c= Mal use,abuso,accidentes,use irrazonableo hechosfotuitos=
d=Corrienteei6ctdca,voita]eo suministroincorrecto=
e= Programacidnincorrectade cualquierade loscontroIes=
2= Lasgarant[asquedanhulassi los nOmerosde serieoriginaleshartsido retirados,
alteradoso no sonf_ciimentelegibles=
3. Focos=
8= Prodoctoscompradosparaoso comercialo industrial
5= ElcostodeJservicioo Ilamadade serviciopara:
a=Corregirerroresdeinstalaci6n=
b=hstroir al osoariosobreel usocorrectodelartefacto=
c= TransportedelartefactoaJestabJecimJentodeseroicioy el retornoal cJiente=
6= Losda_osconsecoenteso incidentaJessofridospot coalquierpersonacomo
resoltadodecoalquierincomplimientode estasgarant[as=Enalgunosestadosno se
permJteIa exclosiOno limitaci6nde losdaiios consecuenteso incidentales,por Jo
tanto la exclosJ6nanteriorpoe@qoe nose apliqoeen so case=
Si Necesita Servicio
Veapr[merolasecci6nde Iocalizaci6ny soiuciOnde averiasen lagu[ade osoy
coidadoo Jlamea MaytagServices sM,Sewicioa JosClientesAmana liamandoal
1-800-843-0304EEUU=o aJ1-866-587-2002Canad&
Para Obtener Sewicio Bajo Garantia
Paraobicaruna compa_iade servicioaotorizadoen so iocaiidad,pOngaseen contacto
con el distribuidordonde adqoiriOso electrodom6sticoo Ilamea MaytagServices sM,
Servicioaios ClientesAmana=Sino recibeserviciosatisfactor[obajolagarant[a,por
favorIlameo escribaa:
Ma}¢ag ServicessM
Attn: CAIR"_Center
RO=Box 2370, Cieveiand, TN 37320-2370
EE.UU. 1 =800=843=0304 y Canad_ 1-866-587-2002
Nora: Cuandose ponga en contactocon Ma}¢agServices sM,Servic[oa los
ClientesAmanaacercadeun problema,pot favorincluyala siguienteinformaci6n:
a=Su nombre,direccidny @merede teldono=
b=Los@merosde modeloy deseriede so eiectrodom6stico;
c=Nombrey direcciOndeIdistriboidory lafechadecompra=
d=UnadescripciOnclaradel problemaqoe est_exper[mentando=
e=Pruebade compra=
SM
LasguiasdeI osuarJo,manuaJesde servicioe informaci6nsobreJaspiezaspoedensolicitarsea MaytagServices' , Servicioa JosCiientesAmana.
Form No. B/06/05 Pair No. 8113P521 60 ®b2005 Maytag Appliances Sales Co. Litho U.S.A.