Loading ...
Loading ...
Loading ...
13
WINDOW KIT ASSEMBLY
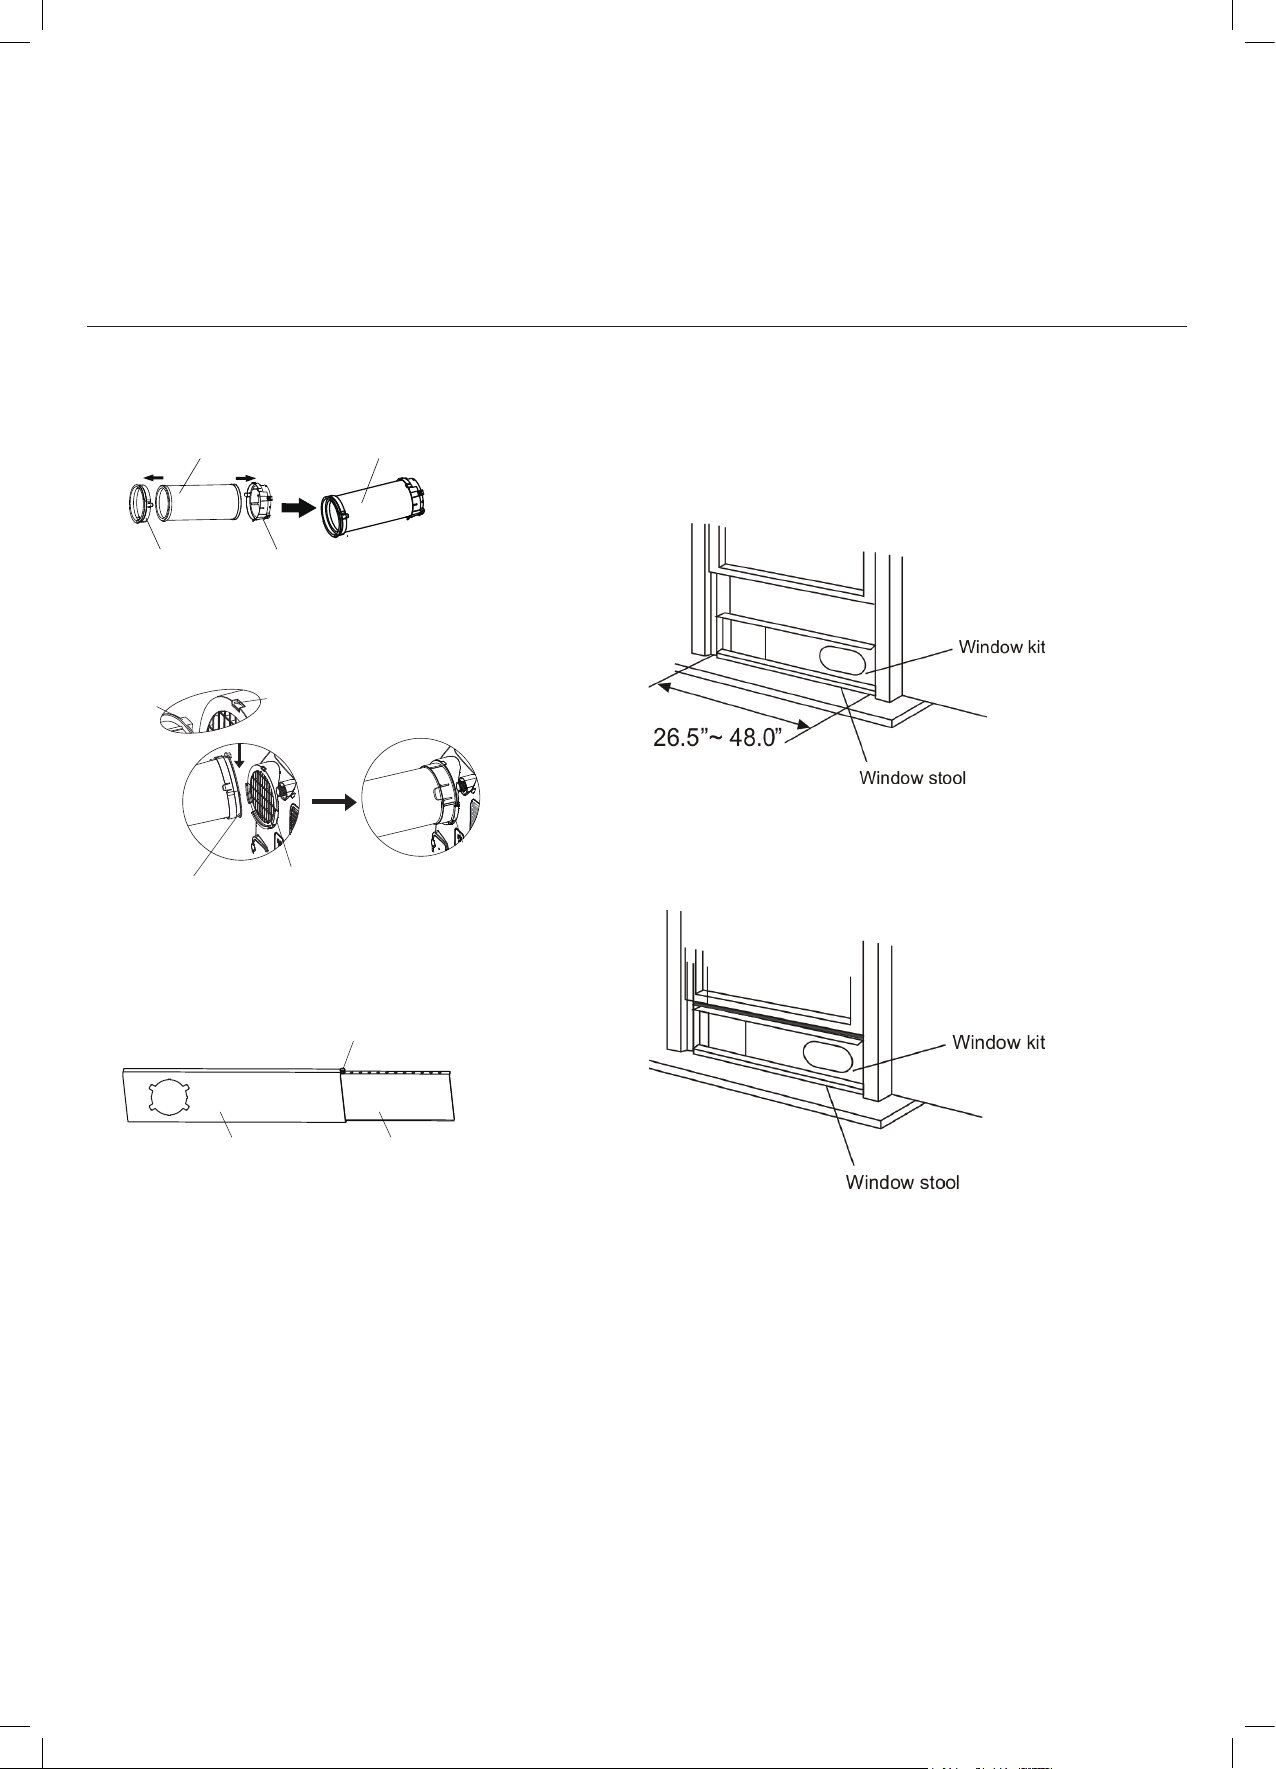
1. Press exhaust hose into window slider adaptor.
2. Install exhaust hose assembly to unit.
3. Adjust window slider to required size according to
your window.
WINDOW KIT INSTALLATION
Attach the window kit to the window stool. Adjust the
length of the window slider kit according to the width of
the window.
Open the window and place the window slider kit on the
window stool.
Close the window securely against the window kit.
Vertically-sliding windows (pictured) and horizontally-
sliding windows will function similarly.
Page 14
Installation
Instructions
Window Installation Kit
Or
Unit adaptor Window slider
adaptor
Exhaust hose
Exhaust hose
assembly
Hook
Hole Seat
Lower groove
adaptor
Make sure the adaptor
is inserted into the lower
groove of the air outlet.
Step Two: Install the Exhaust hose assembly to
the unit
Insert unit adaptor of the Exhaust hose assembly
into the lower groove of the air outlet of the unit
while the hook of the adaptor is aligned with the
hole seat of the air outlet and slide down the
Exhaust hose assembly along the arrow direction
for installation.
Type window installation Type wall installation
Type window installation Type wall installation
Exhaust hose assembly
Unit adaptor
Wall exhaust adaptor A
Exhaust hose
Press the exhaust hose(or extended exhaust hose)
into the window slider adaptor(or wall exhaust
adaptor) and unit adaptor, clamp automatically by
elastic buckles of the adaptors.
Step One: Preparing the Exhaust Hose assembly
Exhaust hose
Extended Exhaust hose
Exhaust hose assembly
Exhaust hose
Extended Exhaust hose
Exhaust hose assembly
Other Regions
Name of Accessories
Qty.
Shape
Name of Accessories
Qty.
Shape
1 pc(*)Window Slider A Bolt
1 pc 1 set(*)Unit Adaptor Security Bracket and 2 Screws
1 pc 1 pcExhaust Hose Drain Hose
1 pc(*) 1 pcWindow Slider Adaptor Power Cord Buckle
ON /OF F
TEM P
SH OR T
CU T
TIME R
O N
TIME R
O FF
MO D E
FAN
SLE EP
SW ING
LED
1 set(*)1 pc(*)Window Slider B
Remote Controller and Battery
(only for remote control models)
1 pc(*)
Wall Exhaust Adaptor A
(only for wall installation models)
2 pc(*)Foam Seal A (Adhesive)
1 pc(*)
Wall Exhaust Adaptor B(with cap)
(only for wall installation models)
2 pc(*)Foam Seal B (Adhesive)
4 set(*)
Screw and anchor
(only for wall installation models)
1 pc(*)Foam Seal C (Non-adhesive)
1 pc(*)
Drain Hose Adaptor
(only for heat pump mode)
1 pc(*)
1 pc(*)
1 pc(*)
Exhuast Hose Adaptor
Extended Exhuast Hose
Page 15
Installation
NOTE: Once the Exhaust Hose assembly and Adjustable Window Slider are prepared, choose from one of
the following two installation methods.
Installation
Instructions
Step Three: Preparing the Adjustable Window
Slider
1. Depending on the size of your window, adjust
the size of the window slider.
2. If the length of the window requires two or three
window sliders, use the bolt(s) to fasten the
window sliders once they are adjusted to the
proper length.
or
Window slider A
MODEL A MODEL B
Window slider B
Bolt
Window slider A Window slider B
Bolt
MODEL A
MODEL B
Window slider A Window slider B
Window slider C
Bolts
Window slider A Window slider B
Window slider C
Bolts
Or
Or
Or
Foam seal B
(Adhesive type-shorter)
Foam seal A
(Adhesive type)
Window slider A
Window slider B
(if required)
Foam seal C
(Non-adhesive type)
Type 1: Hung Window or Sliding Window Installation(For some models)
1. Cut the adhesive foam seal A and B strips to the proper lengths, and attach them to the window sash
and frame as shown.
2. Insert the window slider assembly into the window opening.
Foam seal B
(Adhesive type-shorter)
Foam seal A
(Adhesive type)
Window slider A
Window slider B
(if required)
Foam seal C
(Non-adhesive type)
Or
2 Screws
Security Bracket
3. Cut the non-adhesive foam seal C strip to match the width(or height) of the window. Insert the seal
between the glass and the window frame to prevent air and insects from getting into the room.
4. If desired, install the security bracket with 2 screws as shown.
2 Screws
Security
Bracket
Loading ...
Loading ...
Loading ...