Loading ...
Loading ...
easy
1
•
2
•
3
TOOL-FREE
STEP 1
STEP 2
Watch an
Installation Video
YouTube.com/user/RaindripInc
Note: Hand
Tighten Only!
Flower, Shrub
& Tree Kit
Kit No. SDFSTH1P & SDFSTXP
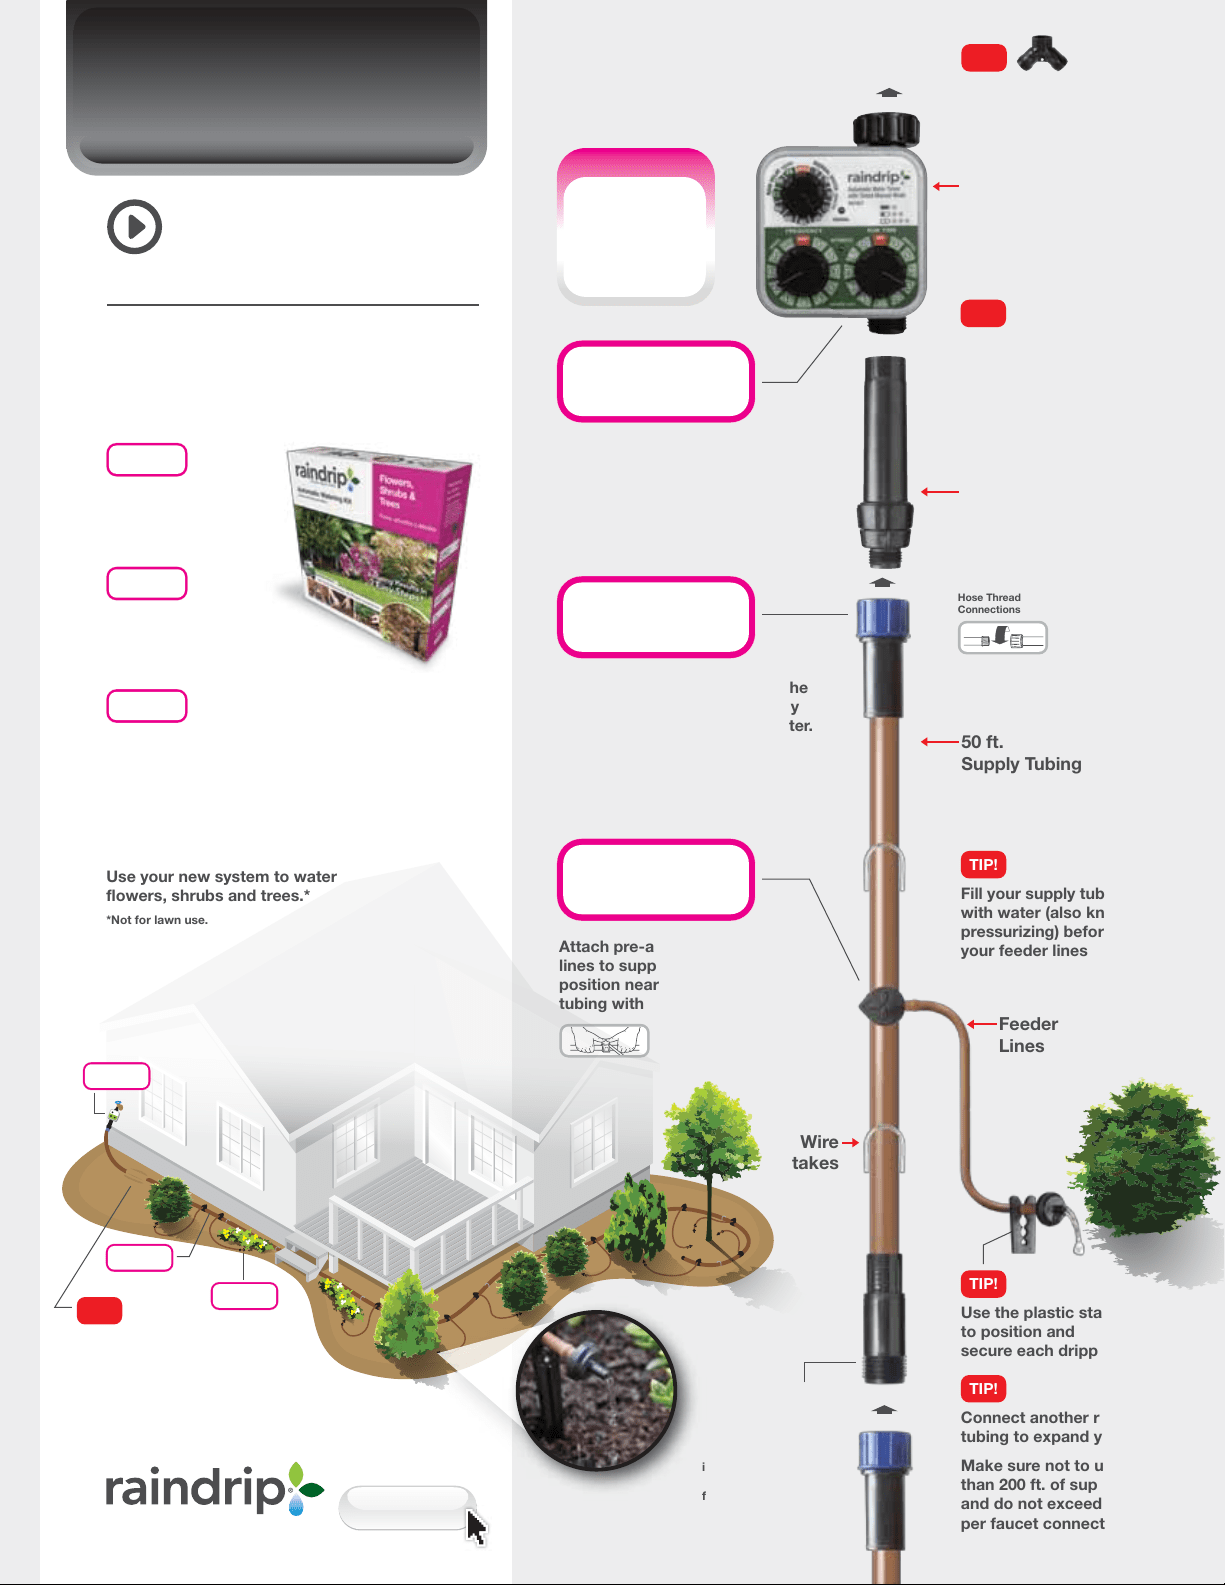
Connect the timer and
filter/pressure regulator
to your outdoor faucet.
Use the “Y” Connector
to convert your faucet
into two separate outlets
Universal Faucet Timer
(Included in Kit No. SDFSTH1P only)
Filter/Pressure
Regulator
50 ft.
Supply Tubing
Connect the supply tubing to the
filter/pressure regulator and lay
out in the area you want to water.
Outdoor
Faucet
TIP!
Additional Instructions and
videos for programming
your timer can be found on
raindrip.com
TIP!
Hose Thread
Connections
1 - Universal Tee
1 - Universal End Plug
1 - 50 ft. Pre-assembled Supply Tubing
5 - Wire Stakes
10 - Goof Plugs
STEP 2
1 - Universal Faucet Timer*
1 - Filter/Pressure Regulator
1 - “Y” Connector
* (2) AA Alkaline batteries not included
(Timer in Kit No. SDFSTH1P only)
STEP 1
10 - Support Stakes
10 - Pre-assembled 3 ft. Feeder
Lines, 2 GPH drippers
STEP 3
Get Started!
Installation is quick, easy and tool-free.
We’ve organized our parts by step. Grab bag
number one to get started.
STEP 3
Feeder
Lines
Wire
Stakes
Attach pre-assembled feeder
lines to supply tubing and
position near plants. Secure
tubing with wire stakes.
Use the plastic stake
to position and
secure each dripper
TIP!
Connect another roll of supply
tubing to expand your system
Make sure not to use more
than 200 ft. of supply tubing
and do not exceed 150 GPH
per faucet connection
TIP!
Fill your supply tubing
with water (also known as
pressurizing) before installing
your feeder lines
TIP!
Clamp-n-Pierce
™
Connection
Use your new system to water
flowers, shrubs and trees.*
*Not for lawn use.
The System
A Better Way to Water.
raindrip.com
Remove endcap to
connect another roll
of supply tubing.
After your system is
installed, remove the end
cap and turn on faucet to
flush out any dirt that may
be in the line. Replace
cap before beginning
normal watering.
STEP 1
STEP 2
STEP 3
Use mulch to cover
or camouflage the
supply tubing.
TIP!
Loading ...
Loading ...
Loading ...