Loading ...
Loading ...
Loading ...
9
cause your wine cellar to run longer than your old one.
You may also hear a pulsating or high-pitched sound from
the compressor or fans adjusting to optimize performance.
Rattling noises may come from the fl ow of refrigerant or items
stored inside the wine cellar.
As each cycle ends, you may hear a gurgling sound due to
the refrigerant fl owing in your wine cellar.
You may hear water running into the drain pan when the wine
cellar is defrosting.
You may hear clicking sounds when the wine cellar starts or
stops running.
Stocking the Wine Cellar
NOTE: For optimum wine storage, place white wines at the
top of the wine cellar, light red wines in the center and
champagne/larger diameter wine bottles at the bottom.
Racks 1-5: For storing up to eight 750 ml wine bottles
[diameter less than or equal to 3
1
/8” (80 mm)].
Rack 6: For storing up to five larger wine bottles
[diameter up to 3
3
/4” (95 mm)].
To stock the Wine Cellar - Racks 1 to 5:
NOTE: The wine rack can be stocked with the bottles facing
either direction, however, to optimize storage adjacent bottles
should be facing in opposite.
1. Start stocking the wine cellar with the bottom display
rack (5).
2. Starting on the left-hand side, place the first bottle on the
bottom of the rack with the neck of the bottle facing the
front of the wine cellar.
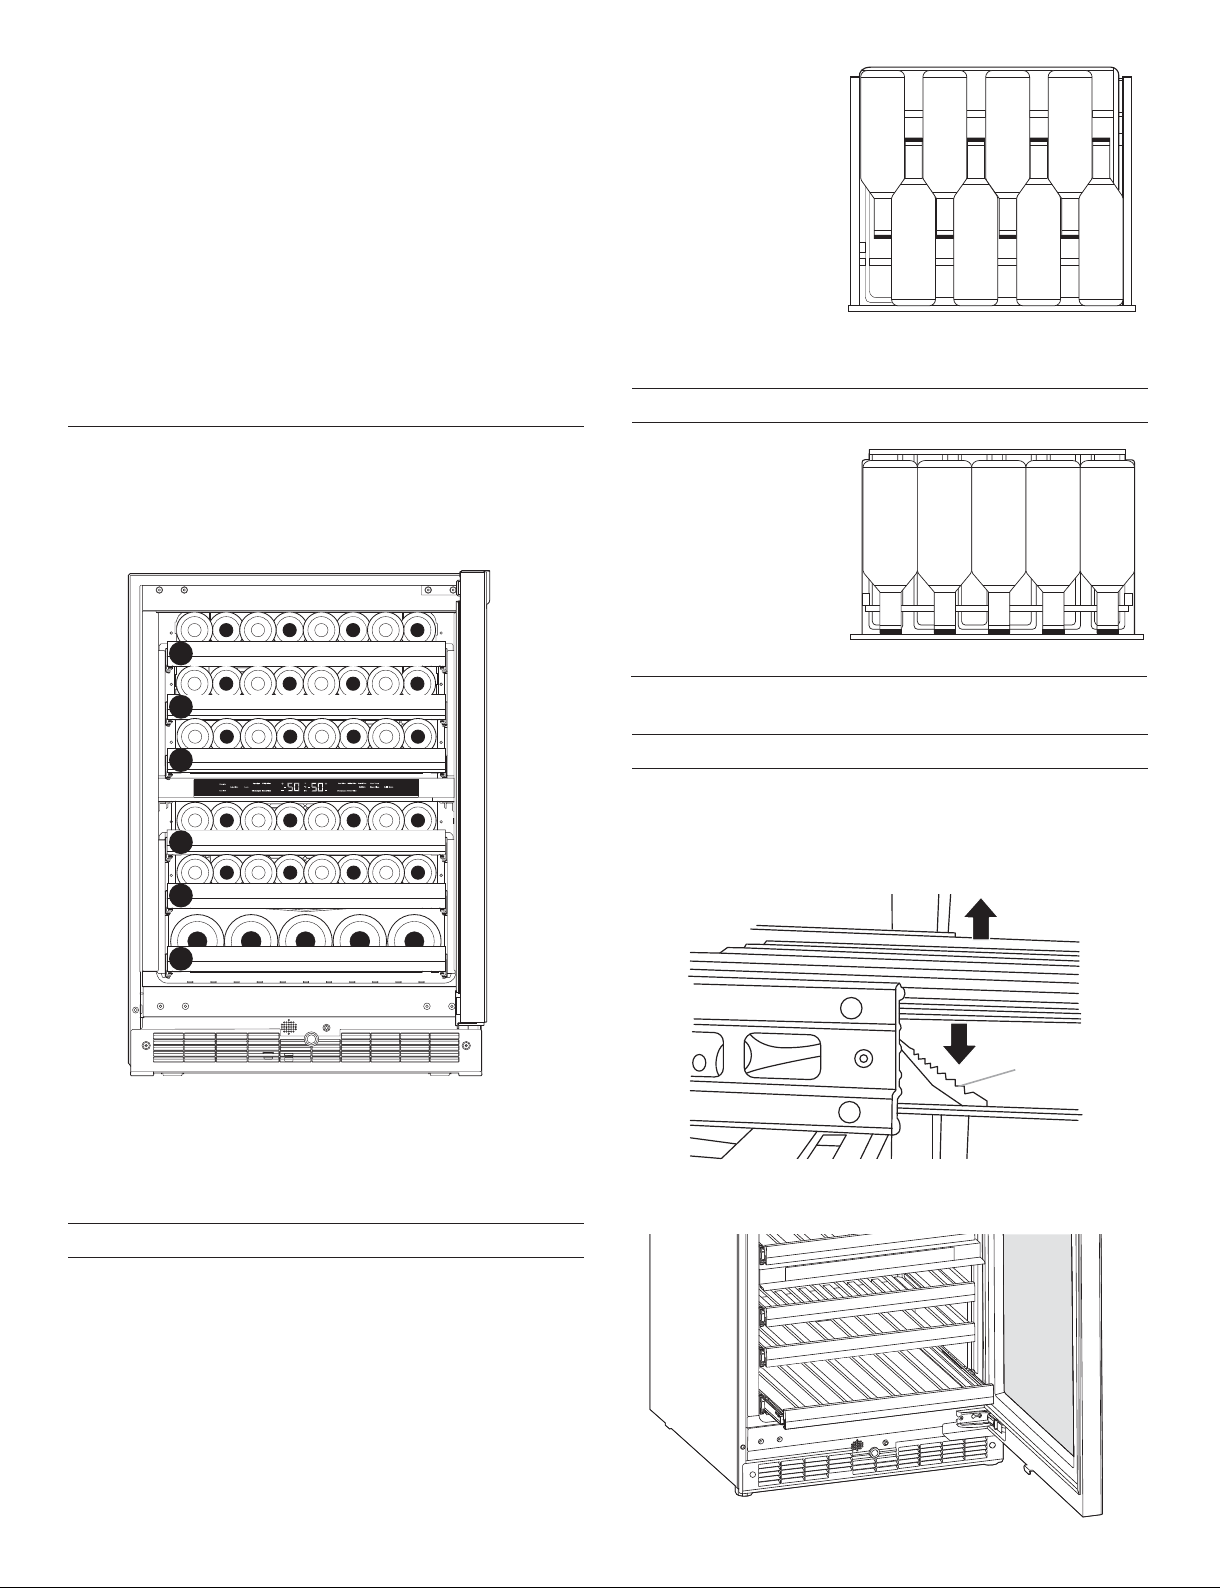
3. Place the next bottle
on its side with the
neck of the bottle
facing the back of the
wine cellar.
Alternate the direction
of the bottles, in this
manner, until the
display rack is full.
1
2
3
4
5
6
4. Slide the bottom rack
into place and pull the
next rack (4) forward.
5. Continue stocking each remaining rack as described in the
above steps.
To stock the Wine Cellar - Rack 6:
1. Starting from left-hand
side of the bottom
rack, place the first
bottle with the neck of
the bottle facing the
front of the wine cellar.
2. Continue to place the
remaining bottles
facing in the same
direction.
Wine Racks
Remove and replace the racks:
1. Pull the rack forward until it stops.
2. Press down on the left-hand lever while lifting up on the
right-hand lever to release the rack. Pull the rack forward
and lift it up and out of the rack supports.
A
A. Lever
3. Replace the rack by inserting the rack into the supports
and sliding it in until it locks.
Loading ...
Loading ...
Loading ...