
Loading ...
Loading ...
Loading ...
CONTENTS
12
ASSEMBLY INSTRUCTIONS
Fig. 6.1
Fig. 6.2
1
2
3
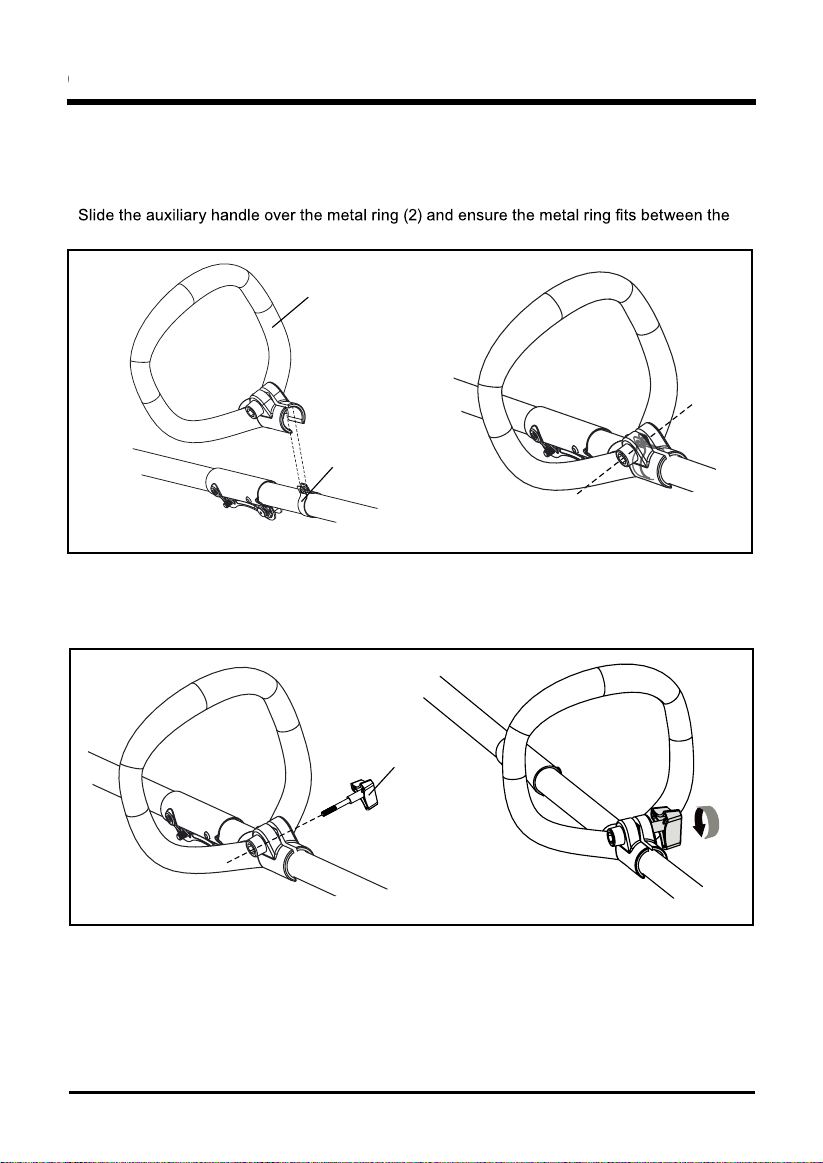
ATTACHING THE AUXILIARY HANDLE (See Figure 6)
• Press the auxiliary handle (1) onto the upper shaft so that the handle is angled toward the rear
handle that allows for comfortable operation.
•
slot on the auxiliary handle.
• Align the holes on the auxiliary handle with the holes on metal ring.
• Insert the handle knob (3) through the auxiliary handle.
• Tighten until there is no movement in the handle.
Loading ...
Loading ...
Loading ...