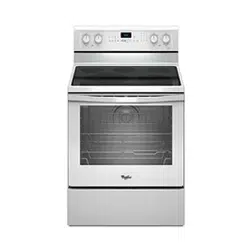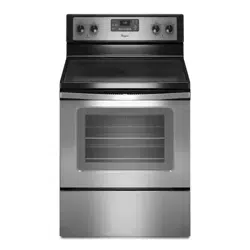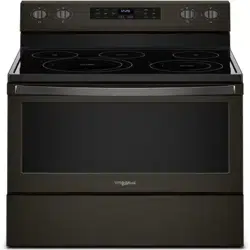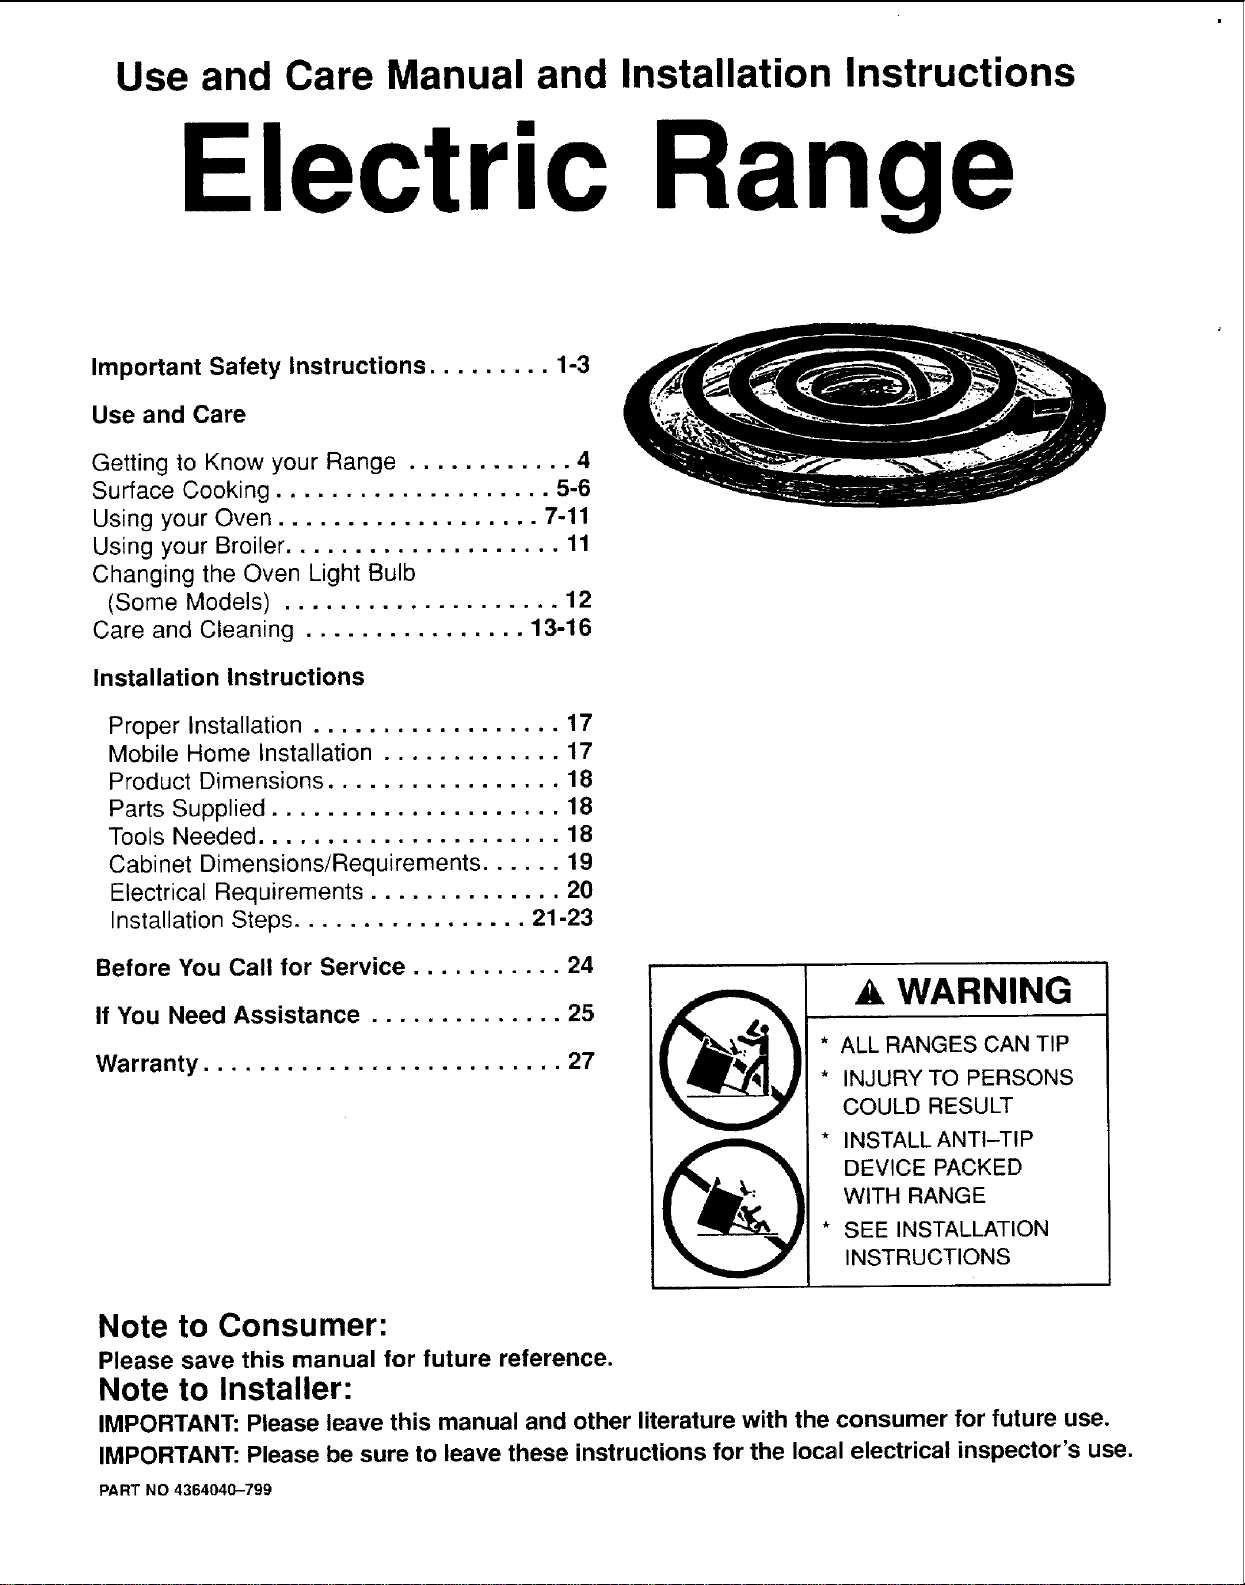
Use and Care Manual and Installation Instructions
Electric Rang
Important Safety Instructions ......... 1-3
Use and Care
Getting to Know your Range ............ 4
Surface Cooking .................... 5-6
Using your Oven ................... 7-11
Using your Broiler .................... 11
Changing the Oven Light Bulb
(Some Models) .................... 12
Care and Cleaning ................ 13-16
Installation Instructions
Proper Installation .................. 17
Mobile Home Installation ............. 17
Product Dimensions ................. 18
Parts Supplied ..................... 18
Tools Needed ...................... 18
Cabinet Dimensions/Requirements ...... 19
Electrical Requirements .............. 20
Installation Steps ................. 21-23
Before You Call for Service ........... 24
If You Need Assistance .............. 25
Warranty .......................... 27
WARNING
1 _ * ALL RANGES CAN TIP
• INJURYTO PERSONS
COULD RESULT
WITH RANGE
• SEE INSTALLATION
INSTRUCTIONS
Note to Consumer:
Please save this manual for future reference.
Note to Installer:
IMPORTANT: Please leave this manual and other literature with the consumer for future use.
IMPORTANT: Please be sure to leave these instructions for the local electrical inspector's use.
PART NO 4364040-799
IMPORTANT SAFETY INSTRUCTIONS
READ AND SAVE THESE INSTRUCTIONS
Electric ranges have been thoroughly tested for safe and efficientoperation. However, as with any appliance, there
are specific installationand safety precautions which must be followed to ensure safe and satisfactory operation.
Your safety and the safety of others is very important.
We have provided many important safety messages in this manual and on your
appliance. Always read and obey all safety messages.
This is the safety alert symbol.
This symbol alerts you to hazards that can kill or hurt you and others.
All safety messages will be preceded by the safety alert symbol and
the word "DANGER" or "WARNING". These words mean:
You will be killed or seriously injured if
you don't follow instructions.
You can be killed or seriously injured if
you don't follow instructions.
All safety messages will identify the hazard, tell you how to reduce the chance of
Injury, and tell you what can happen if the instructions are not followed.
General
To reduce the risk of fire, electrical shock, injury
to persons, or damage when using the range, fol-
low basic precautions, Including the following:
• Read all instructions before using the
range.
• Install or locate the range only in
accordance with the provided Installation
Instructions. The range must be installed
by a qualified installer. The range must be
properly connected to electrical supply
and grounded.
• WARNING: To reduce the risk of tipping
the appliance, the appliance must be
secured by a properly installed anti-tip
bracket. To check if the bracket is
installed properly, see "The anti-tip
bracket" on page 23.
• CAUTION: Do not store things children
might want above the range. Children
could be burned or injured while climbing
on it.
• Do not leave children alone or unattended
in area where the range is in use. They
should never be allowed to sit or stand on
any part of the range. They could be
burned or injured.
• Do not operate the range if it is damaged
or not working properly.
• Do not use the range for warming or heat-
ing the room. Persons could be burned or
injured, or a fire could start.
• Use the range only for its intended use as
described in this manual.
• Do not wear loose or hanging garments
when using the range. They could ignite if
they touch a hot surface unit and you
could be burned.
-1-
RANGE SAFETY
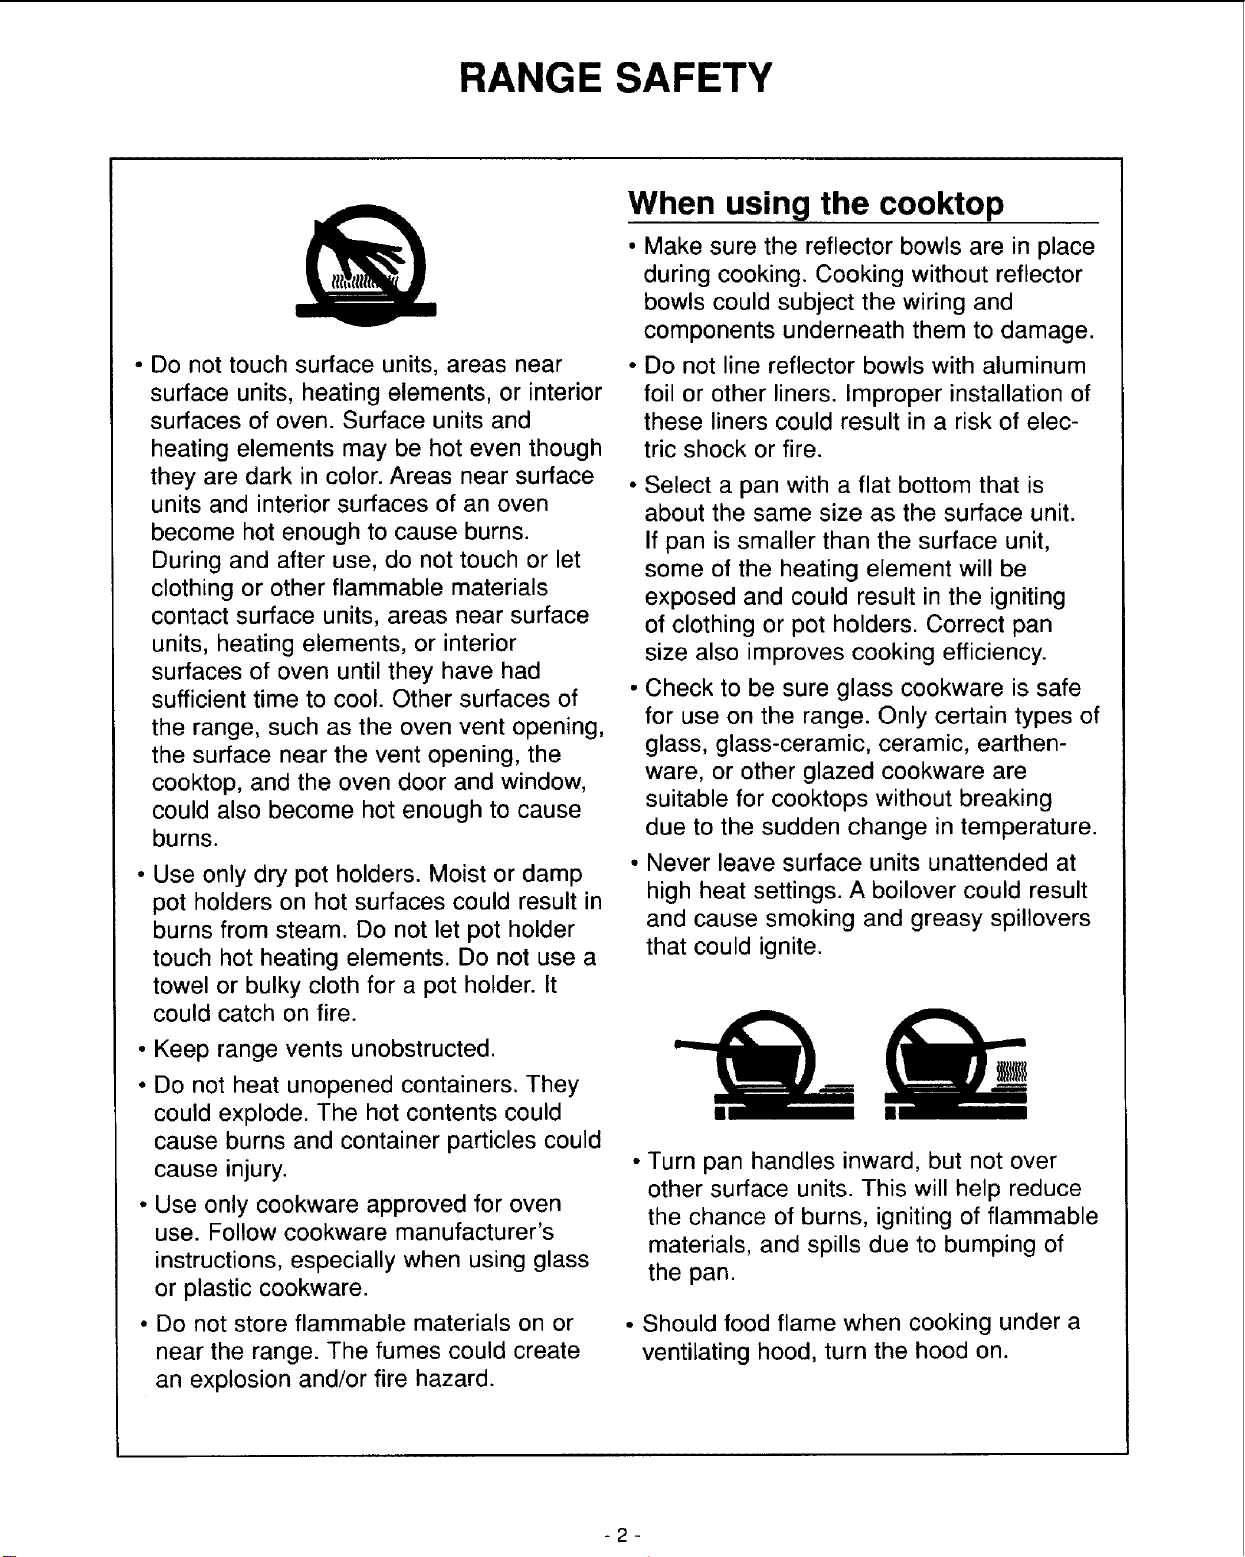
• Do not touch surface units, areas near
surface units, heating elements, or interior
surfaces of oven. Surface units and
heating elements may be hot even though
they are dark in color. Areas near surface
units and interior surfaces of an oven
become hot enough to cause burns.
During and after use, do not touch or let
clothing or other flammable materials
contact surface units, areas near surface
units, heating elements, or interior
surfaces of oven until they have had
sufficient time to cool. Other surfaces of
the range, such as the oven vent opening,
the surface near the vent opening, the
cooktop, and the oven door and window,
could also become hot enough to cause
burns.
• Use only dry pot holders. Moist or damp
pot holders on hot surfaces could result in
burns from steam. Do not let pot holder
touch hot heating elements. Do not use a
towel or bulky cloth for a pot holder. It
could catch on fire.
• Keep range vents unobstructed.
• Do not heat unopened containers. They
could explode. The hot contents could
cause burns and container particles could
cause injury.
• Use only cookware approved for oven
use. Follow cookware manufacturer's
instructions, especially when using glass
or plastic cookware.
• Do not store flammable materials on or
near the range. The fumes could create
an explosion and/or fire hazard.
When using the cooktop
• Make sure the reflector bowls are in place
during cooking. Cooking without reflector
bowls could subject the wiring and
components underneath them to damage.
• Do not line reflector bowls with aluminum
foil or other liners. Improper installation of
these liners could result in a risk of elec-
tric shock or fire.
• Select a pan with a flat bottom that is
about the same size as the surface unit.
If pan is smaller than the surface unit,
some of the heating element will be
exposed and could result in the igniting
of clothing or pot holders. Correct pan
size also improves cooking efficiency.
° Check to be sure glass cookware is safe
for use on the range. Only certain types of
glass, glass-ceramic, ceramic, earthen-
ware, or other glazed cookware are
suitable for cooktops without breaking
due to the sudden change in temperature.
• Never leave surface units unattended at
high heat settings. A boilover could result
and cause smoking and greasy spillovers
that could ignite.
Turn pan handles inward, but not over
other surface units. This will help reduce
the chance of burns, igniting of flammable
materials, and spills due to bumping of
the pan.
Should food flame when cooking under a
ventilating hood, turn the hood on.
-2-
RANGE SAFETY
When using the oven
• Always position oven rack(s) in desired
location while oven is cool. If a rack must
be removed while oven is hot, do not let
pot holder contact hot heating elements in
oven.
• Use care when opening oven door. Let
hot air or steam escape before removing
or replacing food.
Care and cleaning
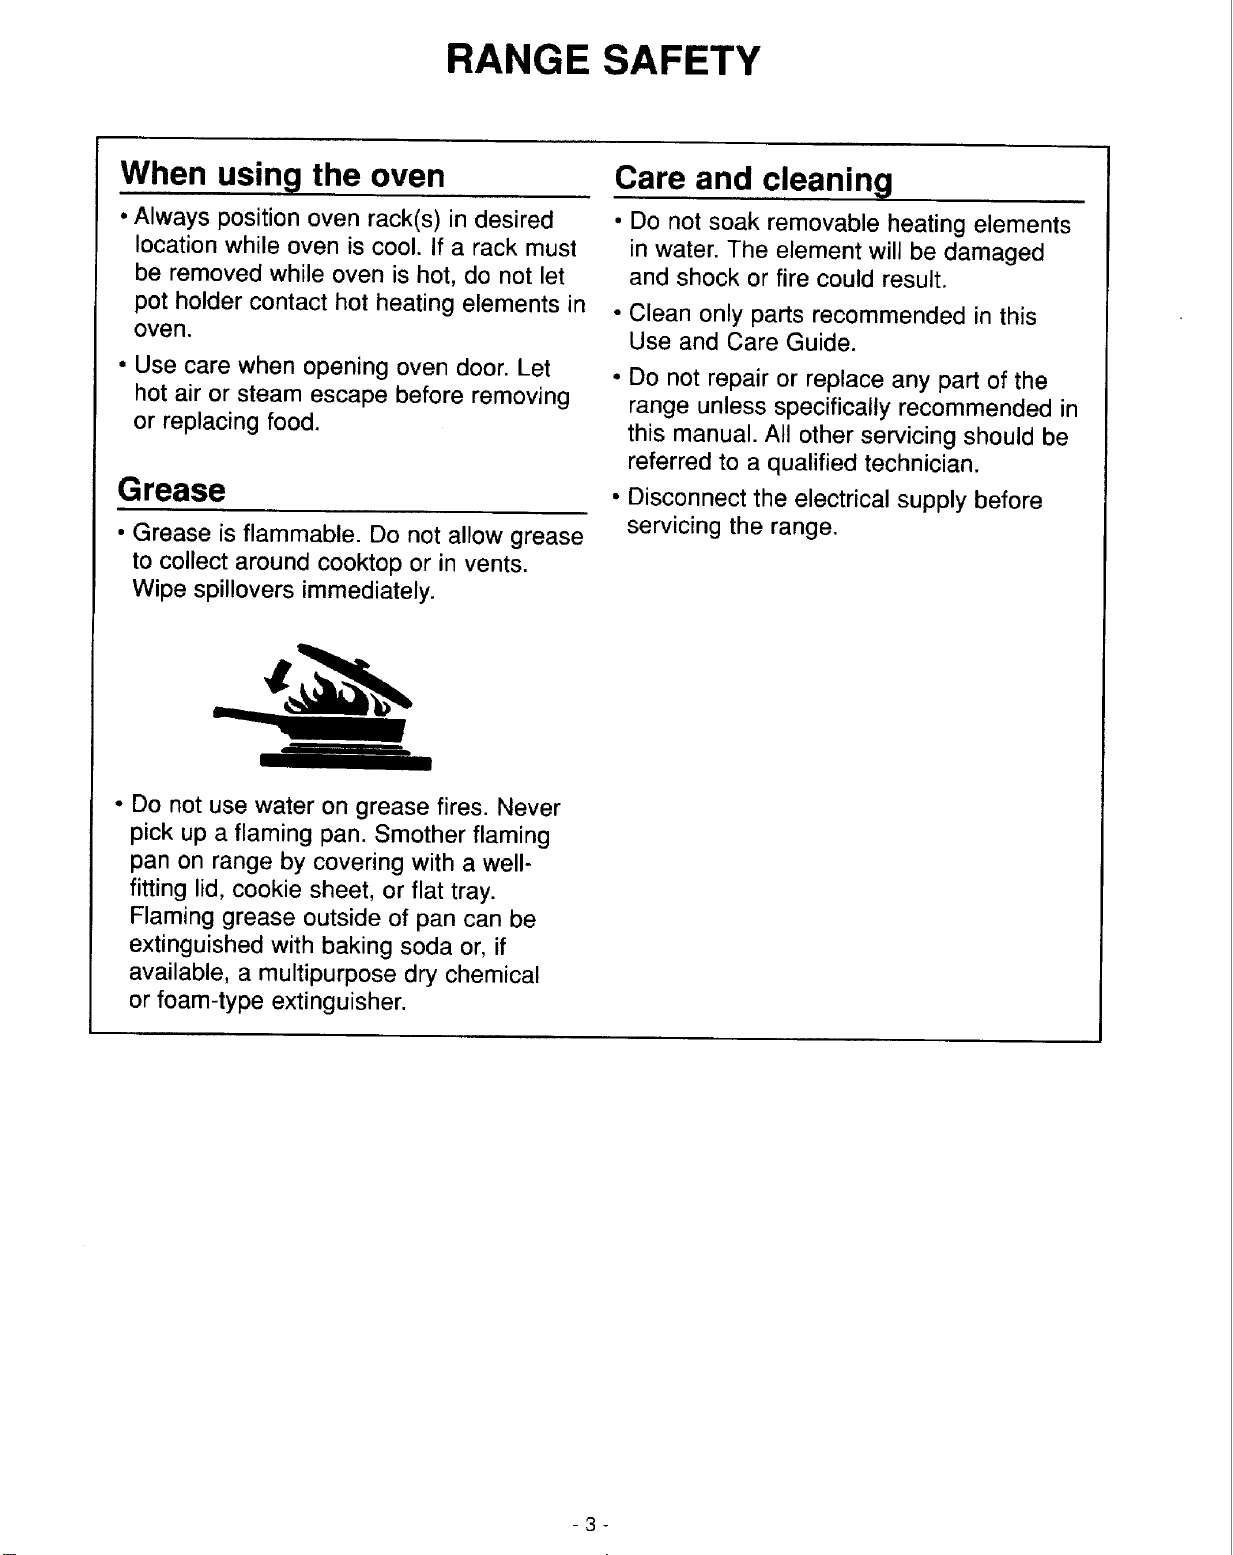
Grease
• Grease is flammable. Do not allow grease
to collect around cooktop or in vents.
Wipe spillovers immediately.
• Do not soak removable heating elements
in water. The element will be damaged
and shock or fire could result.
• Clean only parts recommended in this
Use and Care Guide.
• Do not repair or replace any part of the
range unless specifically recommended in
this manual. All other servicing should be
referred to a qualified technician.
• Disconnect the electrical supply before
servicing the range.
• Do not use water on grease fires. Never
pick up a flaming pan. Smother flaming
pan on range by covering with a well-
fitting lid, cookie sheet, or flat tray.
Flaming grease outside of pan can be
extinguished with baking soda or, if
available, a multipurpose dry chemical
or foam-type extinguisher.
-3-
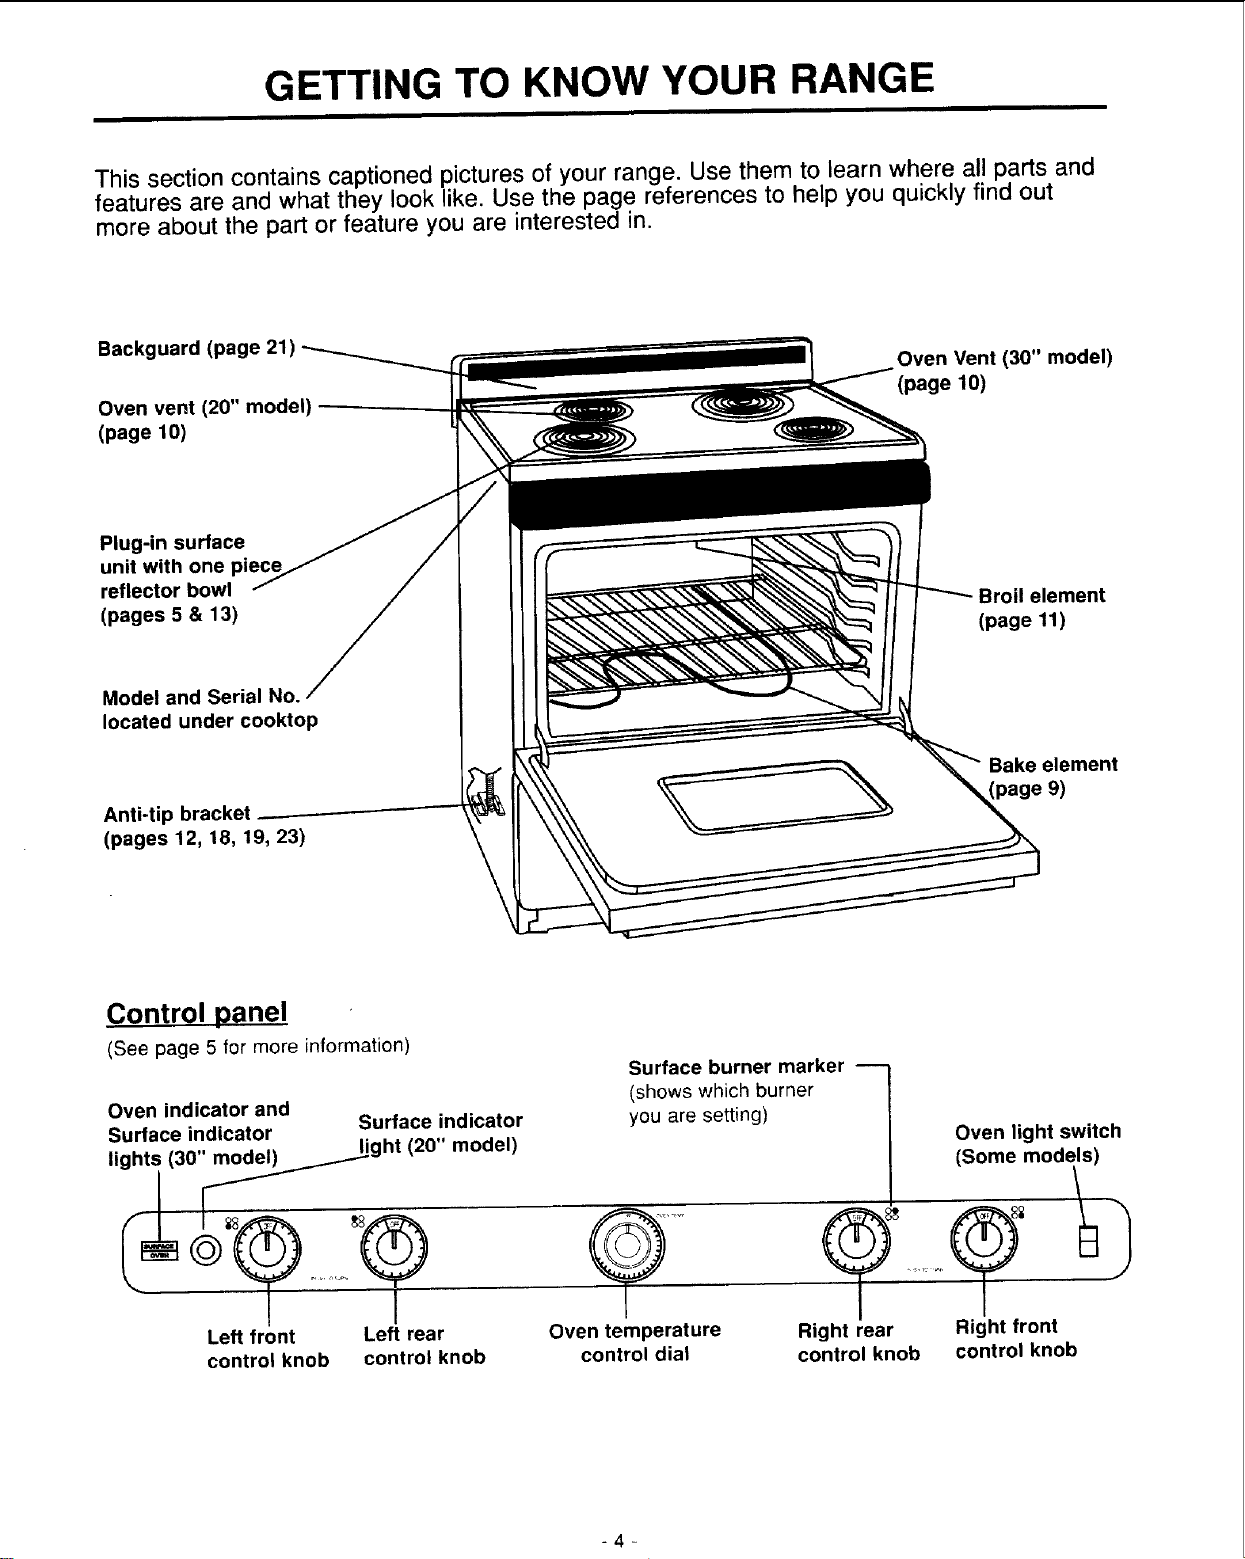
GETTING TO KNOW YOUR RANGE
This section contains captioned pictures of your range. Use them to learn where all parts and
features are and what they look like. Use the page references to help you quickly find out
more about the part or feature you are interested in.
Backguard (page
Oven vent (20" model)
(page 10)
Plug-in surface
unit with one
reflector bowl
(pages 5 & 13)
Model and Serial No.
located under cooktop
Anti-tip bracket
(pages 12, 18, 19, 23)
Oven Vent (30" model)
(page 10)
Broil element
(page 11)
Bake element
(page 9)
Control panel
(See page 5 for more information)
Oven indicator and
Surface indicator
Surface indicator
Surface burner marker
(shows which burner
/
you are setting)
Oven light switch
lights (30" model) .._._ght
(20" model)
......o
Left front Left rear
control knob control knob
Oven temperature
(Some models)
9........9
Right rear Right front
control dial
control knob control knob
-4-
USING THE SURFACE UNITS
Using the control knobs
Push in the control knobs before turning
them to a setting. You can set them
anywhere between HI and OFE The
controls do not have to be set exactly on a
marked setting. Use the marks as a guide
and adjust the control as needed.
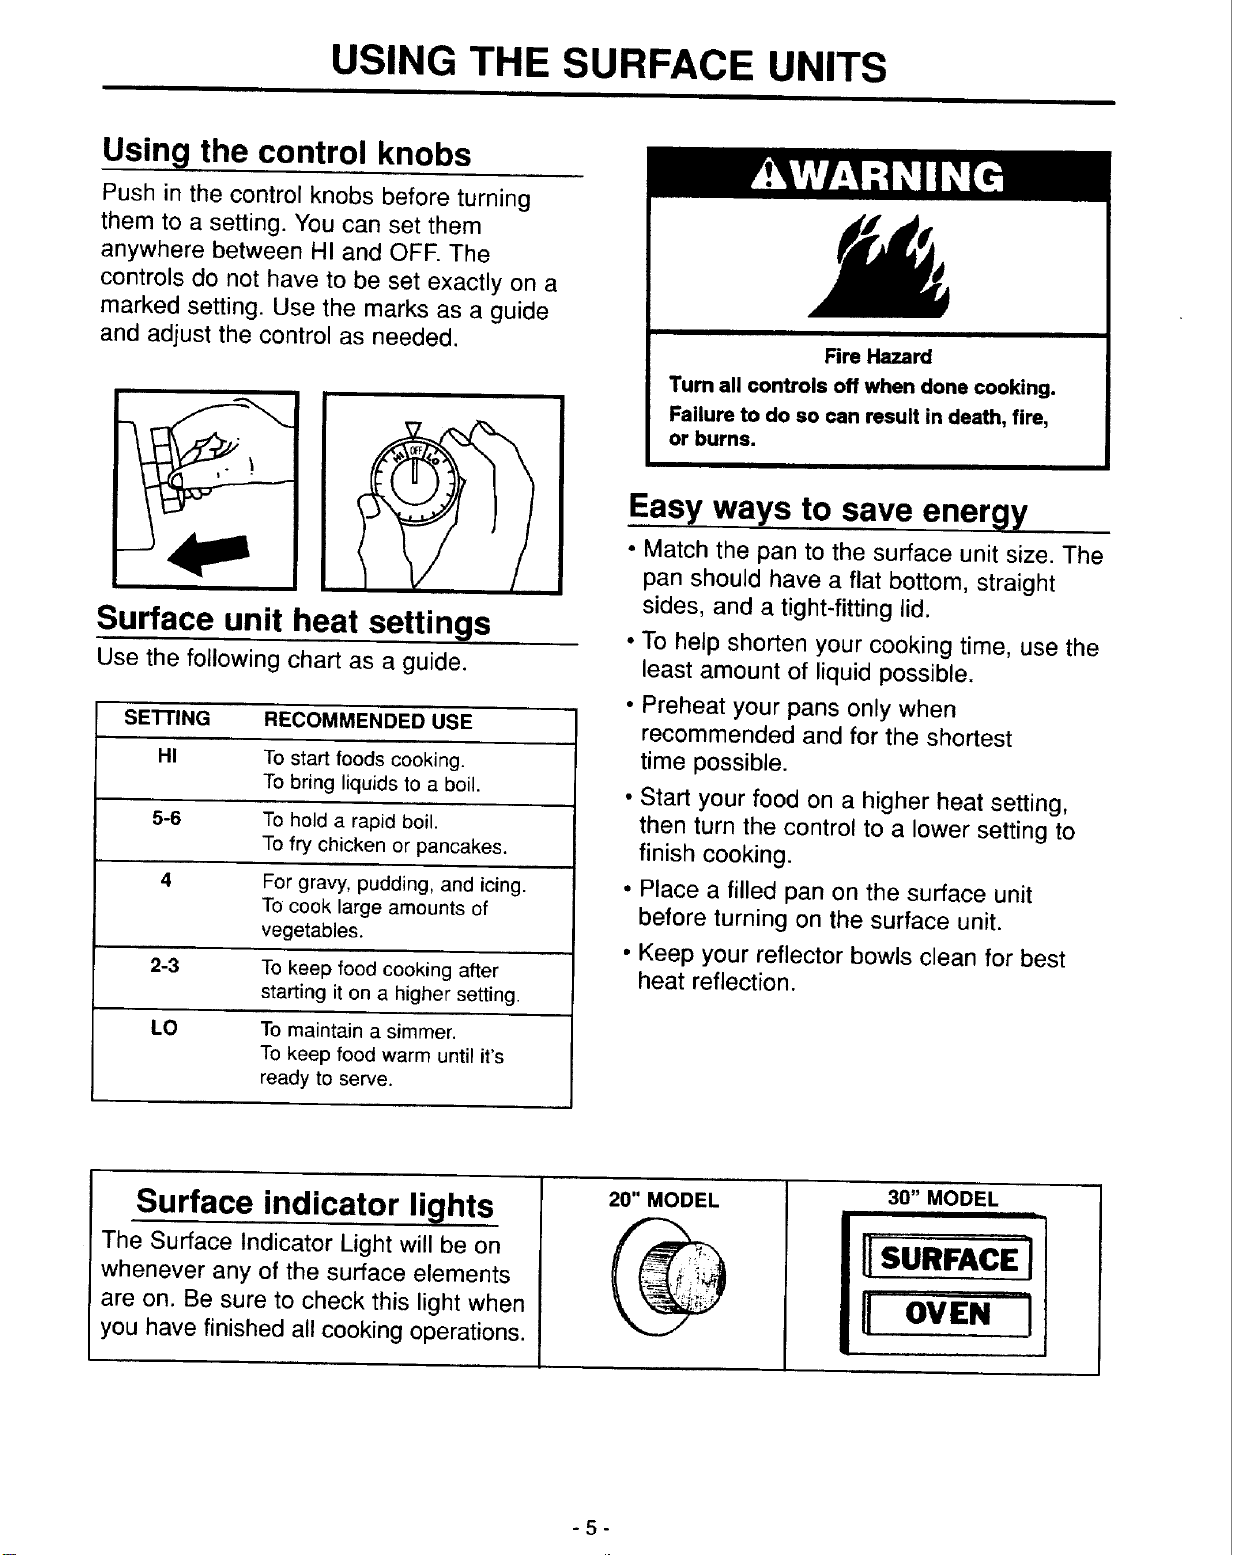
Surface unit heat settings
Use the following chart as a guide.
SE'I-rlNG RECOMMENDED USE
HI To start foods cooking.
To bring liquids to a boil.
5-6 To hold a rapid boil.
To fry chicken or pancakes.
4 For gravy, pudding, and icing.
To cook large amounts of
vegetables.
2-3 To keep food cooking after
starting it on a higher setting.
LO To maintain a simmer.
To keep food warm until it's
ready to serve.
Fire Hazard
Turn all controls off when done cooking.
Failure to do so can result in death, fire,
or burns.
Easy ways to save energy
• Match the pan to the surface unit size. The
pan should have a flat bottom, straight
sides, and a tight-fitting lid.
• To help shorten your cooking time, use the
least amount of liquid possible.
• Preheat your pans only when
recommended and for the shortest
time possible.
• Start your food on a higher heat setting,
then turn the control to a lower setting to
finish cooking.
• Place a filled pan on the surface unit
before turning on the surface unit.
• Keep your reflector bowls clean for best
heat reflection.
Surface indicator lights
The Surface Indicator Light will be on
whenever any of the surface elements
are on. Be sure to check this light when
you have finished all cooking operations.
20" MODEL
30" MODEL
i
"SURFACE ]
-5-
USING THE SURFACE UNITS
Using cookware
• Use the correct cookware to prevent
damage to the surface unit, cooktop,
wiring, and surrounding areas.
• If the cookware is too small for the surface
unit or the bottom is not flat, the surface
unit could stay glowing red for an extended
length of time causing damage to the unit.
• If you start cooking on high, it is important
to turn the control down to a lower setting
to complete cooking.
• The surface unit could overheat or be
damaged if a pot has boiled dry or has
been left empty on a hot surface unit.
Using the right cookware
makes a big difference
• Flat bottomed cookware, including woks,
canners, and teakettles, will provide better
contact with the surface unit and provide
the best cooking and energy saving
results.
• Warped, dented, and ribbed-bottomed
cookware can result in uneven cooking due
to incomplete contact with the surface unit.
• Cookware that has been designed with
slightly indented bottoms or small
expansion channels can be used.
° Choose medium to heavy gauge
(thickness) cookware.
• The pan material (type of metal or glass)
affects how quickly and evenly the pan
heats.
Home canning information
To protect your range:
• Use flat-bottomed canners/pans for best
results.
• Use the largest surface unit for best
results. Also, use a canner/pan that you
can center over the surface. Large
diameter canners/pans, if not centered
correctly, trap heat and can cause damage
to the cooktop.
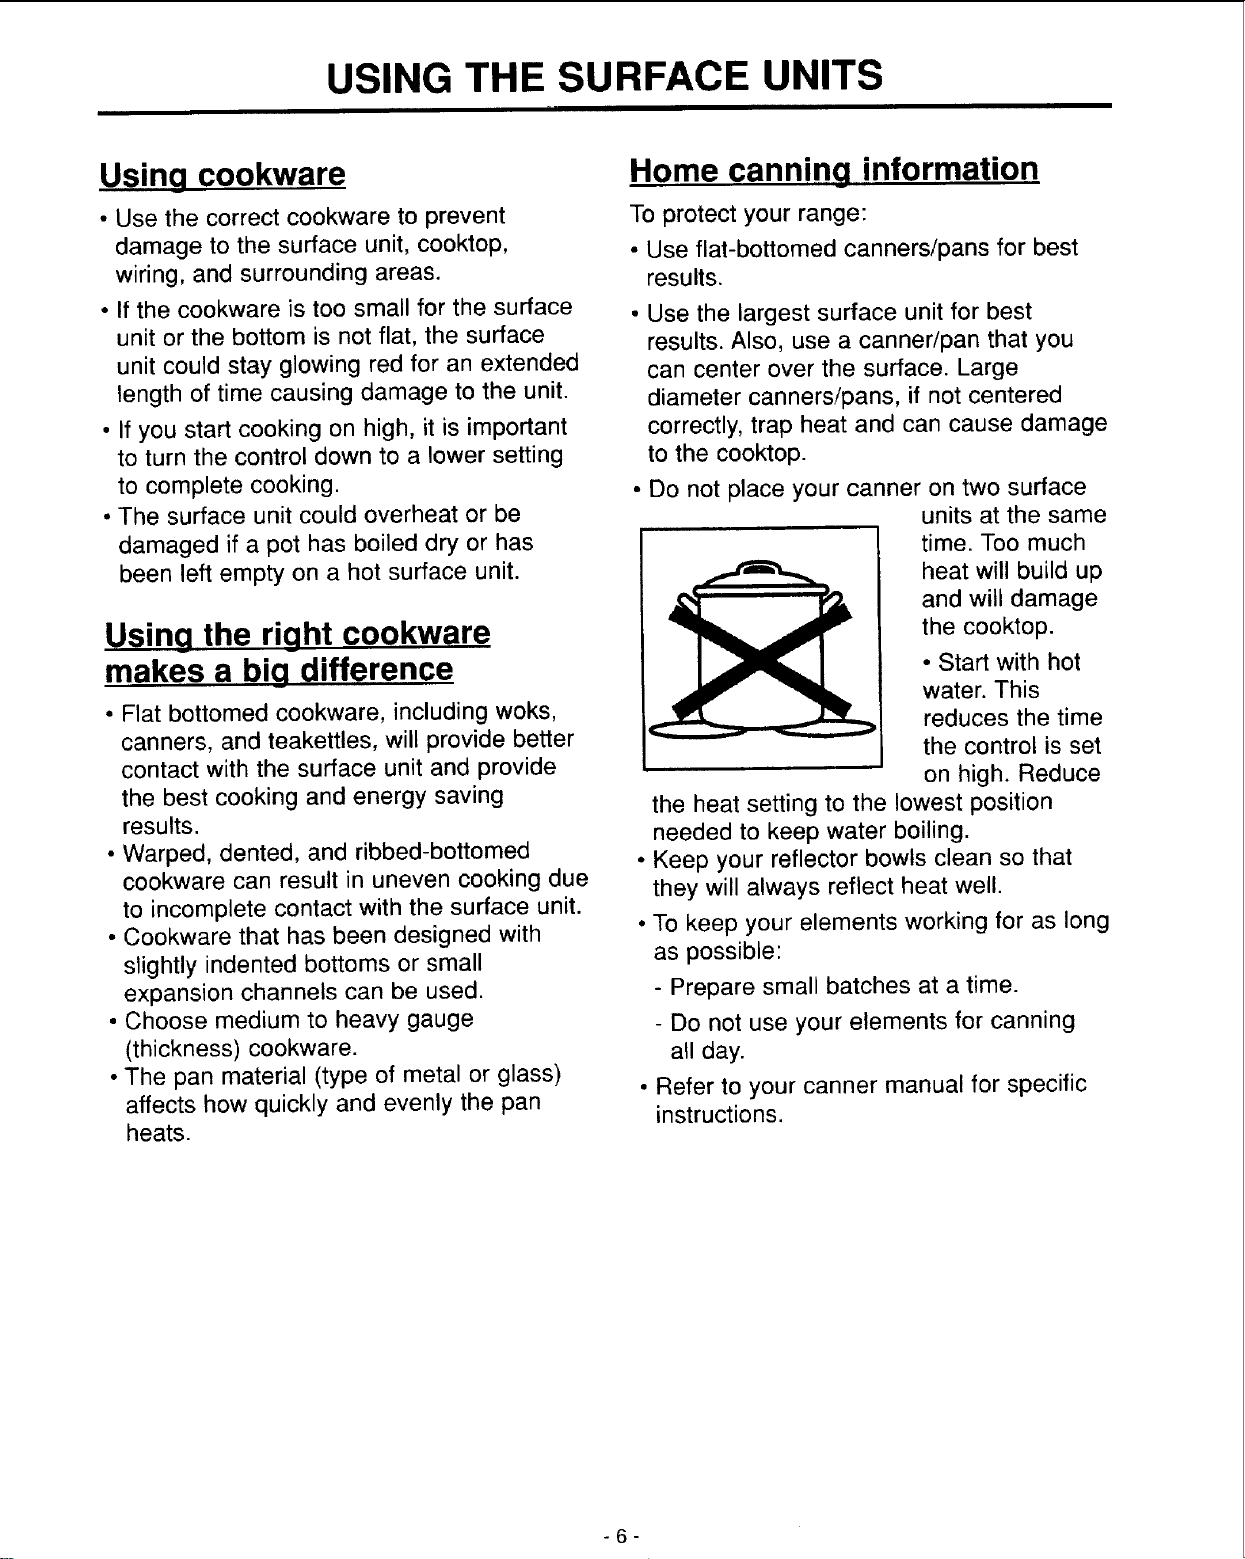
• Do not place your canner on two surface
units at the same
time. Too much
heat will build up
and will damage
the cooktop.
° Start with hot
water. This
reduces the time
the control is set
on high. Reduce
the heat setting to the lowest position
needed to keep water boiling.
° Keep your reflector bowls clean so that
they will always reflect heat well.
• To keep your elements working for as long
as possible:
- Prepare small batches at a time.
- Do not use your elements for canning
all day.
• Refer to your canner manual for specific
instructions.
-6-
USING YOUR OVEN
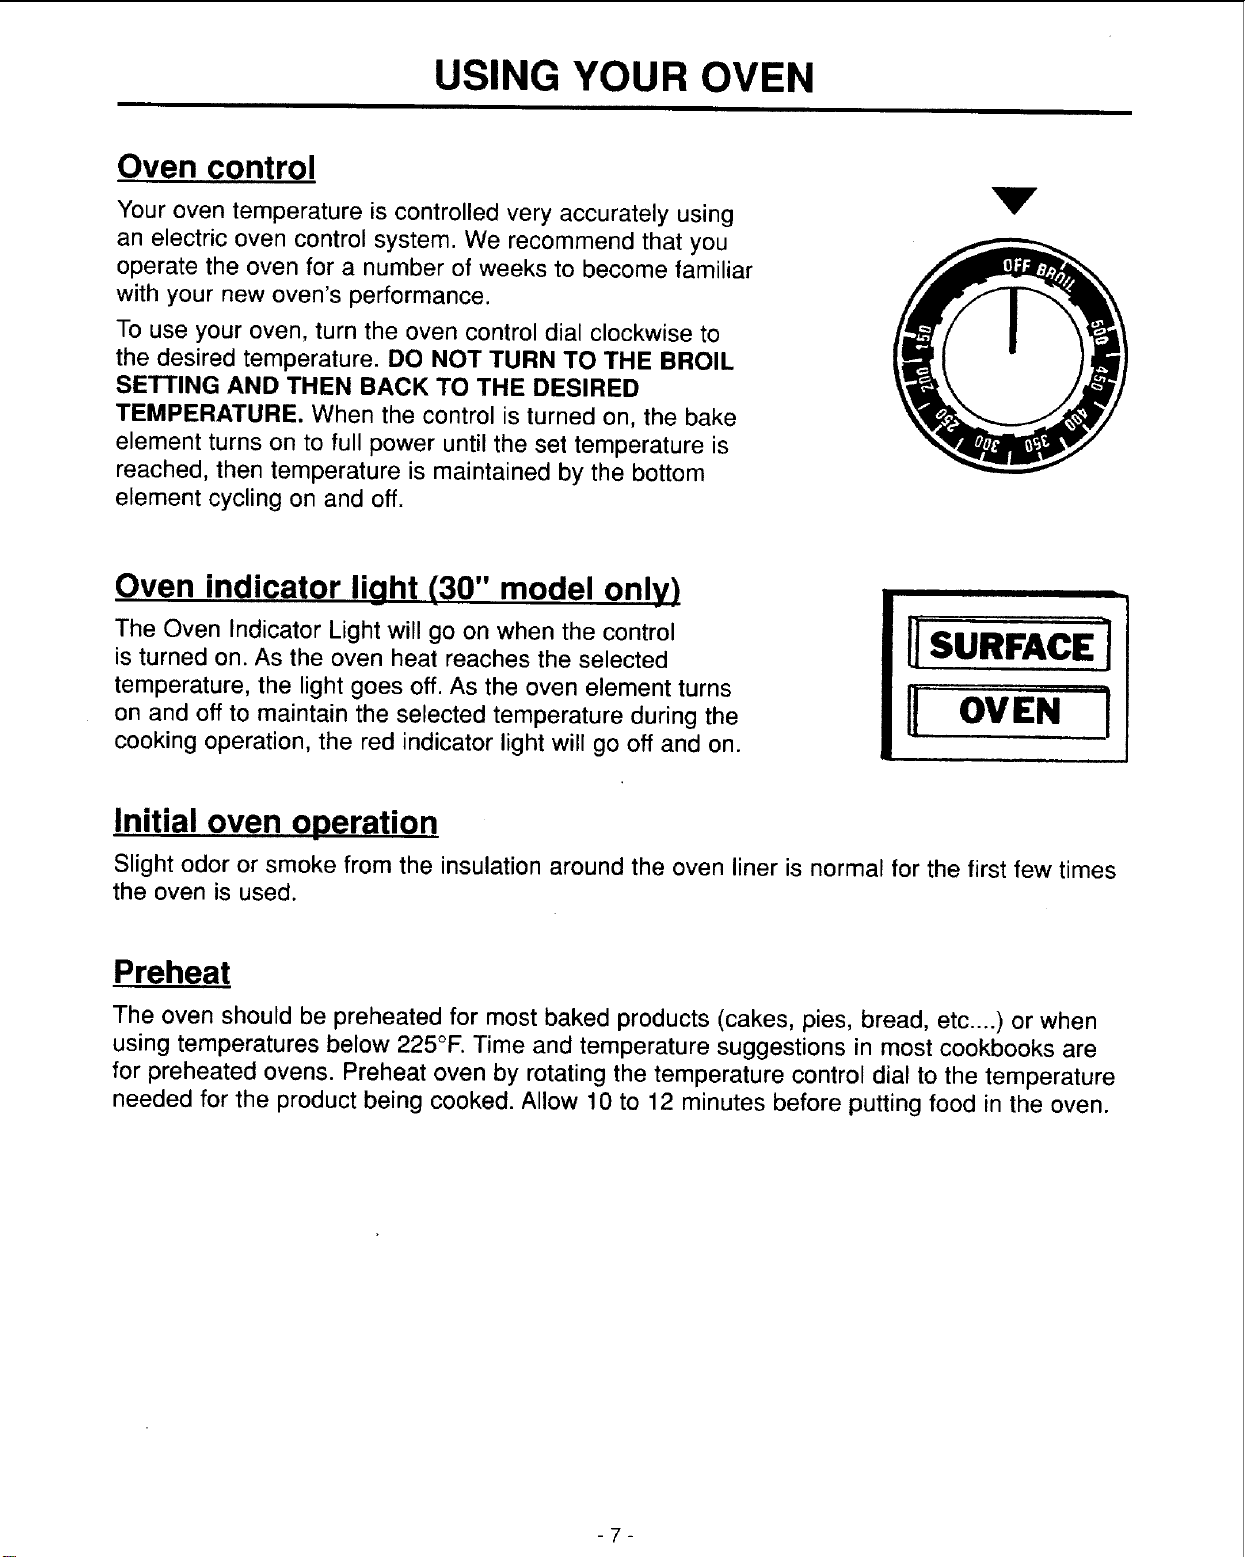
Oven control
Your oven temperature is controlled very accurately using
an electric oven control system. We recommend that you
operate the oven for a number of weeks to become familiar
with your new oven's performance.
To use your oven, turn the oven control dial clockwise to
the desired temperature. DO NOT TURN TO THE BROIL
SETTING AND THEN BACK TO THE DESIRED
TEMPERATURE. When the control is turned on, the bake
element turns on to full power until the set temperature is
reached, then temperature is maintained by the bottom
element cycling on and off.
V
Oven indicator light (30" model only)
The Oven Indicator Light will go on when the control
is turned on. As the oven heat reaches the selected
temperature, the light goes off. As the oven element turns
on and off to maintain the selected temperature during the
cooking operation, the red indicator light will go off and on.
SURFACE I
_ OVEN !
Initial oven operation
Slight odor or smoke from the insulation around the oven liner is normal for the first few times
the oven is used.
Preheat
The oven should be preheated for most baked products (cakes, pies, bread, etc....) or when
using temperatures below 225°1:. Time and temperature suggestions in most cookbooks are
for preheated ovens. Preheat oven by rotating the temperature control dial to the temperature
needed for the product being cooked. Allow 10 to 12 minutes before putting food in the oven.
-7-
USING YOUR OVEN
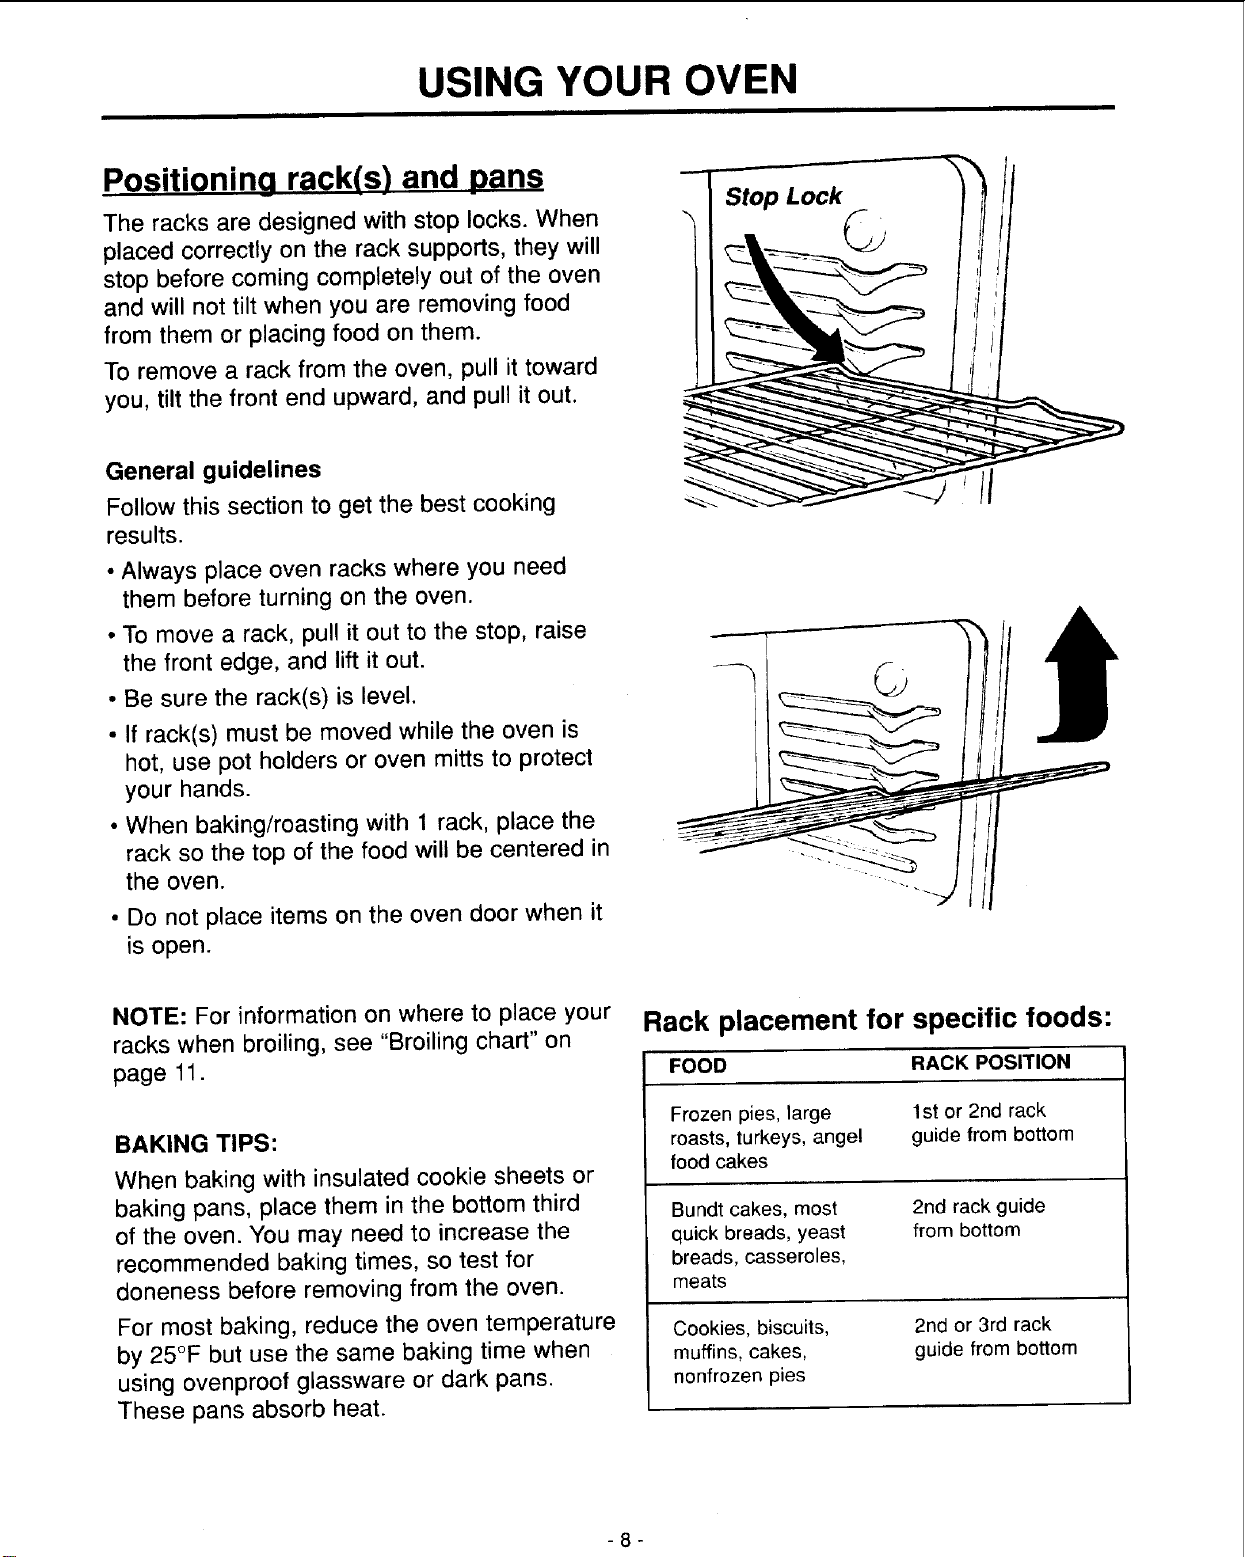
Positioning rack(s) and pans
The racks are designed with stop locks. When
placed correctly on the rack supports, they will
stop before coming completely out of the oven
and will not tilt when you are removing food
from them or placing food on them.
To remove a rack from the oven, pull it toward
you, tilt the front end upward, and pull it out.
General guidelines
Follow this section to get the best cooking
results.
• Always place oven racks where you need
them before turning on the oven.
• To move a rack, pull it out to the stop, raise
the front edge, and lift it out.
• Be sure the rack(s) is level.
• If rack(s) must be moved while the oven is
hot, use pot holders or oven mitts to protect
your hands.
• When baking/roasting with 1 rack, place the
rack so the top of the food will be centered in
the oven.
• Do not place items on the oven door when it
is open.
NOTE: For information on where to place your
racks when broiling, see "Broiling chart" on
page 11.
BAKING TIPS:
When baking with insulated cookie sheets or
baking pans, place them in the bottom third
of the oven. You may need to increase the
recommended baking times, so test for
doneness before removing from the oven.
For most baking, reduce the oven temperature
by 25°F but use the same baking time when
using ovenproof glassware or dark pans.
These pans absorb heat.
Rack placement for specific foods:
FOOD RACK POSITION
Frozen pies, large
roasts, turkeys, angel
food cakes
1st or 2nd rack
guide from bottom
Bundt cakes, most
quick breads, yeast
breads, casseroles,
meats
2rid rack guide
from bottom
Cookies, biscuits,
muffins, cakes,
nonfrozen pies
2nd or 3rd rack
guide from bottom
-8-
USING YOUR OVEN
For best air circulation
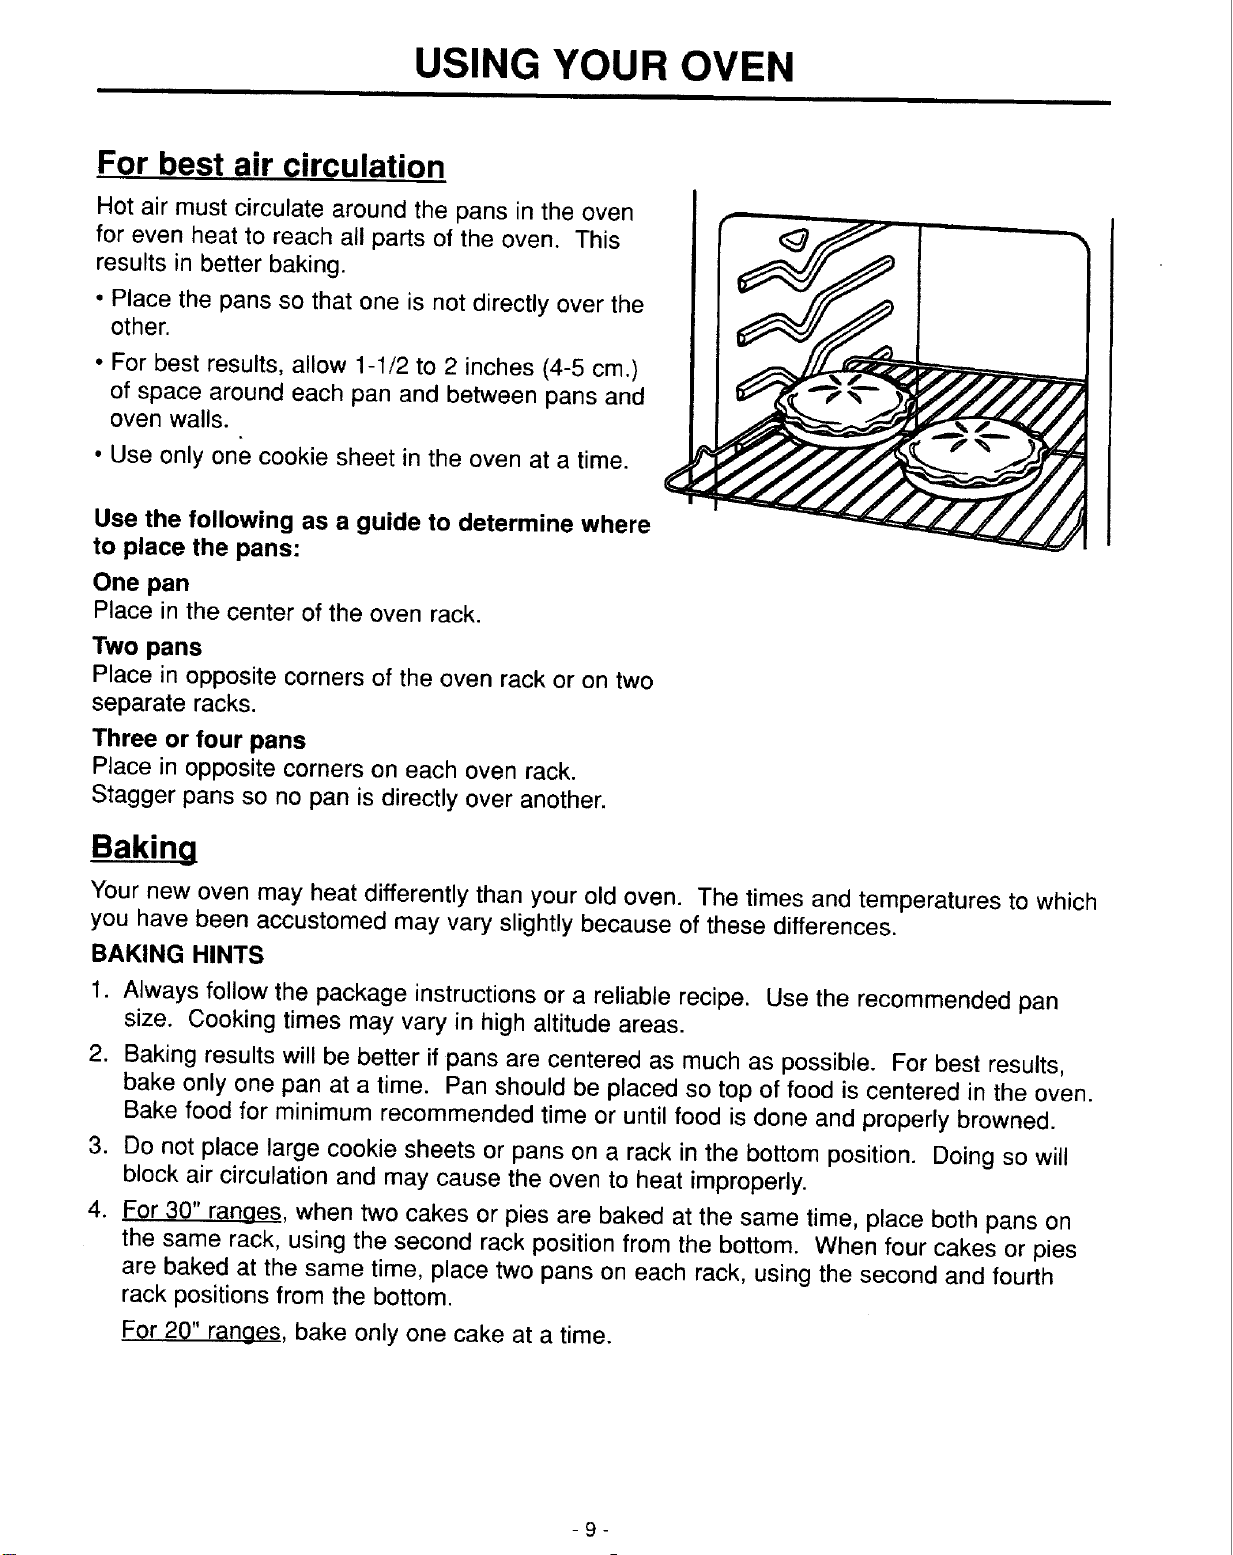
Hot air must circulate around the pans in the oven
for even heat to reach all parts of the oven. This
results in better baking.
• Place the pans so that one is not directly over the
other.
• For best results, allow 1-1/2 to 2 inches (4-5 cm.)
of space around each pan and between pans and
oven walls.
• Use only one cookie sheet in the oven at a time.
Use the following as a guide to determine where
to place the pans:
One pan
Place in the center of the oven rack.
Two pans
Place in opposite corners of the oven rack or on two
separate racks.
Three or four pans
Place in opposite corners on each oven rack.
Stagger pans so no pan is directly over another.
Baking
Your new oven may heat differently than your old oven. The times and temperatures to which
you have been accustomed may vary slightly because of these differences.
BAKING HINTS
1. Always follow the package instructions or a reliable recipe. Use the recommended pan
size. Cooking times may vary in high altitude areas.
2. Baking results will be better if pans are centered as much as possible. For best results,
bake only one pan at a time. Pan should be placed so top of food is centered in the oven.
Bake food for minimum recommended time or until food is done and properly browned.
3. Do not place large cookie sheets or pans on a rack in the bottom position. Doing so will
block air circulation and may cause the oven to heat improperly.
4. For 30" ranges, when two cakes or pies are baked at the same time, place both pans on
the same rack, using the second rack position from the bottom. When four cakes or pies
are baked at the same time, place two pans on each rack, using the second and fourth
rack positions from the bottom.
For 20" ranges, bake only one cake at a time.
-9-
USING YOUR OVEN
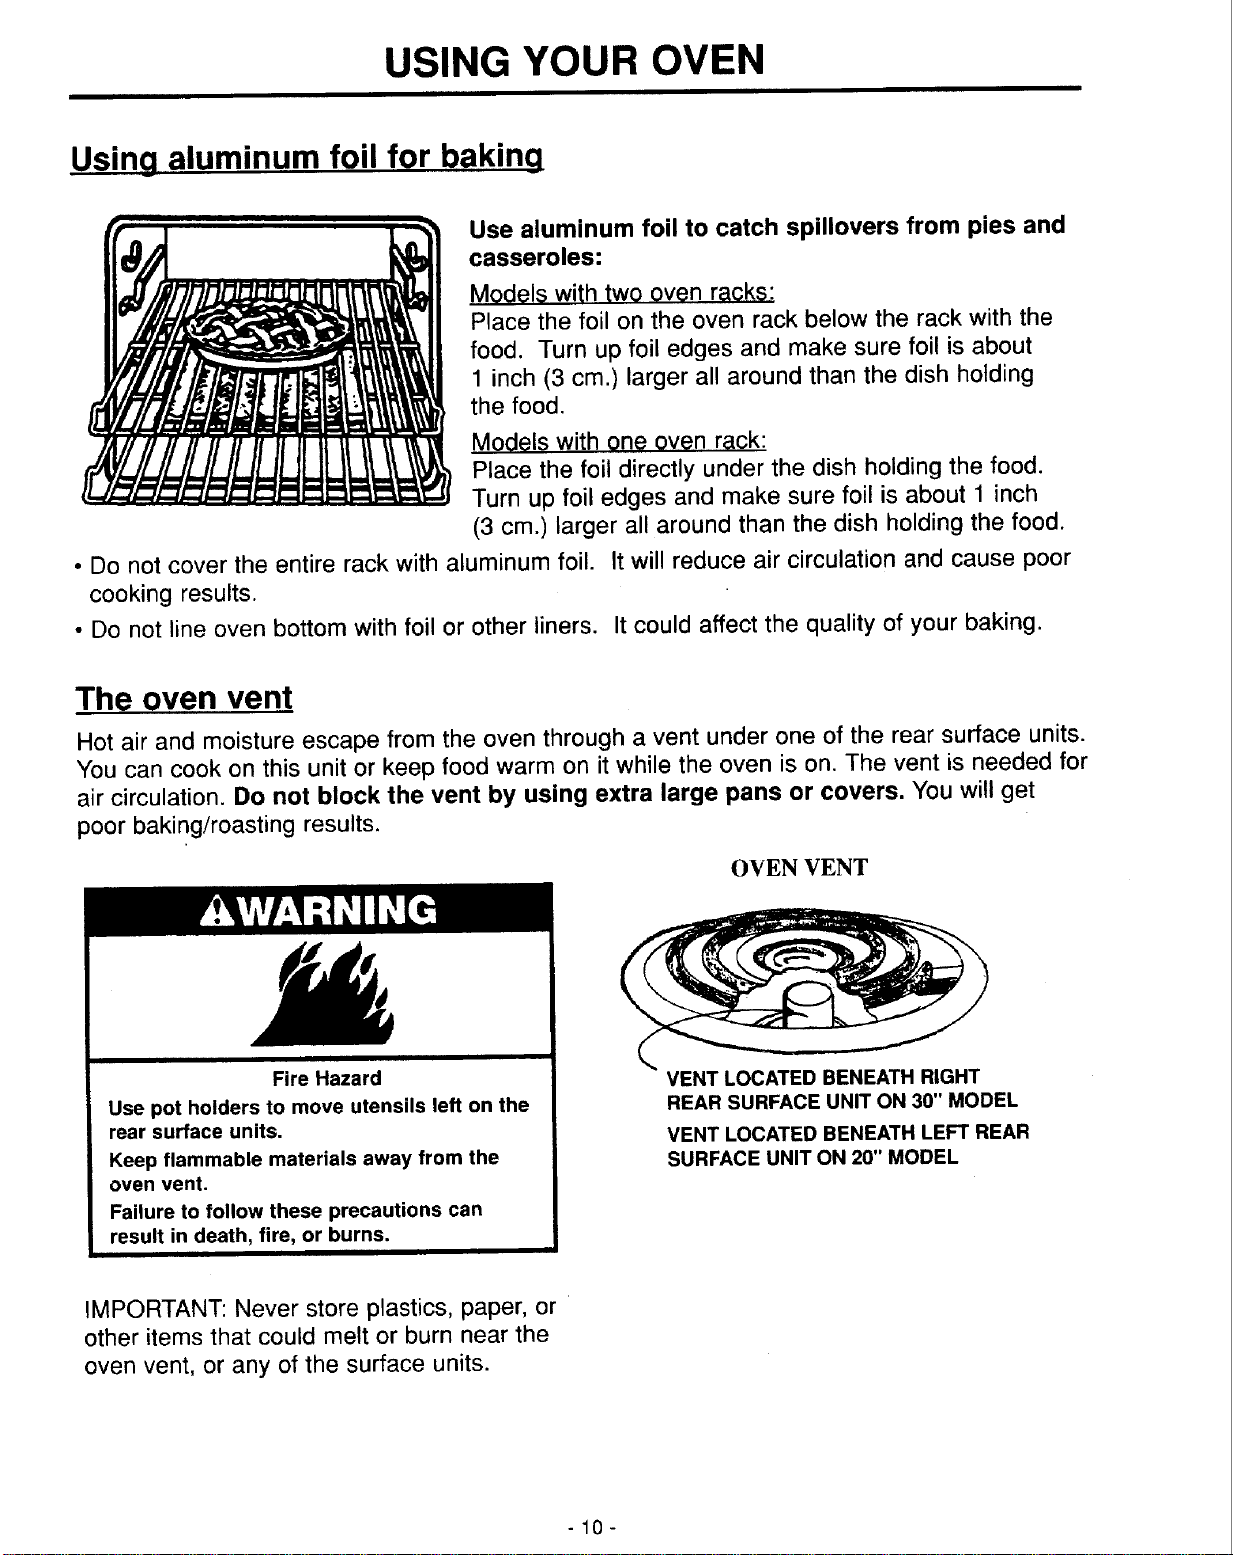
Usinq aluminum foil for bakinq
Use aluminum foil to catch spillovers from pies and
casseroles:
Models with two oven racks:
Place the foil on the oven rack below the rack with the
food. Turn up foil edges and make sure foil is about
1 inch (3 cm.) larger all around than the dish holding
the food.
Models with one oven rack:
Place the foil directly under the dish holding the food.
Turn up foil edges and make sure foil is about 1 inch
(3 cm.) larger all around than the dish holding the food.
• Do not cover the entire rack with aluminum foil. It will reduce air circulation and cause poor
cooking results.
• Do not line oven bottom with foil or other liners. It could affect the quality of your baking.
The oven vent
Hot air and moisture escape from the oven through a vent under one of the rear surface units.
You can cook on this unit or keep food warm on it while the oven is on. The vent is needed for
air circulation. Do not block the vent by using extra large pans or covers. You will get
poor baking/roasting results.
OVEN VENT
Fire Hazard
Use pot holders to move utensils left on the
rear surface units.
Keep flammable materials away from the
oven vent.
Failure to follow these precautions can
result in death, fire, or burns.
VENT LOCATED BENEATH RIGHT
REAR SURFACE UNIT ON 30" MODEL
VENT LOCATED BENEATH LEFT REAR
SURFACE UNIT ON 20" MODEL
IMPORTANT: Never store plastics, paper, or
other items that could melt or burn near the
oven vent, or any of the surface units.
-10-
USING YOUR OVEN
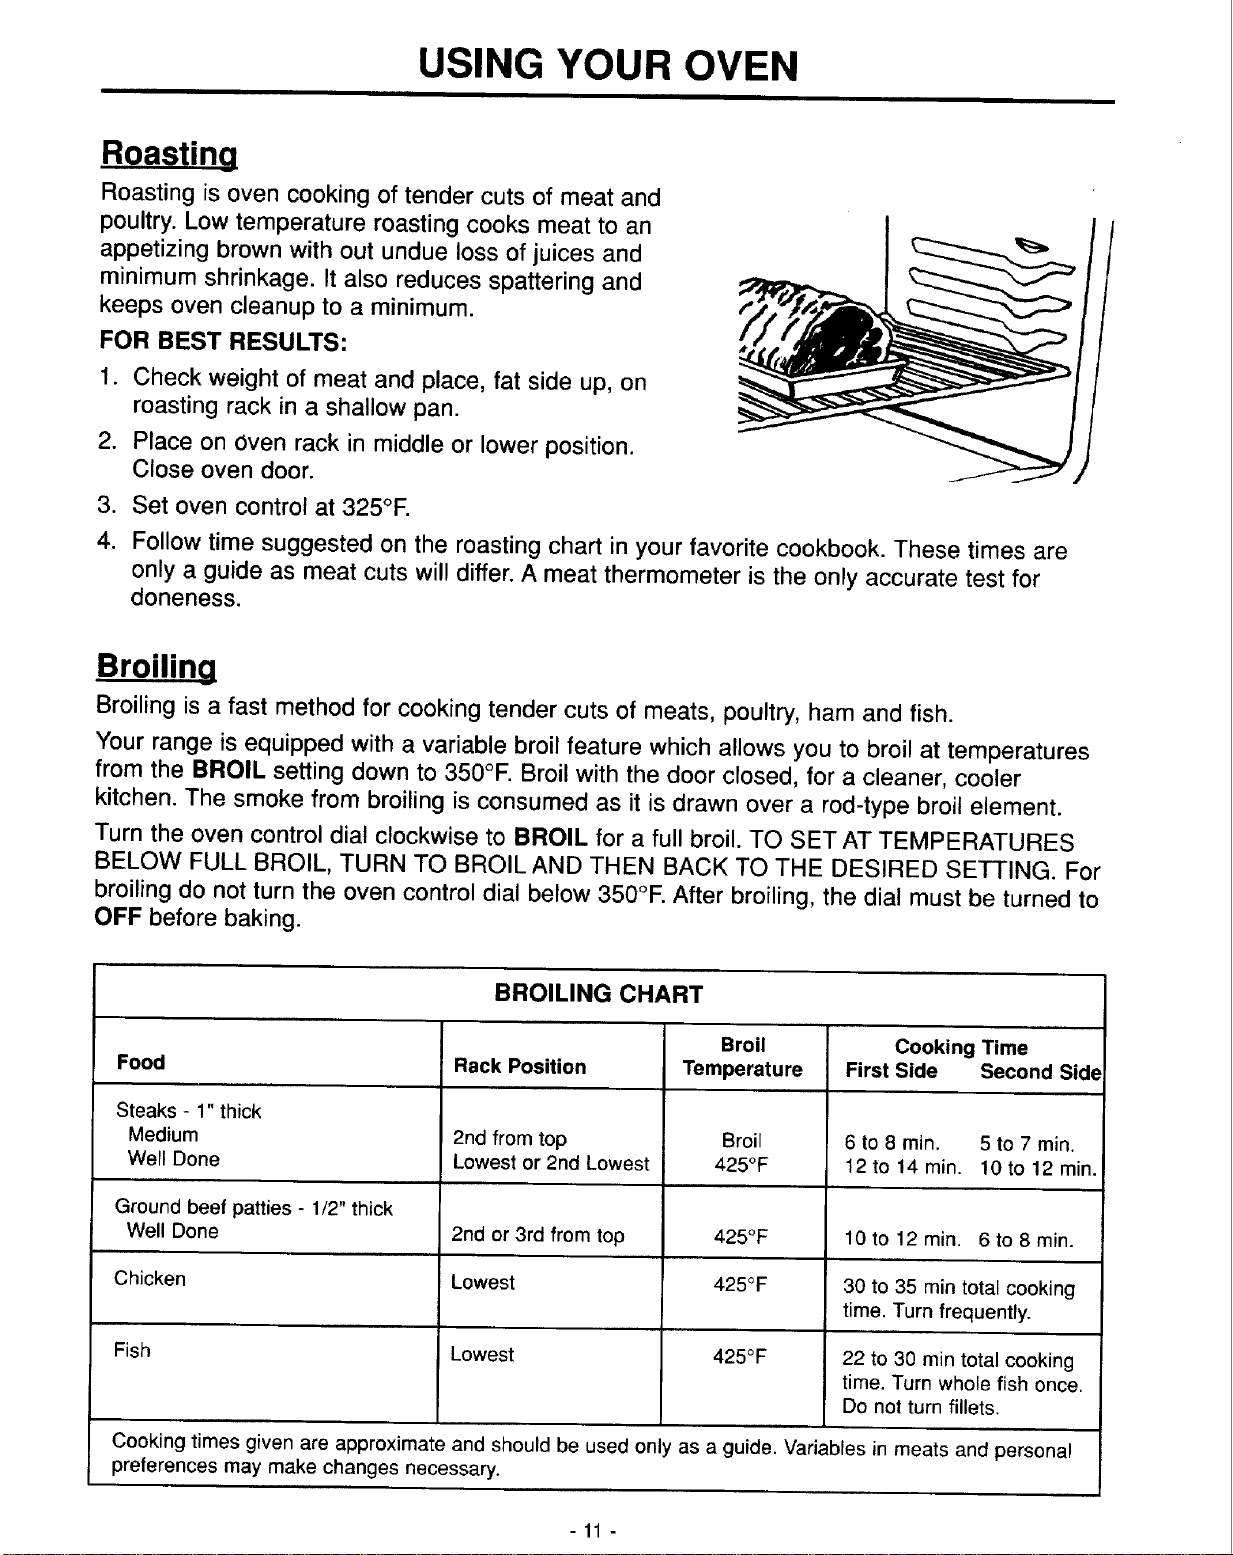
Roastina
Roasting is oven cooking of tender cuts of meat and
poultry. Low temperature roasting cooks meat to an
appetizing brown with out undue loss of juices and
minimum shrinkage. It also reduces spattering and
keeps oven cleanup to a minimum.
FOR BEST RESULTS:
1. Check weight of meat and place, fat side up, on
roasting rack in a shallow pan.
2. Place on Oven rack in middle or lower position.
Close oven door.
3. Set oven control at 325°F.
4. Follow time suggested on the roasting chart in your favorite cookbook. These times are
only a guide as meat cuts will differ. A meat thermometer is the only accurate test for
doneness.
Broiling
Broiling is a fast method for cooking tender cuts of meats, poultry, ham and fish.
Your range is equipped with a variable broil feature which allows you to broil at temperatures
from the BROIL setting down to 350°F. Broil with the door closed, for a cleaner, cooler
kitchen. The smoke from broiling is consumed as it is drawn over a rod-type broil element.
Turn the oven control dial clockwise to BROIL for a full broil. TO SET AT TEMPERATURES
BELOW FULL BROIL, TURN TO BROIL AND THEN BACK TO THE DESIRED SETTING. For
broiling do not turn the oven control dial below 350°E After broiling, the dial must be turned to
OFF before baking.
BROILING CHART
Food
Steaks - 1" thick
Medium
Well Done
Ground beef patties - 1/2" thick
Well Done
Chicken
Fish
Rack Position
2nd from top
Lowest or 2nd Lowest
2nd or 3rd from top
Lowest
Lowest
Broil
Temperature
Broil
425°F
425°F
425°F
425°F
Cooking Time
First Side Second Side
6 to 8 min. 5 to 7 min.
12 to 14min. 10 to 12mino
10 to 12min. 6to8min.
30 to 35 min total cooking
time. Turn frequently.
22 to 30 rain total cooking
time. Turn whole fish once.
Do not turn fillets.
Cooking times given are approximate and should be used only as a guide. Variables in meats and personal
preferences may make changes necessary.
-11 -
USING YOUR OVEN
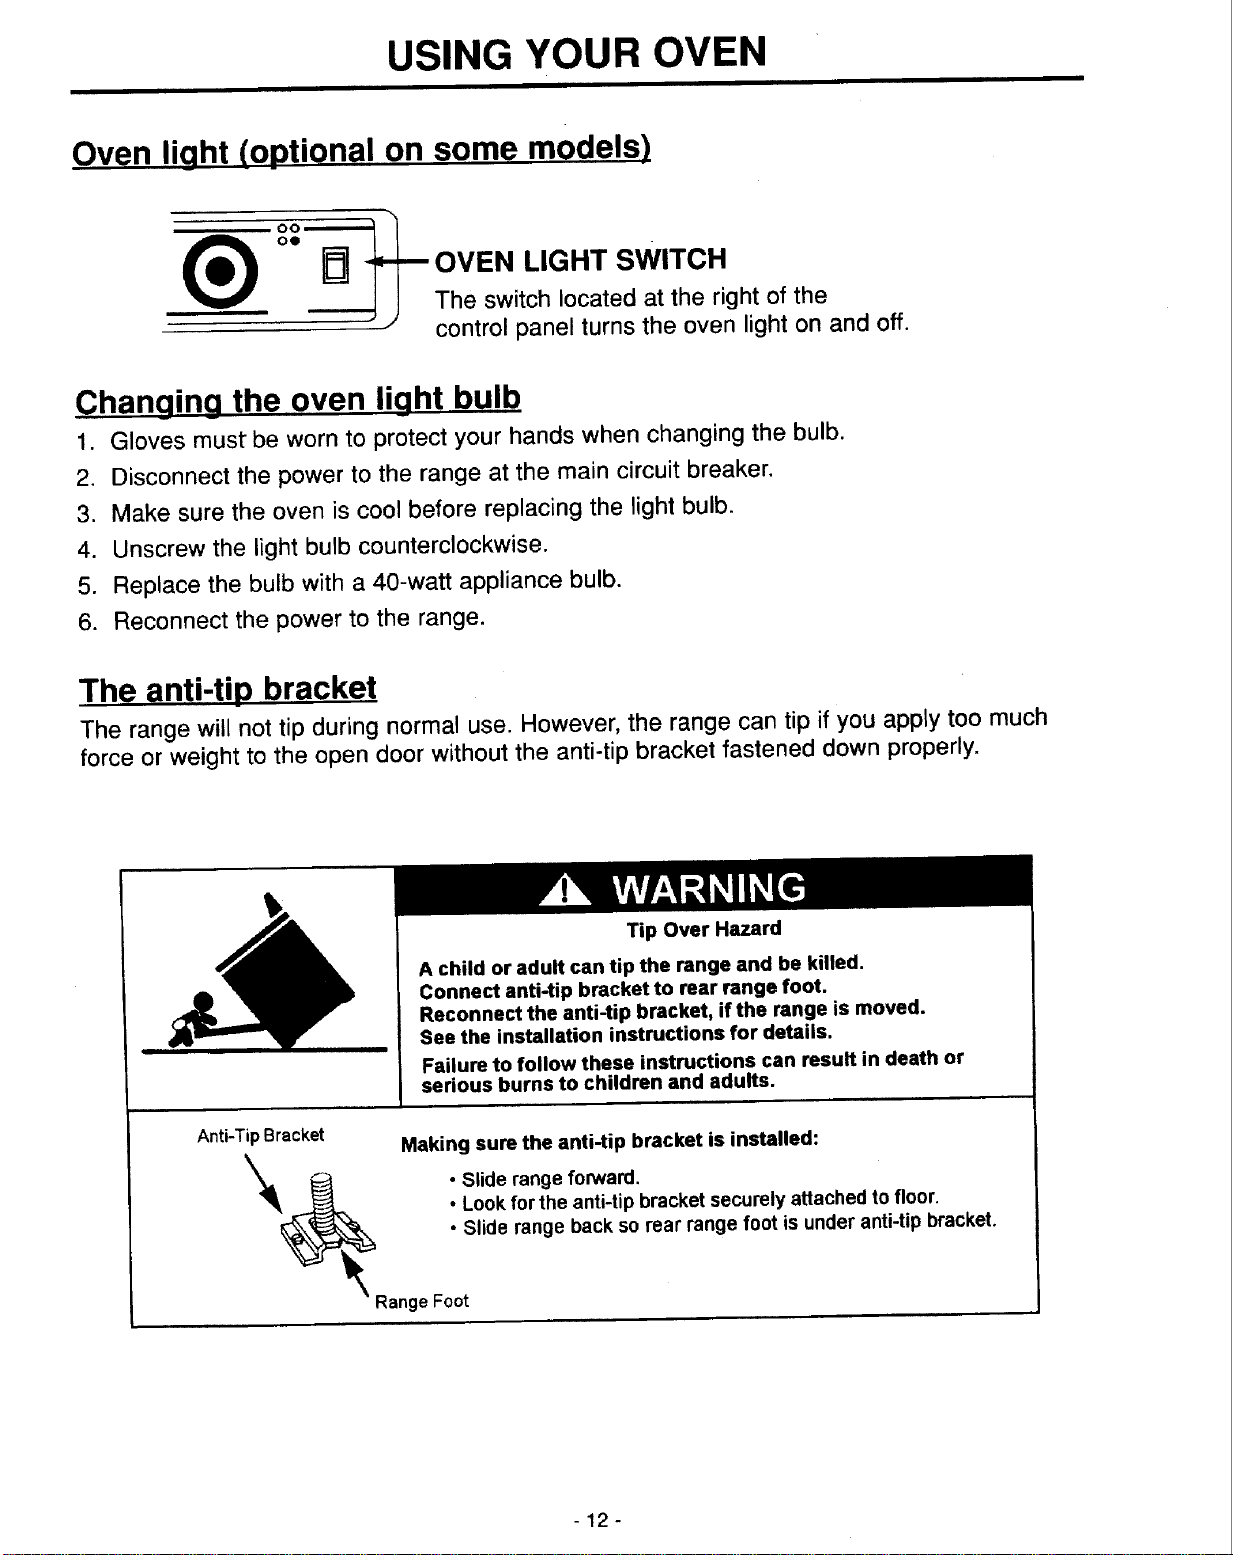
Oven licjht (optional on some models)
®
°°0 _ -_--_"---"_ "_ OVEN LIGHT SWITCH
1 The switch located at the right of the
" control panel turns the oven light on and off.
Chanqing the oven light bulb
1. Gloves must be worn to protect your hands when changing the bulb.
2. Disconnect the power to the range at the main circuit breaker.
3. Make sure the oven is cool before replacing the light bulb.
4. Unscrew the light bulb counterclockwise.
5. Replace the bulb with a 40-watt appliance bulb.
6. Reconnect the power to the range.
The anti-tip bracket
The range will not tip during normal use. However, the range can tip if you apply too much
force or weight to the open door without the anti-tip bracket fastened down properly.
Tip Over Hazard
A child or adult can tip the range and be killed.
Connect anti-tip bracket to rear range foot.
Reconnect the anti-tip bracket, if the range is moved.
See the installation instructions for details.
Failure to follow these instructions can result in death or
serious burns to children and adults,
Anti-TipBracket
__Range
Making sure the anti-tip bracket is installed:
• Slide range forward.
• Look for the anti-tip bracket securely attached to floor.
• Slide range back so rear range foot is under anti-tip bracket,
Foot
-12-
CARE AND CLEANING
Your range is designed so you can care for it easily. You can do most cleaning with items
found around your home. Cleaning your range whenever spills or soiling occurs will help to
keep it looking like new.
Electrical Shock Hazard
Make sure all controls are off and the range is cool before cleaning.
Failure to do so can result in death, electrical shock, or burns.
Cleaning porcelain oven
Porcelain has a smooth finish, and is a type of glass fused to metal. With proper care, the
porcelain enamel walls in this oven will retain a good looking finish for many years.
Food soil that is allowed to harden and bake on can be difficult to remove.
Clean the oven before it is entirely cool (not while it is hot) with detergent and water - using a
soap-filled steel wool pad on burned spots. Rinse and wipe dry.
Commercial oven cleaners may be used on conventional porcelain lined ovens. Do not spray
any oven cleaners on the electrical elements, controls, or switches because it could
cause a short circuit and result in sparking or fire. Do not let commercial oven cleaners
contact the heat seals or exterior surfaces of the range. This will cause damage. Follow
instructions carefully. After using cleaners, thoroughly rinse the oven with a solution of one
tablespoon vinegar to one cup water. Oven cleaners can coat or damage the thermostat
-sensing device (long tube in oven) so that it will not sense temperature correctly. If you are
using a commercial oven cleaner, try to avoid any contact with the rod-shaped bulb of the
thermostat. Be sure that any residue that touches the bulb is carefully removed.
Oven racks are removed by pulling forward, tilting and lifting up. Racks may be washed with
detergent and water. Scour heavily soiled areas with a soap-filled steel wool pad.
Oven and surface heating elements
Both the oven and the surface heating elements clean themselves when they are turned on.
Food spilled on a hot element will burn off. Do not immerse the surface elements in water.
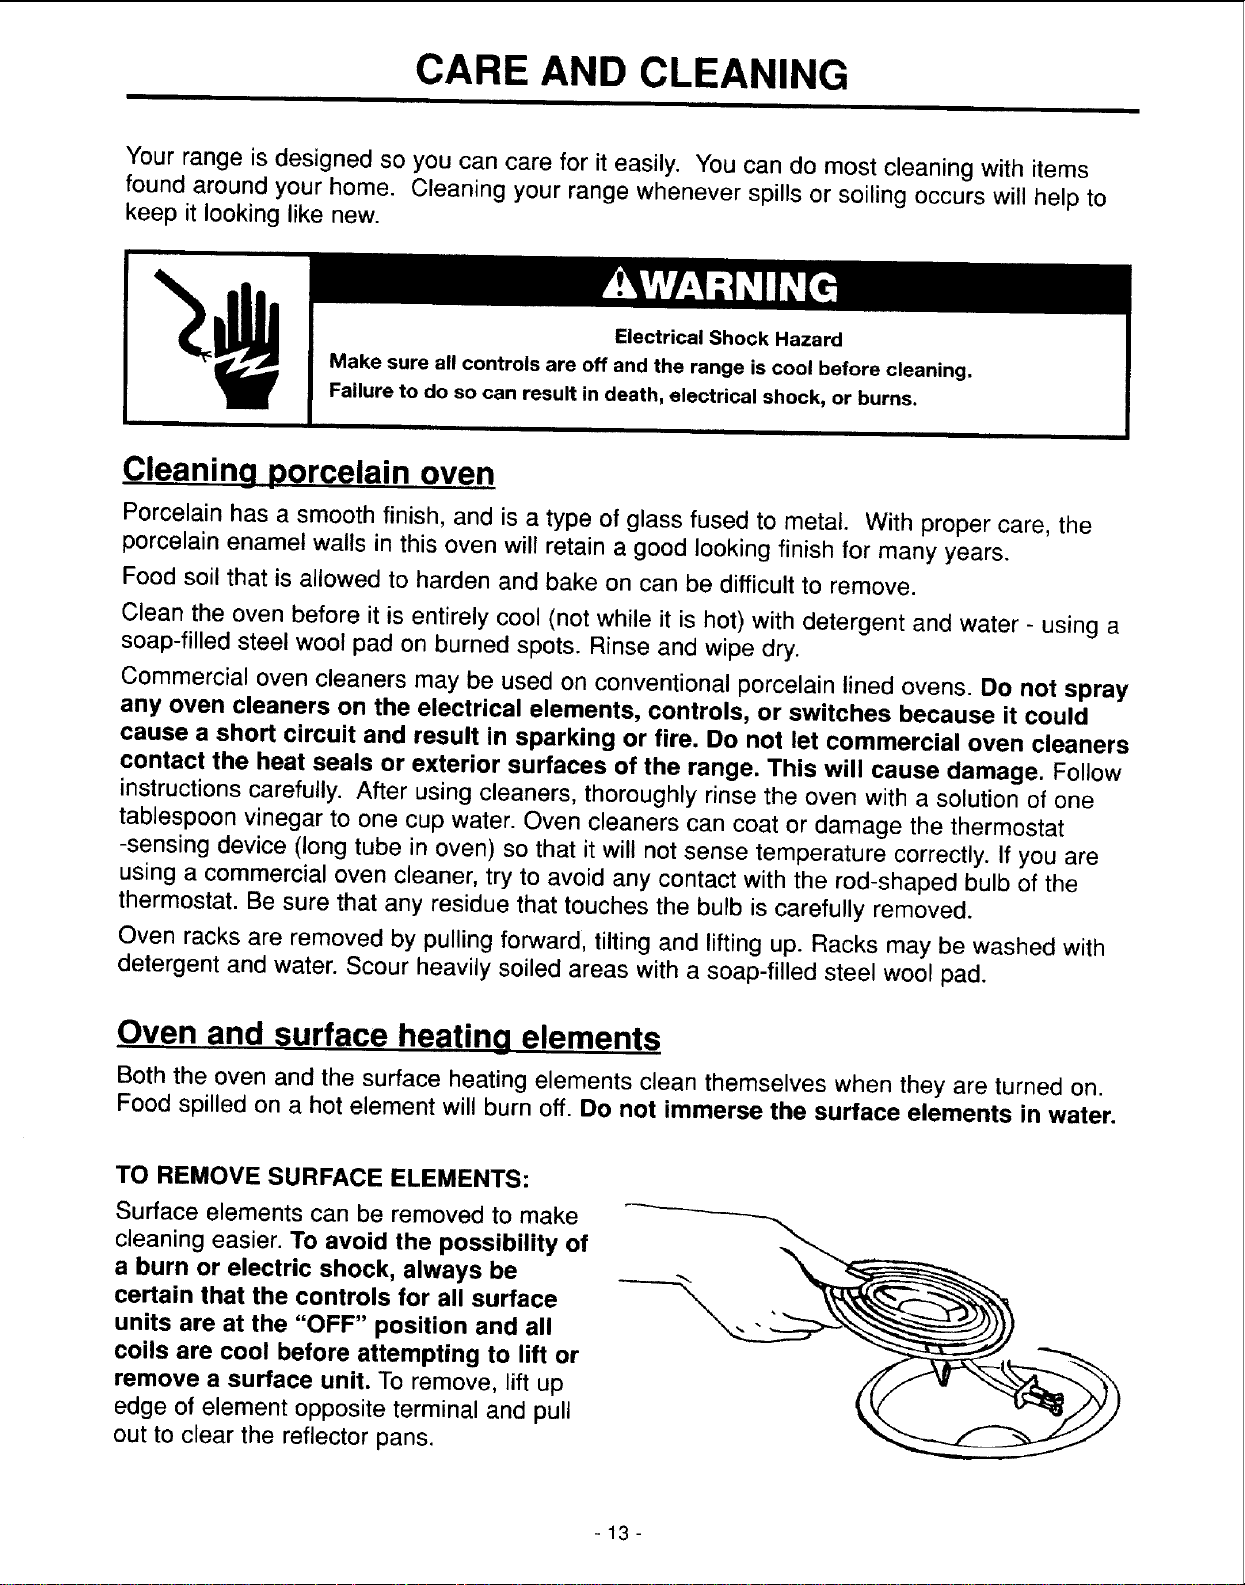
TO REMOVE SURFACE ELEMENTS:
Surface elements can be removed to make
cleaning easier. To avoid the possibility of
a burn or electric shock, always be
certain that the controls for all surface
units are at the "OFF" position and all
coils are cool before attempting to lift or
remove a surface unit. To remove, lift up
edge of element opposite terminal and pull
out to clear the reflector pans.
-13-
CARE AND CLEANING
Reflector pans
Wash reflector pans in warm, sudsy water or in the dishwasher. Rinse and dry while still
warm. Hard-to-remove soil can be removed using a nylon scrubber and a mild detergent and
water. DO NOT USE STEEL WOOL.
TO REMOVE REFLECTOR PANS:
The chrome heat reflector pans are removed by first removing the element, (See: To Remove
Surface Elements page 13) and then lifting the reflector pan out.
Control knobs and dials
Clean up any spills or splatters on the knobs and dial with a damp cloth. Remove heavier soil
with soapy water. The control knobs and dial may be removed for easier cleaning by pulling
straight off the stem. Wash the knobs in soap and water but do not soak.
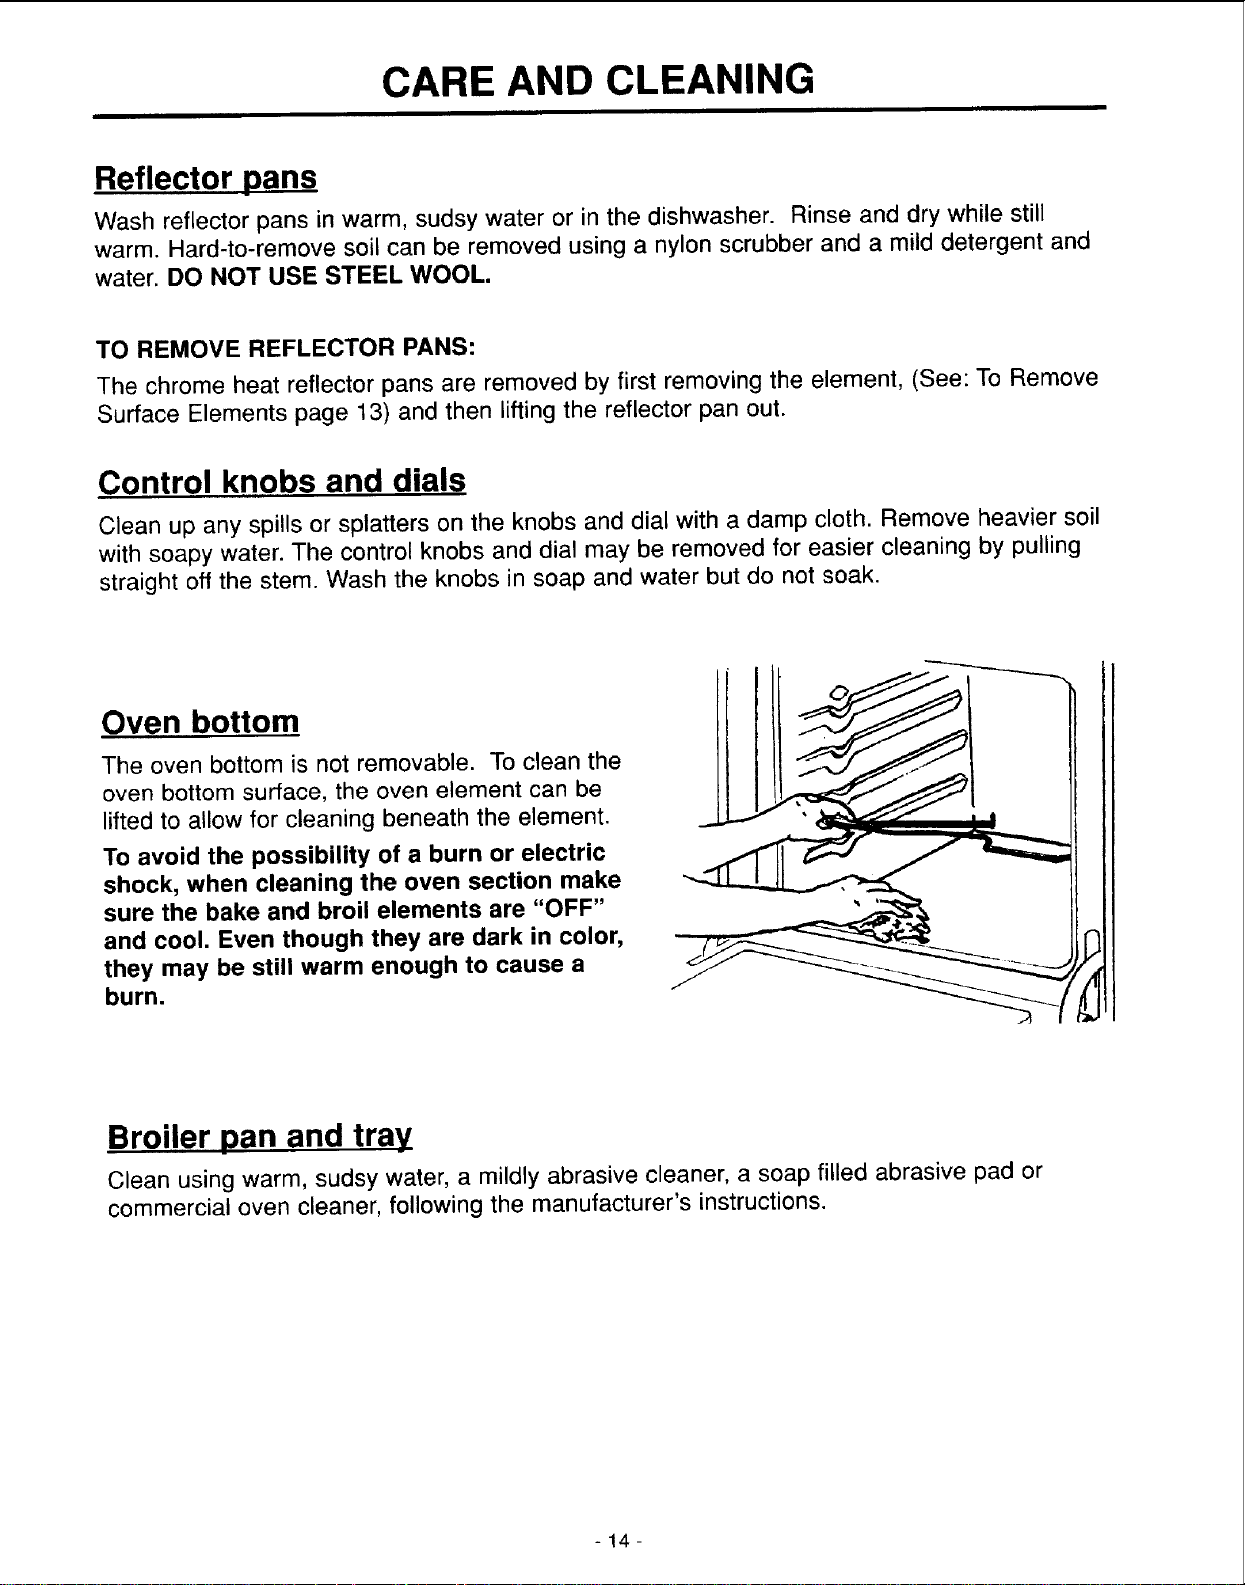
Oven bottom
The oven bottom is not removable. To clean the
oven bottom surface, the oven element can be
lifted to allow for cleaning beneath the element.
To avoid the possibility of a burn or electric
shock, when cleaning the oven section make
sure the bake and broil elements are "OFF"
and cool. Even though they are dark in color,
they may be still warm enough to cause a
burn.
Broiler pan and tray
Clean using warm, sudsy water, a mildly abrasive cleaner, a soap filled abrasive pad or
commercial oven cleaner, following the manufacturer's instructions.
-14-
CARE AND CLEANING
Cleaning porcelain cooktop, oven door, and storage outer panel
Wash with a sponge and warm soapy water. Wipe with clean water and dry well.
Use a nonabrasive plastic scrubbing pad on heavily soiled areas.
Do not use abrasive or harsh cleaners, (such as chlorine bleach, ammonia, or commercial
oven cleaners) which can damage the finish.
LIFT-UP COOKTOP:
To make cleaning easier, the entire cooktop may be
lifted up and supported in the up position. To avoid the
possibility of a burn or electrical shock, make sure
all the surface units are turned "OFF" and cool
before raising the top.
The recessed area beneath the lift-up cooktop may be
wiped clean with a warm soapy rag.
• Do not use gritty or harsh cleaners, which can damage
the finish of the recessed area beneath the cooktop.
TO REMOVE OVEN DOOR:
The 20" range door can not be removed.
The 30" range has a lift-off door.
To remove lift-off door:
1. Open oven door approximately three
inches to its self stop position.
2. Grasp oven door firmly on both sides
and lift complete door straight up and
off hinge assembly.
-15-
CARE AND CLEANING
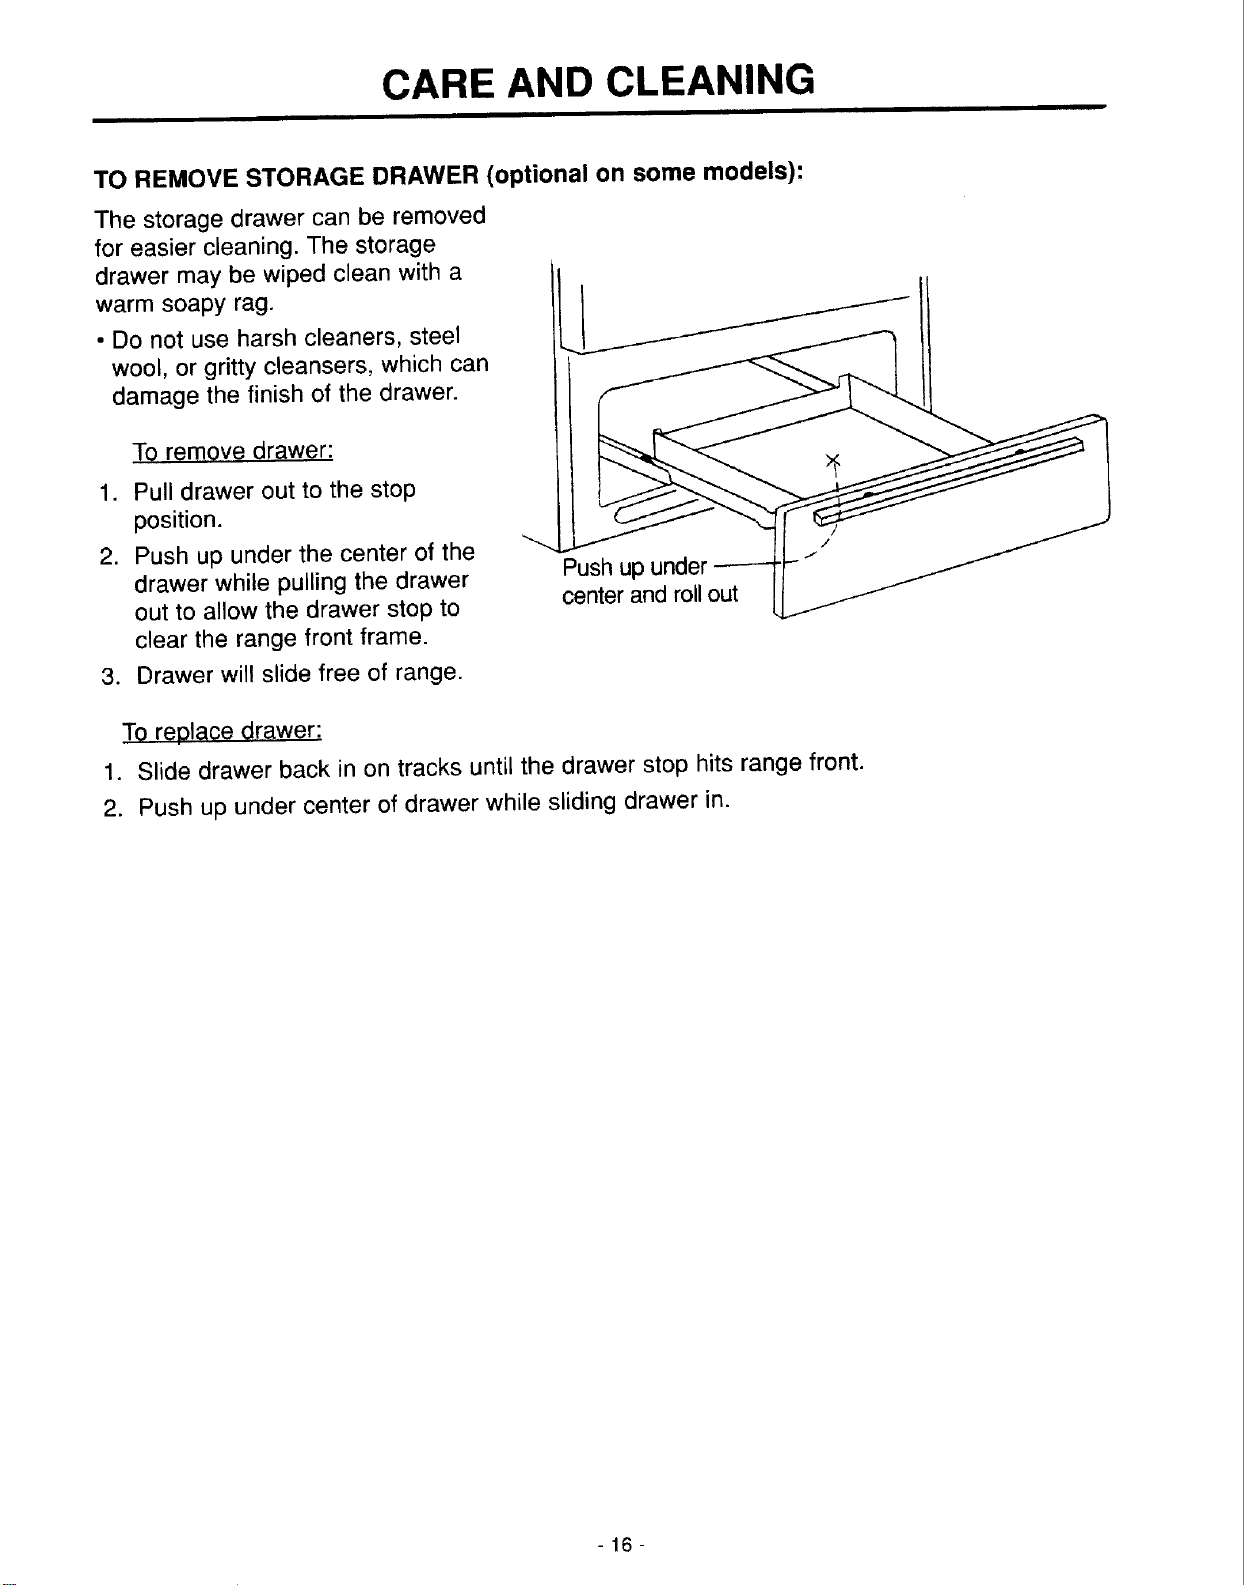
TO REMOVE STORAGE DRAWER (optional on some models):
The storage drawer can be removed
for easier cleaning. The storage
drawer may be wiped clean with a
warm soapy rag.
• Do not use harsh cleaners, steel
wool, or gritty cleansers, which can
damage the finish of the drawer.
TO remove drawer:
1. Pull drawer out to the stop
position.
2. Push up under the center of the
drawer while pulling the drawer
out to allow the drawer stop to
clear the range front frame.
3. Drawer will slide free of range.
Push up under
center and roll out
TO replace drawer:
1. Slide drawer back in on tracks until the drawer stop hits range front.
2. Push up under center of drawer while sliding drawer in.
-16-
BEFORE YOU START INSTALLING
IMPORTANT NOTE TO INSTALLER
BEFORE YOU BEGIN - DISCONNECT THE POWER TO THE RANGE AT THE MAIN CIRCUIT
BREAKER AND READ THESE INSTRUCTIONS COMPLETELY AND CAREFULLY.
SAVE THESE INSTRUCTIONS FOR THE LOCAL ELECTRICAL INSPECTOR'S USE.
Important: Observe all governing codes and ordinances.
Proper installation is your responsibility. A qualified technician must install this range. Make sure you have
everything necessary for correct installation. It is the installer's responsibility to comply with installation clear-
ances specified in these instructions and the electrical requirements specified on the model/serial rating plate
located under the cooktop.
Check location where range will be installed. The range should be located for convenient use in kitchen.
Cabinet opening dimensions shown on page 19 must be used. Given dimensions are minimum clearances.
Grounded electrical outlet is required. See "Electrical requirements," Page 20.
It is the customer's responsibility to contact a qualified
electrical installer and to make sure that the electrical
installation is adequate and in conformance with National
Electrical Code, ANSI/NFPA 70 - latest edition*, and all
local codes and ordinances.
CLEARANCES - When installing a range around cabinets, use
the recommended clearances given in Table X, page 19, and the
maximum and minimum clearances description given on page 19
in order to conform with safety standards.
The maximum depth of cabinets installed above cooking tops is
13 inches.
The sides of the range can be flush to combustible material below the
cooktop. The back of the range can be flush to combustible material.
Zero clearance is permitted between the range and combustible
construction extending from the cooking surface to 18 inches
above the level of the cooking surface.
IMPORTANT: Serious hazards are associated with reaching into
storage cabinets above a range. To eliminate the risk of burns or
fire by reaching over heated surface units, avoid locating cabinet
storage space above the surface units. If storage cabinet is
provided above a range with a lower oven only, the hazard can
be reduced by installing a range hood that projects horizontally
a minimum of 5 inches beyond the bottom of the cabinet.
Caution: Not all cabinets and building materials are designed to
withstand the heat produced during the normal safe operation of a
listed appliance. Damage, such as discoloration or delamination
may occur.
Mobile home installation
The installation of this range must
conform with the Manufactured Home
Construction and Safety Standard,
Title 24 CFR, Part 3280 {formerly the
Federal Standard for Mobile Home
Construction and Safety, Title 24,
HUD (Part 280)}
or, when such standard is not
applicable, the Standard for
Manufactured Home Installations,
ANSI A 225.1/NFPA 501A, or with
local codes.
When this range is installed in a
mobile home, it must be secured to
the floor during transit. Any method
of securing the range is adequate as
long as it conforms to the standards
listed above.
Four wire power supply cord or cable
must be used in a mobile home
installation. The appliance wiring will
need to be revised. See "Four-wire
electrical connection." Page 22.
Copies of the standards may be
obtained from:
*National Fire Protection Association
Batterymarch Park
Quincy, Massachusetts 02269
-17-
BEFORE YOU START INSTALLING
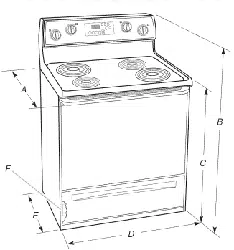
Product dimensions
\
A
\
\
\
_,B _
4
DEPTH WITHOUT DEPTH WITH
MODEL OVERALL HEIGHT COOKTOP HEIGHT WIDTH HANDLE HANDLE
DIM. "A" DIM. "B" DIM. "C" DIM. "D" DIM. "E"
30" ELECTRIC 40" 36" 30" 26" 27 1/8"
20" ELECTRIC 40" 36 1/4" 29 3/16" 24 1/2" 25 1/2"
Parts supplied:
Tools needed:
2 screws #10 x 1"
measuring tape
orruler
floor-mounted Not shown:
anti-tip bracket *literature pack
Bracket must be securely mounted to
sub-floor. Thickness of flooring may
require longer screws to anchor bracket
to sub-floor. Longer screws are avail-
able from your local hardware store.
318"
nutdriver
safety
glasses
wood floors:
118"ddllbit
hand or
electric drill
concrete/ceramic floors:
3116" carbide-tipped masonry
drill bit (Hammer may be
needed for anchors.}
channel lock
-18-
BEFORE YOU START INSTALLING
Cabinet dimensions/requirements
opening width
"B" opening
._ width
top of
cooktop, see Note.***
Do Not pinch the power
supply cord between
the range and the wall.
Do Not seal the range
to the side cabinets.
Oven side panels must
extend beyond cabinet
fronts by 1/4" where 0"
(flush) of side wall is
desired.
/
Wall receptacle - located in shaded
area - 5" from either cabinet, 11"
max. from floor. Position
receptacle as shown.
Zero sides and back clearances
above and below cooktop
TABLE X
MODEL DIM. "A" DIM. "B" DIM. "C"
20" 20" 20 1/4" 10 1/4"
30" 30" 30 3/16" 20 3/16"
***Note: 24" min. when'bottom of
wood or metal cabinet is protect-
ed by not less than 1/4" flame
retardant millboard covered with
not less than No. 28 MSG sheet
steel, 0.015" stainless steel,
0.024" aluminum or 0.020"
copper.
30" min. clearance between the
top of the cooking platform and
the bottom of an unprotected
wood or metal cabinet.
Anti-tip bracket
The floor-mounted anti-tip bracket MUST be installed.
To install:the anti-tip bracket supplied, see Page 23 and
the anti-tip bracket template/instruction sheet.
-19-
BEFORE YOU START INSTALLING
Electrical requirements
Electrical Shock Hazard
Electrically ground this range.
Failure to ground can result in
death or electrical shock.
Do not ground to a gas pipe.
Check with a qualified electrician if you
are not sure the range is properly
grounded.
If codes permit and a separate grounding wire is
used, it is recommended that a qualified electrician
determine that the grounding path is adequate,
Power supply cord is not supplied, but is available
through your local electrical supply house.
Range must be connected to the proper electrical volt-
age and frequency as specified on the model/serial rat-
ing plate. (The model/serial rating plate is located
under the cooktop).
[] CONNECT WITH COPPER WIRE ONLY.
[] A three-wire or 4-wire, single-phase, 120/240-volt,
60-Hz, AC-only, electrical supply (or three-wire or
four-wire 120/208 volt if specified on the model/
serial rating plate) is required on a separate,
40-ampere circuit, fused on both sides of the line.
[] A time-delay fuse or circuit breaker is
recommended.
[] Local codes may permit the use of a U.L-listed,
250-volt, 40-ampere range power supply cord
(pigtail). This cord contains three, No.-10 copper
wires and matches a three-wire receptacle of NEMA
Type 10-50R, shown in Figure 1. Connectors on the
appliance end must be provided at the point the
power supply cord enters the appliance.
The range can be connected directly to the fused
disconnect (or circuit breaker box) through flexible,
armored or non-metallic sheathed, copper cable
(with grounding wire). Allow two to three feet of
slack in the line so that it can be moved if servicing
is ever necessary.
A U.L. listed conduit connector must be provided at
each end of the power supply cable (at the range
and at the junction box).
Wire sizes (COPPER WIRE ONLY) and
connections must conform with the rating of the
range (40-amperes).
The wiring diagram is located on the back of the
range.
If connecting to a four wire system:
This range is manufactured with the ground connected
to the cabinet. This ground must be revised so the
green grounding wire of the four-wire power supply
cord is connected to the cabinet. See "Special ground-
ing instructions for 4-wire system" section, Page 22.
When a four-wire receptacle of NEMA Type 14-50R is
used (see Figure 2), a matching U.L.-listed, four-wire,
250-volt, 40-ampere, range power supply cord (pigtail)
must be used. This cord contains four copper conduc-
tors with ring terminals at the appliance end, terminat-
ing in a NEMA Type 14-50P plug on the supply end.
The fourth (grounding) conductor must be identified by
a green or green/yellow cover and the neutral conduc-
tor by a white cover. Cord should be Type SRD or
SRDT with a U.L. listed strain relief and be at least
four feet long.
The MINIMUM conductor sizes for the copper four-
wire power cord are:
40-ampere circuit
2, No.-8 conductors
1 No.-10 white neutral
1 No.-8 green grounding
3-wire wall 4-wire wail
receptacle 110-50R) receptacle 114-50R)
Figure 1 Figure 2
- 20 -
INSTALLATION STEPS
Remove oven racks and parts package from
inside oven. Remove shipping materials, tape
and protective film from range.
cardboard
shipping base
Keep cardboard shipping base under range to
prevent damage to floor coverings.
I
Excessive Weight Hazard I
I
Use two or more people to move and install the range.
Failure to do so can result in back or other injury.
Porcelain backguard installation
1. Move range cooktop forward about two inches and position backguard over the backguard support.
2. Attach backguard to backguard support with (4) (A) wing nuts. A
3. On the front of the backguard, two nuts are provided on the threaded hinge pin. Remove these two nuts.
Place the cooktop on the pins. Lift the front of the cooktop and thread the two nuts on the hinge pins. Push the
cooktop down into the normal position.
-21 -
INSTALLATION STEPS
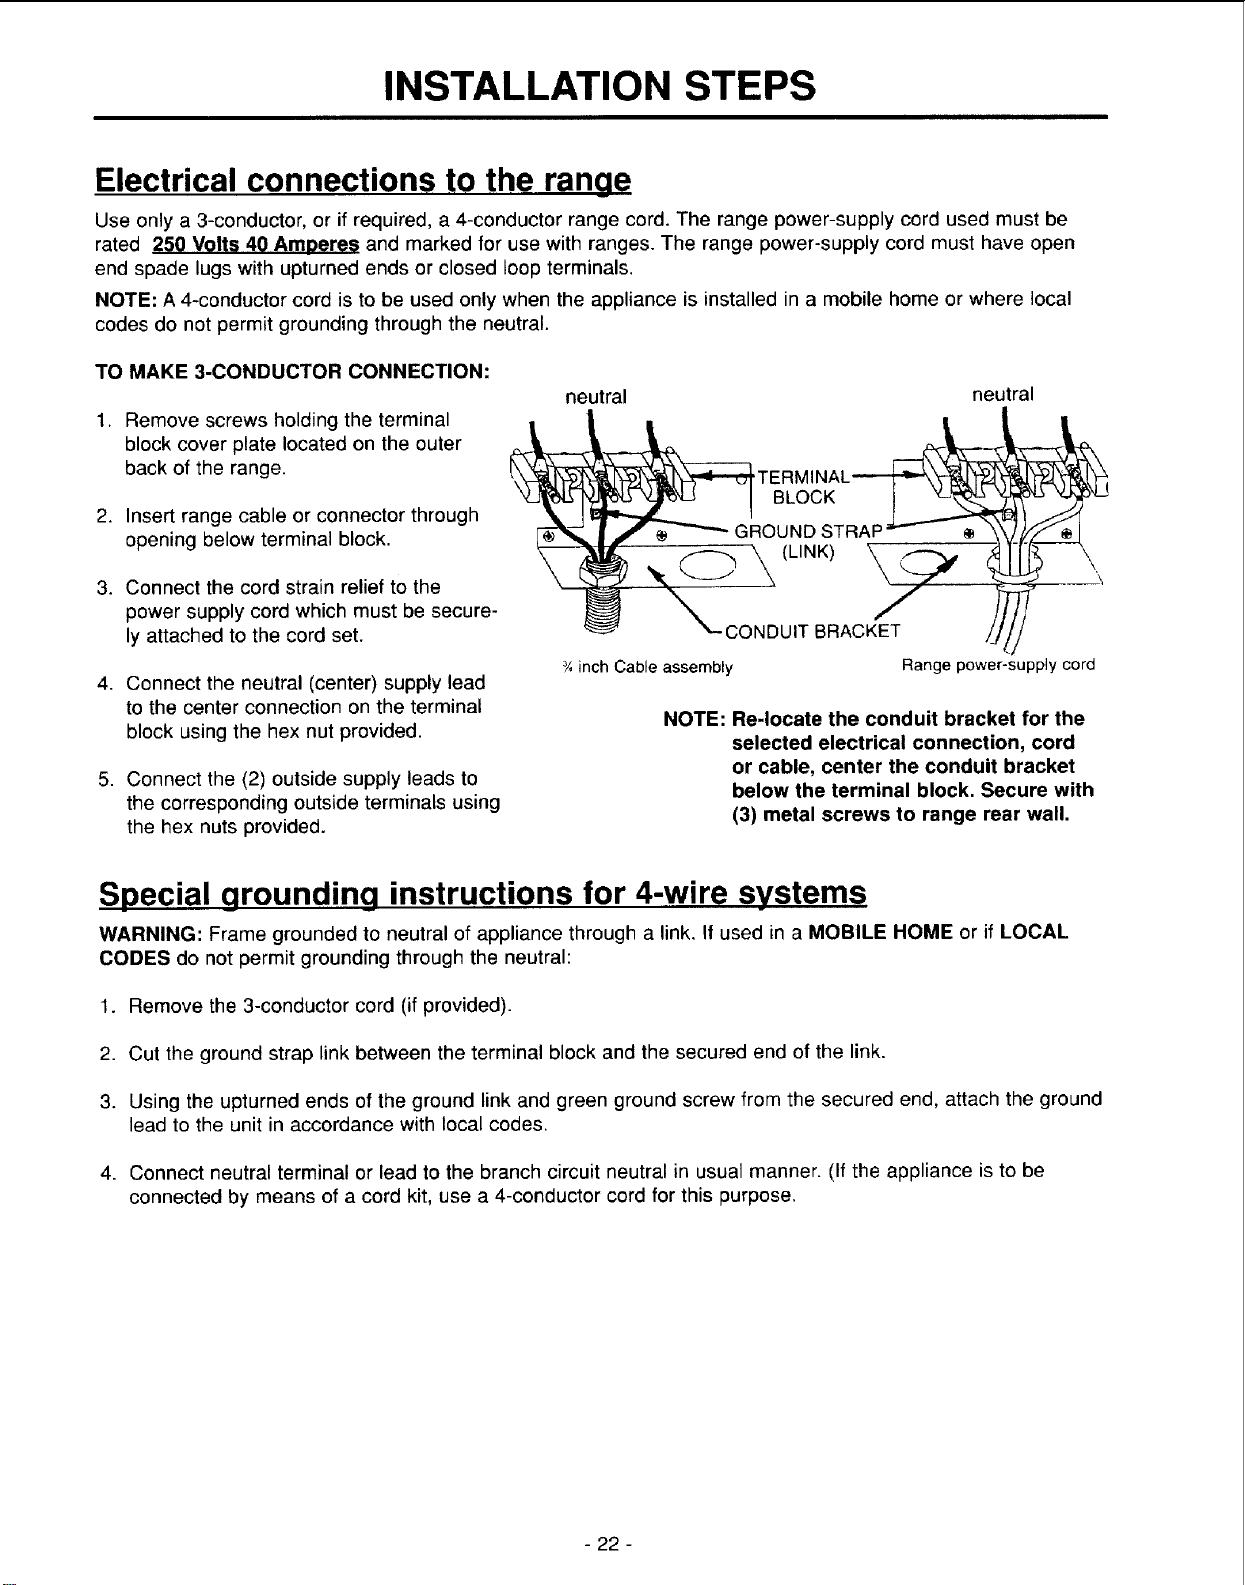
Electrical connections to the ranae
Use only a 3-conductor, or if required, a 4-conductor range cord. The range power-supply cord used must be
rated 250 Volts 40 Amperes and marked for use with ranges. The range power-supply cord must have open
end spade lugs with upturned ends or closed loop terminals,
NOTE: A 4-conductor cord is to be used only when the appliance is installed in a mobile home or where local
codes do not permit grounding through the neutral.
TO MAKE 3-CONDUCTOR CONNECTION:
1. Remove screws holding the terminal
block cover plate located on the outer
back of the range.
2. Insert range cable or connector through
opening below terminal block.
3. Connect the cord strain relief to the
power supply cord which must be secure-
ly attached to the cord set.
4. Connect the neutral (center) supply lead
to the center connection on the terminal
block using the hex nut provided.
5. Connect the (2) outside supply leads to
the corresponding outside terminals using
the hex nuts provided.
neutral neutral
TE
BLOCK
| f _ _ GROUND STRAP
'____ (LINK)
_- CONDUIT BRACKET
inch Cable assembly
Range power-supply cord
NOTE: Re-locate the conduit bracket for the
selected electrical connection, cord
or cable, center the conduit bracket
below the terminal block, Secure with
(3) metal screws to range rear wall,
Special grounding instructions for 4-wire systems
WARNING: Frame grounded to neutral of appliance through a link. If used in a MOBILE HOME or if LOCAL
CODES do not permit grounding through the neutral:
1. Remove the 3-conductor cord (if provided).
2. Cut the ground strap link between the terminal block and the secured end of the link.
3. Using the upturned ends of the ground link and green ground screw from the secured end, attach the ground
lead to the unit in accordance with local codes.
4. Connect neutral terminal or lead to the branch circuit neutral in usual manner. (If the appliance is to be
connected by means of a cord kit, use a 4-conductor cord for this purpose.
- 22 -
INSTALLATION STEPS
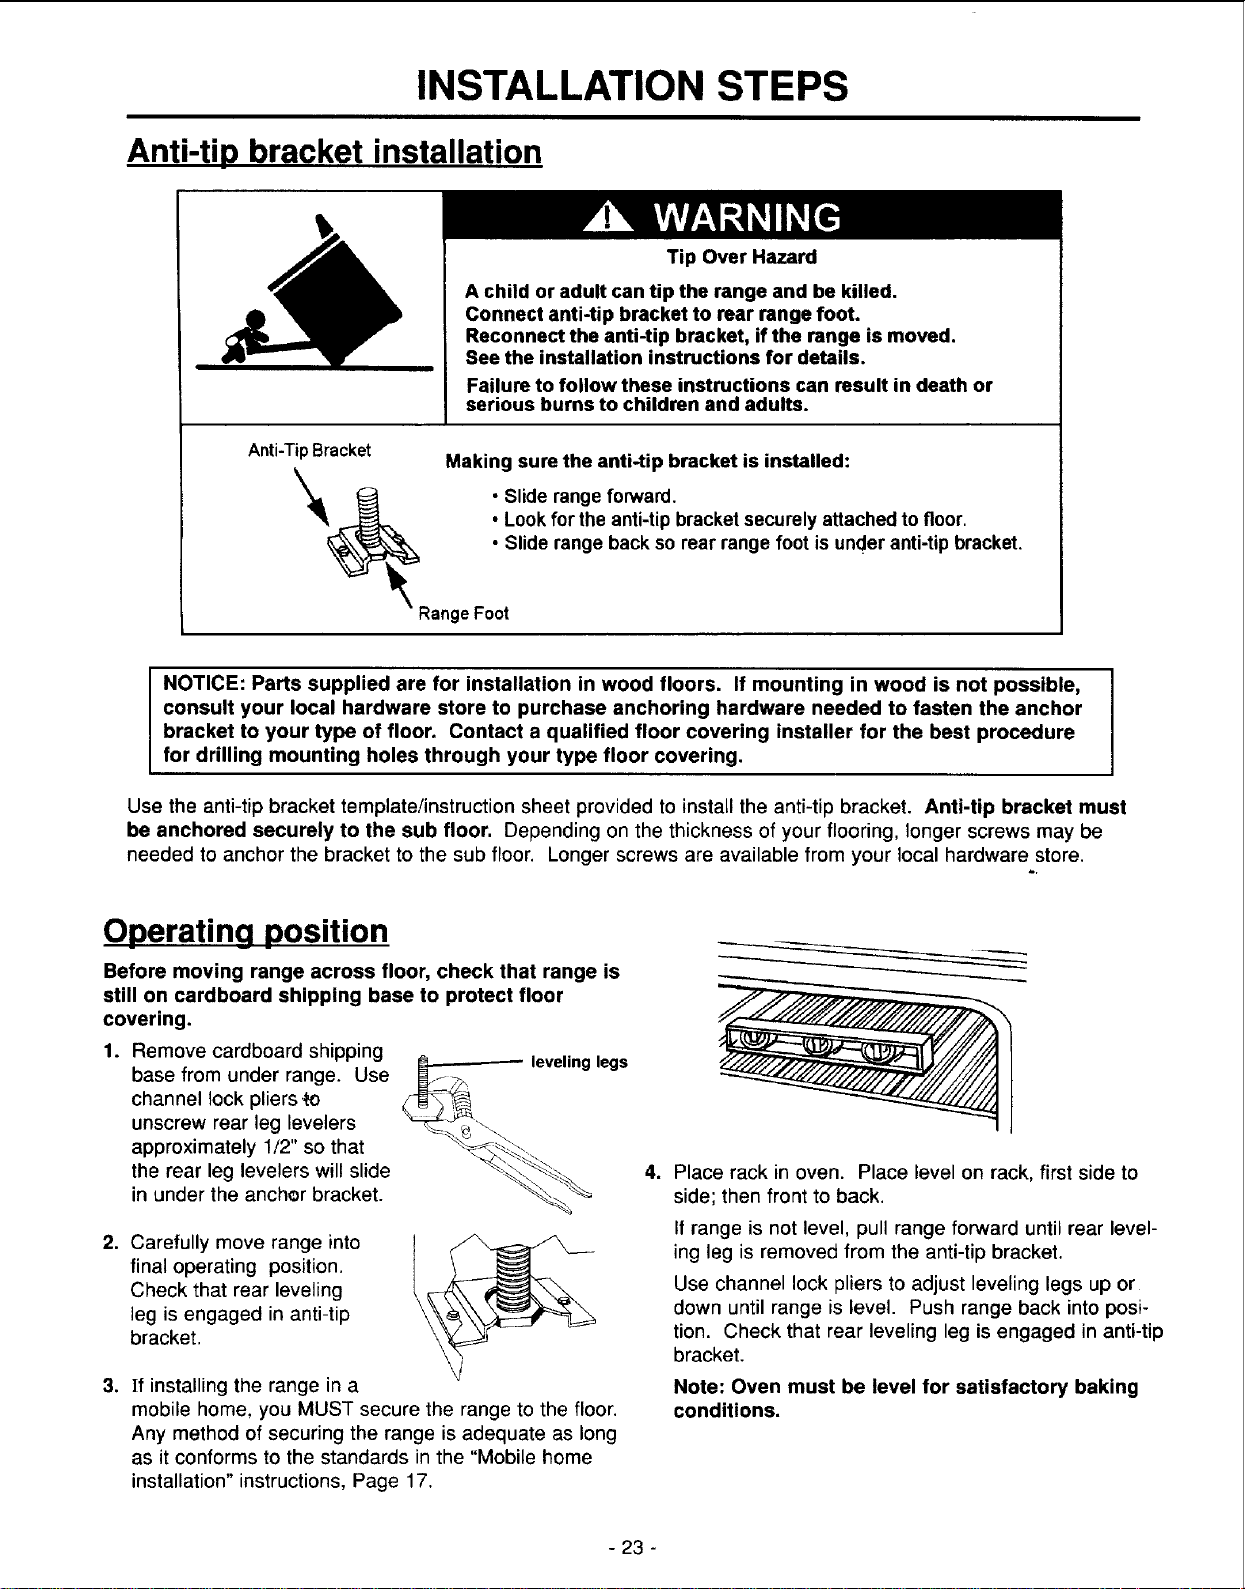
Anti-tip bracket installation
Tip Over Hazard
A child or adult can tip the range and be killed.
Connect anti-tip bracket to rear range foot.
Reconnect the anti-tip bracket, if the range is moved.
See the installation instructions for details.
Failure to follow these instructions can result in death or
serious burns to children and adults.
Anti-TipBracket Making sure the anti-tip bracket is installed:
__ i Slide rangeforward.
• Lookfor the anti-tip bracket securely attached to floor.
Slide range back so rear range foot is under anti-tip bracket.
RangeFoot
NOTICE: Parts supplied are for installation in wood floors. If mounting in wood is not possible,
consult your local hardware store to purchase anchoring hardware needed to fasten the anchor
bracket to your type of floor. Contact a qualified floor covering installer for the best procedure
for drilling mounting holes through your type floor covering.
Use the anti-tip bracket template!instruction sheet provided to install the anti-tip bracket. Anti-tip bracket must
be anchored securely to the sub floor. Depending on the thickness of your flooring, longer screws may be
needed to anchor the bracket to the sub floor. Longer screws are available from your local hardware store.
Operating position
Before moving range across floor, check that range is
still on cardboard shipping base to protect floor
covering.
1. Remove cardboard shipping
base from under range. Use
channel lock pliers ,to
unscrew rear leg levelers
approximately 1/2" so that
the rear leg levelers will slide
in under the ancher bracket.
-- leveling legs
2. Carefully move range into
final operating position.
Check that rear leveling
leg is engaged in anti-tip
bracket.
3. If installing the range in a
mobile home, you MUST secure the range to the floor.
Any method of securing the range is adequate as long
as it conforms to the standards in the "Mobile home
installation" instructions, Page 17.
.
Place rack in oven. Place level on rack, first side to
side; then front to back.
If range is not level, pull range forward until rear level-
ing leg is removed from the anti-tip bracket.
Use channel lock pliers to adjust leveling legs up or
down until range is level. Push range back into posi-
tion, Check that rear leveling leg is engaged in anti-tip
bracket.
Note: Oven must be level for satisfactory baking
conditions.
- 23 -

BEFORE YOU CALL FOR SERVICE
Before you call for service, review this list. It may save you time and expense. This list includes common
occurrences that are not the result of defective workmanship or materials in the appliance.
Find your problem here
OVEN AND SURFACE UNITS WILL
NOT WORK AT ALL.
Possible cause
The plug on the range is not properly plugged into the electrical outlet. BEFORE
CHECKING PLUG, DISCONNECT THE RANGE POWER SUPPLY AT THE
HOUSEHOLD DISTRIBUTION PANEL BY REMOVING THE FUSE OR
SWITCHING OFF THE CIRCUIT BREAKER.
The circuit breaker in your home has been tripped or a fuse has been blown.
OVEN WILL NOT WORK. The Oven Control is not properly set. See Page 7.
SURFACE UNITS WILL NOT WORK The Surface Unit Controls are not properly set. Push in and turn to the desired setting.
The surface units are not plugged in solidly.
The drip pans are not set securely in the cooktop.
OVEN TEMPERATURE TOO HOT Oven Thermostat Control operation in the Broil mode. Turn Oven Control to "OFF" and
OR TOO COLD reset Oven Control rotating from "OFF"to the desired temperature.
BAKE ELEMENT CYCLES OFF AND This is normal for the bake element to cycle as the oven temperature rises above and falls
ON. below the set temperature.
SMOKE OR ODOR ON INITIAL This is normal during the fi_t few times the oven is used.
OVEN OPERATION.
FOOD DOES NOT BROIL PROPERLY. Oven Thermostat Control not set properly. See Broiling Section Page 11.
Improper rack position. See Broiling Section Page 11.
Improper cookware being used.
Improper use of aluminum foil.
FOOD DOES NOT BAKE EVENLY.
Oven Thermostat Control operation in the Broil mode. Turn Oven Control to "OFF" and
reset Oven Control rotating from "OFF' to the desired temperature.
Wrong oven rack location being used.
Incorrect cookware or improper size cookware is being used. See Pan Placement Page 9.
Vent tube obstructed. Clear vent opening located beneath one of the rear surface elements.
OVEN LIGHT DOES NOT WORK.
The oven light bulb is loose ordefective. Tighten or replace. See Page 12.
The oven light switch is not "ON".
- 24 -
Requesting Assistance or Service
To avoid unnecessary service calls, please check "Before you call for Service" on
Pages 24. It may save you the cost of a service call. If you still need help, follow the
instructions below.
If you need Assistance or Service
Call the Consumer Assistance Center
toll free at 1-800-253-1301.
Our consultants are
available to assist you.
When calling:
Please know the purchase date, and
the complete model and serial number of your
appliance (see page 4). This information wil! help
us better respond to your request.
Our consultants provide assistance with:
• Features and specifications on our full line of
appliances.
• Installation information.
• Use and maintenance procedures.
If you need Replacement Parts
• Accessory and repair parts sales
• Do-it-yourself repair help
• Specialized customer assistance (Spanish
speaking, hearing impaired, limited vision, etc.)
• Referrals to local dealers, service companies, and
repair parts distributors
Our service technicians are trained to fulfill the
product warranty and provide after-warranty service,
anywhere in the United States.
To locate the authorized service company in your
area, you can also look in your telephone directory
Yellow Pages.
If you need to order replacement parts, we
recommend that you only use our factory
authorized parts. Our replacement parts will fit
right and work right, because they are made to
the same exacting specifications used to build our
new appliances.
To locate replacement parts in your area, call our
Consumer Assistance Center telephone number or
your nearest authorized service center.
For further Assistance
If you need further assistance, you can write to us
with any questions or concerns at:
Consumer Assistance Center
c/o Correspondence Dept.
2000 North M-63
Benton Harbor, MI 49022-2692
Please include a daytime phone number in your
correspondence.
If the dealer, authorized servicer, and we have failed
to resolve your problem, you can contact the Major
Appliance Consumer Action Program (MACAP).
MACAP is a group of independent consumer experts
that voice consumer views at the highest levels of the
major appliance industry. MACAP will in turn inform
us of your action.
Major Appliance Consumer Action Program
20 North Wacker Drive
Chicago, IL 60606
- 25 -
WARRANTY- Electric Range
LENGTH OF WARRANTY WE WILL PAY FOR
FULL ONE-YEAR Replacement parts and repair labor to correct defects in materials or
WARRANTY workmanship. Service must be provided by an authorized service company.
FROM DATE OF PURCHASE
WE WILL NOT PAY FOR
A. Service calls to:
1. Correct the installation of your range.
2. Instruct you how to use your range.
3. Replace house fuses or correct house wiring.
4. Replace owner-accessible light bulbs.
B. Pickup and delivery. Your range is designed to be repaired in the home.
C. Damage to your range caused by accident, misuse, fire, flood, acts of God, or use of products not
mentioned in this manual.
D. Repairs to parts or systems caused by unauthorized modifications made to the appliance.
E. Repairs when your range is used in other than normal, single-family household use.
WHIRLPOOL CORPORATION SHALL NOT BE LIABLE FOR INCIDENTAL OR CONSEQUENTIAL
DAMAGES.
Some states do not allow the exclusion or limitation of incidental or consequential damages, so this exclusion or
limitation may not apply to you. This warranty gives you specific legal rights, and you may also have other rights
which vary from state to state.
Outside the United States, a different warranty may apply. For details, please contact your authorized
dealer.
Ifyou need service, first see the "Before you call for Service" section of this book. After checking "Before you call
for Service," additional help can be found by checking the "Requesting Assistance or Service" section, or by call-
ing the Whirlpool Corporation Consumer Assistance Center telephone number, 1-800-253-1301, from anywhere
in the U.S.A.