Loading ...

Before beginning assembly, installation, or operation of product, make sure all parts are present. Compare
parts with package and hardware contents list on page 1. If any part is missing or damaged, do not attempt to
assemble, install or operate the product. Contact customer service for replacement parts.
Tools Required for Assembly (not included): Philips screwdriver and safety glasses.
Helpful Tools (not included): Tape measure, pencil, awl/nail
SAFETY INFORMATION
PREPARATION
WARNING: These products may represent a possible shock or re hazard if improperly installed or attached
in any way. Products should be installed in accordance with these instructions, current electrical codes, and/
or the current National Electric Code (NEC). Disconnect power to the unit prior to installation.
WARNING: To reduce risk of re, electric shock, or injury to persons, be sure that power supply is
turned o at fuse box or circuit breaker before attempting installation or servicing of the xture.
WARNING:
Injury to persons and damage to the xture and/or mounting surface may result if the xture is pulled
from the surface. To reduce the likelihood of such injury or damage, mount to a surface that is mechanically sound.
SAVE THESE INSTRUCTIONS.
For safest operation, read and become familiar with complete installation
instructions prior to use. Pay close attention to this manual and stay within its guidelines when using this product.
ADDITIONAL SAFETY MEASURES
• Suitable for indoor damp locations only.
• Do not mount near high heat source.
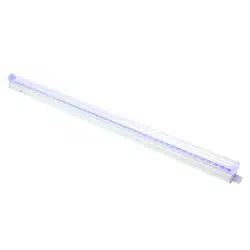
• Each LED black light consumes 9 watts. Do not connect more than 72 watts when linking multiple xtures.
• To reduce the risk of electrical shock, do not put the nit in water or other liquid. Not for use with aquariums.
• Do not place or store unit where it can fall or be pulled into a tub or sink, nor where it can be exposed to
water spray.
• This product has a polarized plug (one blade is wider than the other) as a feature to reduce the risk of
electric shock. This plug will t in a polarized outlet only one way. If the plug does not t fully into the outlet,
reverse the plug. If it still does not t, contact a qualied electrician.
• Never use with an extension cord unless plug can be fully inserted. Do not alter plug.
• Do not use this xture with a dimming circuit; however, it can be used with a switched outlet. Per the National
Electric Code (NED), switched wall outlets cannot be used with wall dimmers.
• For cleaning, use a soft dry cloth.
2
INSTALLATION INSTRUCTIONS - This xture is suitable for under cabinet mount.
3
A
A
A
A
A
D
D
C
B
1. Determine and lightly mark location for each
mounting clip (D). You can attach the clips to
the xture (A) to use as a guide, but DO NOT
ATTEMPT TO INSTALL THIS FIXTURE WHILE IT IS
PLUGGED IN.
2. Attach each clip (D) to the mounting surface
with a short mounting screw (C), using a Phillips
screwdriver. An awl or nail head is useful to start the
hole.
3. If installing multiple xtures (others not included),
repeat steps 1 and 2 for each. Connect multiple
xtures together (up to 8 xtures maximum) by
plugging the two xtures into each other, directly
end-to-end.
4. Insert the power cord (B) into the end of the xture
that is nearest the on/o switch.
5. Plug power cord (B) into wall receptacle only after
installation is complete.
6. Use the on/o switch to operate each xture.
Fig. 1
Fig. 2
Fig. 3
Fig. 4
Fig. 5
Fig. 6
B
B
WARNING: PROPOSITION 65
This product can expose you to Lead, which is known to the State of California to cause cancer. For more
information go to www.P65Warnings.ca.gov.
