Loading ...
Loading ...
Loading ...
i fill iiI I J]i i
PREPARING YOUR SAW FOR USE
,,,,,,, ,, = i ii i i i iiii
i i iiiiiiii i i iiii
A. GETTING READY
1. READ YOUR OPERATOR'S MANUAL
CAREFULLY.
YourOperator'sManual hasbeendevelopedtohelp
you prepare yoursaw foruseandtounderstandils
safe operation. It is importantthat you read your
manual completelytobecomefamiliar withthe unit
beforeyoubeginassemblyorattemptoperation.Your
Poutan_ Dealer is available to show you how to
operateyoursaw.Besure toaskforhisassistance.
2. HAVE THE FOLLOWING AVAILABLE:
a, Protective gloves.
b. Approved, marked fuel container,
c. Regular, leaded or unleaded gasoline.
d. 2-cycle engine oil(See page 9).
eoBar and Chain Oil (See page 10).
fo Baradjusting toolprovidedwithyourunit.Oneend
of the toolservesas a wrench;the othercan be
usedas ascrewdriver.
g. Phillips screwdriver.
h. Hex wrench -provided withyouruniL
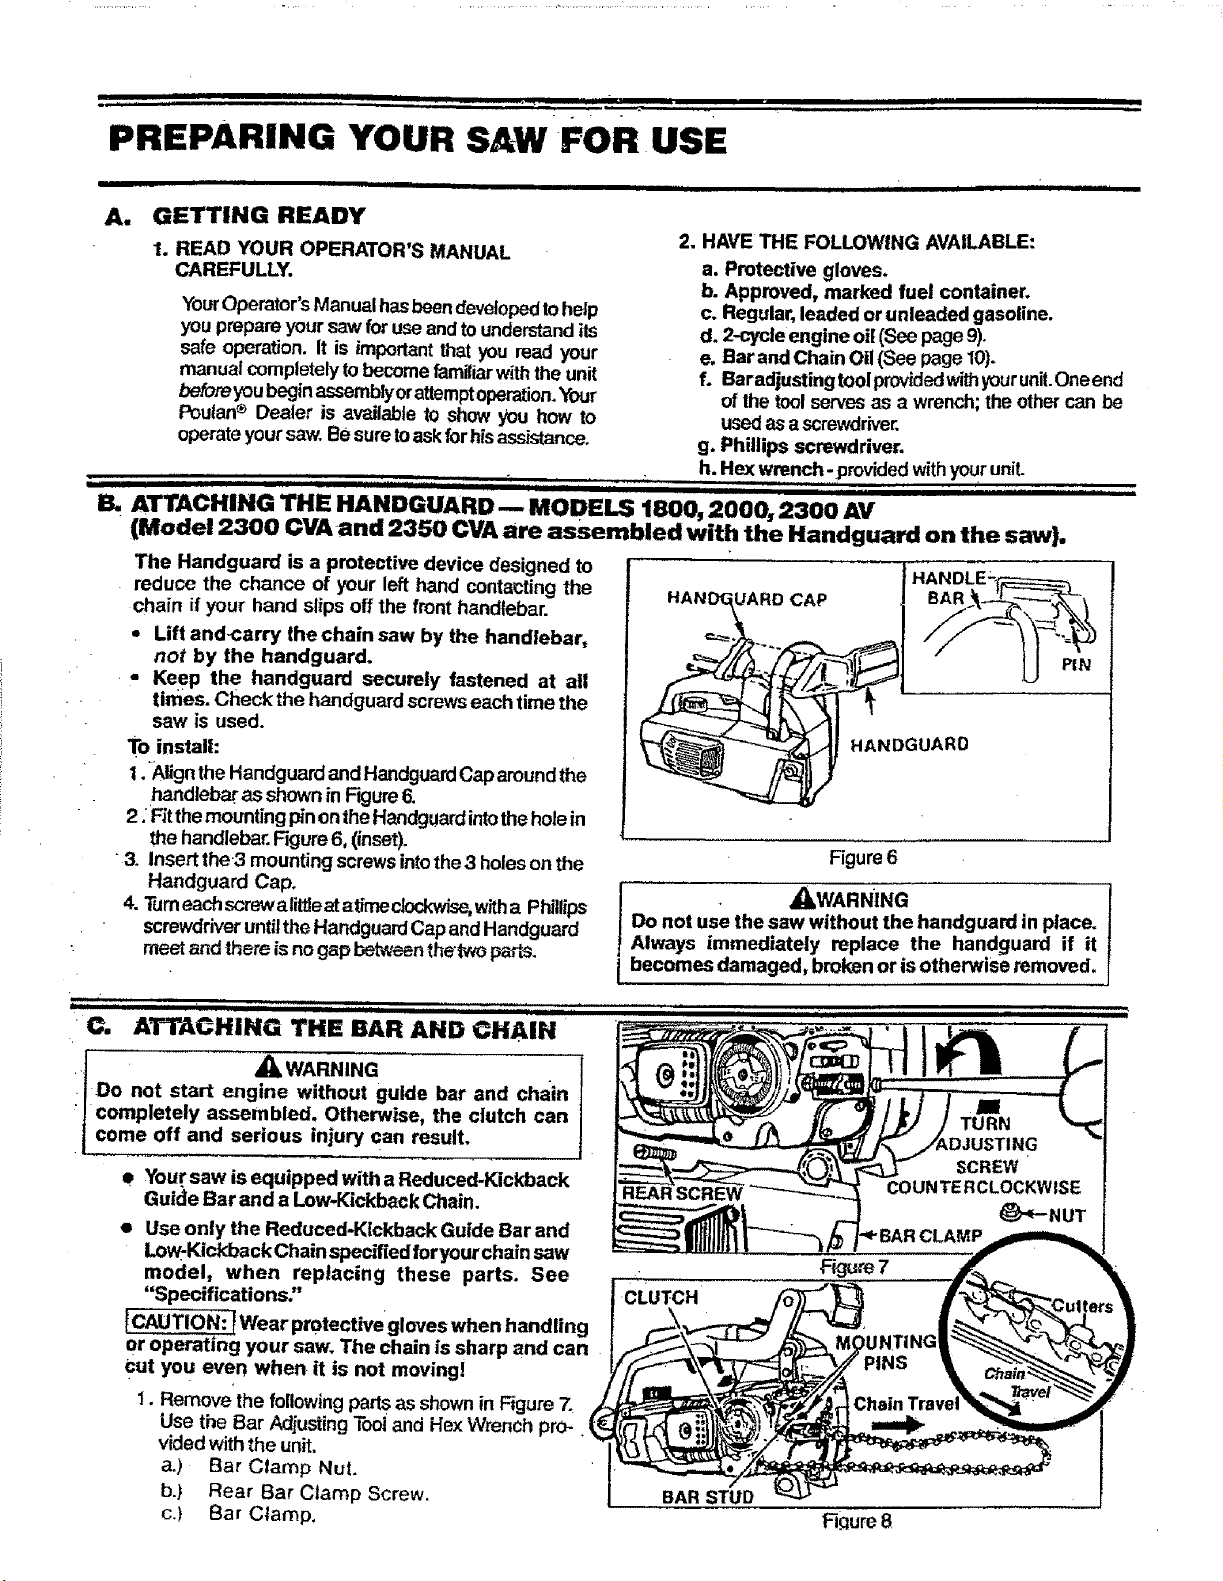
15. ATTACHING THE HANDGUARD -- MODELS 1800, 2000, 2300 AV
(Model 2300 CVAand 2350 CVA are assembled with the Handguard on the saw).
The Handguard is a protective device designed to
reduce the chance of your left hand contacting the
chain if your hand slips off the fronthandlebar.
• Lift and-carry the chain saw by the handlebar,
not by the handguard.
• Keep the handguard securely fastened at all
times. Check the handguard screwseach time the
saw is used.
To install:
1._ign the Handguardand HandguardCap aroundthe
handlebar as shown in Figure6.
2: F_tthemountingp_nonthe Handguardintotheholein
the handlebar.Figure6, (inset).
•3. Insert the3 mounting screwsintothe 3 holeson the
Handguard Cap.
4. Turneachscrewalittleatafirneclockwise, witha Phillips
screwdriveruntiltheHandguardCap andHandguard
meet and there isno gap betweenthe'_ paps.
• ,,,,, i ,L V,H,,,,,, HHHH'H' "U"'"'" :
C. ATTACHING THE BAR AND CHAIN
.l & WARNING
•_Do not start engine wzthout guide bar and chain
_ completely assembled. Otherwise, the clutch can
j come off and serious injury can result.
e Your saw is equipped with a Reduced-Kickback
Guide Bar and a Low-Kickback Chain.
• Use only the Reduced-Kickback Guide Bar and
Low_KicP,back Chain specifiedforyourchain saw
model, when replacing these parts. See
"Specifications"
ICAUTION: 1Wear protective gloves when handling
or operating your saw. The chain is sharp and can
Cut you even when it is not moving!
1. Remove'the followingpartsas shownin Figure 7.
Use the Bar AdjustingTooiand HexWrench pro-
videdwith the unit.
a.) Bar Clamp Nut.
bJ Rear Bar Clamp Screw.
c,) Bar Clamp,
HAN UARD CAP
HANDLE_,__
HANDGUARD
Figure6
j _I=WARNING
Do not use the saw without the handguard in place.
Always immediately replace the handguard if it
i becomes damaged, broken or is otherwise removed.
BAR STUD
Figure 8
Loading ...
Loading ...
Loading ...