Loading ...
2
31-49144
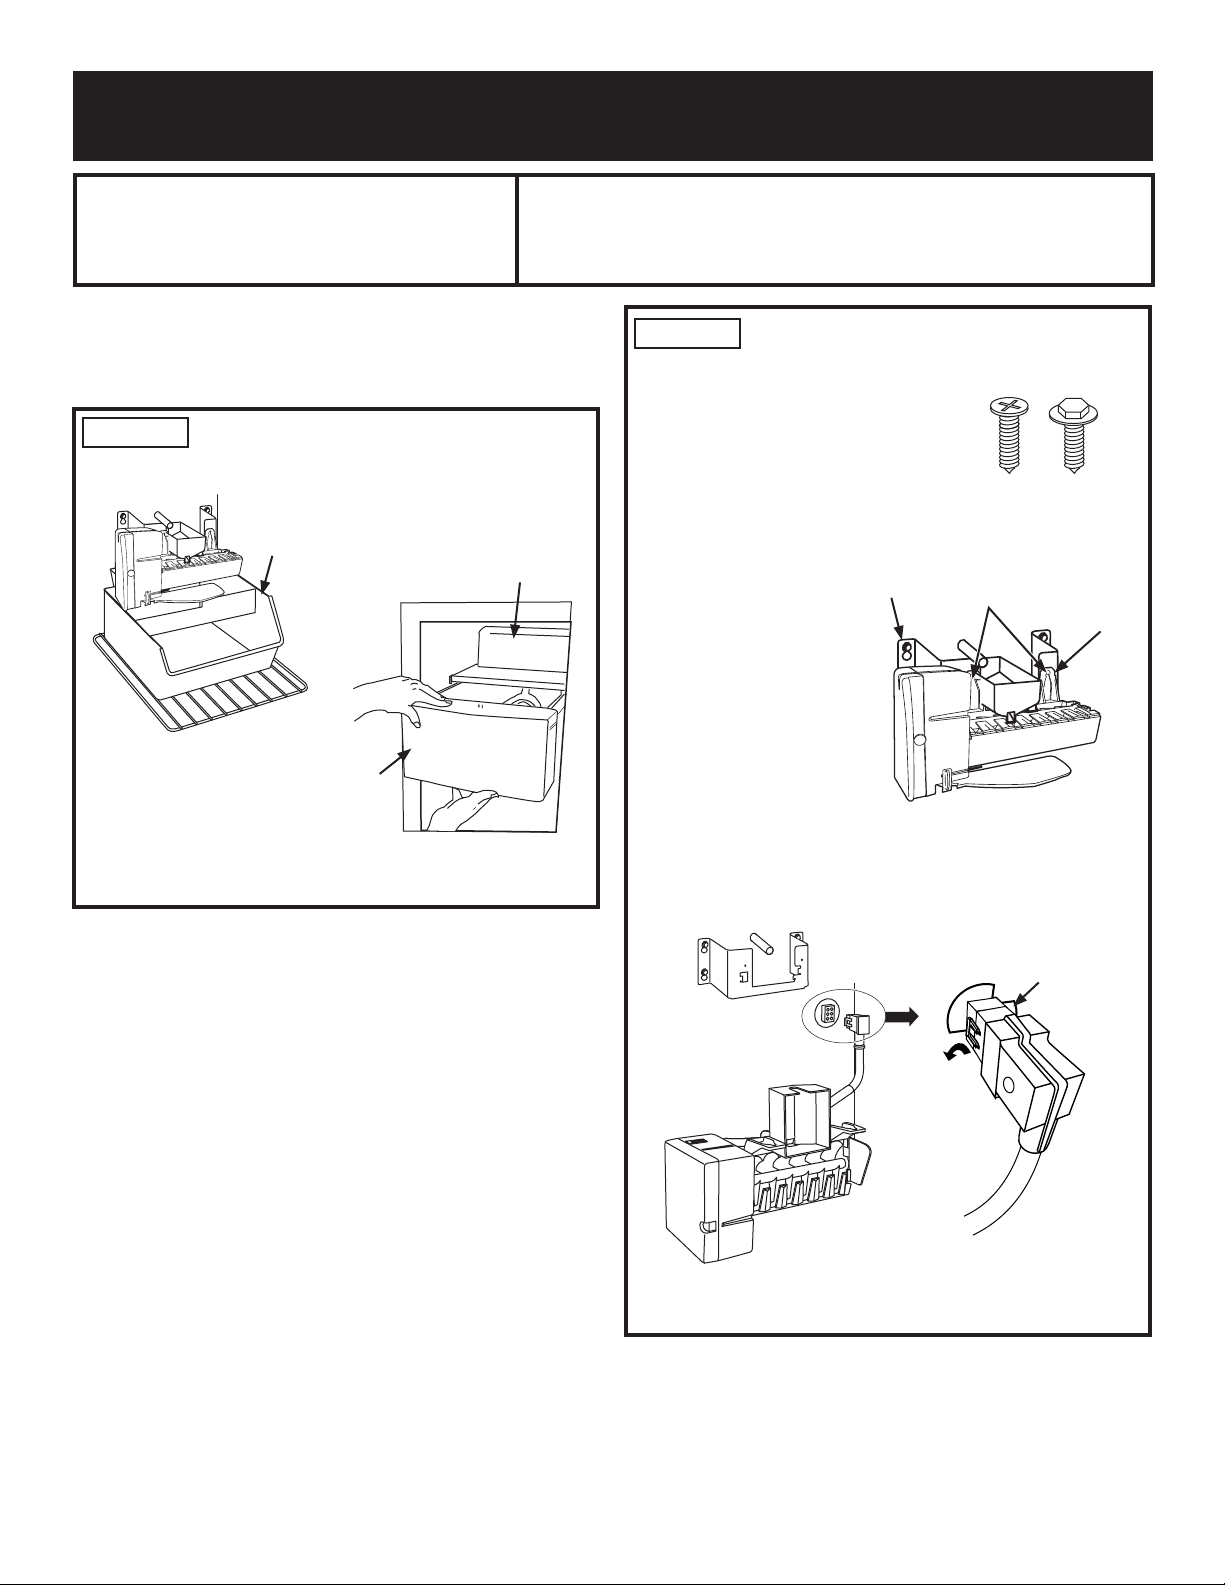
STEP 2 REMOVE THE EXISTING
ICEMAKER
The icemaker will be attached to the
icemaker bracket with a Phillips head
or Hex head screws.
Ŷ 8VLQJWKHDSSURSULDWHVFUHZGULYHU
loosen the 2 mounting screws
until the screw heads extend
about 1/2" (13mm) from the
icemaker bracket.
NOTE: Do not
completely remove
the screws.
Ŷ 6OLGHWKHLFHPDNHU
upwards so that the
screws are in the wide
part of the mounting
tab. Pull the icemaker
away from the
icemaker bracket.
Ŷ 7RXQSOXJWKH
icemaker, locate the restraints on each side of the
SOXJ8QFOLSWKHUHVWUDLQWVE\SXOOLQJRXWZDUG
Ŷ 8QSOXJWKHLFHPDNHUIURPWKHVRFNHWORFDWHGRQWKH
rear wall of the freezer.
Dispenser
Side-By-Side Bucket
Installation
Instructions
Bracket Mount Instructions
WR30X10061 & WR30X10062
STEP 1 REMOVE THE ICE BUCKET &
CHILLER SHELF
,I$SSOLFDEOH
USE THESE INSTRUCTIONS FOR METAL INTERIOR LINED
SIDE-BY-SIDE REFRIGERATORS ONLY
These instructions apply to metal interior lined side-by-
side refrigerators only. For Plastic interior lined side-
by-side refrigerators refer to page 4. For top-freezer
refrigerators refer to page 6.
ON–
O
FF
,FH%XFNHW
,FH%XFNHW
Non-Dispenser
Side-By-Side Bucket
Chiller Shelf
Phillips Hex
Head Head
(Appearance may vary)
ON–OFF
,FHPDNHU
Bracket
Mounting
Screws
Mounting
Tabs
8QFOLS5HVWUDLQWV
by Pulling Them
Outward
0D\5HTXLUH
a Flatblade
Screwdriver to
8QFOLS5HVWUDLQWV
on Back Side
Loading ...
Loading ...
Loading ...