
Loading ...
Loading ...
Loading ...
10
Installation Instructions
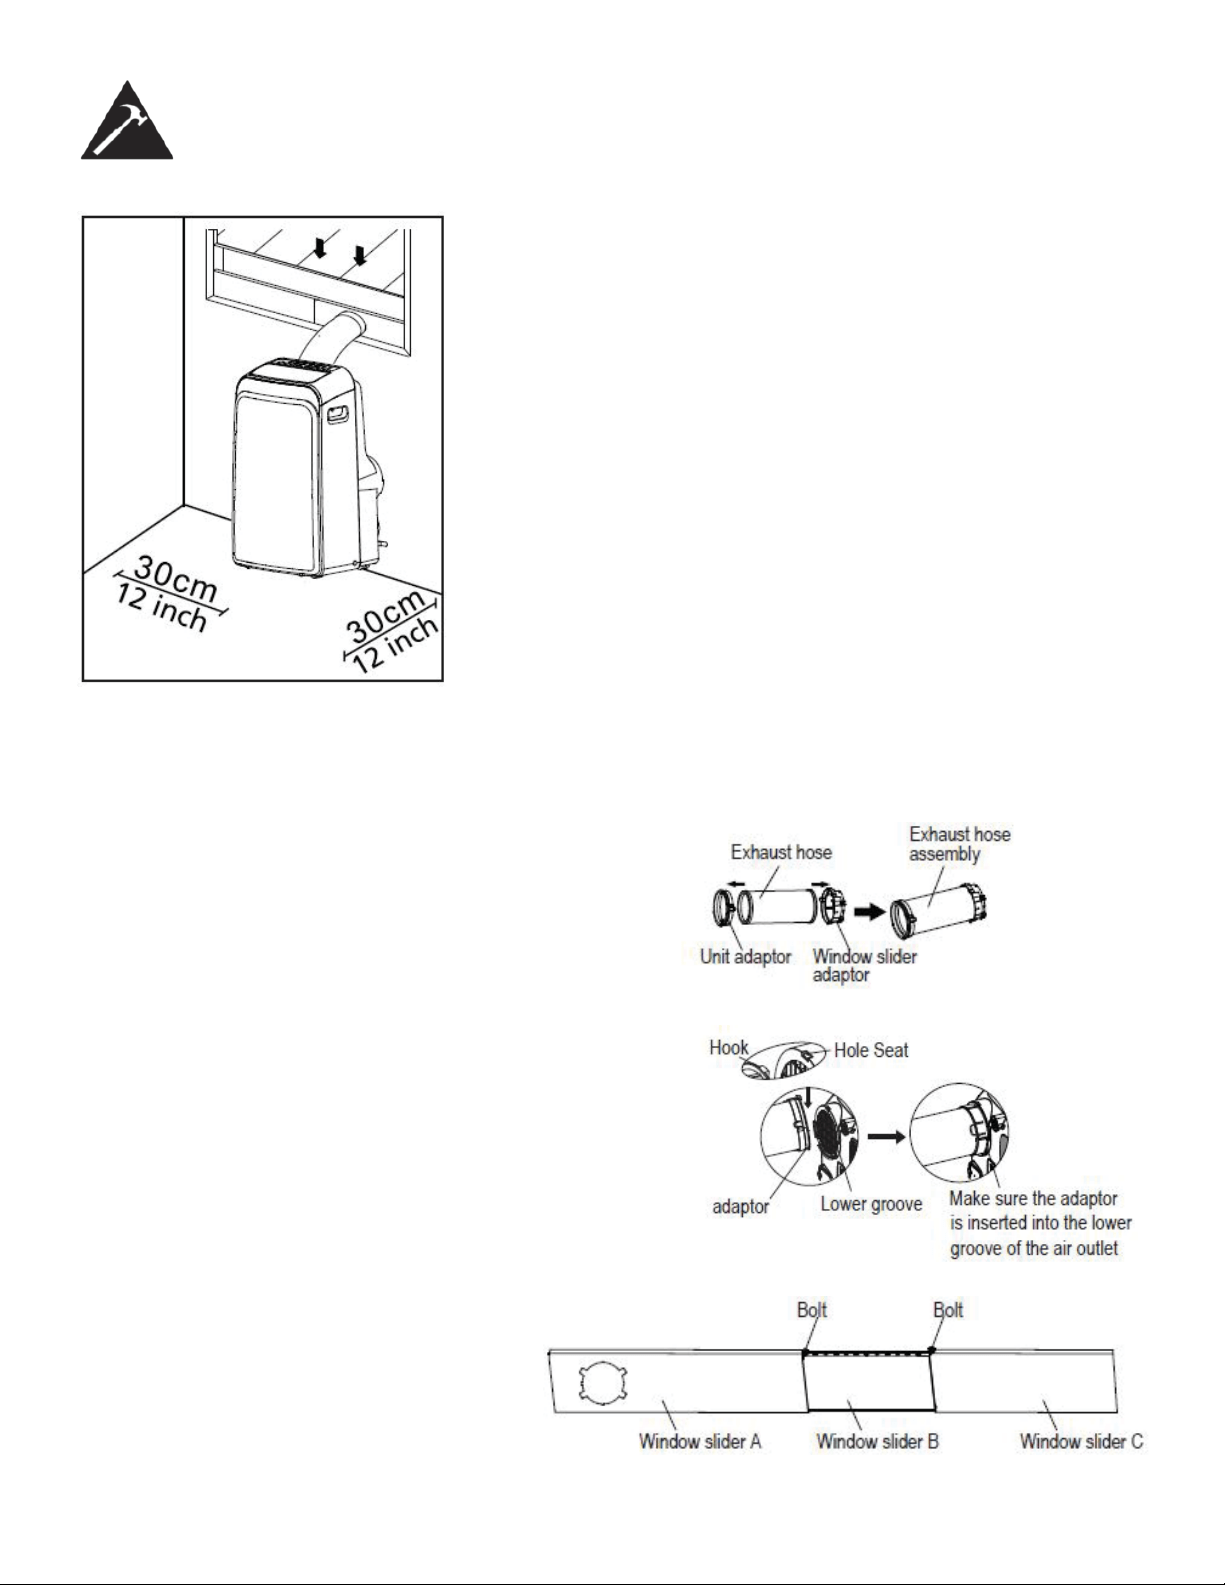
LOCATION
• The air conditioner should be placed on a fi rm foundation to
minimize noise and vibration. For safe and secure positioning,
place the unit on a smooth, level fl oor strong enough to sup-
port the unit.
• The unit has casters to aid placement, but it should only be
rolled on smooth, fl at surfaces. Use caution when rolling on
carpeted surfaces. Use caution and protect fl oors when rolling
over wood fl oors. Do not attempt to roll the unit over objects.
• The unit must be placed within reach of a properly rated
grounded socket.
• Never place any obstacles around the air inlet or outlet of the
unit.
• Allow at least 30 cm of space away from the wall for effi cient
air conditioning.
WINDOW SLIDER KIT INSTALLATION
Your window slider kit has been designed to fi t most standard vertical and horizontal window applica-
tions, however, it may be necessary for you to modify some aspects of the installation procedures for
certain types of windows.
Visit www.danby.com for general instruction videos.
Press the exhaust hose into the window slider adapter
and unit adapter. The adapters will automatically clamp
to the exhaust hose using internal elastic buckles.
Insert the unit adapter into the lower groove of the air
outlet on the unit. Ensure that the hook of the adapter
is aligned wit hthe hole seat of the air outlet and slide
down in the direction of the arrow on the unit.
Measure the window opening where the
window kit will be installed and extend the
sliders to match the measurement. If the
legth of the window opening requires three
window sliders, use the bolt to fasten the
sliders at the proper length.
If the window opening is less than the mini-
mum length of the window slider kit, use the
single slider that has the hole in it and cut it
to the correct size. Ensure that you do not
cut the end of the slider that has the hole in
it, this will ne necessary to attach the ex-
haust hose assembly.
Loading ...
Loading ...
Loading ...