Loading ...
Loading ...
Loading ...
8
Installation
with the cutting hole in the RV roof.
Fig. 10
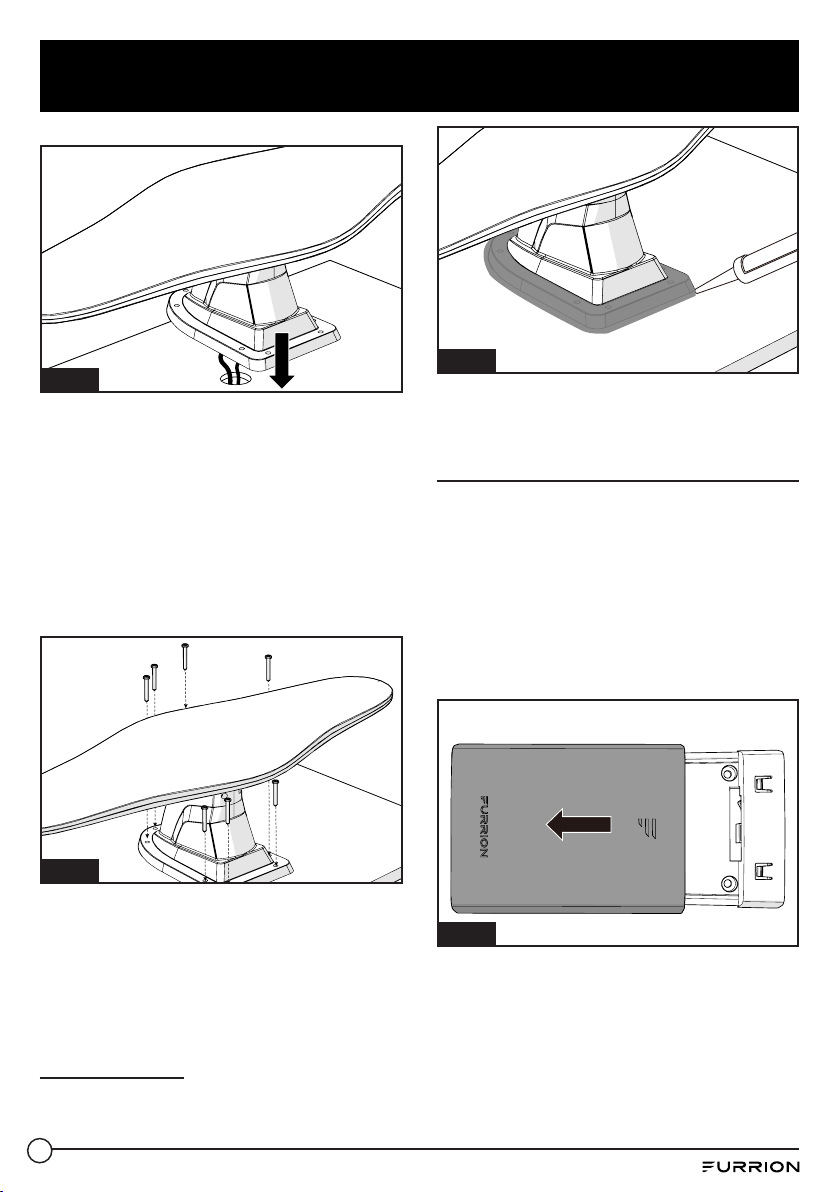
7. Fix the antenna base on the RV roof
using seven stainless steel self-
tapping screws and tighten using a
screwdriver. (Fig. 11)
****
NOTE: Do not overtighten as damage
to the base may be occur, which will
void the warranty. A screw angle up
to 30 degrees is acceptable without
damaging the base.
Fig. 11
8. Apply a liberal amount of sealant
around the antenna base and
the screw holes to prevent water
leakage if necessary. Check with the
RV manufacturer for the standard
sealant for the vehicle. (Fig. 12)
****
For FAN73B7C-BL3, six screws are
needed.
Fig. 12
Installing the Ceiling Mount
Bracket
NOTE: It is recommended that you
have all the wires connected before
permanently installing the ceiling mount
bracket onto the rooftop. See ‘Wiring
Diagram’ section on how to connect the
wires.
1. Push to remove the top cover of the
ceiling mount bracket. (Fig. 13)
Fig. 13
2. Follow the wiring guidelines below
to connect the cables from the
interior of the RV ceiling. See “Wiring
Diagram” section for detail. Fix the
wires with nylon cable tie. (Fig. 14)
Loading ...
Loading ...
Loading ...