Loading ...
Loading ...
Loading ...
page 7
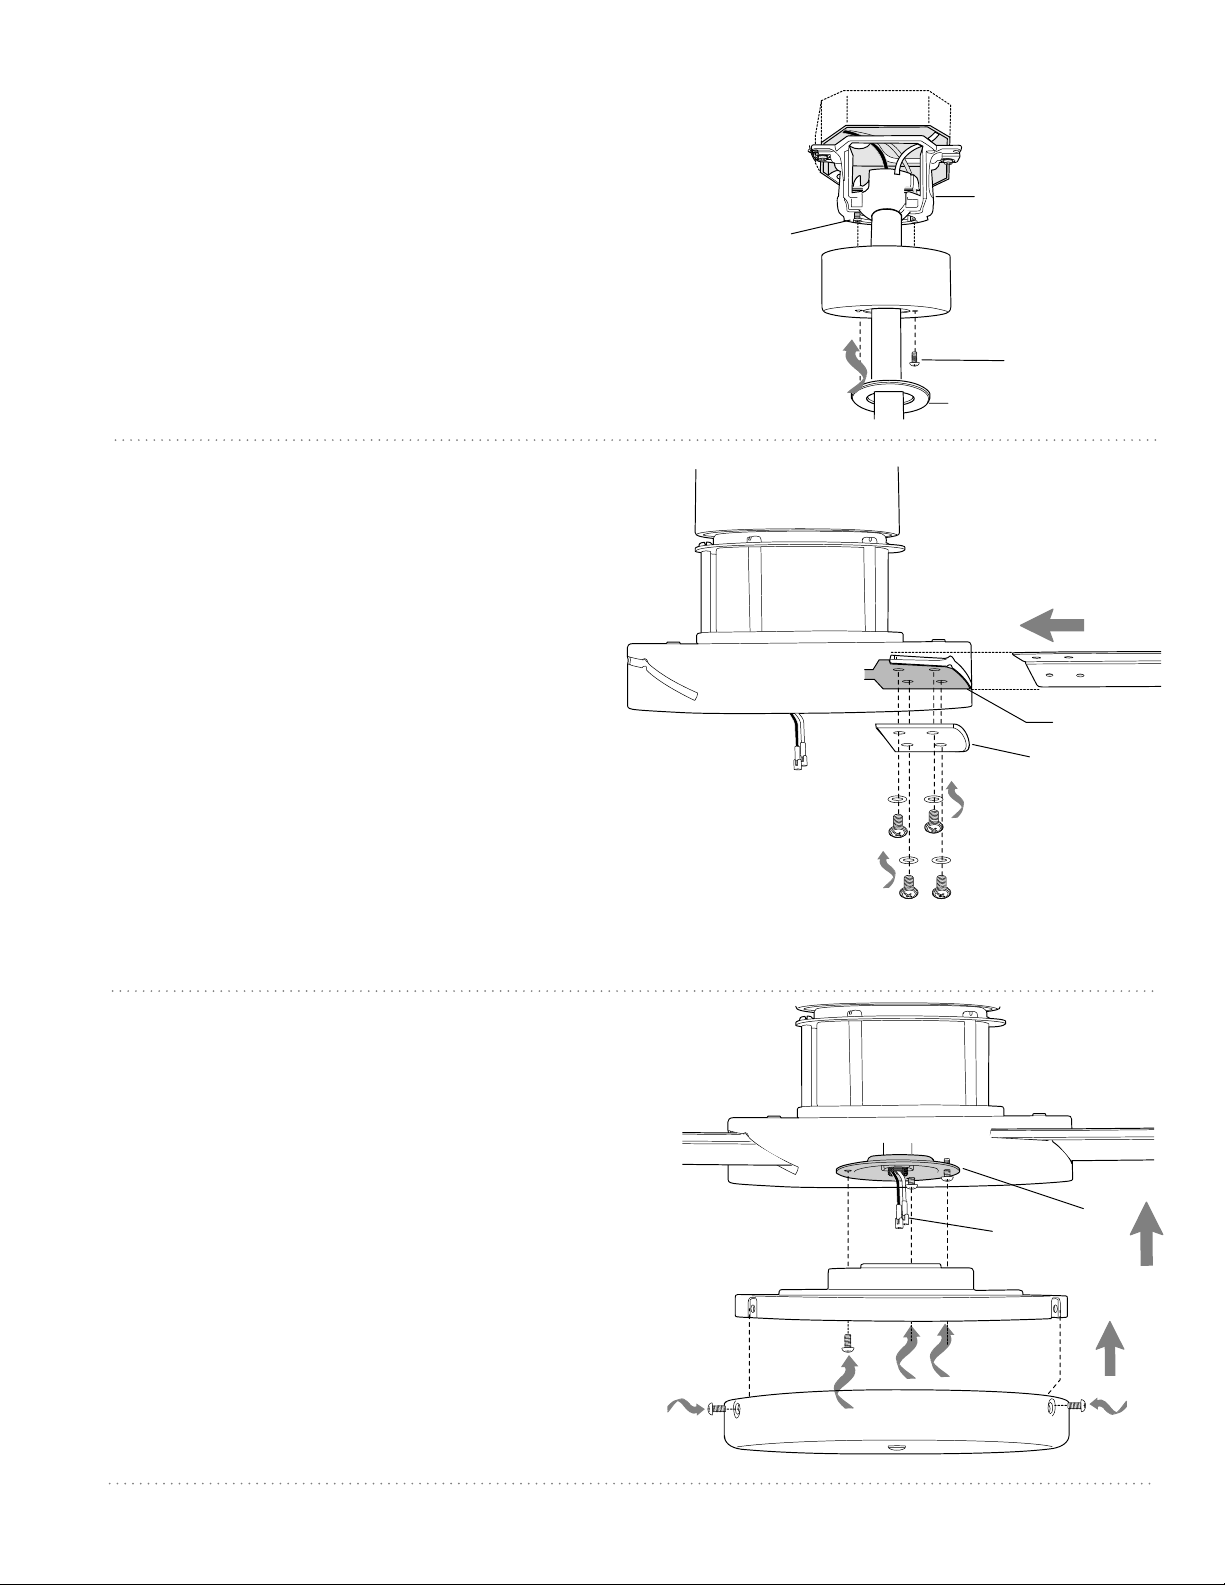
7. Canopy Assembly.
8. Blade Assembly.
Locate 2 screws on underside of hanging bracket and
remove screw closest to the open end of the hanging
bracket. Partially loosen the other screw. Lift canopy to
hanging bracket. Place rounded part of slotted hole in
canopy over loosened screw in hanging bracket and
push up. Twist canopy to lock. Re-insert screw that was
removed, and then tighten both screws securely. Slide
canopy cover up to canopy, aligning rounded part of
slotted holes in canopy cover with screw heads in
bottom of canopy. Turn canopy cover to the right
(clockwise) until it stops.
hanging bracket
screw
screw
canopy cover
9. Switch Housing Assembly.
Remove 3 screws from outer edge of switch housing
plate (save screws for later use).
Remove 1 screw from fitter plate on underside of
motor and partially loosen the other 2 screws. Align
slotted holes in center of switch housing plate with
loosened screws in fitter plate, allowing molex plugs
from motor housing to come through hole in
middle of switch housing plate. Twist switch housing
plate to lock. Re-insert screw that was removed and
secure all screws.
Align holes in switch housing cap with holes in
switch housing plate. Re-insert screws that were
previously removed and use a Phillips screwdriver
to secure all screws.
switch housing
plate
switch
housing cap
molex
plugs
fitter
plate
motor housing
canopy
WARNING: To reduce the risk of serious bodily injury,
DO NOT use power tools to assemble the blades. If
overtightened, blades may crack and break.
Time Saver: Washers for blade screws can be set on
each blade screw prior to installing blades.
Locate 12 blade attachment screws and washers in
hardware pack. Slide blade through one of the narrow,
rectangular openings on motor housing, aligning
holes in blade with holes in blade arm (located on
the underside of the motor housing)--refer to
drawing at right. [Be sure to note label on blade
indicating THIS SIDE UP.] Then, place blade plate over
holes in blade arm, making sure to align all 4 holes, as
shown in drawing at right. Partially insert 4 blade
attachment screws (along with washers). Securely
tighten screws with a Phillips screwdriver only after all
4 screws have been inserted. Repeat procedure for
remaining blades.
Note: Tighten blade arm screws twice a year.
blade
motor housing
blade attachment
screws and washers
blade arm
blade plate
Loading ...
Loading ...
Loading ...