Loading ...
Loading ...
Loading ...
Installation
Instructions
Refrigerat0
Model 18
I Questions?Call 800.GE.CARES(800.432.2737)or VisitourWcbsiteat:GEAppliances.com
In Canada,call 1.800.361.3400or Visitour Websiteat:geappliances.ca
I
BEFORE YOU BEGIN
Read these instructions completely and carefully.
• IMPORTANT - Savethese
instructions for local inspector's use.
• IMPORTANT - Ot,so ,,call
governing codes and ordinances.
• Note to Installer - Besure to leave these
instructions with the Consumes:
• Note to Consumer - Keepthese instructions
for future reference.
• Skill level - Installation of this appliance requires
basic mechanical skills.
• Completion time - Refrigerator Installation
15 minutes
• Proper installation is the responsibility of the
installer.
• Product failure due to improper installation is not
covered under the Warranty.
WATER SUPPLY TO THE ICEMAKER
(ON SOME MODELS)
If the refrigerator has an icemakm, it will have m be
connected m a cold water line. AGE water supply kit
(containing tubing, shutoff valve, fittings and
instructions) is available at extra cost from your dealm,
by visiting our Website at GEAppliances.com (in
Canada at geappliances.ca) or fi'om Parts and
Accessories, 800.626.2002 (in Canada 1.888.261.3055).
REFRIGERATOR LOCATION
• Do not install the refiigeramr where the temperature
will go below 60°F (16°C) because it will not run often
enough to maintain proper temperatures.
• Do not install the refrigerator where the temperature
will go above 100°F (37°C) because it will not perform
properly.
•lnstall the refrigerator on a floor strong enough to
support it when fhlly loaded.
13
PACKAGING TAPE
Remove all packaging tape and peel-off films. These
tapes were added to secure and protect your refi'igerator
during shipping.
CLEARANCES
Allow the following clearances 1or ease of installation,
proper air circulation and plumbing and electrical
connections:
• Sides 1/8" (3 mm)
• Top 1" (25 mm)
• Back 1" (25 mm)
If the refrigerator is against a wall on either side, allow
a minimum of 13/1" (45 mm) between the wall and the
side of the refrigerator to allow for door and handle
clearance.
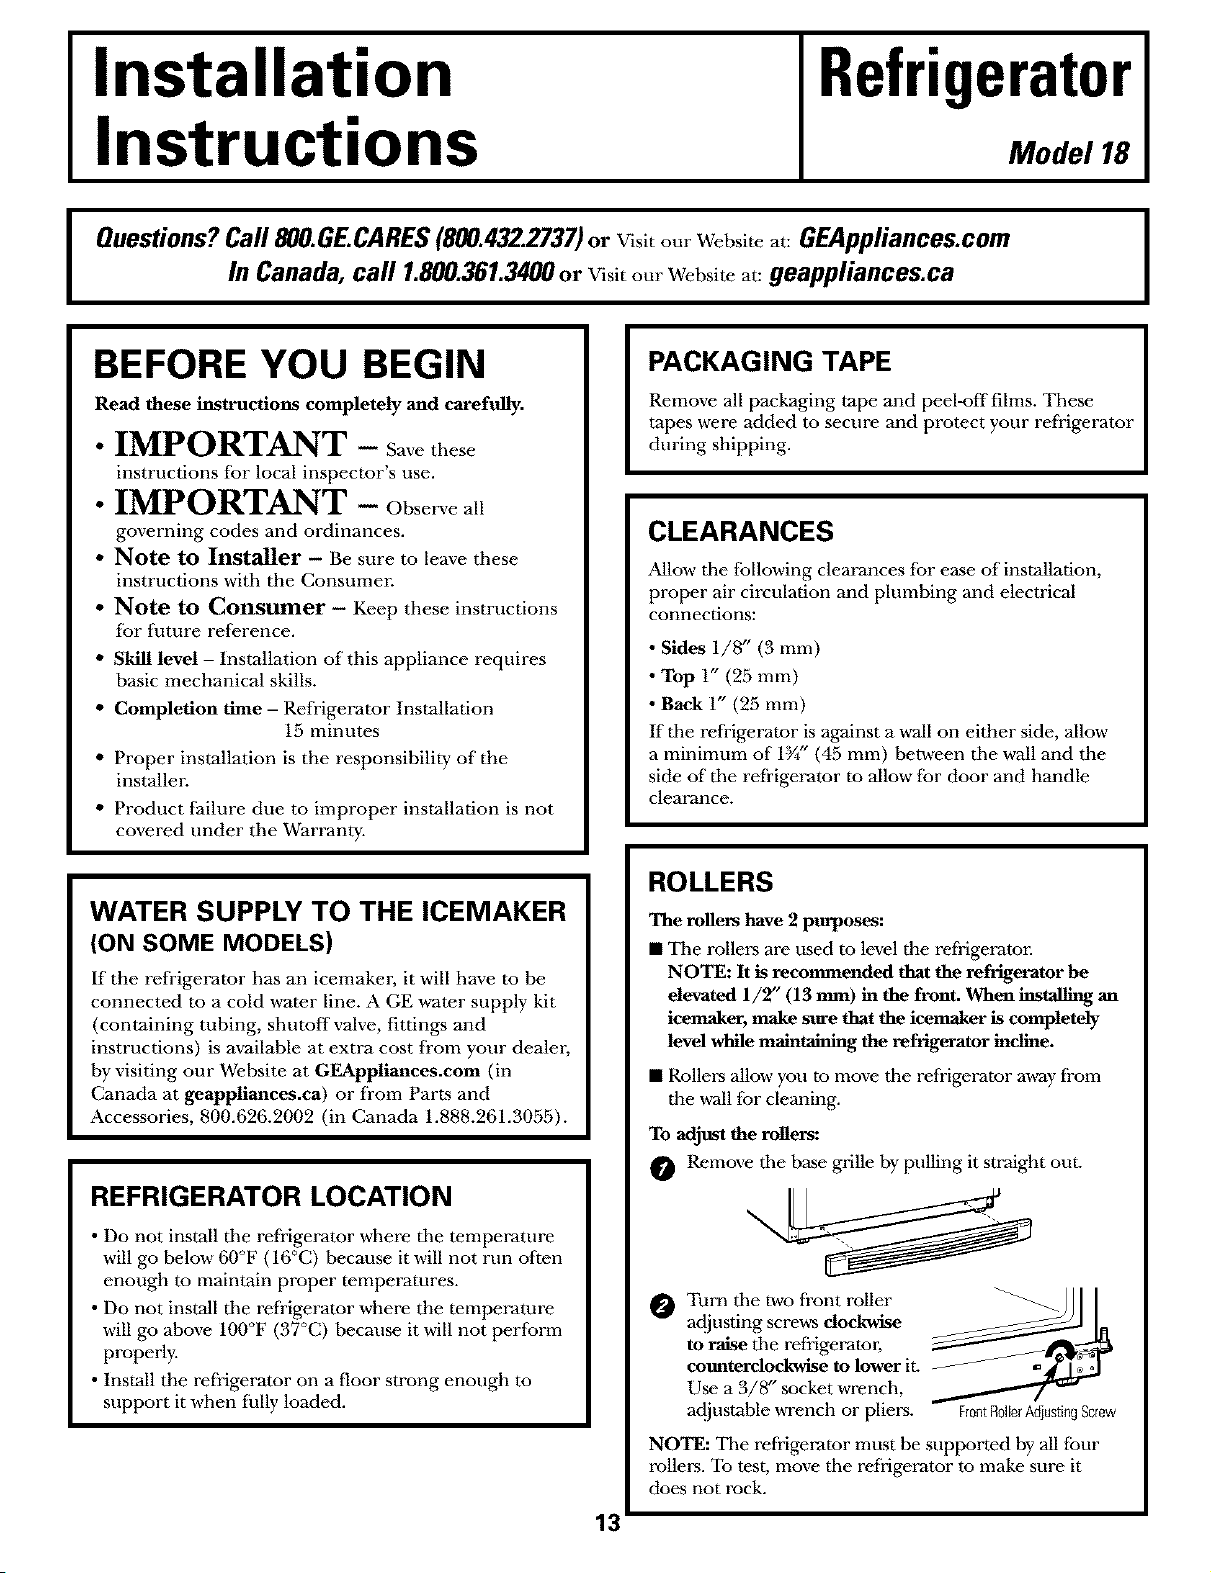
ROLLERS
The rogers have 2 purposes:
• The rollers are used to level the refrigerator.
NOTE: It is recommended that the refrigerator be
elevated 1/2" (13 mm) in the front. When installing an
icemaker, make sure that the icemaker is completely
level while maintaining the refrigerator incline.
• Rollm_ allow you to move the refrigerator a_a_yfrom
the wall for cleaning.
To adjust the rollers:
O Remove the base grille by pulling it straight out.
Turn the two front roller
acljusting screws dockwlse
to raise the refrigerator,
counterclockwise to lower it.
Use a 3/8" socket wrench,
adjustable wrench or pliers. FrontFl011erAdiustingScrew
NOTE: The refrigerator must be supported by all four
rollel.-s.To test. move the refrigerator to make sure it
does not rock.
Loading ...
Loading ...
Loading ...