Loading ...
Loading ...
Loading ...

1
EN
1. HOWTOUSE
• “Mulching” - Chopping and depositing grass
on the lawn (1).
MJ 66 Series: Only for machines manufac-
tured from the year 2003 onwards.
F 72 Series: The “Mulching” function can
only be carried out by using the special blades
(included in the kit). Blade replacement should
only be done by your Dealer, following the
instructions contained in the machine’s manual.
2. PREPARATION FOR USE
Onlyforkitspurchasedseparatelyfromthe
machine:
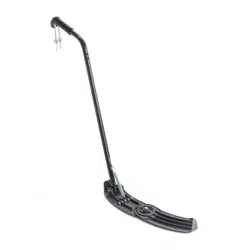
Fit the handle (2.1) onto the deector cap (2.2)
using the pin (2.3), hammering it right down.
Fit one end of the spring (2.4) in the deector
cap opening (2.2). Fasten it using the pin (2.5),
which is tted in position (2.6) in the deector
cap (2.2).
Fit the other end of the spring (2.4) in the widest
part of the hook (2.6).
Using a screwdriver, attach the narrowest part of
the hook (2.6) to the hole of the handle (2.1).
2.1 S A F E T Y R E G U L A T I O N S
A)Introduction
1) This instruction sheet adds to the information
contained in the machine instruction manual
and becomes an integral part when the
“mulching” accessory is used.
2) The application of the “mulching” accessory
modies the traditional system already tted
on the machine for mowing, collecting and
ejecting grass cuttings.
3) The application of the accessory and the use
of the machine equipped for “mulching” must
fully comply with the safety regulations given
in the machine instruction manual and with
the instructions regarding dierent situations
of use and maintenance.
B)Standardsofuse
NOTE The cutting deck cap recycles grass
inside the cutting deck, chopping it into fine
strands and strewing them evenly on the lawn.
The grass cuttings are left on the lawn, protecting
it from drying out during heatwaves. These finely
chopped grass cuttings decompose quickly,
nourishing the soil. The “Mulching” cap helps
protect the environment, reducing waste and the
sound level of the machine.
1) Always t and dismantle the accessory with
the engine o, after removing the ignition key
and engaging the parking brake.
2) Apply the “mulching” accessory and check
that the tted parts have been fastened cor-
rectly and securely.
3) You always need to work with the grass-
catcher or stone-guard tted properly even
when using the “mulching” accessory.
4) For a sound operation, mow the lawn fre-
quently and regularly to reduce the height of
the grass.
5) Always avoid removing a large quantity of
grass, to avoid blocking the cutting deck
or over-loading the engine and the cutting
parts. Regulate the forward speed depend-
ing on the lawn conditions and the quantity of
grass removed.
3. UNPACKINGANDASSEMBLY
Assembly
Make sure that the inside of the cutting deck is
suciently clean and free of encrusted grass
and mud which could make it dicult to insert
the deector cap.
Bring the cutting deck to the highest position,
then re-move the grass-catcher and insert the
“mulching” cap (3.7) in the outlet, tilting it to the
right and pushing it into the collector channel
until it blocks.
Hook the two elastic tie-rods (3.8) onto the holes
provided and ret the grass-catcher.
IMPORTANT It is important to attach the
elastic tie-rods (3.8) correctly, to ensure that
the “mulching” cap is secured inside the cutting
deck and to prevent it from touching the rotating
blades. For this very reason, replace the worn
elastic tie-rods in good time.
Dismantling
Follow the above steps in reverse order.
Loading ...
Loading ...
Loading ...