Loading ...
Loading ...
Loading ...
5
6. It is recommended to use metal/aluminum duct/pipe with a uniform size (ex. 6” round pipe from
range hood to the outside).
7. If an elbow is necessary, a minimum of 12” straight run is necessary before the elbow.
8. Clearance is the distance between the cooktop and the bottom of the range hood. The
recommended minimum clearance for this model is 30” and the maximum clearance is 36”.
9. It is important to install the hood at the recommended clearance. Installing too low could result in
damage and/or fire hazard while installing too high may result in reduced performance and
efficiency.
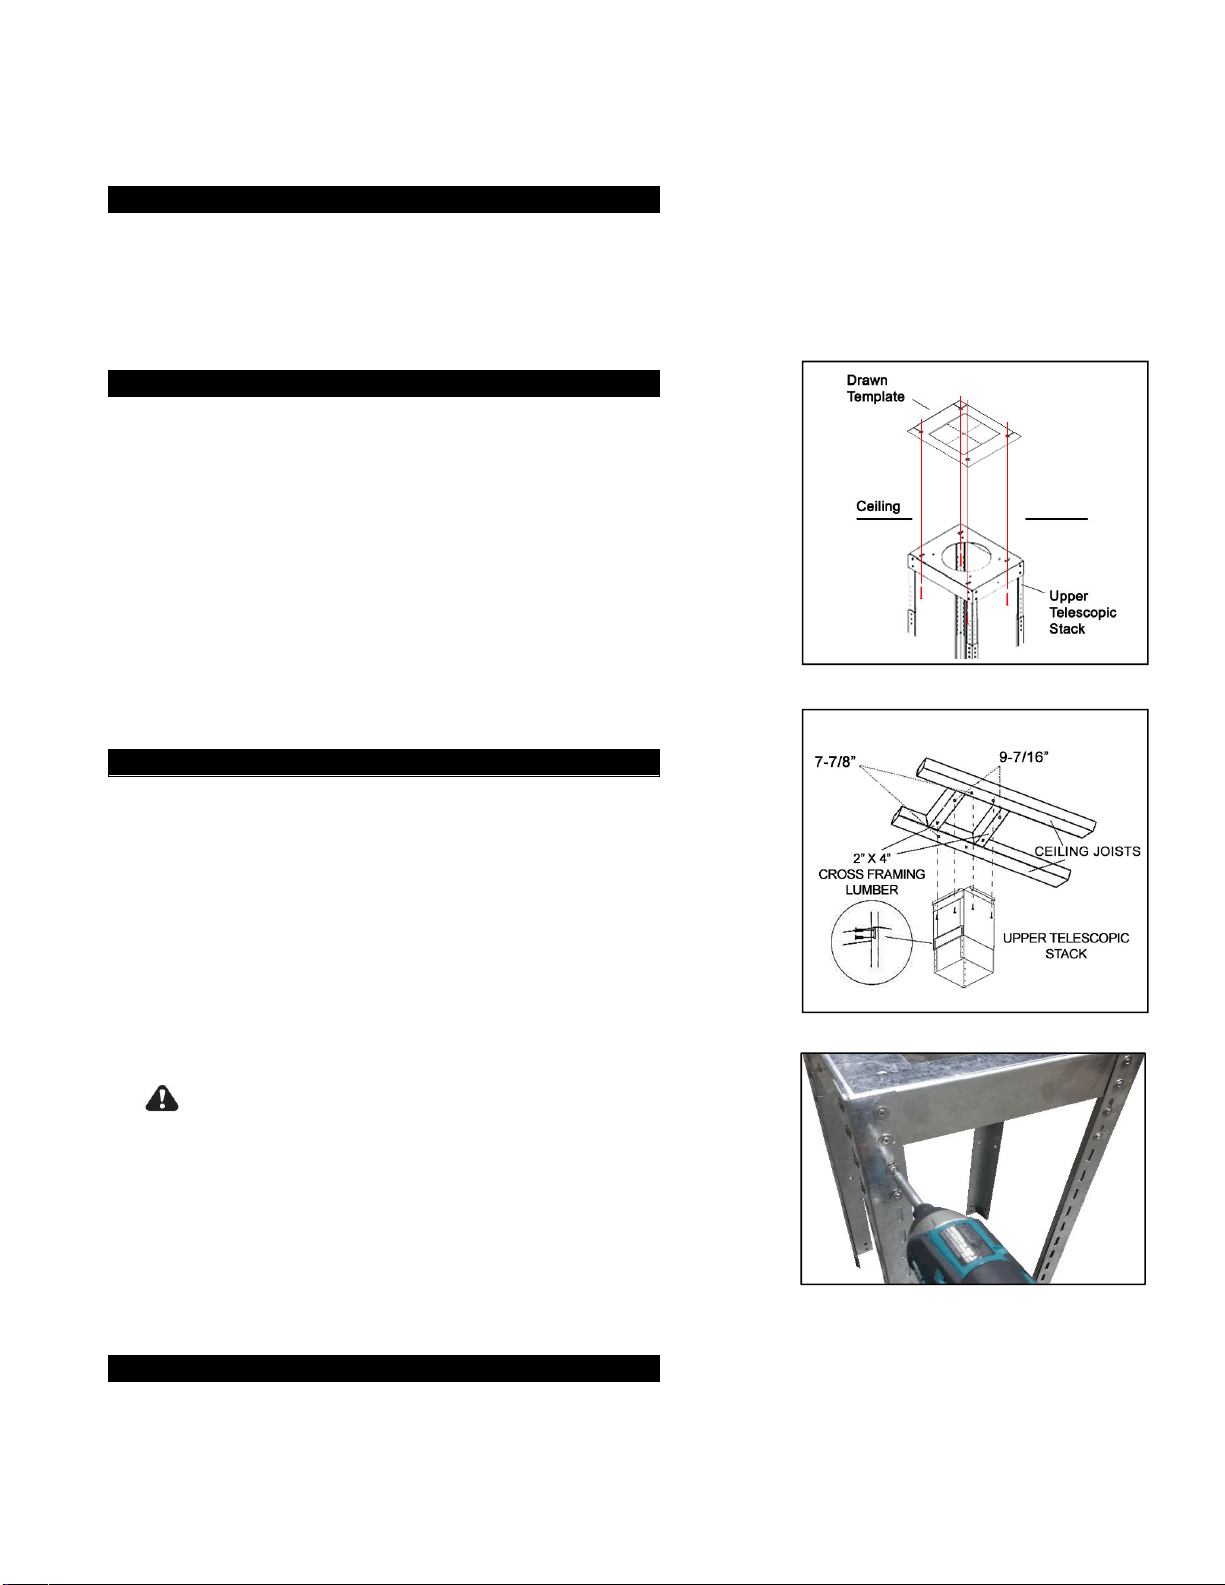
10. Mark the centerline of the cooktop/range on the ceiling. Use
that centerline to determine the position of the range hood as
shown in Figure 1.
11. Cut and remove the ceiling drywell. Install a 2” x 4” cross
lumber frame (not provided) between ceiling joists as shown in
Figure 2.
12. The frame should be 7-7/8” on center between front and back
and 9-7/16” on center between both sides.
13. Once the frame is installed, close the ceiling surface. Make
sure to mark the location of the ceiling joists and the lumber
frame.
14. After closing the ceiling, cut a hole approximately 6”-6-1/2” for
the duct opening and a 1” wire access hole.
15. Dettach the lower telescopic stack from the upper telescopic
stack as shown in Figure 3.
16. Attach the lower telescopic stack to the hood motor box using
the 4mm x 8mm screws and the round screw washers. Then
attach the upper telescopic stack to the lower telescopic stack.
Adjust the height of the stack according to your desired height.
The end result should be as shown on Figure 4.
17. Align the telescopic stack to the mounting surface on the ceiling
then attach it by securing the provided mounting screws into
the ceiling joist and cross lumber frame. Make sure the screws
are inserted at the middle of the joists and cross lumber frame
for maximum support and stability.
CAUTION: MAKE SURE THE TELESCOPIC STACK IS
SECURE BEFORE RELEASING.
18. Prior to placing the duct covers, complete the ductwork
installation first. See the ductwork section.
19. Attach the inner duct cover to the upper telescopic stack. The
inner duct cover has two screw holes at the top on opposite
sides.
20. Connect the outer duct cover at the bottom of the stack. Note
the outer duct cover does not need screws to be attached.
21. Connect the pipe onto the vent adapter and seal the joint with duct tape. Make sure that it is
completely air tight.
Clearance
Ceiling
Preparation
Hood Installation
Ductwork
Figure
1
Figure
2
Figure
3
Loading ...
Loading ...
Loading ...