Loading ...
Loading ...
Loading ...
JumpStarting
,_ WARNING: When removing or installing
the battery, follow these instructions to
prevent the screwdriver from shorting against
the frame.
IMPORTANT: Never jump your tractor's dead battery
with the battery of a running vehicle.
• Connect end of one jumper cable to the positive
terminal of the good battery, then the other end to
the positive terminal of the dead battery.
• Connect the other jumper cable to the negative
terminal of the good battery, then to the frame of
the unit with the dead battery.
WARNING: Failure to use this procedure
could cause sparking, and the gas in either
battery could explode.
Cleaning
Clean the battery by removing it from the tractor and
washing with a baking soda and water solution. If
necessary, scrape the battery terminals with a wire
brush to remove deposits. Coat terminals and exposed
wiring with grease or petroleum jelly to prevent
corrosion.
BatteryFailures
Some common causes for battery failure are:
• incorrect initial activation • undercharging
• overcharging • corroded connections
• freezing
These failures are NOT covered by your tractor's
warranty.
CuttingBlades
WARNING: Be sure to shut the engine off,
remove ignition key,disconnect the spark plug
wire(s) and ground against the engine to
prevent unintended starting before removing
the cutting blade(s) for sharpening or
replacement. Protect your hands by using
heavy gloves or a rag to grasp the cutting
blade.
_, ARNING: Periodically inspect the bladespindles for cracks or damage, especially if
you strike a foreign object. Replace
immediately if damaged.
The blades may be removed as follows.
• Remove the deck from beneath the tractor, (refer to
CuttingDeckRemovalon page 23) then gently flip the
deck over to expose its underside.
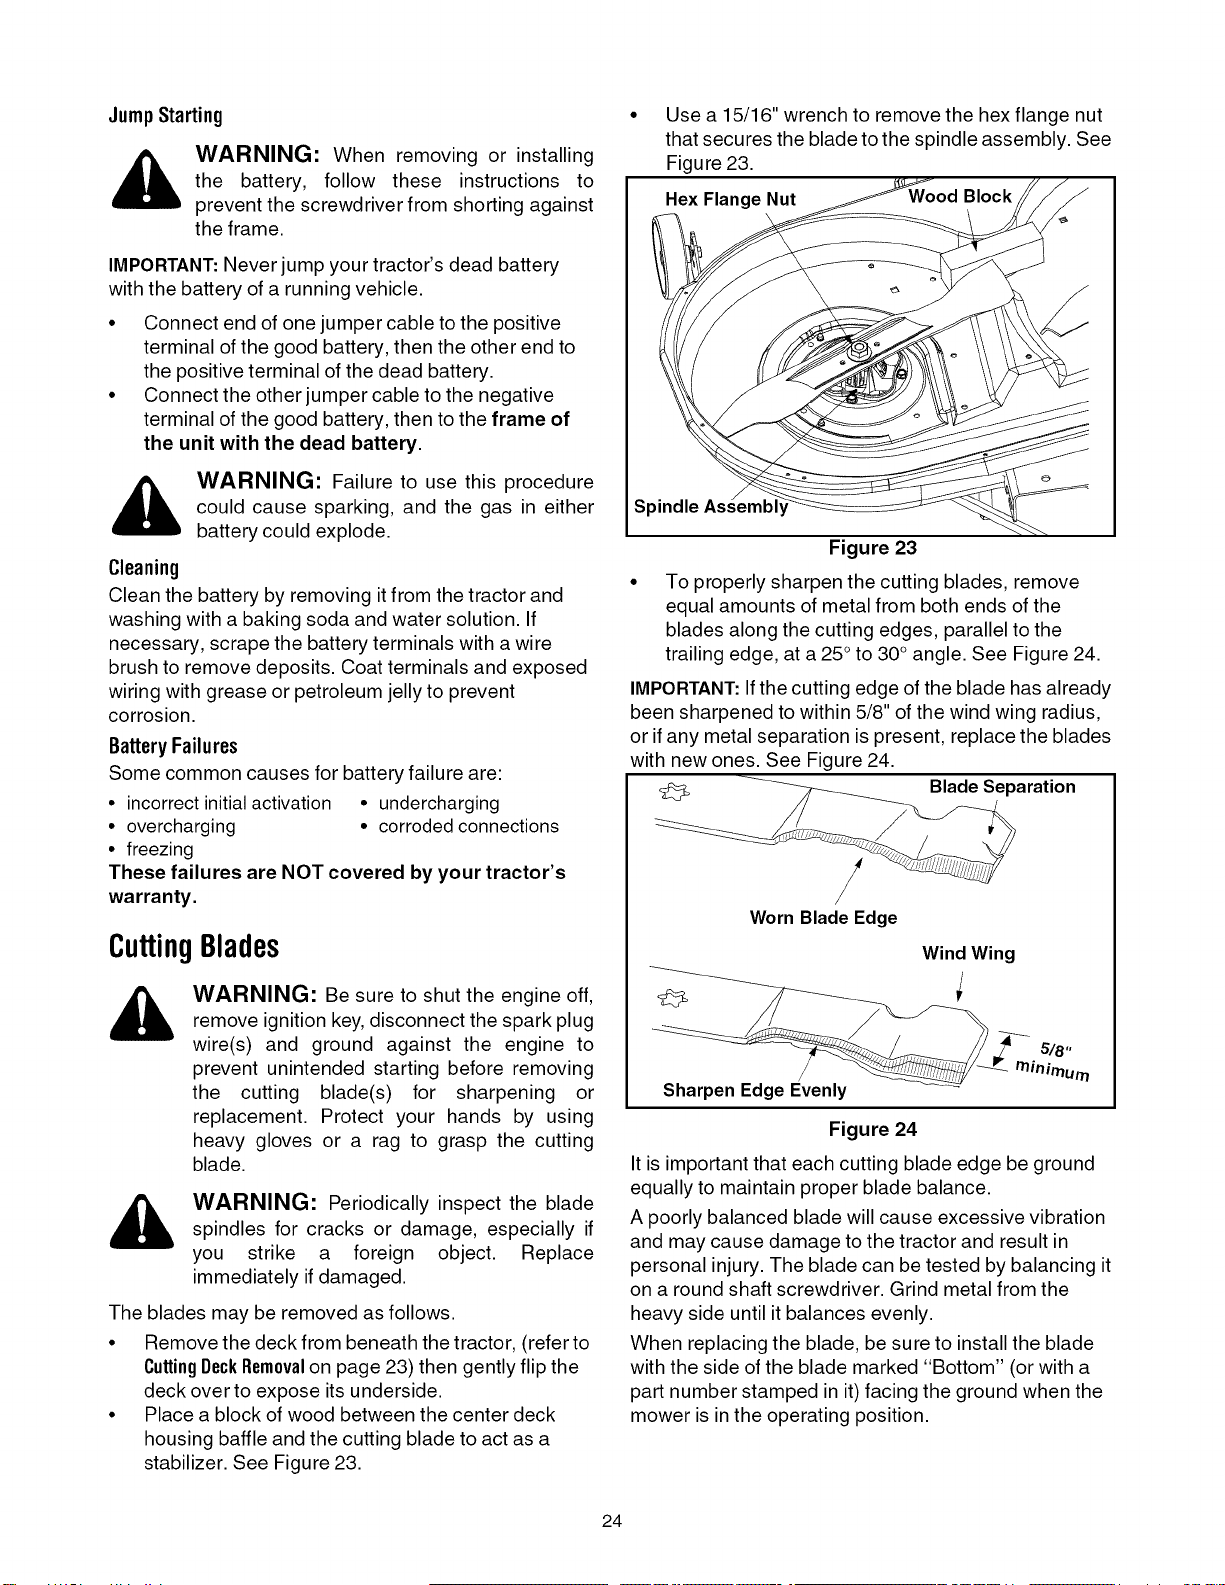
• Place a block of wood between the center deck
housing baffle and the cutting blade to act as a
stabilizer. See Figure 23.
Use a 15/16" wrench to remove the hex flange nut
that secures the blade to the spindle assembly. See
Figure 23.
Hex Flange Nut Block
Spindle
Figure 23
To properly sharpen the cutting blades, remove
equal amounts of metal from both ends of the
blades along the cutting edges, parallel to the
trailing edge, at a 25° to 30° angle. See Figure 24.
IMPORTANT:If the cutting edge of the blade has already
been sharpened to within 5/8" of the wind wing radius,
or if any metal separation is present, replace the blades
with new ones. See Figure 24.
Blade Separation
Worn BladeEdge
Wind Wing
Sharpen Edge Evenly
Figure 24
It is important that each cutting blade edge be ground
equally to maintain proper blade balance.
A poorly balanced blade will cause excessive vibration
and may cause damage to the tractor and result in
personal injury. The blade can be tested by balancing it
on a round shaft screwdriver. Grind metal from the
heavy side until it balances evenly.
When replacing the blade, be sure to install the blade
with the side of the blade marked "Bottom" (or with a
part number stamped in it) facing the ground when the
mower is in the operating position.
24
Loading ...
Loading ...
Loading ...